Sign In
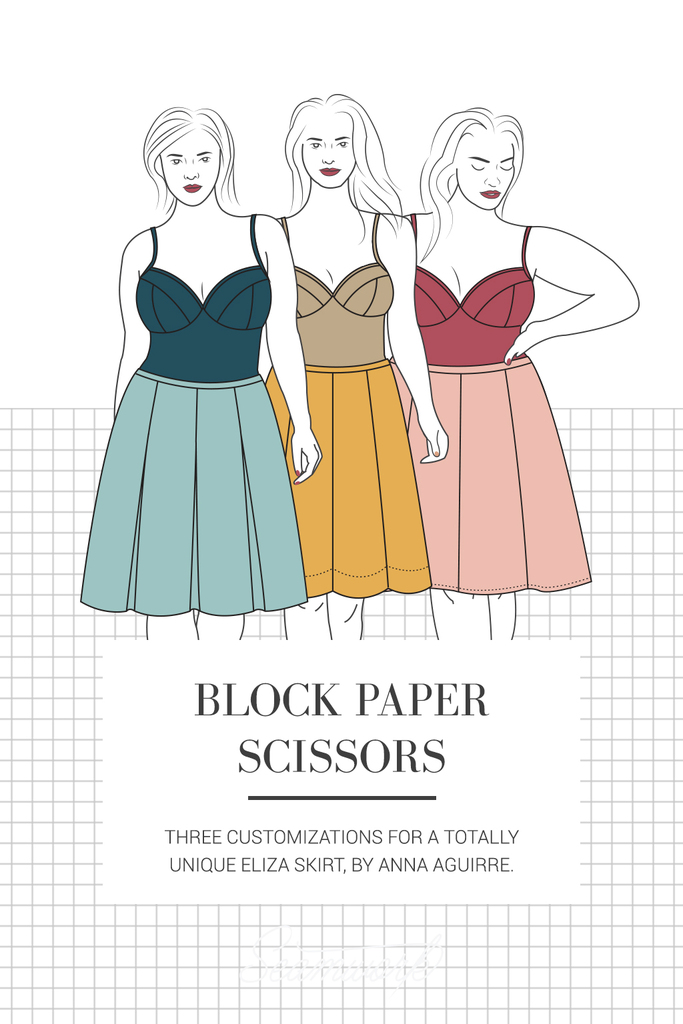
"Block Paper Scissors" is a monthly column featuring patternmaking hacks that will help you give your Seamwork patterns a custom spin—all you need is paper, a ruler, and a pencil!
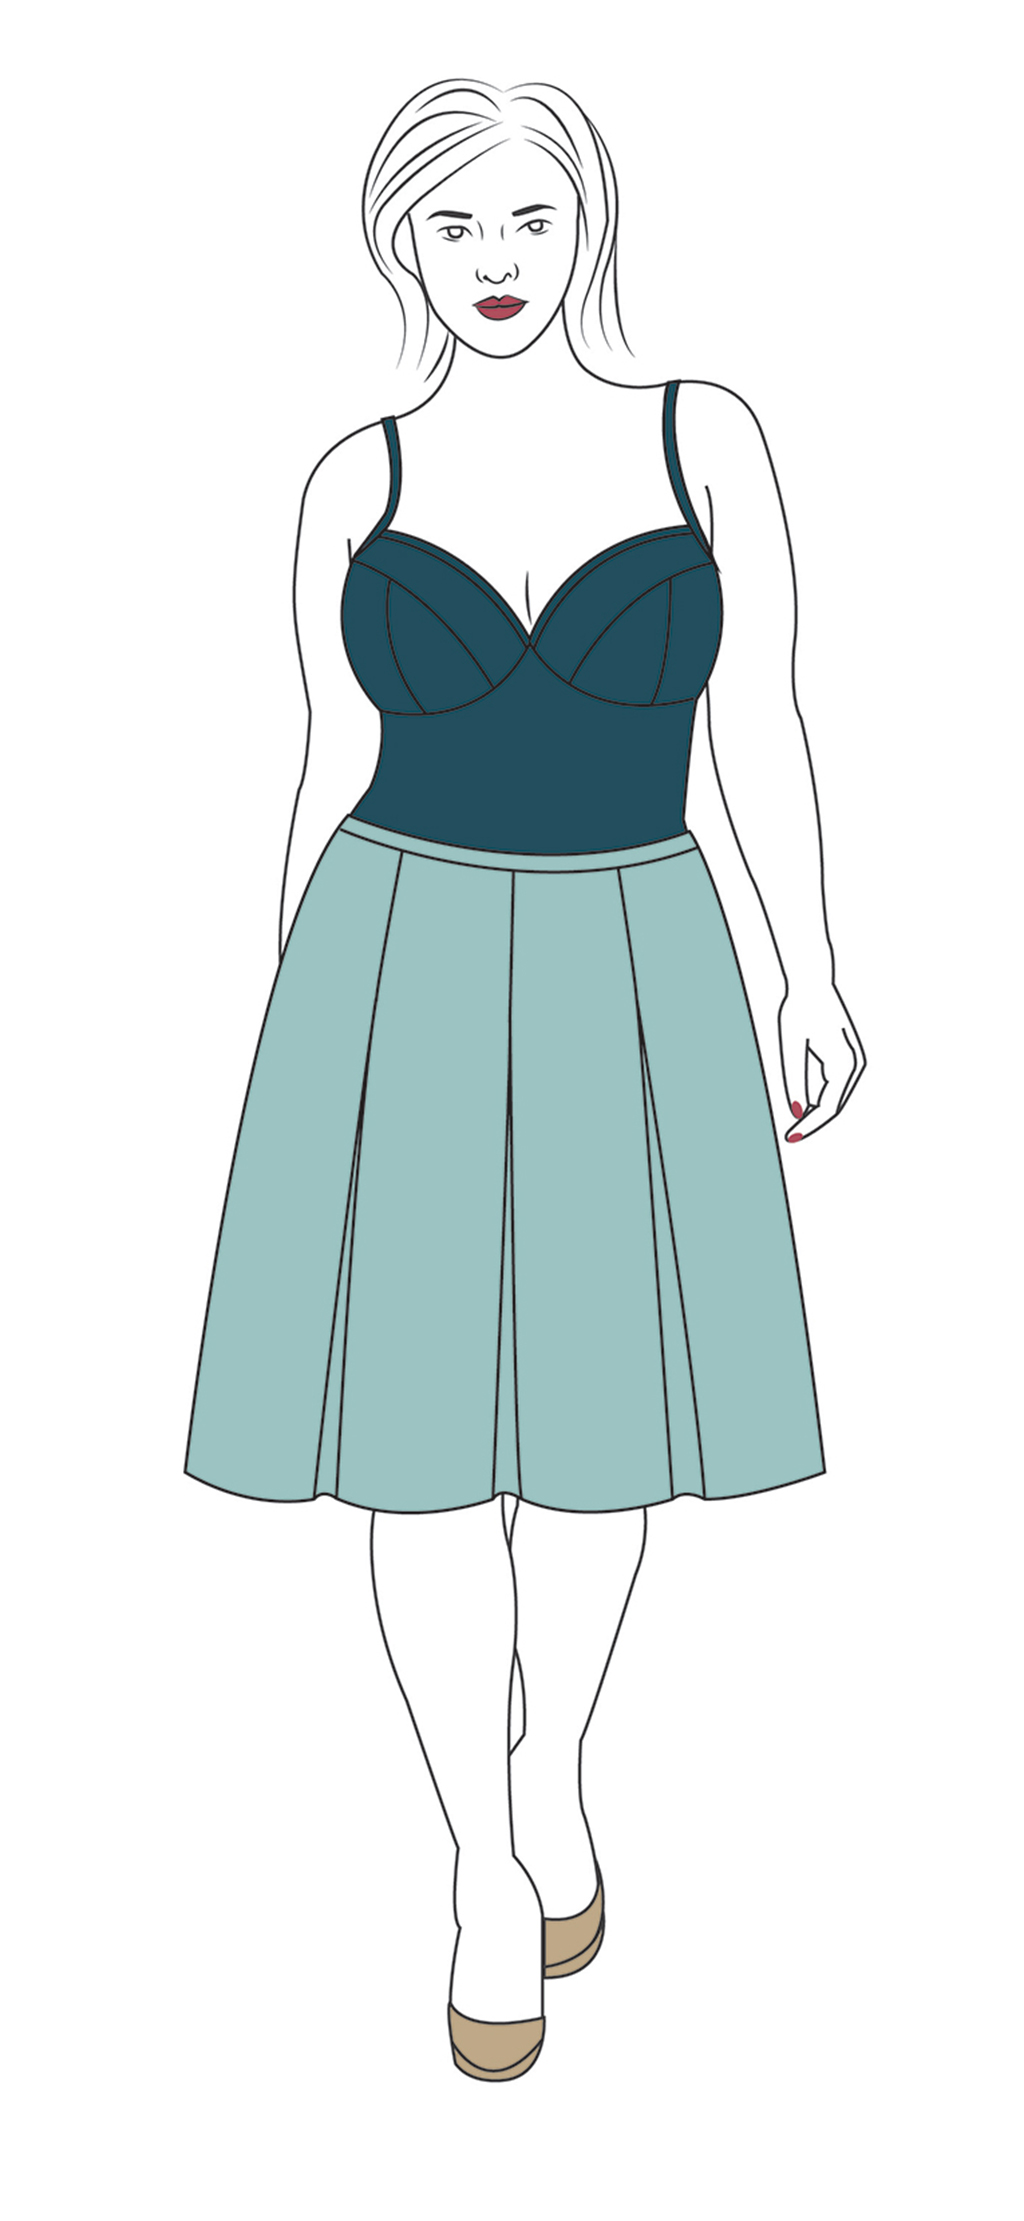
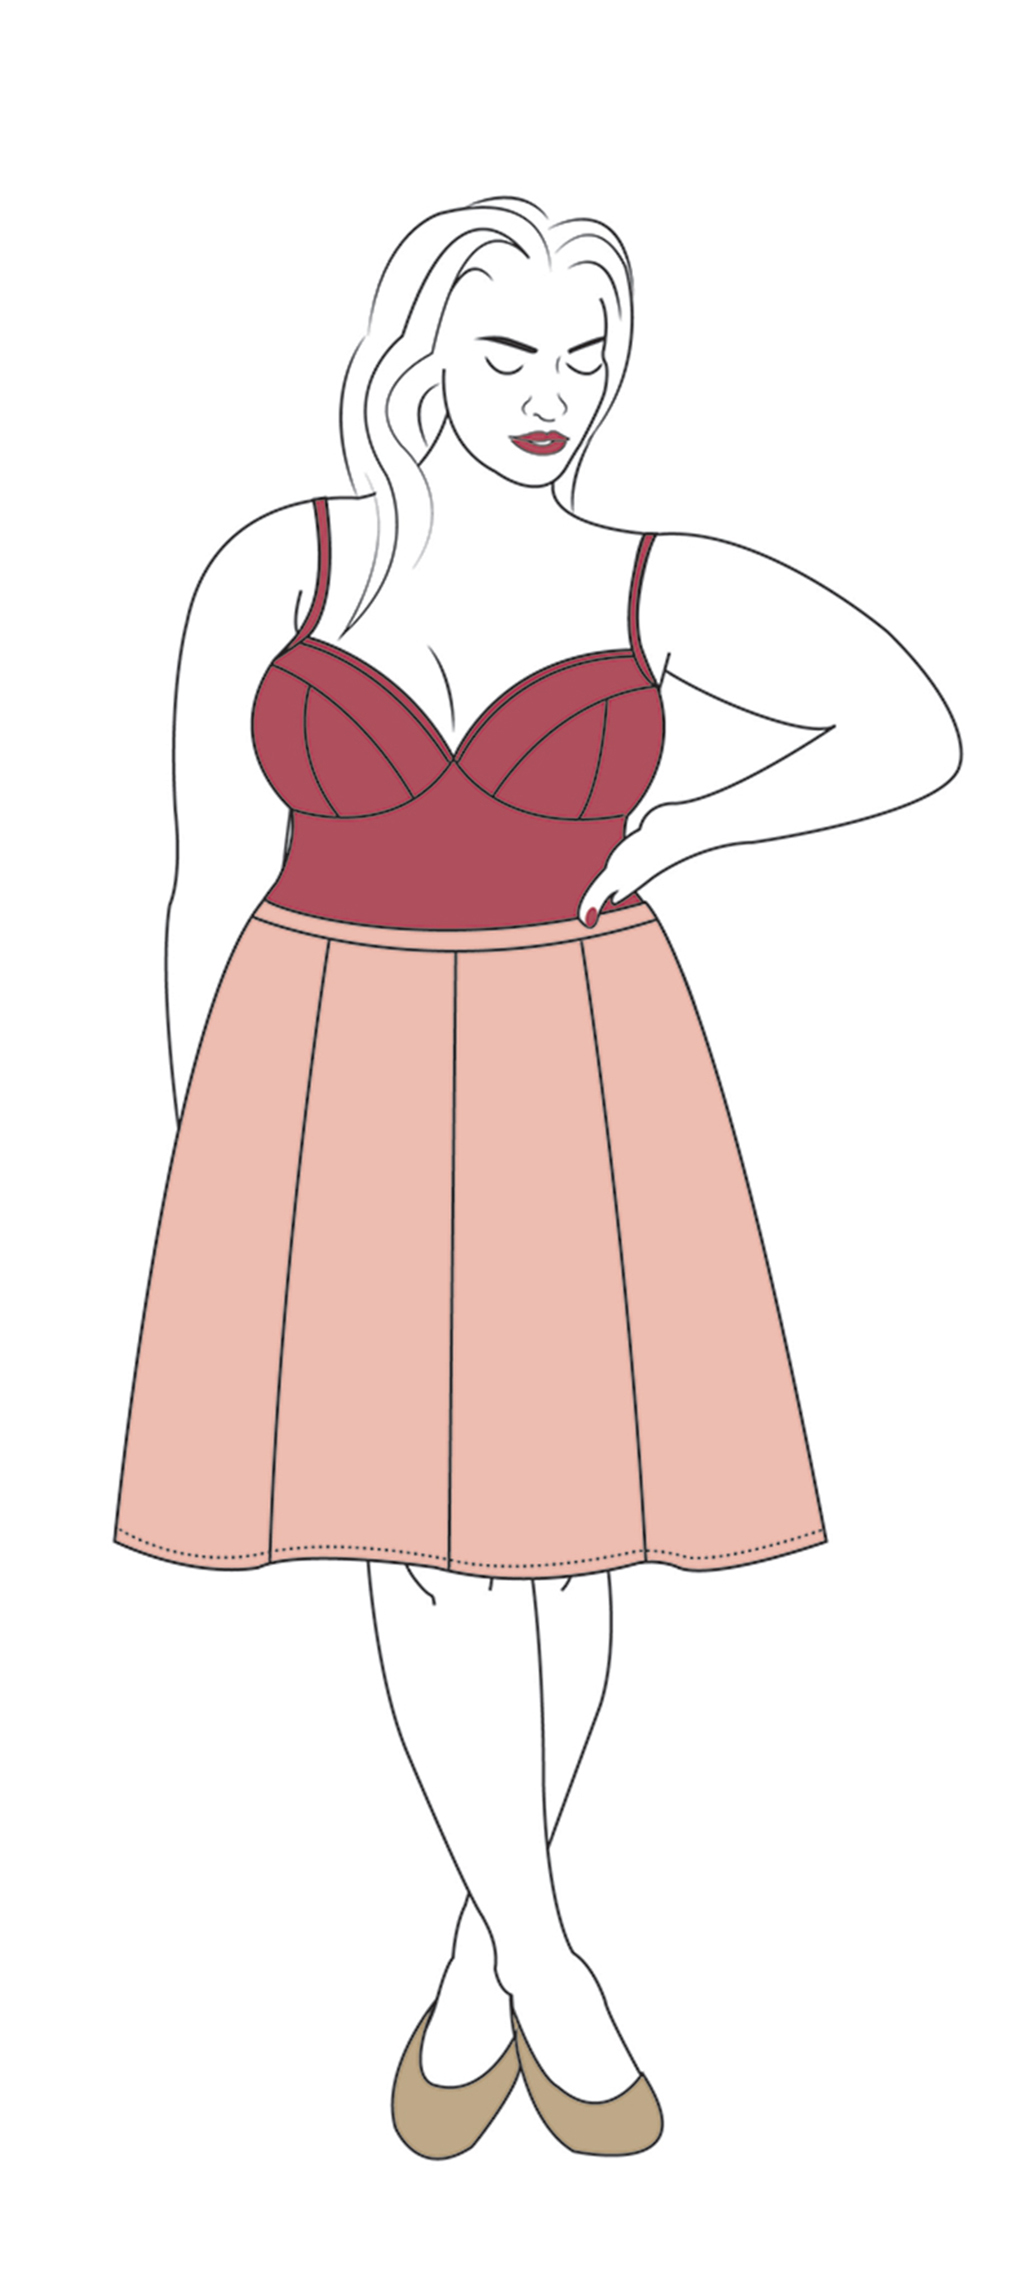
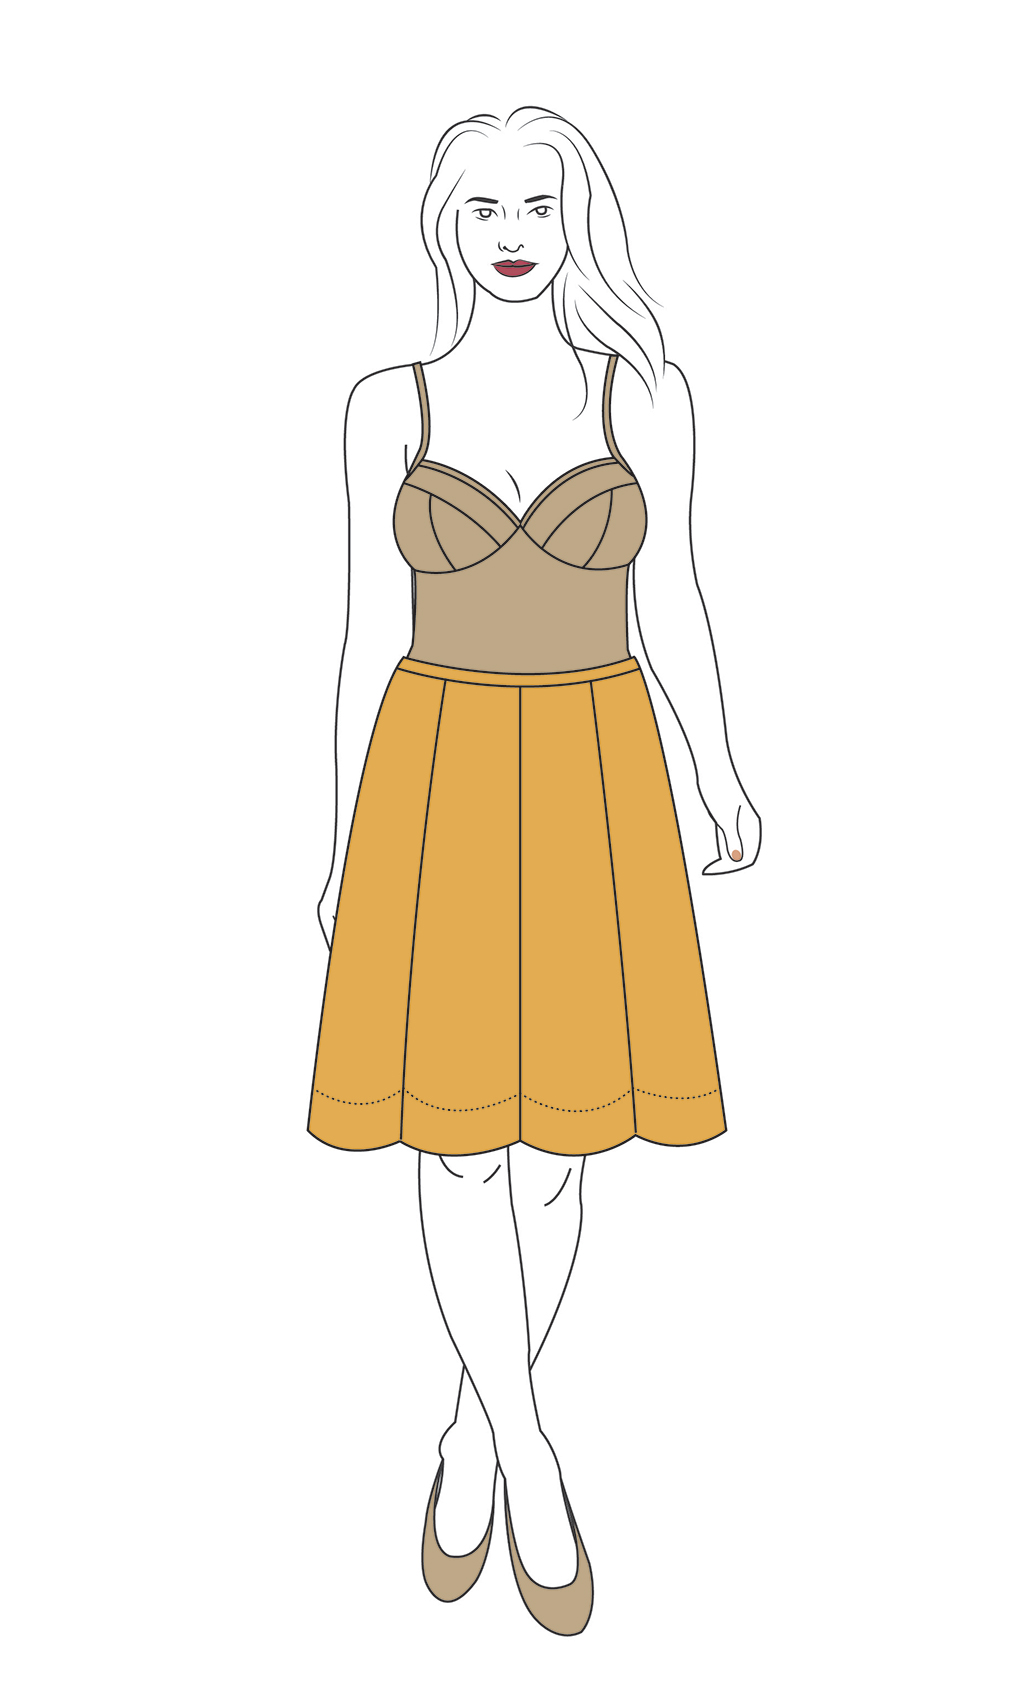
This month we walk you through three different customizations for Eliza that you can mix and match to create a totally unique skirt or half slip. Learn to draft a waistband and finish the skirt with an invisible side seam zipper, remove the godet panels, and create a scalloped hem.
Note: Be sure to make any fit adjustments before doing the pattern hack.
You'll Need:
- Eliza
- Paper
- Pencil
- Tape
- Scissors
- Clear ruler
- French curve
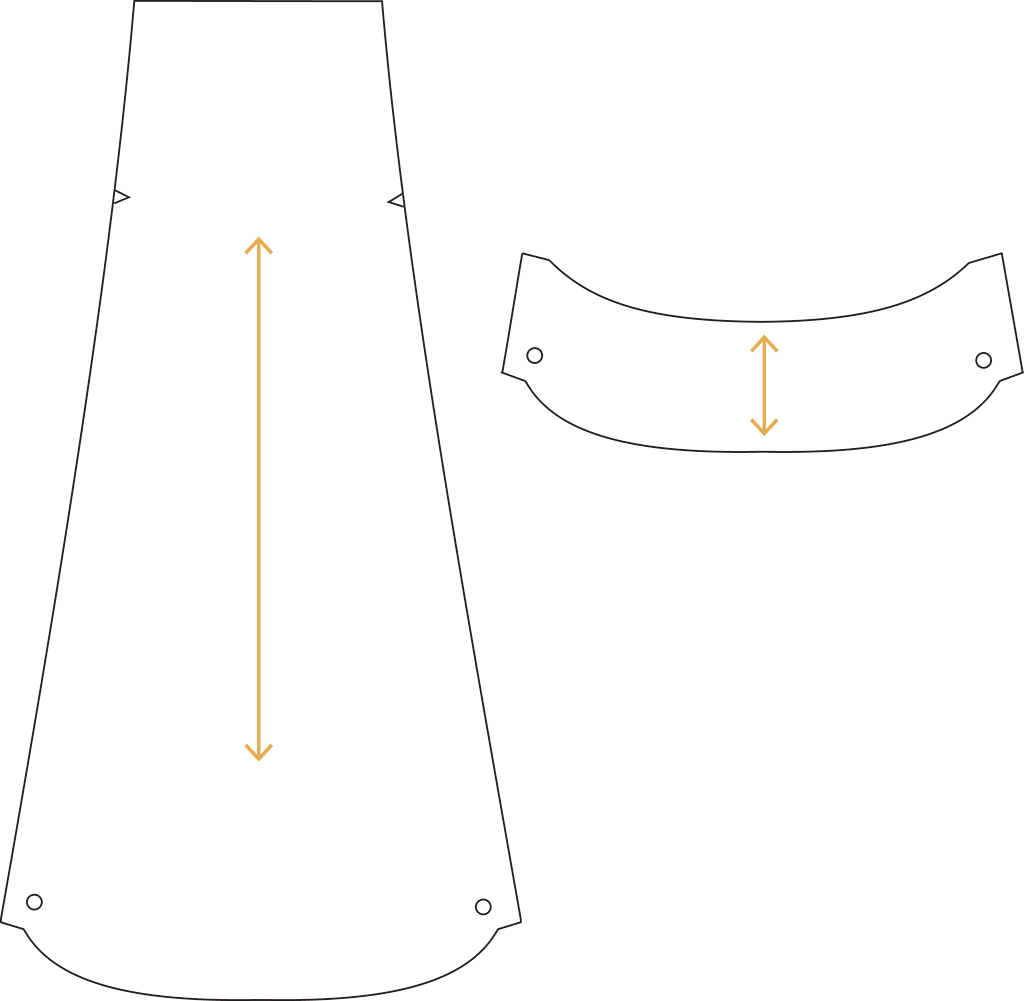
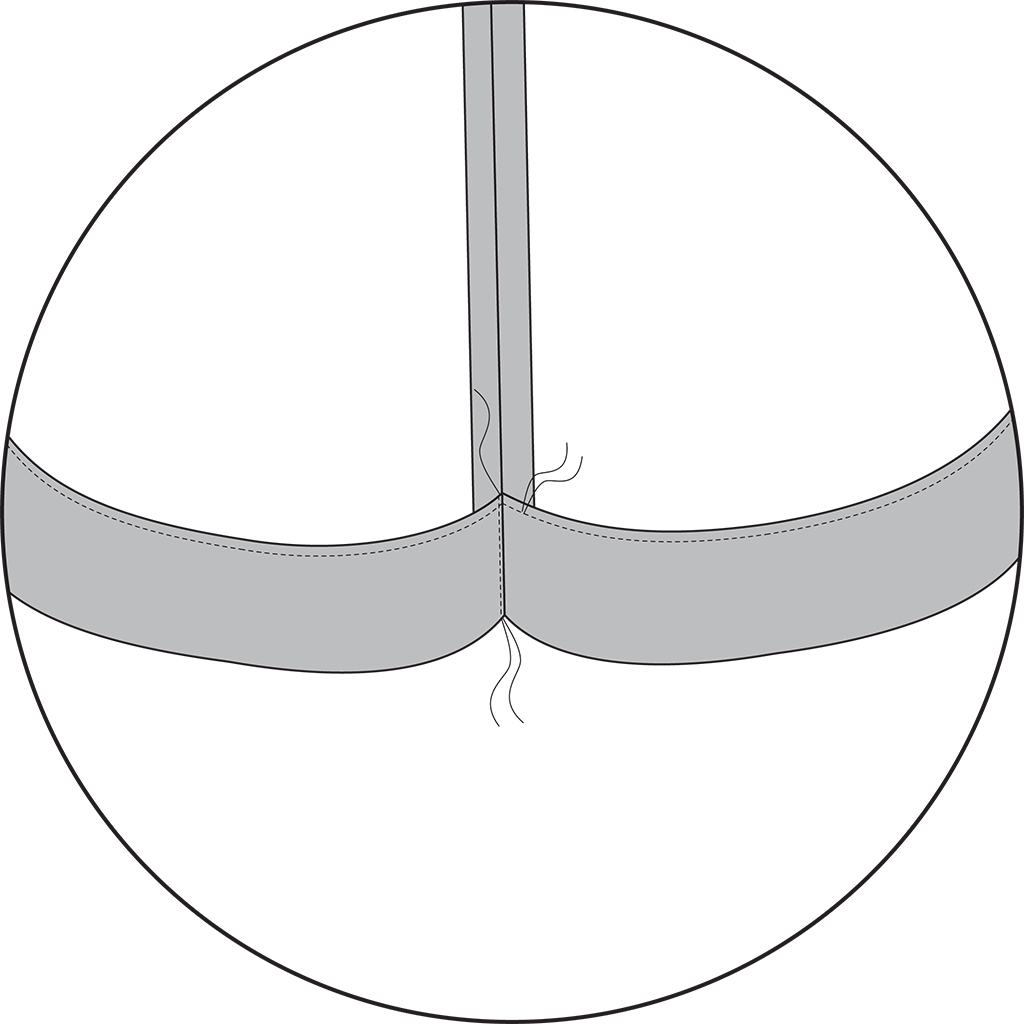
Add a Waistband and Zipper
Step | 01
Measure around the front of your abdomen, approximately 2” down from your natural waistline.
Step | 02
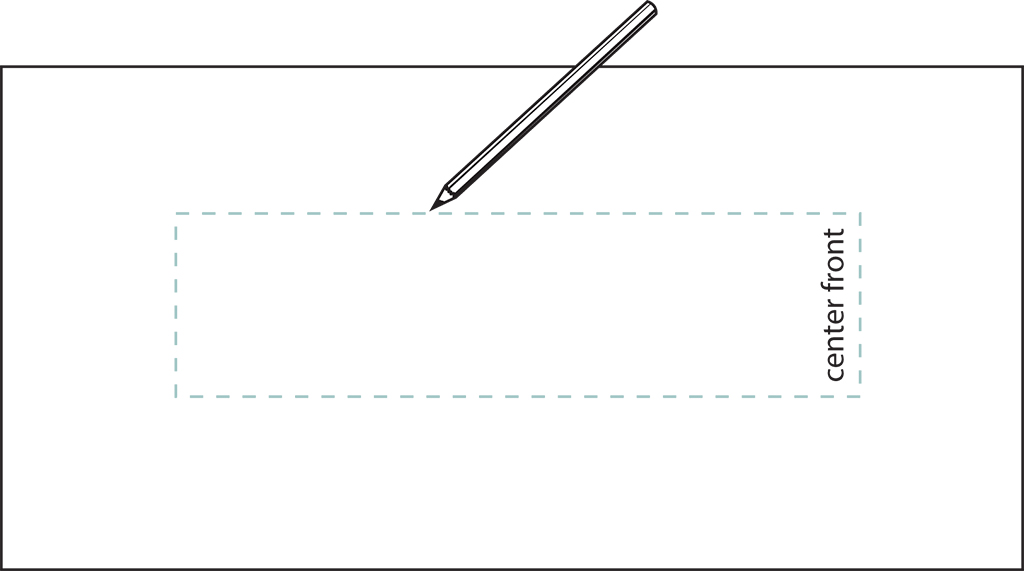
On a piece of pattern paper, draw a rectangle that is 1” wide by half of your measurement in length. Label one short edge of the rectangle “center front” and the other “side seam."
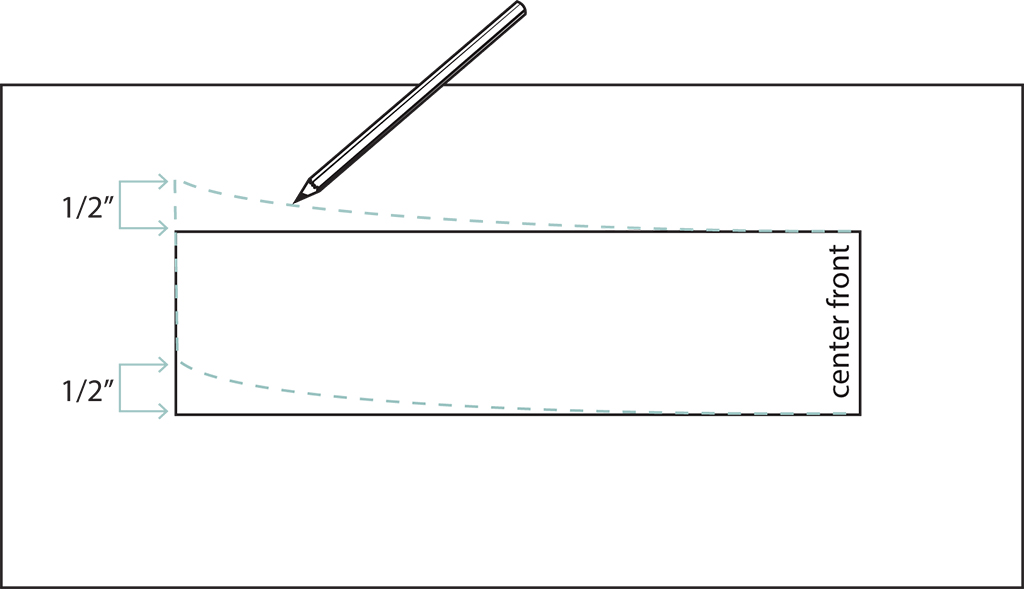
Step | 03
On the opposite short edge of the rectangle, make a mark 1/2” up from the bottom long edge. Make another mark 1/2” up from the top long edge.
Step | 04
Using a French curve, draw slight curves squared out from the center front, and connect them to the marks at the side seam. This creates the front waistband.
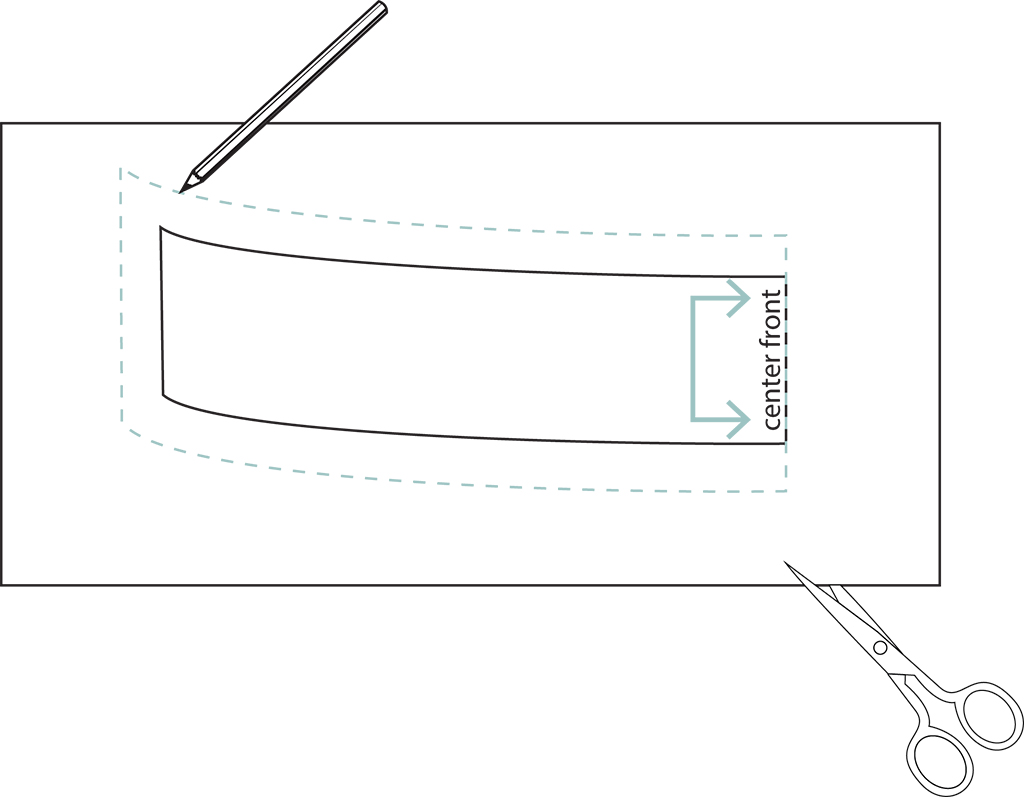
Step | 05
Draw a 5/8” seam allowance around the long edges and side seam of the front waistband. Label the center front fold line.
Step | 06
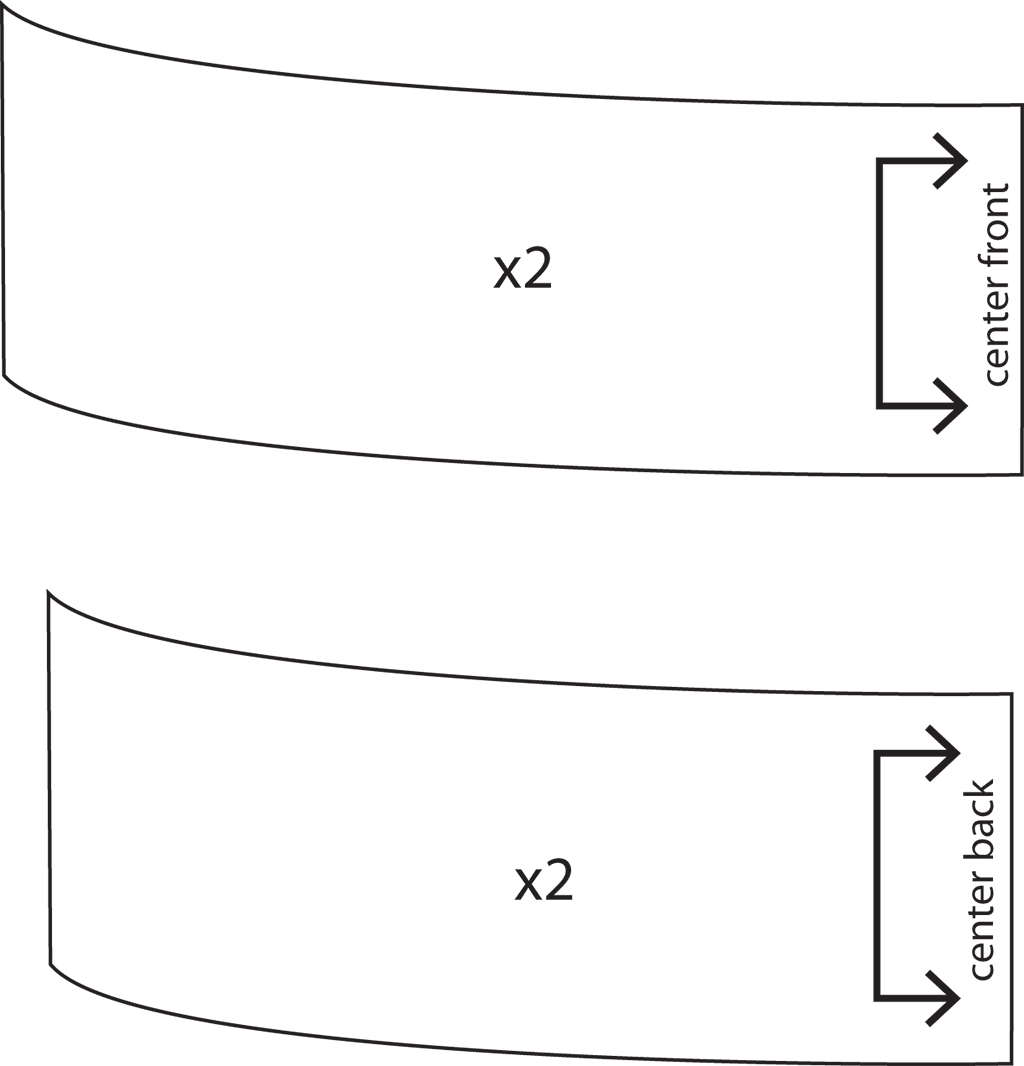
Repeat steps 1 - 5 to create the back waistband. Cut two front and back waistband pieces from your main skirt fabric. When using lightweight fabrics cut one front and back interfacing.
Step | 07
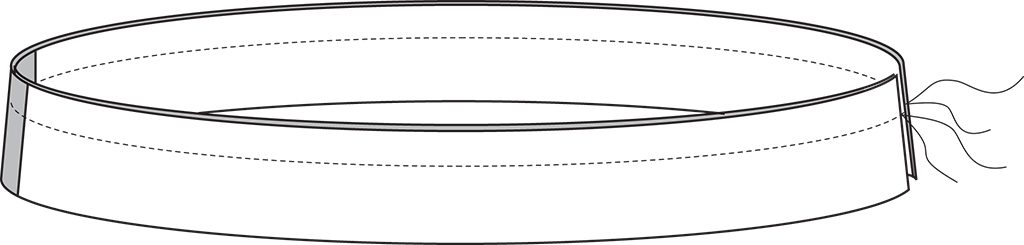
To assemble the waistband, with right sides together, match one front waistband to the back waistband at the right side seam. Pin. Stitch.
Step | 08
Press the seam allowances open.
Step | 09
Repeat steps 7 - 8 for the remaining front and back waistband pieces.
Step | 10
With right sides together and side seams aligned, match the two waistband units together at the top long edge. Pin. Stitch.
Step | 11
Trim and grade the seam allowances.
Step | 12
Turn the waistband right side out and neatly press in place.
Step | 13
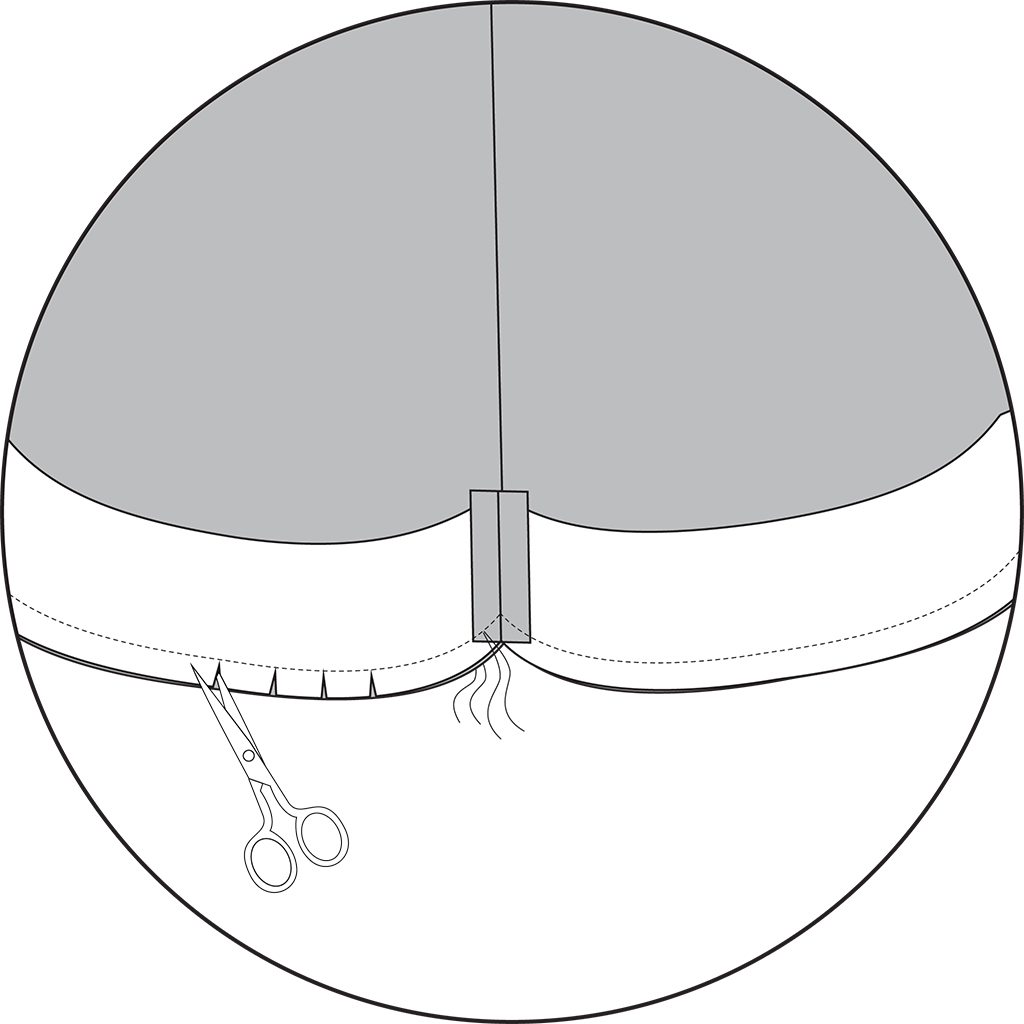
Assemble the skirt per pattern instructions, leaving the left side seam open.
Step | 14
Create gathering stitches along the waistline.
Step | 15
Match the waistband to the skirt at the waistline, aligning side seams. Adjust the gathers of the skirt to align with the waistband by pulling on the thread tails. Follow this tutorial to finish the waistband and zipper.
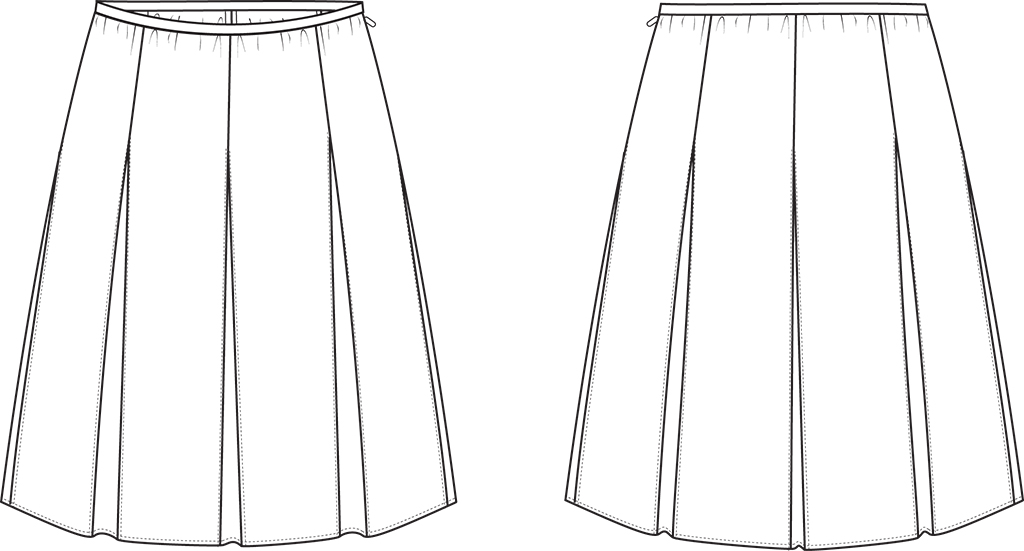
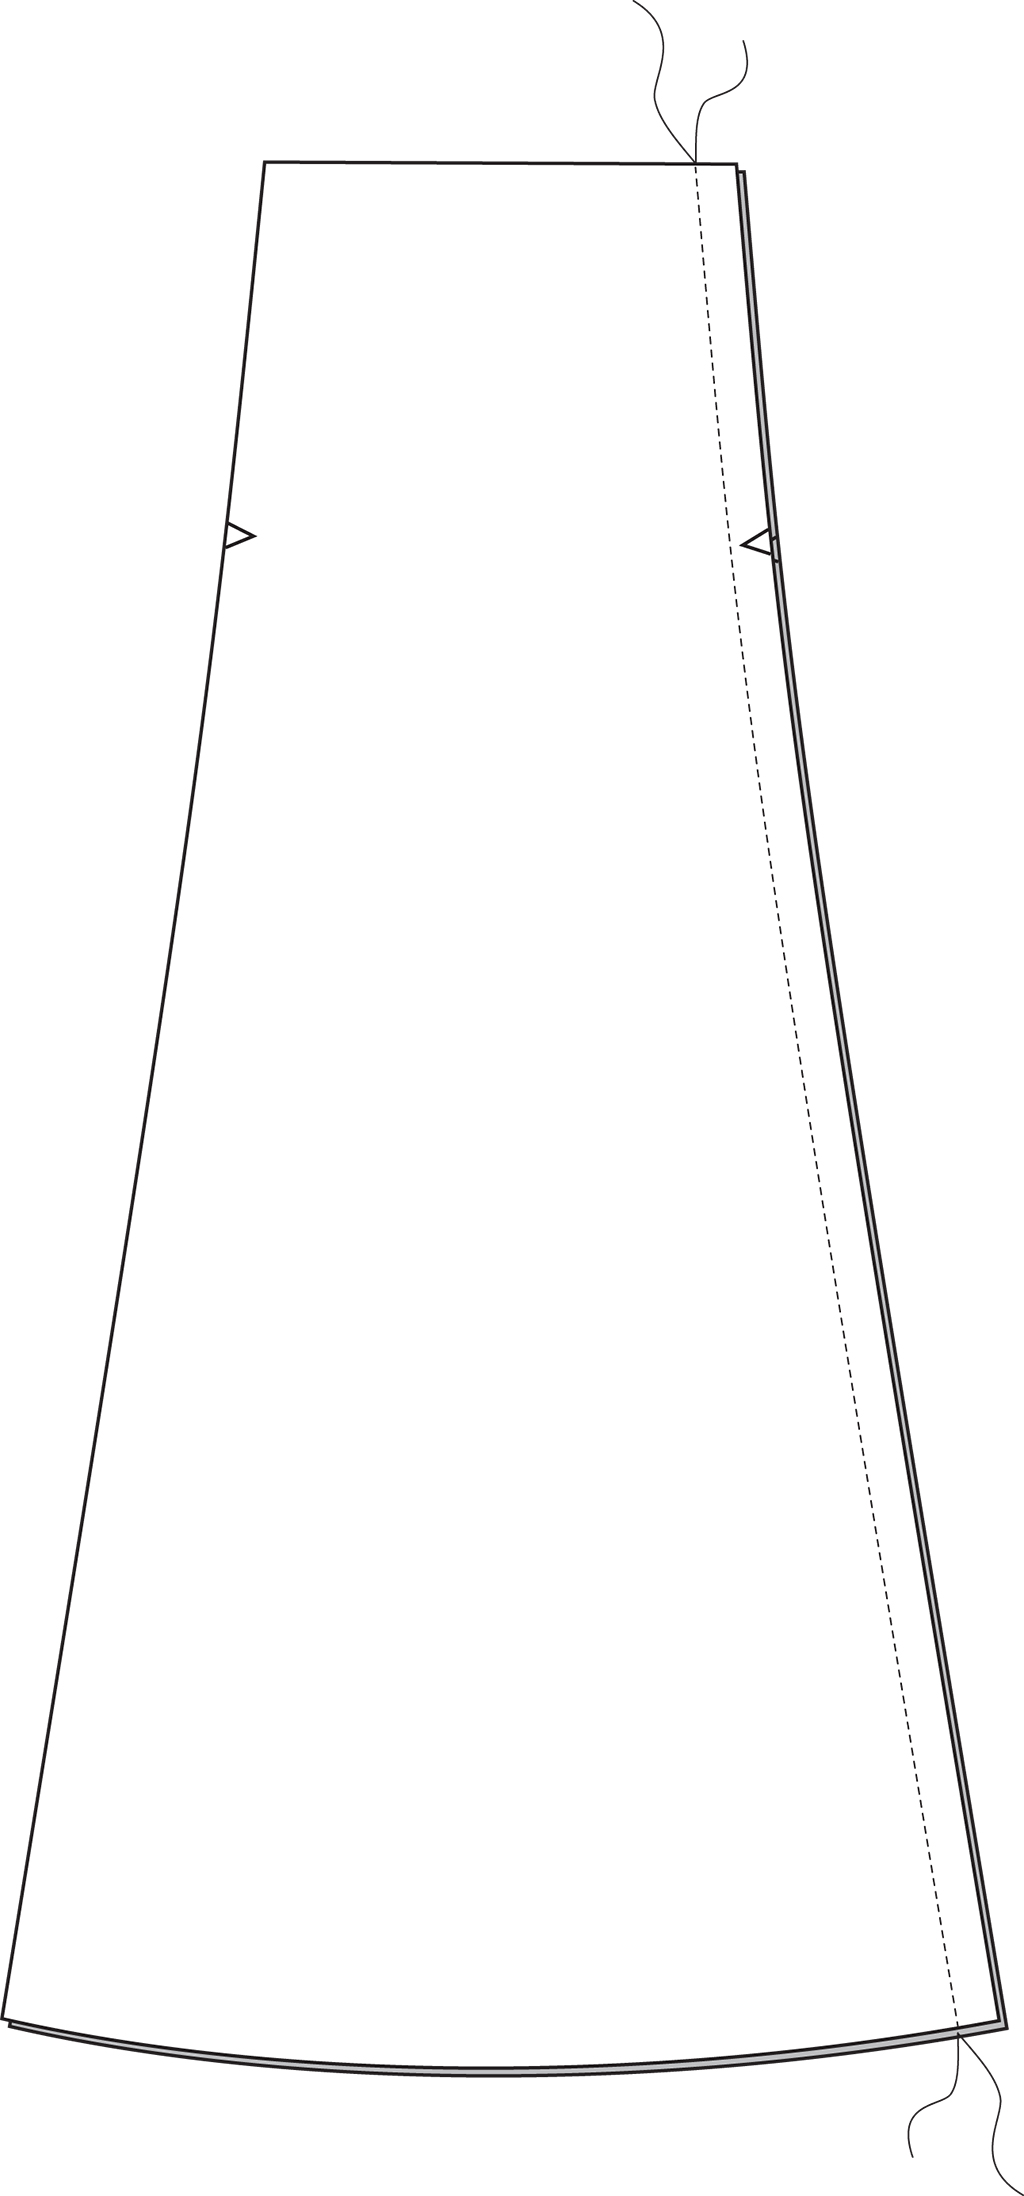
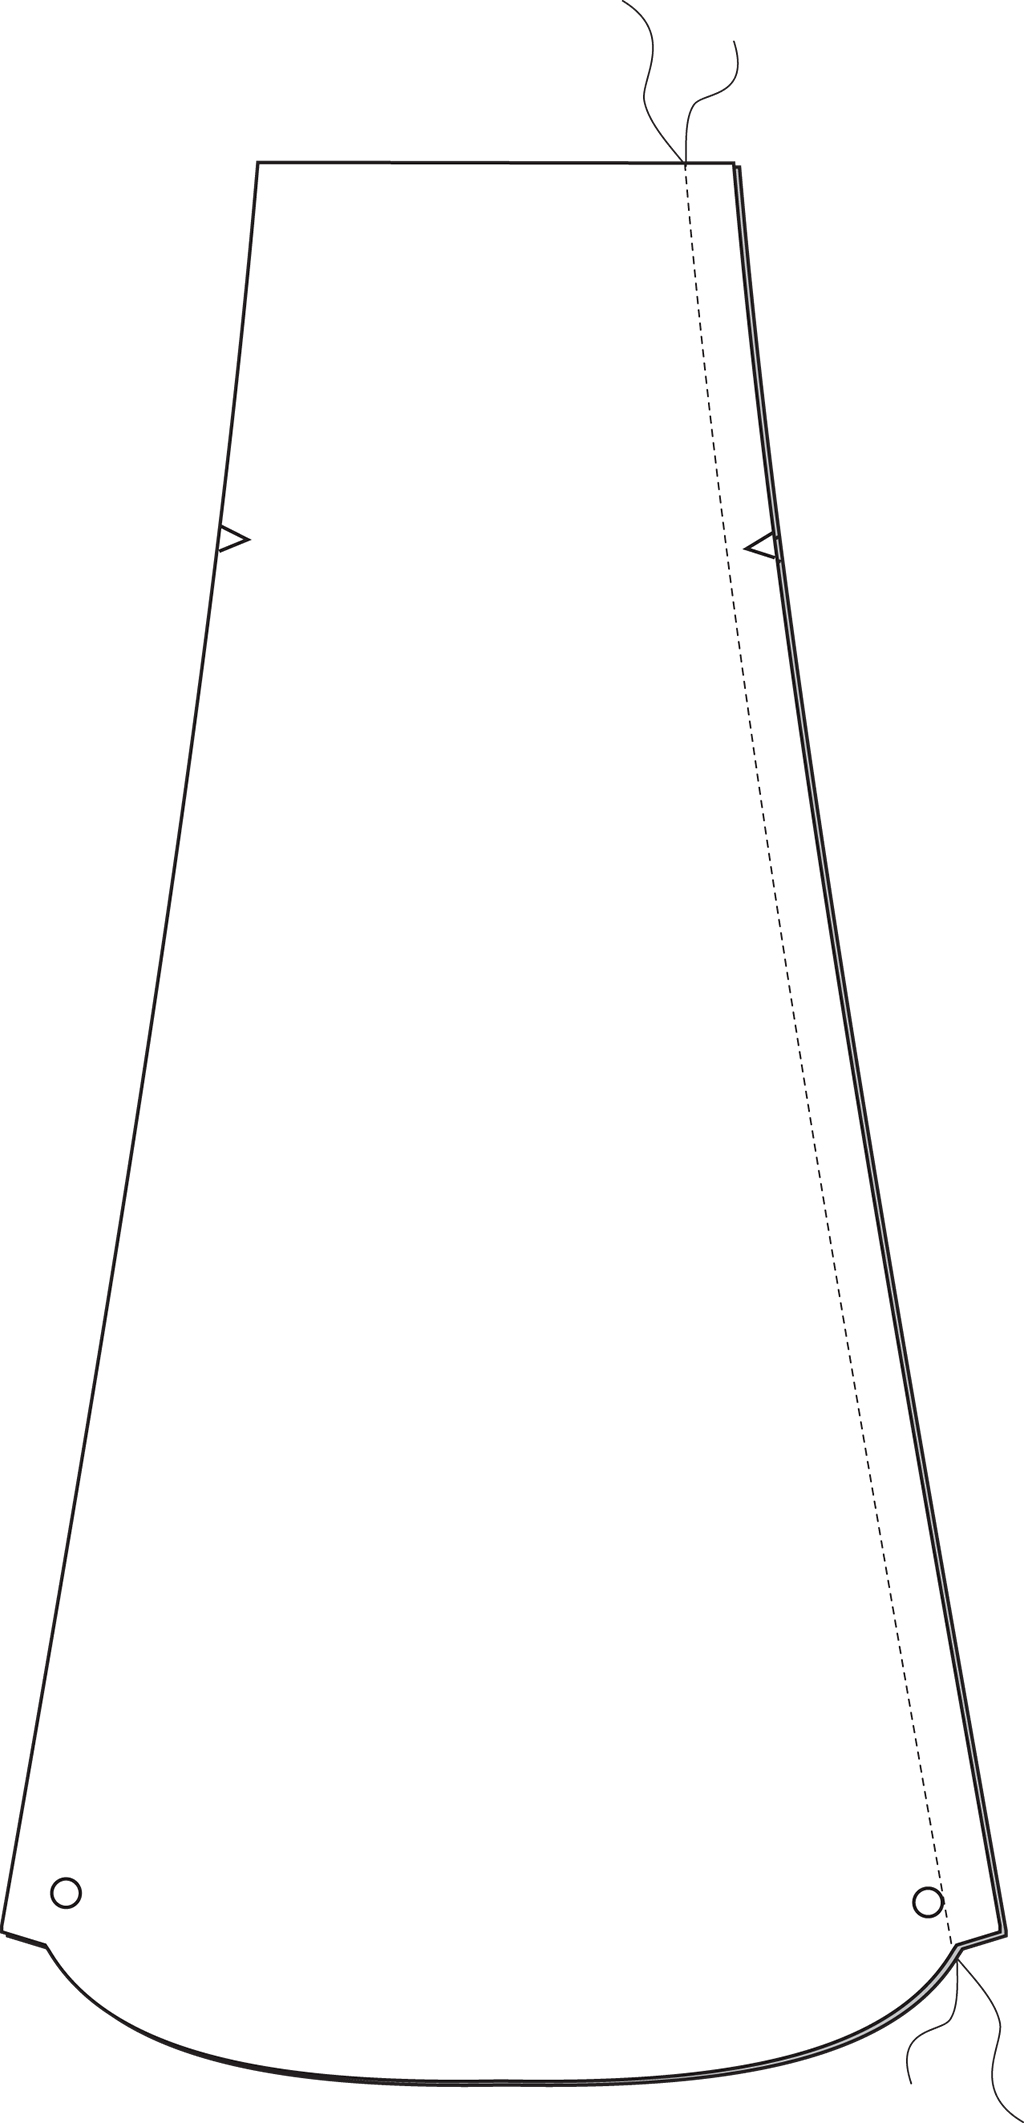
Remove the Godets


Step | 01
Trace one skirt panel and two godet panels onto a separate sheet of paper.
Step | 02
Draw in the seam allowances.
Step | 03
Aligning circles and seam lines, tape the godet panels to the skirt panel, with stitch lines aligned.
Step | 04
Trace a new skirt panel piece onto pattern paper, blending the long edges of the skirt panel and godet panels together.
Step | 05
Draw in notches to the seam allowances where the original circles would be. Cut out the pattern piece.
Step | 06
To assemble the skirt, with right sides together and notches aligned, match two skirt panel pieces together at one long edge. Pin. Stitch.
Step | 07
Finish the seam allowances separately and press open.
Step | 08
Repeat steps 6 - 7 until all of the skirt panels are sewn together, or leave one seam open if you plan to install the waistband and invisible zipper.
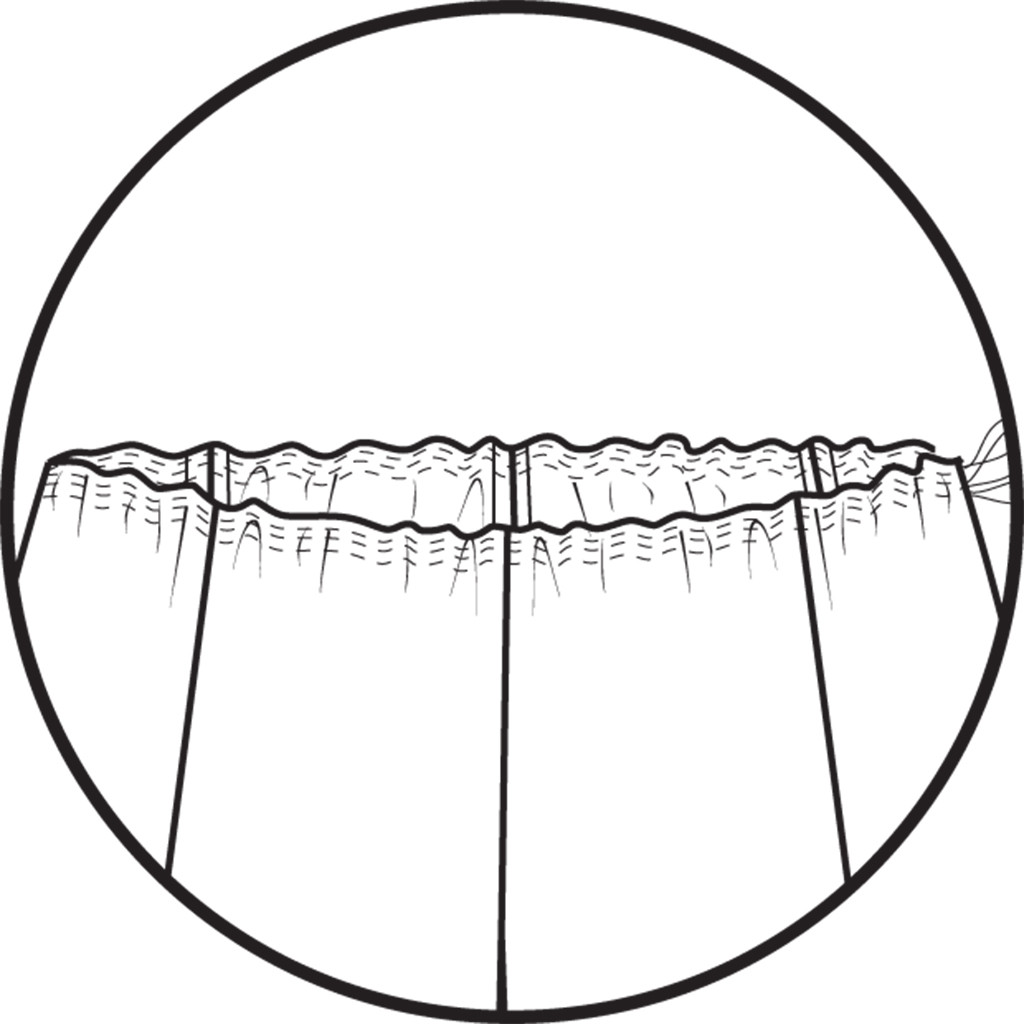
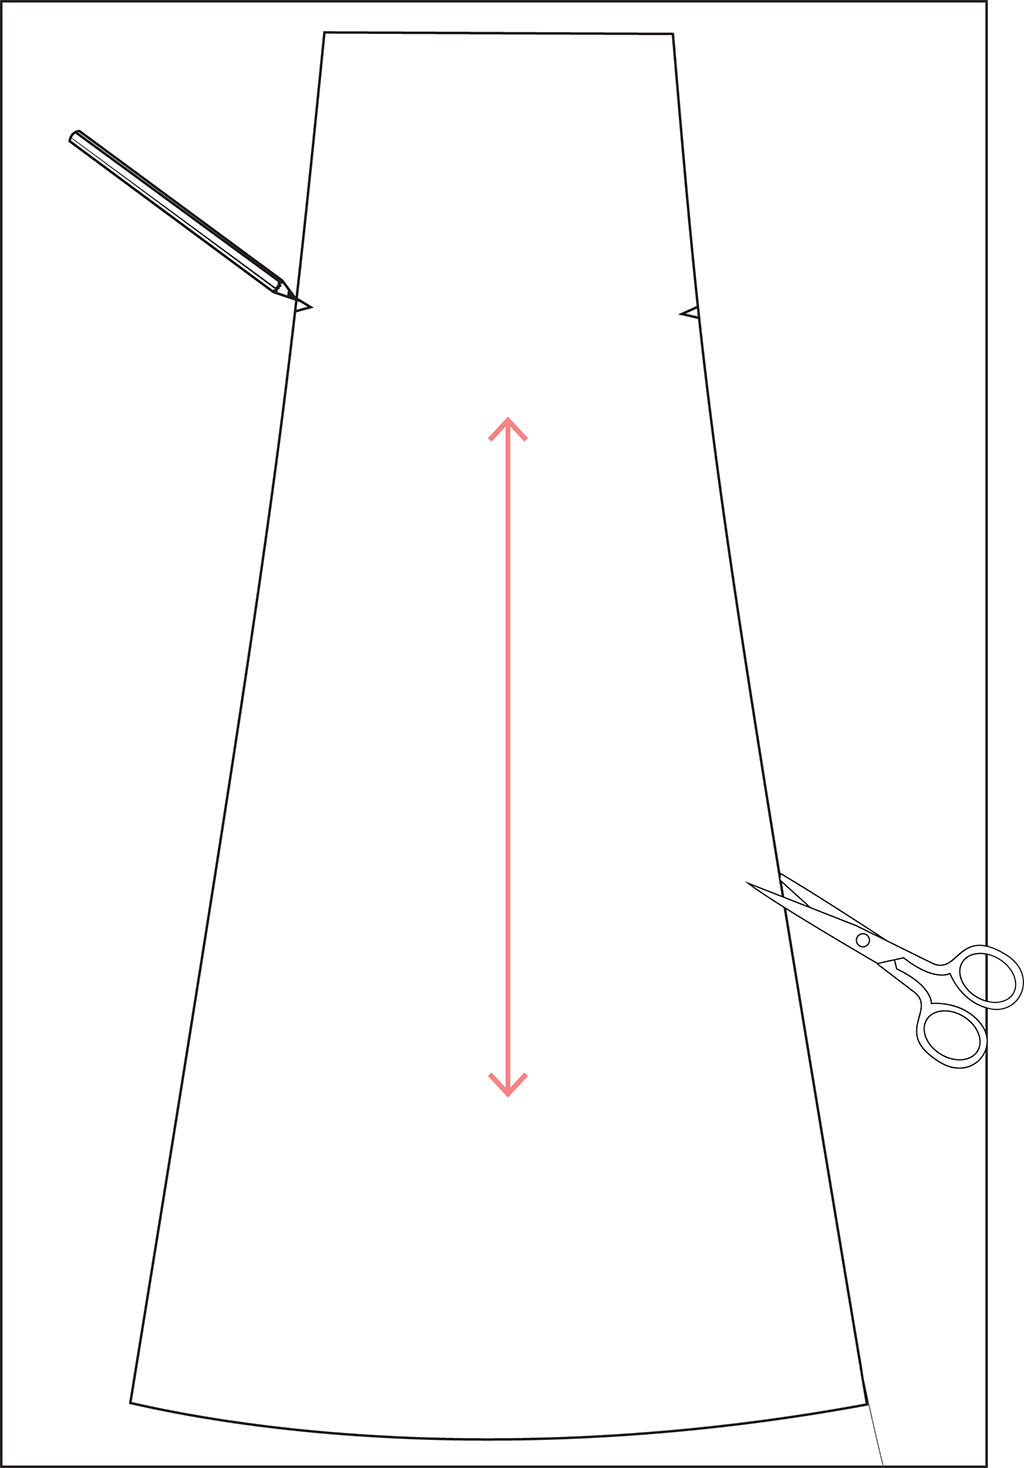
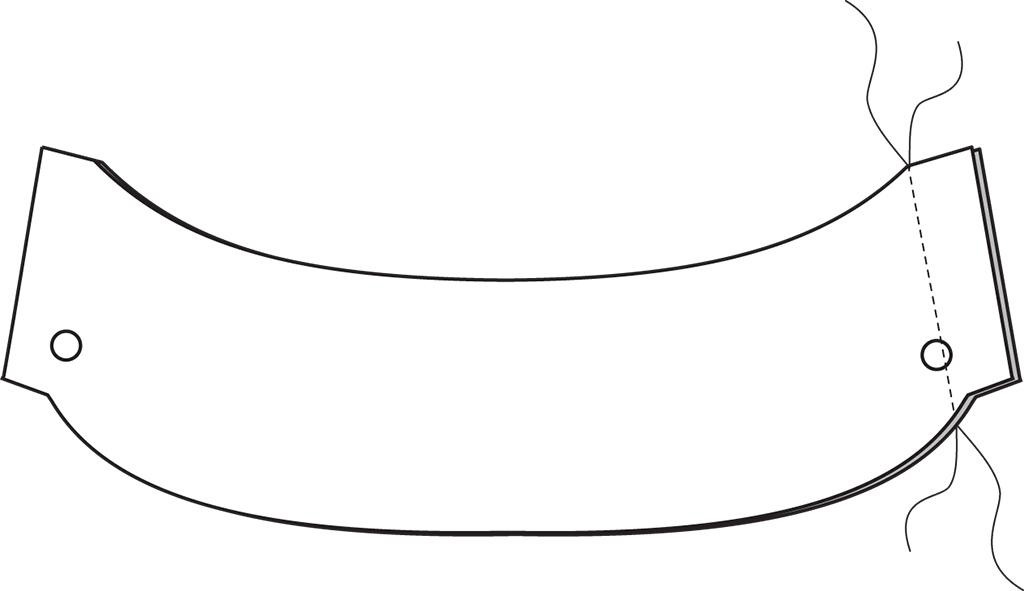
Create a Scalloped Hem
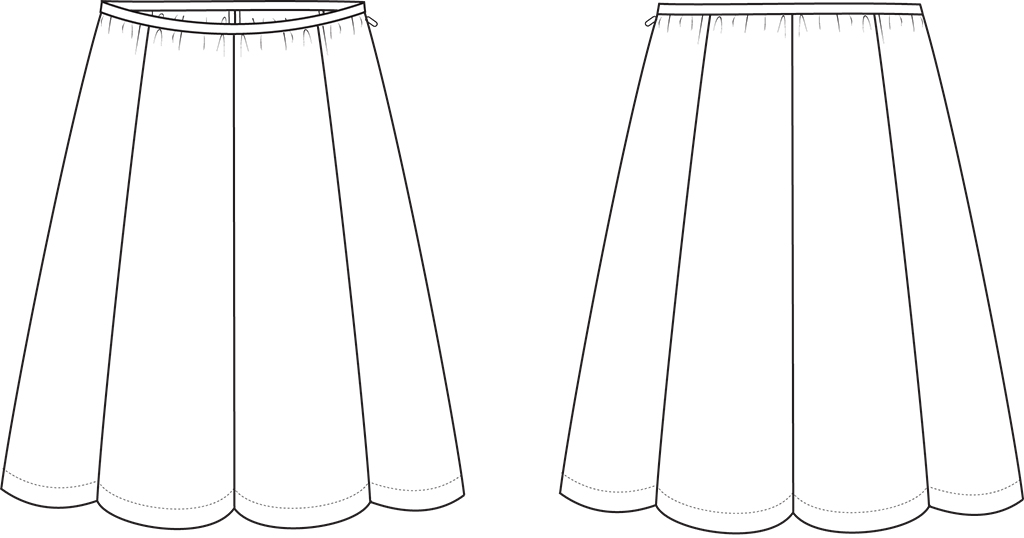
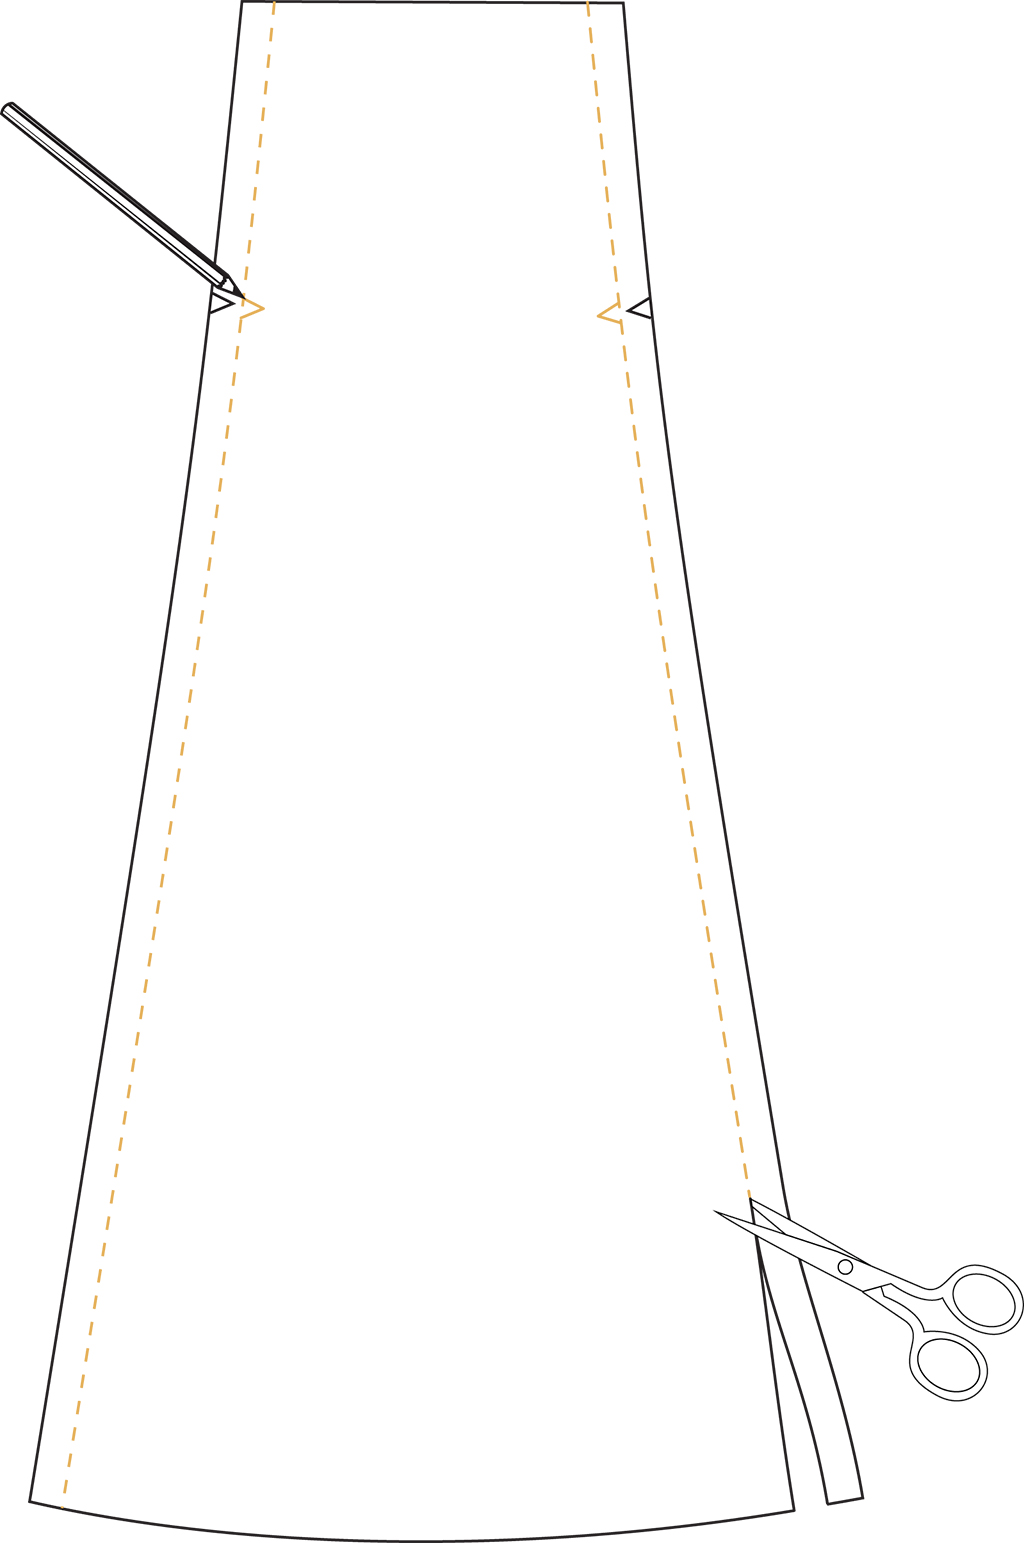
Step | 01
Using the new skirt panel piece drafted in the previous section, draw in the stitch lines and transfer the notches.
Step | 02
Cut along the stitch lines, removing the seam allowances.
Step | 03
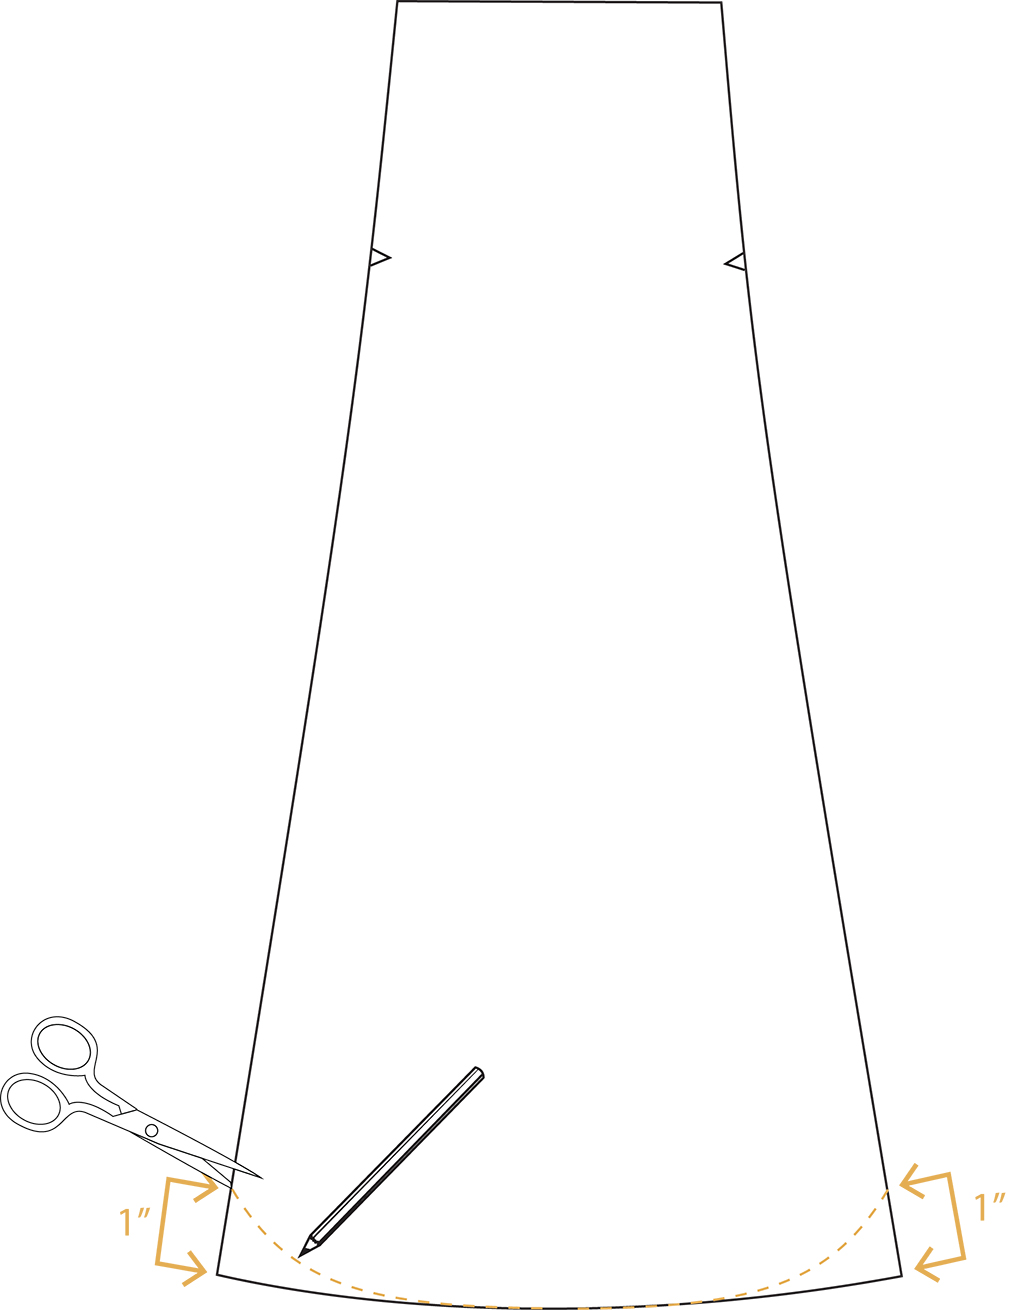
Mark 1” up from the hemline on both side seams.
Step | 04
Using a French curve, draw a curved line that blends from the hem up to the markings. This creates your new hemline. Cut along this line.
Step | 05
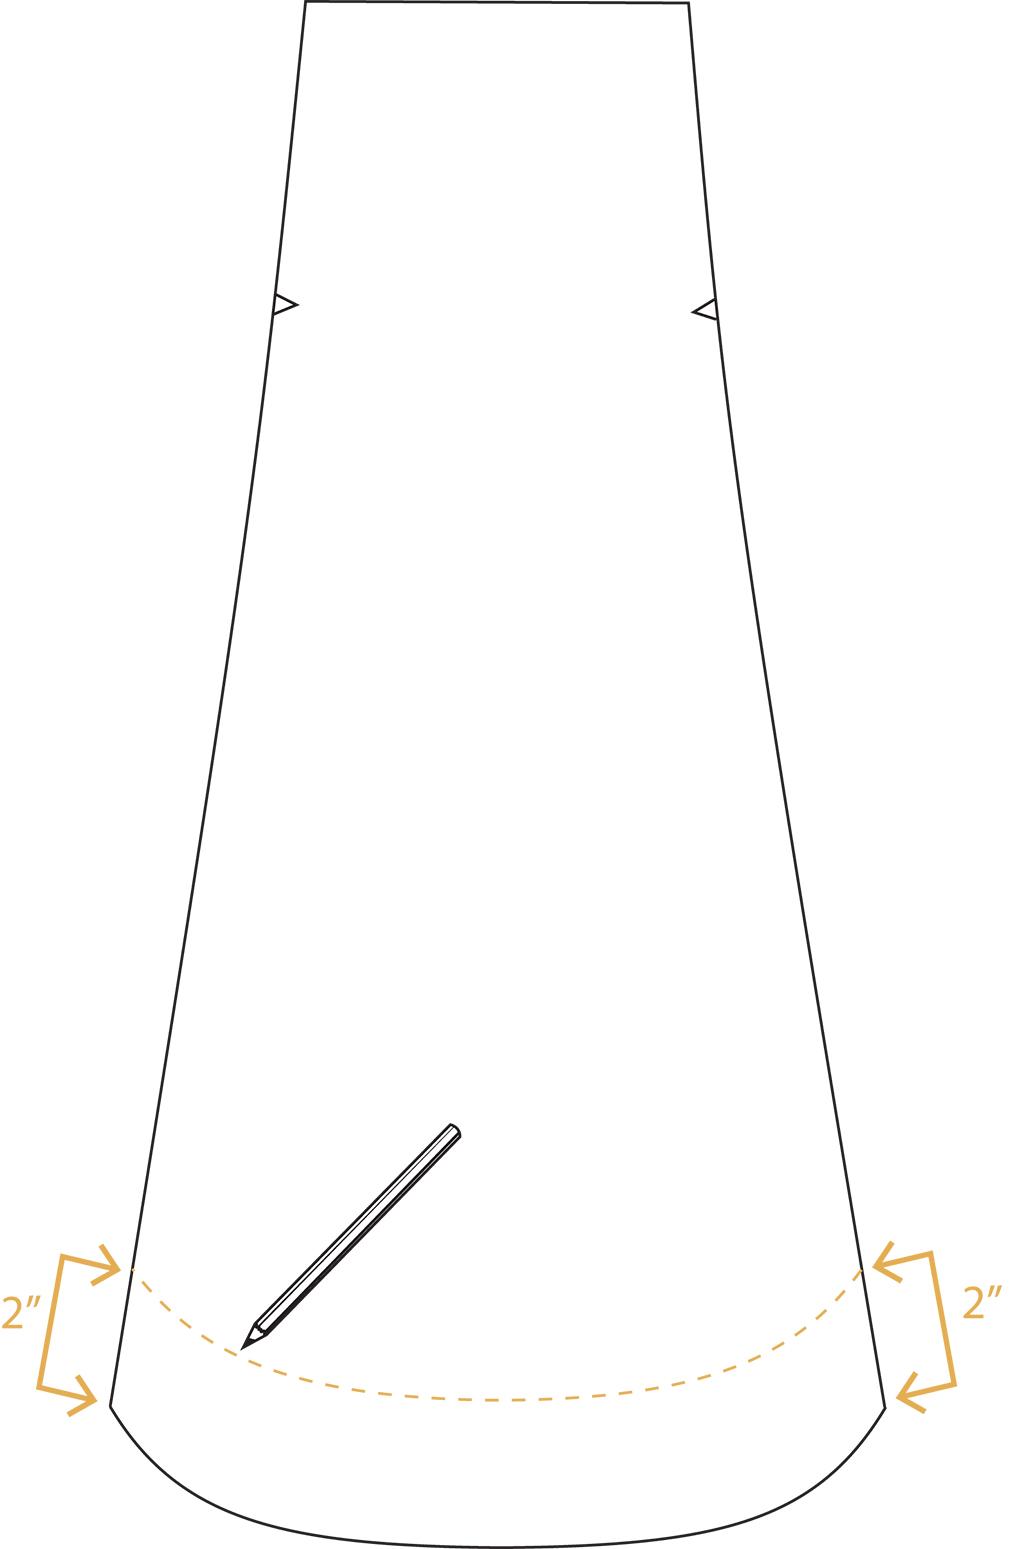
Draw a curved line, parallel and 2” up from the hemline.
Step | 06
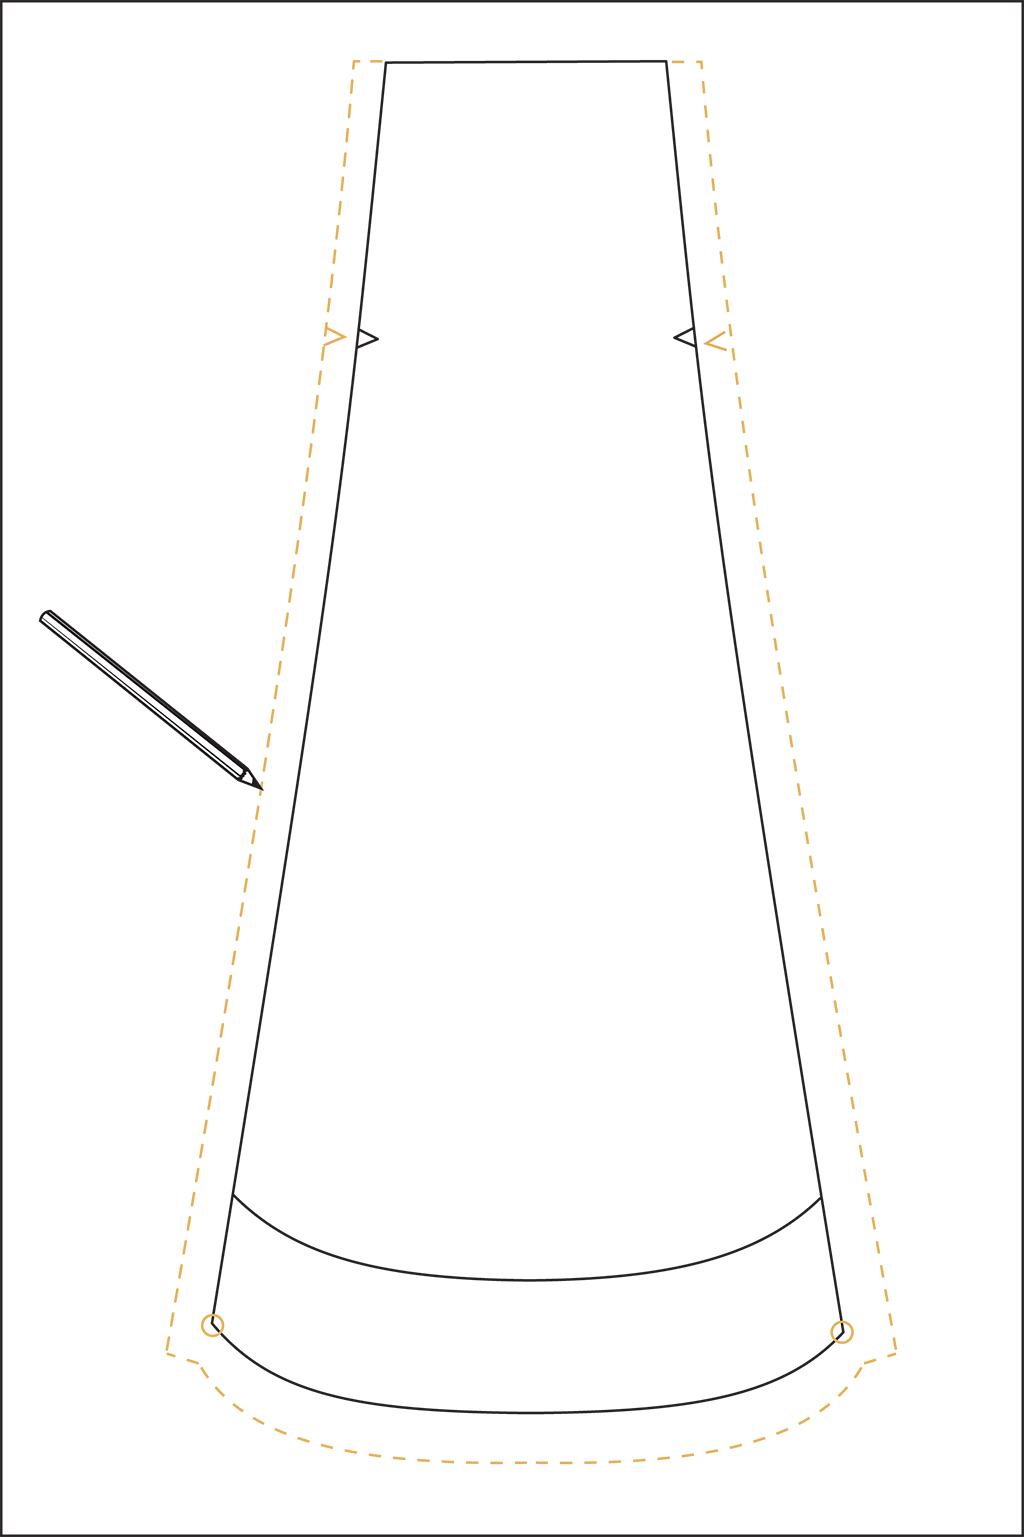
Draw 5/8” seam allowances around the side seams and hem. Mark circles at the corners of the curved hemline.
Step | 07
On another piece of pattern paper, trace over the lower portion of the skirt panel, including seam allowances and circles. This creates the hem facing.
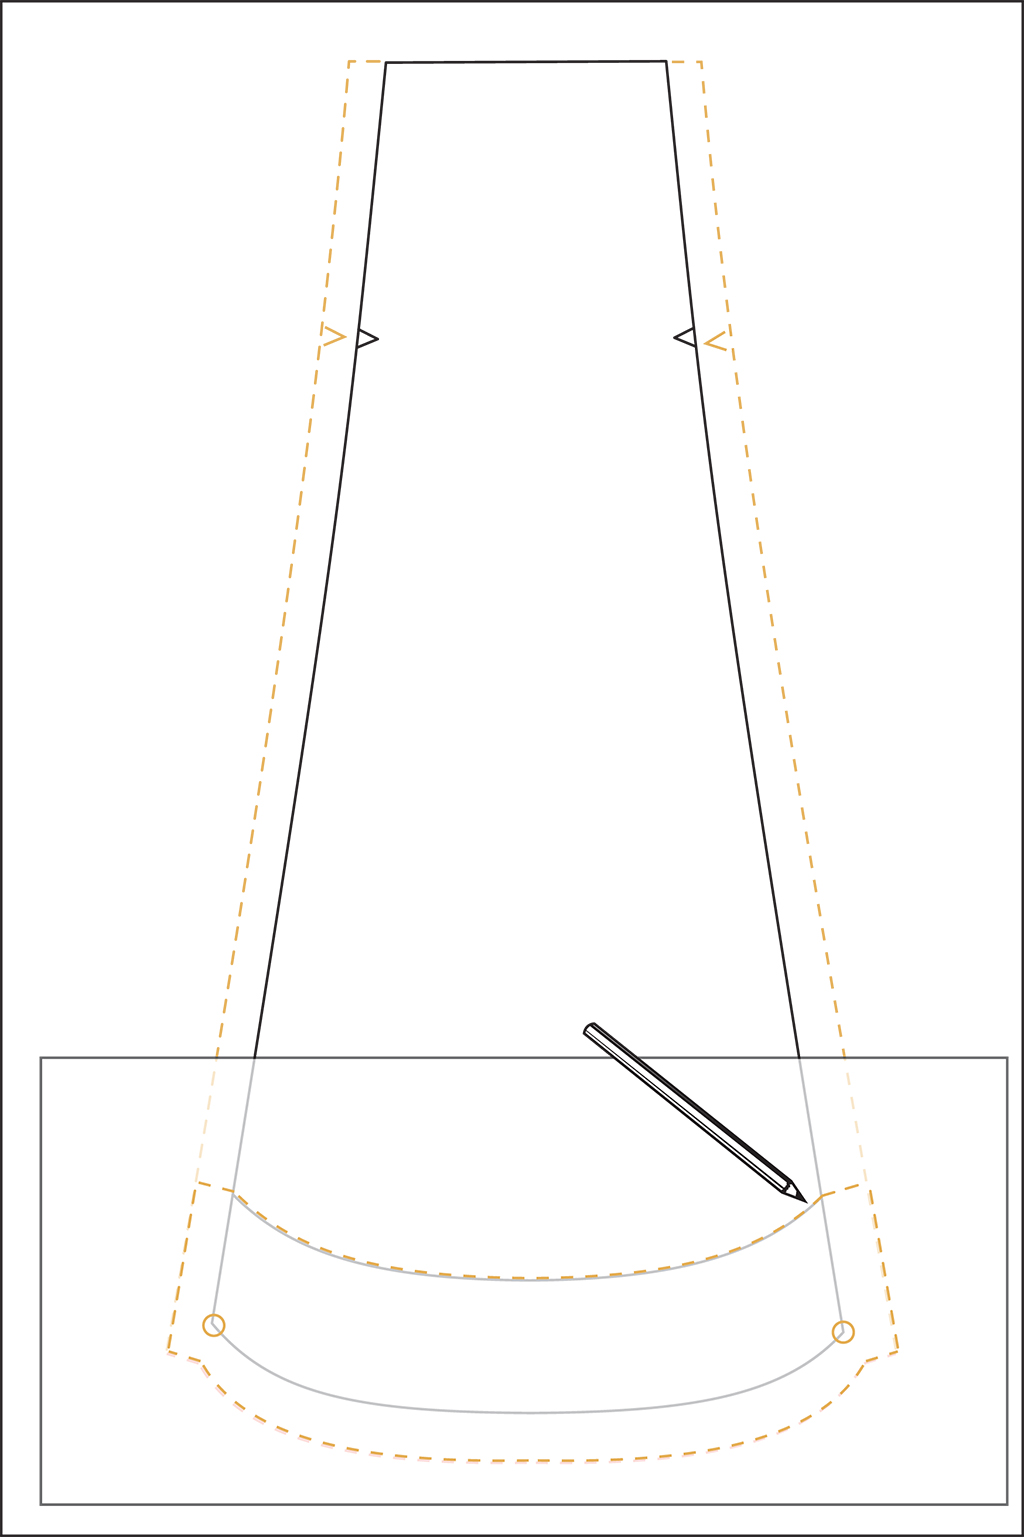
Step | 08
Cut out the pattern pieces and mark the grainlines. Cut eight of each piece from your main fabric.
Step | 09
To assemble the skirt, with right sides together, circles and notches aligned, match two skirt panel pieces together. Pin. Stitch.
Step | 10
Finish the seam allowances separately and press open.
Step | 11
Repeat steps 9 - 10 until all of the skirt panels are sewn together, or leave one seam open if you plan to install the waistband and invisible zipper.
Step | 12
Repeat steps 9 - 11 to assemble the hem facing pieces.
Step | 13
Finish the top edges of the hem facing.
Step | 14
To finish the scalloped hem, with right sides together and circles and seams aligned, match the hem facing unit to the skirt unit at the hemline. Pin. Stitch.
Step | 15
Trim and grade the seam allowances. Clip the curved edges.
Step | 16
With wrong sides together, turn the hem facing to the inside of the skirt. Neatly press the hem facing in place.
Step | 17
To complete the skirt, topstitch through all layers along the top edge of the hem facing. Optional: use a blind hem stitch instead of topstitching.

About the Author
As pattern designer, Anna works hard to make sure our sewing patterns boast both great style and instructions. She believes in the power of chocolate and coffee to cure just about anything.