Sign In
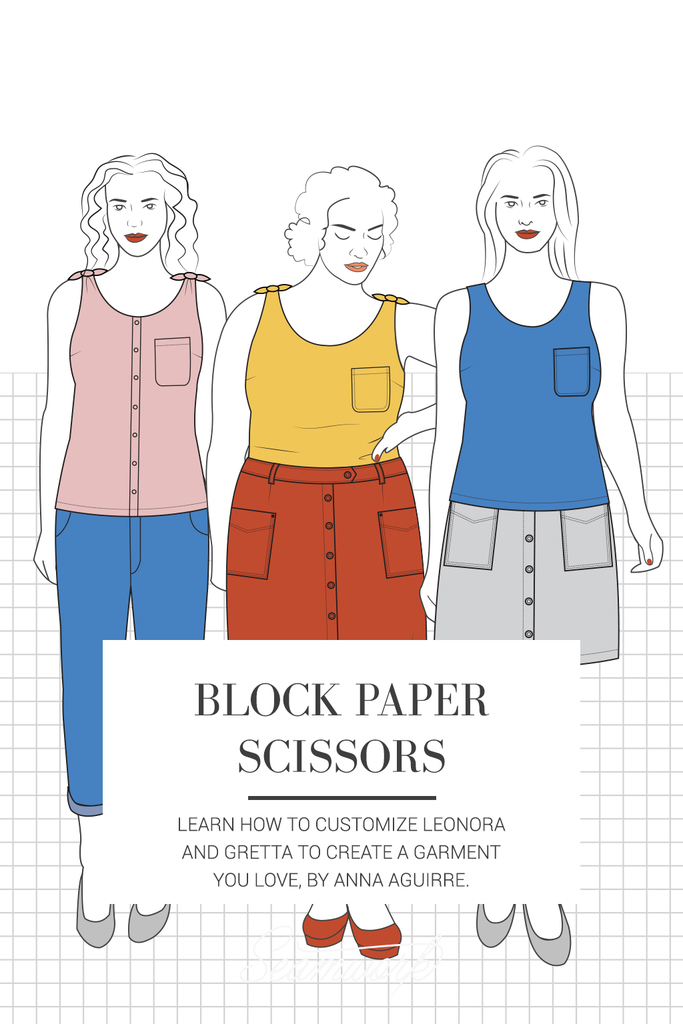
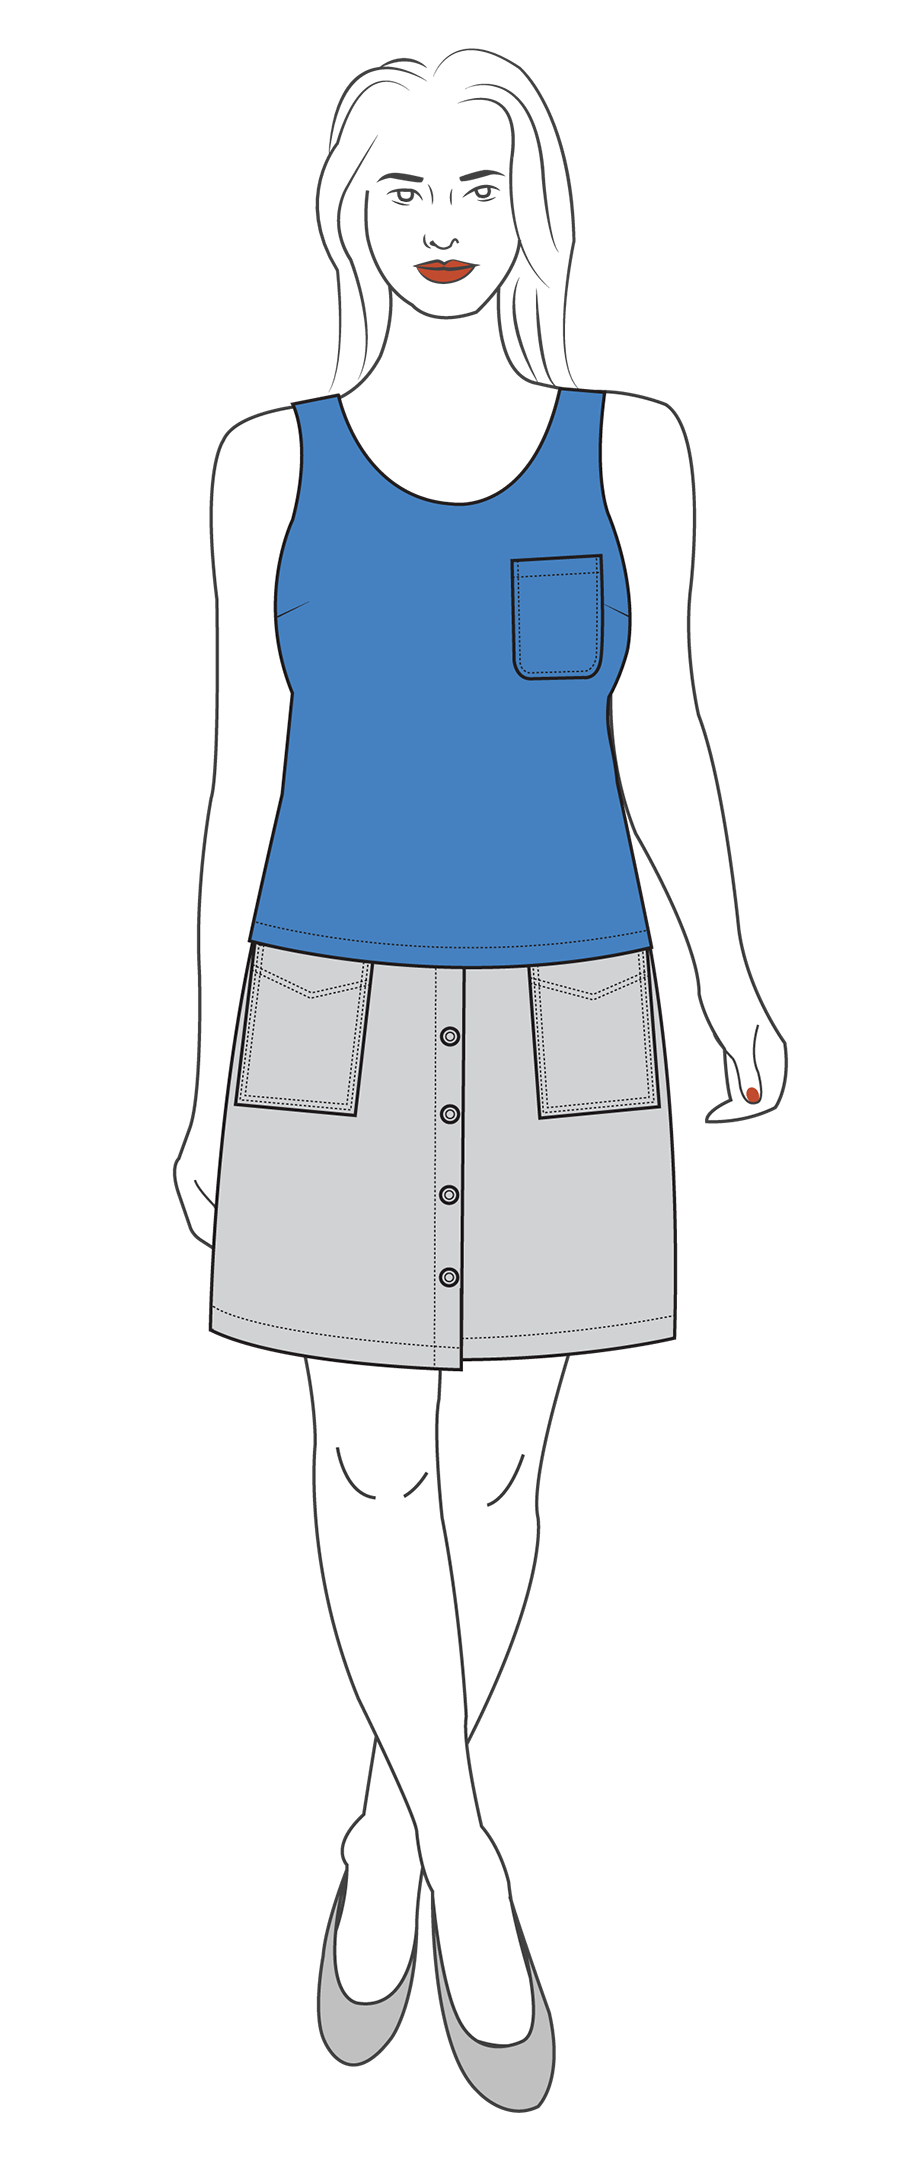
Block Paper Scissors is a monthly column featuring patternmaking hacks that will help you give your Seamwork patterns a custom spin—all you need is paper, a ruler, and a pencil! Each month we walk you through three different pattern hacks so you can create a garment exactly to your preference.
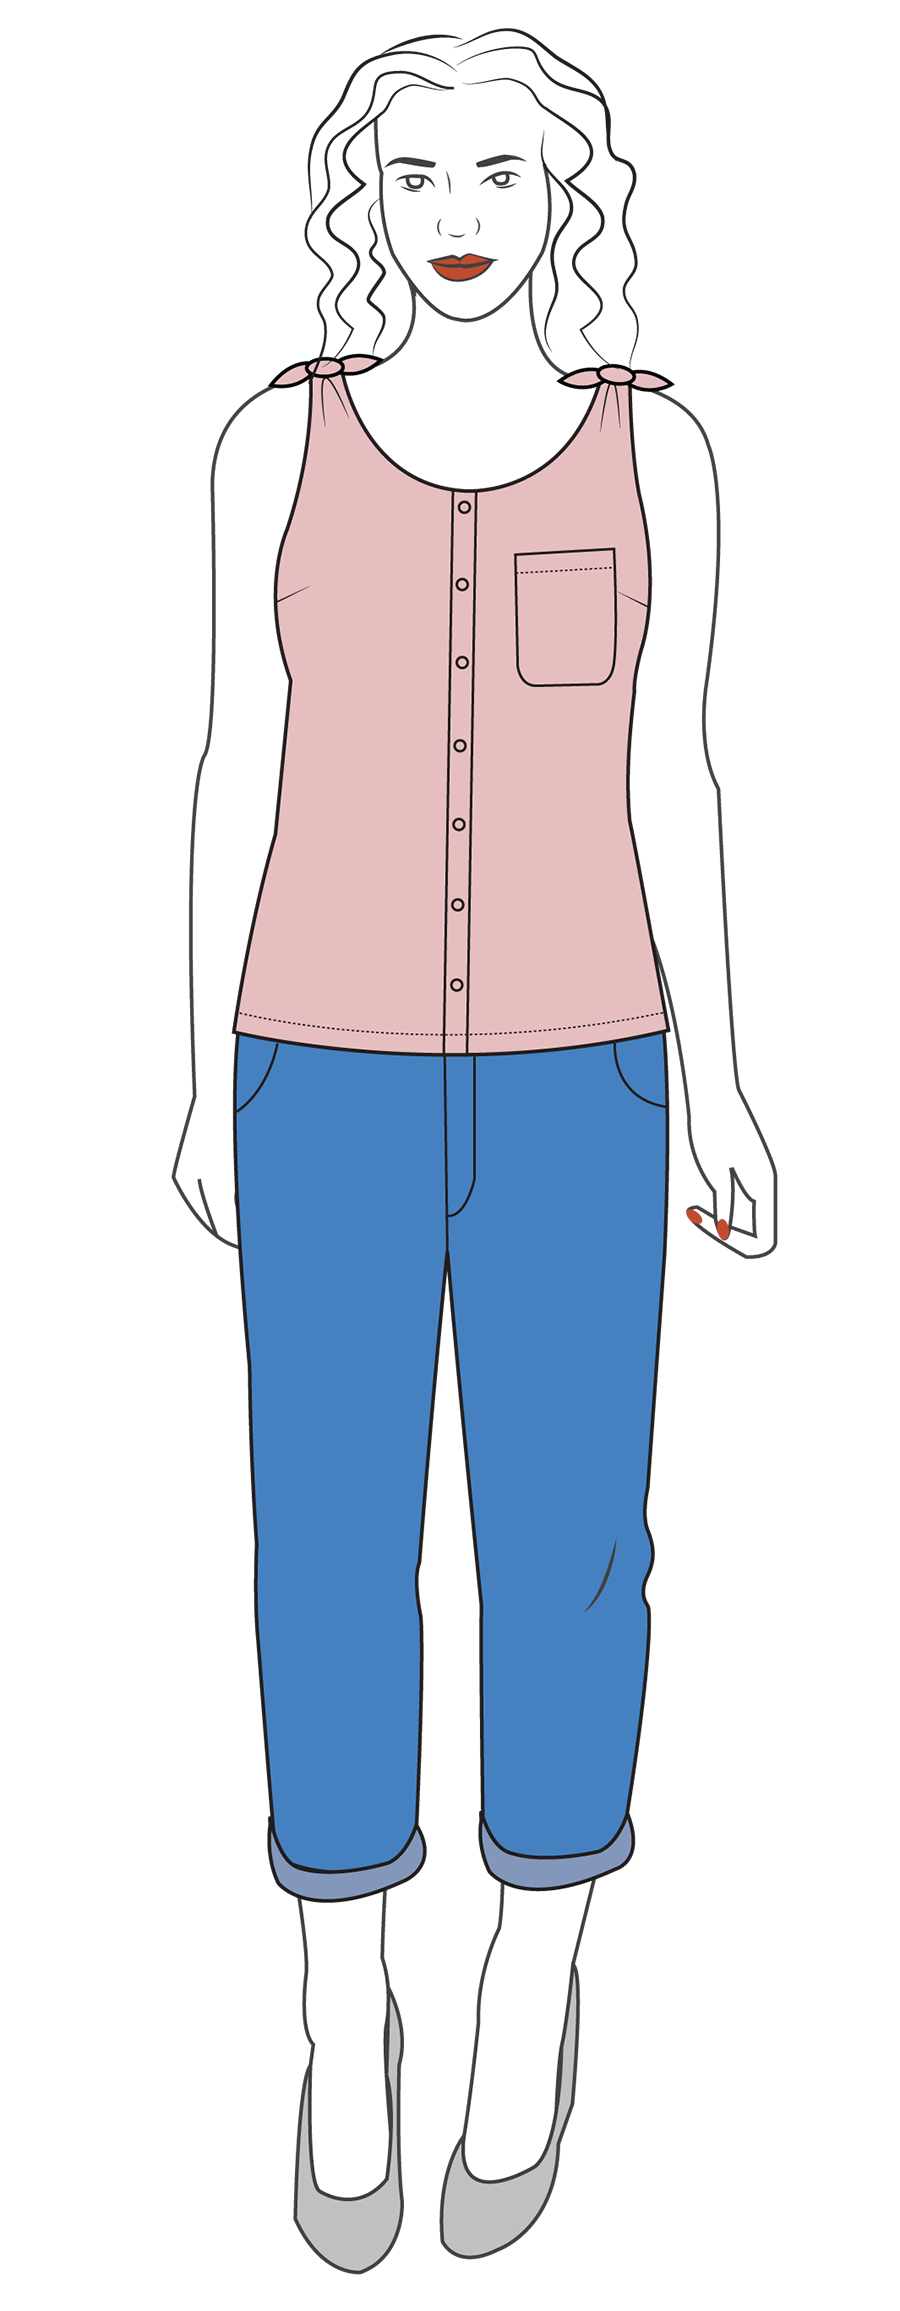
This month we walk you through two customizations for Gretta, and one customization for Leonora, to create totally unique garments. For Gretta, you’ll learn how to add a front button placket and how to construct the tank top with no shoulder ties; for Leonora, you’ll learn how to lengthen the skirt to be tea-length.
Note: Be sure to make any fit adjustments before doing the pattern hack.
You'll Need:
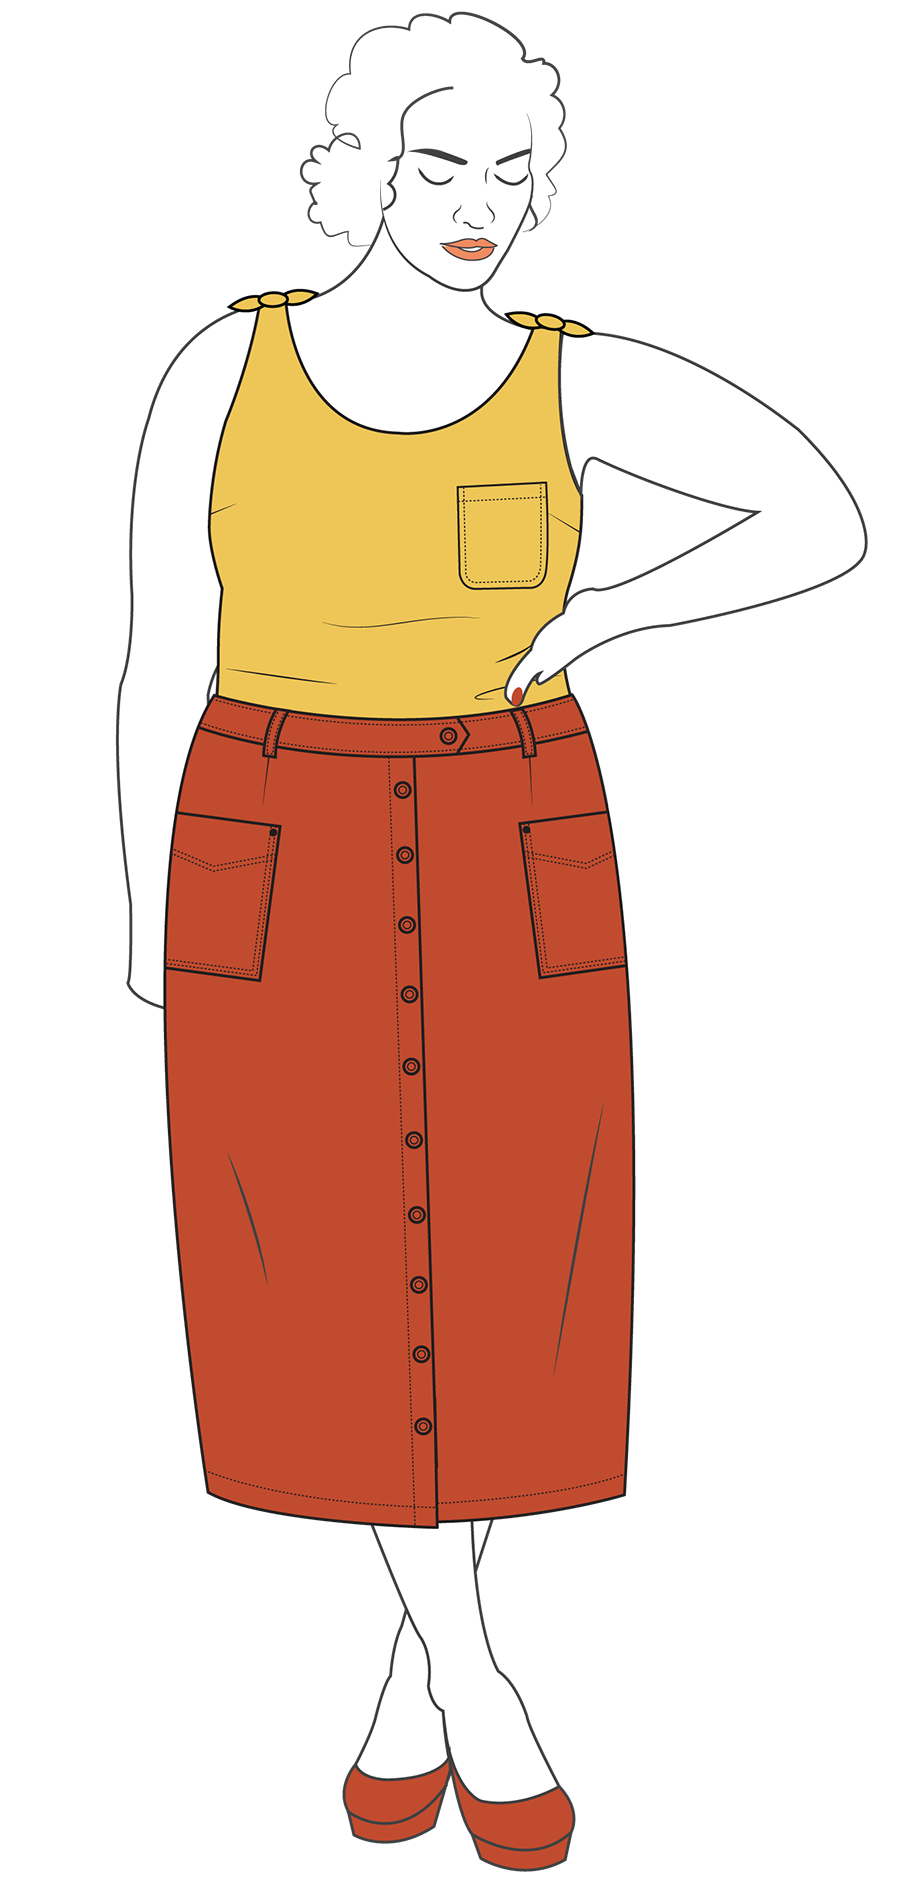
Tea-Length Leonora Skirt

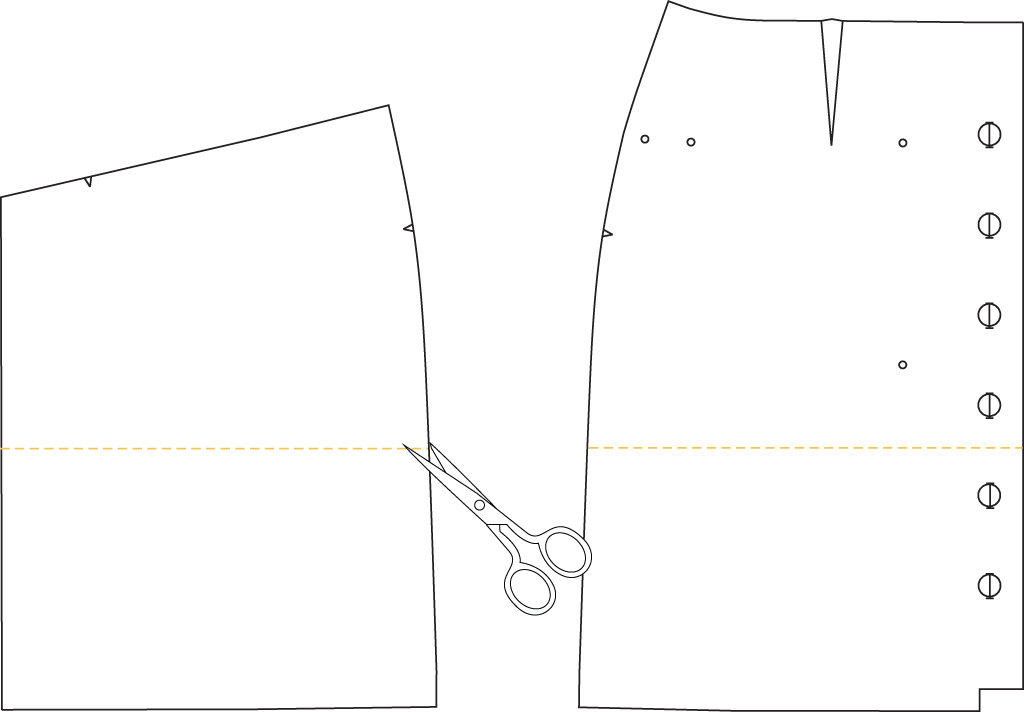
Step | 01
Draw lengthen lines on the front skirt and back skirt, a few of inches below the notches at the hip line. Cut the pattern pieces along this line.
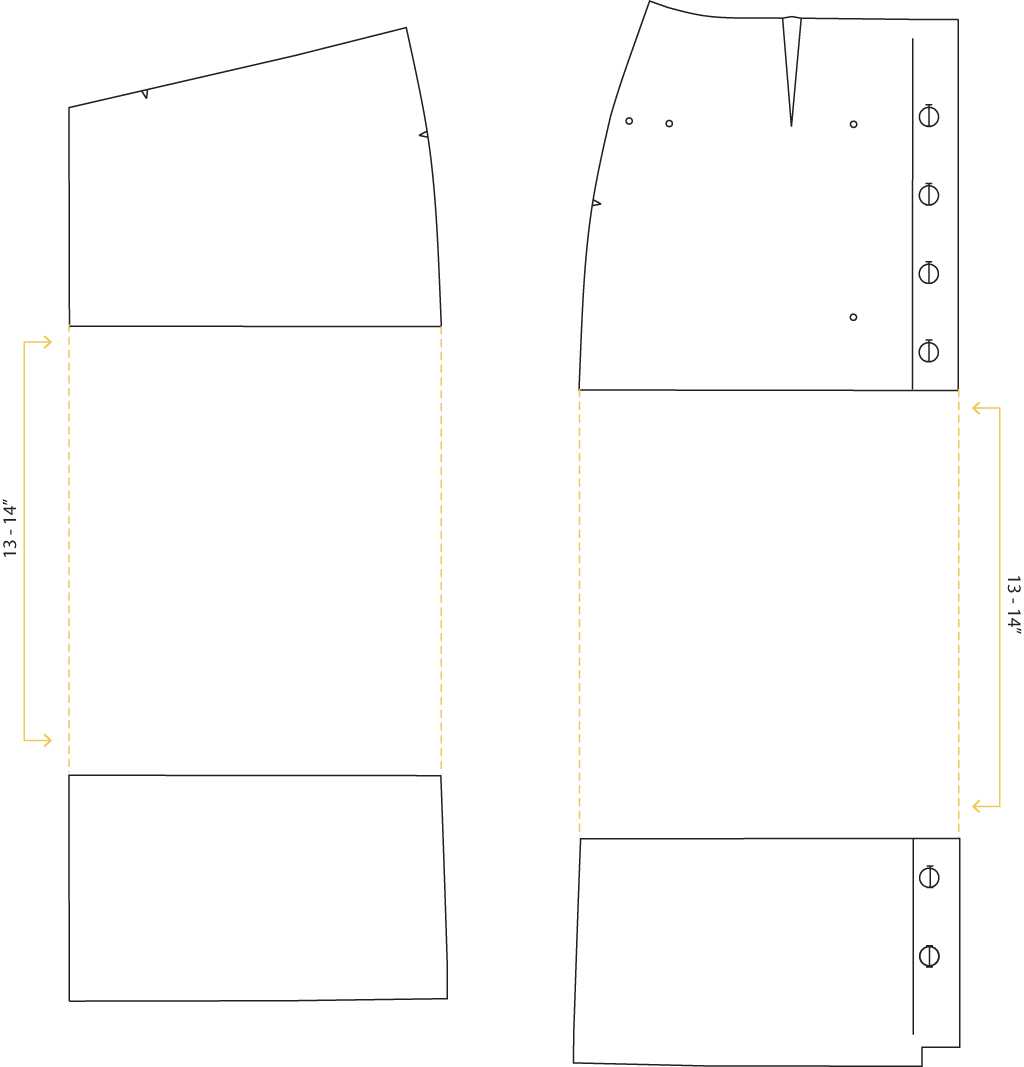
Step | 02
Separate the top and bottom portions of the skirt pieces by approximately 13-14”. You can adjust this measurement based on your personal preference. For a true tea-length skirt, the hem should hit just below mid-calf.
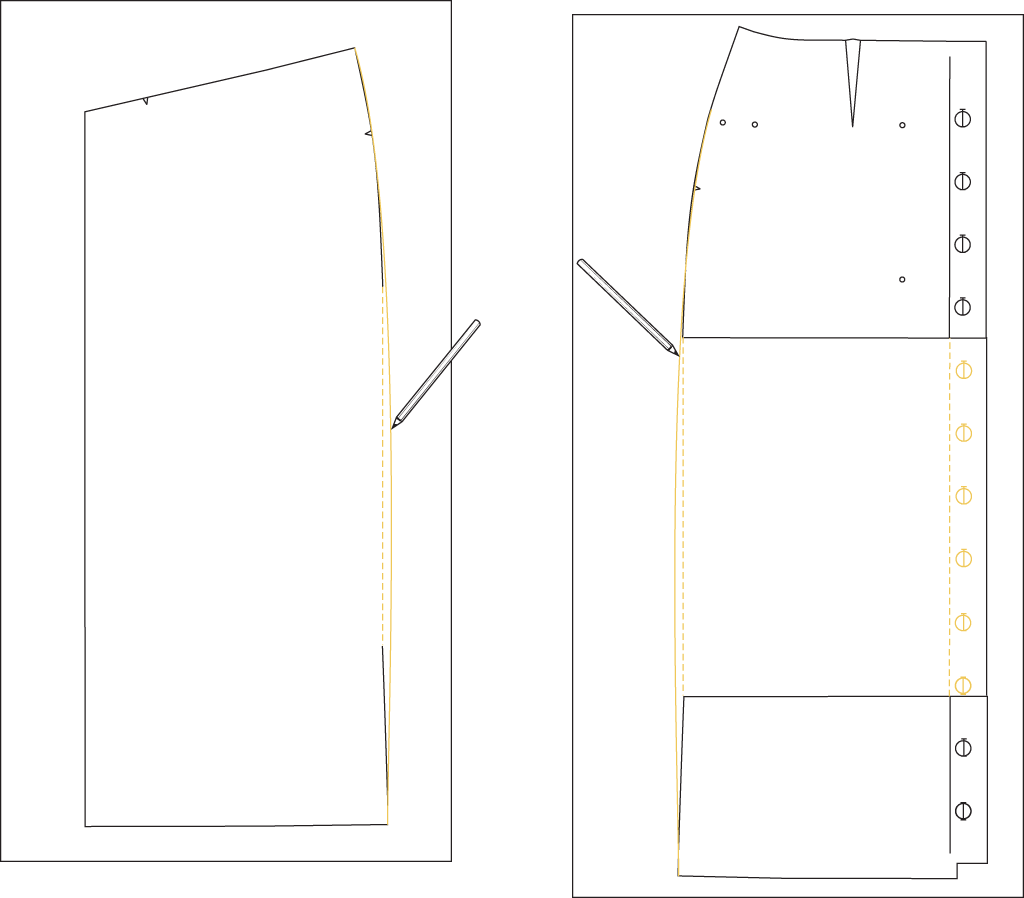
Step | 03
Trace the new pattern pieces onto a sheet of pattern paper. Draw new side seams by blending from the hip to the hem. Add new button and buttonhole markings along the skirt front, evenly spacing the markings, using the upper portion of your skirt as a guide. The final buttonhole should sit about 3” above the hem.
Step | 04
Sew the skirt according to the pattern instructions.
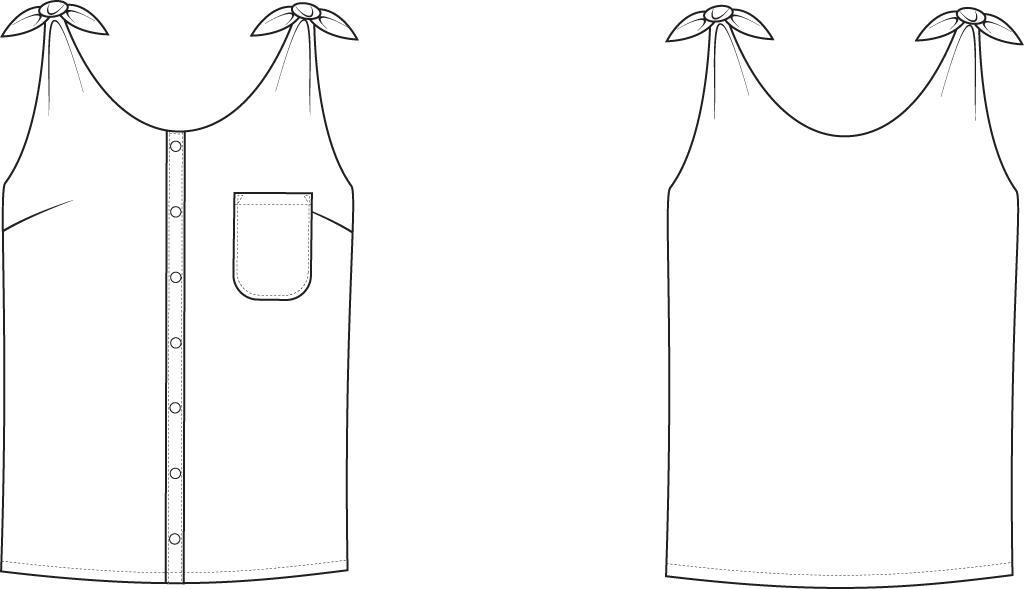
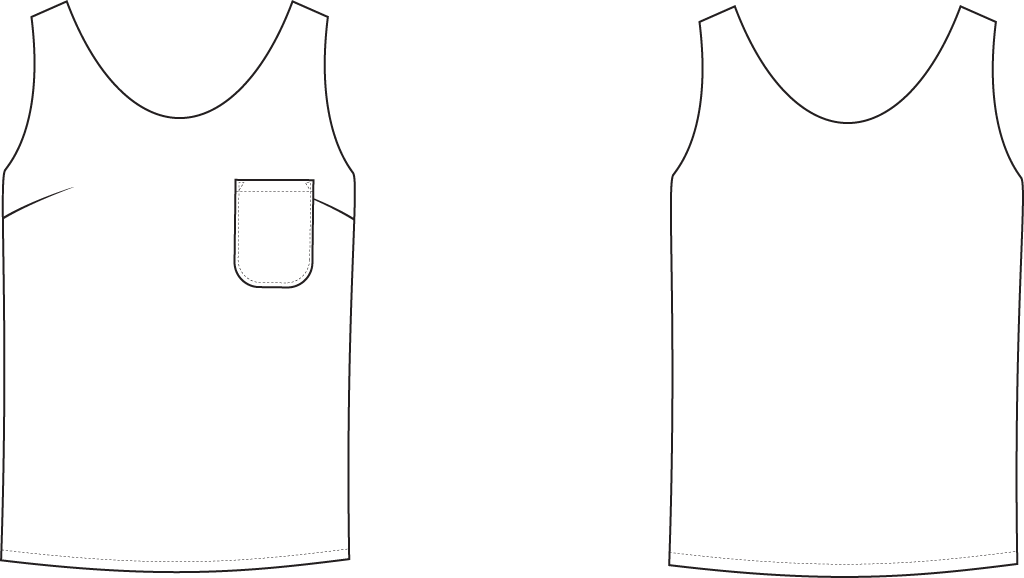
Front Button Placket for Gretta
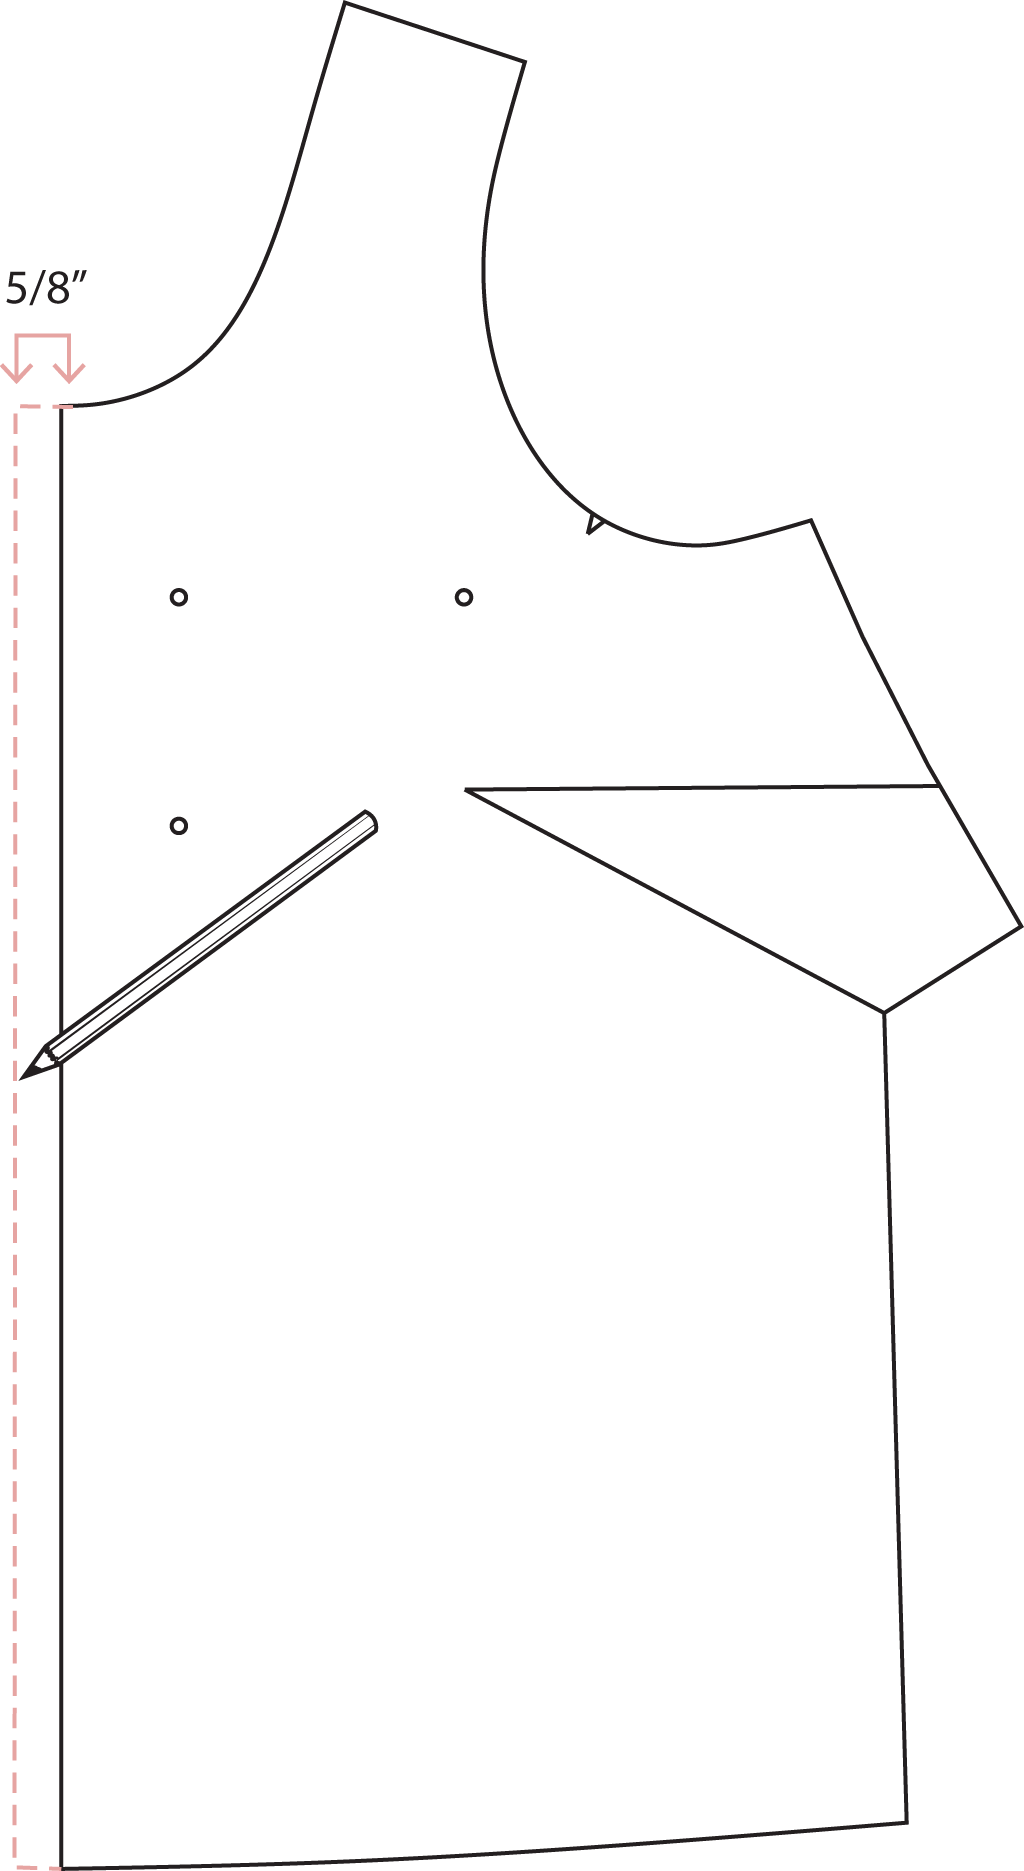
Step | 01
Lay the front piece on a new piece of pattern paper, making sure there is about 4” of room at the center front.
Step | 02
Draw a line, parallel to and 5/8” away from the center front. Label this the “Fold Line.”
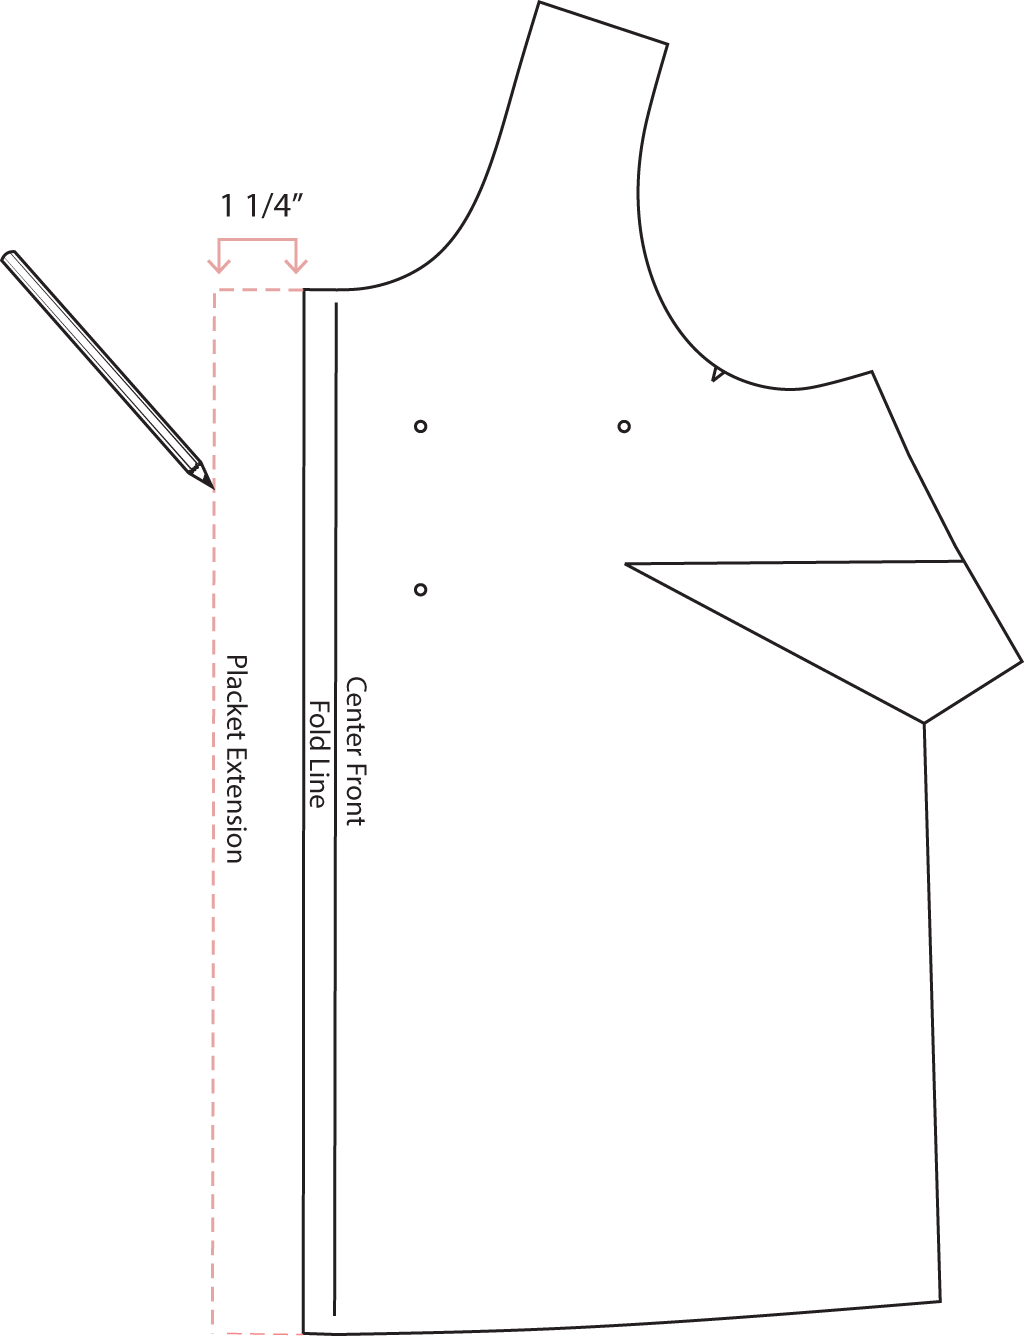
Step | 03
Draw a second line, parallel to and 1 1/4” away from the center front fold line. Label this the “Placket Extension.”
Step | 04
Trace and cut out the new front pattern piece.
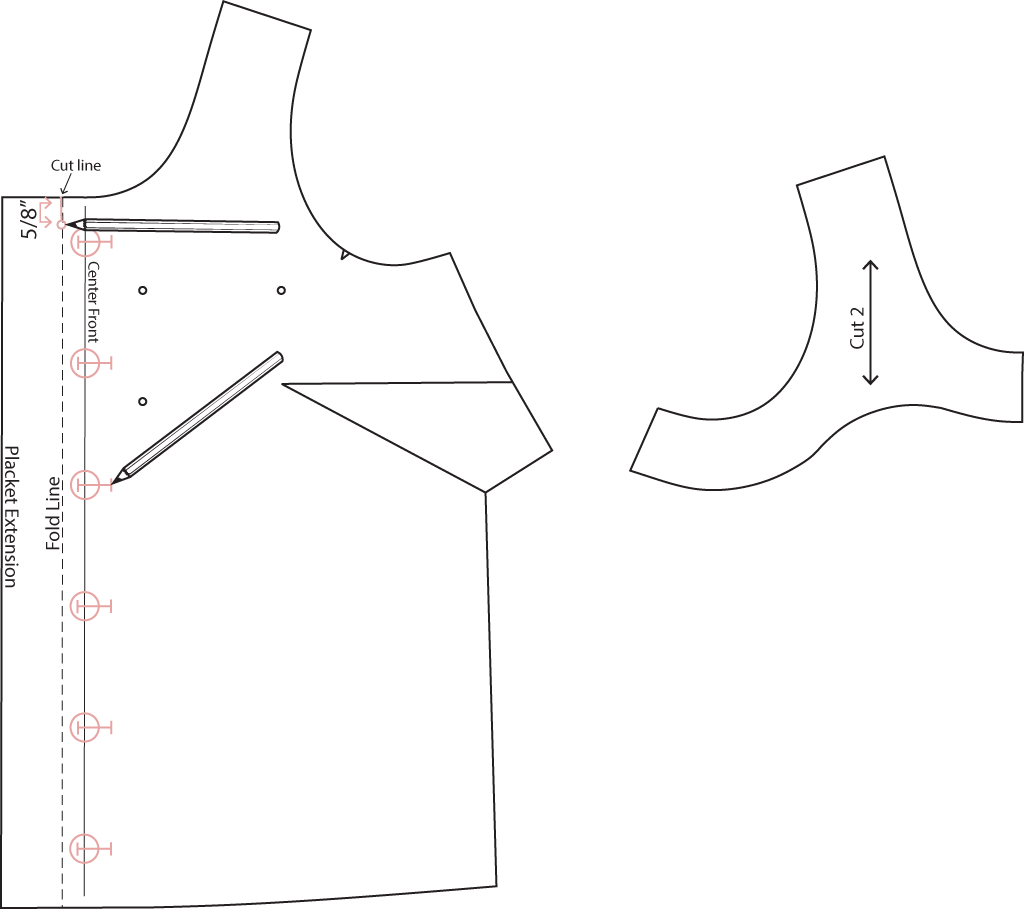
Step | 05
Draw button and buttonhole markings along the center front line. Depending on the length of your front piece, you will have 6-7 button and buttonhole markings.
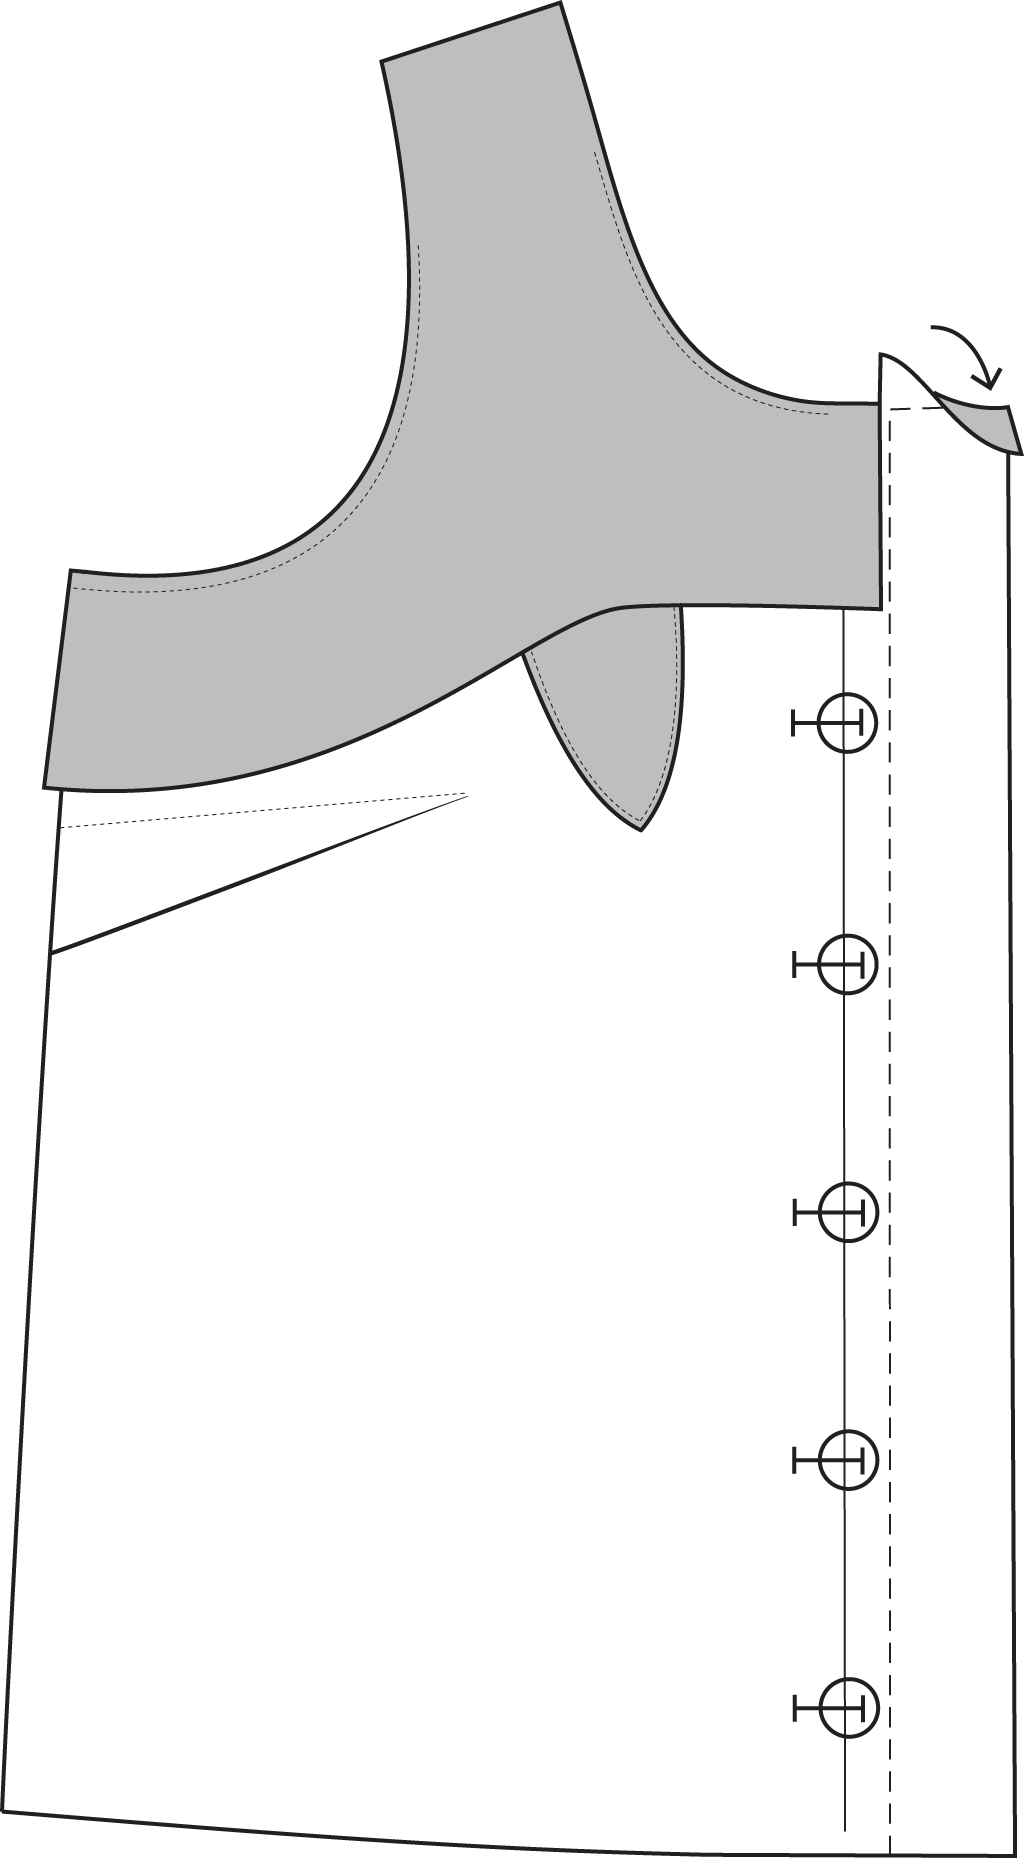
Step | 06
Draw a cut line along the fold line, 5/8” down from the neckline.
Step | 07
Add 5/8” seam allowance to the front facing at the center front. Make a new grainline on the front facing piece and label it “Cut 2.”
Step | 08
Cut out the pattern pieces from your fabric, transferring all the markings.
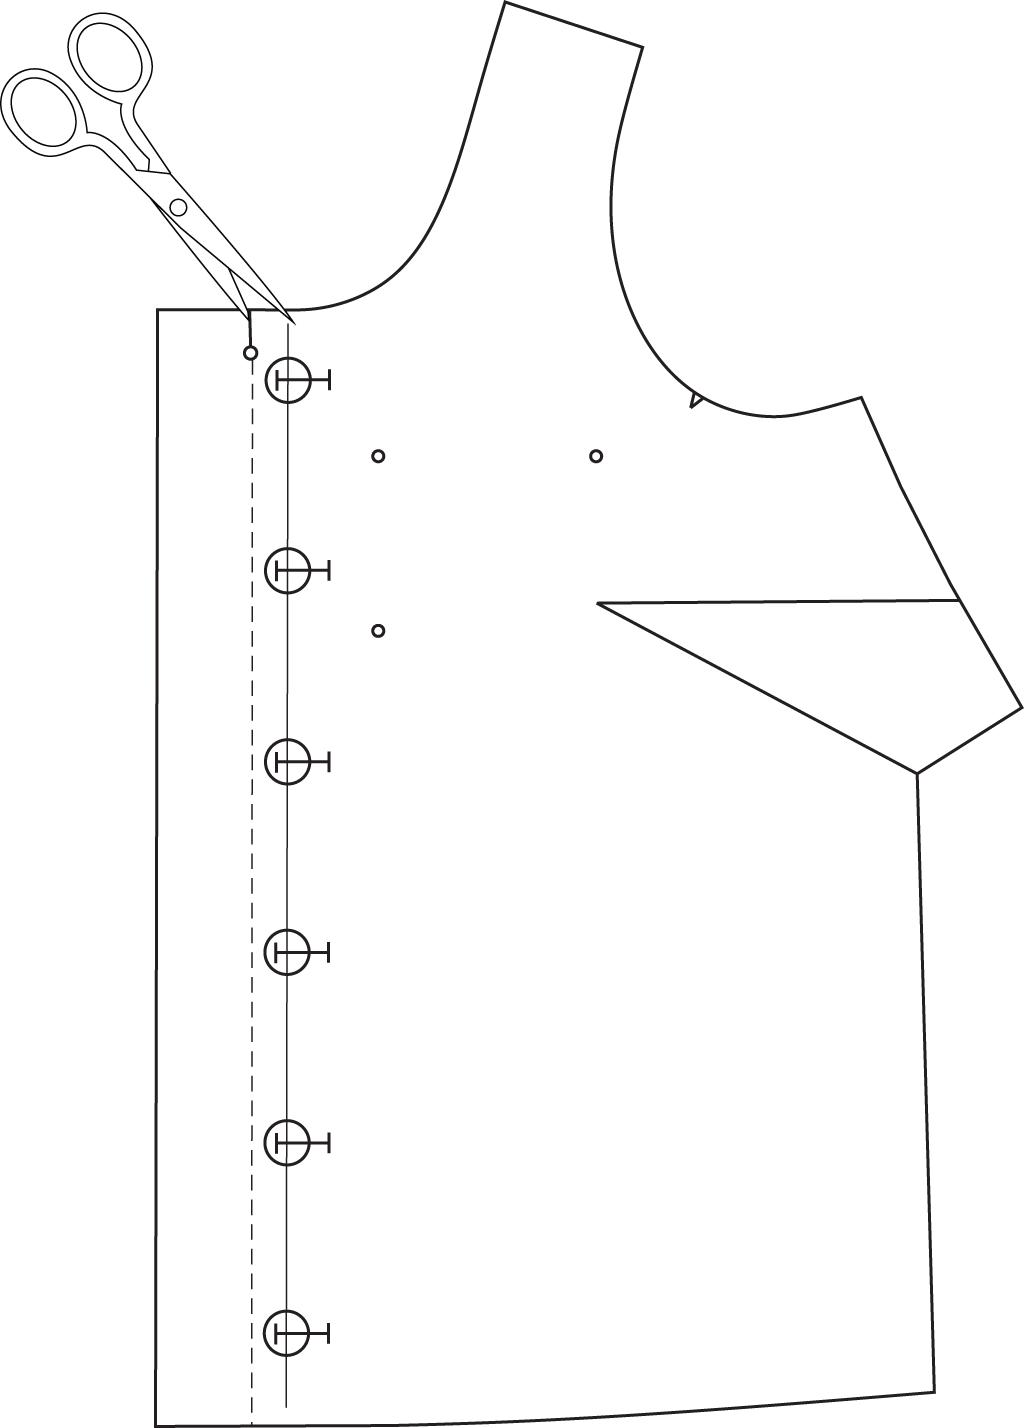
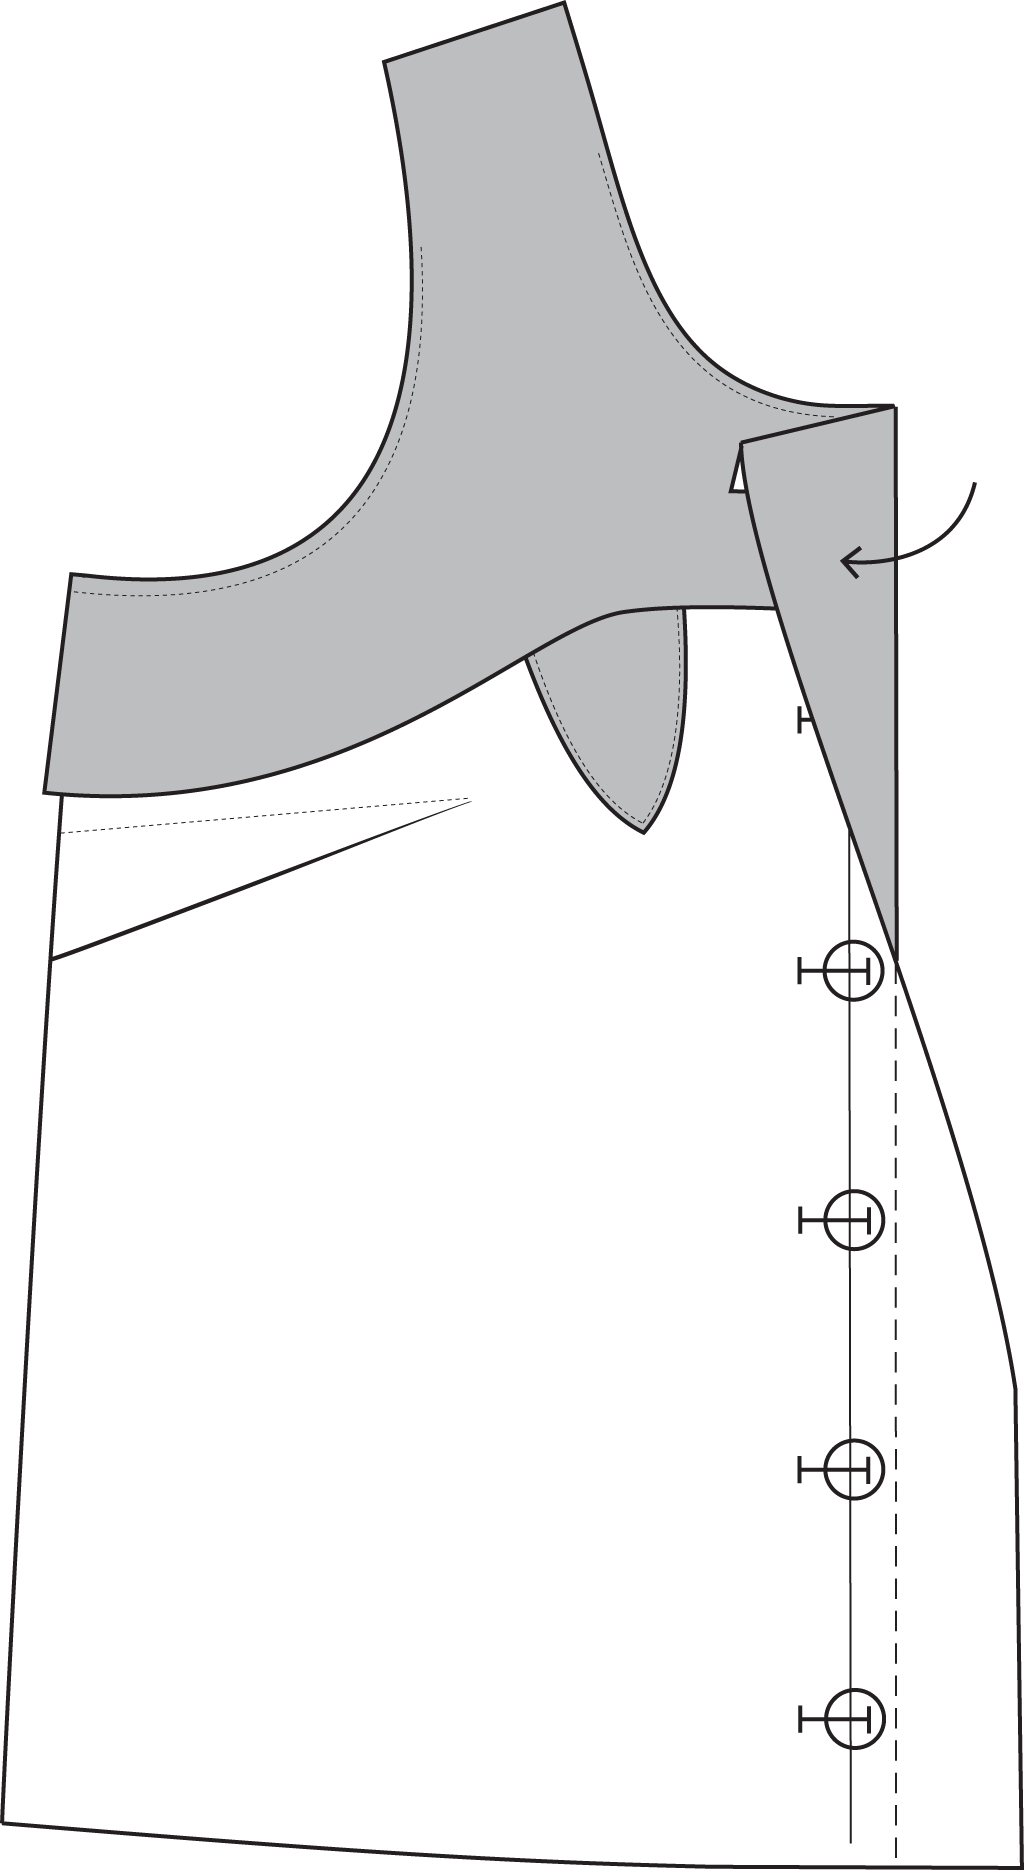
Step | 09
Clip along the cut line.
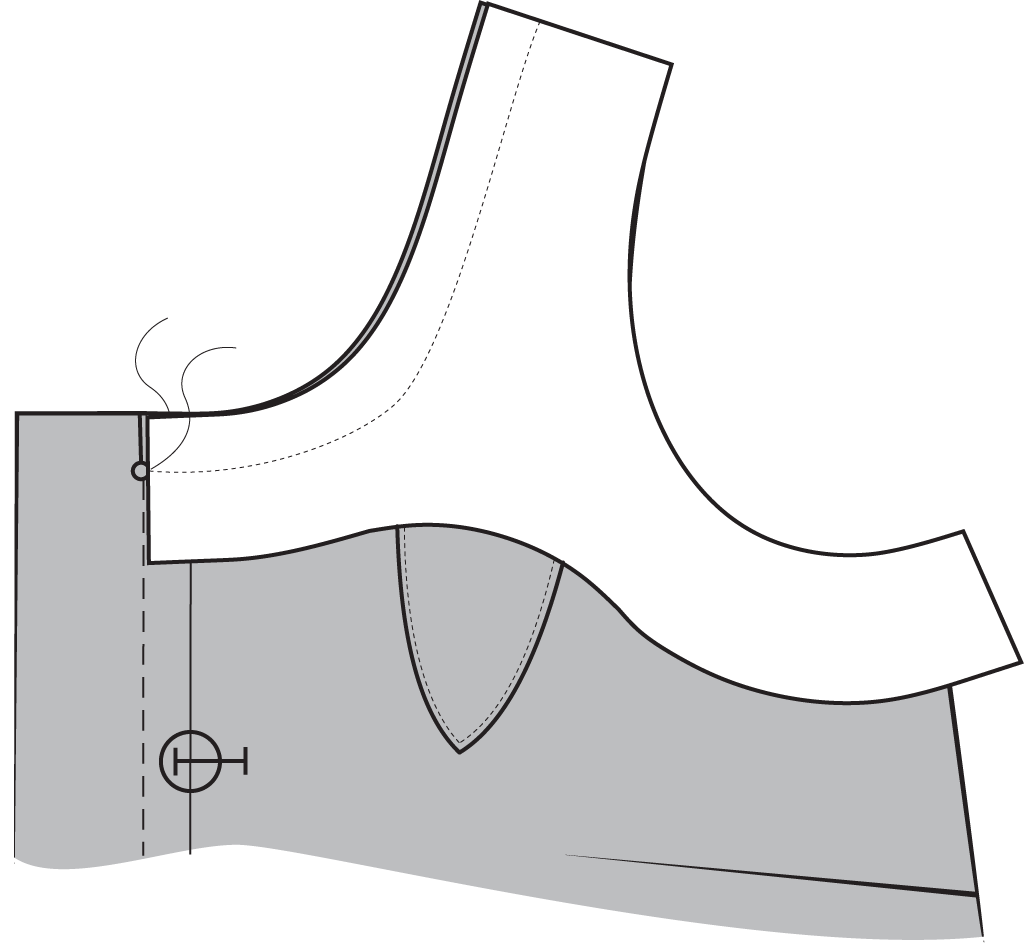
Step | 10
With right sides together, match one front facing to one front along the neckline. Pin. Stitch.
Step | 11
Trim and grade the seam allowances, and clip along the curved edges.
Step | 12
Fold the neckline seam allowance of the front placket extension to the wrong side at 5/8”. Press.
Step | 13
Finish the seam allowance on the long edge of the front placket extension.
Step | 14
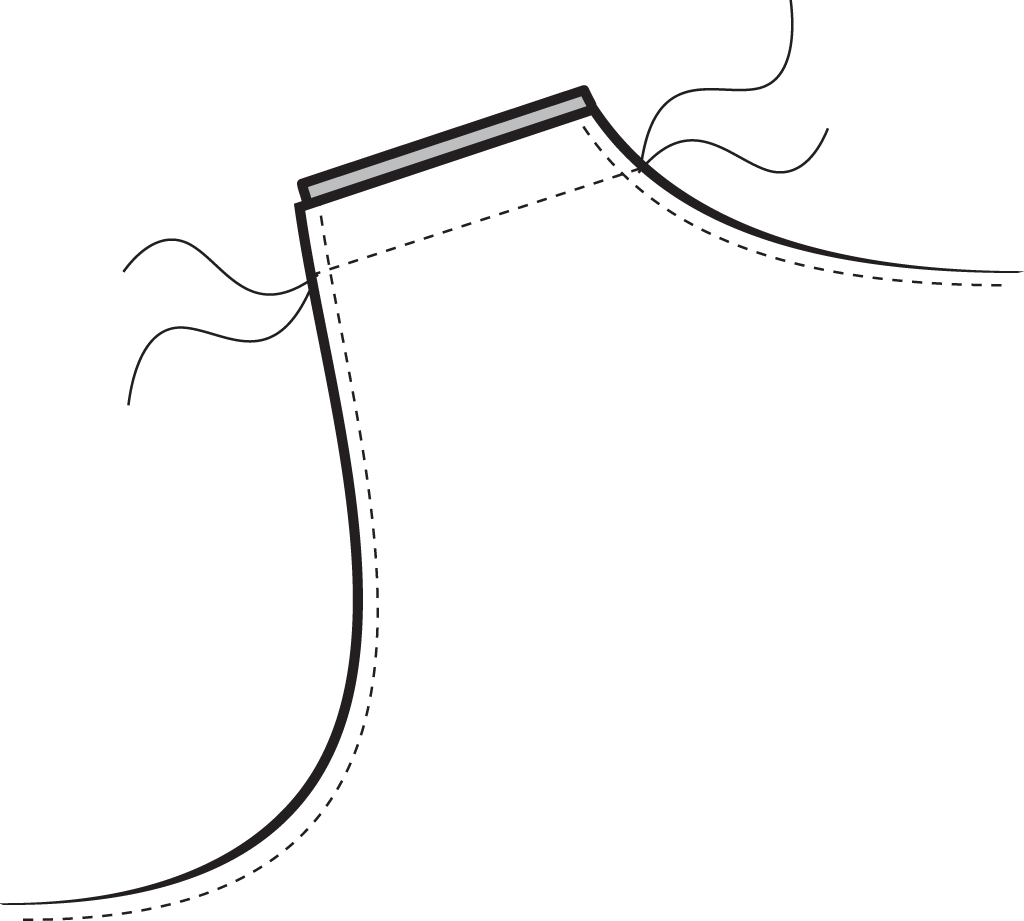
Fold the front placket extension to the wrong side along the fold line. Press.
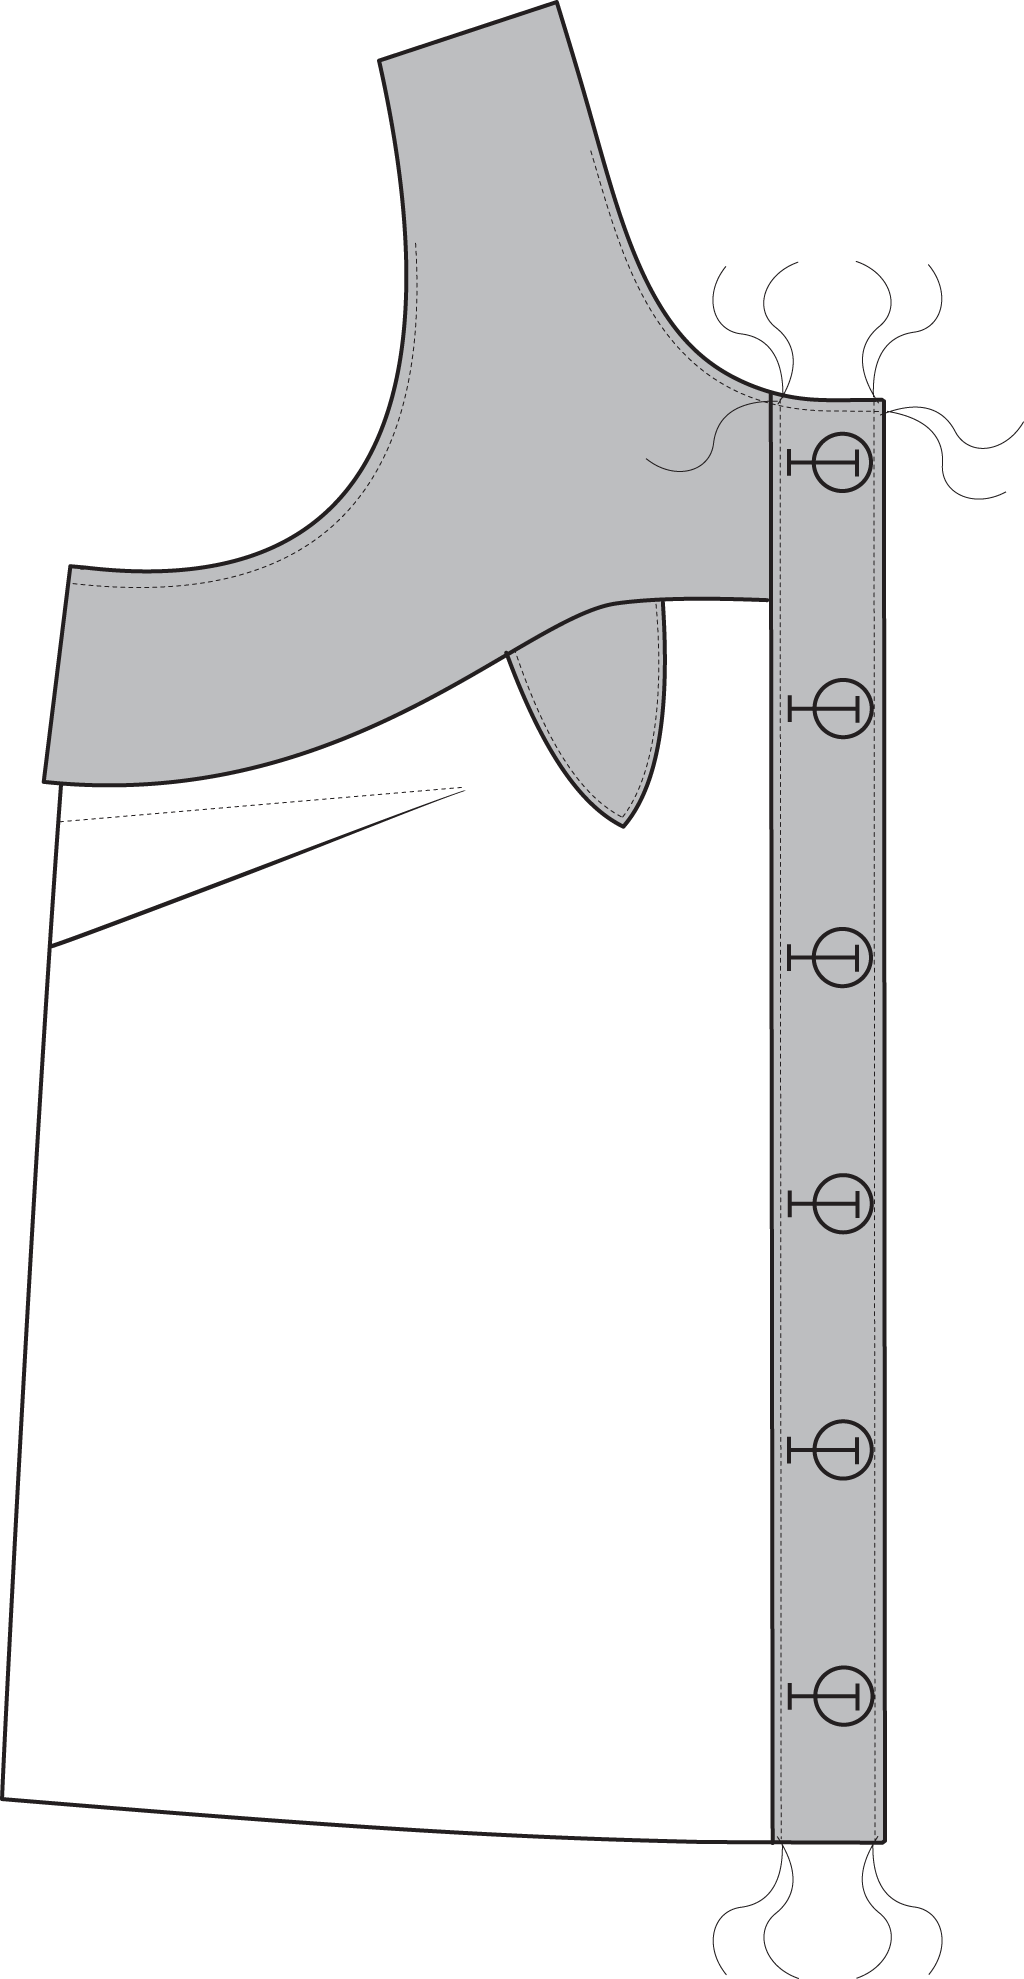
Step | 15
Topstitch along the fold line, approximately 1” parallel to and away from the fold line.
Step | 16
Topstitch along the edge of the neckline on the front placket extension.
Step | 17
Continue garment construction according to the pattern instructions.
Gretta with No Ties
Step | 01
Cut out all the pattern pieces from fabric, except for the shoulder ties.
Step | 02
With right sides together, match the front to the back at one shoulder. Pin. Stitch.
Step | 03
Press the seam allowances open.
Step | 04
Repeat steps 2-3 for the other shoulder seam.
Step | 05
Repeat steps 2-4 for the front and back facing shoulder seams.
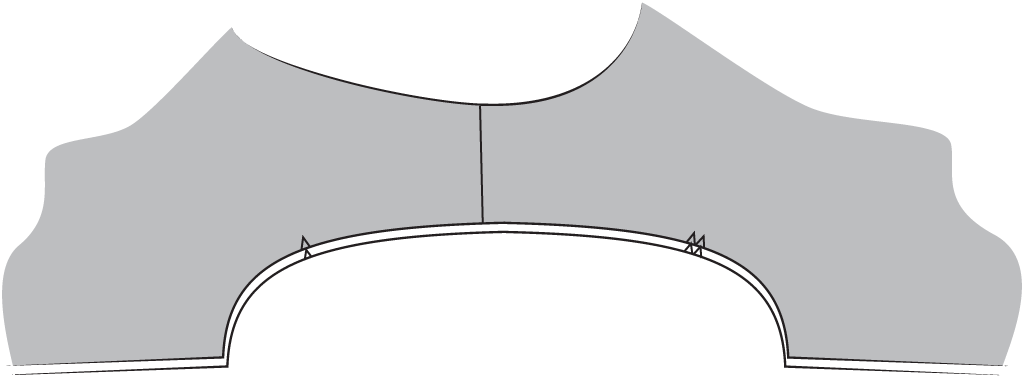
Step | 06
With right sides together and shoulder seams aligned, match the facing to the bodice at the neckline. Pin. Stitch.
Step | 07
Trim and grade the seam allowances and clip along the curved edges.
Step | 08
Edgestitch along the facing, catching the seam allowances underneath.
Step | 09
Turn the facing to the inside of the top. Neatly press the neckline in place.
Step | 10
Lay the top flat, with the facing right side up.
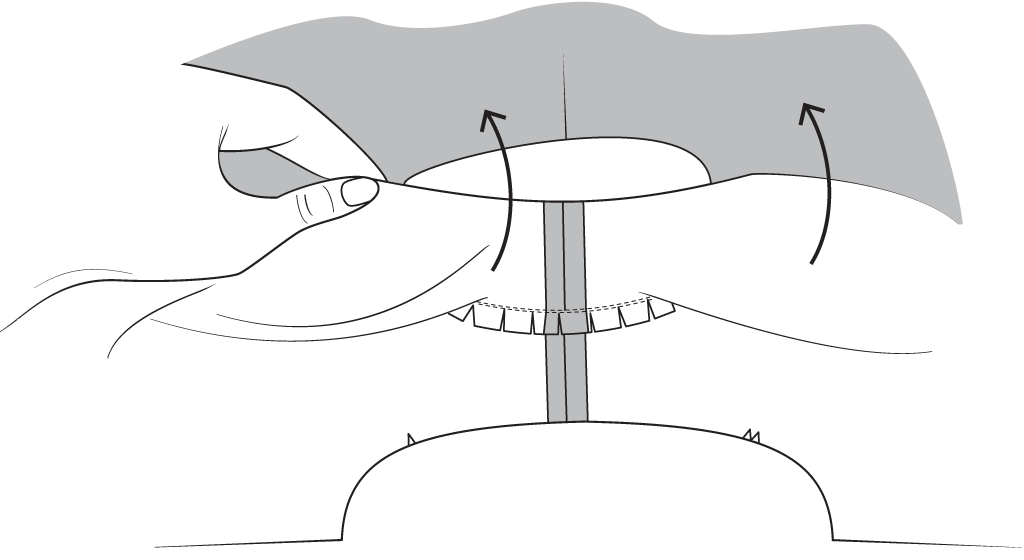
Step | 11
Pull the armhole of the facing up and away from the top, opening the shoulder seam at the neckline.
Step | 12
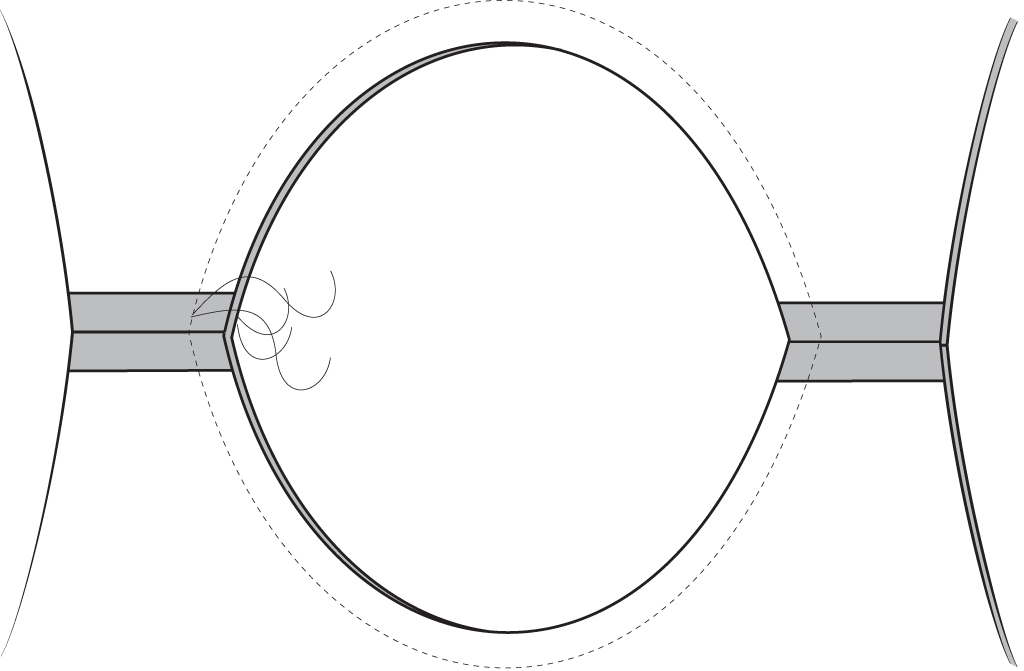
Lay the shoulder seams flat at the neckline, with right sides facing up. Roll the body of the top up to fit inside the width of the open armholes.
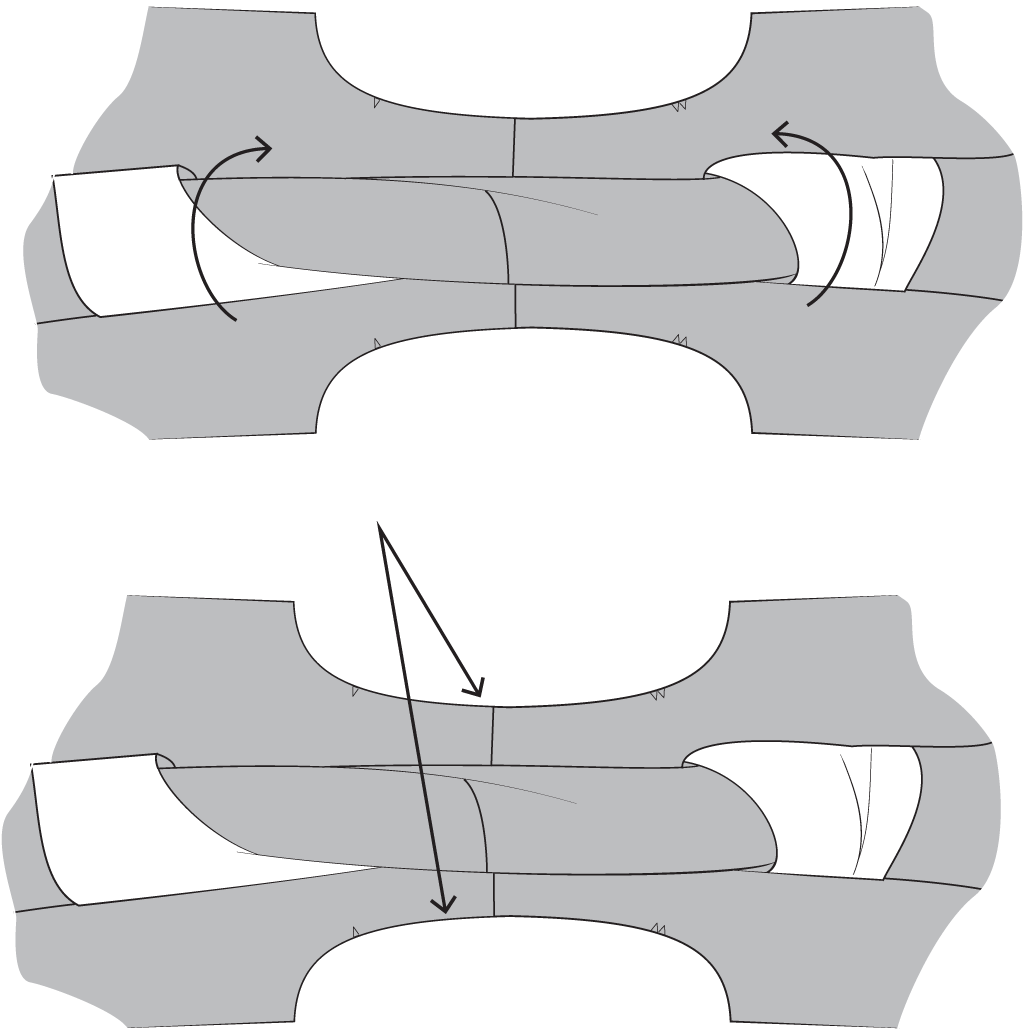
Step | 13
With right sides together, match the armholes of the facing and tank top together, sandwiching the rolled up portion of the top. Pin.
Step | 14
Stitch the armholes together, being careful not to catch the body of the top in the seam.
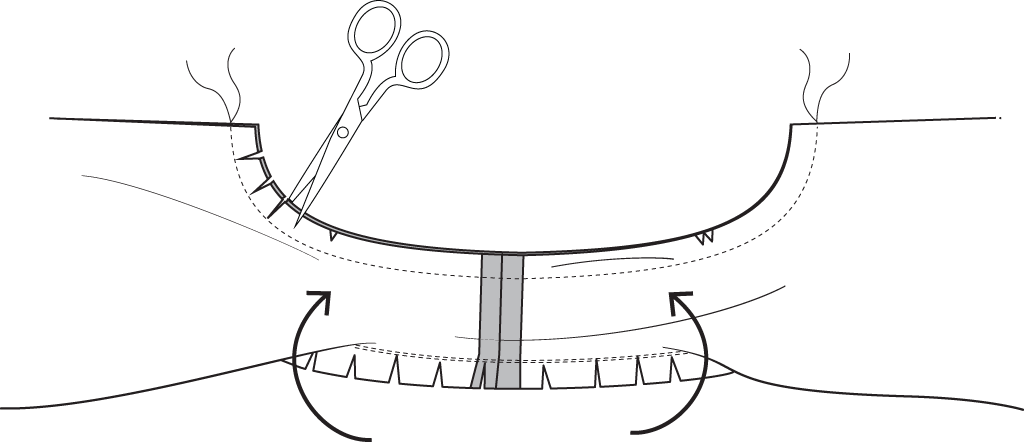
Step | 15
Trim and grade the seam allowances. Clip along the curved edges.
Step | 16
Understitch along the facing unit, catching the seam allowances underneath. You won’t be able to stitch all the way to the shoulder seam, but get as close as you can.
Step | 17
Turn the garment right side out by pulling through the shoulder channel.
Step | 18
Neatly press the armhole in place.
Step | 19
Repeat steps 11-18 for the other armhole.
Step | 20
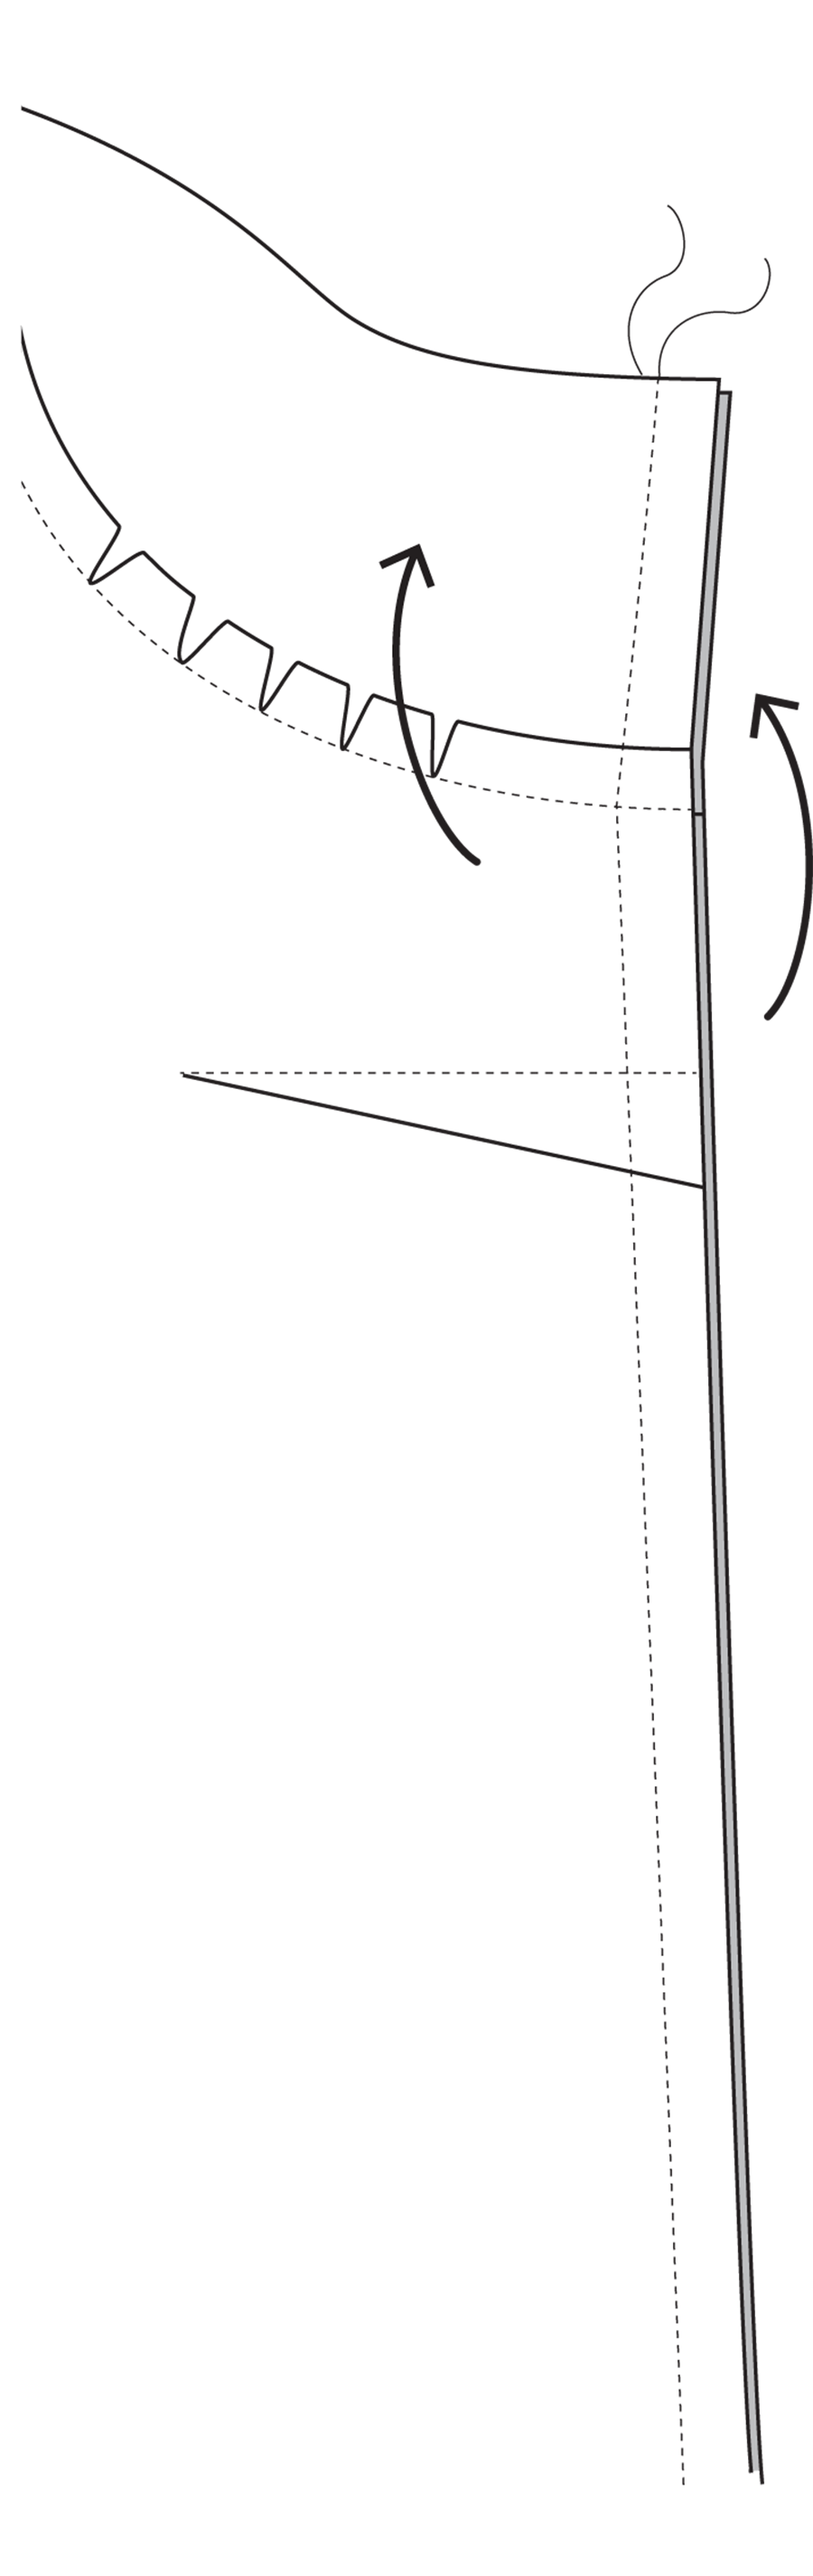
Sew the side seams together. To do this, pull the front and back facing up and away from the front and back at one side seam.
Step | 21
With right sides together, notches and underarm seams aligned, match the front facing, back facing, front, and back pieces together at one side seam. Pin. Stitch.
Step | 22
Finish the seam allowances separately and press open.
Step | 23
Repeat steps 20 - 22 for the other side seam.

About the Author
As pattern designer, Anna works hard to make sure our sewing patterns boast both great style and instructions. She believes in the power of chocolate and coffee to cure just about anything.