Sign In
Sometimes a pattern might have a longer or shorter armhole depth than you need. A long armhole can impact your mobility and lift. A short armhole will be tight and uncomfortable and you won't want to wear it! Learn how to quickly adjust armhole depth with this tutorial.
Do you need this adjustment?
An armhole depth adjustment changes the length between your shoulder and underarm.
If the armhole depth on a muslin is too long, you'll find the underarm seam hitting your body much lower than your armpit, you might see extra fabric bagging along your upper chest, and your range of motion and lift will be restricted.
If the armhole on your muslin is too short, the underarm will be tight and uncomfortable. You might also see some strain across the upper chest.
If your armhole depth is shorter than the pattern
Step 01: Remove seam allowance from your pattern.
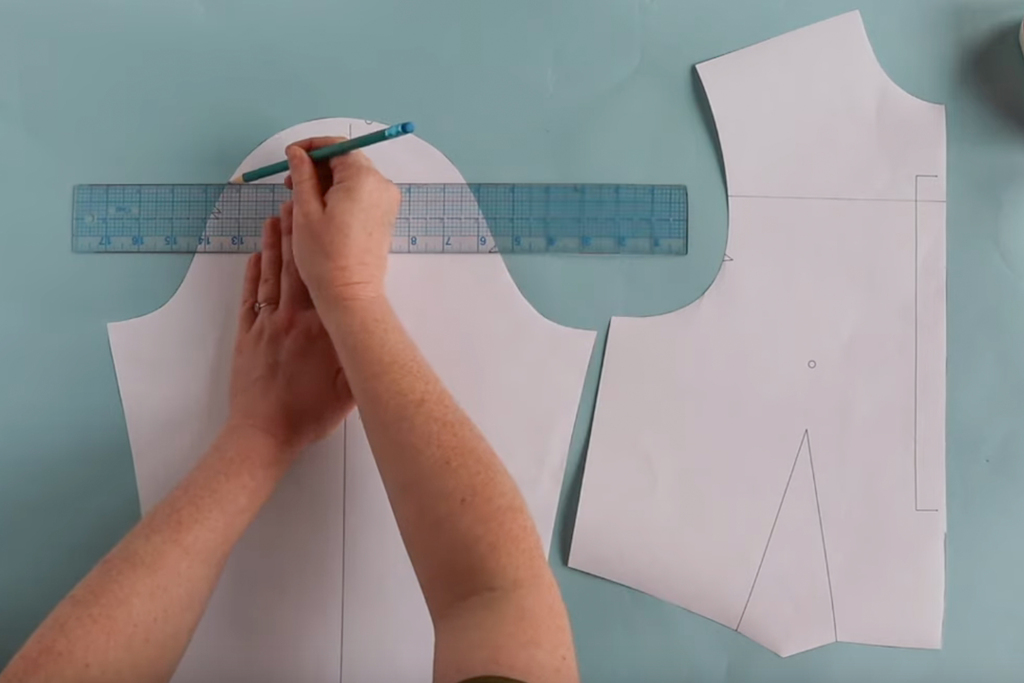
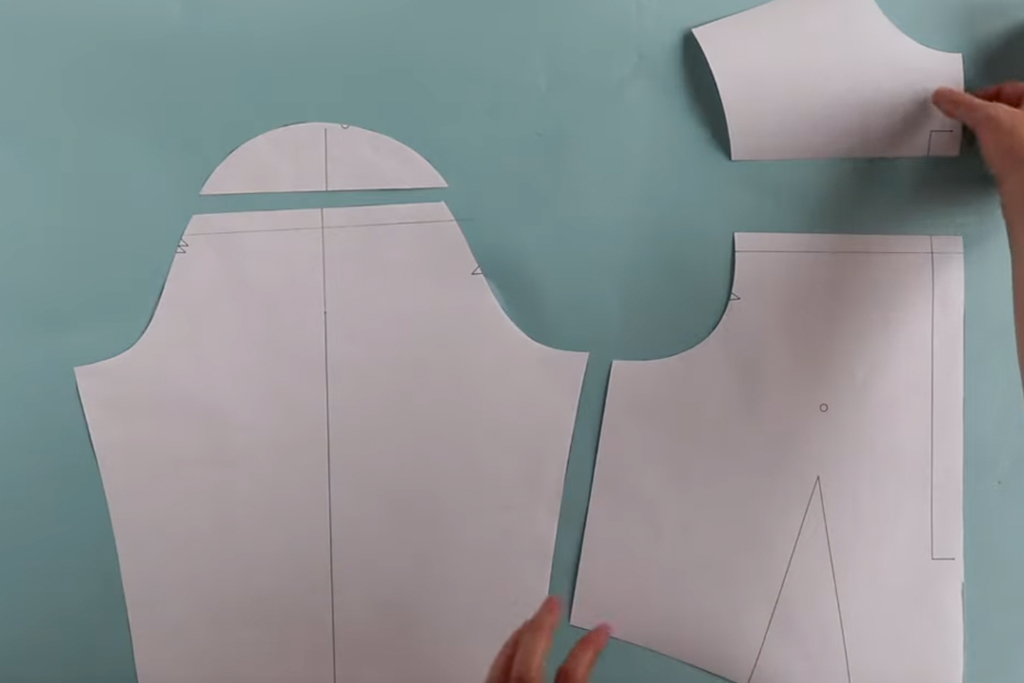
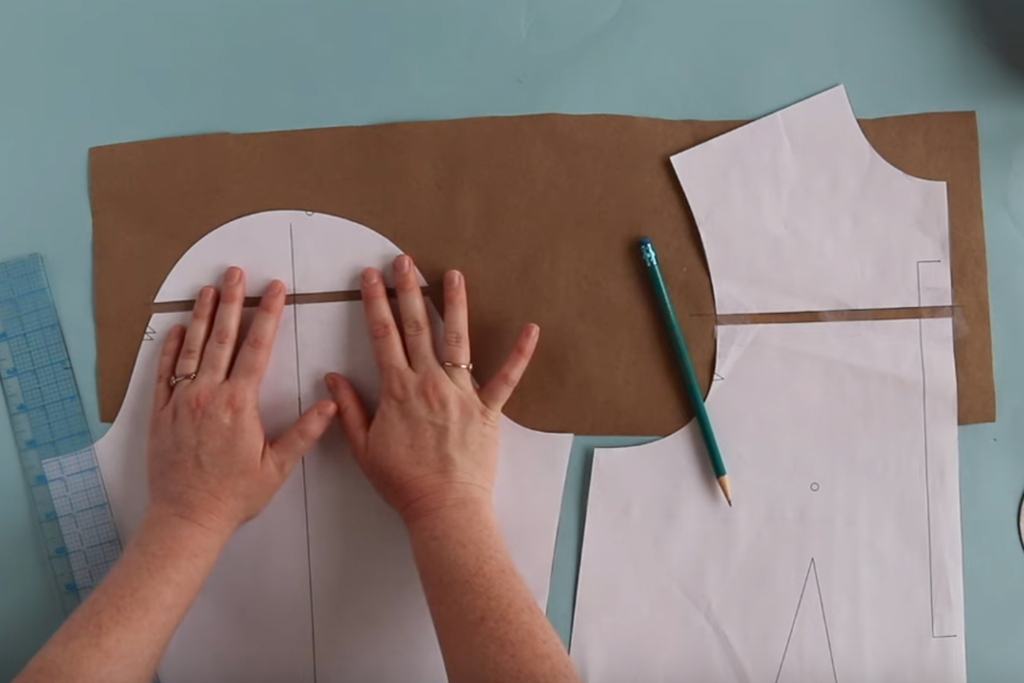
Step 02: Draw horizontal slash lines above the sleeve notches on the front bodice, sleeve cap, and back bodice. Cut along the lines.

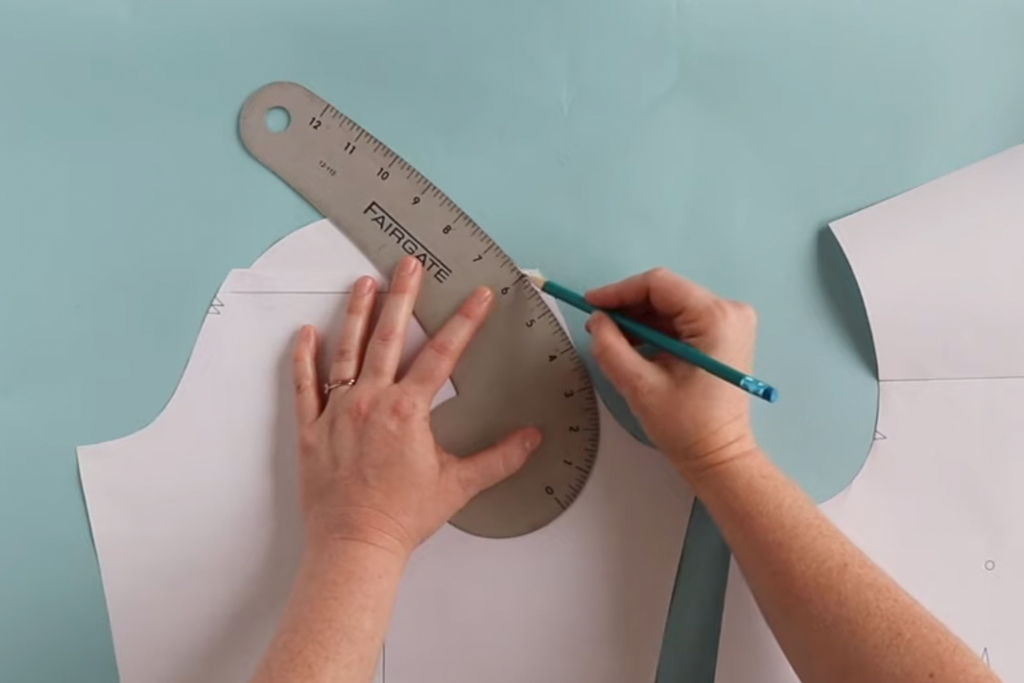
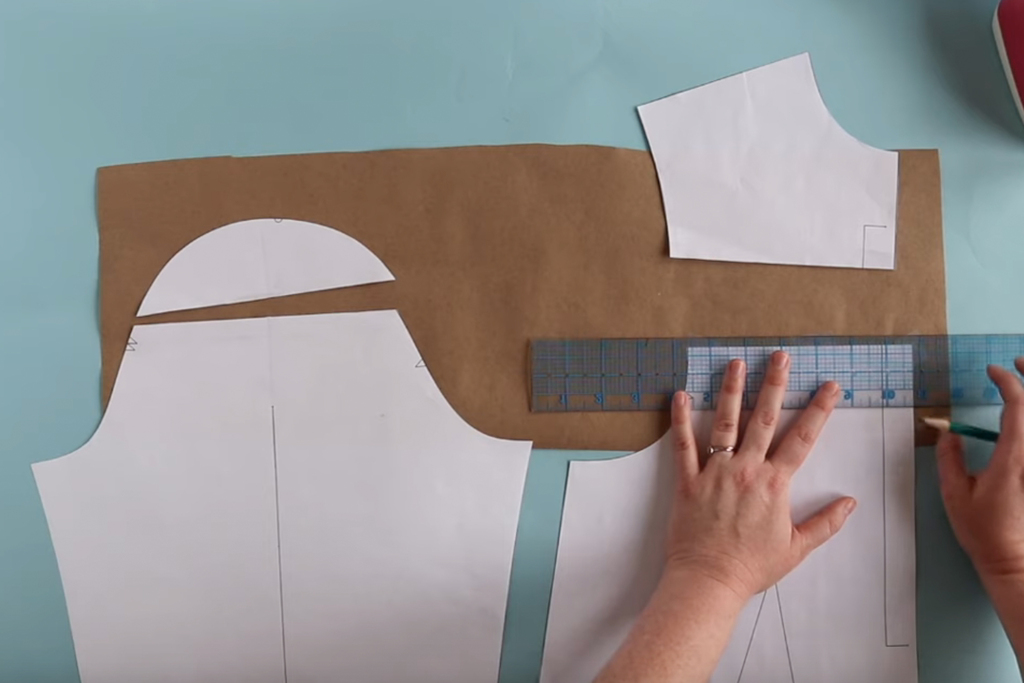
Step 03: On the lower portions of the the front bodice, sleeve, and back bodice, draw lines parallel to each slash line. The distance should be the amount you pinched out on your muslin.
Step 04: Overlap the upper portions of the front bodice, sleeve, and back bodice along the new lines. Tape in place, smooth out any jagged edges, and add seam allowance.
If your armhole depth is longer than the pattern
Step 01: Remove seam allowance from your pattern.
Step 02: Draw horizontal slash lines above the sleeve notches on the front bodice, sleeve cap, and back bodice. Cut along the lines.
Step 03: Tape the lower portion of the front bodice, sleeve, and back bodice to scrap paper.
Step 04: On the scrap paper, draw parallel lines above the taped down parts of the pattern pieces. The distance should be the amount you slashed and added to your muslin.
Step 05: Extend the center front line, center back line, and sleeve grainline.
Step 06: Tape the upper portions of the pattern pieces along the drawn lines, smooth out the edges, and add seam allowance.