Sign In
Seamwork Magazine helps you build your wardrobe with sewing patterns, special techniques, and inspiring style. Sewists tend to be detail-oriented by nature. We thrive when fussing over the perfect welt pocket or finding the perfect shade of thread to match.
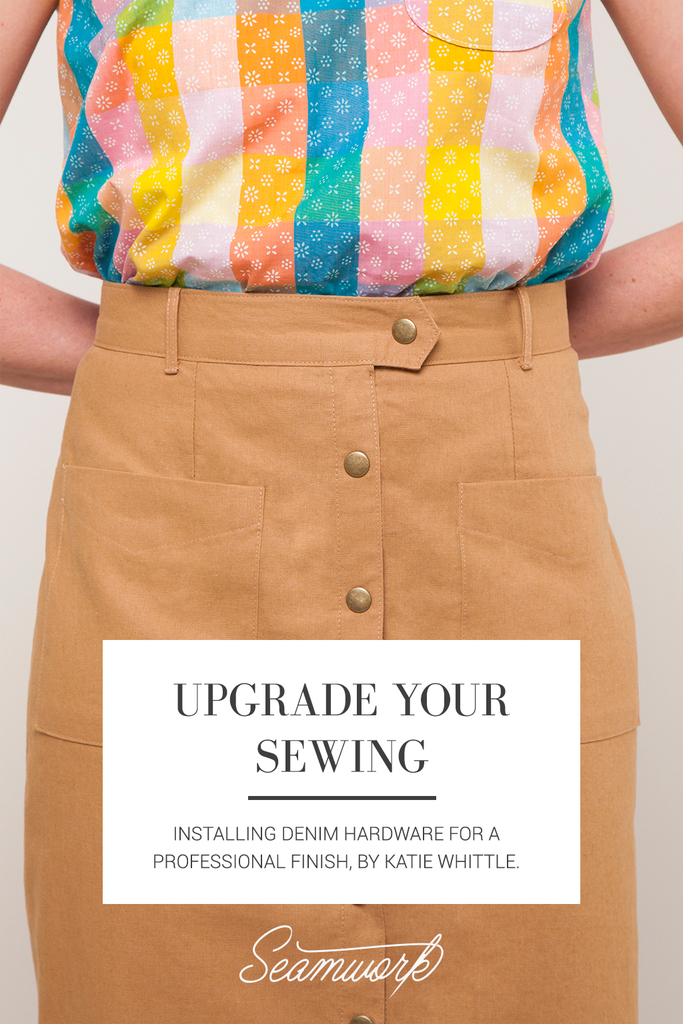
Those times when we slow down and cherish the details are when we shine the brightest. Upgrade Your Sewing is dedicated to the small details that take your project to the next level. Whether it is a new seam finish or a fun embellishment, take the time to make your next me-made item one of a kind.
Need some help finding the right hardware? We’ve compiled a list of resources in April Discoveries for denim sewists in the US and abroad!
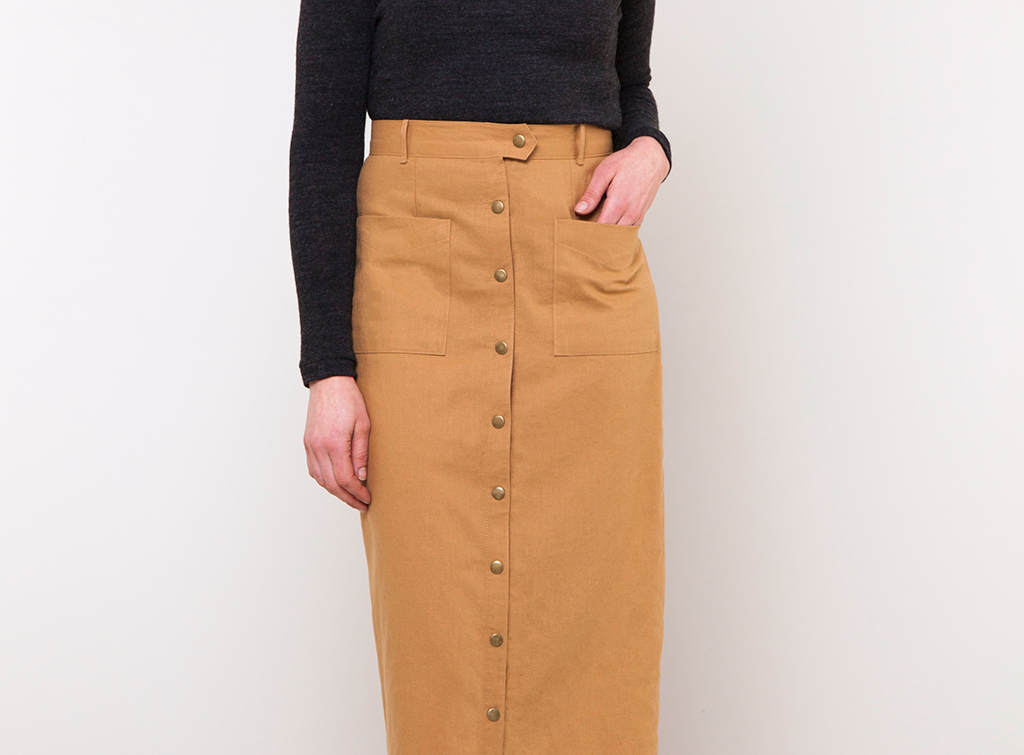
This month we will take an in-depth look at how to apply professional denim hardware. These techniques are perfect for Leonora or any other garment made with denim fabric. In this article, I will walk you through installing jean buttons, heavy-duty snaps, and rivets.
NOTE: Practice installing the following hardware on a scrap piece of fabric before moving to your final garment.
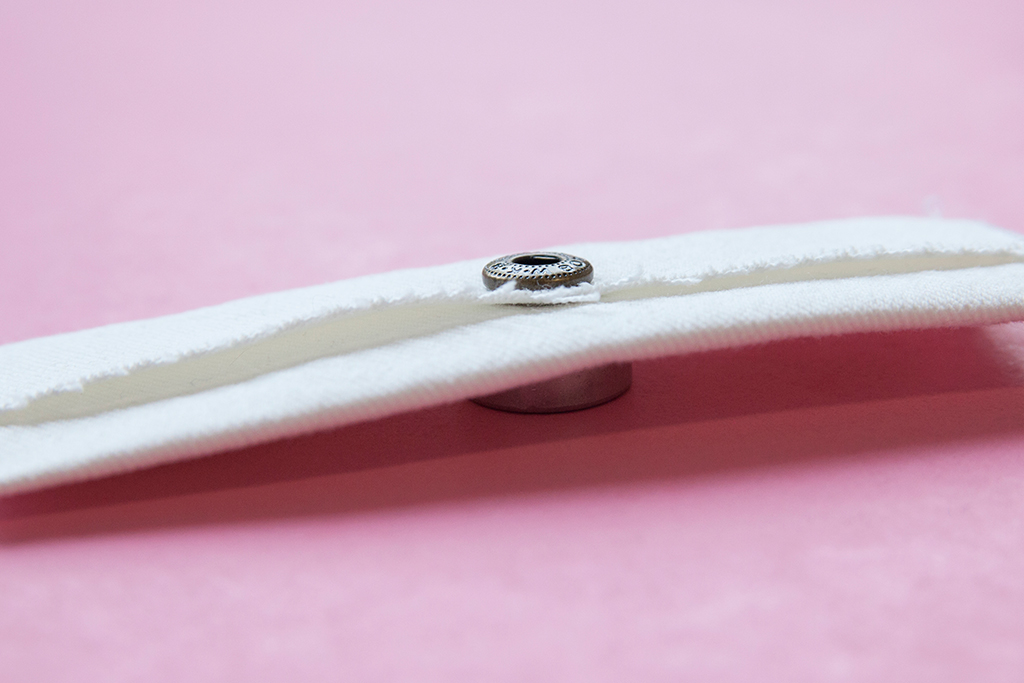
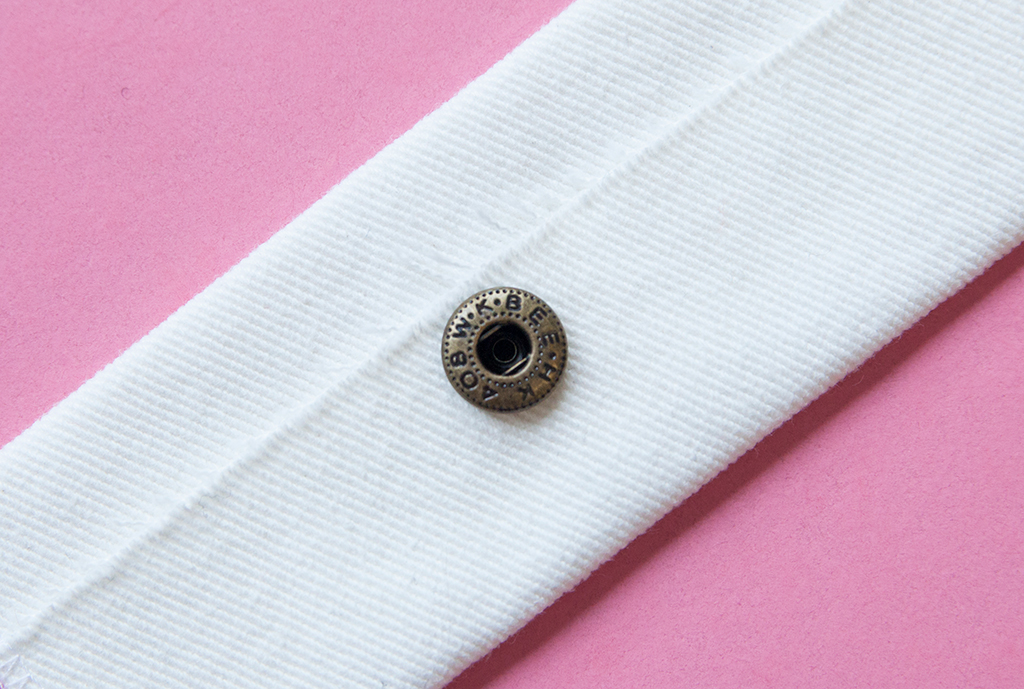
Jean Buttons

Jean buttons come in two different styles—tack buttons or screw buttons. These buttons are specifically used for denim garments, because they provide the necessary durability and strength for a denim waistband. Tack buttons have posts that look similar to nails and are secured with a hammer. Screw buttons have screw posts and tend to be easier to install. Always avoid using plastic hardware for denim. Metal fasteners will last longer and look more professional.
You'll Need:
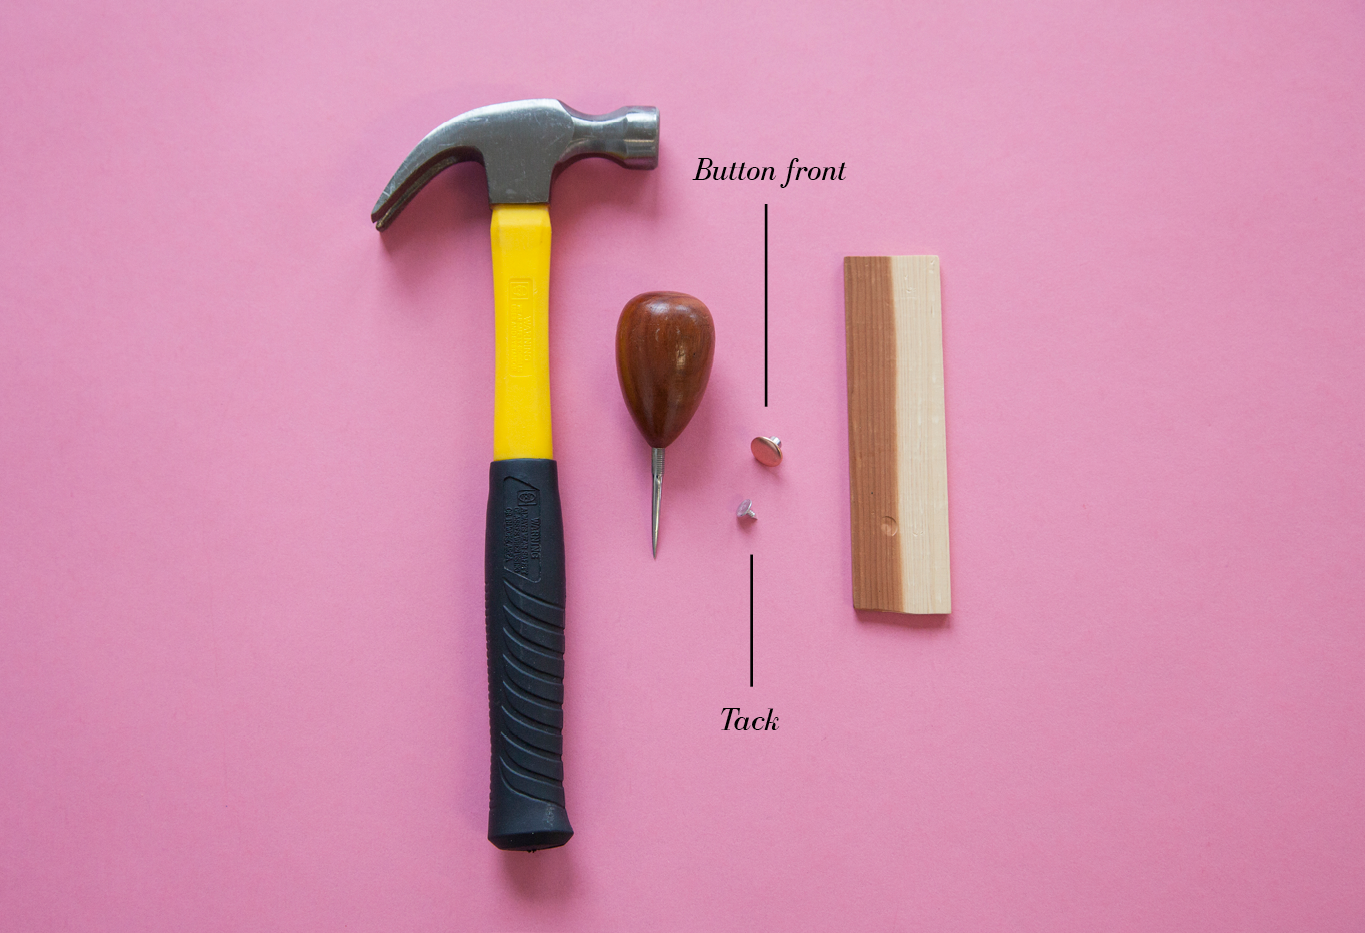
- Jean button hardware (button front, tack)
- Fabric marking pen
- Flat wooden surface
- Hammer
- Awl

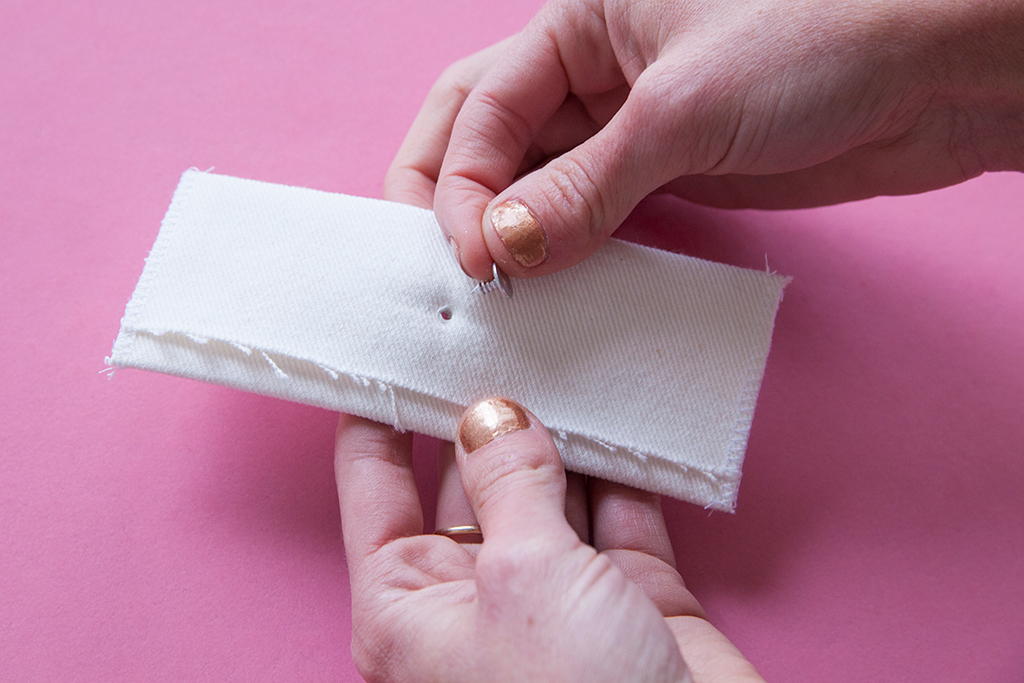
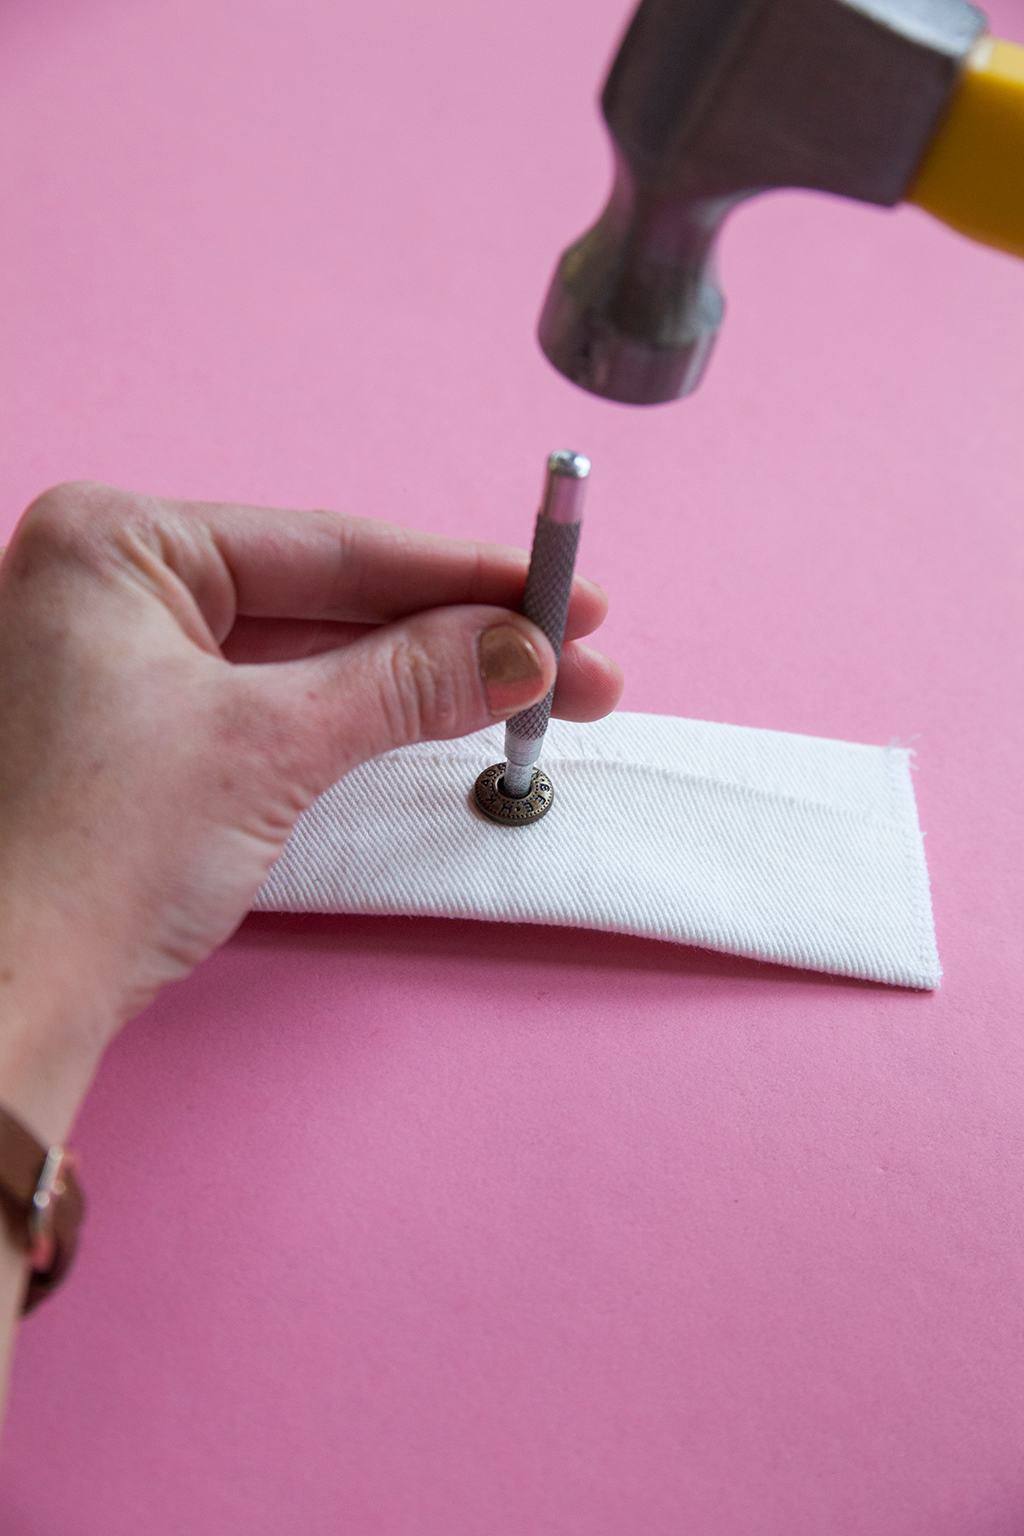
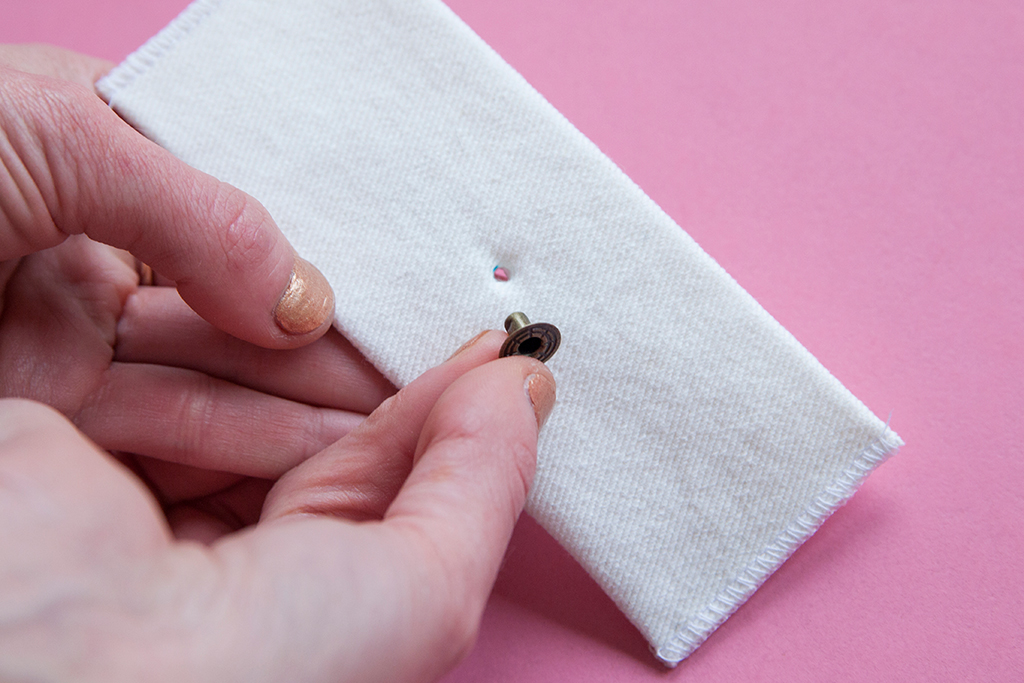
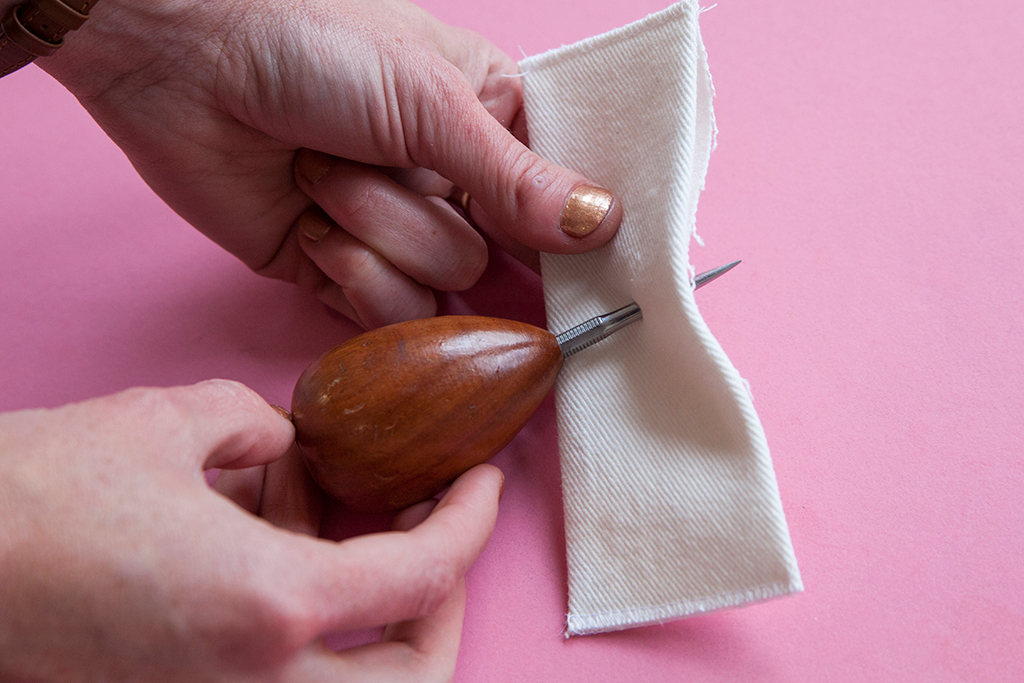
Step One
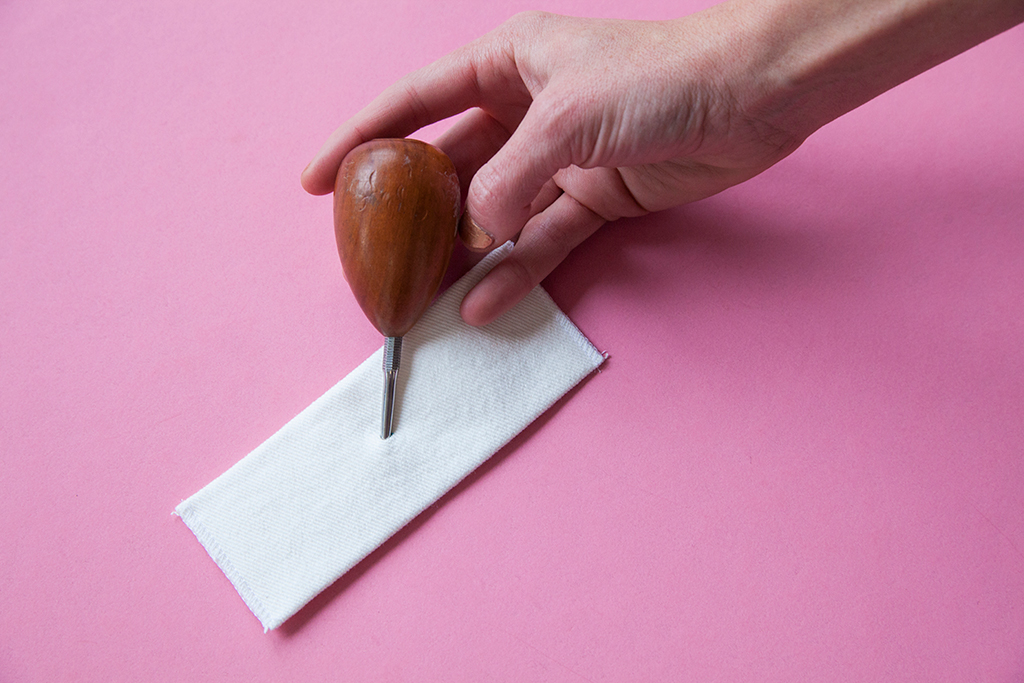
Mark the position of the button on the right side of your garment. Use an awl to punch a hole through the fabric.
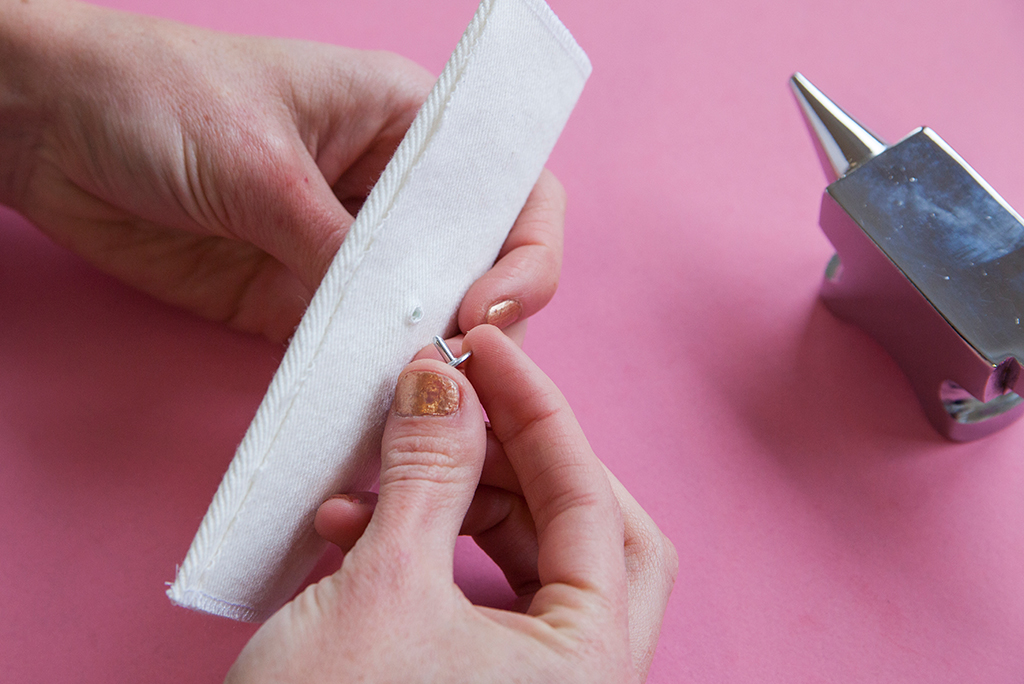
Step Two
On the wrong side of the garment, insert the tack through the hole created with the awl.
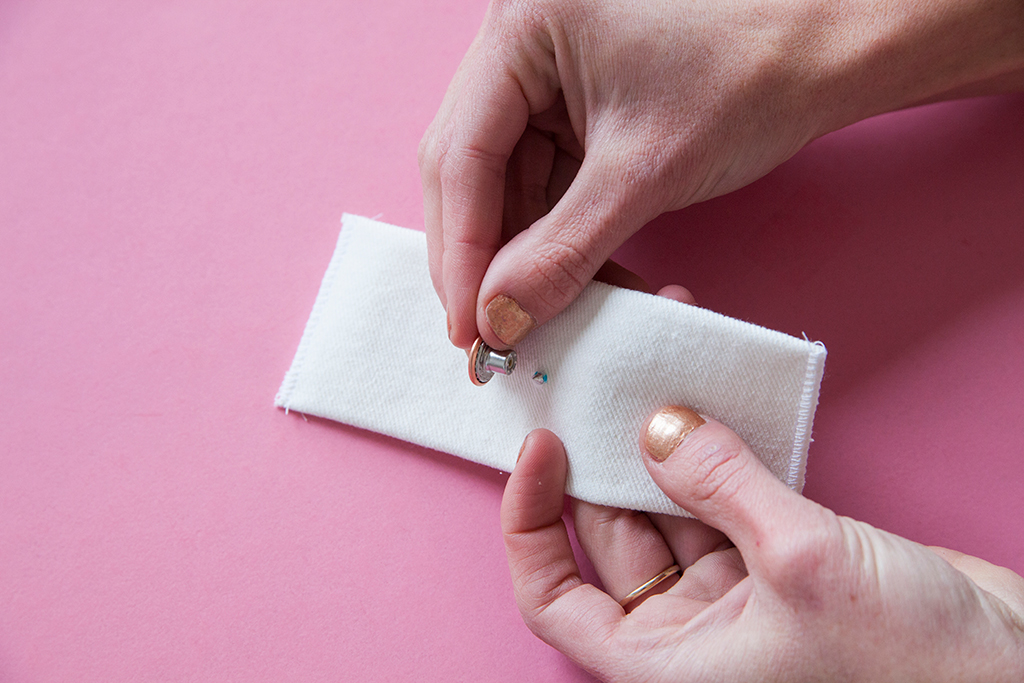
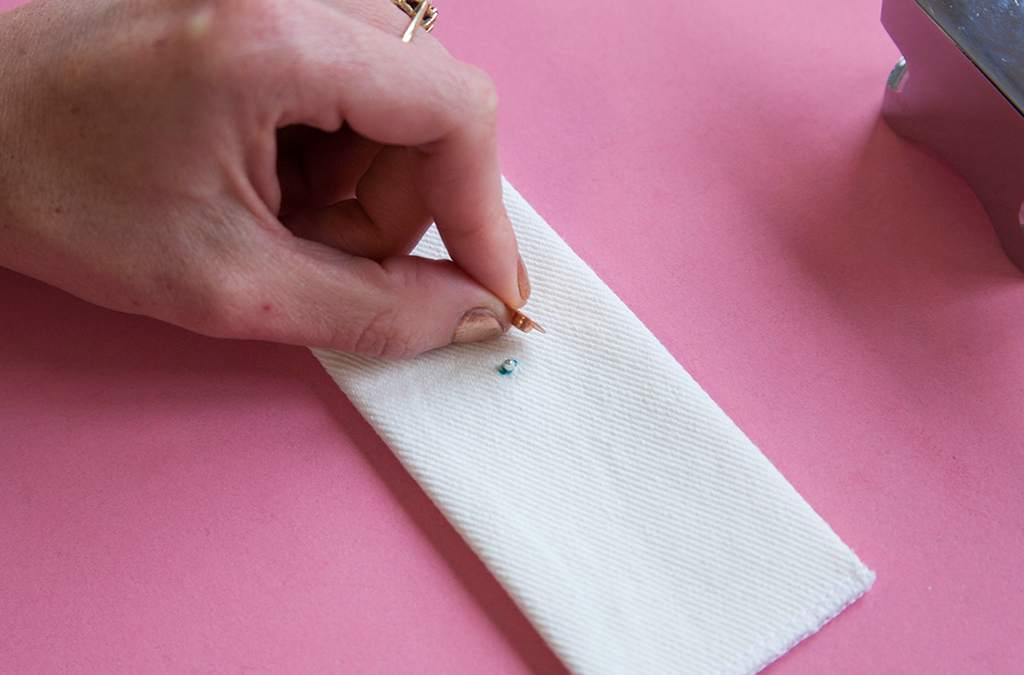
Step Three
On the right side of the garment, insert the button front post into the tack.
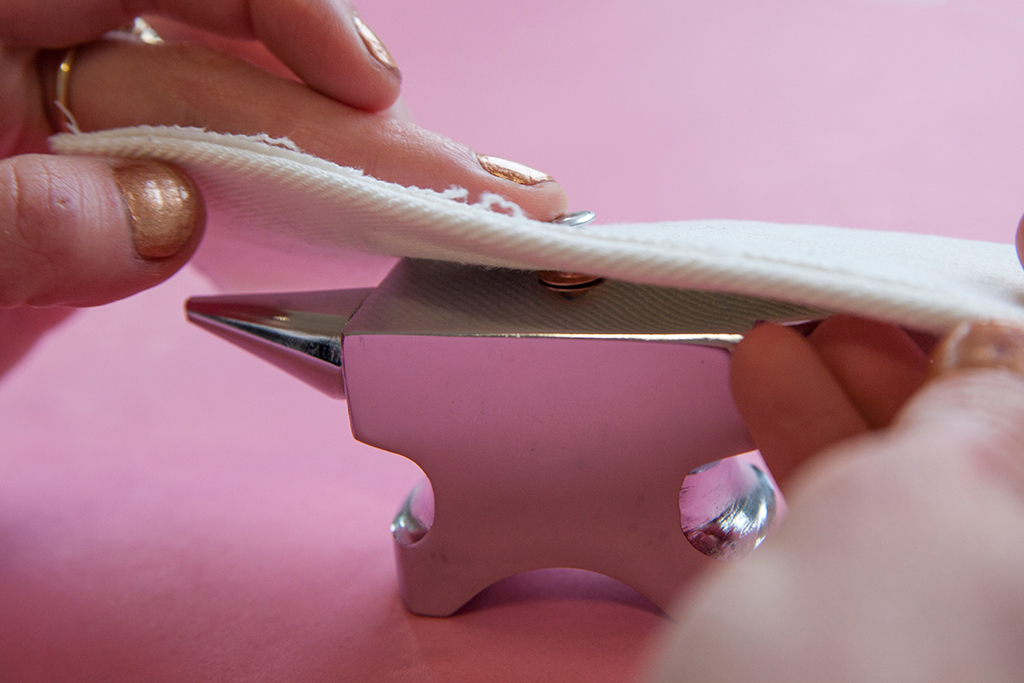
Step Four
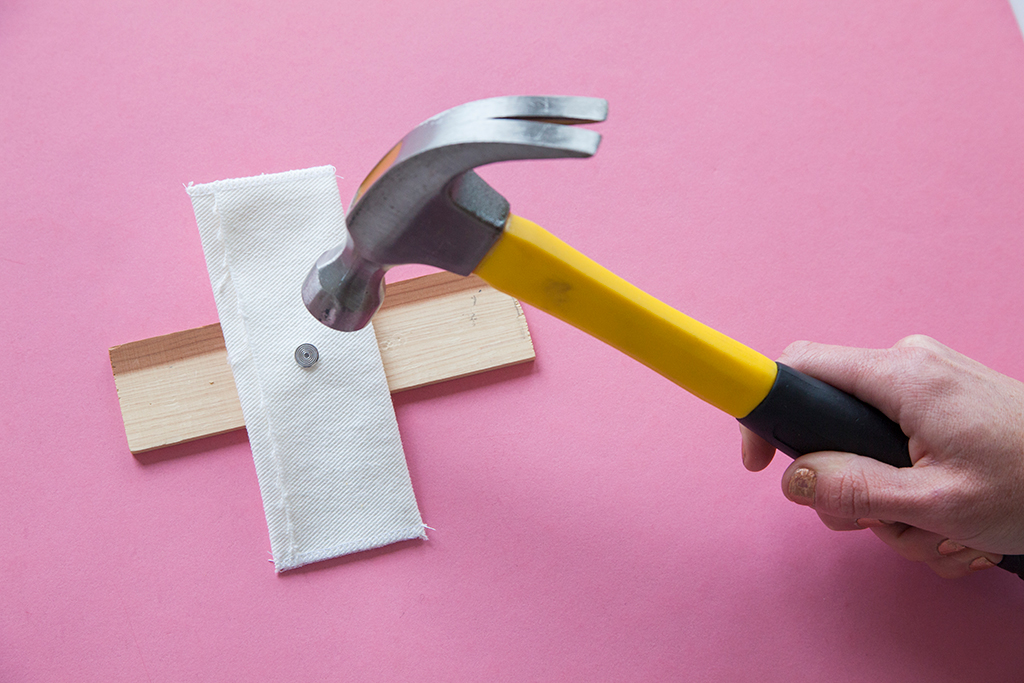
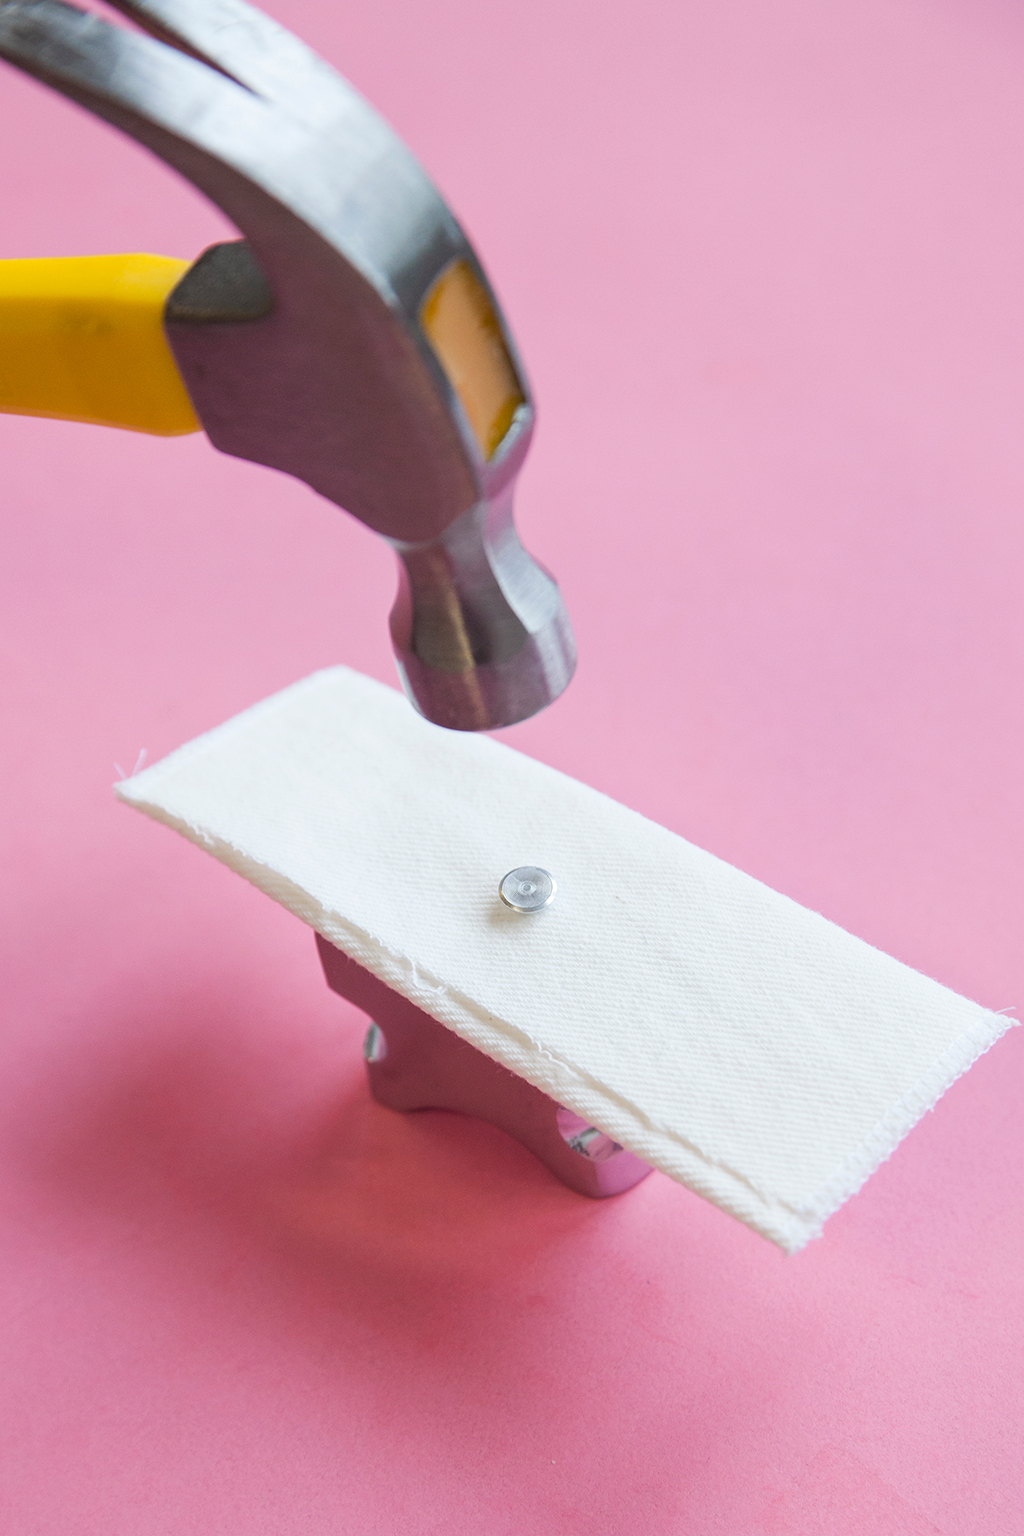
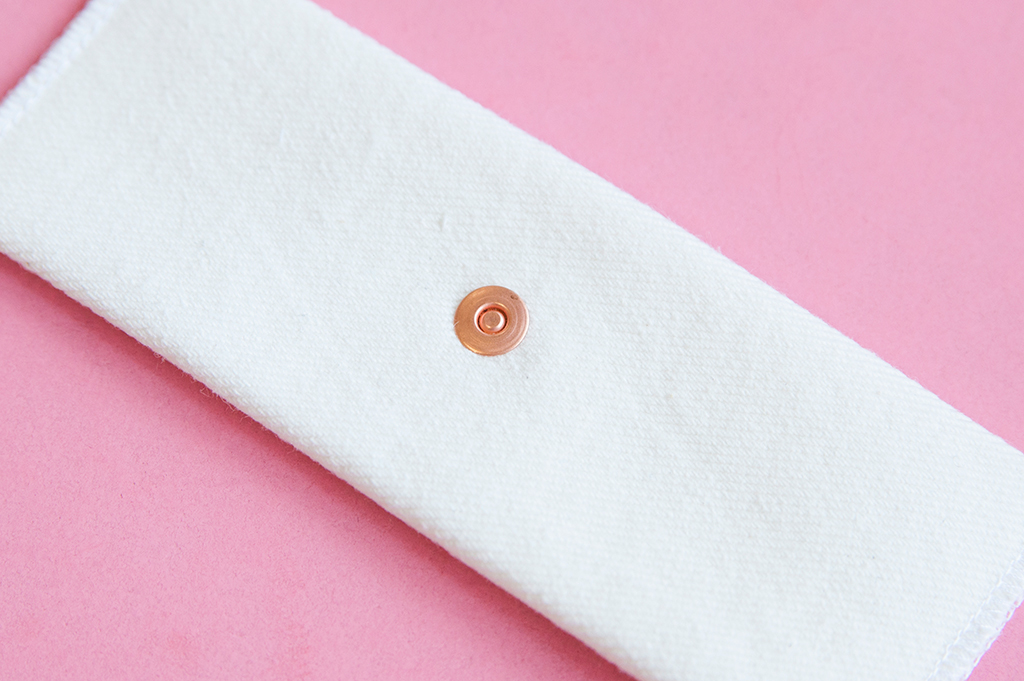
On a flat wooden surface, place the jeans button with the button front facing down. Hammer the tack until the button is securely attached.
Heavy-Duty Snaps
Heavy-duty snaps come in two different styles: post-style and prong-style. With post-style snaps, the post is inserted through a hole in the fabric, while prong-style snaps feature teeth that secure the snap in place. For heavyweight fabrics, post-style snaps will yield better results than prong-style snaps.
This technique requires three tools: a metal cup used to hold the unit in place during installation, a metal anvil used to drive the two components together, and a rubber mallet used to deliver the necessary force. The metal cup and anvil can be purchased as a set and are unique to the snap’s size.
You'll Need:
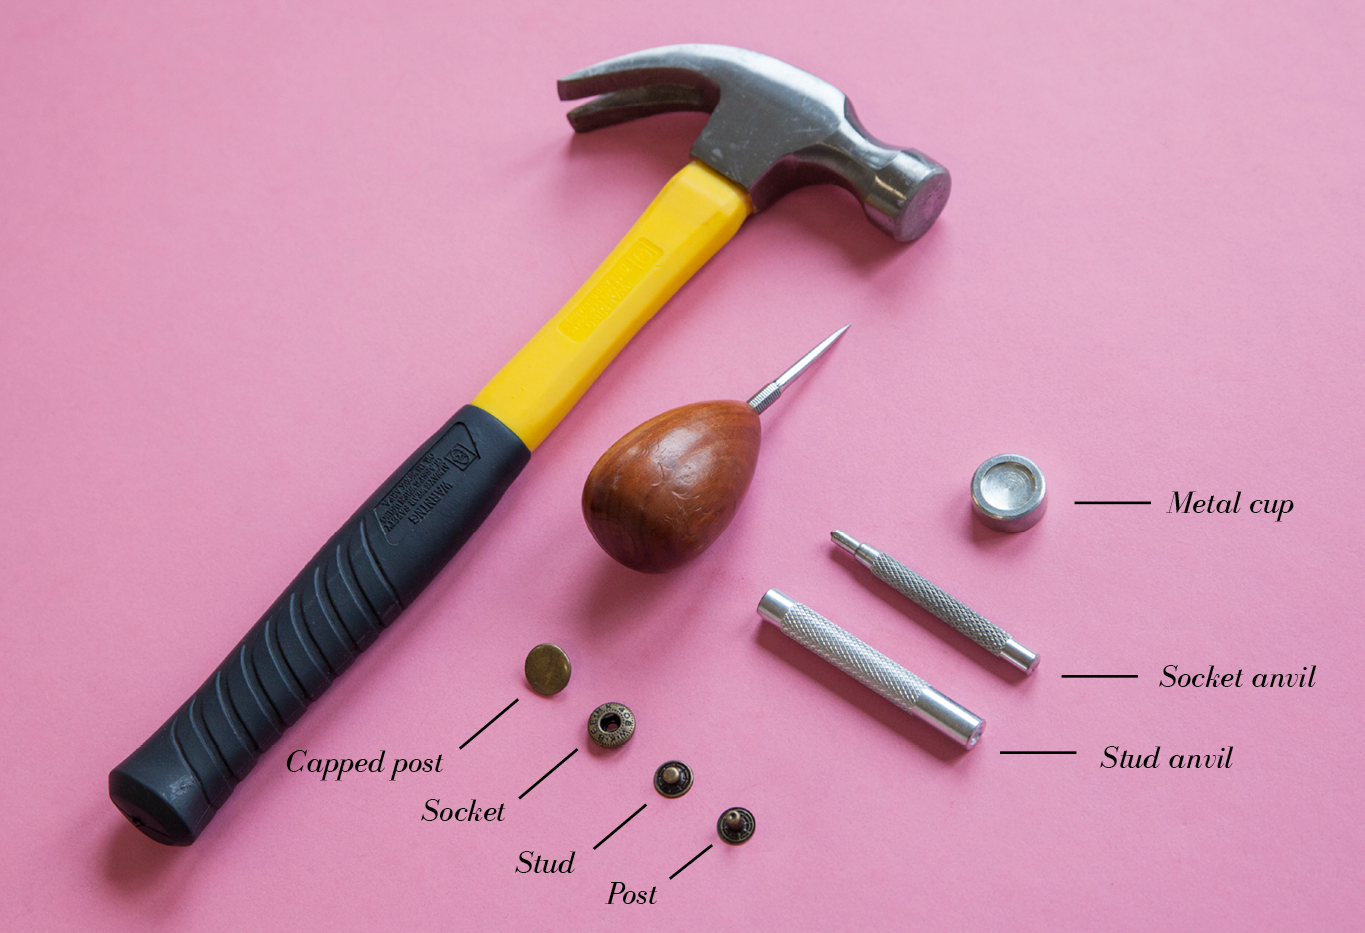
- Heavy-duty denim snaps (socket, stud, capped post, post)
- Metal anvil and cup, specific to the snap's size
- Fabric marking pen
- Flat wooden surface
- Hammer
- Awl
Step One
On the left placket (right on menswear), mark the snap placement on the right side of your garment. At the marking, use an awl to punch a hole through the fabric.
Step Two
Place the capped post right side down in the metal cup. Lay the outer garment right side down, and insert the shaft of the capped post through the punched hole.
Align the socket with the shaft of the capped post, with the indented side facing up.
Step Three
Cover the socket with the socket anvil and use the mallet to secure the snap.
Step Four
Next, secure the stud and post of the snap. Start by marking the placement of the snap on the right side of your garment. At the marking, use an awl to punch a hole through the fabric.
On the right placket (left on menswear), insert the shaft of the post through the punched hole from the wrong side of the garment.
Step Five
Align the stud with the shaft of the post, with the indented side facing down.
Step Six
Flip the metal cup around to expose the inverted cup. Place the post right side down in the metal cup.
Step Seven
Cover the stud with the stud anvil, and use a mallet to hammer the components together.
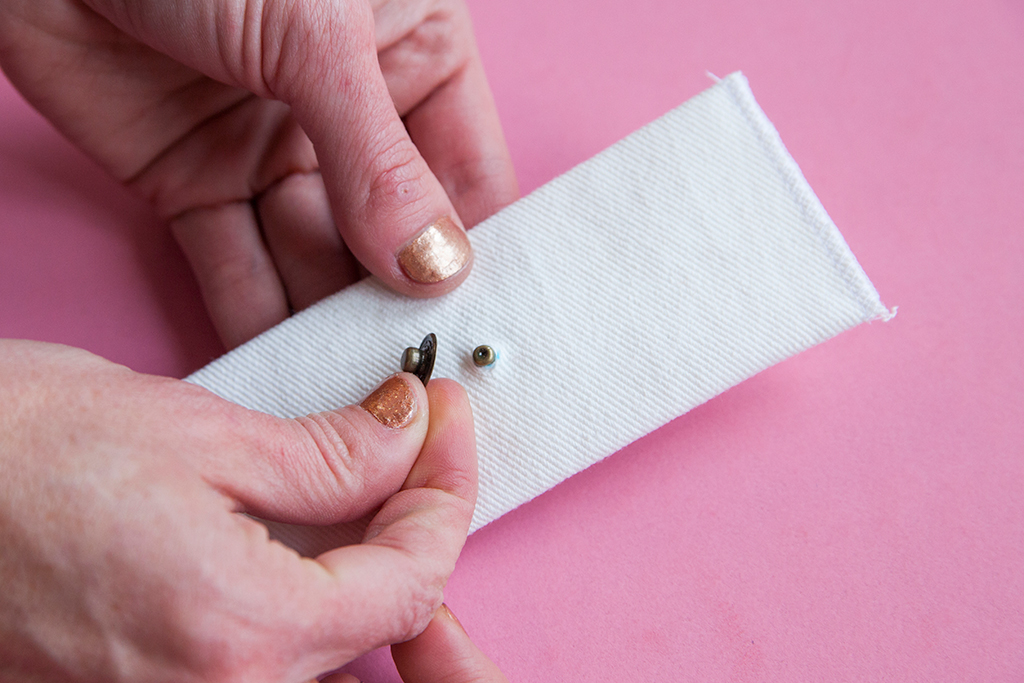
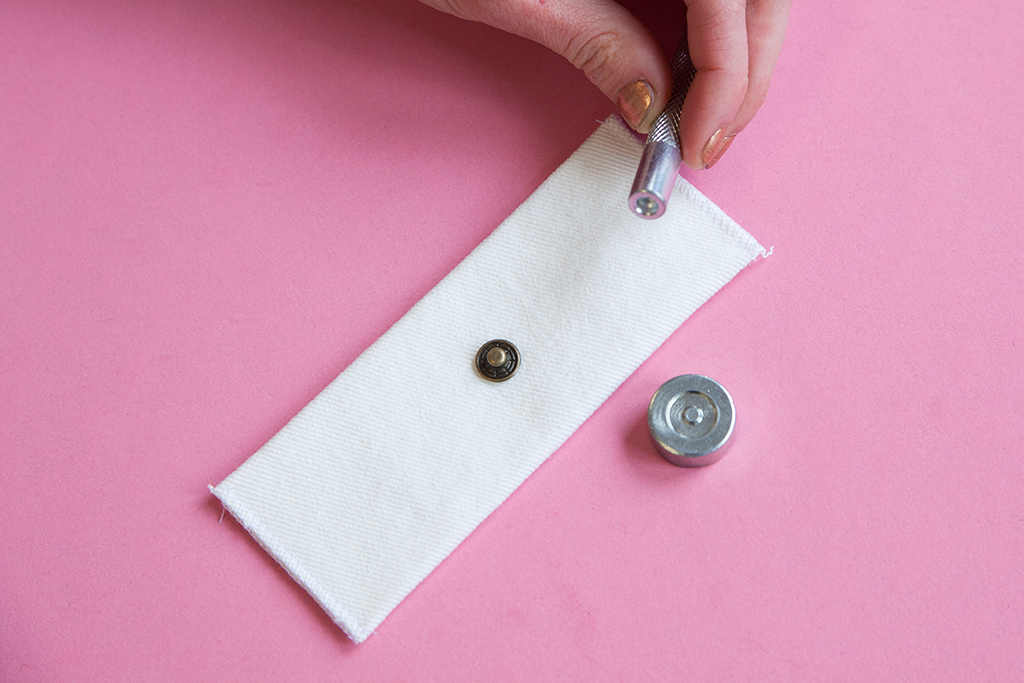
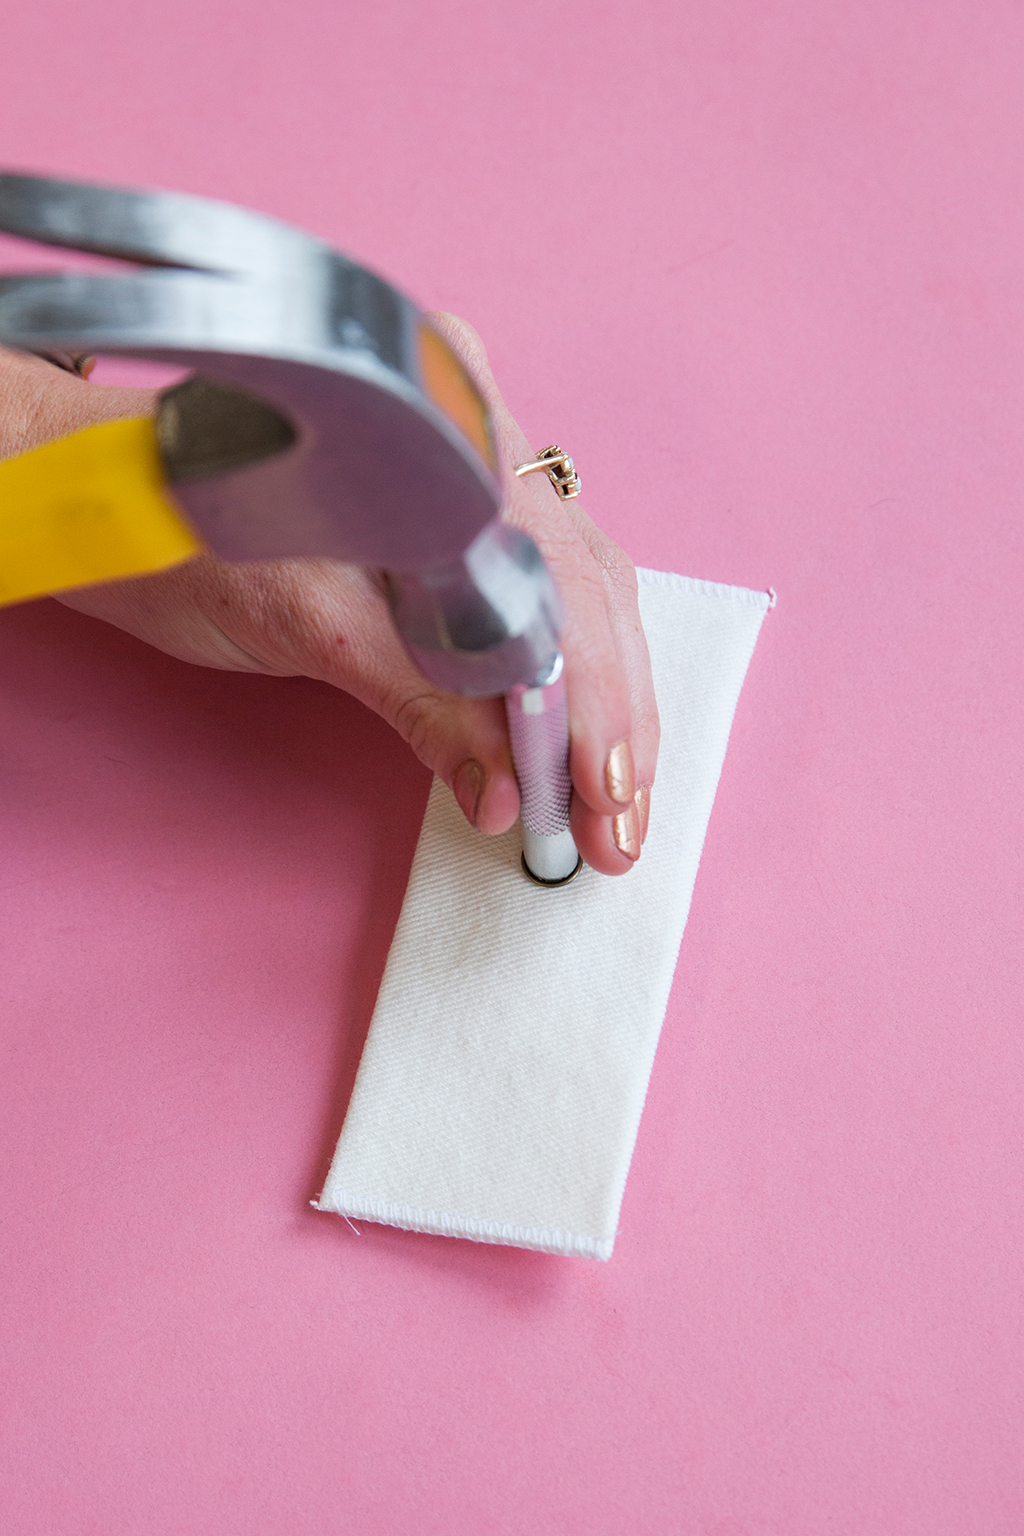
Rivets

Rivets are used to reinforce points of strain on a garment. Traditionally, rivets are installed on the corners of pockets in denim clothing, but you are welcome to place rivets wherever you would like. I like to add a rivet at the bottom of my belt loops to ensure that they don't rip over time.
You'll Need:
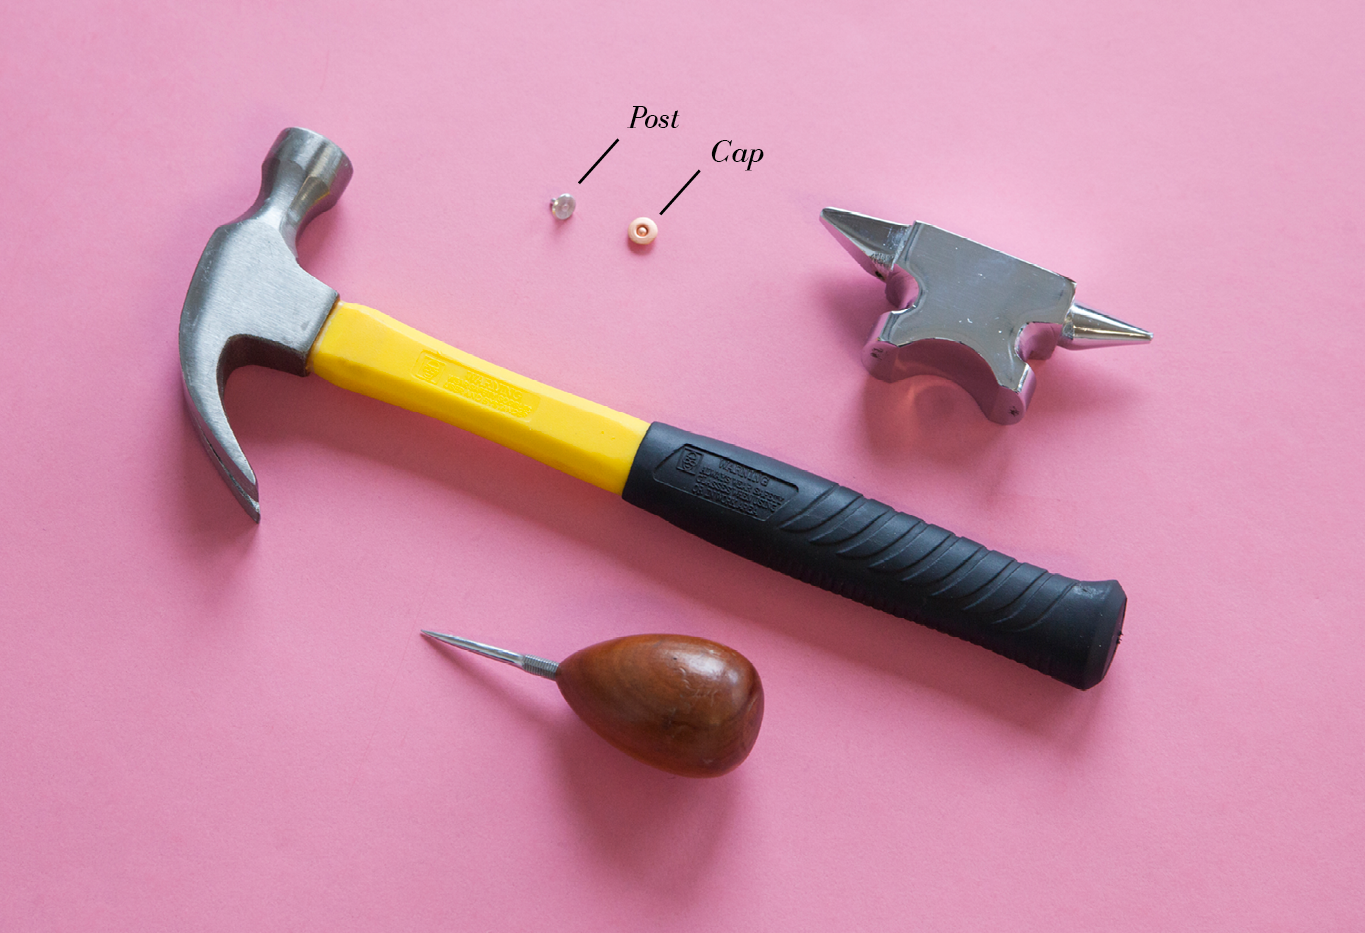
- Heavy-duty rivets (rivet post, rivet cap)
- Fabric marking pen
- Anvil
- Hammer
- Awl
Step One
Mark the placement of the rivet on the right side of your garment. At the marking, use an awl to punch a hole through the fabric.
Step Two
From the wrong side of the garment, insert the rivet post into the punched hole.
Step Three
From the wrong side of the garment, insert the rivet post into the rivet cap.
Step Four
Lay the rivet on the anvil, with the right side of the garment facing down. Permanently set the rivet by hammering the rivet cap in place a few times, using a regular hammer. Be wary of hammering too much—this can cause your rivet to become dented.

About the Author
Katie teaches new skills through in-depth tutorials, sewalongs, and articles for Seamwork Magazine and The Colette Blog. She’s all about encouraging sewers to try new techniques and create a personalized wardrobe that makes them feel great!