Sign In
Block Paper Scissors is a patternmaking series featuring dart manipulation – no experience necessary to join in! Every month, we start with a basic bodice pattern (also called a "block" or a "sloper") with an underarm bust dart and a waist dart. We use that as a jumping off point to create a different bodice design each time.
This month, we’ll be transforming our basic block into a bodice with a shoulder yoke, and transferring the waist dart to shoulder gathers.
How to:
Step | 01
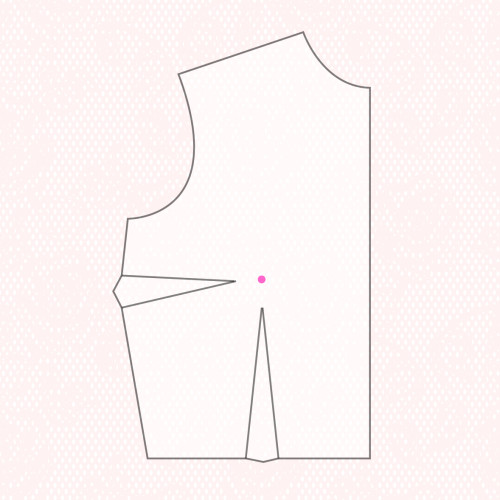
Mark your bust apex on your pattern piece by placing the pattern piece over your body and aligning the center front and side seam. Mark the fullest point.
Step | 02
Draw a line from the base of each waist dart leg to the bust apex.
Step | 03
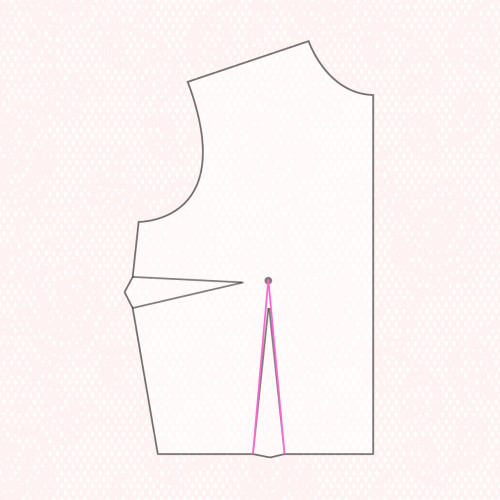
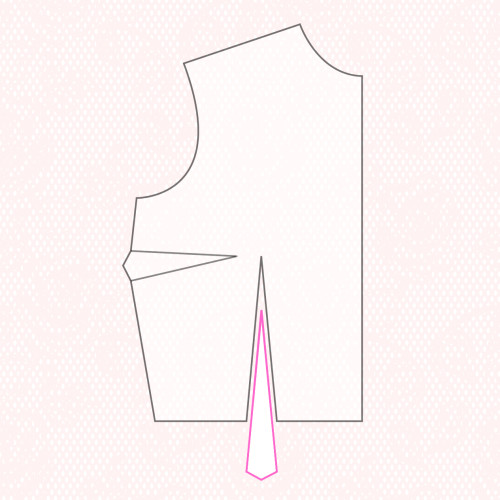
Cut along both lines and remove wedge.
Step | 04
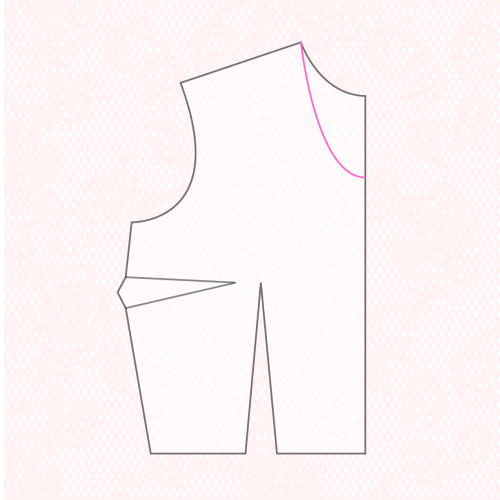
Depending on your pattern, you may need to redraw the neckline lower to give yourself a narrow enough shoulder for the yoke. Use a curved ruler or other curve edge, and make sure the neckline meets the center front at a 90 degree angle, otherwise you’ll get a point or “v” at the center front.
Tip: if you’re not sure how to draw the neckline, look through your pattern stash for one with a more scooped neckline and trace it off onto your bodice.
Step | 05
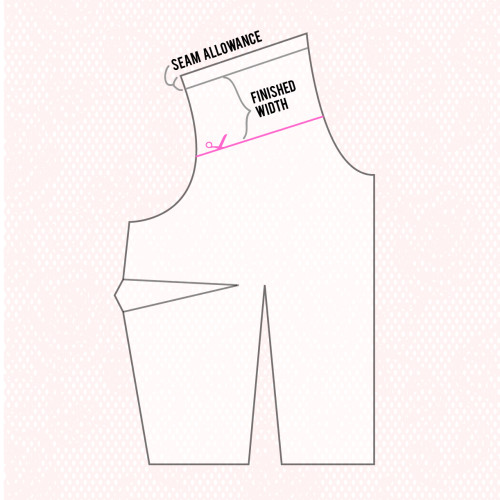
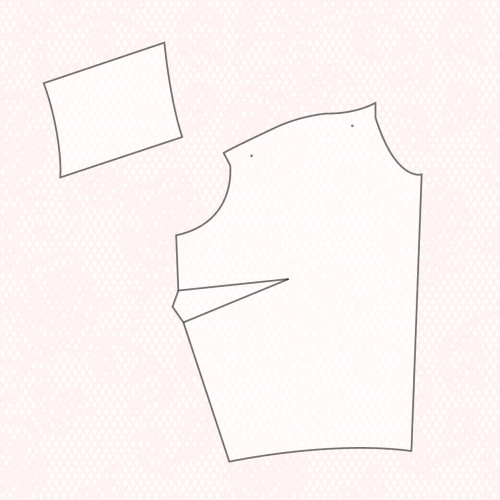
Determine where you’d like your shoulder yoke seam to be by measuring from the top of your shoulder down towards your bust. Add the seam allowance of the shoulder seam to this measurement. Draw a line this distance below and parallel to the shoulder seam edge.
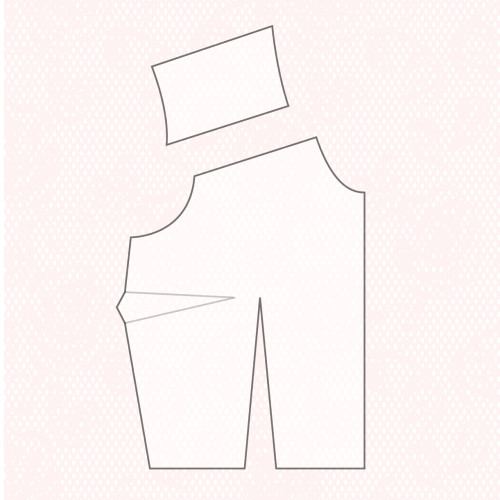
Step | 06
Cut along the line.
Step | 07
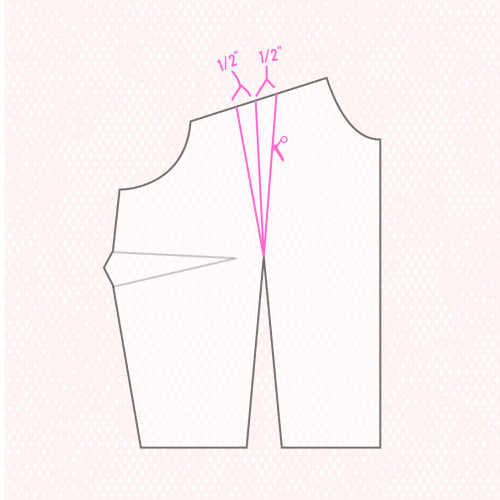
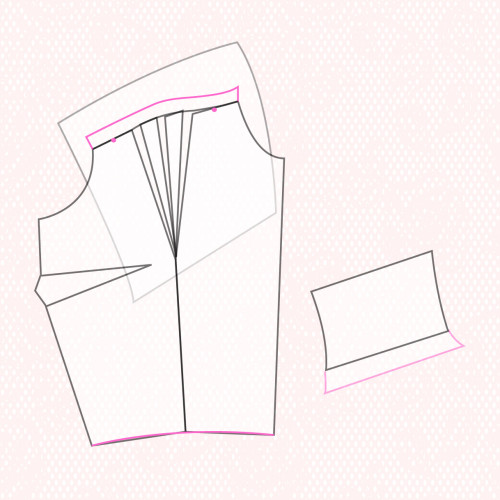
On the lower half, draw a line from the bust apex to the middle of the newly cut edge. Draw two more lines, one to each side of it, ending ½” away from the first line.

Step | 08
Cut along all three lines to but not through the bust point. The goal is to create hinges. If you’re using thin paper, put a piece of tape on the bust point before cutting to reinforce. Bring each side of the pattern piece together to close the dart and tape together.
Step | 09
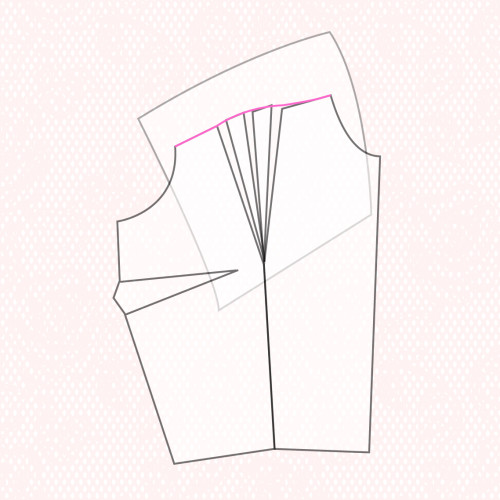
Place extra paper behind the pattern piece. Spread the hinged wedges so that they are evenly distributed and tape them down. Use a curved ruler to redraw the edge, following the contours of the wedges. The edge should now curve outwards in the center.
Step | 10
Add seam allowance. This can be whatever seam allowance you want to use when you sew the seam. Mark gathering dots 1” out from each side of the wedges. Cut off excess paper. Use extra paper to add seam allowance to lower edge of shoulder yoke.
Step | 11
Retrace pattern pieces if desired.
Sewing notes:
For cutting, you will cut one front bodice on the fold, and two shoulder yokes (a left and a right).
To construct bodice, sew bust dart as usual. Sew two rows of basting stitches between dots and gather bodice to fit shoulder yoke. Stitch bodice to yoke right sides together, finish seam and press up. Finish garment as indicated.