
 Sign In
I'm always looking for ways to simplify my closet, especially as spring rolls around. It feels so good to fit most of my wardrobe onto a single rack, and it certainly makes getting dressed in the morning a bit easier. Plus, an intentionally small wardrobe makes packing for travel a breeze.
The secret to maintaining a small closet without getting bored is to aim for versatility in every piece. And there's no beating a reversible garment for versatility. Just imagine if all your garments were reversible; you'd have double the wardrobe in the same amount of space.
You'd be surprised how many garments can be made reversible. While not everything works as a 2-for-1, there are plenty of skirts, tops, dresses, and jackets that can be made to show off either side.
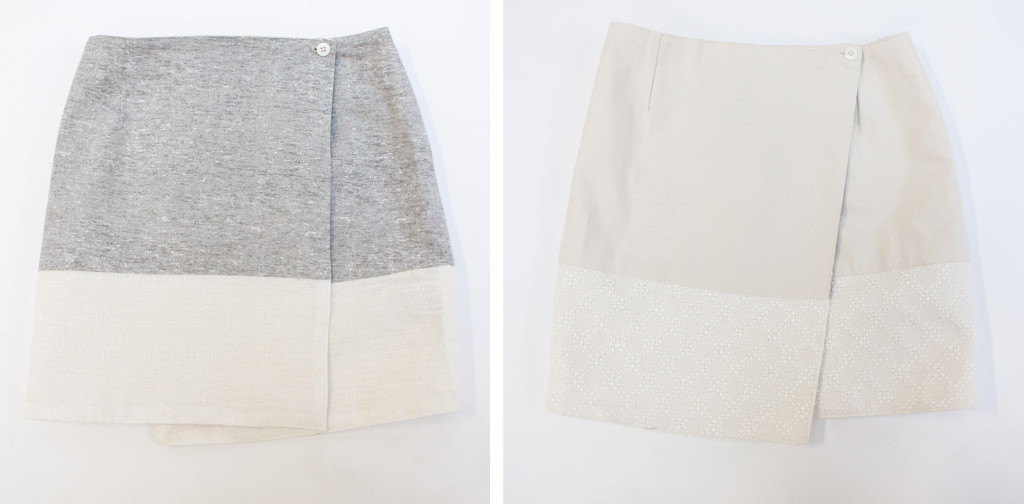
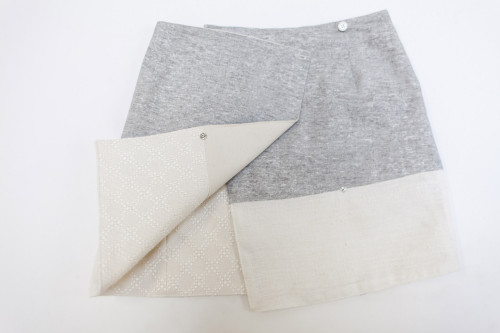
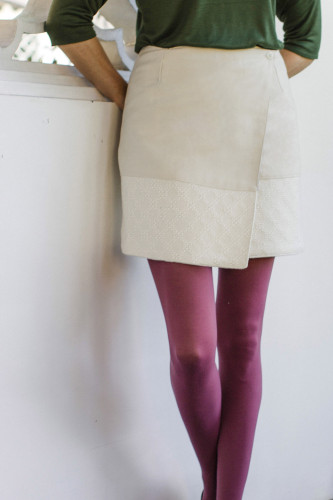
The Osaka skirt from this month's issue is a prime example. This modern wrap skirt uses panels of fabric that allow you to create several different combinations of fabric and print in one. It also looks great as a monochrome skirt with textural interest. Imagine brocades, tweeds, or silks mixed with plain woven cottons in a single color, or a mix of florals and on one side for spring and autumnal browns on the other for fall.
There are a few things to keep in mind when sewing reversible garments of any kind. We'll walk through the most important considerations: style, fabric, seams, and closures.
01 Section
Choosing a style
Learn how to pick a pattern that can be made reversible.
The single most important consideration when making a reversible garment is the style of the pattern that you choose. In general, reversible garments are easiest to execute when the design lines are simple. Avoid overly complicated styles that will add unnecessary bulk and make sewing more difficult.
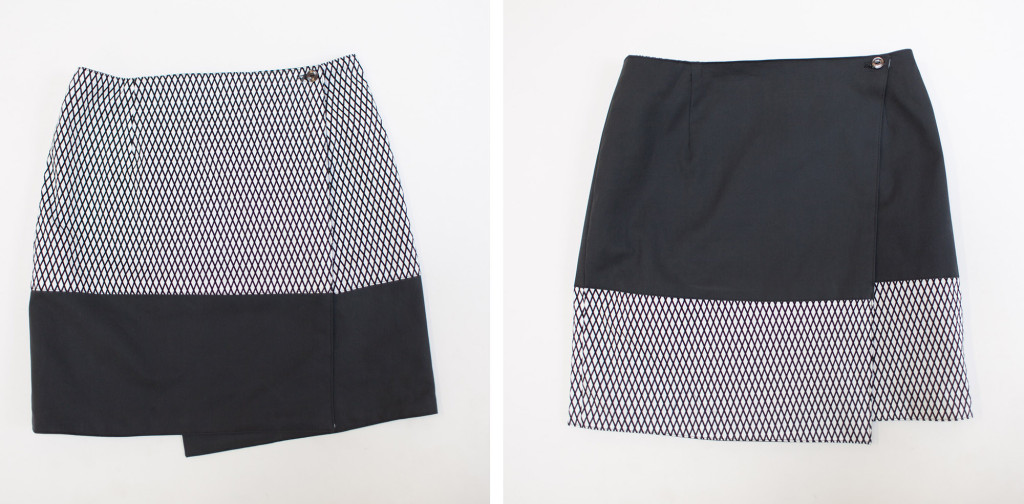
Try flipping your fabrics on each side when making the Osaka skirt.
Fabric shown: Bloom sateen print from Harts Fabric.
Wrap shapes are easy to make reversible, whether it's a wrap skirt such as Osaka, a wrap dress, or a a blouse or sweater. Try to avoid patterns that have zippers, unless you can replace the zipper with another type of closure.
Also look for styles with minimal seaming. Eliminating seams wherever possible will help you to cut down on bulk between the layers, and you'll end up with a smoother looking garment. If your pattern has a front or a back seam, see if you can cut these pieces on the fold instead. If a seam is only there for design interest and you feel it can be eliminated without sacrificing the look you want, tape your pattern pieces together at the seam line to create single pieces from multiple ones.
You can still sew darts, tucks, pleats, or gathers if you choose to, but the fewer of these bulky details you have, the easier your job will be. Darts are often necessary to add shape, but try finding styles that don't have too many of them. Pleats and gathers can look nice, but be aware of how much extra bulk they'll add when sewing with two layers.
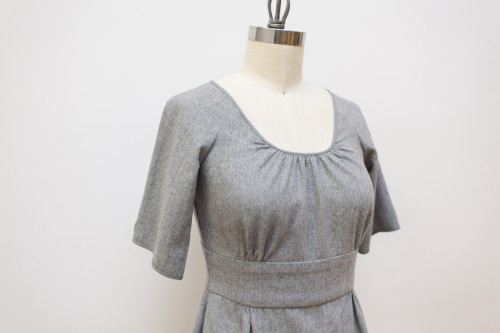
A dress with raglan sleeves, like the
Colette Patterns Dahlia, will be easier to make reversible
than one with set-in sleeves.
If you're sewing a garment with sleeves, such as a jacket, top, or dress, look for alternatives to set-in sleeves, such as raglan, dolman sleeves, or kimono sleeves. These don't require the precise easing that set-in sleeves do, and are much simpler to make reversible. If you do choose a set-in sleeve, a low sleeve cap and a slightly dropped shoulder are easier to work with than a very fitted high cap sleeve.
You can also choose styles that have pockets. In-seam pockets that are sewn into a side seam can work well if you use the pillowcase method of construction (see below). These pockets look similar for either side of the garment. You can also sew patch pockets or welt pockets on one or both sides before sewing the two layers together.
02 Section
Choosing fabrics
Pick the right fabrics to keep your reversible garments smooth and wearable.
The next decision you will need to make is about fabric. Choosing the right fabric for a garment can be a challenge as it is. When making a reversible garment, you also must consider whether the fabrics will work together, both aesthetically and structurally.
Because reversible garments involve multiple layers of fabric, choosing light-to-medium weight fabrics will help you to avoid excess bulk. At the same time, picking fabrics that have some crispness (or "body") to them will make sewing much easier. For the Osaka skirt, we like crisp cotton poplin, linen, light canvas, sateen, twill, or light wool. Silk twill can also work well.
Fabrics that have too much drape can sag over time, resulting in uneven, baggy hems. If you decide to sew a reversible garment in a drapey fabric, minimize this by pinning your layers together after assembly. Hang them or place them on a dress form overnight. Trim to even the layers before you hem.
Using similar weights and hands will usually yield the most surefire results. You could use the same fabric in different colors or prints, or just find fabrics that feel very similar to one another. The closer the fabrics are in feel, the fewer problems you'll run into.
You can even make reversible knit garments, such as dresses, sweaters, or wraps. With knit fabrics in particular, it's very important to choose two fabrics that work well together and are similar. Not only should they be about the same weight, they should also have approximately the same amount of stretch and recovery. Test this by stretching 10 inch swatches of each fabric. See if they'll stretch the same distance, and if they both return to the same size. Because recovery is so important in making reversible knit garments, it's usually a good idea to look for knit fabrics that have some spandex content.
If one or more of your fabrics is light colored, test it with your other fabrics to see if there will be any show-through. Often fabrics will seem to be opaque, but when a darker fabric is placed behind them, the color is transformed. If your fabric isn't completely opaque, you can underline it with a second layer to help prevent fabric and seams showing on one side.
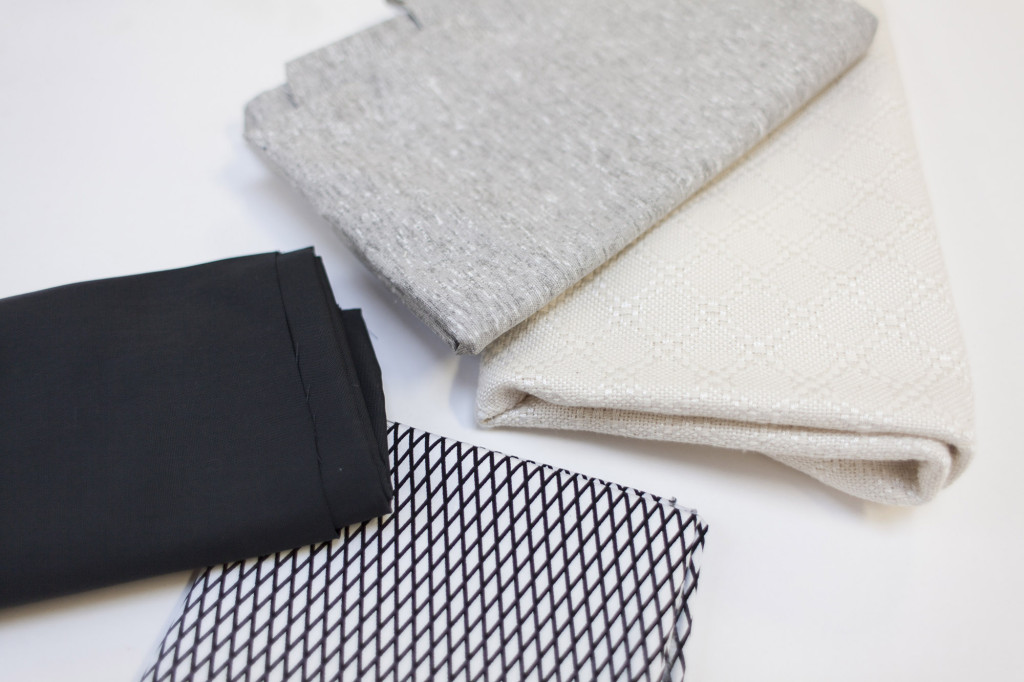
Lay fabrics out next to one another to see how the colors and prints might work together in the final garment.
Finally, make sure the colors and prints you choose work together if they'll be seen together. On the Osaka skirt, up to four different fabrics can be used. Although the inner fabric is not as visible, it can still be seen at times peeking out from the edges of the wrap front. You don't have to stick to neutral colors or get too matchy-matchy, but consider how the various tones of your fabric look next to one another.
03 Section
Seams, edges, and construction details
Once you're ready to put your garment together, use these techniques to create neat seams and edges.
There are two main methods you can use to construct reversible garments. You can adapt a wide variety of styles to be reversible, but matching the method to the garment style is crucial. The first method is one I'll call the layered method, a great method to choose for the most simple styles. The second method is one I call the pillowcase method, and this one can be used on garments that have more complex seams and details.
The layered method
To make a reversible garment with the layered method, cut two of each pattern piece, with one piece in each fabric. Baste or glue baste the matching pieces to one another, with wrong sides together. Sew the garment, using these two basted pieces as one, just like when you underline.
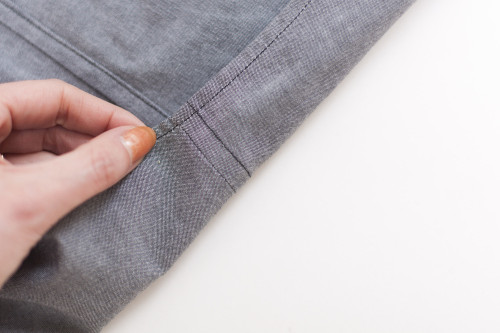
Flat felled seams look finished on both sides of a garment.
The trick for this method is that the seams must be sewn in such a way that they look good on both sides. The best option for this is a flat felled seam, which looks great from either direction. The downside of flat felled seams is that they can be a little bulky, and they're difficult to sew along tight curves. For this reason, it's best to use the layered method on garments with minimal seams that are mostly straight or just slightly curved.
Other options for seams might be bound seams or French seams. Topstitch these seam edges flat to get a cleaner look. You can even bind seams in a contrasting color to emphasize the lines of the garment.
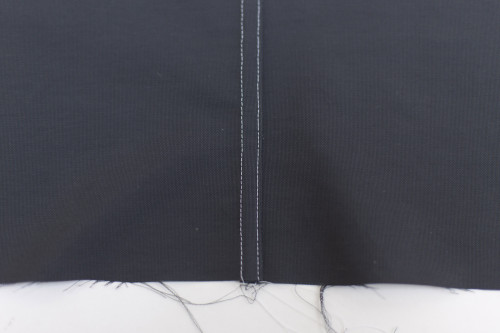
Edgestitch a French seam or bound seam flat to make it work
on the reverse side.
This method does not work well if your garment has darts. If you have your heart set on a style with darts, try converting the darts into tucks, pleats, or gathers instead. These will provide the fullness of a dart, but will look good from either side.
The edges of reversible garments created this way can be finished cleanly with an edge binding. Use one of your fabrics to keep the binding inconspicuous on one side of the garment and give a pop of color or pattern on the reverse. Or, choose a binding color that blends with both sides.
The pillowcase method
The second method is one I call the pillowcase method, because it's very similar to sewing a pillow. Again, cut two of each pattern piece from each of your fabrics. Assemble each side of the reversible garment separately. Sew them together along all of the edges, with right sides together, leaving a gap along one edge. Turn the entire garment out through the opening, then close the gap with a hand slipstitch.
The advantage of this method is that all seam allowances and darts are neatly hidden between the two layers. This lets you use patterns that have more details and shaping than the layered method, and it doesn't greatly alter the look of the garment. When using this method, it's important to grade all seam allowances, and press the seams from each side in opposite directions to reduce bulk. Darts should also be trimmed on the wrong side and pressed in opposite directions wherever possible.
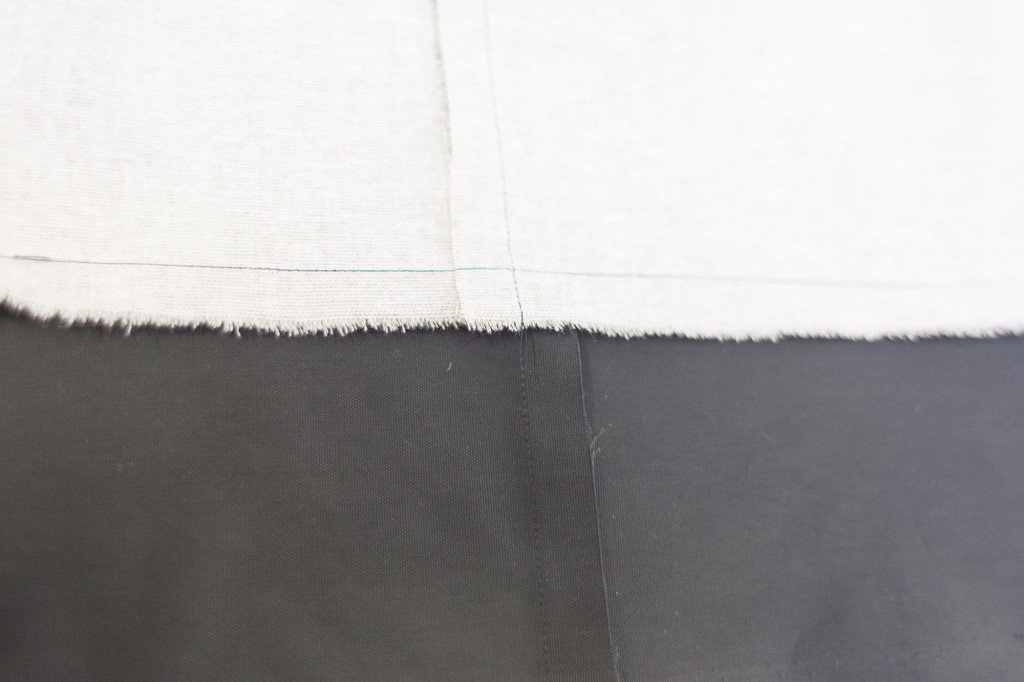
Press all matching seams and darts in opposite directions, so there are fewer layers of bulk inside the garment.
04 Section
Closures
Many garments need some form of closure to take on and off. Learn which ones work best and how to apply them.
Closing up reversible garments can be tricky, as traditional closures such as zippers are usually designed to work only from one side. There are some reversible zippers, but these are usually intended for bulky outerwear.
Buttons can also present a problem, since it can be difficult to fasten buttons from the inside, and the threads from attaching buttons can sometimes show. Use flat buttons that won't dig into your skin. If you're sewing a shirt or a jacket, a blind placket can help conceal buttons or thread on either side. The Osaka skirt uses just two buttons, one on each side of the garment, so that only one button shows at a time.
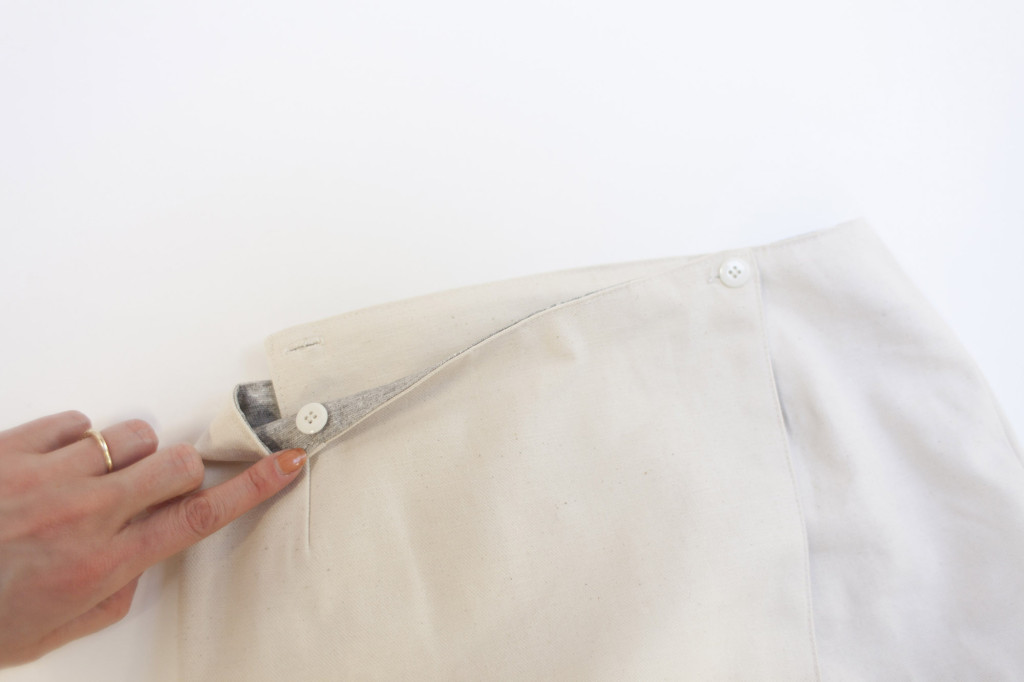
Closing garments with buttons on each side works well as long as the buttons are flat.
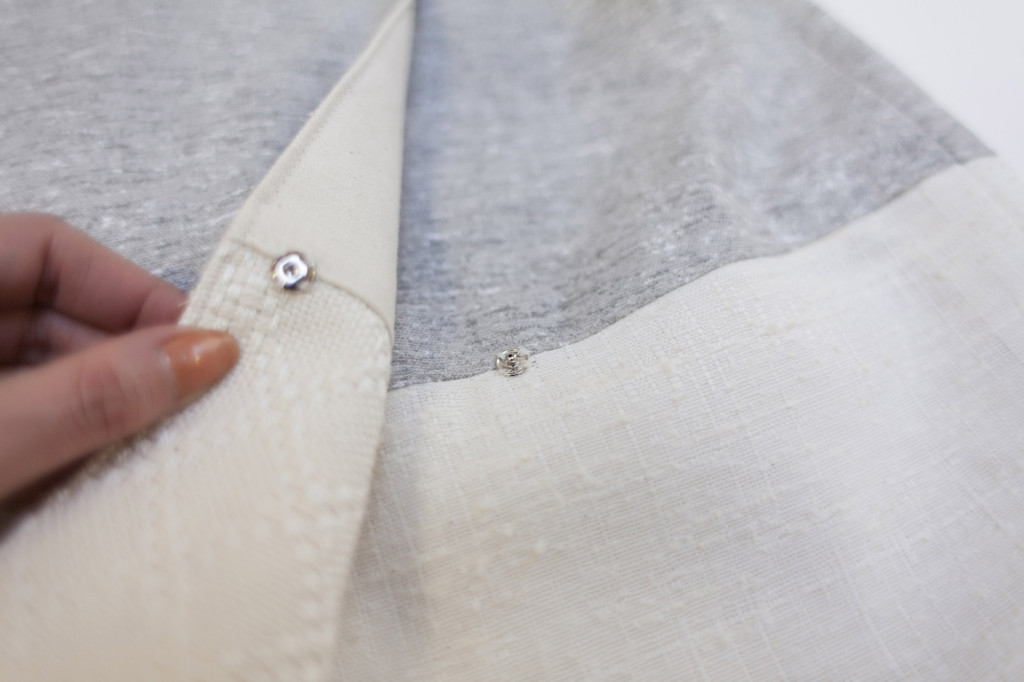
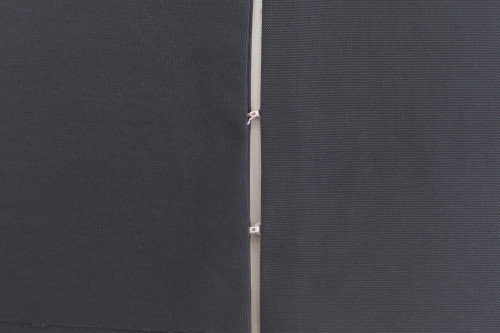
Snaps can be hidden easily between the layers of a placket or lap.
Snaps are another easy option for reversible garments, since they are normally hidden between layers. Try replacing button plackets with snaps when adapting a pattern. For the Osaka skirt, a single snap is placed along the wrap opening to keep the skirt closed in heavy wind or when sitting or standing.
Hooks and eyes are another alternative that can be concealed easily between layers. Or, sew garments such as tops and jackets so that the edges meet rather than overlap, and place hooks between layers. Add thread eyes to the other side along the opening.
How to sew reversiblehooks and thread eyes
Step | 01
Attach hooks to one layer of the opening, on the right side.
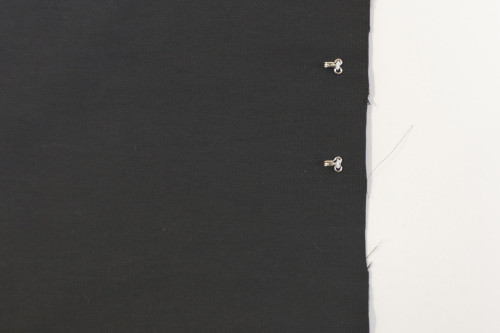
Step | 01
Place the second layer on top, right sides together, and stitch along the opening between the hooks. Turn to the right side. The hooks should protrude from the seam.

Step | 01
On the opposite side. make thread eyes. Create a small loop of thread to correspond with the placement of each hook. Use a buttonhole stitch to reinforce the loop.
One final option is to add ties to close a garment. These work beautifully on wrapped garments, but they can also be incorporated into jackets, tops, and many other styles. You can even install small buckles, provided they won't feel annoying to wear on the inside.
Once you've made these few decisions on style, fabric, construction, and closures, you'll be ready to make all your clothing do double duty. Start with our Osaka pattern for an easy start that gives you nearly infinite options.

