
 Sign In
An intentionally raw hem can be a lovely stylized choice for finishing your garments. Use this technique to highlight the casual nature of a garment or to dress down a more formal fabric choice. Though an unfinished edge can be charming, a uniform look is what keeps this detail looking neat and intentional.
When making this design decision, it is important to take a few things into consideration:
- Does the fabric have a high tendency to unravel? For example, controlling the fraying of synthetics can be challenging.
- How does the fabric look when unraveled?
- Is the hem straight or curved? If the hem is curved it may fray irregularly.
Method One: Raw Edge with a Single Needle Straight Stitch
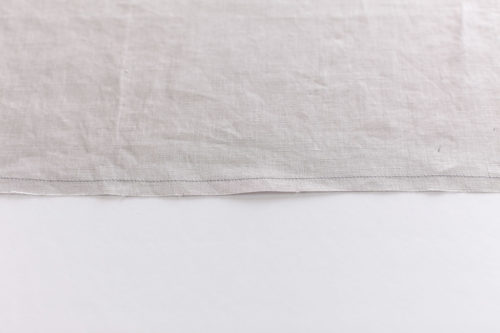
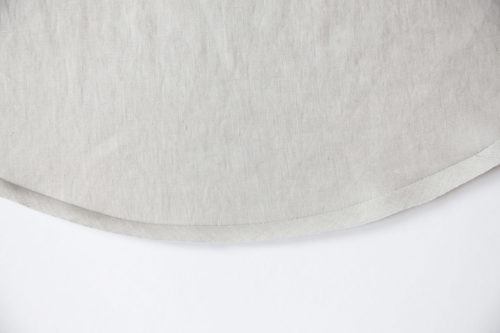
This technique is best used on straight hems, as the consistent grain line will allow the fabric to unravel evenly. A straight stitch located right above the cut hem ensures that the edge will only unravel up to a certain point. This technique features a more minimal frayed look, as only the warp threads are exposed during the fraying process.
Make sure the garment hem is cut to the desired length, as this will be the finished garment length.<
Step | 01
Set up your sewing machine for a standard straight stitch. The seam allowance used will directly affect the amount the garment will unravel. Use a larger seam allowance for more fringe and a smaller seam allowance for less fringe.
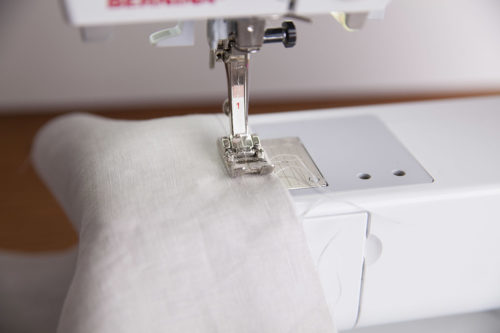
Step | 02
Begin stitching at the garment side seam or another less visible location on the garment. Stitch around hem at the desired seam allowance, and when you arrive back to your starting point, backstitch to finish. Trim threads.
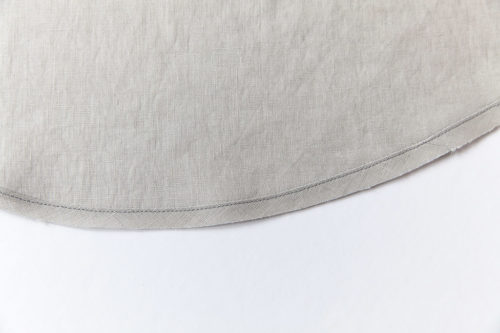
Tip: If the fabric being used unravels at a high rate, try using a zigzag stitch instead. A zigzag stitch grips a broader surface area of the fabric, helping to better control fraying.
Method Two: Bias Tape with an Unfinished Edge
How to Determine Dimensions
Width = Desired visible width+ 3/8"
Example: if the desired visible width is 1/2", the equation would be: 1/2"+ 3/8" = 7/8"
Length = Length of hem + the number calculated for bias tape width
Example: If the hem circumference is 45", the equation would be: 45 + 7/8" = 45 7/8"
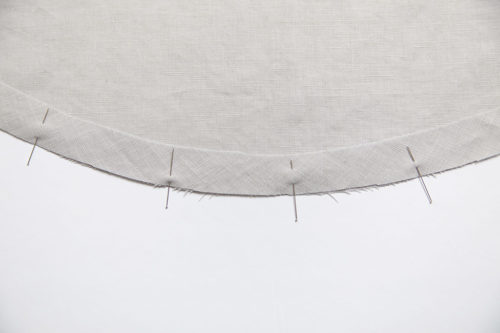
This method of creating an unfinished hem is an excellent option for garments with curved hems. The use of bias tape allows you to create a consistent unfinished edge. You can use store-bought bias tape or make your own. This finish also offers a more plush unfinished edge since both the warp and weft threads are exposed through the unraveling.
If making bias tape, begin by cutting bias strips. If you are using store-bought bias tape, press it flat.
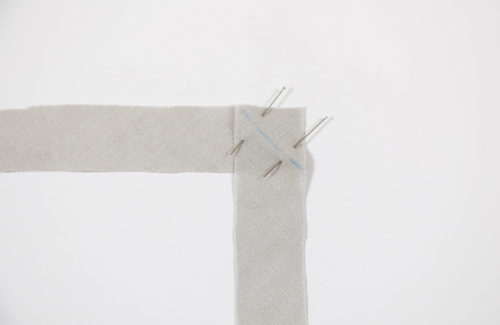
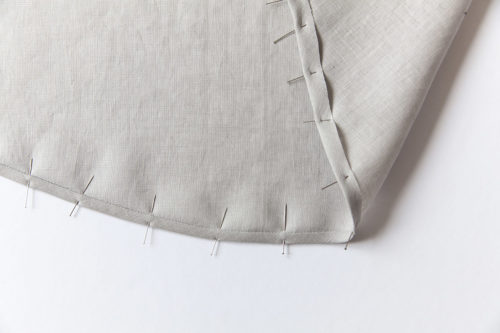
Step | 01
Join two short ends of bias tape right sides together. Trim the seam allowance and press open.
Step | 02
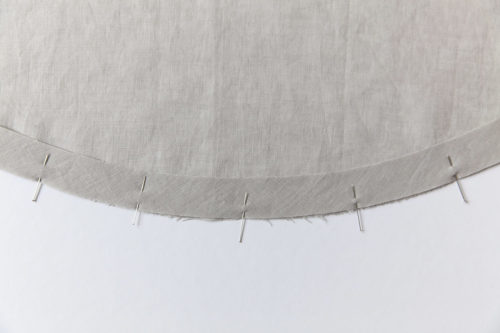
Pin the right side of bias tape to the right side of garment hem. Using a straight stitch, sew with a 3/8" seam allowance. Finish the seam with your preferred finishing method.
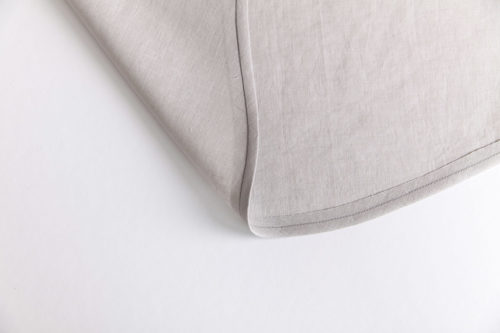
Step | 03
Press the seam allowance up and away from bias tape.
Step | 04
If needed, topstitch the seam allowance at 1/4".
Method Three: Turned Bias Tape with Unfinished Edge
How to Determine Dimensions
Width = Desired visible width x 2
Example: If the desired visible width is 1/2", the equation would be: 1/2" x 2 = 1"
Length = Length of hem + the number calculated for the bias tape width
Example: If the hem circumference is 45", the equation would be 45 + 1 = 46
This hem uses a similar technique in the previous method but would be better suited for lighter fabrics or fabric that has a higher tendency to unravel. The bias is turned up and then stitched down in this technique, offering more control over how much the fabric will fray.
Make sure the garment hem is cut to the desired length, as this will be the finished garment length.
Step | 01
If making bias tape, begin by cutting bias strips. If you are using store-bought bias tape, press it flat. Sew the short end of the bias tape right sides together, creating a continuous circle. Trim the seam allowance and press open.
Step | 02
Turn the garment inside out and pin the right side of the unfolded bias tape to the wrong side of the hem. To determine the seam allowance, take the total width of the bias tape and divide into quarters. For example, if the bias tape is 1", use a 1/4" seam allowance.
Step | 03
Fold the bias tape around the raw hem and toward the outside of the garment. Leaving half of the bias visible on the exterior of the garment, press into place.
Step | 04
Secure the bias in place with pins on the wrong side of garment. Stitch in the ditch to finish.
Tips for Distressing the Unfinished Edge
- Wash and dry using suitable cycle setting for the fabric being used. The agitation of a wash cycle will help to loosen and fray the edges of the fabric.
- If the garment is more delicate, try hand washing. The gentle abrasion should help loosen the warp and weft threads.
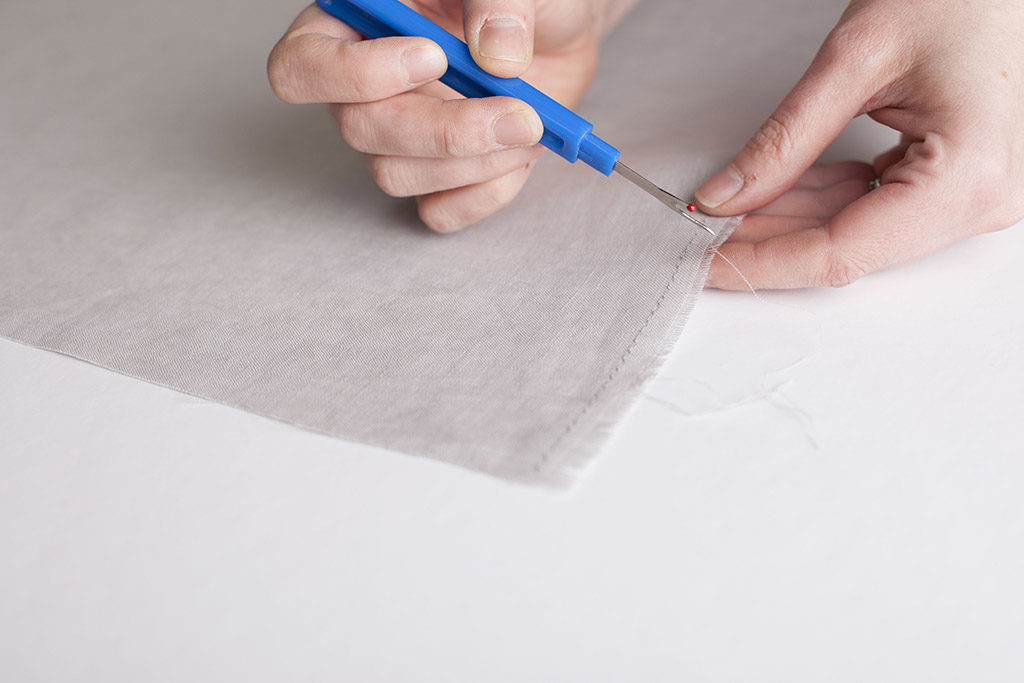
- Use a seam ripper to gently separate warp and weft threads.
- If the fabric is finer, try using a straight pin instead.

About the Author
Haley Glenn is a staff writer at Seamwork Magazine. She is a professional sewing writer and teacher based in Portland, Oregon.

