Sign In
As a sewing teacher, I have become acutely aware of a paradox that exists in the sewing community. Though the average person's wardrobe consists mostly of knitwear, the majority of seamstresses sew almost exclusively with woven fabric. This could be attributed to the misguided notion that sewing knits requires a serger. This is absolutely false! Though a serger makes the assembly of knit garments much faster, they are a costly addition to your sewing arsenal and are not imperative. The following is a guide to sewing knits on your home sewing machine.
By the way, you can use these techniques on any of the knit sewing patterns in our catalog. The cool thing is that if you're a Seamwork member, you can download as many of these as you want and try the techniques on different types of knit garments. And right now, you can get half off a Seamwork Unlimited membership, which gets you over 200 patterns with more added each month.
Handling
The stretch and resilience of knit fabric makes them such a joy to wear. Knits move with our bodies and active lifestyles, giving us room to grow and move. These qualities are what make knits unique, but also require us to handle them in a different manner.
Tips and tricks for handling knits:
- Use ballpoint pins to avoid damaging knit fabric while cutting and sewing.
- Always reserve a few scraps to test your needle and machine settings. Test stitches with the stretch of the fabric and against it. Both directions of the fabric will behave differently and may require slightly different settings. Take note of these variations and store with your project as you work.
- Do not stretch as you sew or resist the feed of your machine by pulling the fabric toward or away from you.
- Support the weight of your project while you sew. Do not let it fall to the ground as it passes through your sewing machine. This will stretch your fabric and put unnecessary stress on your sewing machine. Instead, position your sewing machine so there is plenty of space for your fabric to be supported behind and to the left of your sewing machine.
- If some stretch occurs during the sewing process, hover your iron approximately 1" above the stretched seam and apply steam. The heat and moisture of the steam will help to shrink the seam back to its intended size and shape.
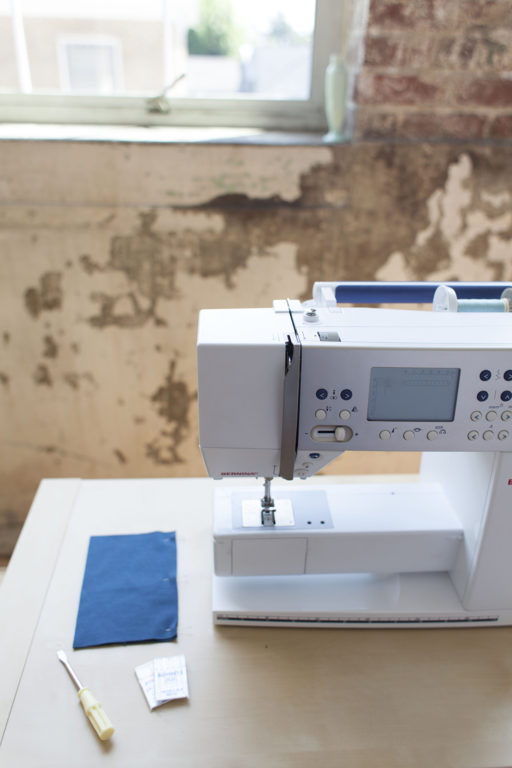
Preparing your Sewing Machine
Making a few simple adjustments on your machine before sewing will help you get off on the right foot when working with knits.
Needles
Correct needle choice is essential to successfully sewing knit fabrics. Universal needles have a slightly rounded tip and are intended for switching between wovens and knits. Though a universal needle can sometimes work for knits, it is always best to exchange your needle with a needle that is specifically intended for the task of sewing knit fabrics.
A needle with a rounded tip, commonly called a ballpoint needle is optimal. A ballpoint needle gently pushes through fabric, rather than piercing the fibers, helping to avoid runs and tears. A standard ballpoint needle is ideal for most knit projects. Ballpoint needles, also called jersey needles, typically come in sizes 70/10 to 100/16. Use a smaller needle for finer knits and a larger needle for heavier fabrics.
If a knit has a significant amount of spandex or Lycra, consider using a stretch needle instead. Just like a jersey needle, stretch needles have a ballpoint intended for knit fabric, but the eye and scarf of the needle are specially designed to help when sewing elastic and also help avoid the skipped stitches, which are commonly associated with sewing stretch fabrics. Stretch needles typically come in two sizes: 75/11 and 90/14.
Presser Foot Pressure and Even Feed Foot
The presser foot of a sewing machine holds the fabric against your feed dogs as you sew. This action is what feeds fabric through the sewing machine. The amount of pressure the presser foot delivers to the feed dogs directly affects how your fabric looks when removed from your sewing machine. If the pressure is set too high, the result will be stretched out fabric that is rippled in appearance. To avoid this, adjust your presser foot pressure. Typically a setting of 1 or lower is appropriate for knit fabrics.
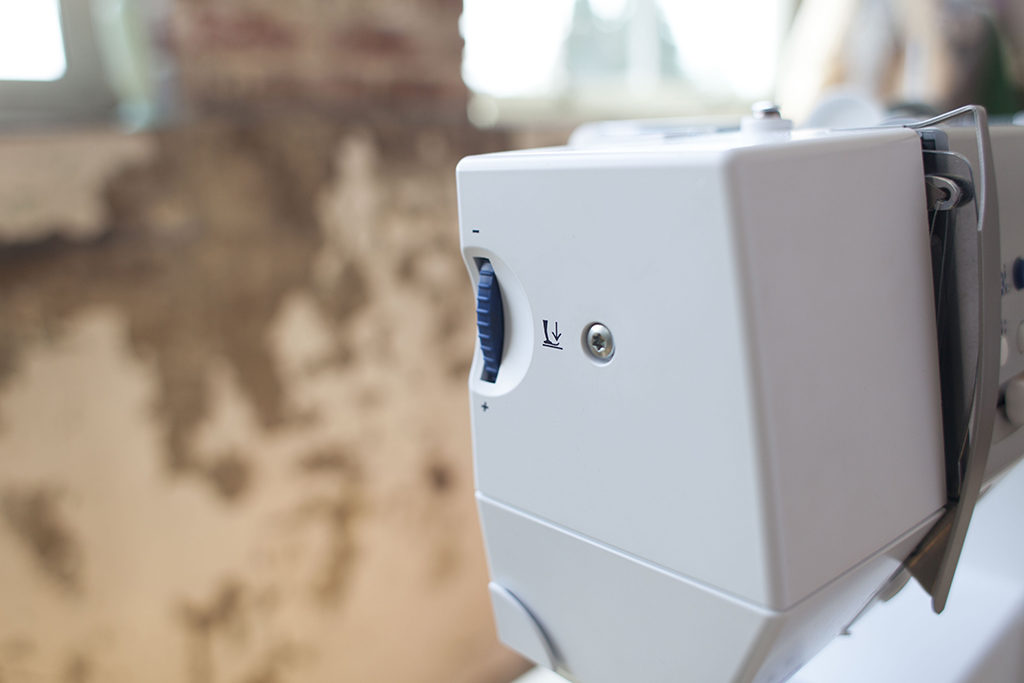
The location of this dial or lever can vary from machine to machine. Refer to your machine manual to learn more about the presser foot pressure on you sewing machine.
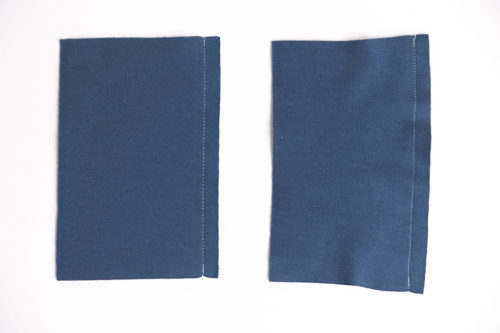
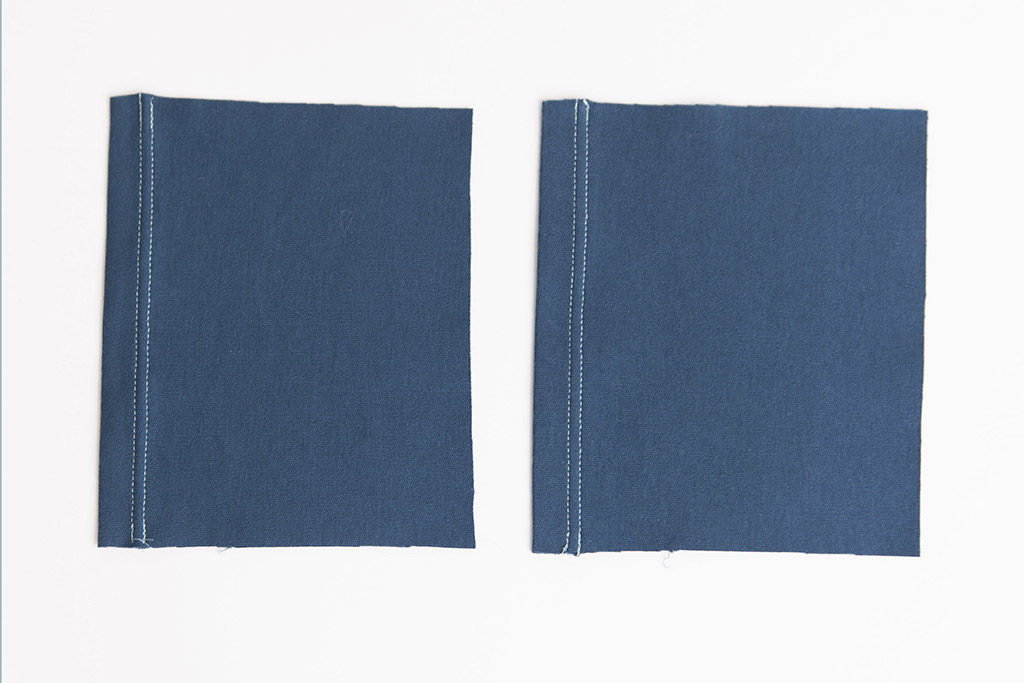
On the left, a seam sewn with help of a walking foot; on the right,
a seam sewn without.
An even feed foot or walking foot can also be helpful to gently and uniformly feed your fabric. An even feed foot has feed dogs that help to pull your fabric through your machine at a more even rate. This can be a helpful tool when working with finer, more delicate knits. When shopping for an even feed foot be sure to purchase one that is intended for your sewing machine. Like most machine accessories, walking feet are specific to the brand of sewing machine being used.
Seaming
When working with wovens, the average seam consists of two parts. The first part is your construction stitch; this is typically a straight stitch. The second component to a seam is a finishing stitch. These are like a zigzag stitch or other overcast stitches that finish the raw edges of your fabric and keep your project from unraveling. When working with knit fabrics you can use one stitch to do the job of two. This is one of the many perks of working with knits! Here are some stitches that are ideal for the task of seaming knits.
It can be a helpful exercise to look at the inside of a few of your favorite knit garments. Look at the stitches being used to construct the garment. The first thing you might notice is the width of the stitches being used. The typical overlock stitch is 1/4" in width. This width provides strength as well as stretch and is what we want to mirror when sewing knits on a home sewing machine.

Note
The seam guides on your sewing machine are only accurate when the needle is in the center position. When using stitches other than a straight stitch for construction, be sure to use a small ruler and painter’s tape to mark a new seam guide suitable for the stitch you are using.
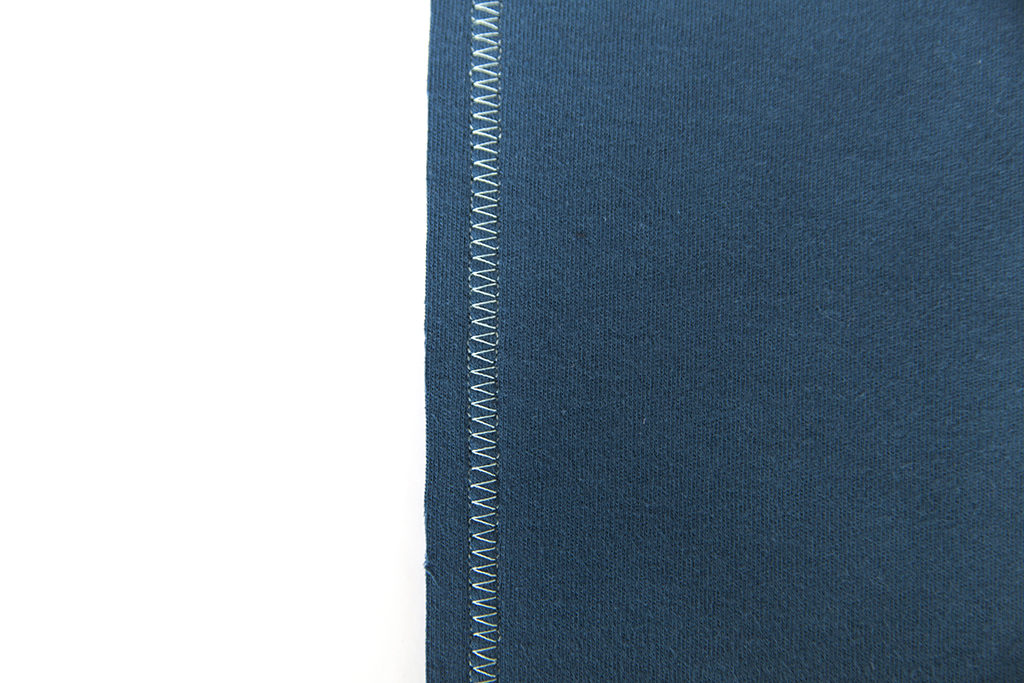
Zigzag Stitch
A zigzag stitch is a great way to seam knit fabrics. Its inherent stretch allows for the fabric to stretch and move without fear of popping a seam. On light to medium weight knits, try using a stitch length of 1.5 and a width of 5. This setting closely mimics the look and function of an overlock stitch. When sewing, remember to backstitch at the beginning and end of every seam to secure. To finish, trim the seam allowance close to stitching. This will closely emulate an overlock stitch and allow for maximum stretch and strength.
Faux Overlock Stitch
Most sewing machines will offer a variety of stretch stitches, many of which are intended to mimic the look of a serged edge. These stitches are aptly named overlock stitches. Check your sewing machine manual for the recommended stitch settings, though typically they tend to use a wide width and a short length. Keep in mind that many of these stitches will use a back-and-forth stitch path to create an elastic stitch. To avoid stretching when using this style of stitch merely support and gently guide fabric through the throat of the sewing machine. Resist the urge to stretch and sew! Backstitch to secure stitching and trim to neaten the seam allowance edges.
Reinforced Straight Stitch
When working with thicker knits like ponte or heavy double knits, pressing the seam allowance open may be necessary. In these cases, a reinforced straight stitch can be used to create strong and flexible seams. A reinforced straight stitch is created by the needle moving forward and backward in a straight line, placing three parallel stitches side by side.
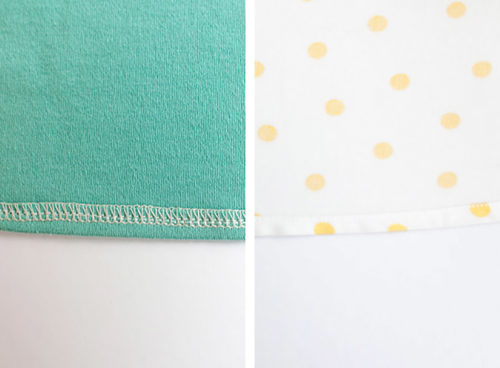
From left to right: a knit garment with a single fold hem,
and a double fold hem on a woven garment.
Hemming
The biggest difference between hemming wovens versus knits, is that knits should be finished with a single fold hem. A double fold hem can create unnecessary bulk and cause the hem to roll toward the right side. When hemming knits at home, it is important to create a stitch that will stretch with your fabric. With these qualities in mind you have a few different options. In ready-to-wear, most knits are finished with a single fold hem and a machine called a coverstitch. A coverstitch machine produces a couple stitches: a chain stitch and a single or double-sided coverstitch. A chain stitch looks like a standard straight stitch from the right side but has a looped chain look on the wrong side; this is what gives the stitch its stretch. A single-sided coverstitch has two lines of parallel stitching on the right side, and on the reverse side it has the appearance of an overlock stitch. A double-sided coverstitch has the look of an overlock stitch on either side of the hem.
When planning your hem finish, it is important to consider the fit of your garment. The hem width will determine the amount of stretch the hem will need in order to get the garment on and off.
Twin Needle: For Fitted Knits
On the left, an example of tunneling created by using a twin needle. On the right, a perfect finish after a small adjustment to the bobbin tension.
A twin needle is your best bet if trying to imitate the look of a coverstitch. The stitch created when using a twin needle has the appearance of coverstitch from the right side, but on the wrong side, it looks like a zigzag stitch. This stitch has inherent stretch and is excellent for close-fitting knit garments. It is also highly beneficial to use when hemming jersey. The double stitching will help the hem from rolling toward the right side when wearing.
A twin needle will fit into any standard sewing machine. It has a single shank that is easily inserted just like a typical needle. Check your sewing machine manual to learn about threading for your make and model of machine. The tension and length settings recommended for twin needle use can also vary depending on your machine.
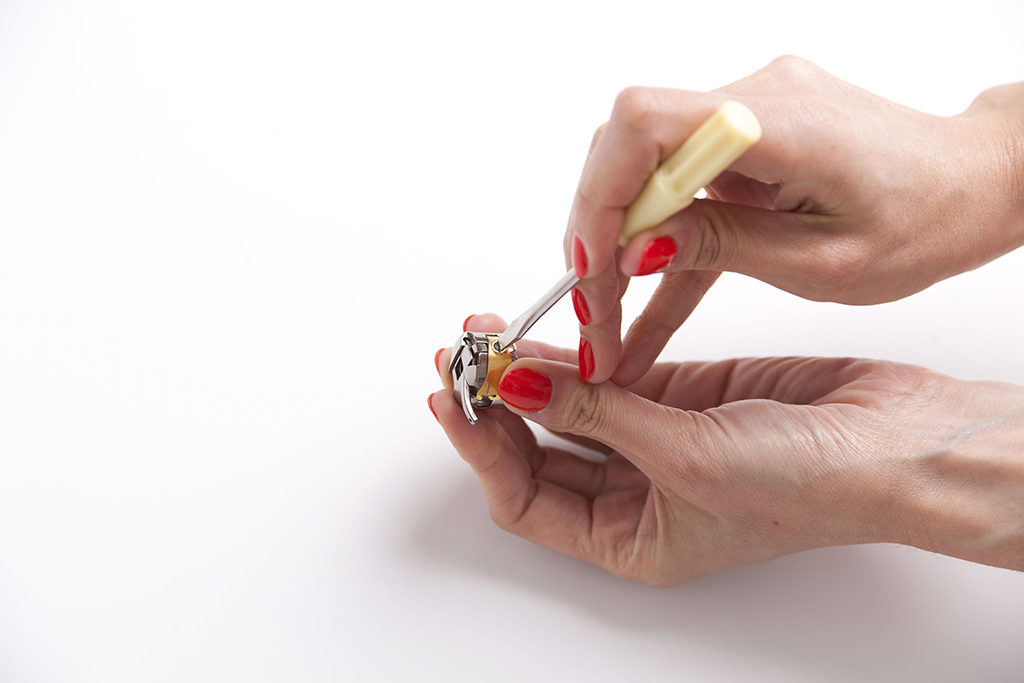
Use a small flat-head screw driver to loosen the tension of your bobbin case.
Tunneling is a problem commonly associated with twin needles. This is when the space between the two stitches is raised, creating a tunnel. To avoid tunneling, knit stay tape can be used to stabilize the hem of your knit garments by offering additional support without adding bulk to your hem.
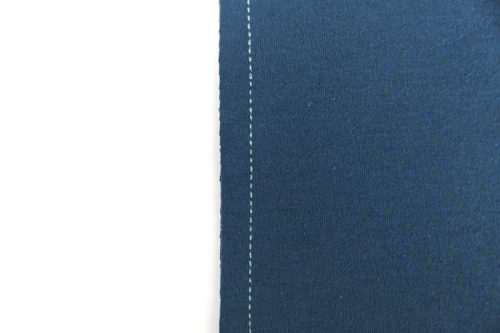
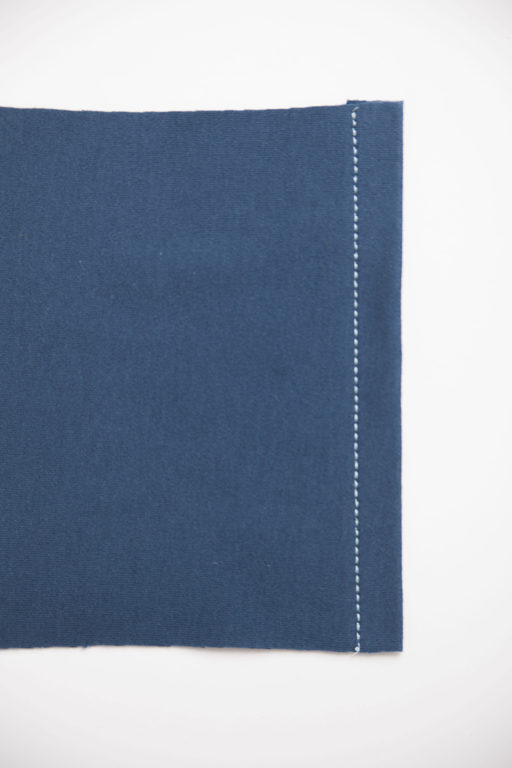
Narrow Zigzag: For Garments with Ease
This can be an excellent option for wider hems that do not require huge amounts of stretch. At first glance this finish looks just like a straight stitch, but upon closer inspection you can see the small amount of width that gives the stitch just enough stretch. Set your machine up for a standard zigzag stitch. Adjust your width to be a very narrow 0.5 and your length to be just a bit longer than normal, approximately 3 (this may vary depending on how heavy or light your fabric is, so always test). You can also use a wider zigzag stitch to hem knitwear. The appearance of this can be very subtle if your thread is well-matched.
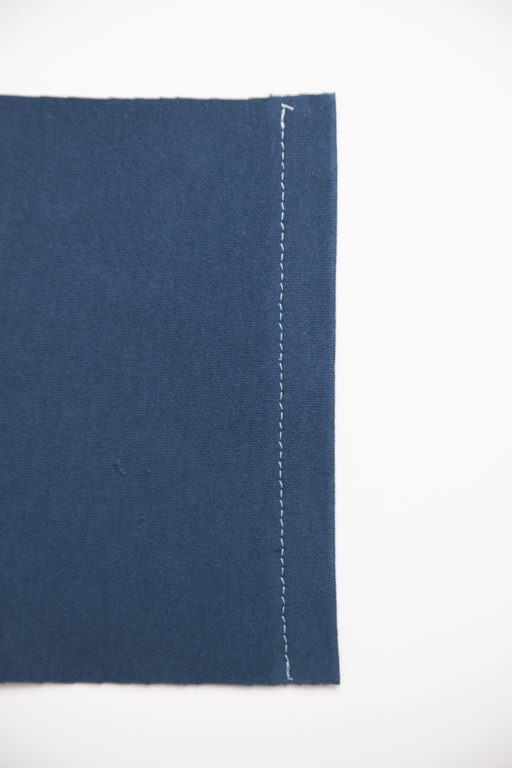
Reinforced Straight Stitch: For Firm Knits
A reinforced straight stitch can also be used to create the stretchable hem required for knits. Since this stitch creates a very bold stitching line, only use this technique when your thread matches perfectly or if you are using an intentionally contrasting thread color. The reinforced straight stitch is ideal for hemming stable knits that are firm with a fair amount of structure. This finish is not ideal for spongy knits, as it will produce an inconsistent finish. Avoid this method if you are working with a jersey knit that has a high tendency to roll toward the right side.
There is no reason to fear knits. With these easy to follow techniques and tips, your next knitwear project will be a success. So grab some ballpoint needles and that cut of knit fabric that has been hanging out in your stash for far too long! With a little know how and the correct tools you fall in love with sewing knits.
And don't forget to check out our knit sewing patterns and get half off a Seamwork Unlimited membership. You get access to classes, our community, plus a library of over 200 sewing patterns (that's worth a total of over $3200) for just $90 a year. That's less than the cost of one trip to the fabric store, if you're like me!

About the Author
Haley Glenn is a staff writer for Seamwork. She is a professional sewing writer and teacher based in Portland, Oregon.