Sign In
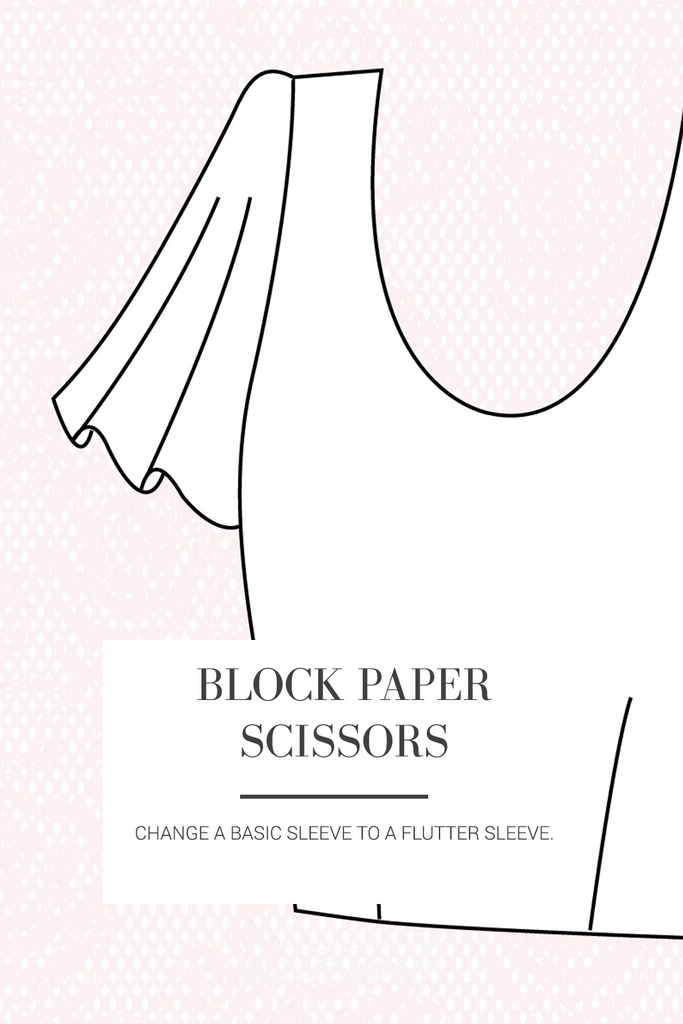
Block Paper Scissors is a patternmaking series featuring easy-to-follow tutorials––no experience necessary to join in! Each time we’ll start with a basic bodice pattern (also called a block or a sloper) with an underarm bust dart and a waist dart. We’ll use that as a jumping off point to create a different bodice design each time.
This month, we are deviating a little bit from previous columns and playing around with the sleeve. You’ll want to start with a standard dartless sleeve that is either short or elbow length. The Peony, Laurel, and Hawthorn patterns would all be great options. Make sure you make all fit adjustments before attempting any patternmaking modifications.
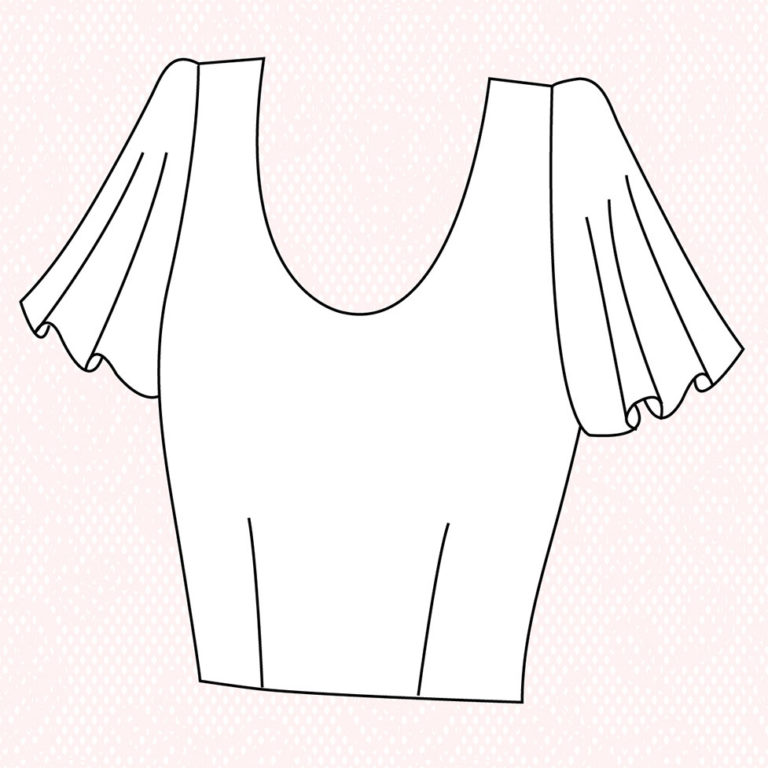
In this tutorial, we’ll transform a basic sleeve into a full and drapey flutter sleeve. This would look best sewn up in a lightweight, floaty fabric. It would be a fun chance to play with transparency––for instance, you could attach a sheer chiffon sleeve to an opaque bodice. Dreamy!
How to:
Step | 01
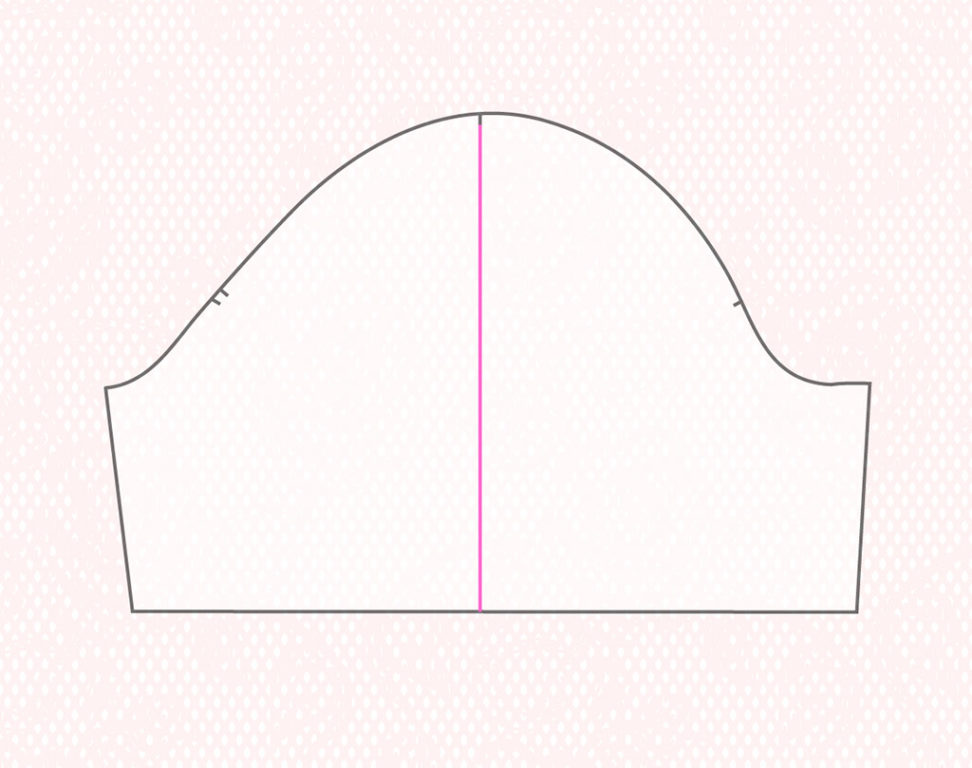
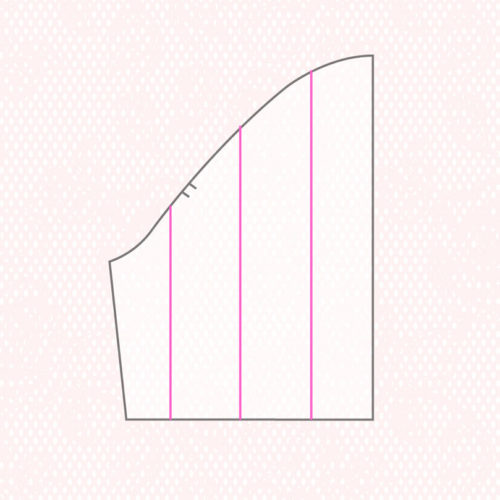
Start by tracing a duplicate of your sleeve pattern piece. Draw a line from the top of the sleeve cap [there should be a mark there] to the hem, parallel to the grainline. Cut along the line and discard the front.
Step | 02
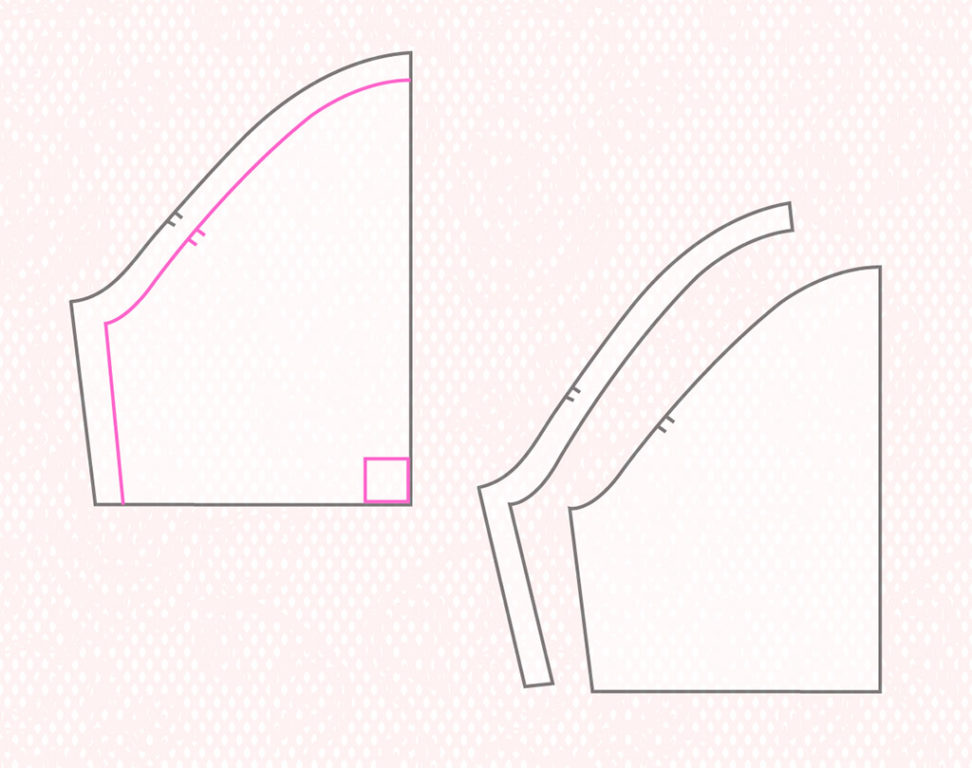
If necessary, make the bottom edge square in relation to the newly cut edge. Draw in the stitching lines on the underarm seam and along the top. Cut seam allowances off, being sure to note the notch placement.
Step | 03
Draw three slash lines equidistant across the width of the sleeve, parallel to the grainline. Cut up from the bottom along each line, to but not through the opposite edge to create hinges.
Step | 04
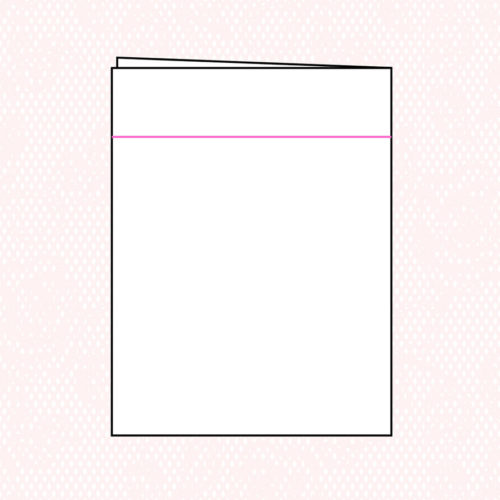
Fold a piece of tracing paper in half. Draw a line square to the fold.
Step | 05
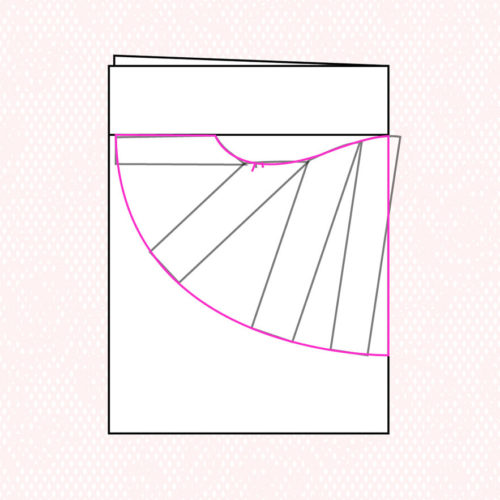
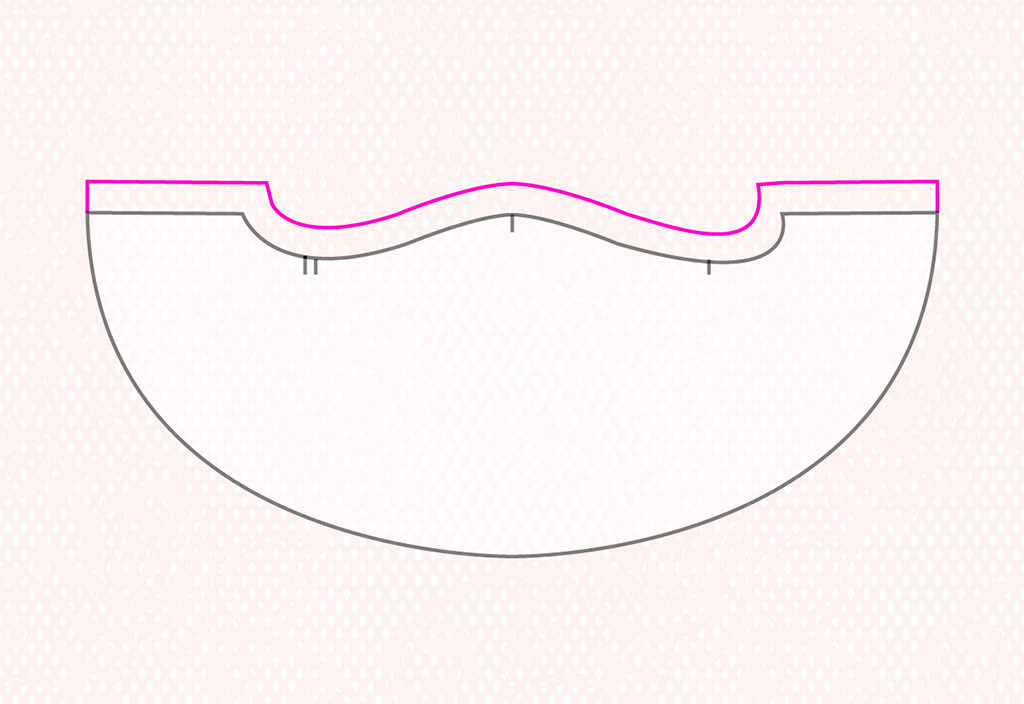
Fan out the pieces of the sleeve (as shown), so the underarm seam and top of the sleeve cap are aligned with the squared line. Let the very tip of the sleeve cap hang off the edge of the fold so that it meets the fold at a right angle. (If you try to line up that corner with the fold, you’ll have a small dip in the top of the sleeve cap edge.) Tape down and trace edges of pattern piece, using a curved ruler to blend.
Step | 06
With paper folded, cut out the pattern piece and open it up. Pattern will be mirrored as one large piece.

Step | 07
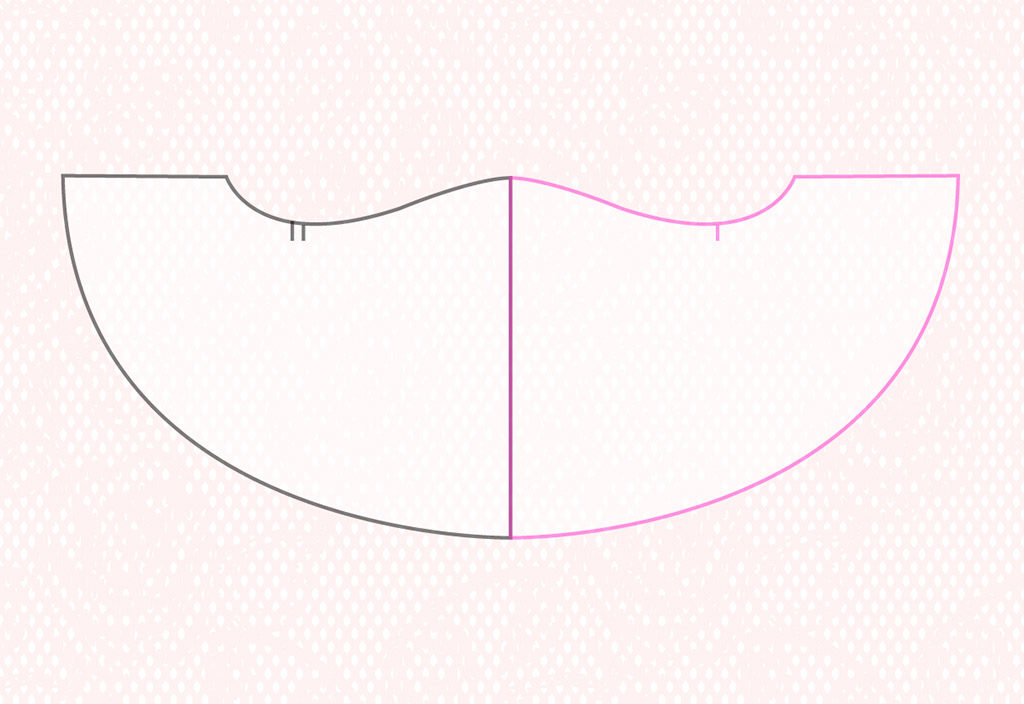
Scoop out the front lower curve by about 1/8”. For better guidance on how much to trim, fold the original sleeve piece in half and align the underarm seam, then note the differences between the front and back edges below the notches.
Step | 08
Tape the paper to the top and underarm edge. Add seam allowances back to these edges and trim.
Sewing notes:
Attach and sew as the pattern directions indicate. Because the bottom edge is so curved, it is best hemmed with bias tape or a baby hem.