Sign In

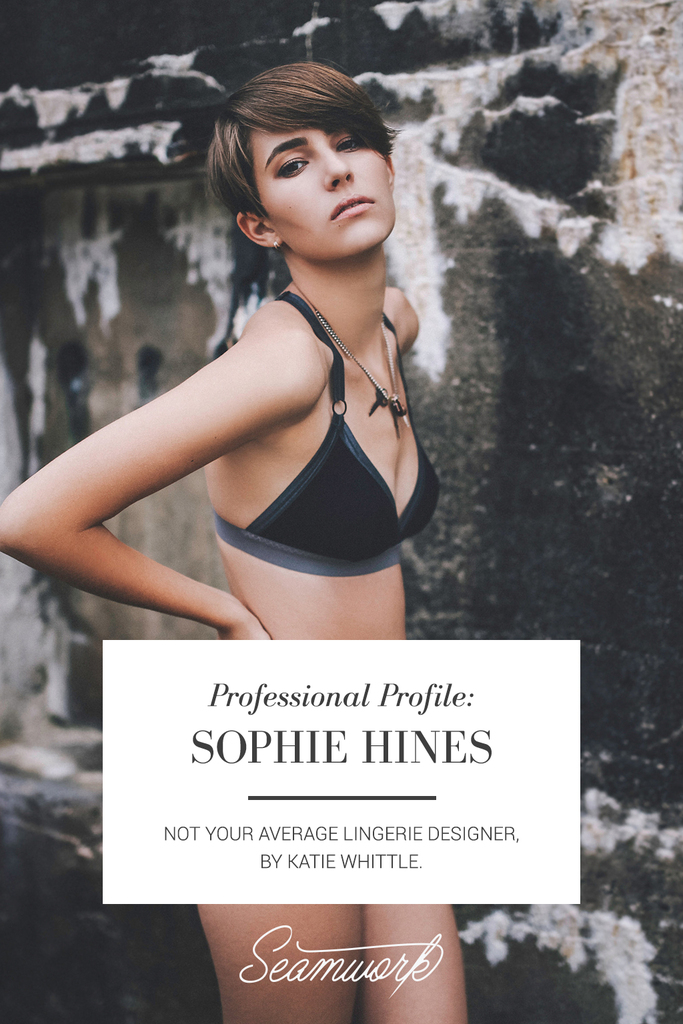
Sophie Hines has always been a maker, and when you get to know her it becomes quite evident that that is what she was always destined to be. Her enthusiastic approach to sewing and small business is contagious. Hearing her talk about her love for sewing, you can’t help but feel renewed creatively. It is hard to believe that when she was growning up in Nebraska, she nearly wrote off fashion design as a career.
“I thought that fashion design was this glamorous mythical job for people in movies. I didn’t think it was an actual career option! But I love making clothes, and I love fabric and trims—you should see my office, it’s a pastel glitter explosion. So I just sewed and made things and took flat pattern classes, and started selling my clothes at the farmer’s market and to local shops and boutiques. It eventually turned into a real business!”
Today, Sophie makes simple geometric-based lingerie with clean lines and androgynous style in a wide size range (XS-XXL). She caters to women who want comfortable, stylish lingerie. Looking for a variety of unique soft bras? A daring high-waisted thong? Or leather pasties? Sophie has you covered. Best of all, a portion of each purchase goes to charity.
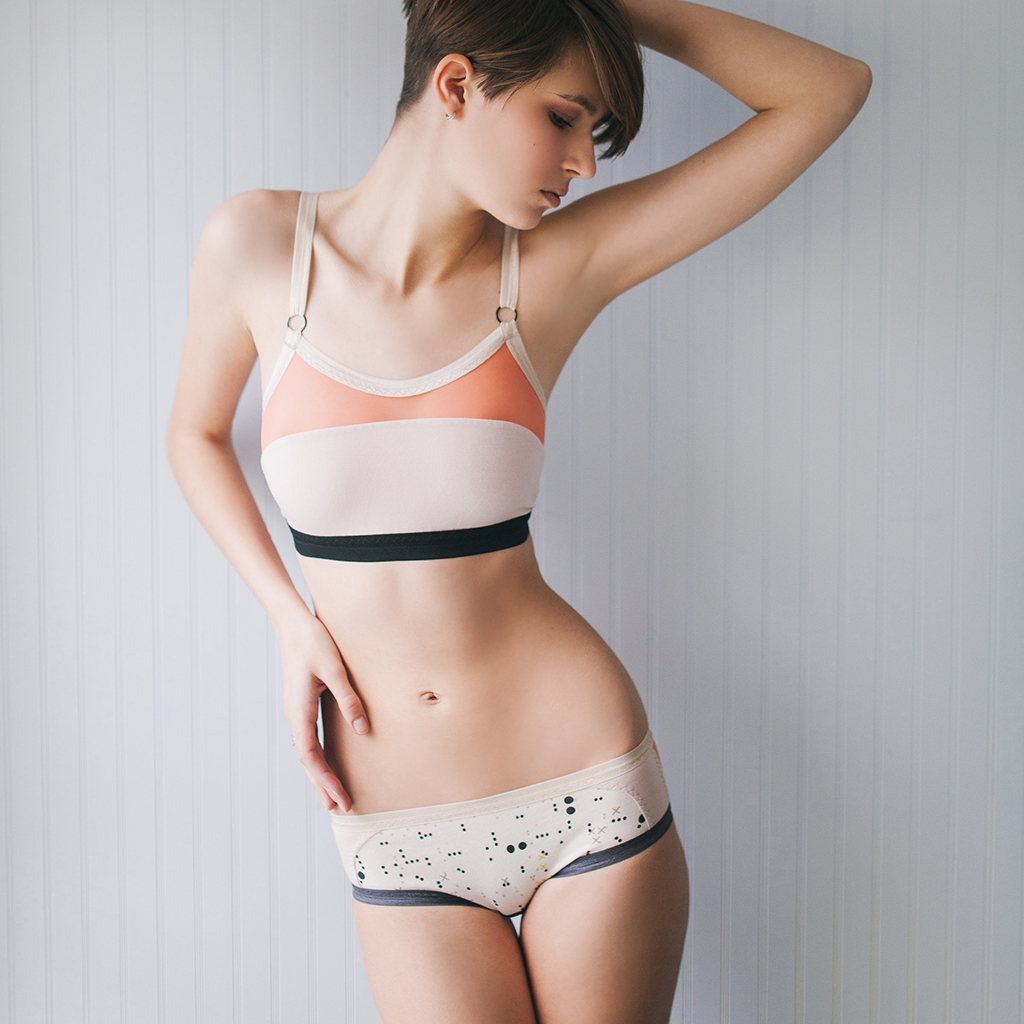
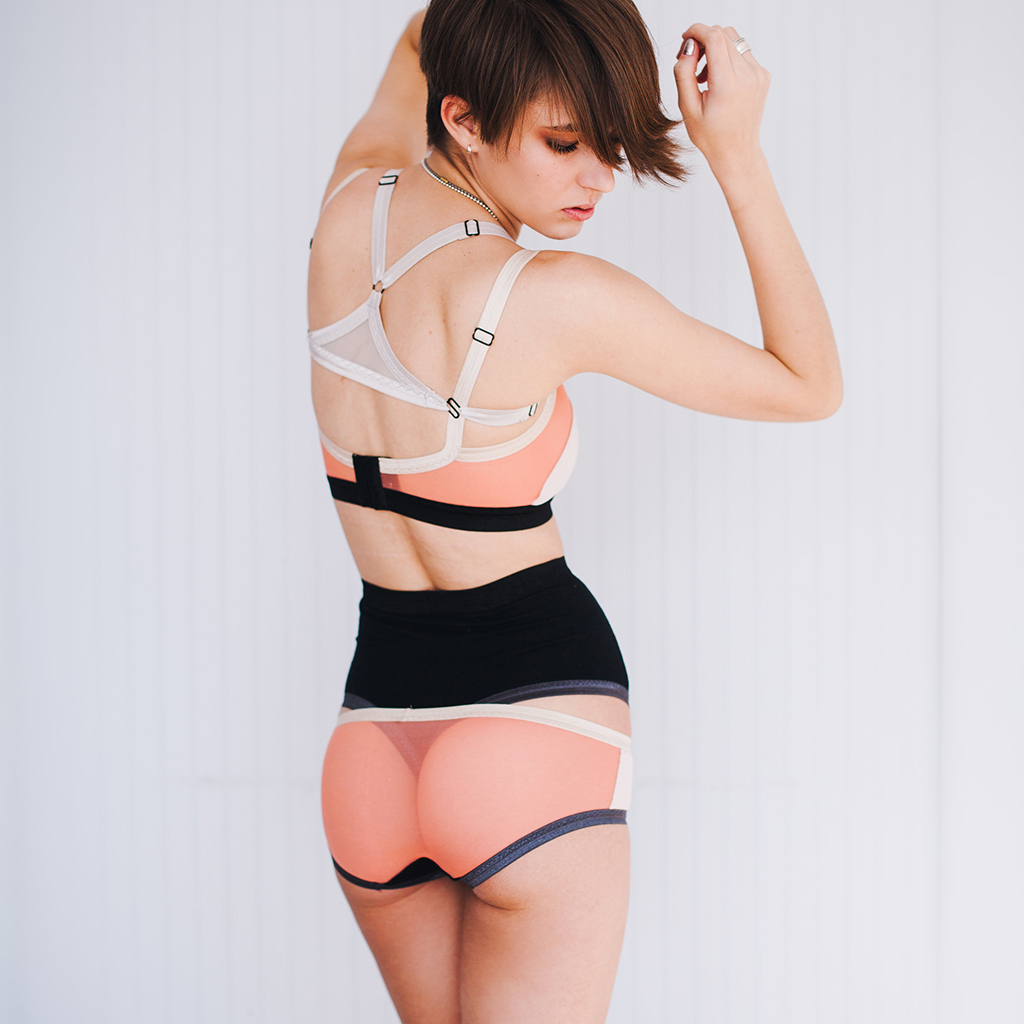
Recently, Sophie released a sewing pattern—the Euler Bra. “My most recent pivotal moment came when I decided to release sewing patterns alongside my handmade garments … It’s just so exciting to see what other people make with your tools, how they bring their style together with your techniques to make things you’d never have thought of making!"
Sophie’s Favorite Tools
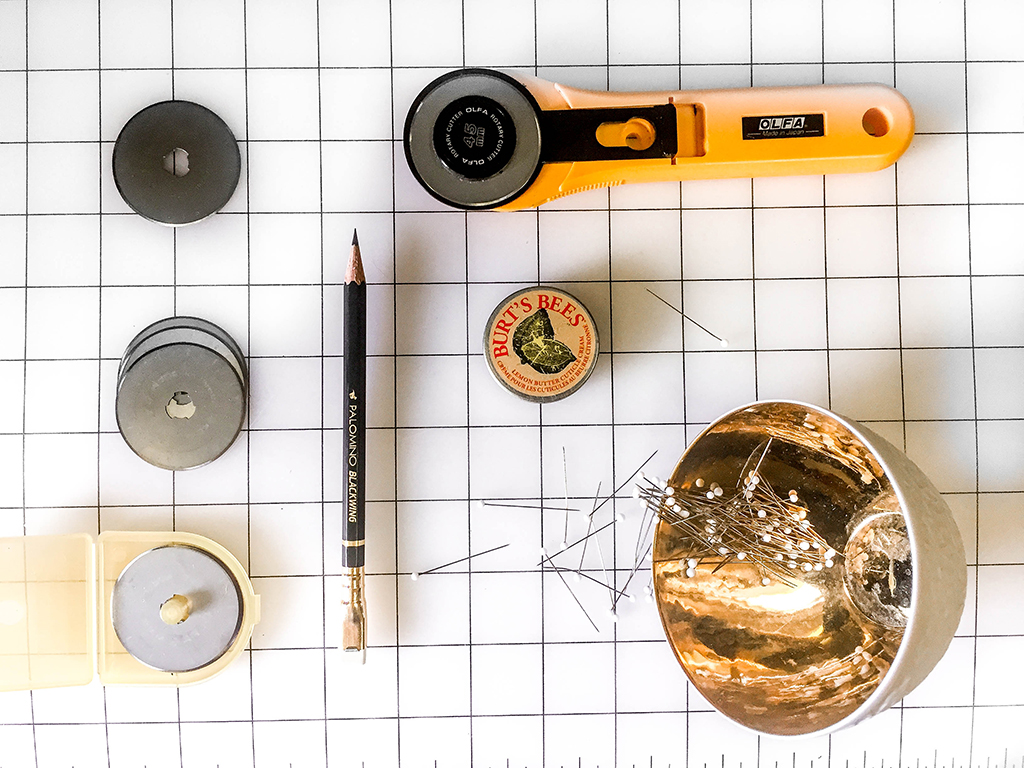
Rotary Cutter
My absolute favorite sewing tool is my super-sharp rotary cutter. I always make sure to have extra blades on hand, and I invested in the biggest cutting mat I could find—it’s four by six feet! Laying out patterns and cutting are my least favorite part of sewing, so once I invested in good tools to help me, it became much more enjoyable! If you have great tools, it becomes exciting and fun to sew, rather than dreading this or that janky machine or tool.
Glass Head Pins
I always use glass head silk pins because (a) they are pretty, (b) they are so sharp and thin that they’ll never snag your fabric, and (c) the glass heads won’t melt, so you don’t have to worry about where they are when you’re ironing!
Cuticle Cream
When you’re sewing delicate fabrics that are easily snagged, it’s super important to keep your hands nice and smooth so you don’t catch threads on rough fingertips—which can happen very easily if you prick yourself as often as I do! I use a Lemon Cuticle Cream by Burt’s Bees to keep my fingers nice and smooth, and I always have a nice hand cream nearby to keep my hands from drying out while working.
Clean-Finished Edges with Fold Over Elastic
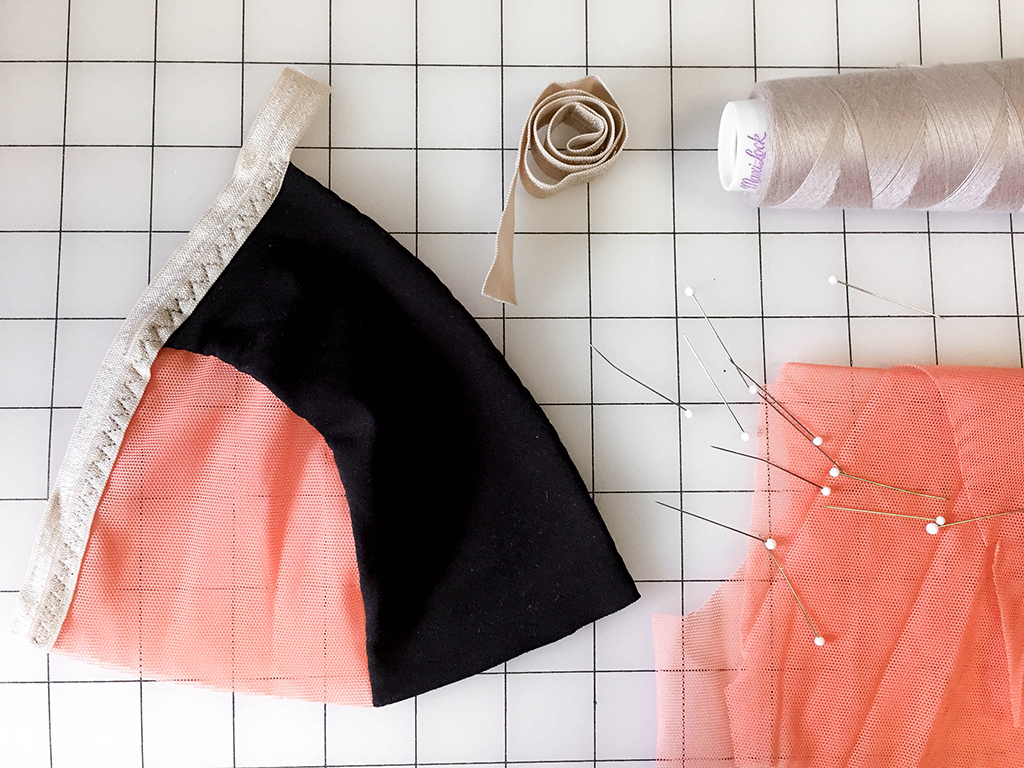
Sophie loves her garments to look as beautiful on the inside as they do on the outside. Fold over elastic traditionally encloses the raw edge of a garment by sandwiching the fabric between two layers of elastic.
This technique uses fold over elastic to create a clean finish with less bulk, making it an ideal finish for undergarments like Ariane or Geneva. In this step-by-step tutorial you will learn how to apply this finish to the cups of a bra, but you can easily use the same technique on underwear or a bodysuit.
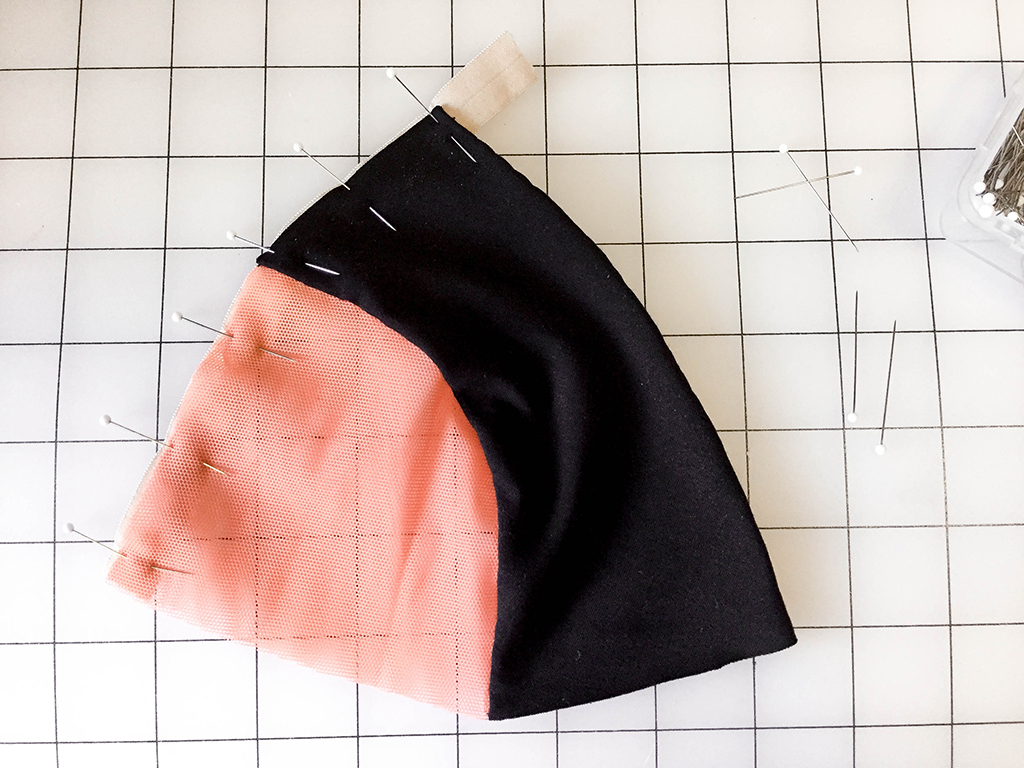
Step One
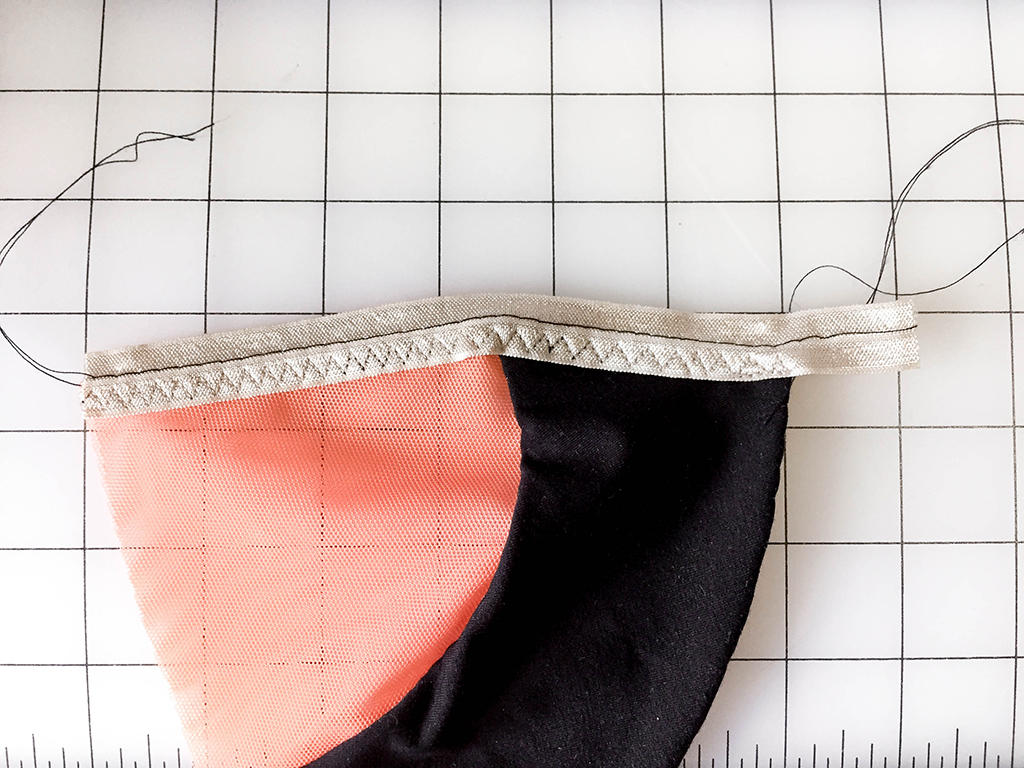
With wrong sides together, match the elastic to the outside edge of the cup, keeping the right side of the garment facing you.
Align the fabric to be about 1/16 or 1/8” from the edge of the elastic. Pin the elastic to the fabric, stretching the elastic slightly to fit. This keeps the seam allowance from peeking out when it's folded to the right side.
NOTE: If you’re applying trim to something that is already in the round, like the waistband on a pair of underwear, sew your elastic into a circular band before pinning. Measure and mark your fabric and elastic band into quarters, then stretch and pin evenly. This will distribute the elastic and material evenly throughout the waistband.
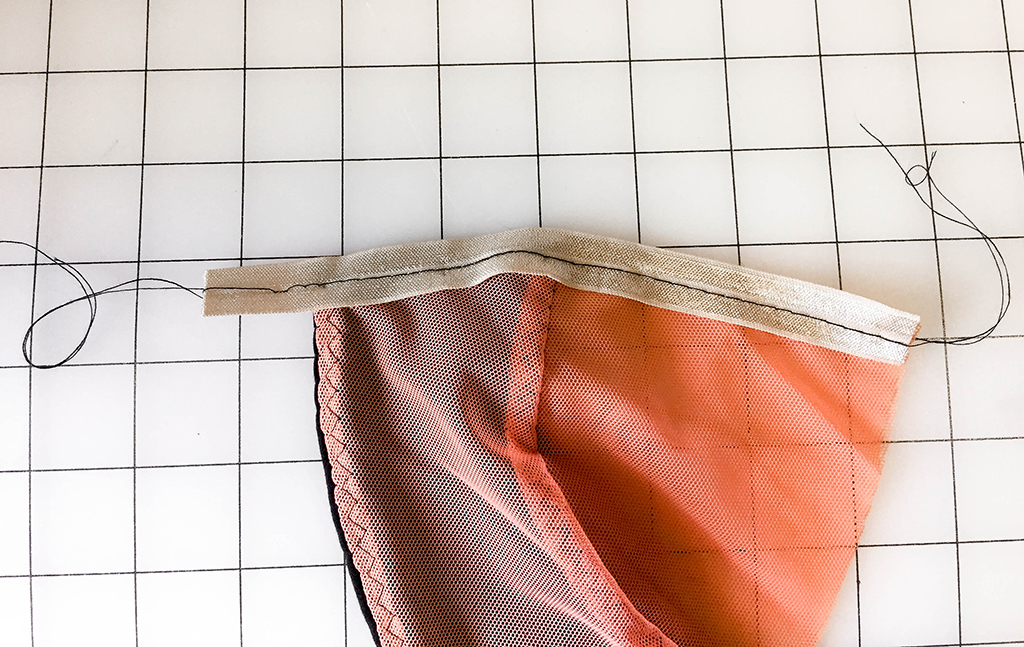
Step Two
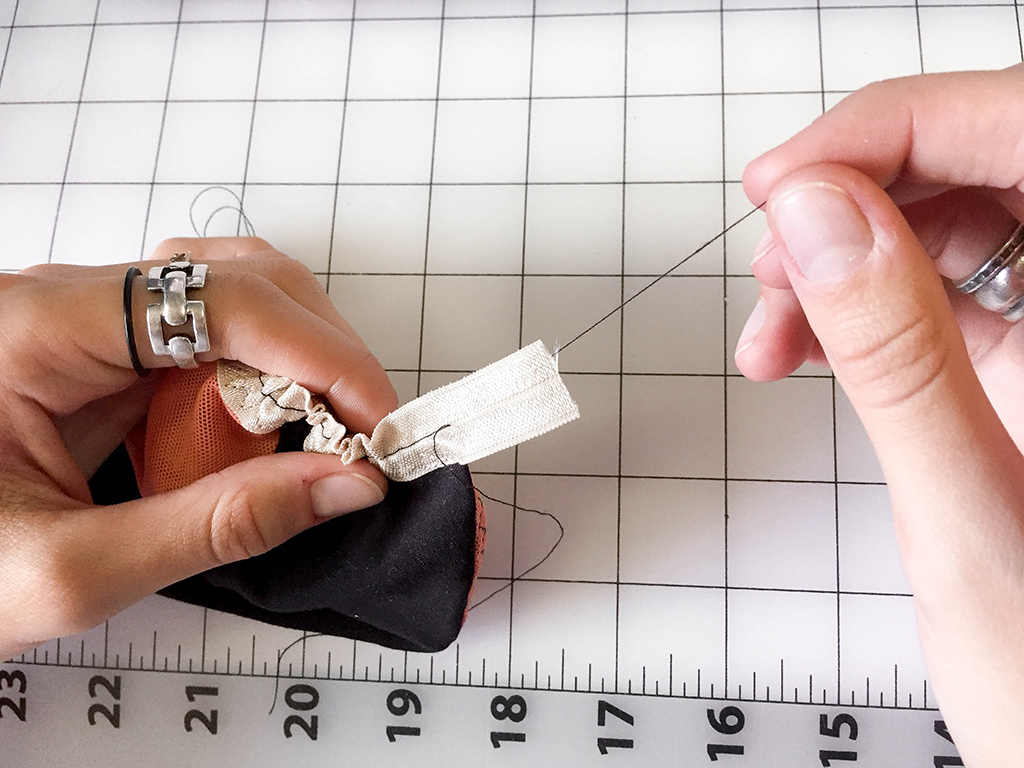
Baste along the center of the trim with a contrasting thread. This will make it much easier to remove later, and help keep you from snagging your delicate trim if you have to use a seam ripper. If you have any seam allowance peeking out past the edge of the elastic, now is the best time to trim it.
Step Three
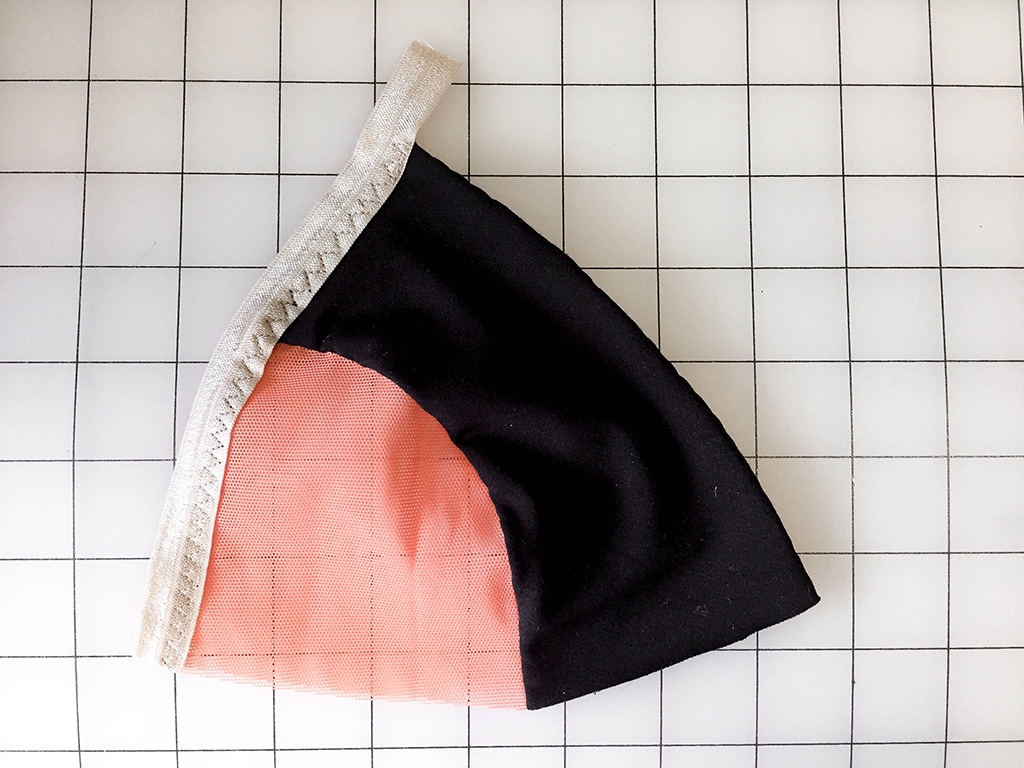
Fold your trim toward the right side of the garment.
If your trim extends beyond the edge of the garment, like the strap of Ariane, reinforce the inside edge where the elastic meets the fabric with a 1/2” backstitch along the inner edge of the elastic.
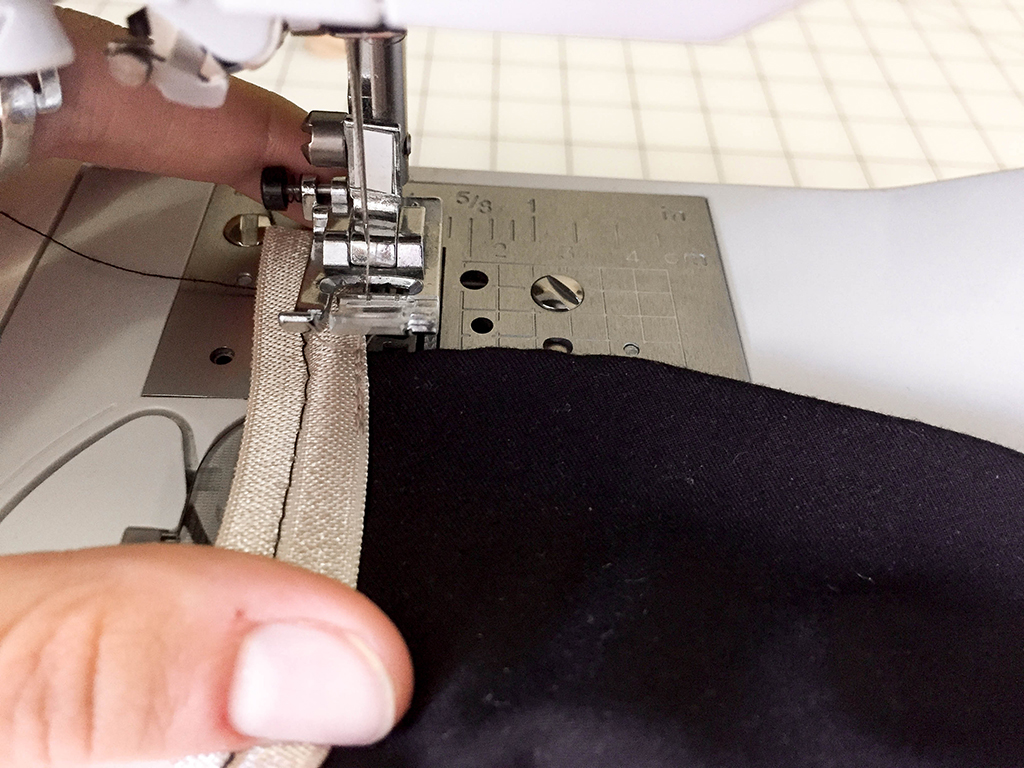
Step Four
Using a three-step zigzag stitch (a regular zigzag stitch also works, but offers less resilience under high stretch), sew the inside edge of the elastic, being careful not to sew over your basting. Be sure that your zigzag stitch is wide enough to catch the seam allowance.
Step Five
Remove your basting stitches.

Step Six
Voilà ! A beautifully applied trim with a perfectly clean finish.

About the Author
Katie teaches new skills through in-depth tutorials, sewalongs, and articles for Seamwork Magazine and The Colette Blog. She’s all about encouraging sewers to try new techniques and create a personalized wardrobe that makes them feel great!