Sign In
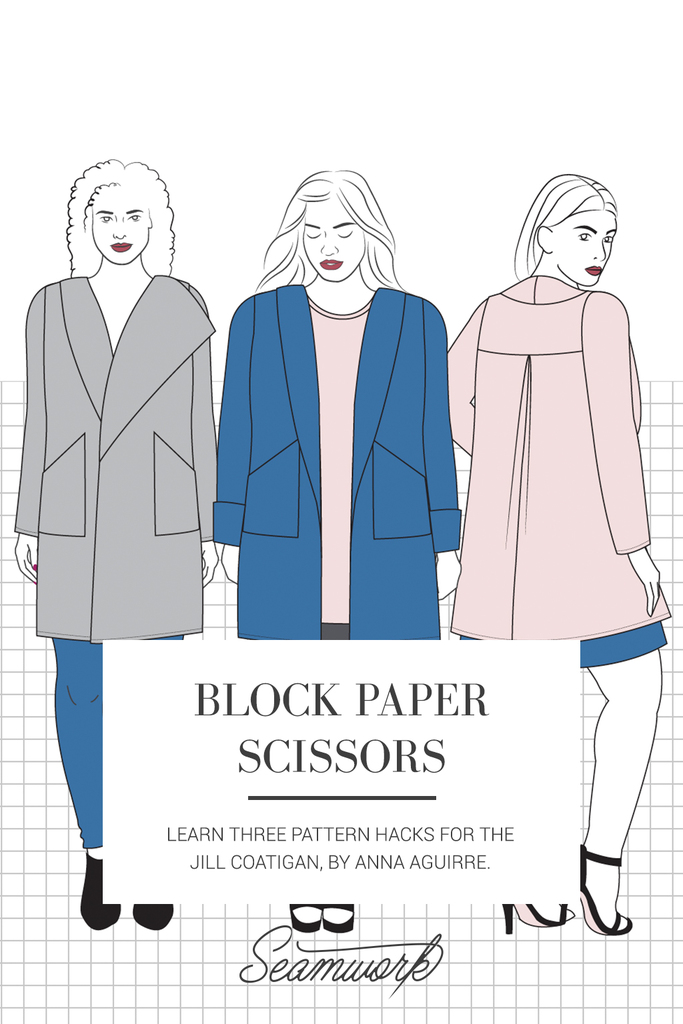
Block Paper Scissors is a monthly column that teaches three pattern hacks. These hacks help you give your Seamwork patterns a custom spin—all you need is paper, a ruler, and a pencil!
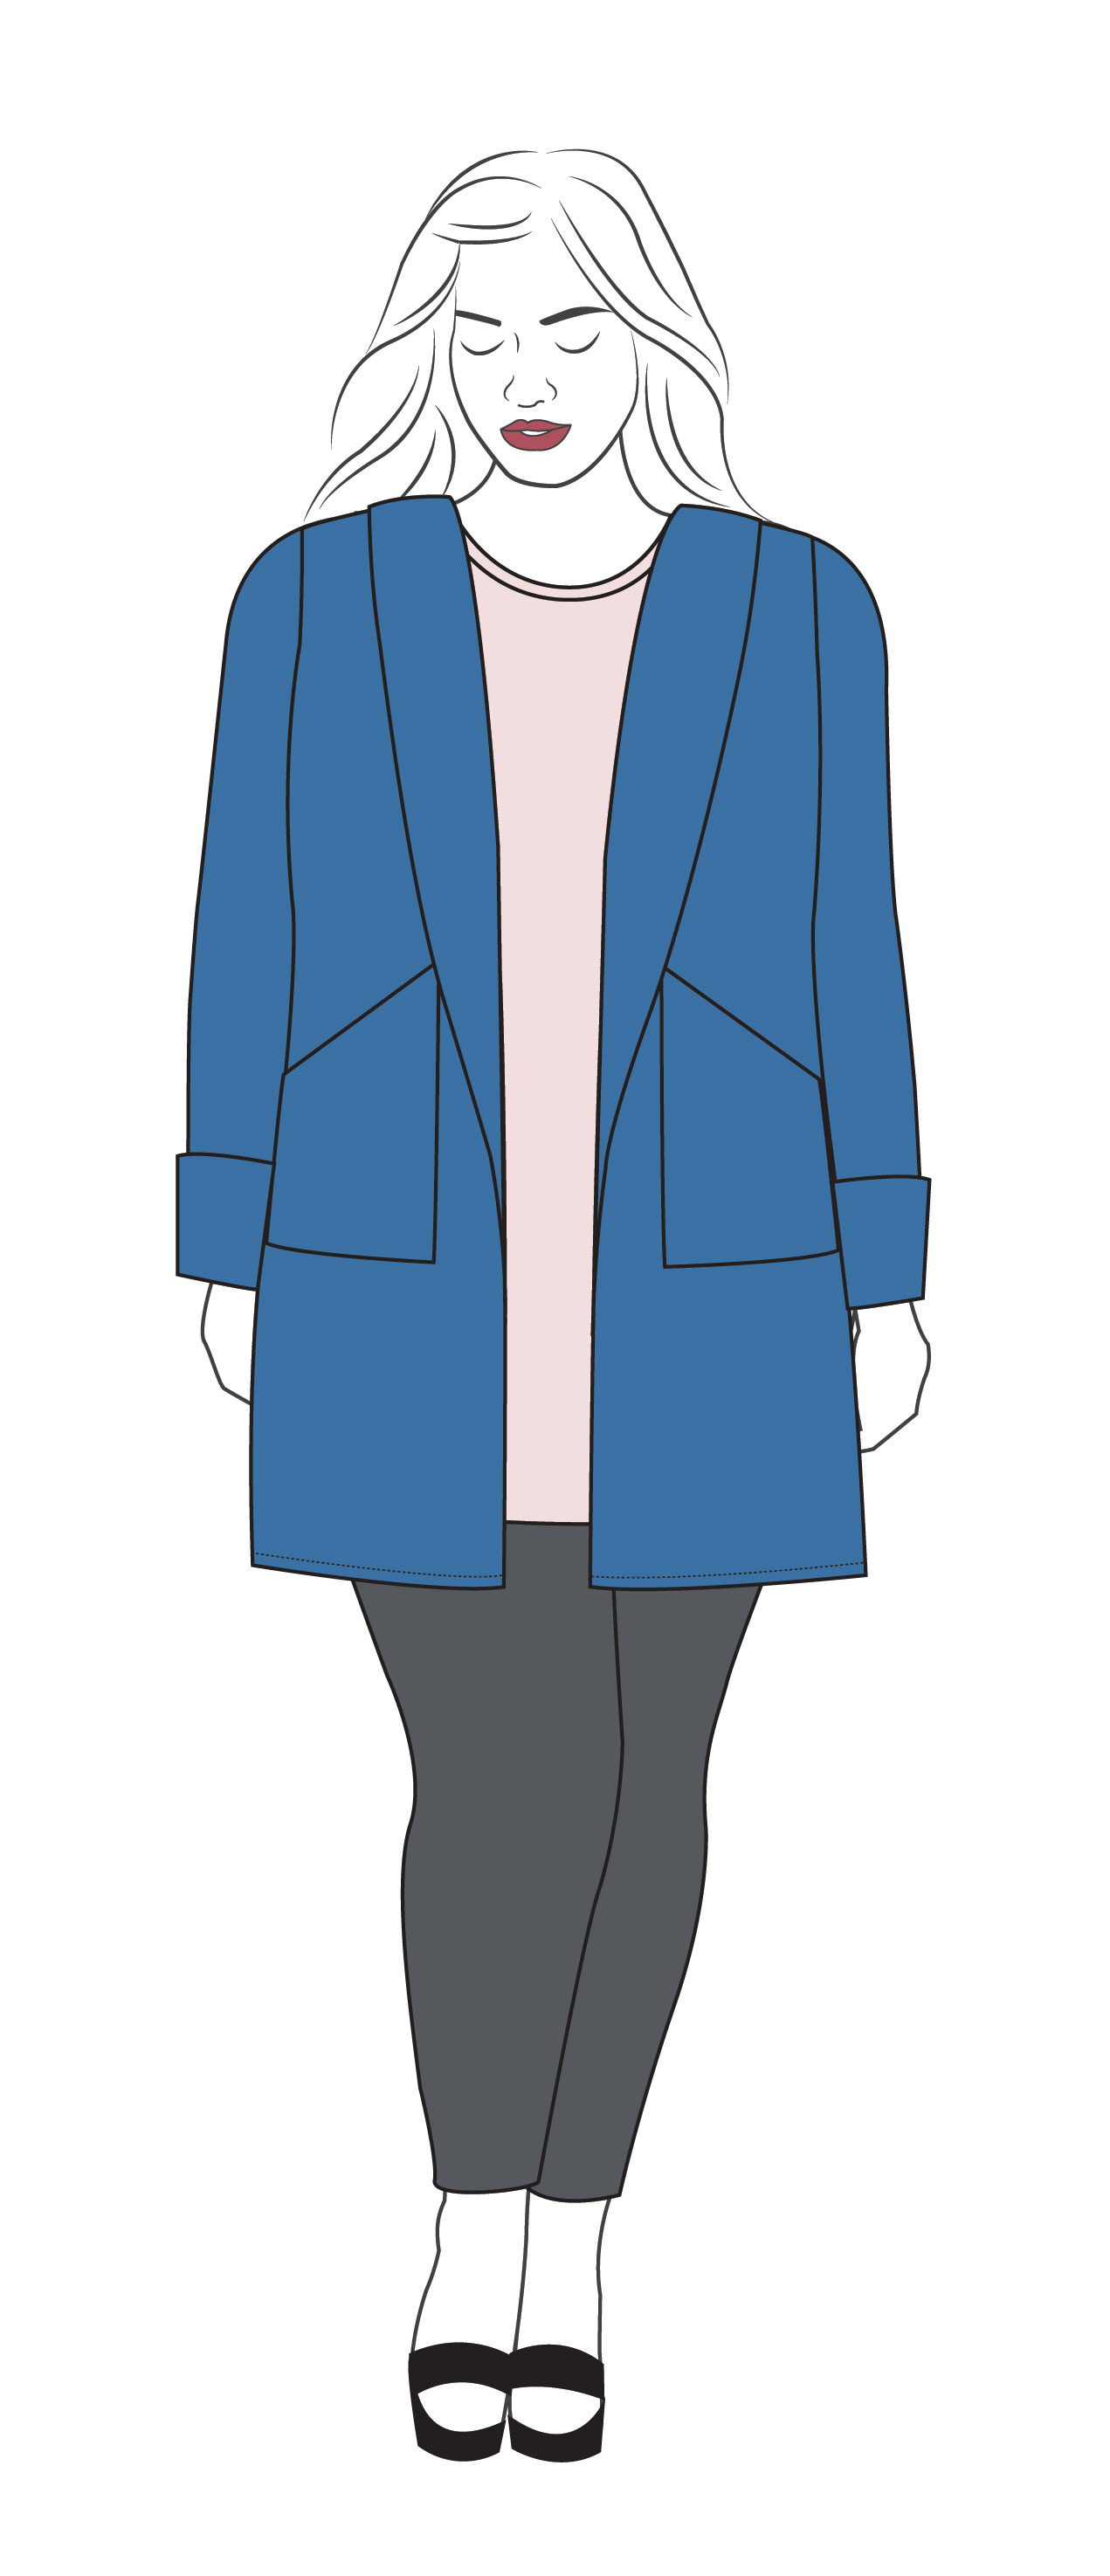
This month we walk you through three different pattern hacks for the Jill coatigan. Learn how to create an asymmetrical front with an oversized lapel, sleeve cuffs, and a back yoke with a center back pleat.
Note: For best results, be sure to make any necessary fit adjustments before hacking your pattern.
You'll Need:
- Jill
- Paper
- Pencil
- Scissors
- Clear ruler
- French curve
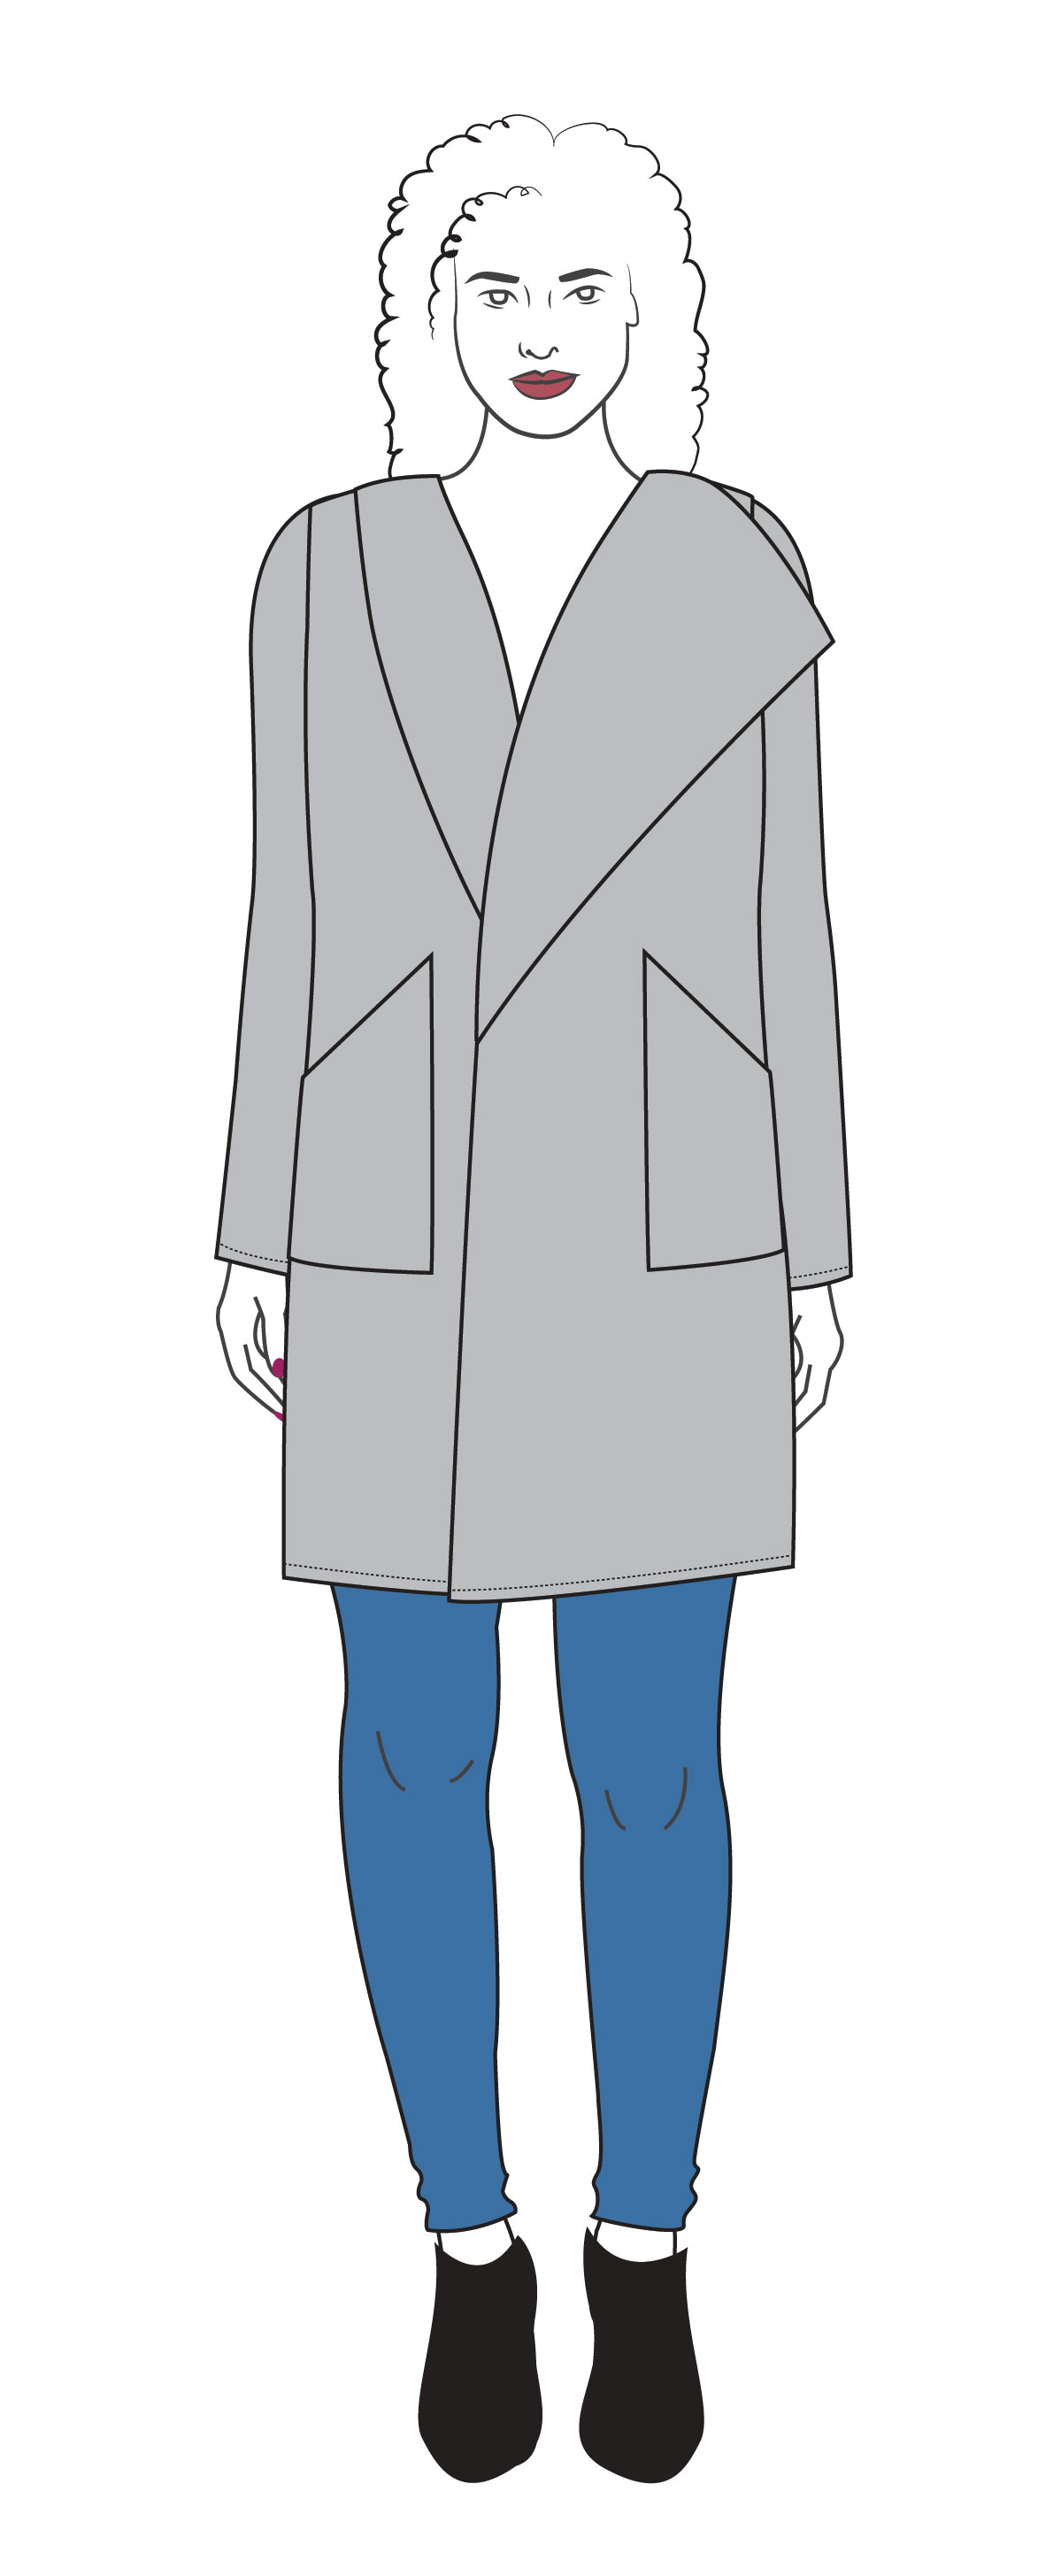
Create an asymmetrical front with an oversized lapel
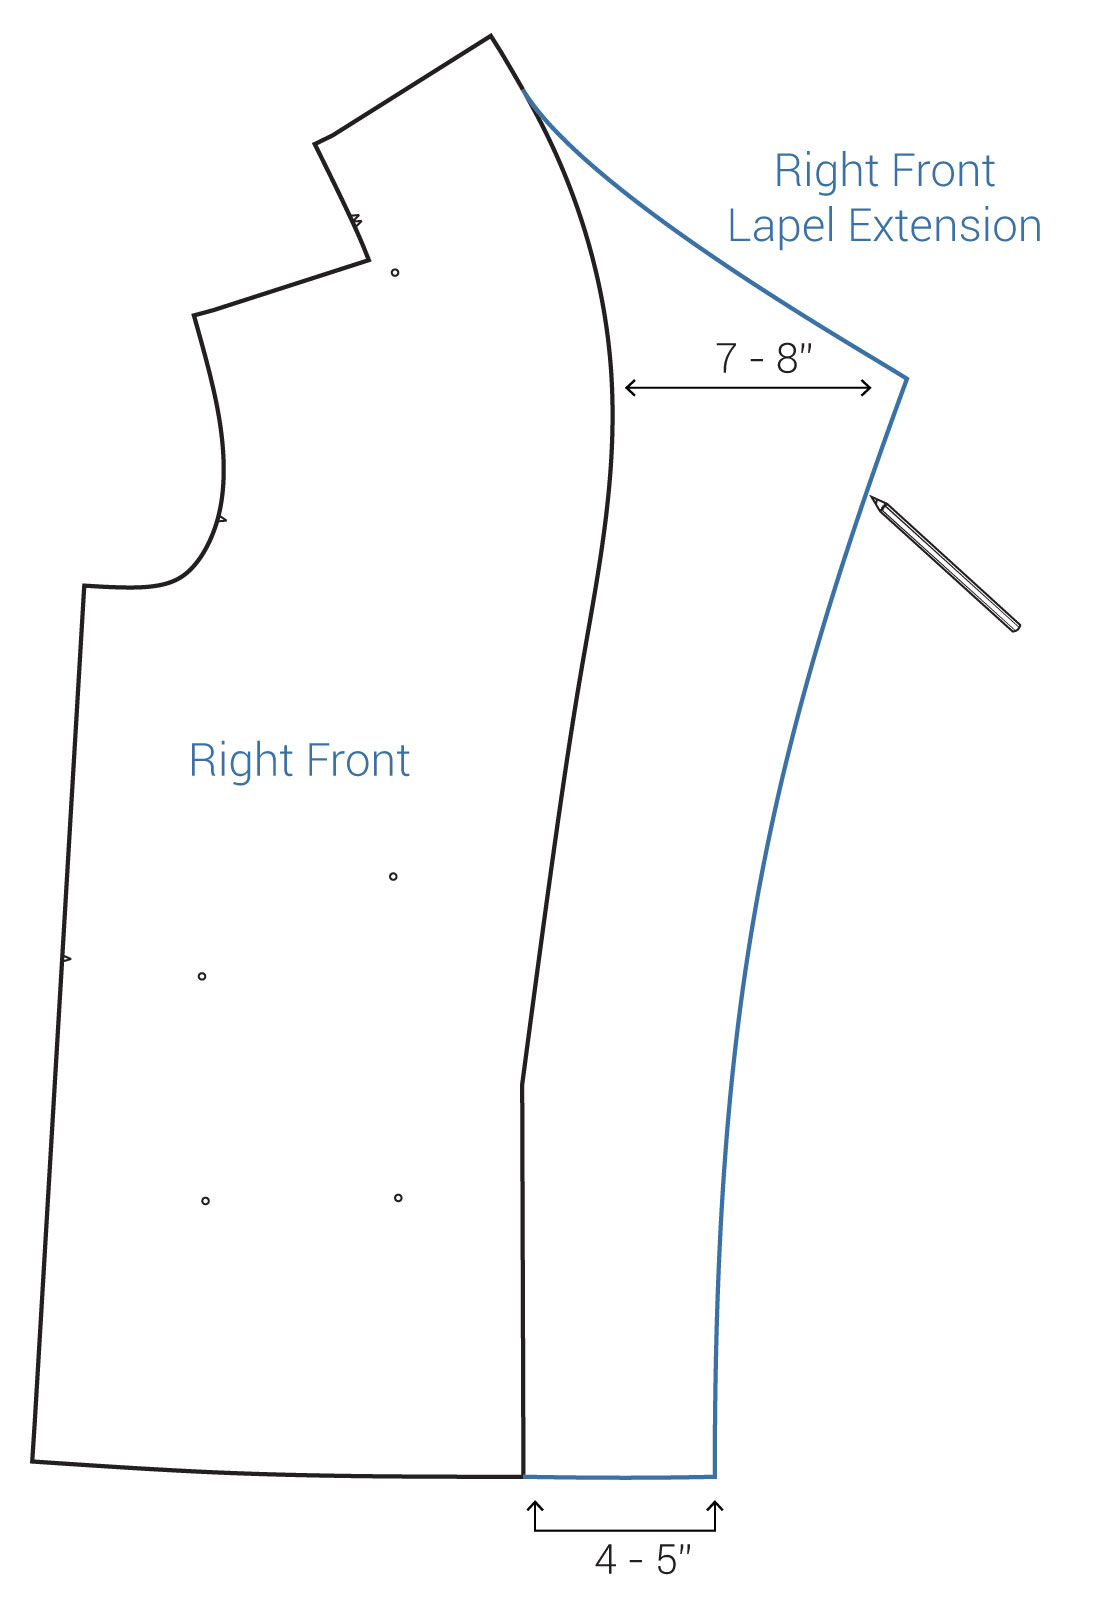
This particular hack for the Jill coatigan is rather freeform. Depending on your personal preference, you can make the pattern adjustments to suit your design style. You can make the oversized lapel as wide as you’d like and adjust the point of the lapel to hit at different angles.
Step | 01
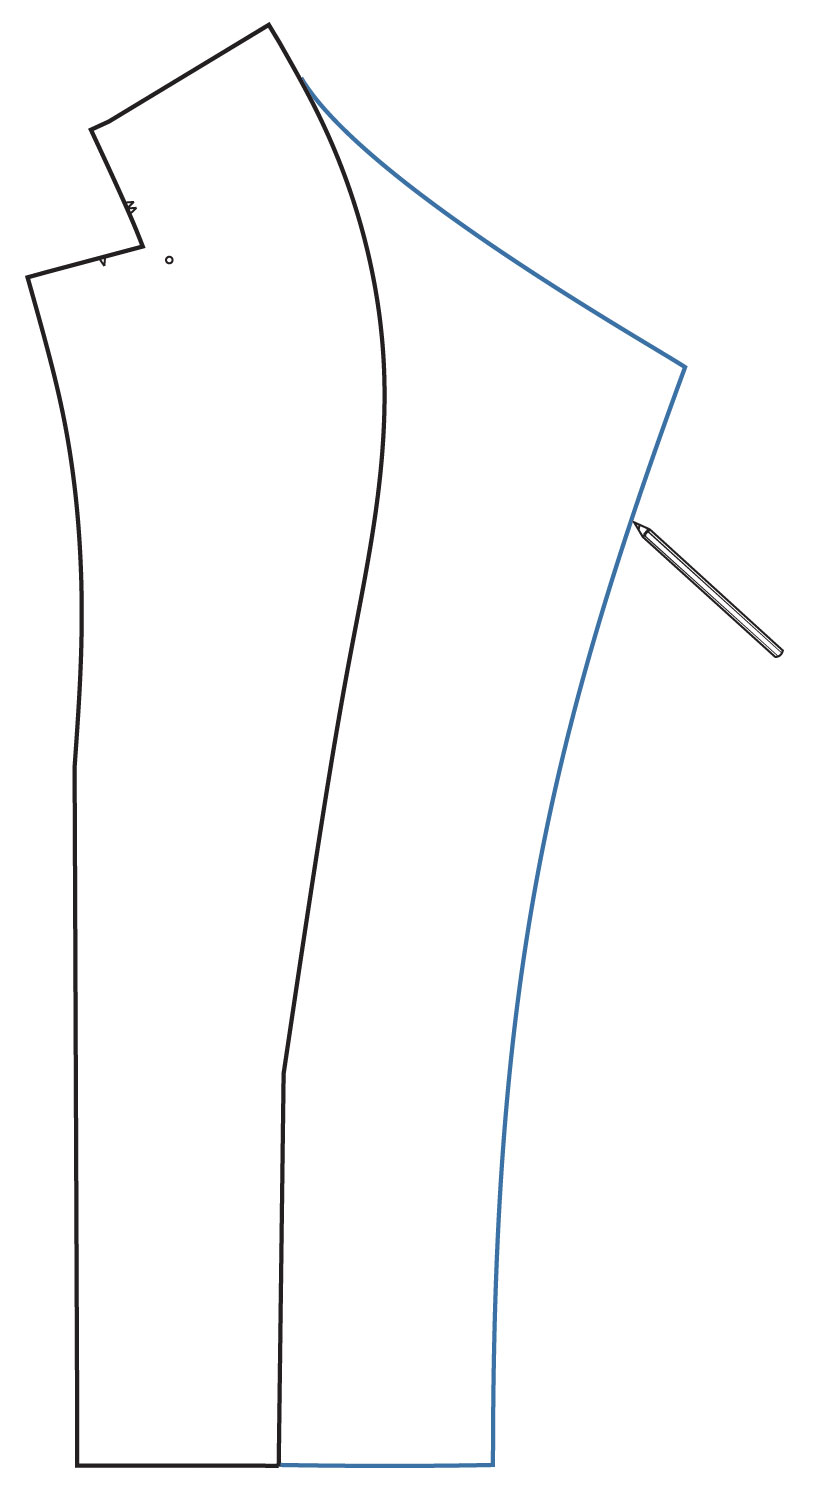
To copy this hack, first measure out 4-5” from the center front hem of the right front (A).
Step | 02
Find the widest part of the curve on the front (A) lapel. From that area, measure out 7-8”.
Step | 03
Blend from the neckline to the lapel point, then down to the new hemline. Adding a slight curve to the line will help the fabric lay more attractively on your body.
Step | 04
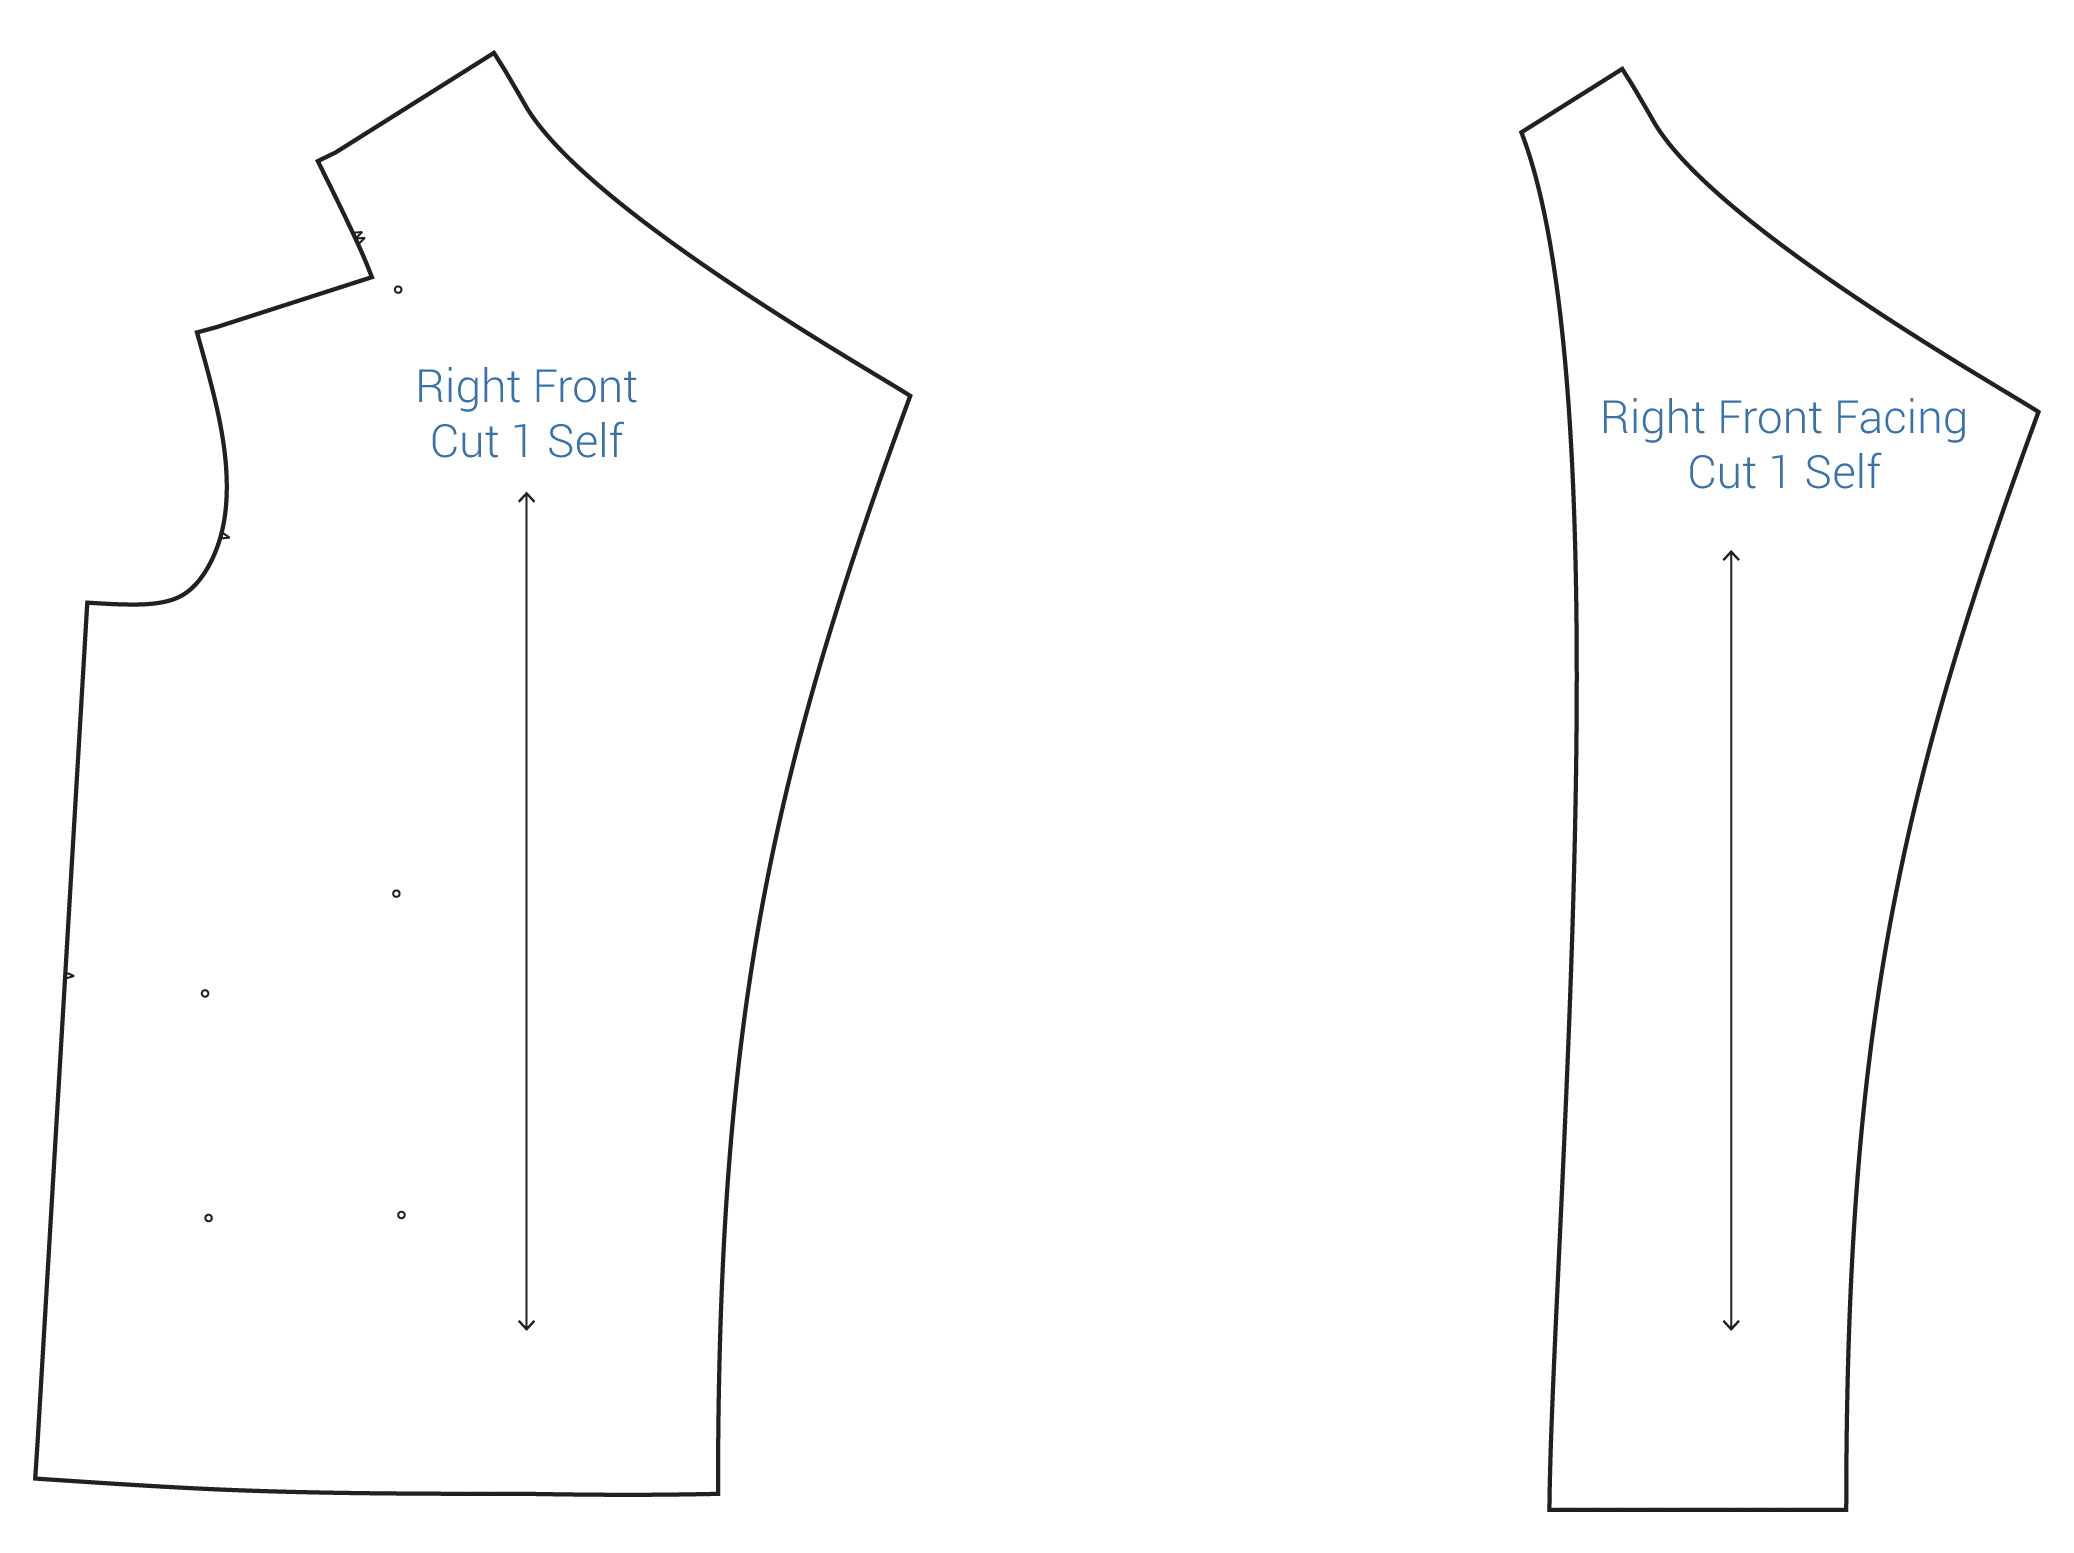
Trace and transfer the lapel extension you created in the previous steps onto the front facing (D).
Step | 05
Label the right front (F) “cut 1,” and the right front facing (G) "cut 1."
Step | 06
Follow the original instructions to assemble these pieces and finish the garment.
Add sleeve cuffs
Step | 01
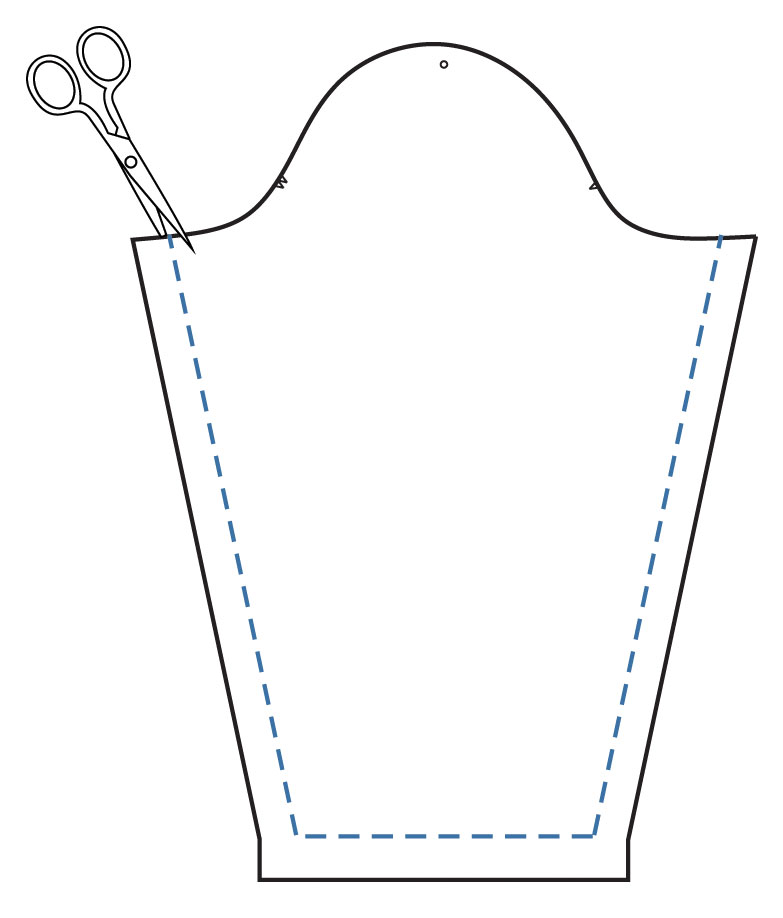
Remove the seam allowance on the sleeve (C) piece, along the underarm seams and hem.
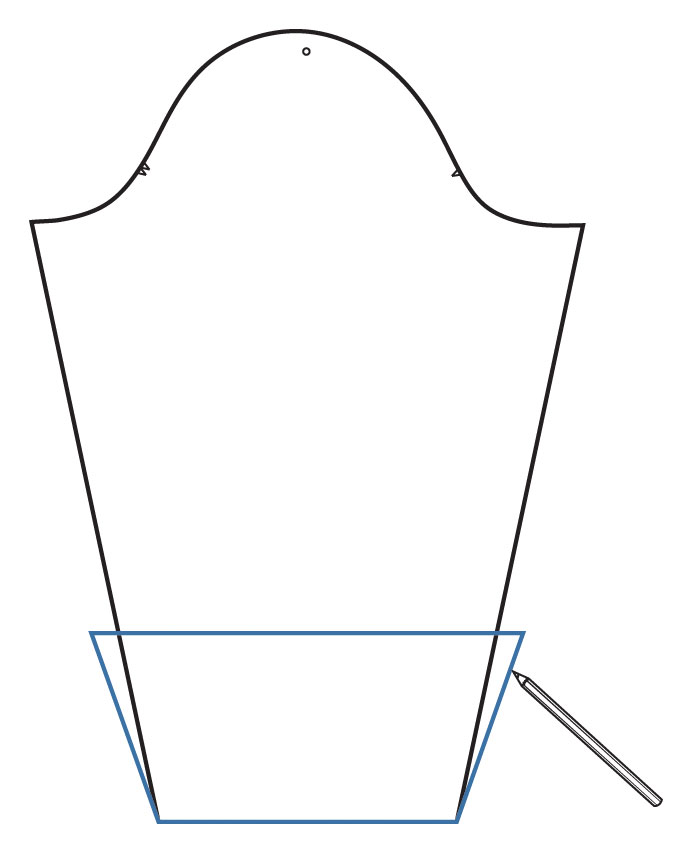
Step | 02
Trace a cuff piece, using the sleeve (C) from step 1 as your guide. Make sure that the bottom edge of the sleeve cuff is the same width as the bottom edge of the sleeve (C), as you will sew these pieces together. Make the sleeve cuff as wide as you’d like. For a dramatic effect, make the sleeve cuff 4-5” wide. Slightly angle the side edges of the cuff out and away from the edge that will be attached to the sleeve (C).
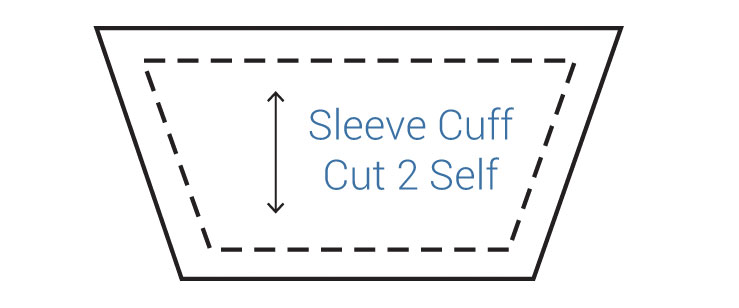
Step | 03
Add seam allowance to the sleeve cuff and label “cut 4 .” Add seam allowance to the sleeve (C).
Step | 04
Follow the original pattern instructions to sew the rest of the coatigan.
Step | 05
To assemble the cuff, with right sides together, sew the angled sides. Press.
Step | 06
Use a single-fold hem to finish the widest edge of the cuff.
Step | 07
To attach the sleeve cuff, match the right side of the sleeve cuff with the wrong side of the sleeve, aligning seams. Pin. Stitch.
Step | 08
Flip the sleeve cuff to the right side of the sleeve, covering the seam allowance. Press.
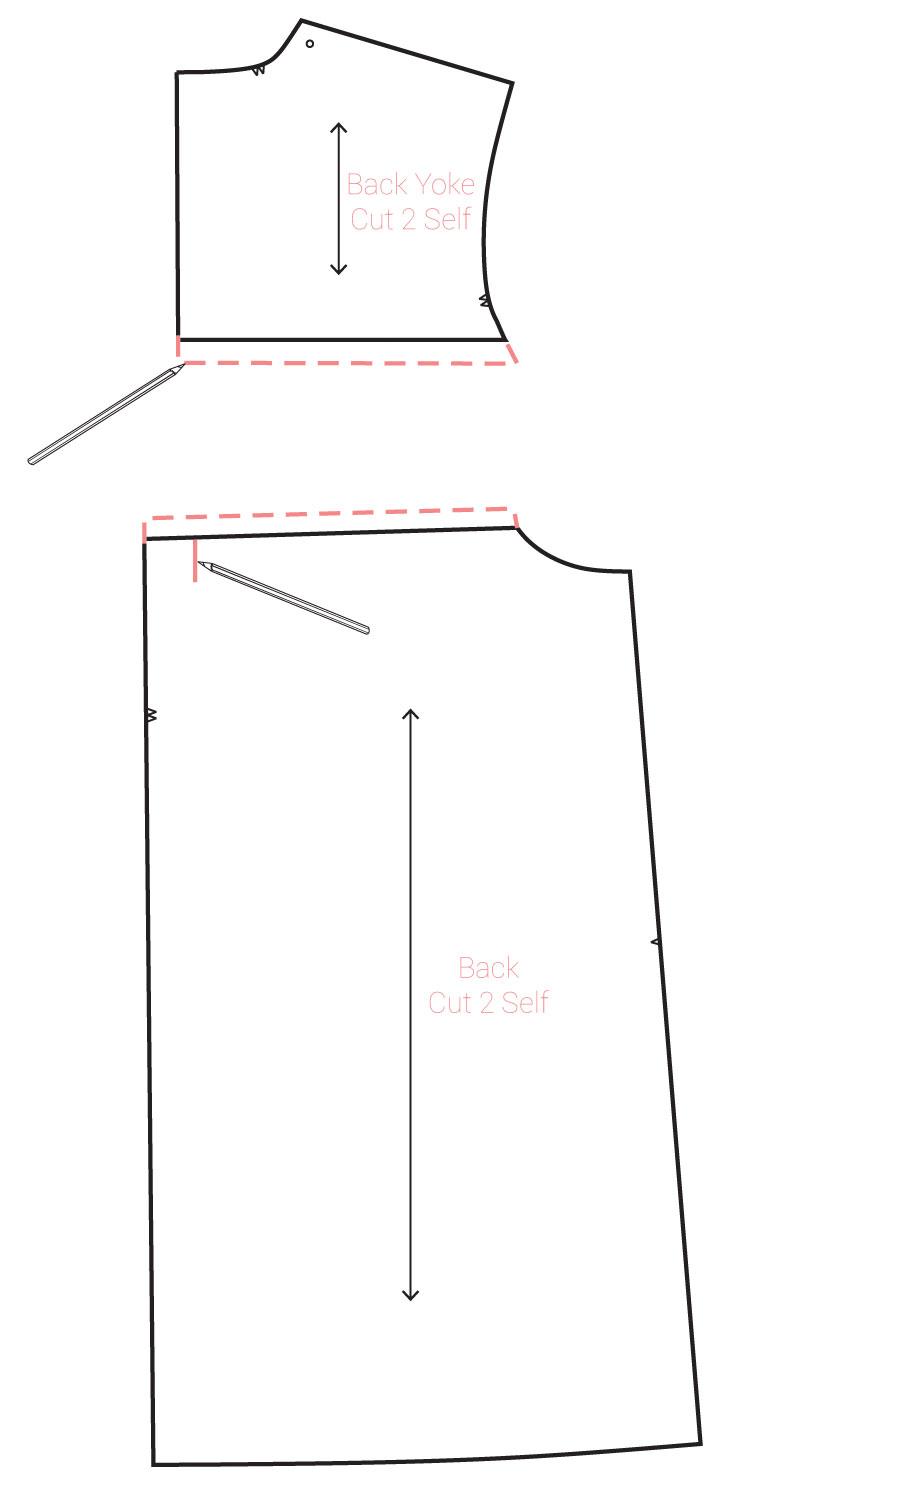
Create a back yoke and center back pleat
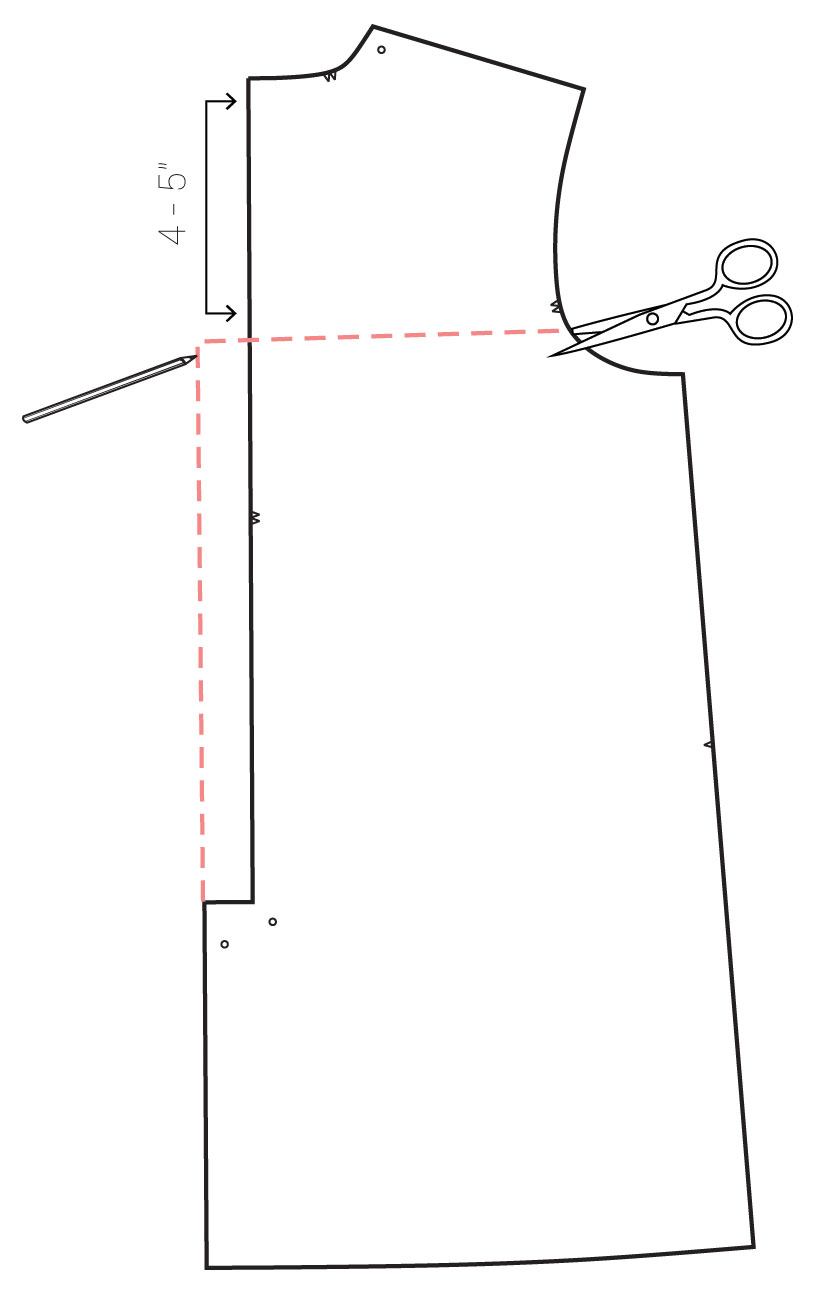
Step | 01
Measure down from the center back neckline approximately 4-5”. Draw a perpendicular line from the center back seam to the armhole.
Step | 02
Draw a line parallel to the center back seam, following the center back kick pleat line, and going up to intersect with the first line you drew in step 1.
Step | 03
Cut along the line from step 1.
Step | 04
Add seam allowance to the bottom edge of the back yoke piece and label “cut 2.”
Step | 05
Draw a lower back piece, removing the kick pleat markings and adding seam allowance to the top cut line. Mark a line where the original center back seam was; this will now become a pleat marking. Label this piece “cut 2.”
Step | 06
To assemble the back of the coatigan, with right sides together, sew the lower back pieces together at the center back.
Step | 07
Repeat step 6 with the back yoke pieces.
Step | 08
Fold the pleat marking toward the center back seam to create an inverted box pleat. Stitch the pleat in place.
Step | 09
With right sides together, sew the back yoke unit to the lower back coatigan unit.