Sign In
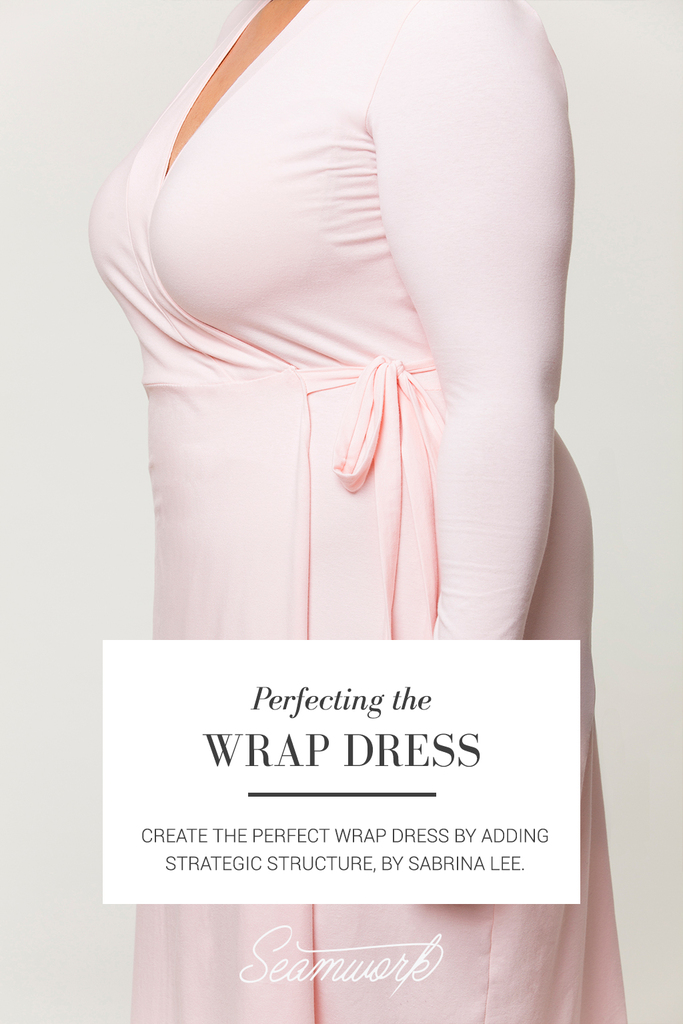
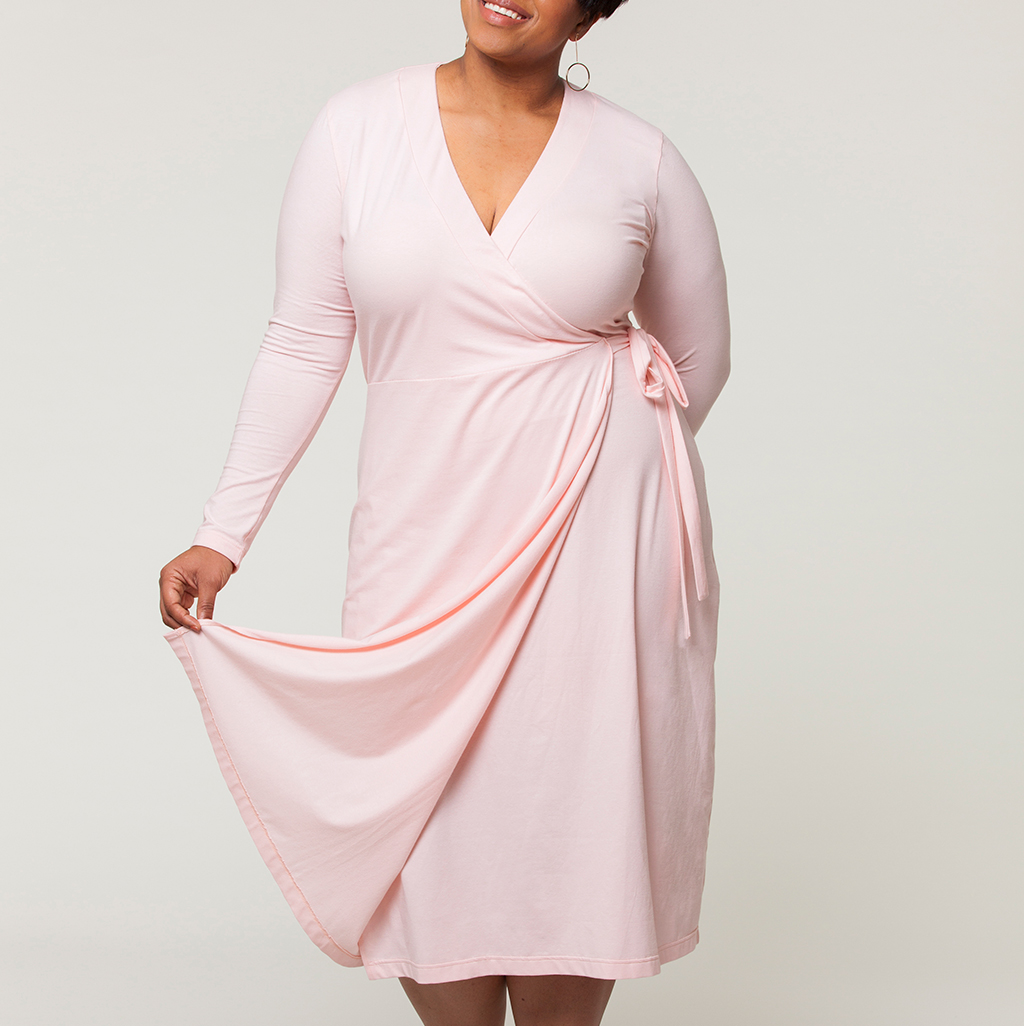
This spring, I came down with a severe spring fever of a unique kind—I became obsessed with the wrap dress. Fueled by countless hours on the Diane von Furstenberg website, I began churning out these dresses in rapid succession. Some were rendered in dizzying prints, others were subdued and work-appropriate, but they each had a unique personality all their own. While I loved the versatility of the wrap dress design, there were structural issues that left something to be desired. The neckline often gaped around the bust; the waist rode up after a few hours of wear; the skirt flew up in gusts of wind, à la Marilyn Monroe.
Through trial and error, I learned some simple techniques for fixing these issues, which resulted in longer-lasting, more secure wrap dresses that could withstand the rigors of everyday life.
Sewing patterns for wrap dresses do not detail many of these steps, but they can be easily incorporated into any wrap dress project.
Selecting a fabric
It starts, as always, with picking the right fabric. In my experience, what most differentiates a wrap dress that looks cheap from one that seems polished and expensive is the weight of the material. Thinner fabrics will highlight any lumps and bumps, so using a sturdier knit is key! This is a particular problem if you are buying fabrics online and don’t have a chance to feel the weight of the fabric first.
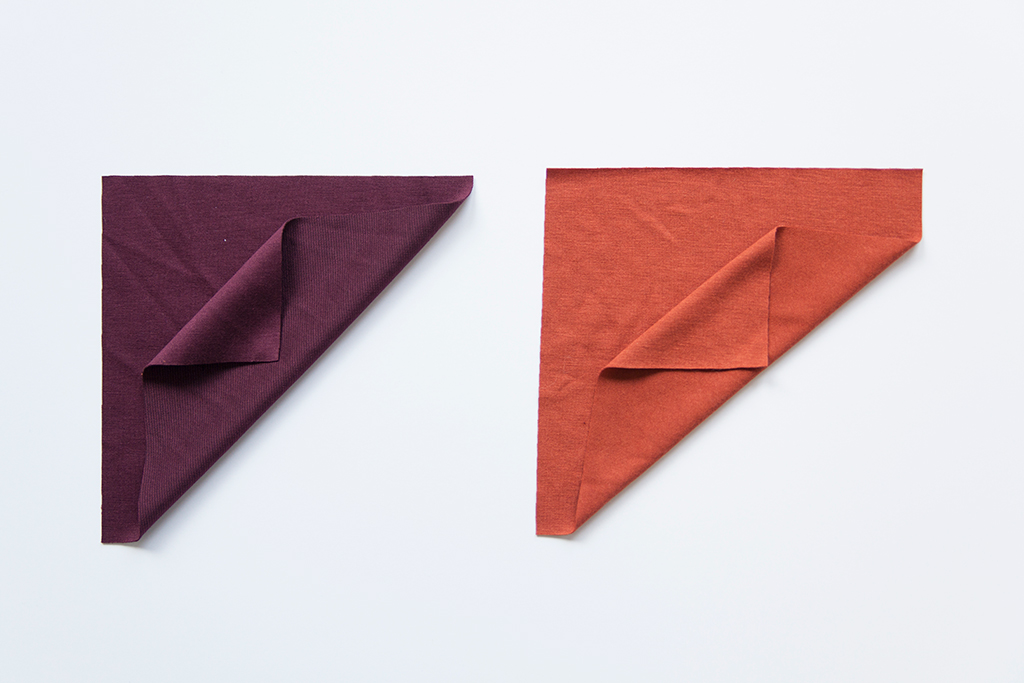
Sturdy medium weight knits (left) create a more flattering wrap dress than light weight (right) knits.
Recently, I became enamored of a fabric that I found online, and in the midst of my infatuation, I bought the fabric without requesting a swatch first. To my dismay, the fabric ended up being so thin that the ridges of my underwear showed through the dress. The moral of the story? Swatch, swatch, swatch! Or, if you really can’t wait for the swatch, look for fabrics that are described as “medium weight” or “14 oz.” These fabrics will have the heft needed to disguise any lumps and bumps.
Creating structure
One of the great advantages of the wrap dress is how easy it is to construct and wear—no corsets or boning here! Nonetheless, even the nonchalant wrap dress can benefit from a few structural additions here and there, to stop it from shifting as you move around during the day.
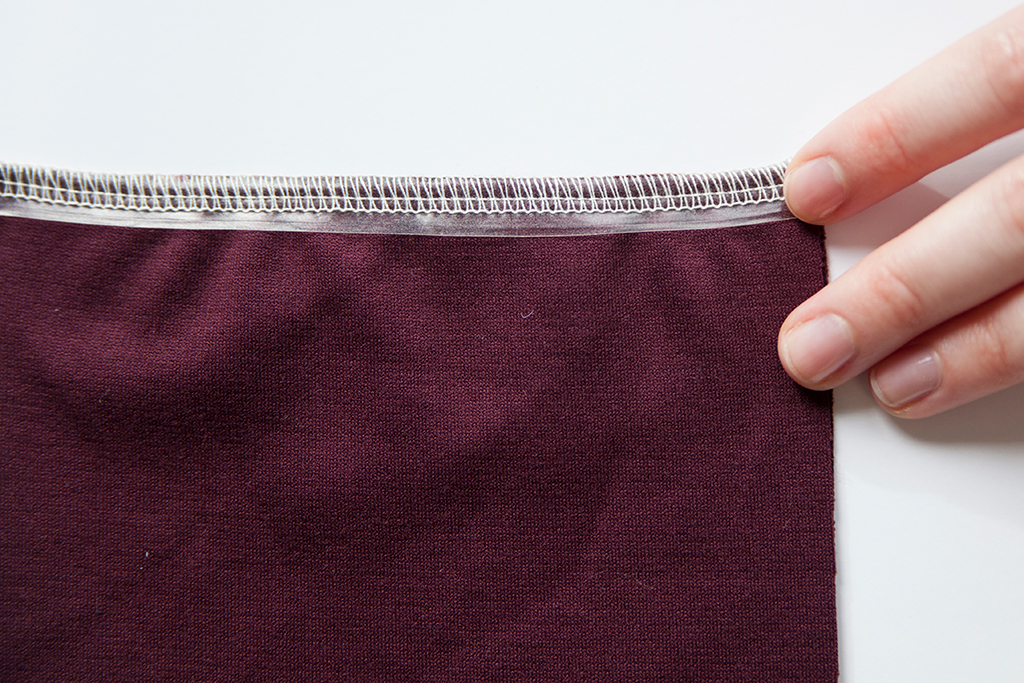
Interfacing
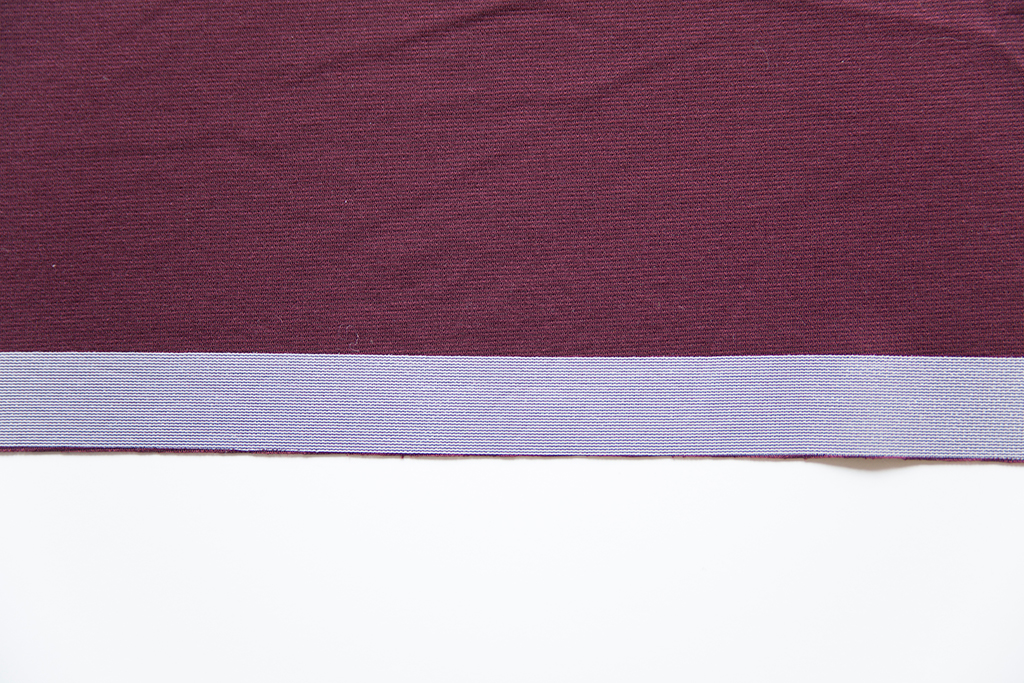
Add knit interfacing to hems for a crisp and professional finish.
Take the time to interface the hem, cuffs, collar, and waist ties, even if the pattern does not call for it. Do not skip this step, unless your fabric is sturdy—like a ponte knit—and has a lot of structure already! In addition to giving the bow a much crisper look, the interfacing also ensures the waist ties lie smoothly and don’t stretch out over time. I usually only use one layer of interfacing (i.e., I interface half of the waist tie fabric piece, which is then folded over), as I find two pieces of interfacing to be too bulky.
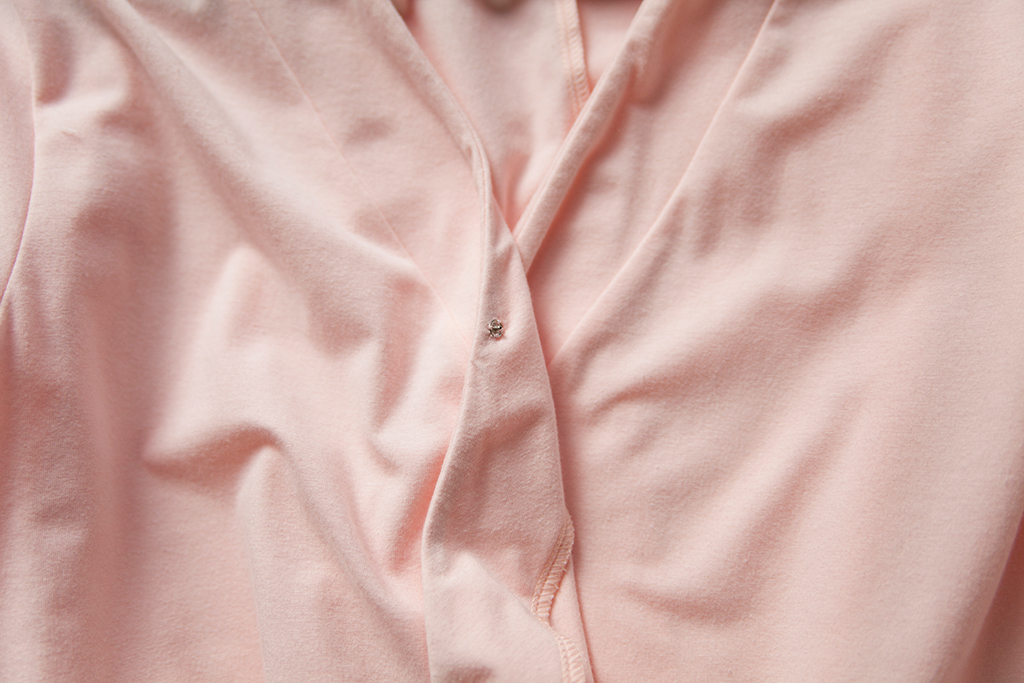
Elastic
Use elastic to reinforce the neckline, shoulder, and waist seams. The method used to finish the neckline may vary from pattern to pattern, but whether the neckline is turned and stitched, faced, or finished with a band, adding clear elastic to this edge helps to minimize any gaping.
On patterns that use facings at the neckline, I prefer to use elastic as the finishing technique instead. This method couldn’t be easier to apply. Pin the elastic to the fabric edge on the wrong side, stitch with a zigzag stitch or serger, then fold the edge with the elastic over and stitch down, again using a stretch stitch. Utilizing this finish instead of a facing will help you to avoid the issue of the facing perpetually flopping out, which is one of my pet peeves with facings.
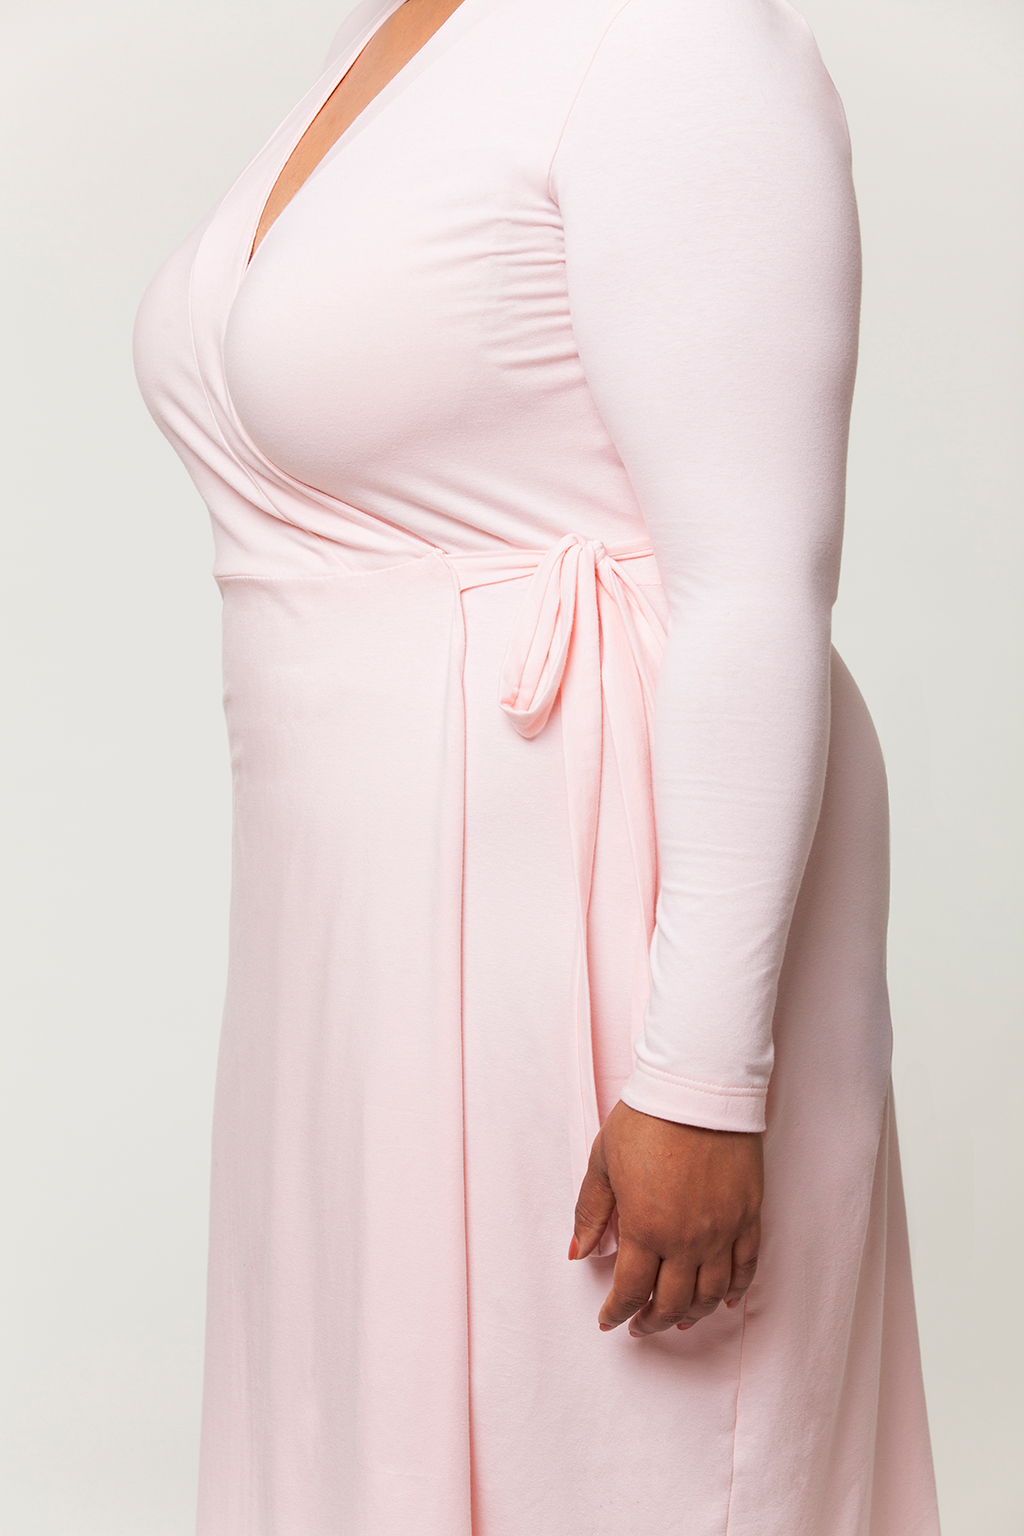
Add clear elastic to the shoulder seams of your dress and other areas that are prone to stretching.
I also add clear elastic at the shoulders and waist to stop those seams from stretching out, and to stop the waist from riding up or dropping down. This is a problem in particular with full-length wrap dresses, when the weight of the fabric drags the waistline down without the stability of the clear elastic, which functions as a waist stay.
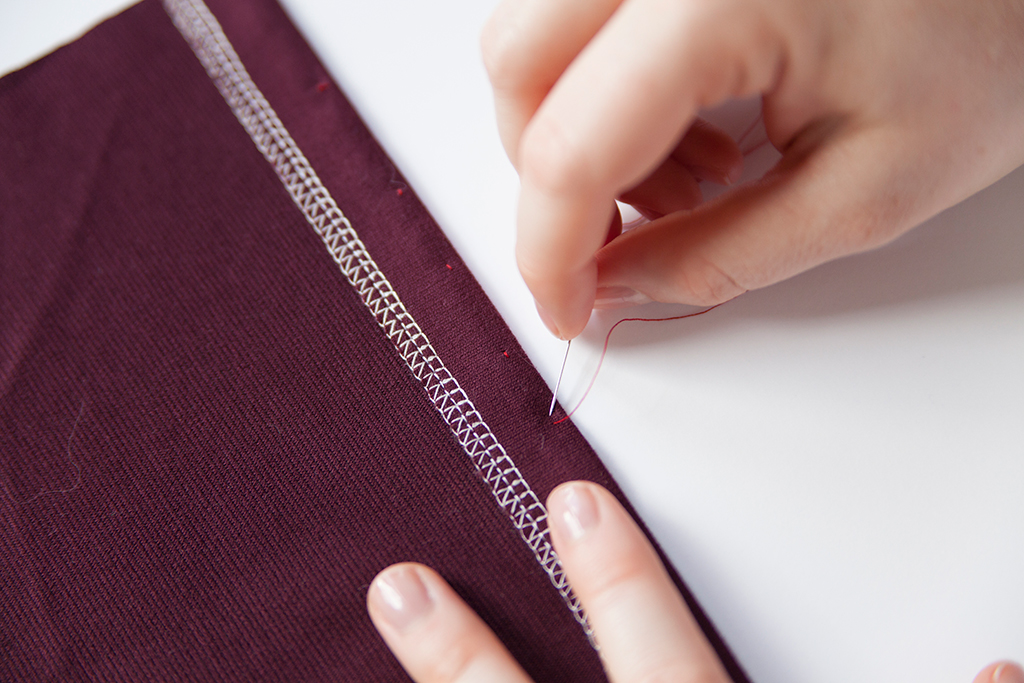
Strategic fastenings
Add snaps or buttons to the neckline and the skirt to keep your wrap dress secure.
Next, to solve the gaping problem and make the dress even more secure, I add small fasteners in strategic places. I add buttons and elastic loops at the neckline to stop it from becoming too revealing, and I add snaps about a third of the way down the thigh to stop the skirt from spreading open.
Finishing touches
Now that the basics are taken care of, there are a few—optional— finishing touches that can help elevate the finished look of your wrap dress.
Chain-weighted hems
If your fabric is lightweight and you are worried about the fabric flying up when the wind blows—or walk over a subway grate, if you live in New York—then consider chain-weighting the hem of the skirt. A chain-weighted hem is a hem that is weighted down by a chain that is hand sewn to the inside edge of the hem. You can buy chain at your local craft store in the jewelry making section.
Test out chains of a few different weights with your fabric before applying. The right weight depends on the length of the skirt and the stretchiness of your fabric. For example, you don’t want to pair a very stretchy polyester jersey with a heavy chain, as that will most likely end up weighing the fabric down and distorting the fabric.
Chanel jackets use this chain-weighting technique, and it works equally well here, to make sure the entire skirt hem hangs properly. The interfacing also helps make the hem stay crisp, adding to the polished look of the garment.
Fun fact—the Queen of England also adds weights to her hems to preserve her royal modesty.
The classic way to chain-weight the hem is to sew the chain to the finished hem by hand. However, I prefer the chain to be enclosed within the fabric so I can wash the dress without worrying about the chain catching on the garment.
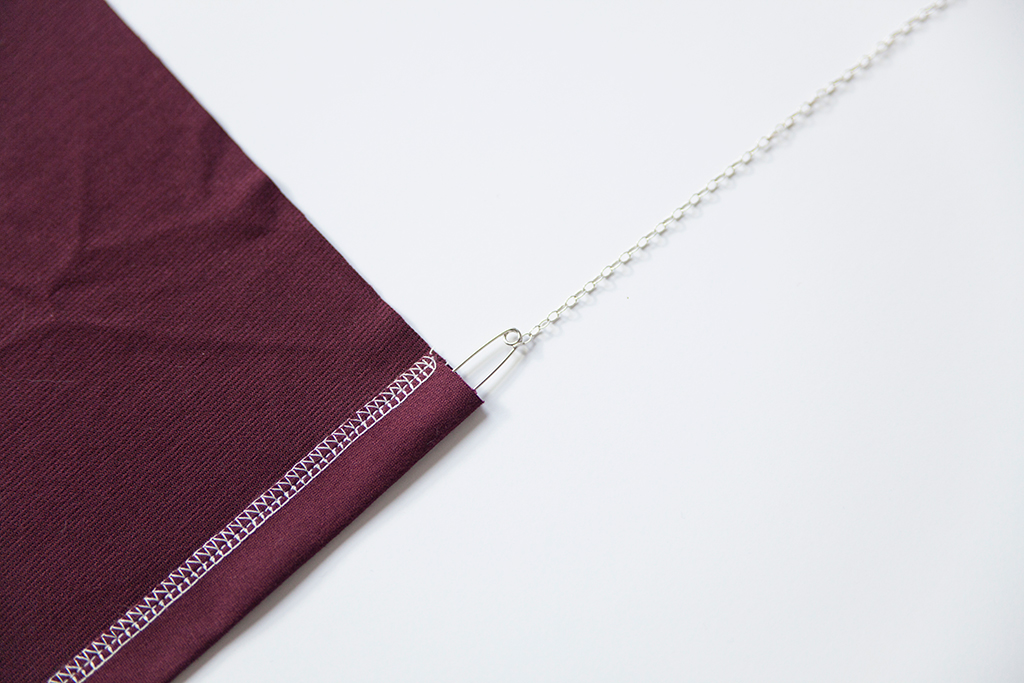
To do this, I interface the hem of my skirt, press the hem up and sew it down to create a channel. Then, thread the chain through the channel, just like you would do with elastic.
I then add a few hand stitches at various points around the hem, to prevent the chain from moving inside the channel.
Eyelets
Another finishing touch to consider is to reinforce the gap where the waist ties pass through the side of the front bodice. If you are planning to wrap the waist ties all the way around and tie in the front, then you can probably skip this step, as the waist ties will wrap around and cover up the gap. However, if you are planning to tie the waist ties in the back, without wrapping them around the waist once, then you may have an unsightly bulge at the gap because the fabric does not have enough structure to lay flat.
If you want to get rid of this bulge and achieve a more polished look, consider applying an oval eyelet to the area. This eyelet will give the gap the structure it needs to lay flat. Don’t forget to interface the fabric around the gap before applying the eyelet; the fabric needs this extra stiffness to hold the eyelet in place.
With these final steps completed, you and your wrap dress are ready to face the world, fully confident that the dress will stay in place and the hem will not fly up in inclement weather.

About the Author
Sabrina Lee is a seamstress and wrap dress enthusiast living in Brooklyn, NY.