Sign In

For as long as I have been wearing bras I have also been wrestling with them.
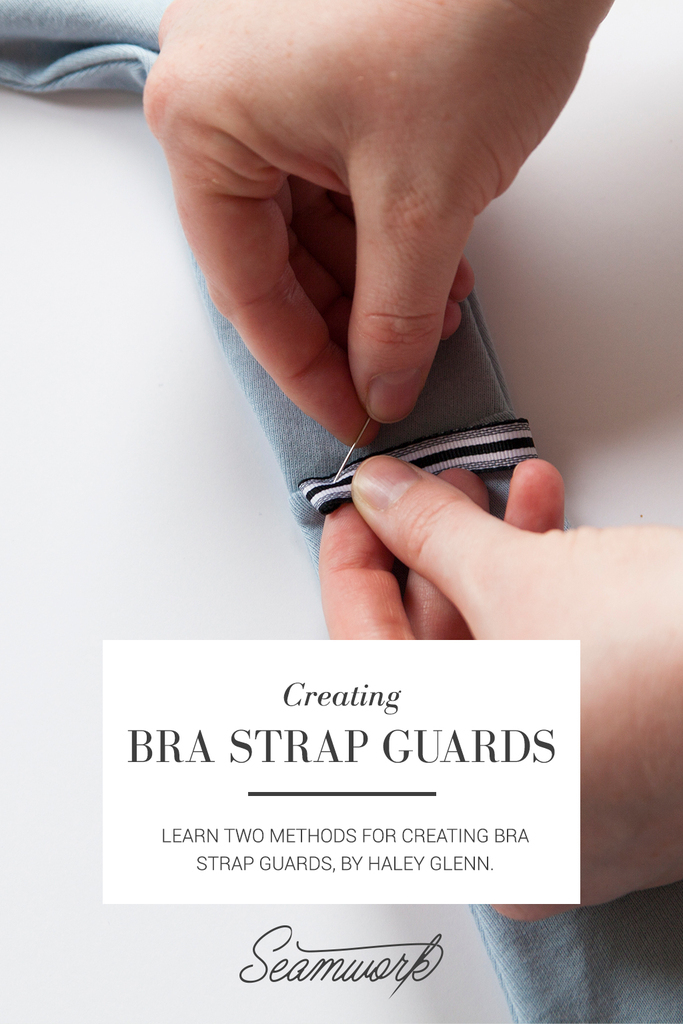
There seems to be an endless list of bra-related struggles, and bra straps are often the principal culprit. Like many women, I avoid strapless bras whenever possible, so bra strap guards are my best friend. If you have never worn a garment with a bra strap guard, I am about to change your life. This tiny-but-mighty detail uses either a thread chain or a small ribbon plus sew-on snaps to secure your bra strap to your garment, helping you avoid dreaded bra strap slippage. It is a total game changer.
In this article, I am going to walk you through two super simple techniques for adding bra strap guards to your garments.
Thread-Chain Method
Use this method to add bra strap guards to existing garments.
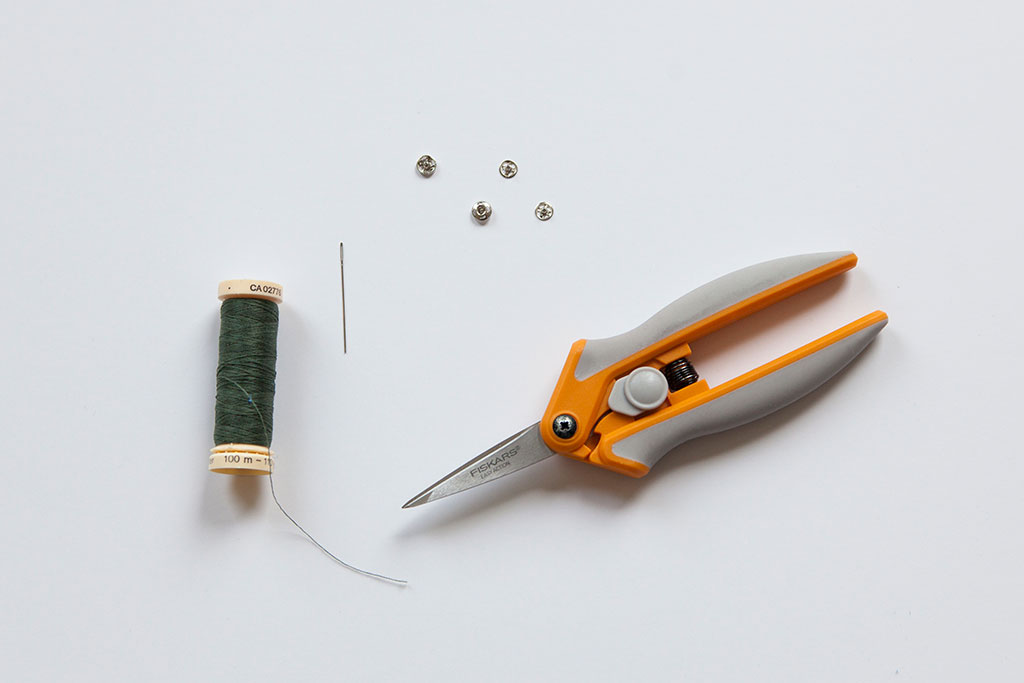
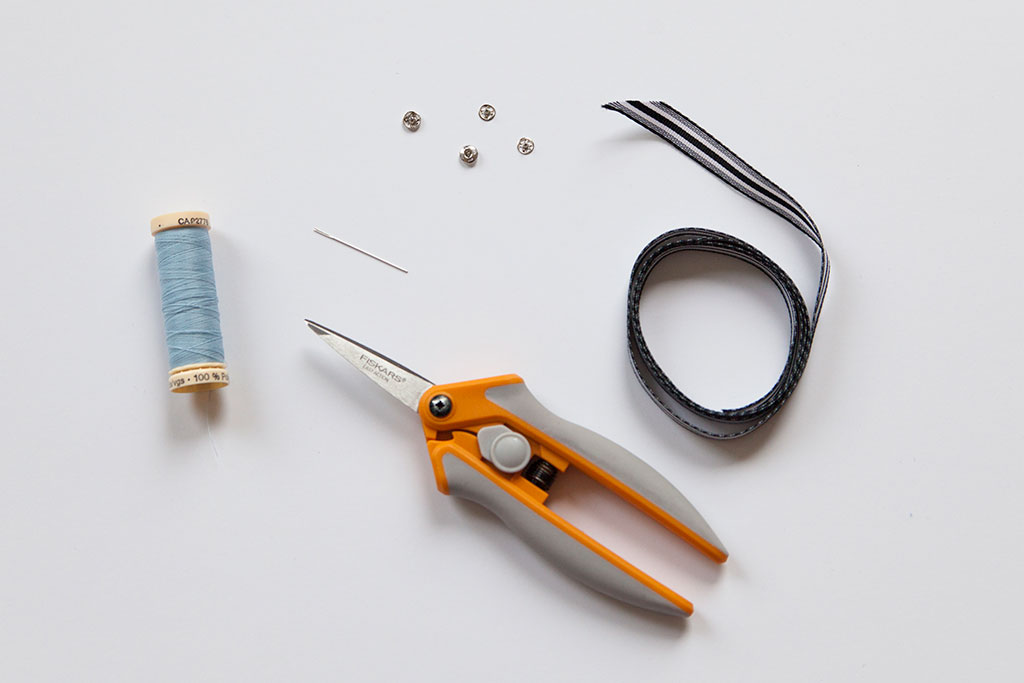
You'll Need:
- Matching thread
- Small sew-on snaps (size 4/0)
- Hand-sewing needle
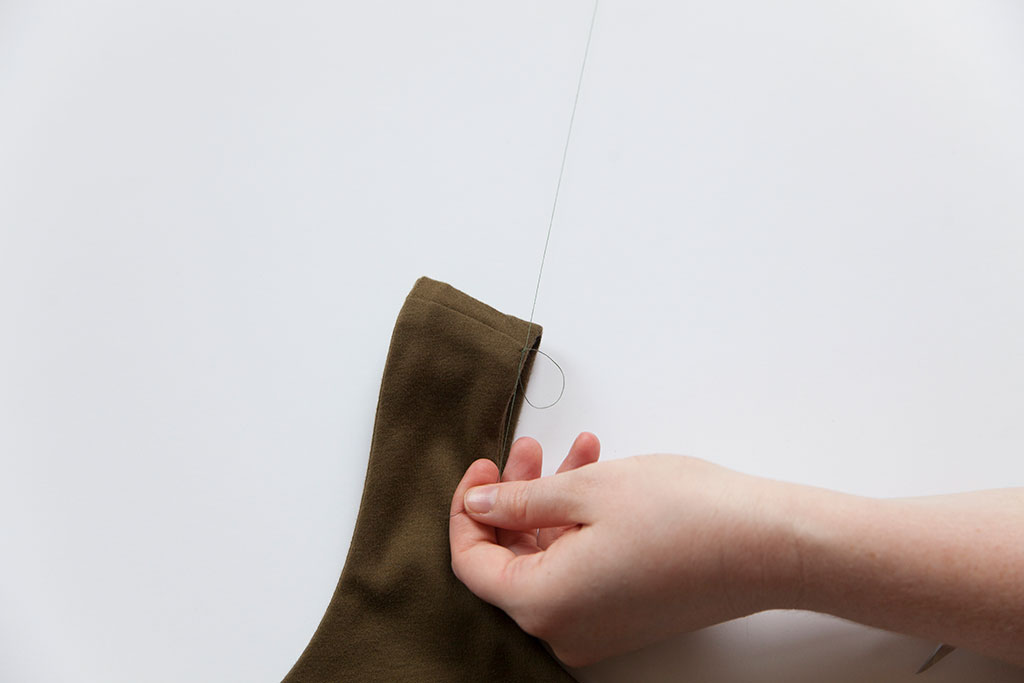
01 | Using a hand-sewing needle and thread, make a small backstitch through the wrong side of the garment at the outer shoulder.
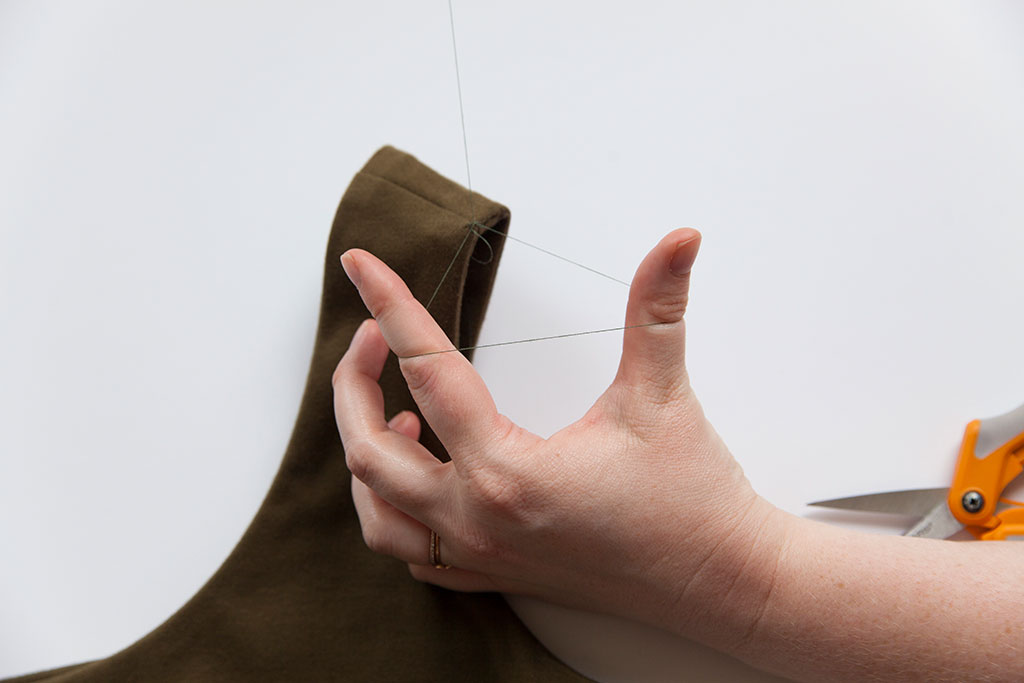
02 | Hold the open loop with your index finger and thumb, and hold the thread in the needle taut with your other index finger and thumb.
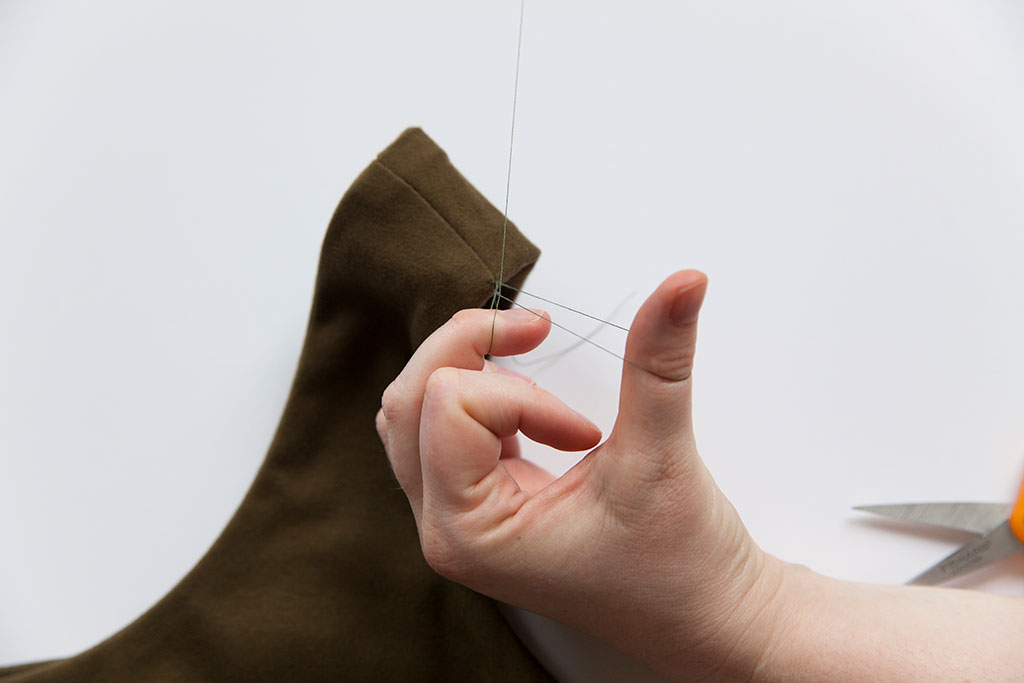
03 | Using your middle finger, pull the thread in the needle through the backstitch loop, creating another small loop.
04 | Release the backstitch loop, and pull the small loop through. Open the small loop and hold with your index finger and thumb. This will close the backstitch loop and create the first chain.
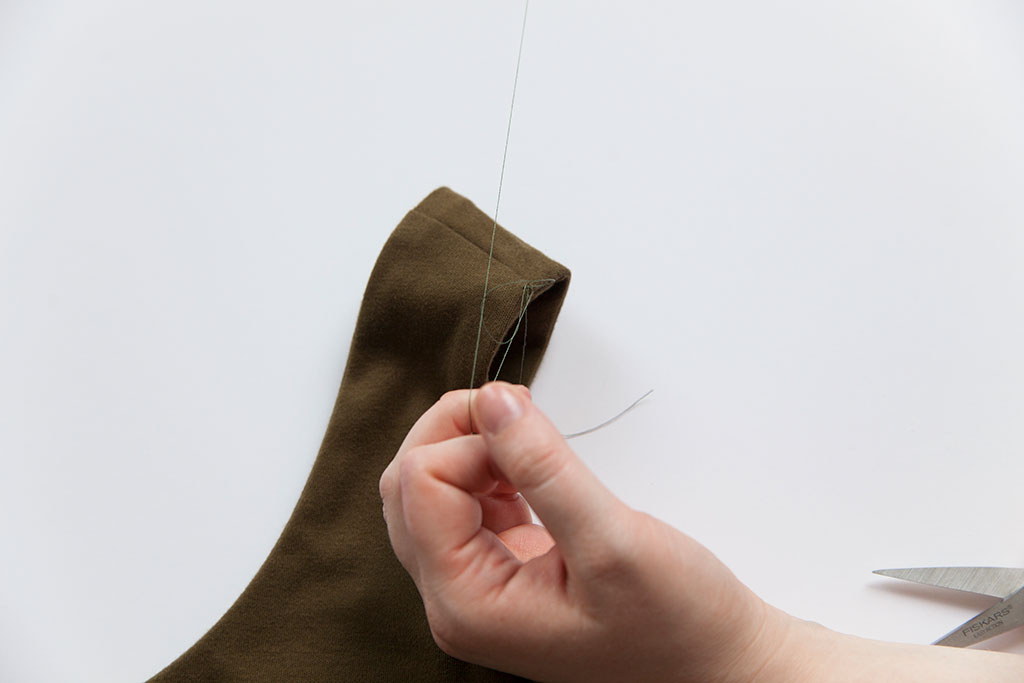
05 | Repeat steps 1-4 until your thread chain is about the width of the strap. Finish the thread chain by threading the needle through the last loop and pulling tight.
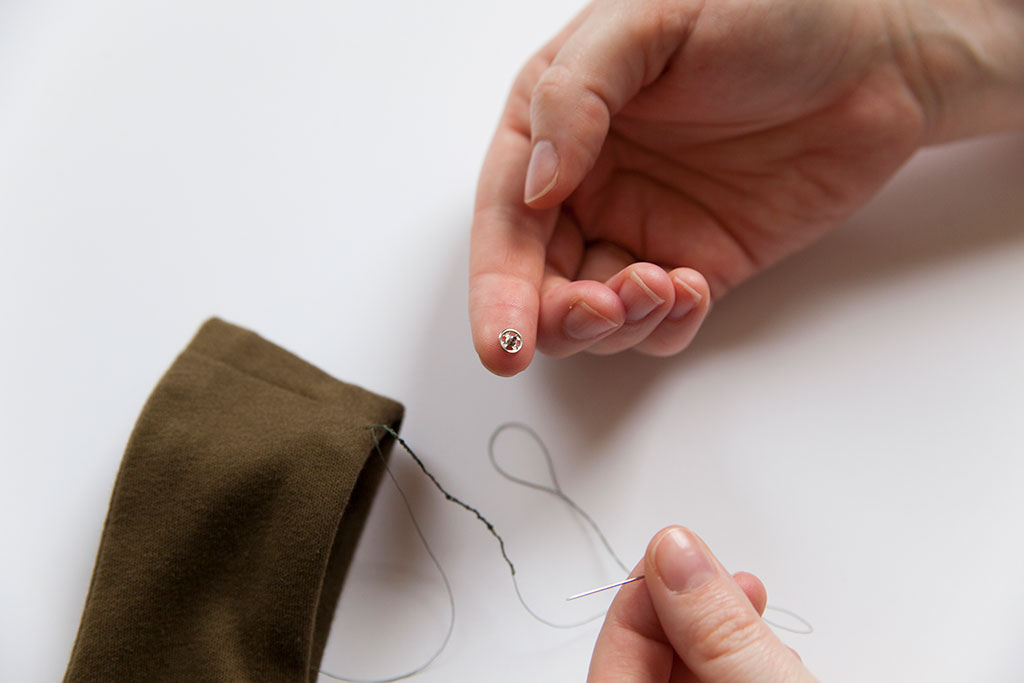
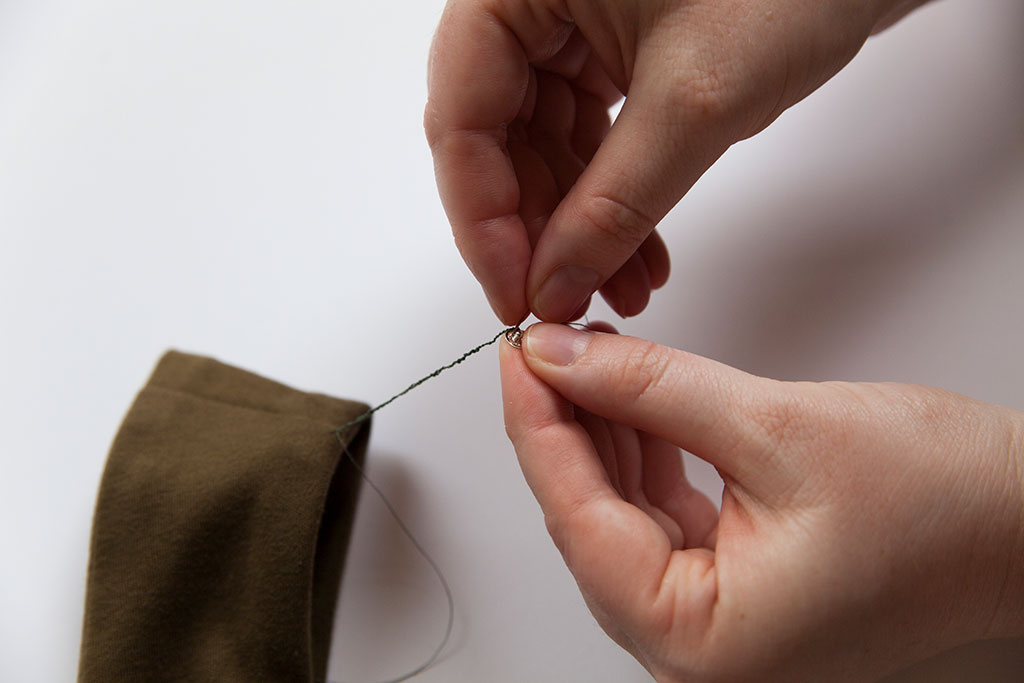
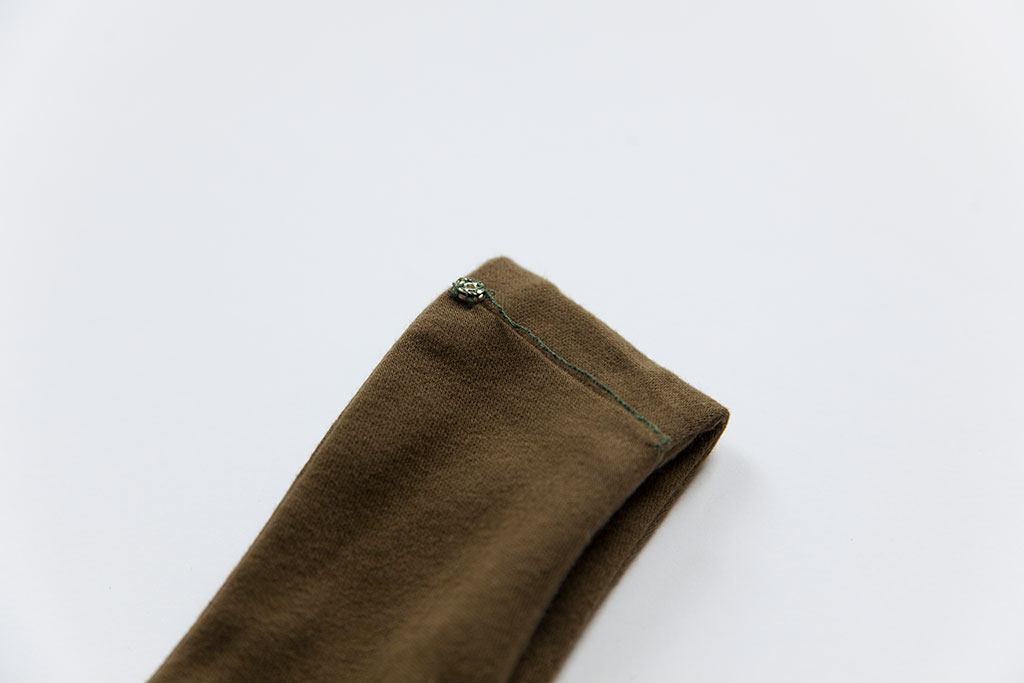
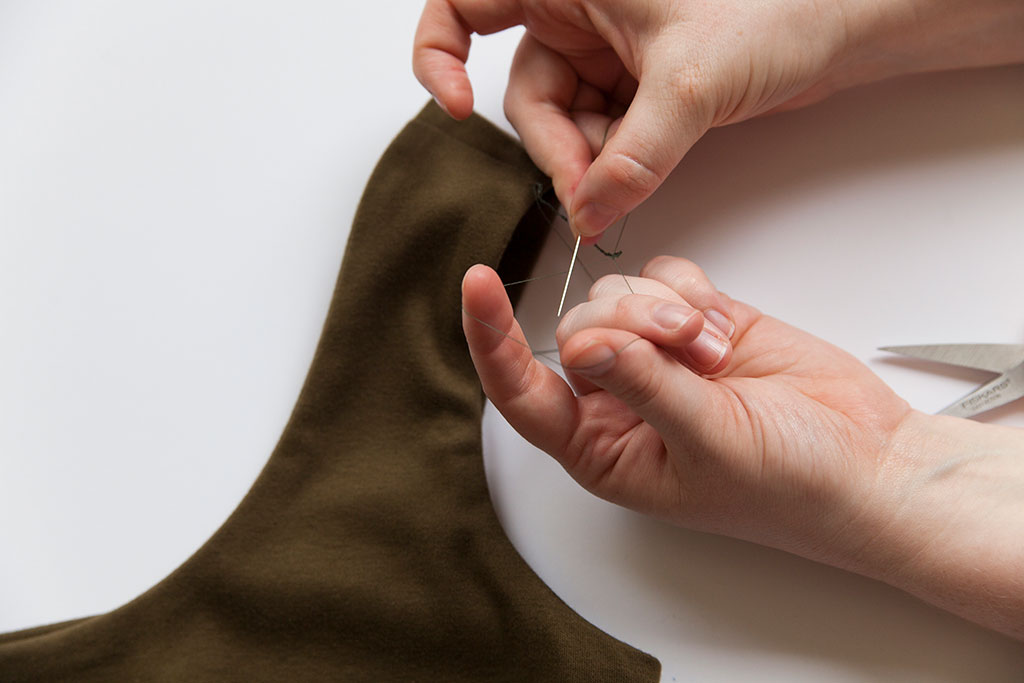
06 | Sew the end of the thread chain to the stud (male) side of a small sew-on snap.
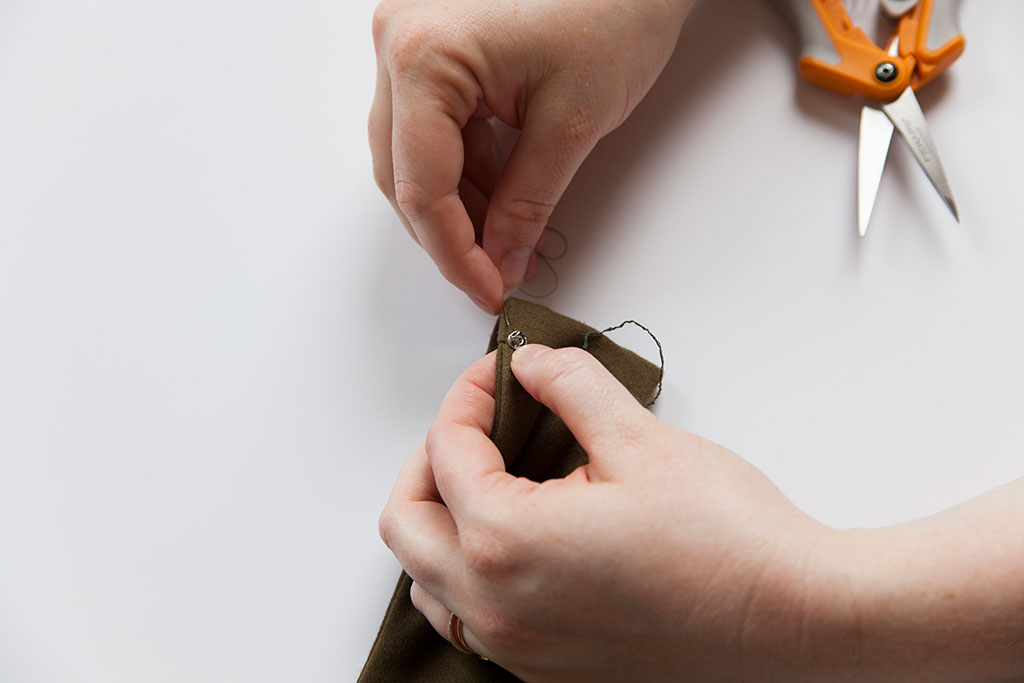
05 | Sew the socket (female) side of the sew-on snap to the wrong side of the inner shoulder.
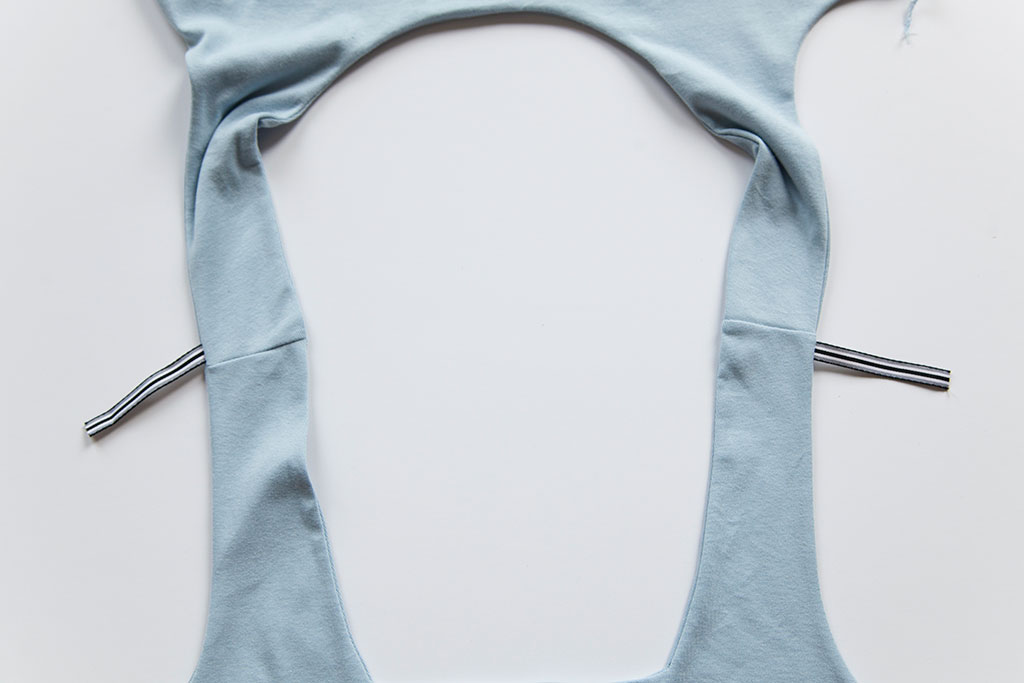
Ribbon Method
This method is ideal for garments that are finished with either a lining or an all-in-one facing.
You'll Need:
- 1/4" ribbon or twill tape
- Matching thread
- Small sew-on snaps (size 4/0)
- Hand-sewing needle
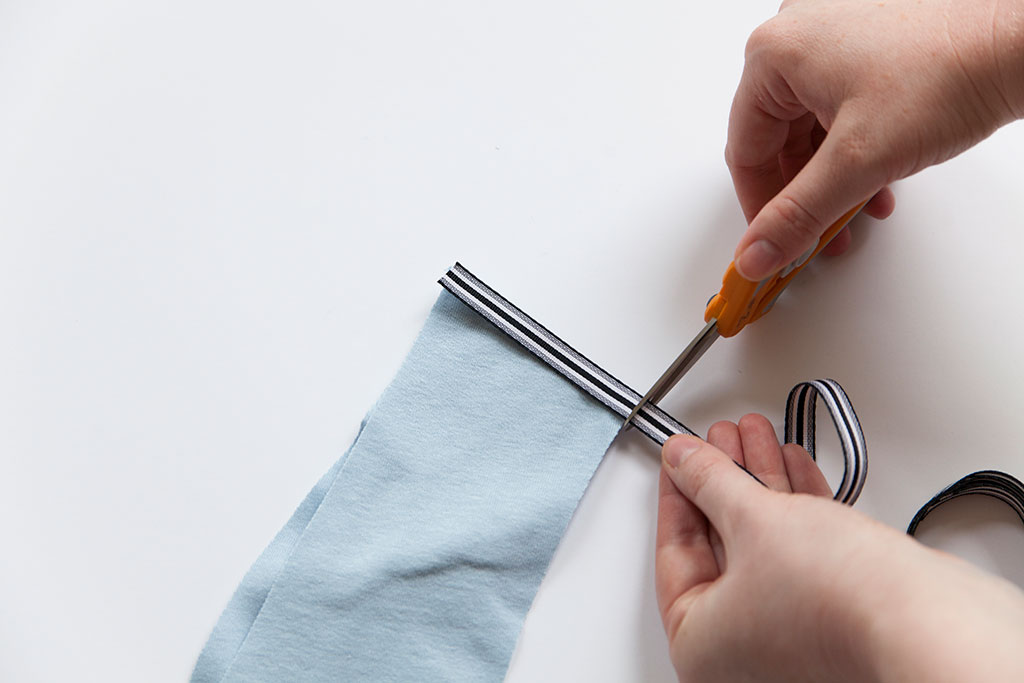
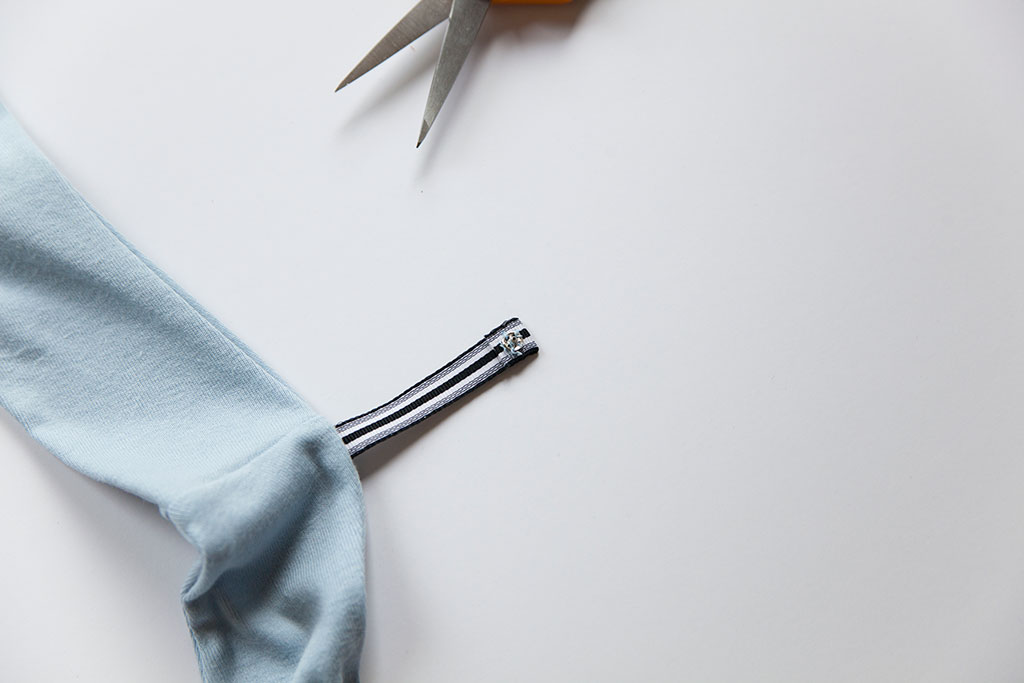
01 | Cut a piece of ribbon the width of the strap.
02 | With right sides together, baste the ribbon to the lining at the outer edge of the shoulder using a 3/8" seam allowance.
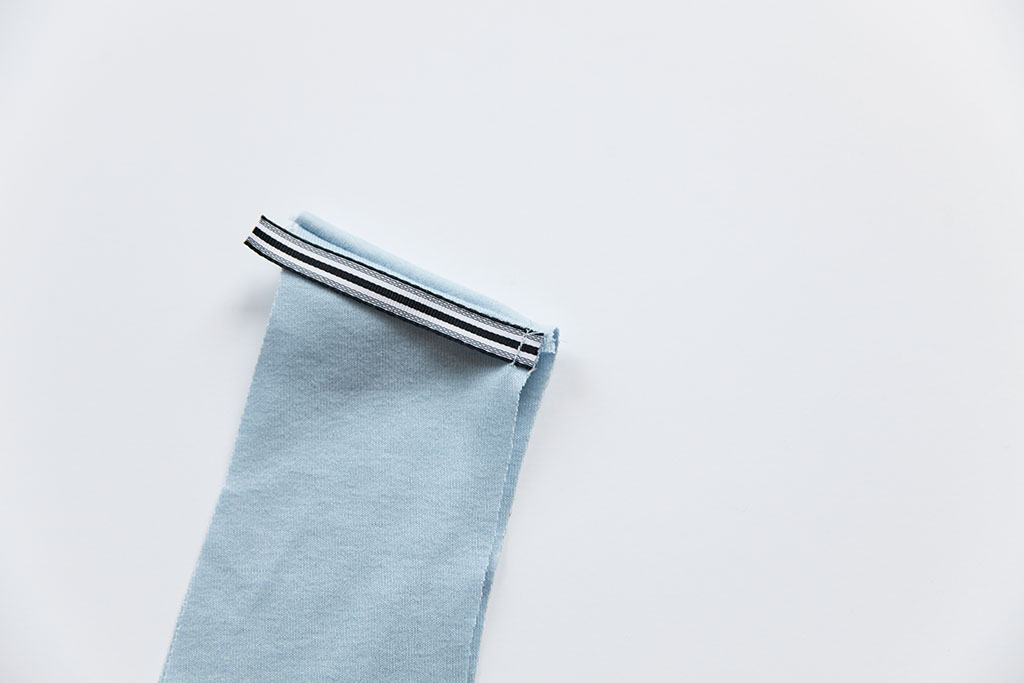
03 | Attach the lining to the outer shell, following the pattern instructions.
04 | Fold the free end of the ribbon toward the wrong side at 3/8". (This may vary based on the neckline seam allowance). Secure with a small hand stitch, but ultimately you want the finished ribbon to be the width of the shoulder strap.
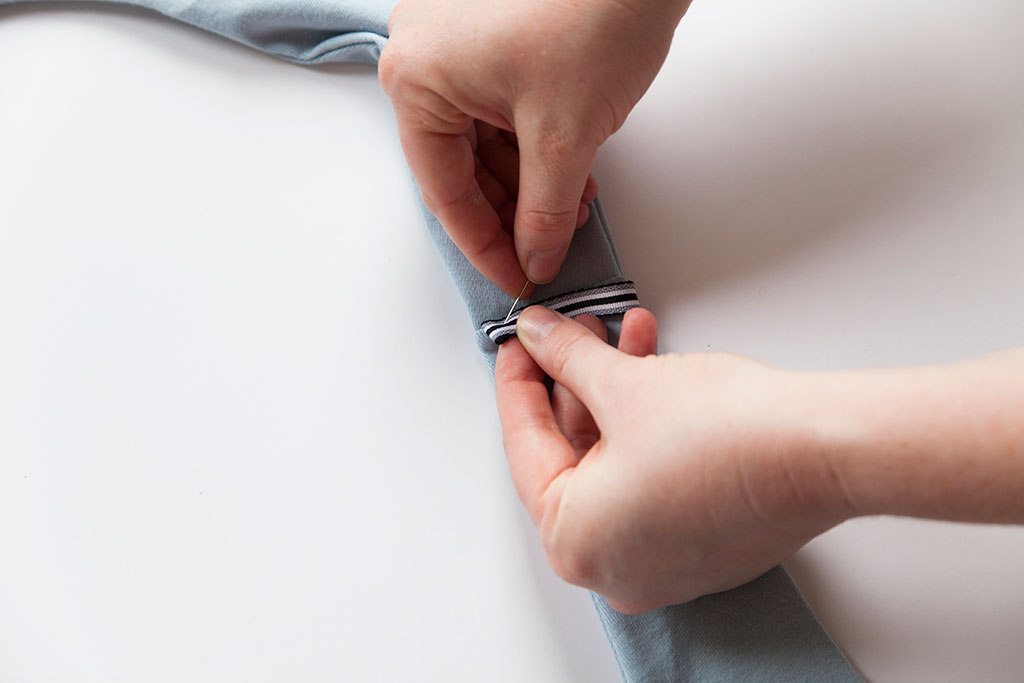
05 | Sew the stud (male) side of a small sew-on snap to the wrong side of the ribbon at the turned-under edge.
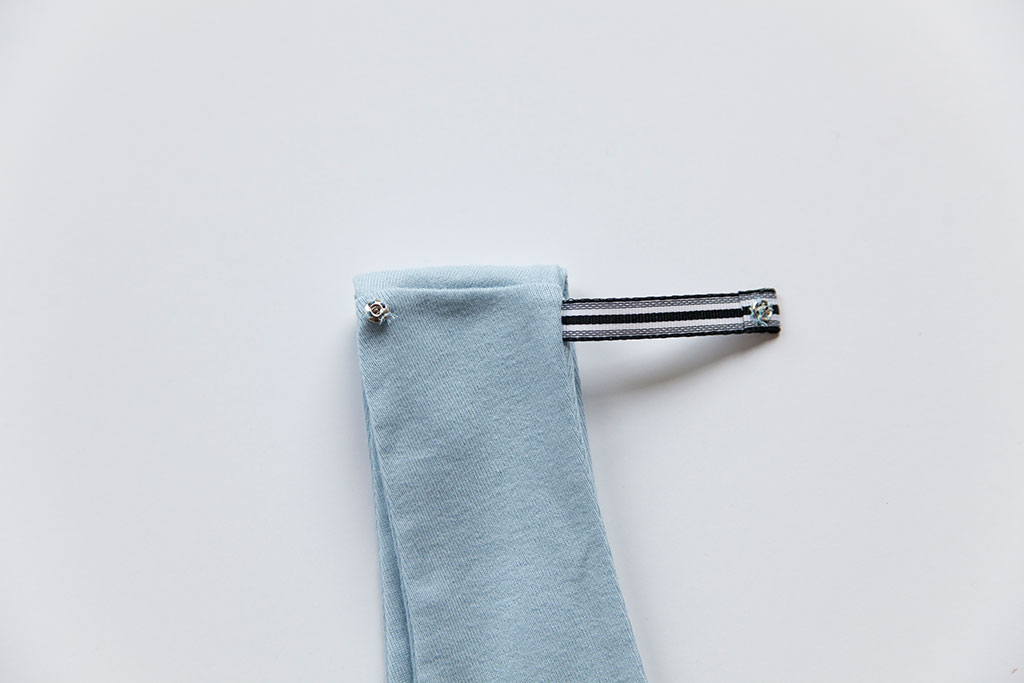
06 | Sew the socket (female) side of the sew-on snap to the wrong side of the inner shoulder.

About the Author
Five years ago, Haley left the apparel industry to join the world of home sewing. She has been empowering women to sew ever since—first through years of in-person teaching at Sew LA, and now through her work at Colette. Haley writes tutorials and articles on our blog, teaches sewalongs, and writes and edits for Seamwork magazine.