Sign In
I don’t think fitting should be scary, because here’s the thing—at the end of the day, the stakes are just not that high. It is going to take some trial and error to find the best fit, but that is okay. Do you know the only person who is going to notice a couple of draglines? You. That’s it.
That being said, I think that a combination of fitting pants intuitively and “by the book” can go a long way when it comes to creating something to fit your body. In this article, I am going to walk you through the process I use for fitting pants. I’m also going to give you some tips along the way to help you build confidence through intuitive fitting.
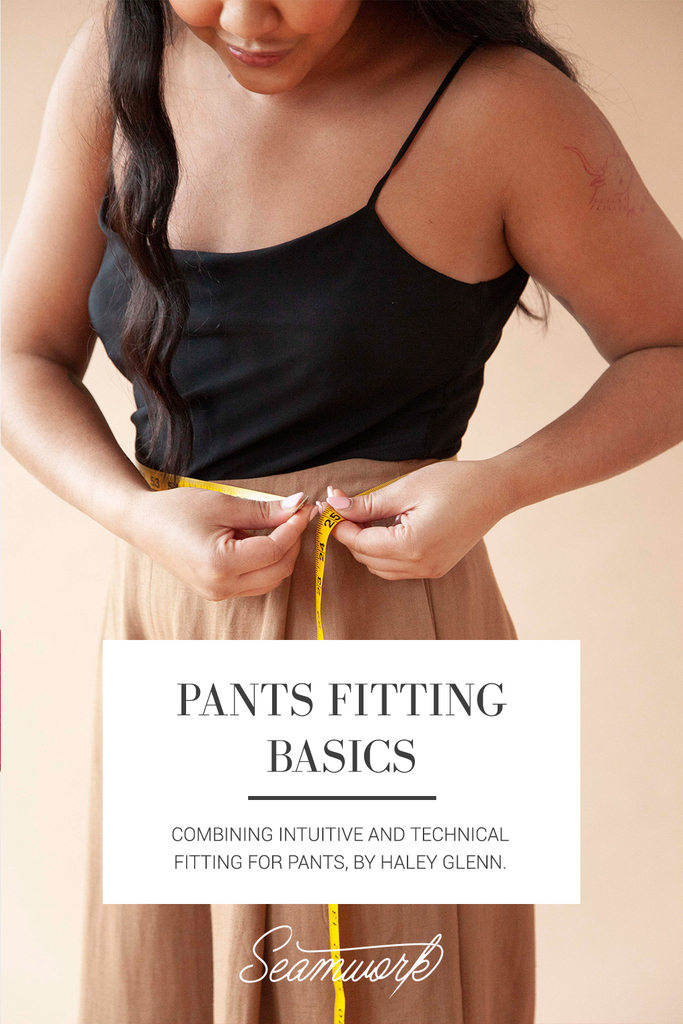
Measure Once, Measure Twice
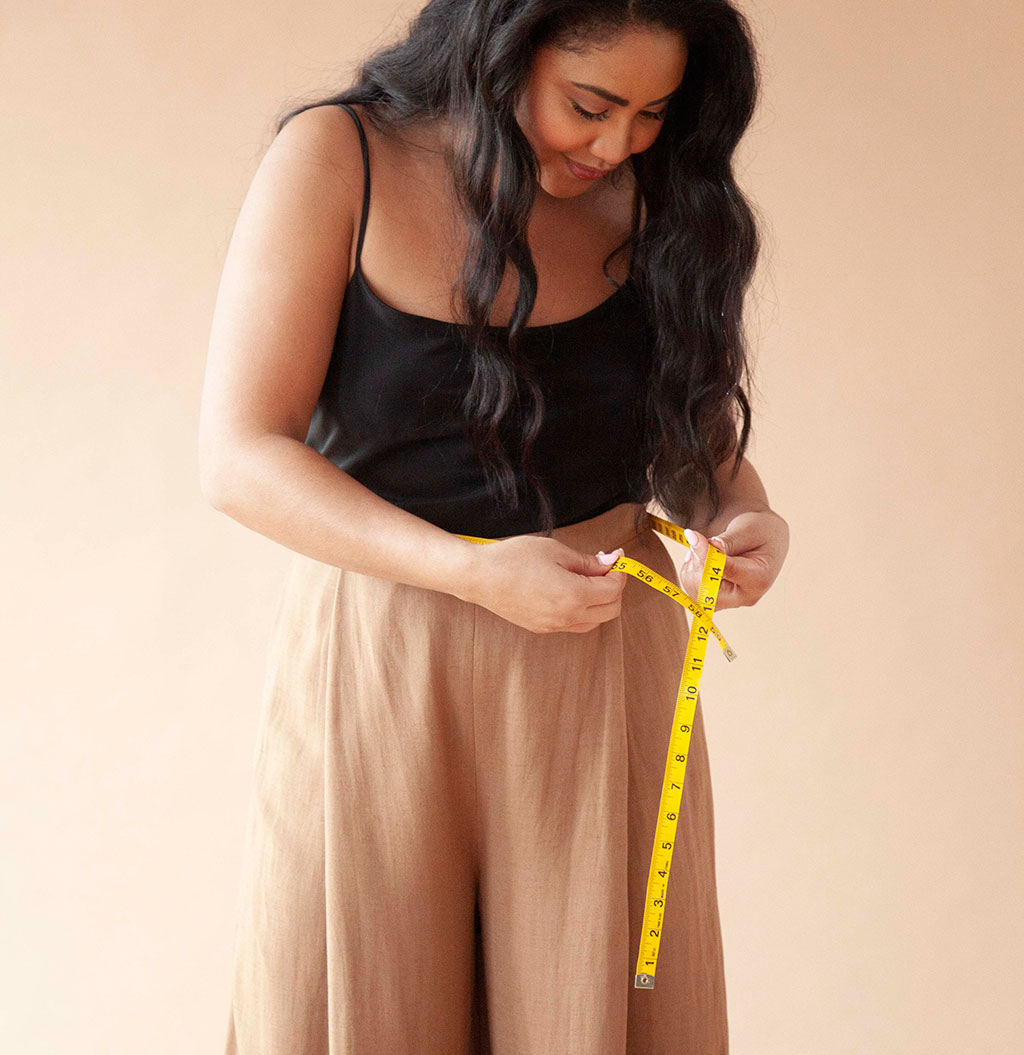
This is the single best thing that you can do to get the best fit possible. I know that even the most seasoned sewists can have a complicated relationship with the measuring tape, but measurements are just data used to help you make clothing that makes you look and feel amazing. So take your measurements often and accurately.
In addition to taking your body measurements, try measuring your favorite pair of ready-to-wear pants and comparing them to the finished garment measurements of the pattern you want to sew. Of course, keep in mind that you want to compare apples to apples, meaning that a pair of skinny jeans will only apply to a similar pattern that calls for similar fabric.
“I know that even the most seasoned sewists can have a complicated relationship with the measuring tape, but measurements are just data used to help you make clothing that makes you look and feel amazing. So take your measurements often and accurately.”
Pre-muslin Adjustments
I am a big believer in muslins, but making a few small changes to your pattern before sewing a muslin can help you focus on specific fit needs rather than getting hung up on a simple ease issue.
First and most importantly, if you fall into a couple of different sizes, blend between sizes before you cut your muslin—this way you are working with something that has the recommended ease at least in your waist and hips.
Next, shorten or lengthen if necessary. As a petite person, I find that this helps me to both save fabric and to see the garment with more clear eyes if the length is more in the ballpark of what I need.
Lastly, I like to add to the inseam and side seam to create a 1” seam allowance. This simple change will give you the ability to assess—then adjust—the muslin for more ease if needed. Even if you are confident in the primary measurements (waist and hip), you might find that a little extra room in the thigh or calf is needed once you have sewn your muslin.
Sewing and Assessing Your Muslin
After you have made your preliminary adjustments, you are ready to sew your muslin. Keep in mind that there may be many elements of the pattern you can skip through, like pockets, hems, or topstitching—even the zipper fly can be skipped at this stage. The most critical elements to include are, of course, the pants legs and the waistband.
Make sure to staystitch at the seam line along any un-sewn edges. This will help to prevent stretching and also indicate the stitch line.
When trying on your muslin, pin in place along the stitch line of the fly or closure. The first thing I like to assess when looking at my muslin is the overall ease of the garment. Are there areas where it is too loose? If so, use pins to pinch out any excess ease. If there are areas where it is too tight, use the extra-wide seam allowances you included in the previous step to release your pants.
Apply these changes to your pattern first, by adding or subtracting from the pattern at the areas you pinned or let out.
After you have addressed these issues, you can dive into the nitty-gritty details. Take pictures of the front, back and side, and take note of any areas of concern. It can also be helpful to use a marking tool to mark pulling or bagginess directly on the muslin. Doing this can help you focus on areas of concern more objectively.
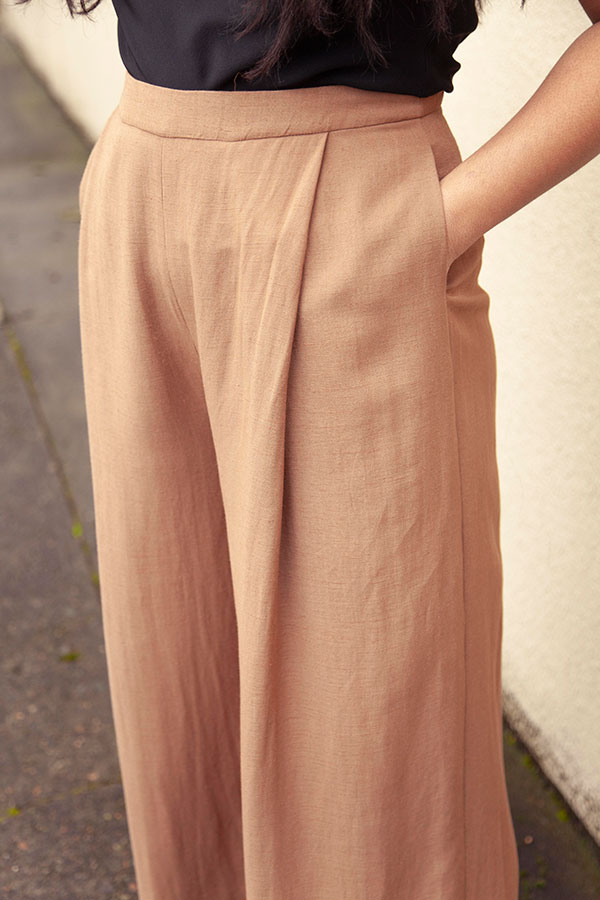
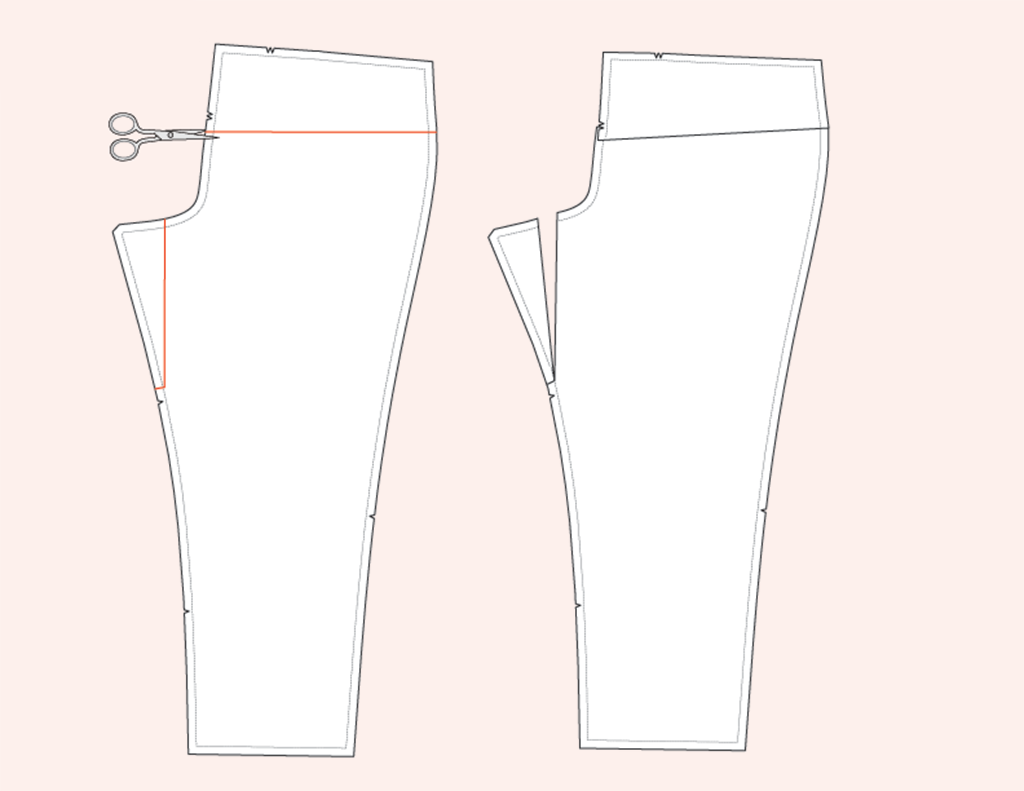
Adjusting for a Full or Flat Rear
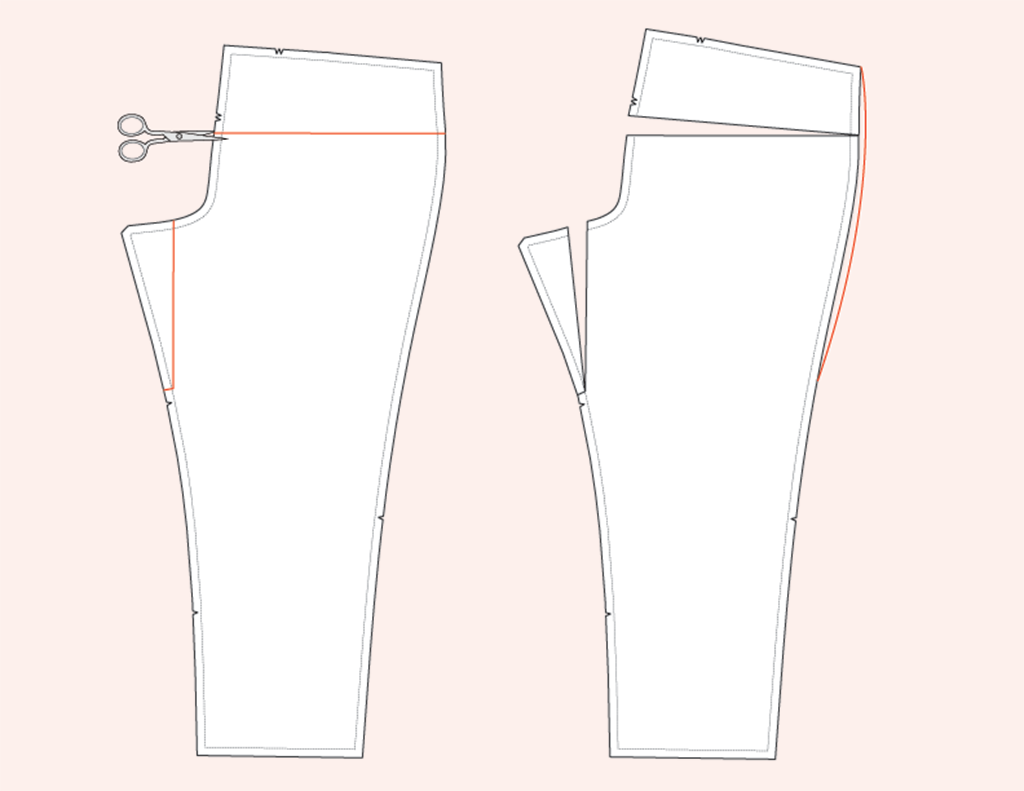
If you notice the back waist of your pants pulling down or sense general tightness across your butt, you need a full rear adjustment.
Try:
- Adding to the hip line at the side seam on the back pants legs.
- Adding to the back leg inseam.
- Adding to the center back rise.
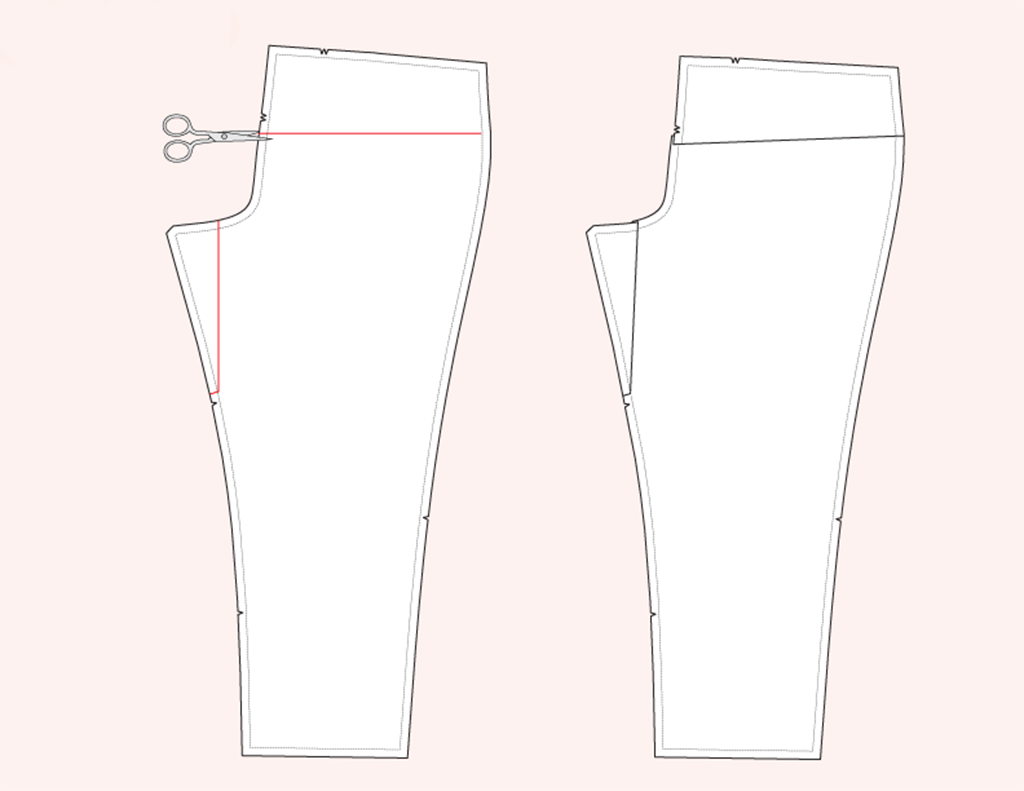
If you notice excess fabric at the under or at the fullest part of your butt, you need a flat rear adjustment.
Try:
- Removing a wedge from the center back rise.
- Removing a wedge at the back leg inseam.
Adjusting for a Full Belly
If you notice or feel tight wrinkles around the lower abdomen, you need a full belly adjustment.
Try:
- Adding length to the center front rise.
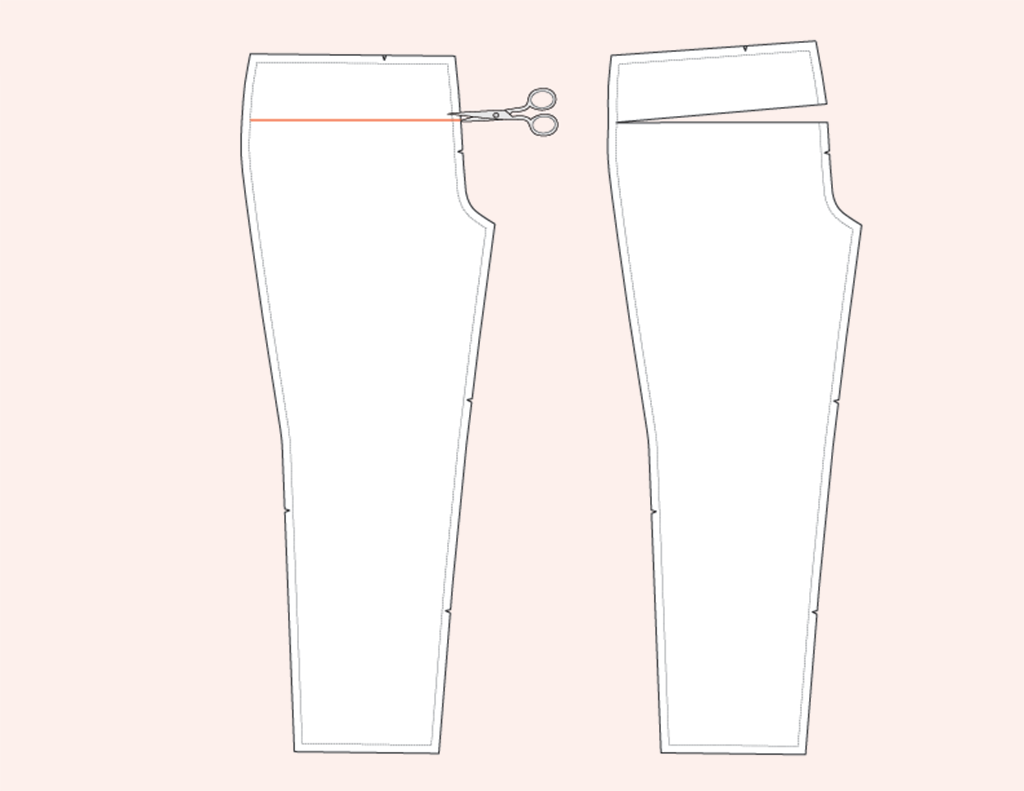
Adjusting for a Swayback
If you notice excess fabric pooling above your butt, accompanied by a general tightness across the butt, you need a swayback adjustment.
Try:
- Removing a wedge from the center back rise.
- Adding to the back inseam.
Adjusting for Full or Thin Thighs
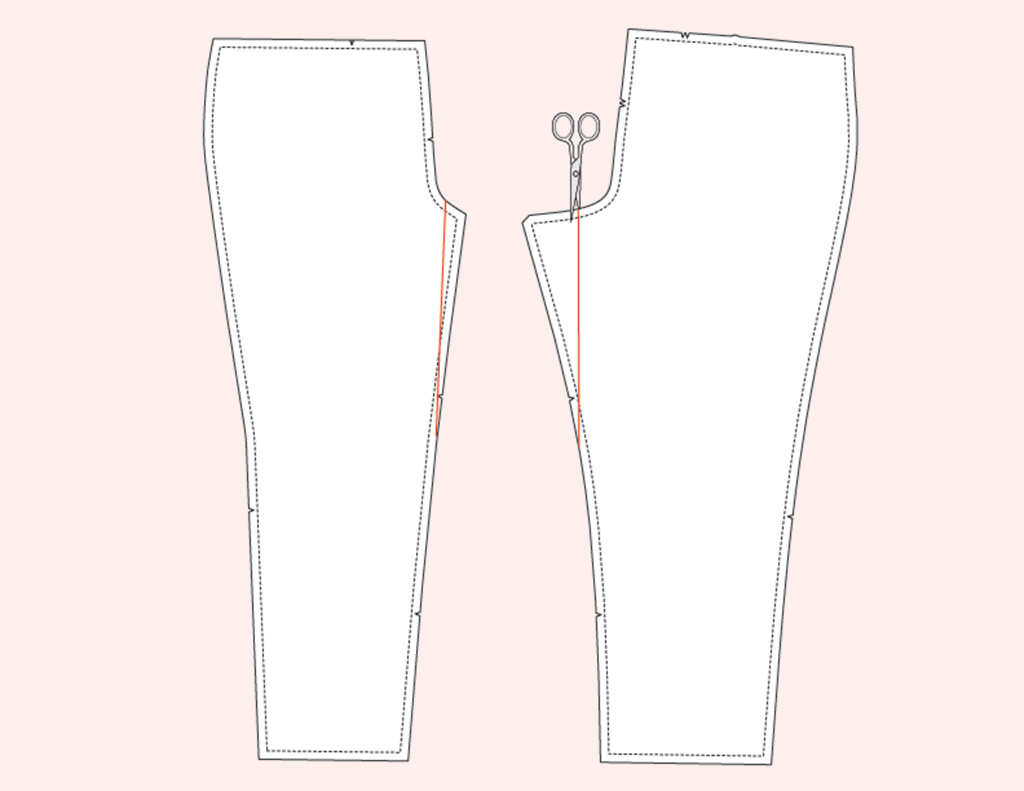
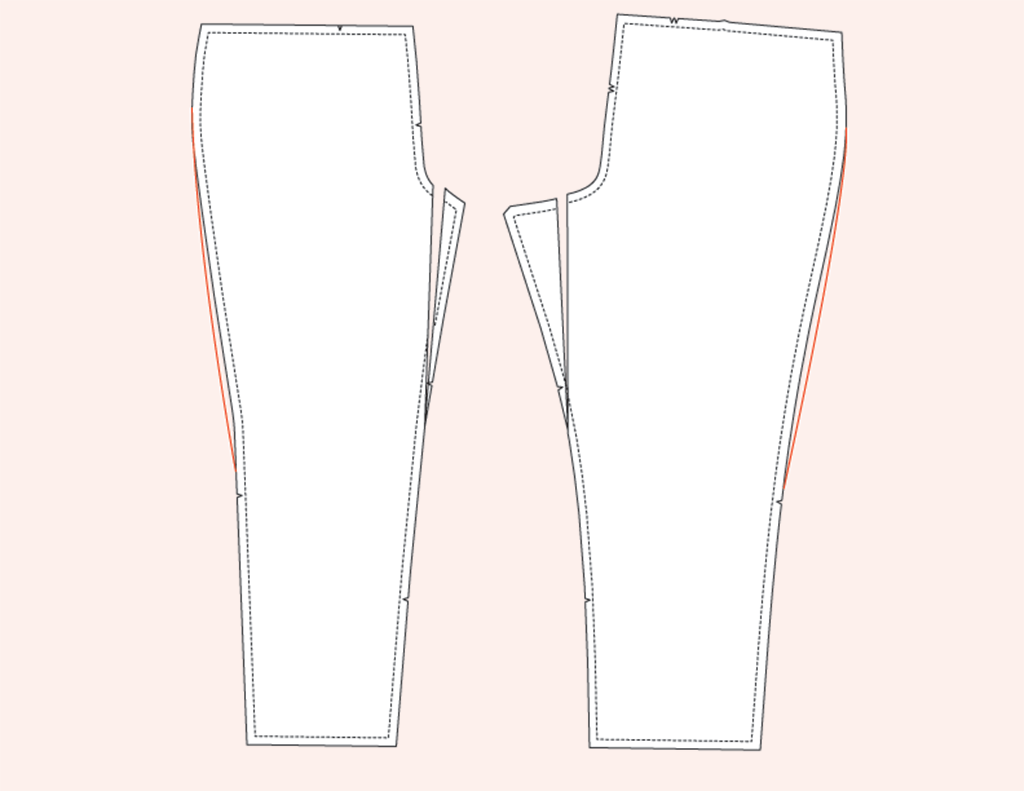
If you notice tight wrinkles across the thighs, you need a full thigh adjustment.
Try:
- Adding to the thigh along the inseam and outseam.
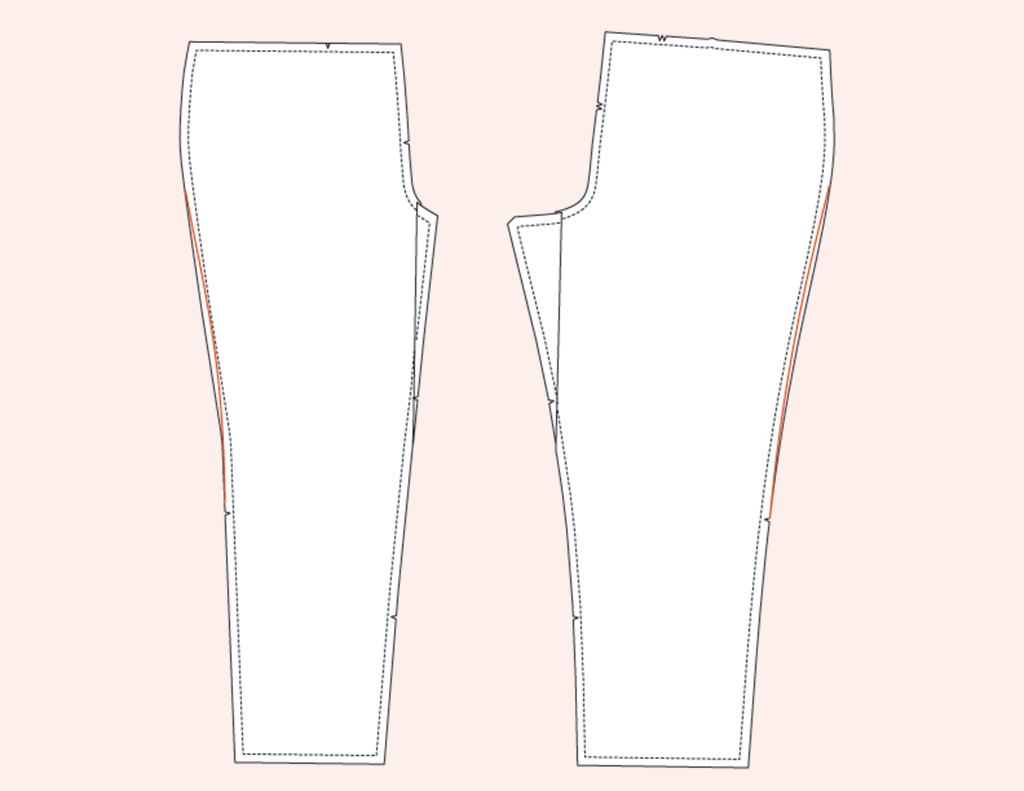
If you notice excess fabric hanging vertically at the thighs, you need a thin thigh adjustment.
Try:
- Removing excess along the thigh on the inseam and outseam.

About the Author
Haley doesn’t just want to design clothing you’ll love to wear, but clothing you’ll love to sew. With a background in both design and teaching, she combines her talents to imagine patterns with thoughtful details that build your skills as you sew.