
 Sign In
Everyone knows that sewing gives you superpowers. First on that long list is the ability to break the rules and make garments that represent you and your taste. We want to encourage you to think of our patterns as a blank canvas that you can customize to truly suit your style.
Our pattern hacks are designed to teach you hacking basics that help you customize patterns so that you can become a confident pattern hacker. Each month, we will show you how to draft and sew one new pattern hack, and we'll share links to two additional pattern hacks from our pattern hacks library.
These hacks help you give your Seamwork patterns a custom spin—all you need is paper, a ruler, and a pencil!
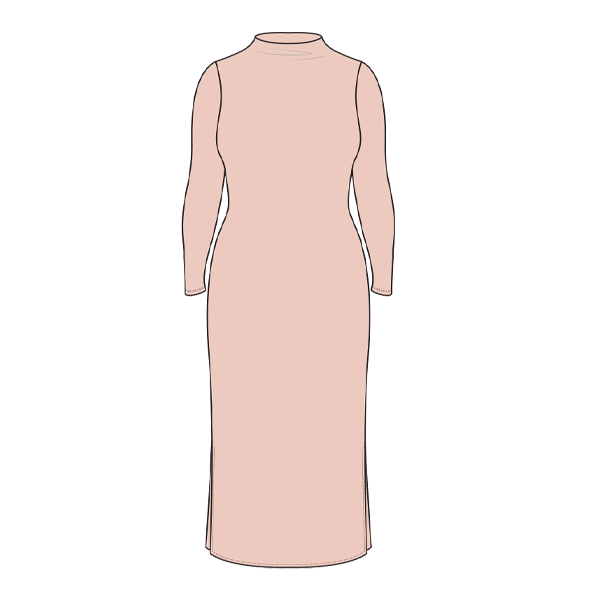
This month, we teach you how to slash and spread the sleeves on your Ace top, giving you some fun bell sleeves! You can also check out the other hacks we have for the Ace top, which include lengthening the top to a dress and another that changes the silhouette into a trapeze top.
Note: For best results, be sure to make any necessary fit adjustments before hacking your pattern.


HACK ONE: Bell sleeves
Who doesn't love to rock some bell sleeves? They've been on trend lately, and whether you like them big or small, you can make the bell sleeves of your dreams for your Ace top.
DRAFTING INSTRUCTIONS
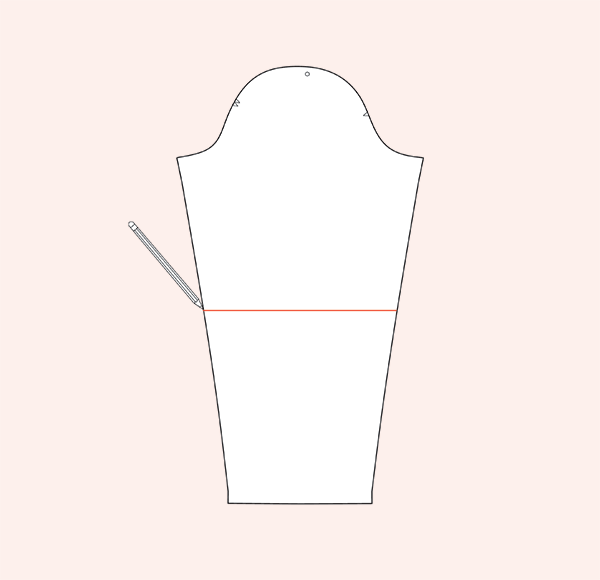
1. Draw a horizontal line, perpendicular to the grainline, halfway down the sleeve. This will be your baseline.
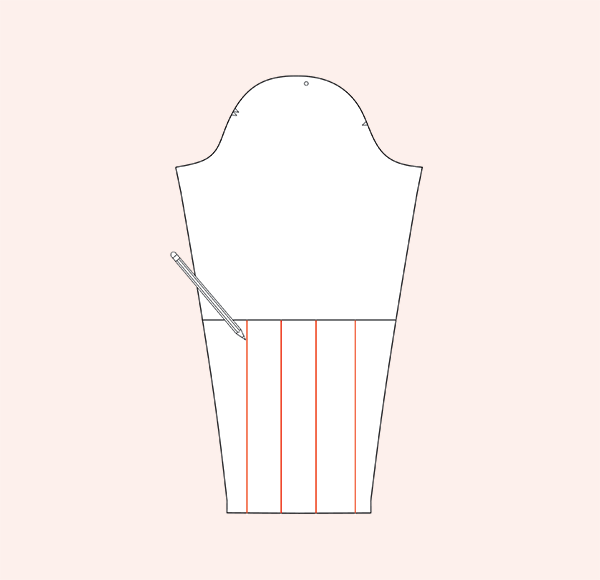
2. Use a pencil and your clear ruler to mark your slash lines, parallel to the grainline. These lines will go from the hem of the sleeve, up to the baseline
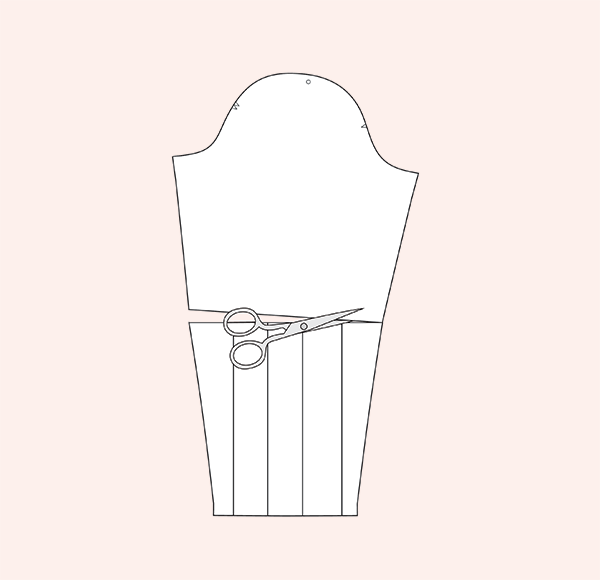
3. Use your scissors to cut the sleeve piece in half at the baseline.
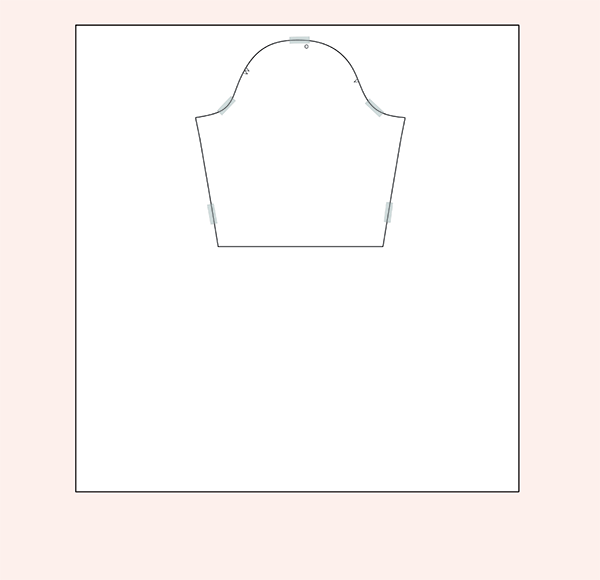
4. Place some paper under your sleeve pattern pieces and tape the top of the sleeve in place.
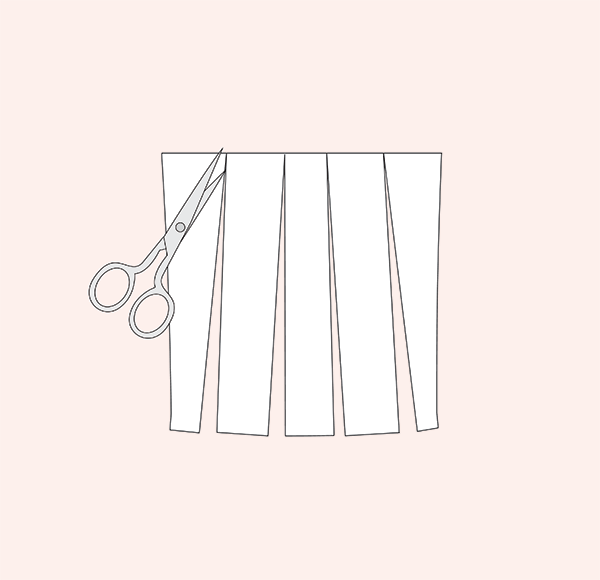
5. Use your scissors to cut up the slash lines, leaving about 1/8" uncut to create paper hinges.
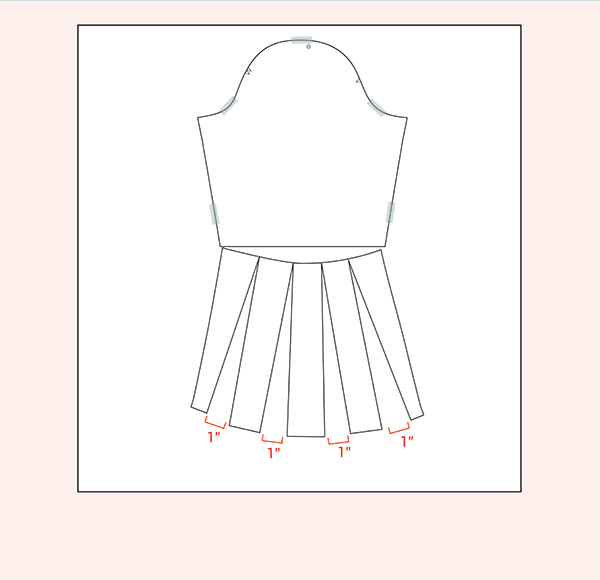
6. Place the bell portion of the sleeve under the upper portion. Adjust the bell portion using the hinges to create the bell shape. You can create a very dramatic shape, or something more subtle. Try to keep a consistent amount between each segment (we did 1").
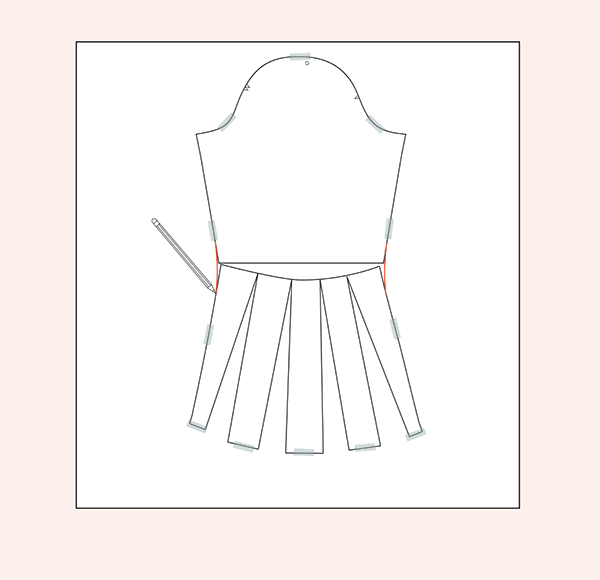
7. Tape the bell portion of the sleeve under the top portion, aligning the edges as much as you can. Use a pencil to blend where the bell meets the upper portion of the sleeve.
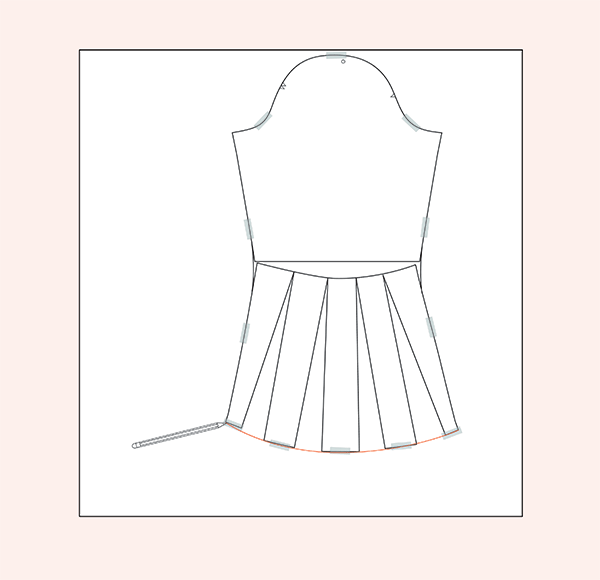
8. All that's left is to redraw your hem and cut out your new bell sleeve.
SEWING INSTRUCTIONS
- Assemble the shirt bodice according to the pattern instructions.
- With right sides together, pin the sleeve cap to the armhole of the shirt and serge.
- With right sides together, match the side seam of the front, back, and sleeve. Pin and serge.
- Hem the sleeve by folding the hem to the wrong side at 5/8" (15 mm). Pin and edgestitch in place.
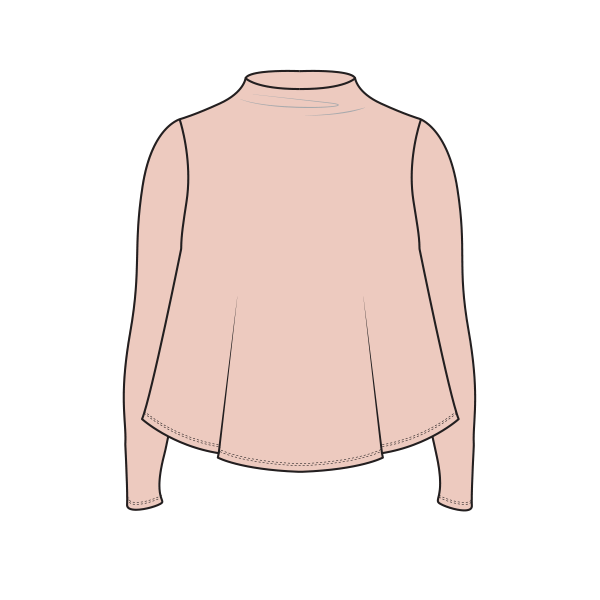
HACK THREE:
Ruffle hem
Change the silhouette of your Ace top into a trapeze style using this hack from issue 53.

About the Author
When she isn't pattern hacking, Chelsea is drawing step-by-step pattern instructions in Illustrator. As the Technical Illustrator here at Seamwork, she loves to make our instructions easy to follow and fun to read.

