Sign In
Sewing can be an empowering and therapeutic process, but what happens when your tailoring needs are outside of the majority of tutorials and fit articles? Today we’re going to dive into some bodice pattern adjustments and “breaking the rules” tips for a few common bodice alterations after a bilateral mastectomy, but without reconstruction (BMX.)
We have extensively interviewed and fitted multiple breast cancer survivors, and while many of these are the common pattern alterations, certainly there is no one-fix-for-all. Every woman’s story and body is different. Here, we will work with the more common tips and suggestions. These suggestions are for those days when you want a garment that doesn’t draw attention to your body going through breast cancer. We acknowledge that there is pride in your body and your life, while also having days you may not want all of the attention for those reasons.
Pattern Adjustments
Darts
Most interviewees preferred to still have a dart in their bodice to both hold the fabric away from the body and provide some volume. In that case, we suggest following the Small Bust Adjustment (SBA) tutorial here to convert the bodice to an A-AA cup. If you want the volume to remain, but don’t want to deal with a dart, here’s a tutorial on converting to a dart-less bodice.
First, you’ll want to follow the SBA tutorial here to convert the bodice to an A-AA cup. The less volume you’re transferring out into the bodice from the dart, the easier it is to true up and keep looking natural.
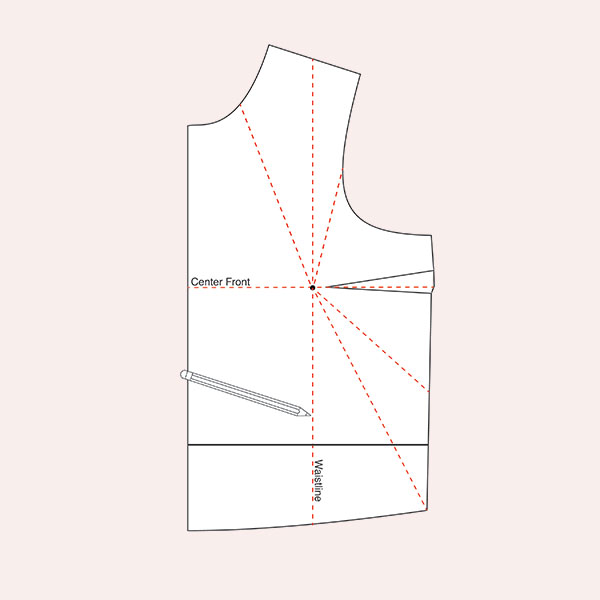
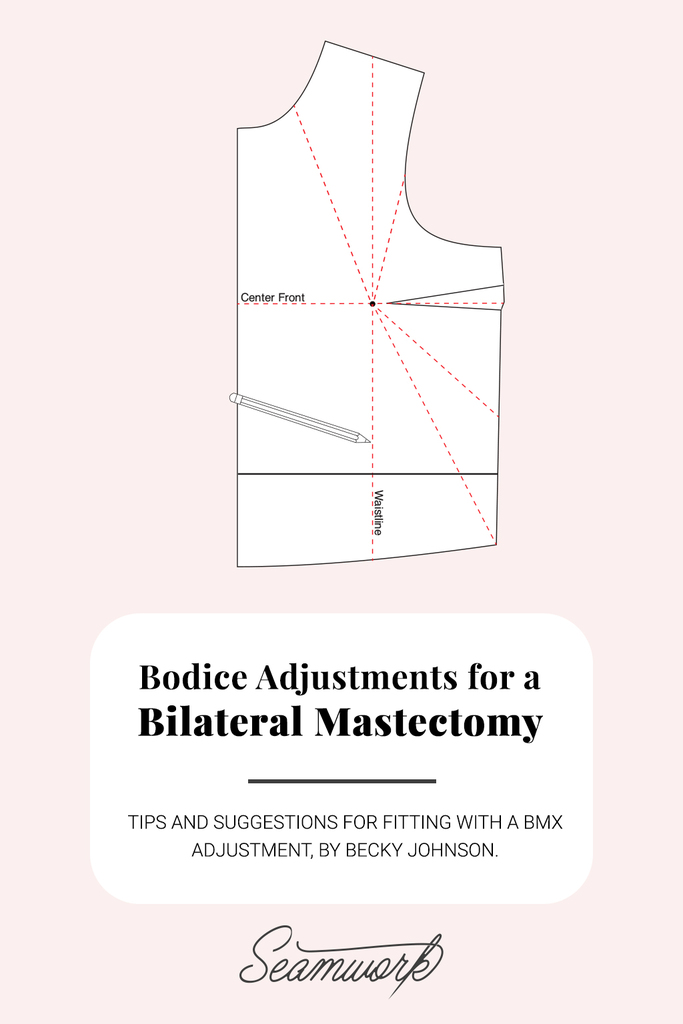
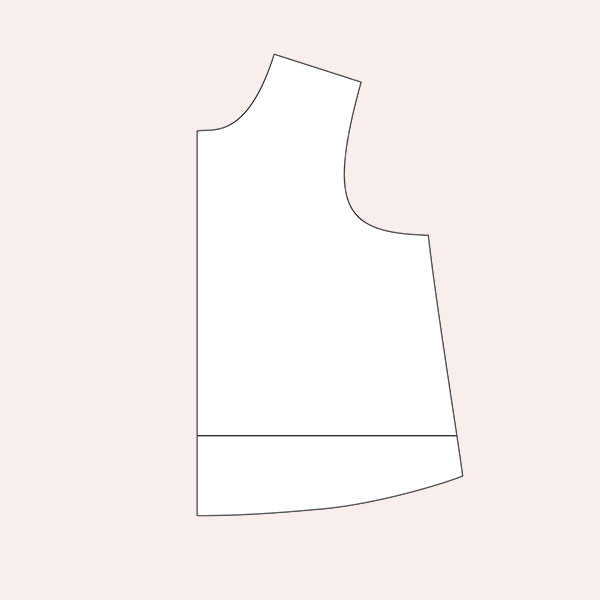
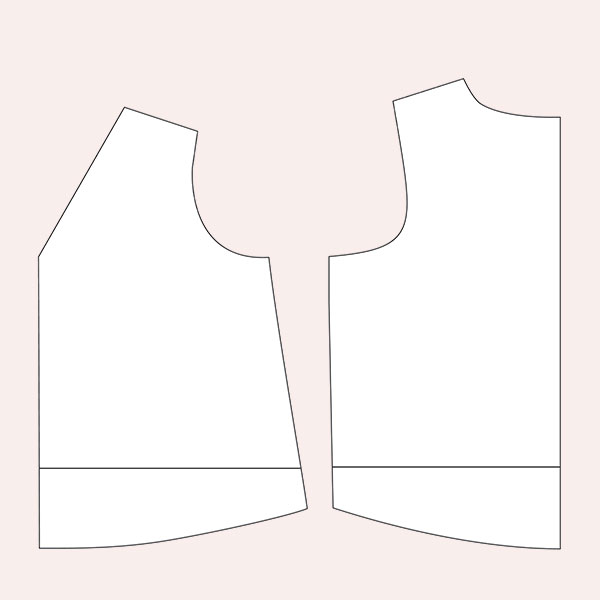
This image is an example of all the places darts may be located on a bodice. Technically, you can transfer any dart to any other dotted line shown on this bodice. For this tutorial, we will be moving the side dart to the waistline and leaving the volume.
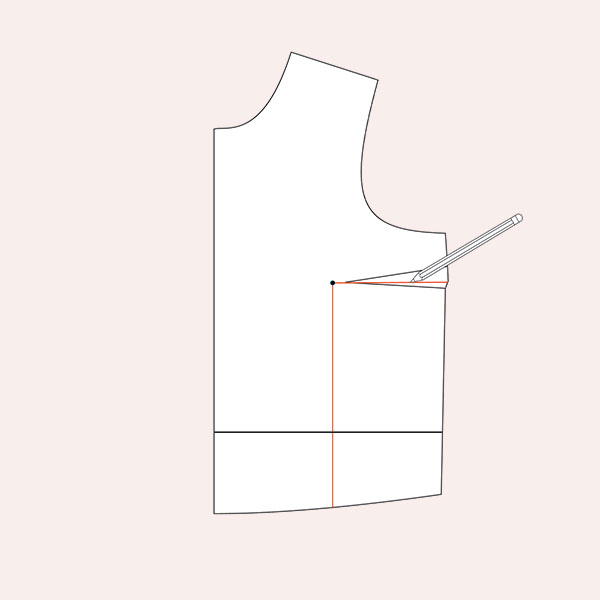
Using a pencil and ruler, draw a line through the center of the dart to the bust apex dot. Then draw a second line, perpendicular to the first, from the apex to the hem.
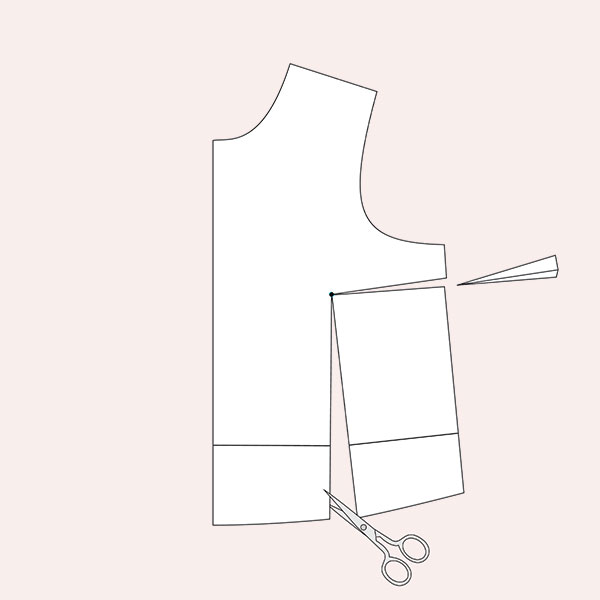
Remove the bust dart, cutting from the side seam to the bust apex. Cut from the hemline up to the bust apex leaving a small paper hinge.
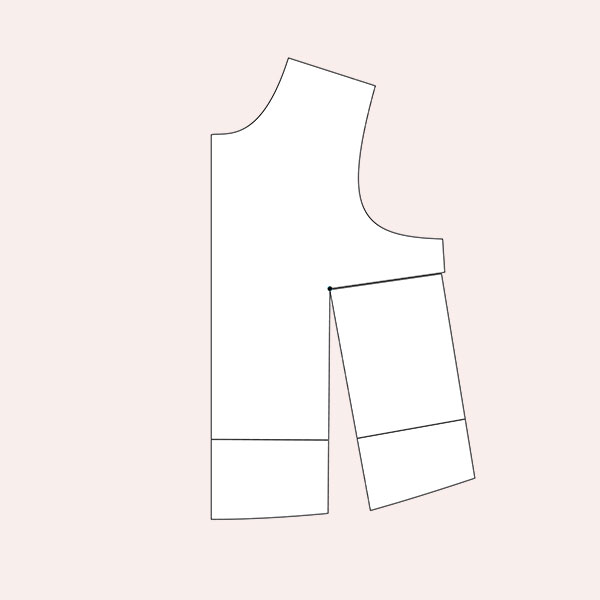
Pivot the corner piece of bodice up, closing the dart.
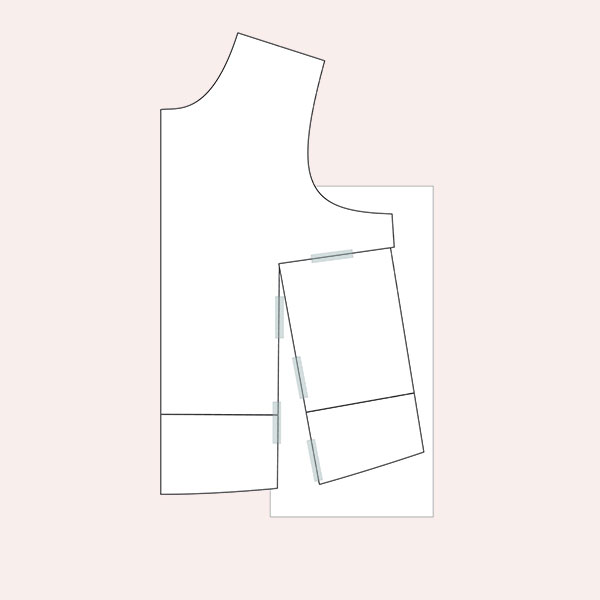
Carefully tape the slashed pattern piece to a sheet of pattern paper, keeping the pivot point at bust apex dot intact.
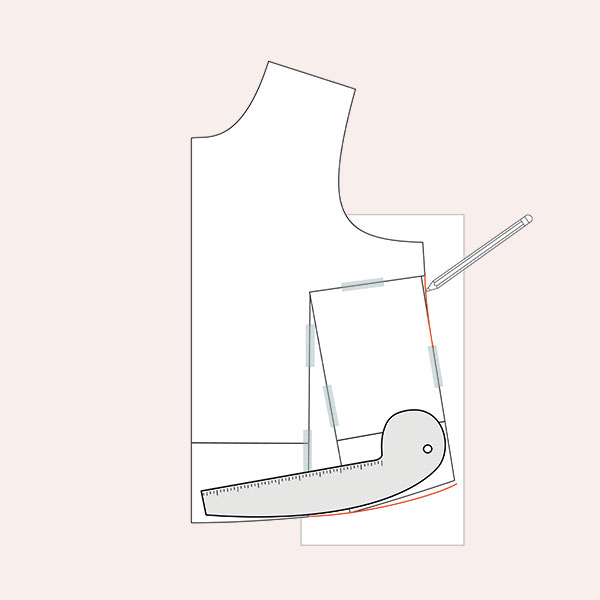
Using your rulers, connect and blend your side seam and hemline.
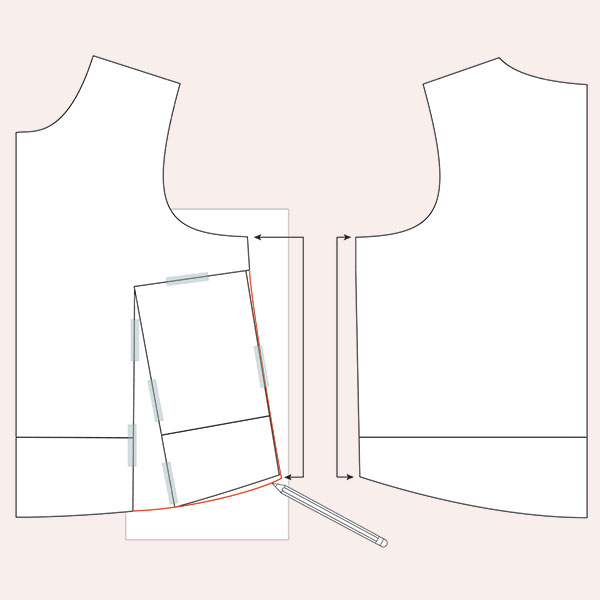
Place the bodice back next to your bodice front before cutting out your new bodice front. You can use a flexible ruler or “walk the side seams” of the front and back bodice together to be sure they are the same length. Adjust the front bodice length as needed.
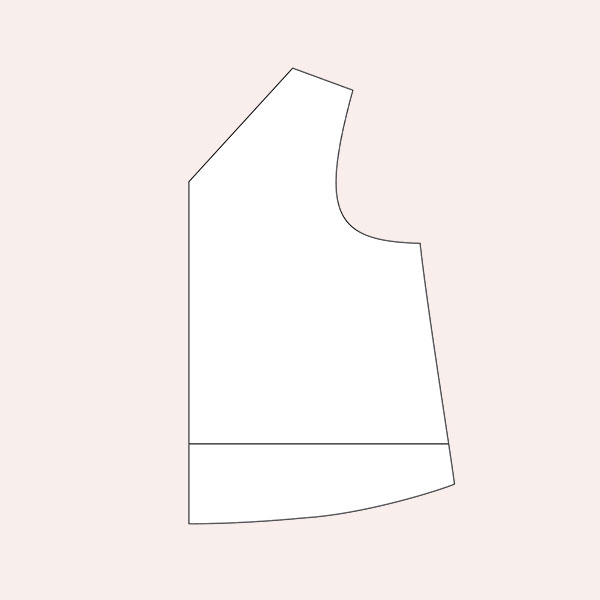
You now have a dart blended out into the bodice. You can optionally take the dart-width back out of the lower side seam at this point, as long as it was an A-AA cup dart, but you may find keeping the volume in covers another complaint after breast cancer, which is the effects of being put into menopause. This will help solve both the desire to avoid sewing a dart and any extra width you may need as the body changes from menopause or the various steroids and chemo medications is already there for you.
If there is a hem-facing, it will have to be altered to match.
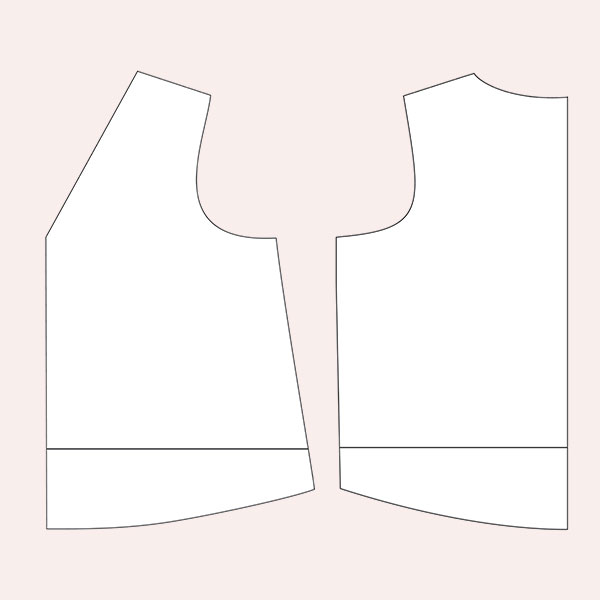
Necklines and Armscyes
This next tutorial is for those looking to cover scarring, chemo ports, and/or the divot left behind in the armpit after a BMX. Note: the armscye adjustments here work both ways, meaning you can reverse the instructions to put in more room if you need. We found the responses to be about 50/50 in regards to armscye/armpit adjustments. Some wanted higher, some found the tissue taken out of the armpit caused their shirts to be “eaten” by their armpits, and some have more sensitivity or complications thereby needing more room in their armpit/arm area. Many wanted lower v-necks, but higher on the shoulder, as an example, to cover chemo port scarring. This tutorial will also work for round and scoop necks.
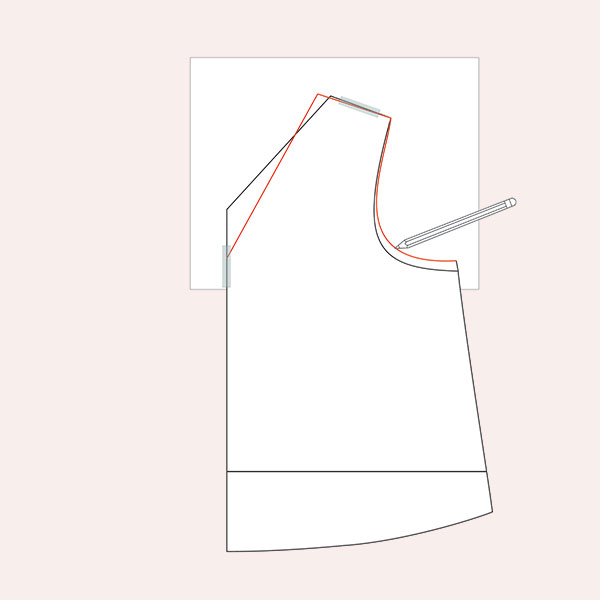
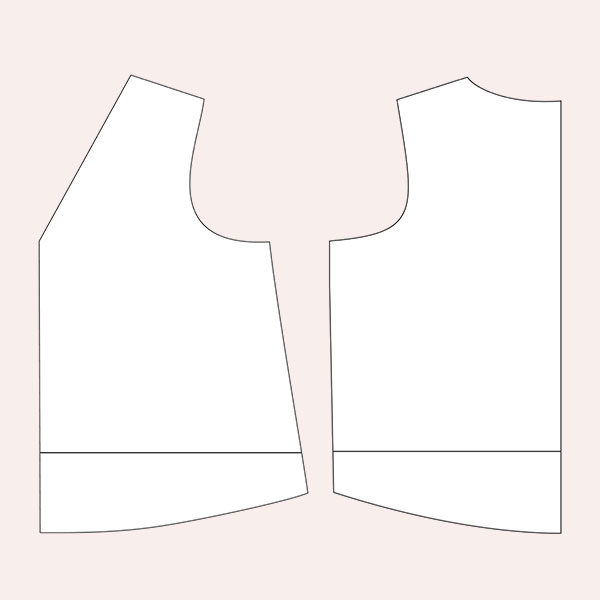
First, tape the front bodice to a piece of paper. Using a straight ruler, reposition and draw your v-necklines where you want them to be. If you’re not sure, use a tape measure, and in the mirror, measure the width and depth you want to be exposed. Divide width by half, subtract seam allowance and use that width from center front of the bodice to the point you want your shoulder seam to start at repeat length minus seam allowance for the depth.
Increase your armscye as you like. Use a French ruler to redraw the armscye.
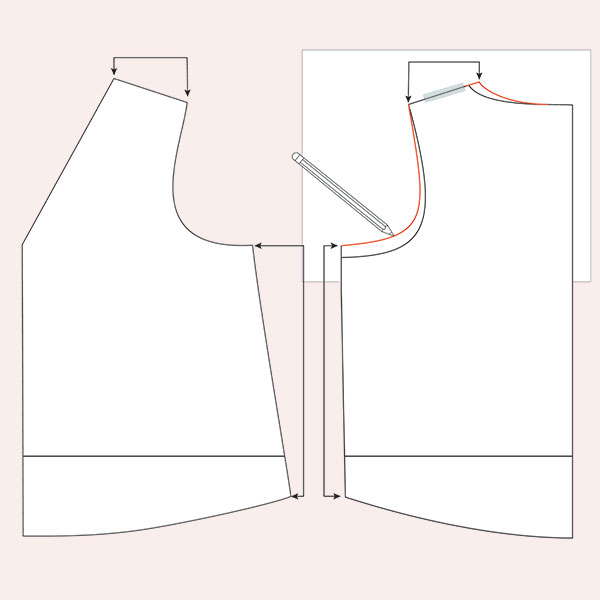
Cut out your new front bodice. Place your back bodice on a piece of paper, and true-up your shoulder and side seams to match the adjustments made to the front bodice. Take note that where the front and back bodice meet, they need to connect at a 180-degree angle, meaning you want 90-degree corners. Another way of saying that is you don’t want any peaks or valleys in your seam connections. Sometimes the “No Peaks or Valleys” seam rule is an easier visual to remember.
When all is said and done, you’ll have two new front and back bodice pieces. Remember to adjust any facings, collars, or sleeves to match.
Forward Shoulder Adjustment
A common complaint after a BMX is that front shirt necklines tend to start creeping toward the back. This happens to almost everyone in a cut-on sleeve bodice where the shoulder seams run down into the sleeve, but it’s more troublesome in all tops for those with a small bust size or after a BMX. Most times, not always, a small Forward Shoulder Adjustment can pivot just enough of the shirt shape forward to help prevent the neckline creep. It’s worth mentioning in this article to point out it’s not just you.
Take both the front and back bodice out for this adjustment.

Cut both shoulders at a point just below the seam allowance, and parallel to the seam. Decrease the front bodice shoulder by 1/4”-1/2” and increase the back bodice shoulder by the same amount.
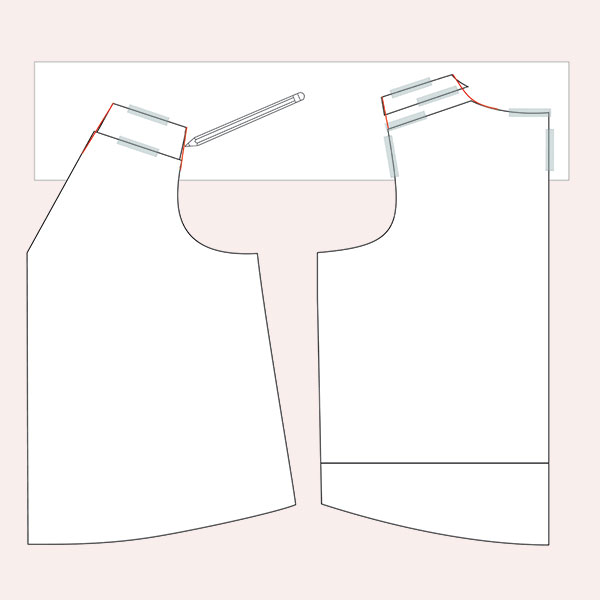
Using a pencil and your rulers, blend the armscye and neckline.
Once you have your new front and back bodice pieces, make sure you make the same alterations to any facings you may have. If you are working with a pattern with sew-on sleeves, adjust the sleeve shoulder marking to reflect the new shoulder position.
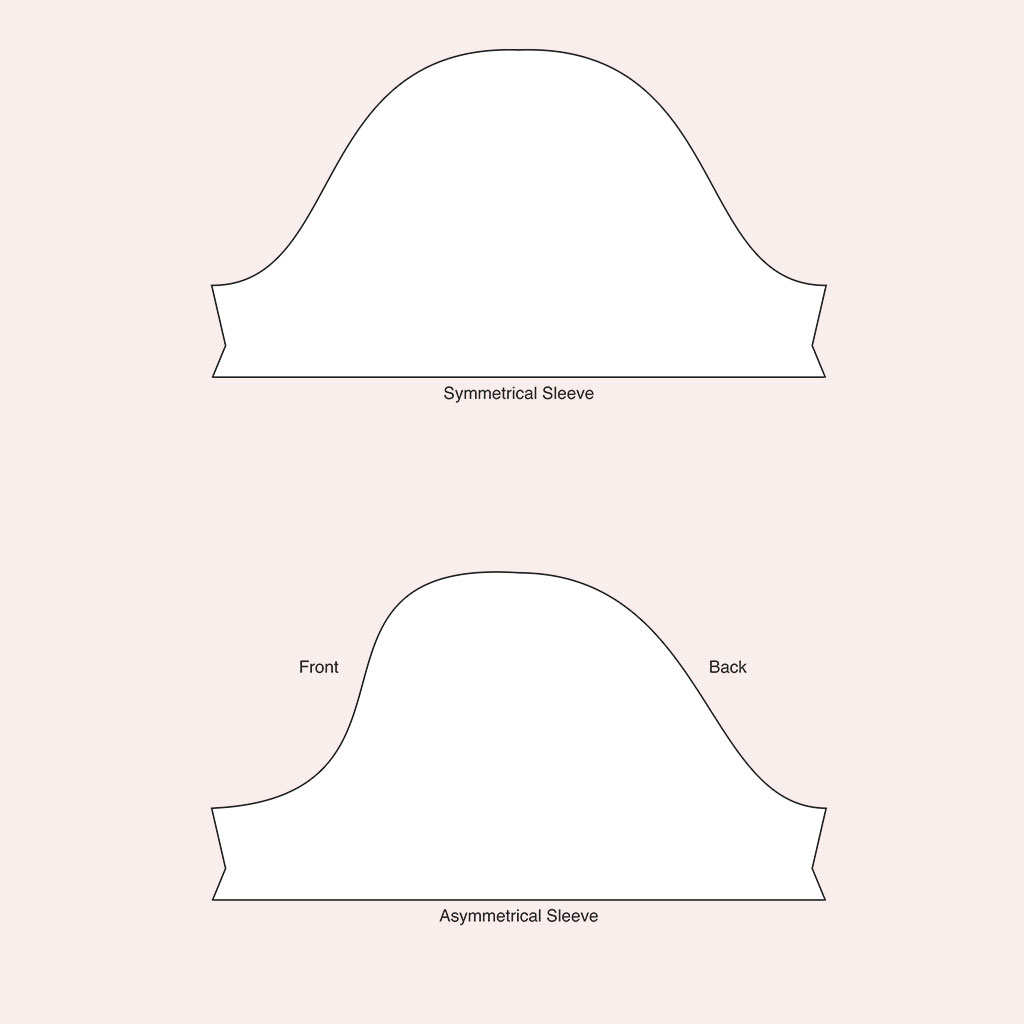
Sometimes, adjusting for the neckline creep can be entirely avoided by choosing patterns that do not have cut-on or symmetrical set-in sleeves. The diagram below is a bit exaggerated to show the difference between a symmetrical set-in sleeve and an asymmetrical set-in sleeve. The asymmetrical sleeve with a clearly shaped front and back side will help hold the entire bodice in place as it is shaped for the differences in the front and back of a shoulder.
These bodice alterations are just a start to helping the Breast Cancer community sew garments that feel good. There is no one solution for all, and while we interviewed the more vocal in the community who were so very generous in sharing their stories and bodies with us, we acknowledge there is so much more to learn together. There are many amazing sewists on Instagram and in forums talking about sewing after a bilateral mastectomy, unilateral mastectomy, with prosthetics, with reconstruction, without reconstructions, and more. The more our community talks about sewing and fitting alterations, the better.
We want to give special thanks to Denise Archer and the Portland Breast Cancer group, survivor Dr. Heather Sanders, and all the many women who let us into their lives.

Becky Jo Johnson
Becky Jo Johnson has been in some form of marketing and graphic design for 20 years. With a penchant for reverse engineering, she’s found there’s nothing more exciting than learning and sharing. Becky Jo lives in the Pacific Northwest with her family and can be found online on Instagram @sewbeckyjo.