Sign In
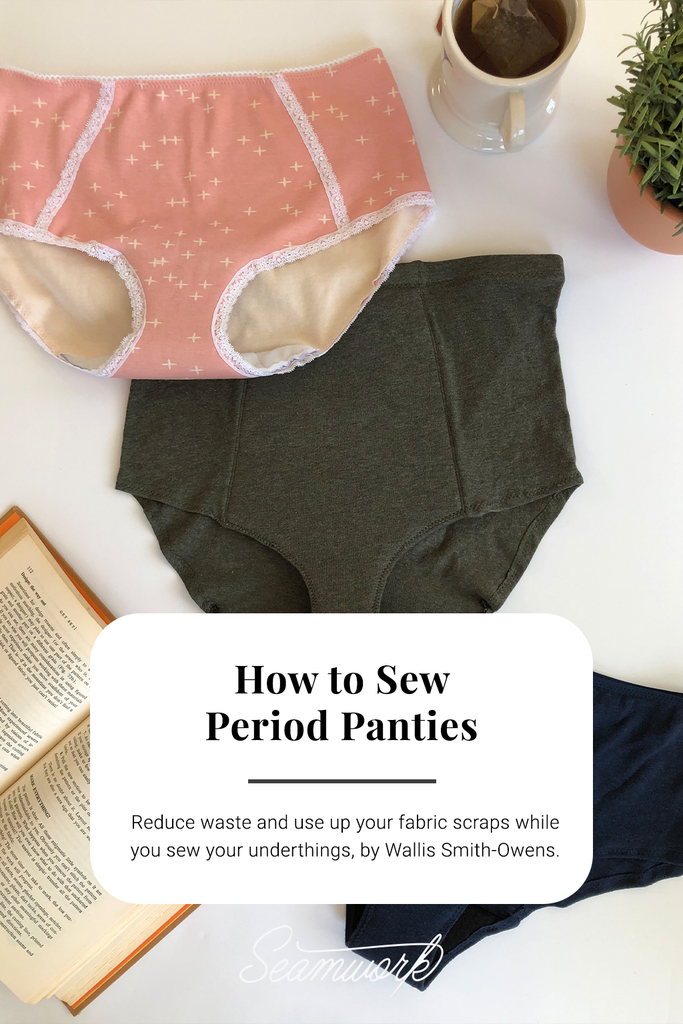
Last year I attempted to reduce my environmental impact much more than I have in the past. I started using dryer balls, mesh produce bags, bar shampoo, and conditioner, etc.—but one of the more taboo switches has been to menstrual underwear.
I don't know about you, but recently I have been bombarded with ads for period underwear. Many of these panties are around $30 or more each and, according to many reviewers, do not offer much absorbency. Last year, I dove into the world of DIY period underwear and haven't looked back! Keep in mind there are many ways to make your own period panties, and I encourage you to research other articles and methods to find what works best for your body and lifestyle.
In this article, we will be using organic cotton for our underwear, but this is a great project for those small knit scraps that you have around! We realize that PUL is not considered an environmentally friendly fabric, but keep in mind the number of pads and tampons you'll be able to keep out of landfills. On average, one person uses around 25-30 tampons and pads combined a month (source here), whereas 1 yard of PUL can supply enough undies to get you through many cycles!
Fabrics to Consider
-
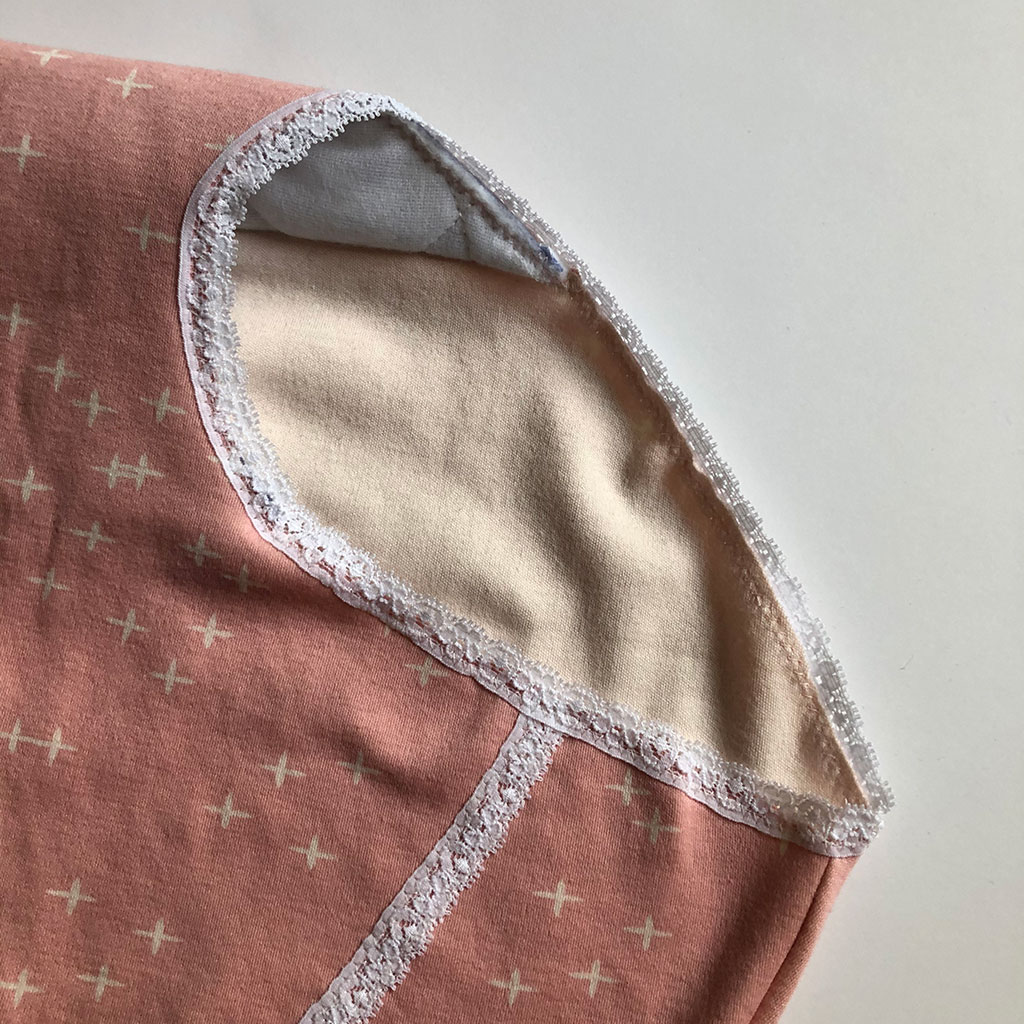
A leakproof layer such as PUL. There are a lot of different PUL-backed fabrics such as terry cloth, but we'll be using an antimicrobial Zorb Waterproof Soaker Absorbent Silver Fabric with PUL for this tutorial. An added benefit of this material is that the right side of the fabric is safe to use directly against the skin. In this tutorial, I will be referring to the PUL side of the fabric as the wrong side or the back. -
Shell fabric or the main fabric of your underwear. I recommend something comfortable and breathable like organic cotton. Consider using some of your small knit scraps—you can even use different fabrics for each pattern piece to create a fun color-blocked look. -
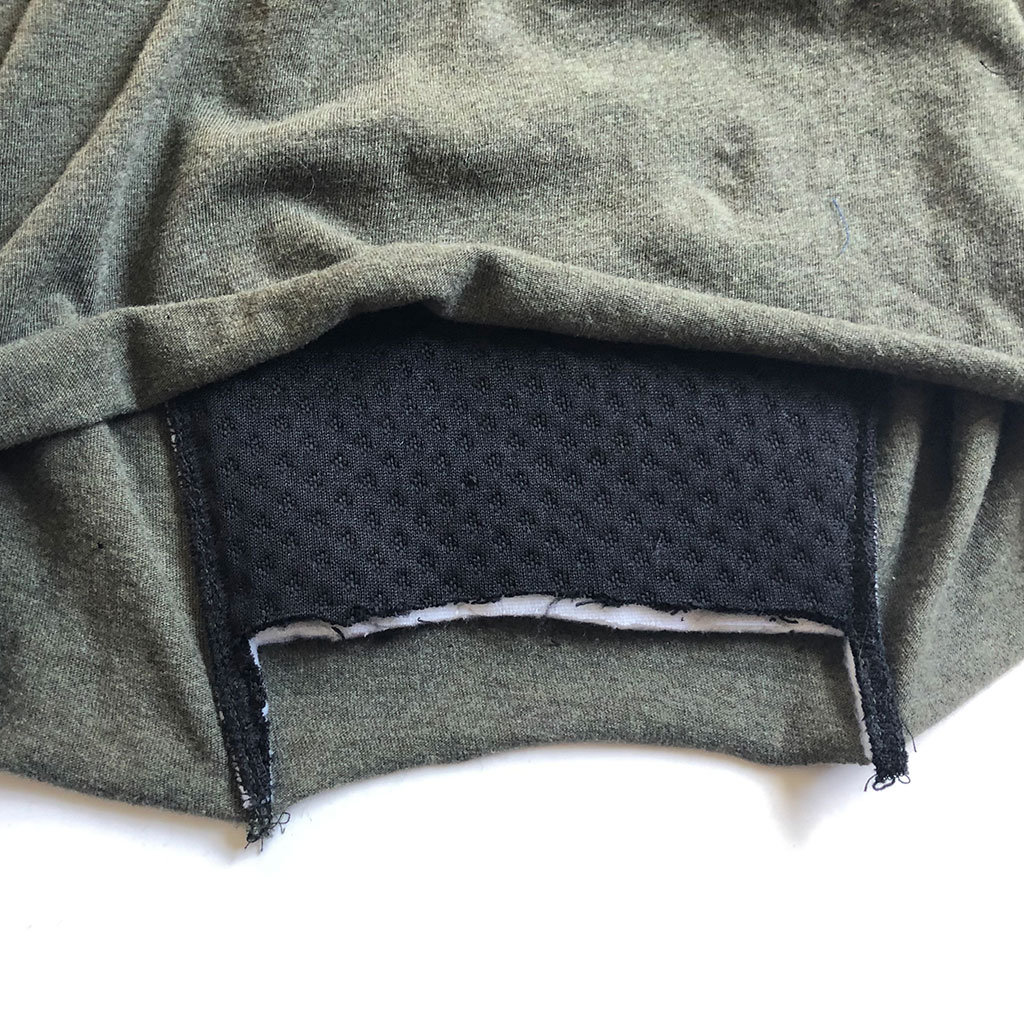
An absorbent layer such as Zorb—some prefer fleece or other fabrics that are more accessible. I favor Zorb because it is less bulky and more absorbent than other options I've explored. Keep in mind if you use plain Zorb inside of your gusset (it looks and feels like felt), you'll need another layer of fabric on top of it because it cannot be used right against your skin. For this article, I am using antimicrobial Zorb Bamboo Dimple Fabric that is approved for use directly against the skin. -
Optional wicking fabric to cover Zorb. If it's not approved for direct skin contact or if you want to cover up a light-colored Zorb, use another fabric to cover it. I typically use scraps of wicking athletic fabrics leftover from my activewear projects (or cut up an old race shirt) - Lingerie or fold-over elastic
Looking at all of the different fabric options can be overwhelming, especially if you're on a budget. The initial price tag of making your own menstrual panties can be steep, but given how many pairs of underwear you'll be able to make with each yard of fabric (or even less than a yard), the actual cost of each pair individually is only a few dollars. Keep in mind you can also use scraps for the main fabric of your underwear, or if your scraps are extra small, consider designs with princess panels such as Reno or Geneva. If you order from Wazoodle (where I order Zorb from), check out their seconds selection—it offers the same fabrics with minor flaws for around 30% off. Later in this article, I will be offering tips for alternative fabrics that are more cost-effective.
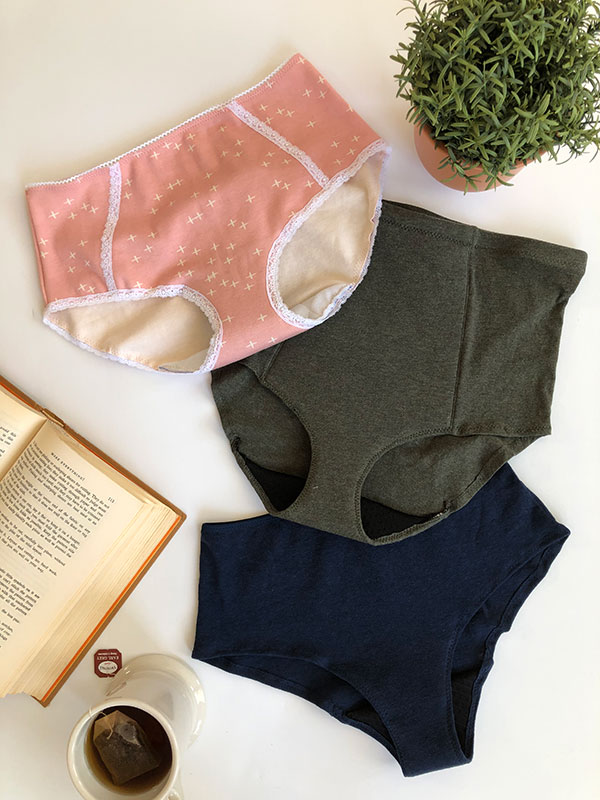
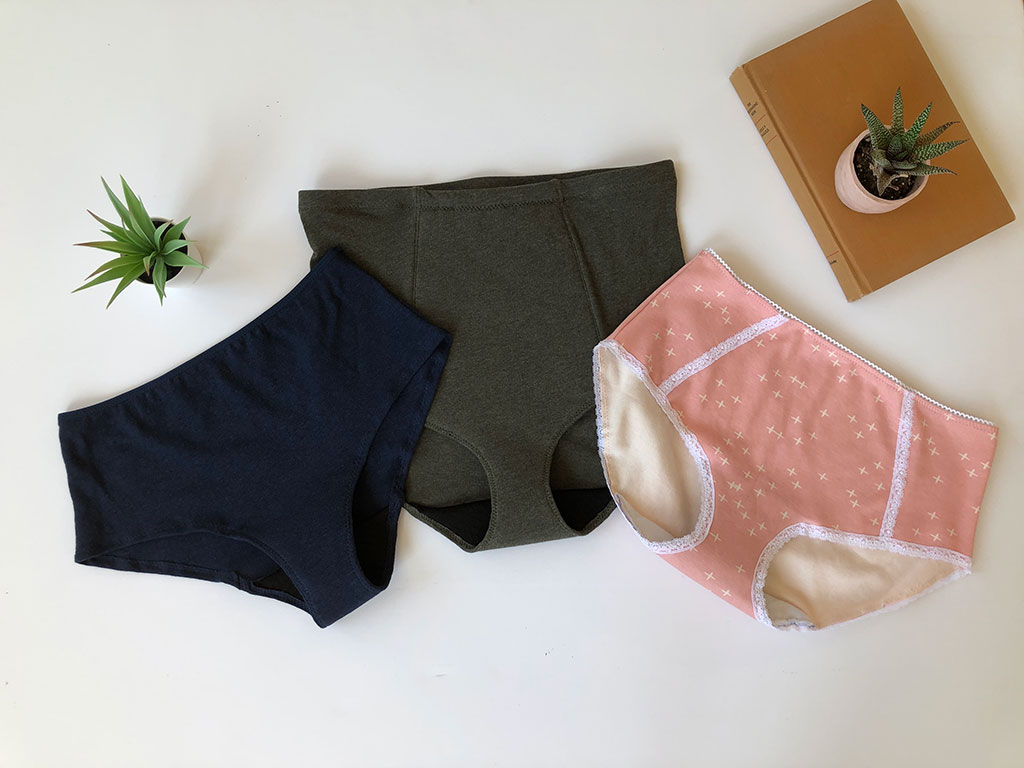
Period Panties Three Ways

Here are three ways to hack your favorite underwear or swimwear patterns into period panties. You can mix and match any of these methods and finishes with other patterns, and this is just my own personal twist. Depending on how much support and absorbency you personally need, you can play with gusset length and width and how many layers of absorbency to cut (you can stack more layers of absorbent fabric in the gusset as long as it is not backed with PUL). If you want to cover up light-colored Zorb to hide stains, I recommend using a dark wicking athletic fabric to draw the moisture away from your body.
Reno: For Heavy Days
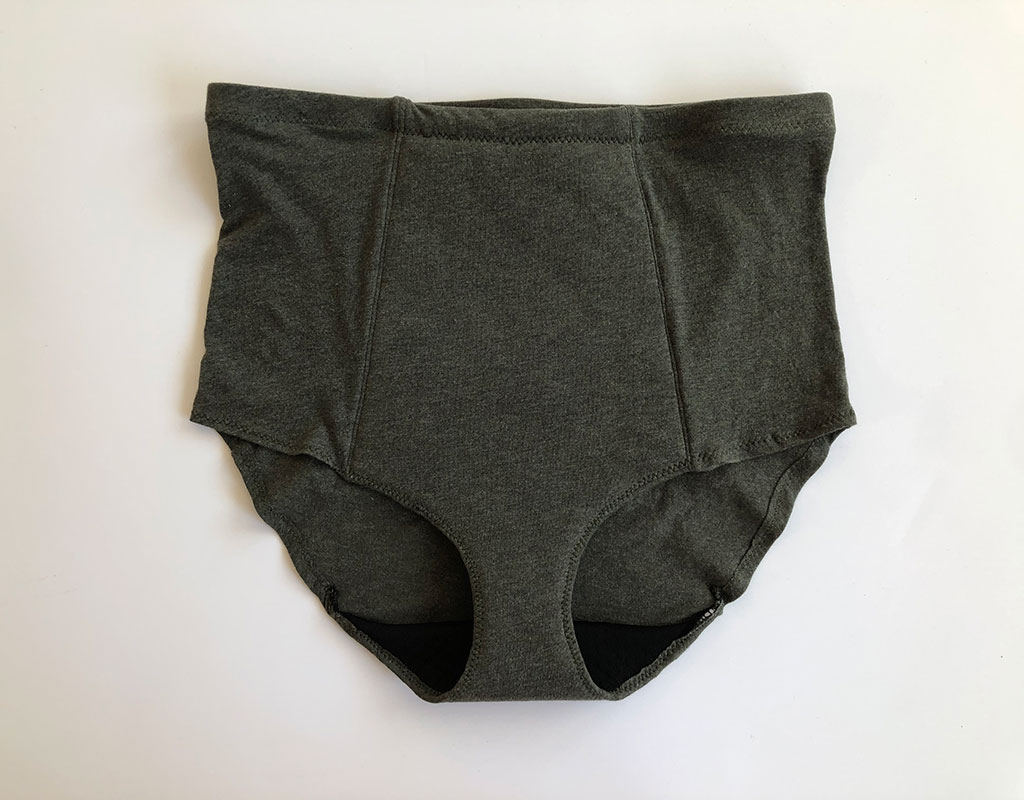
Reno is a great pattern to start with, even though it's intended to be swimwear. I used organic cotton for this pair. PUL (which is used in the gusset) typically does not have any stretch, so it's important to make sure the front rise of your underwear will still be high enough for comfortable coverage, even without stretch. A high-waisted pattern will require fewer adjustments overall since you won't have to adjust the rise.
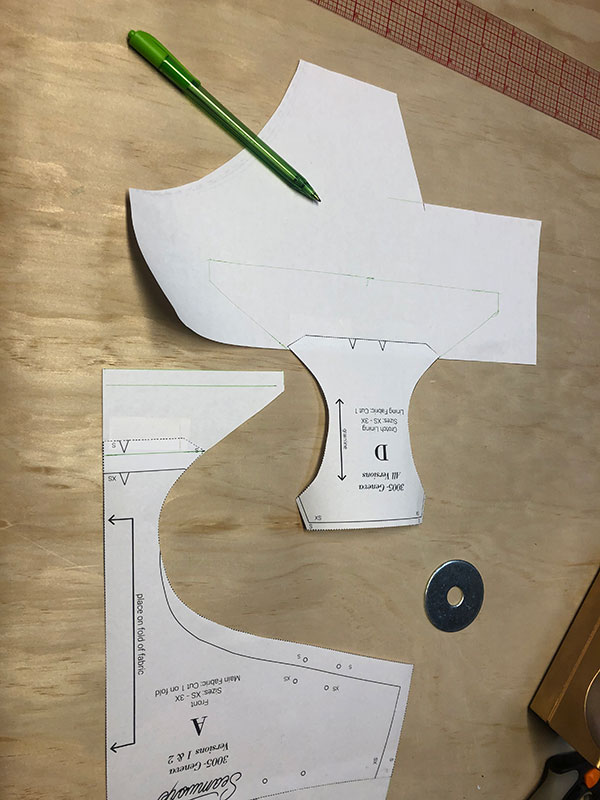
Pattern Adjustments
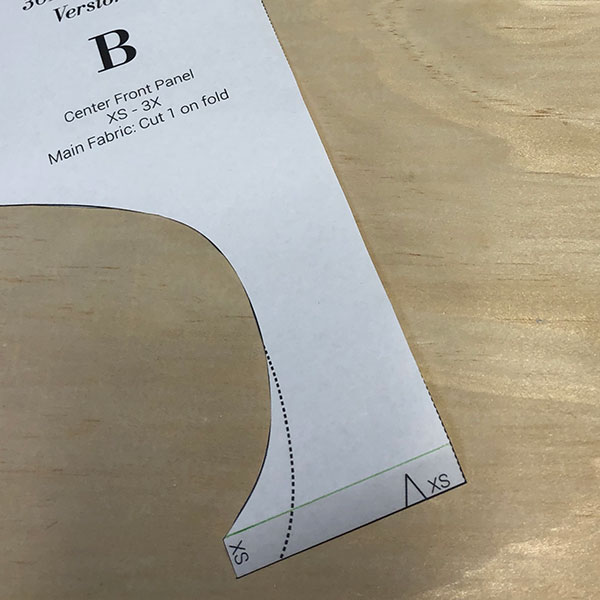
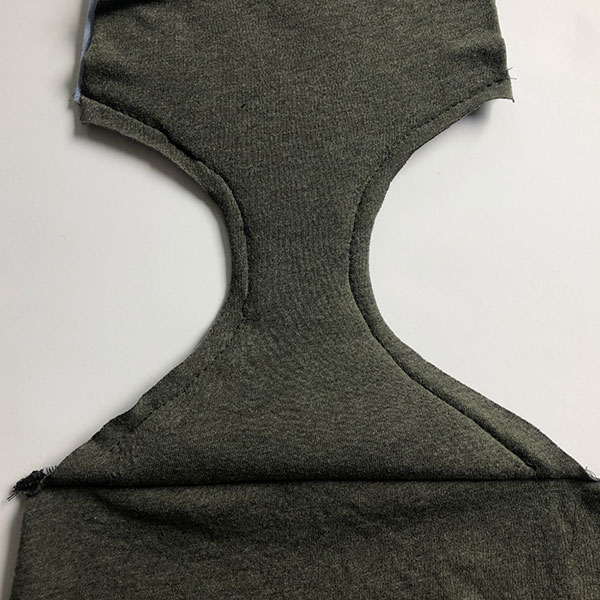
1. Remove 3/8" seam allowance from the bottom of the front center panel and the back.
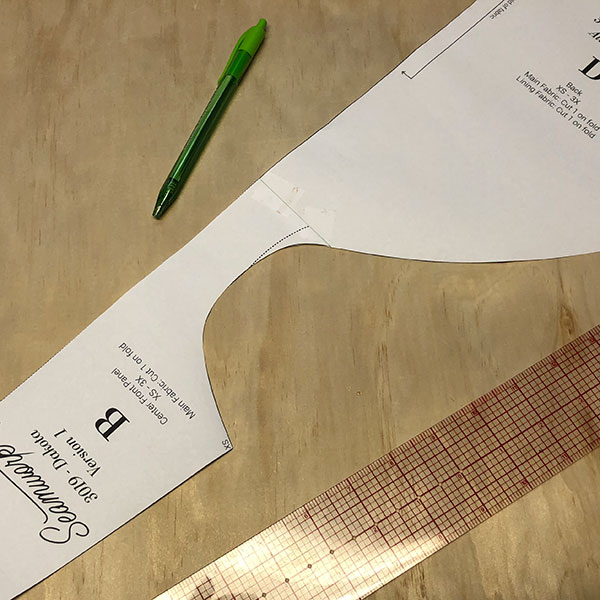
2. Tape paper to the bottom of the front center panel and then lay these two pieces together along the bottom seam. Extend the bottom of the center front panel by 2" following the shape of the back piece by tracing onto the paper underneath. Add 3/8" seam allowance. These alterations will extend the gusset to better replicate the length of a pad.
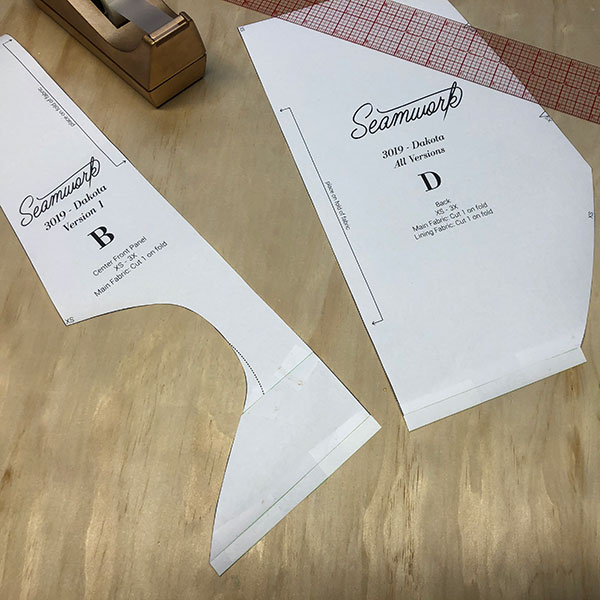
3. Remove 2" from the back and add 3/8" seam allowance.
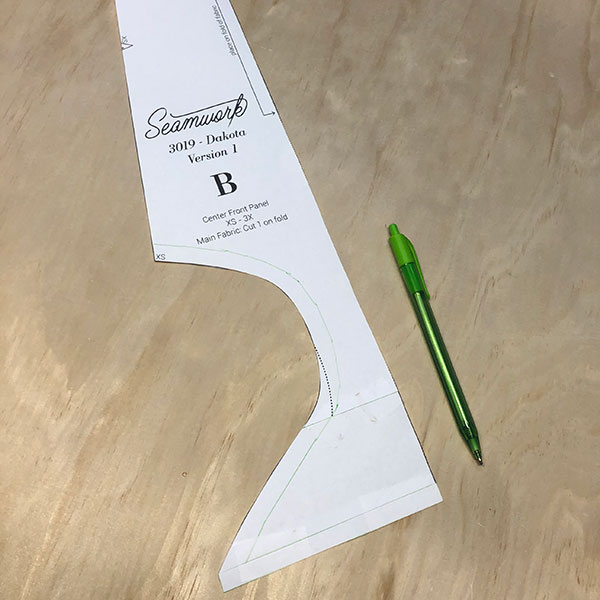
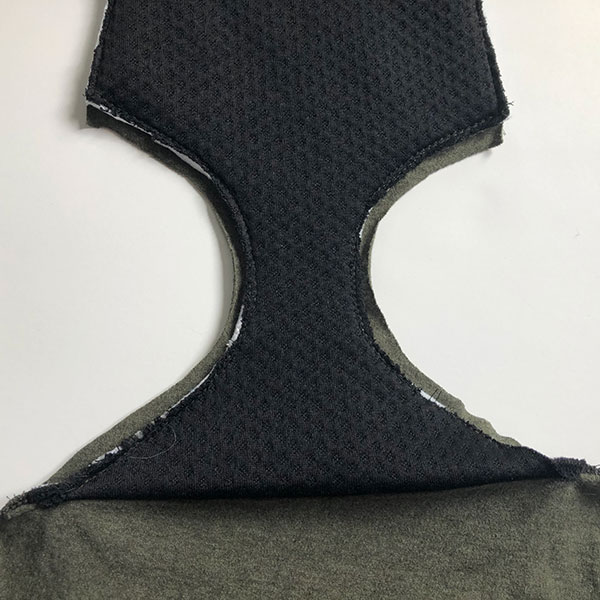
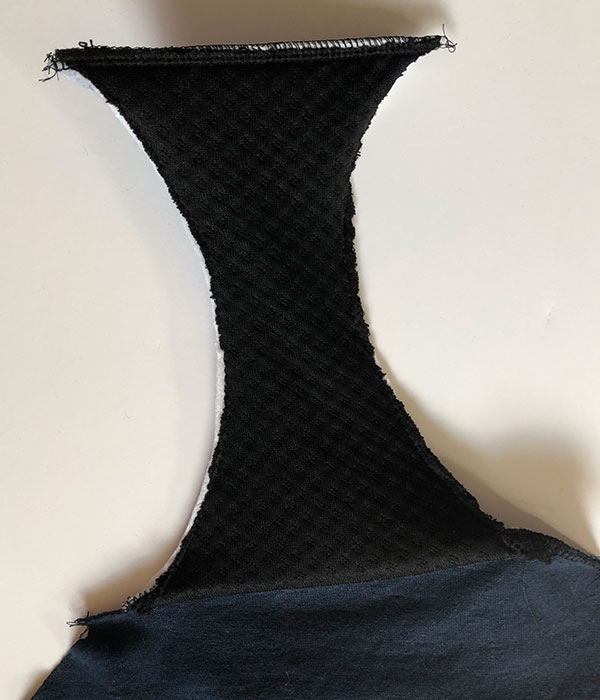
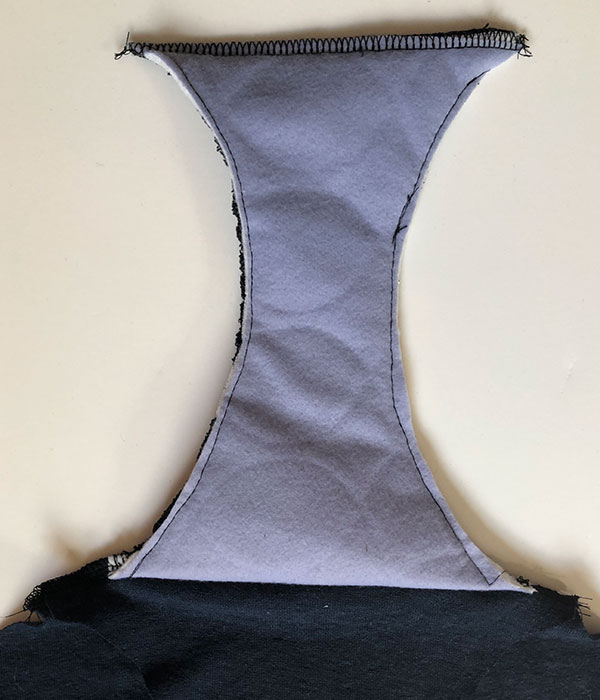
4. If you plan on turning and hemming the leg openings (like I have), trace your front center panel piece. Remove 3/8" seam allowance from the leg openings— this is now your gusset piece that will be only for cutting out your absorbent layers. I forgot to do this next step, but if you're using a wide elastic for the waist, it's important to remove the same amount as the width of your elastic from the top of this new gusset piece. I regret not removing 3/4" from the top of my gusset pattern piece (the width of my elastic), but I will show you the solution I came up with in the next section. The gusset piece with PUL will now be called your inner gusset, and the absorbent layer will be called your outer gusset. The shell/main fabric will be cut from the front center panel.
Sewing
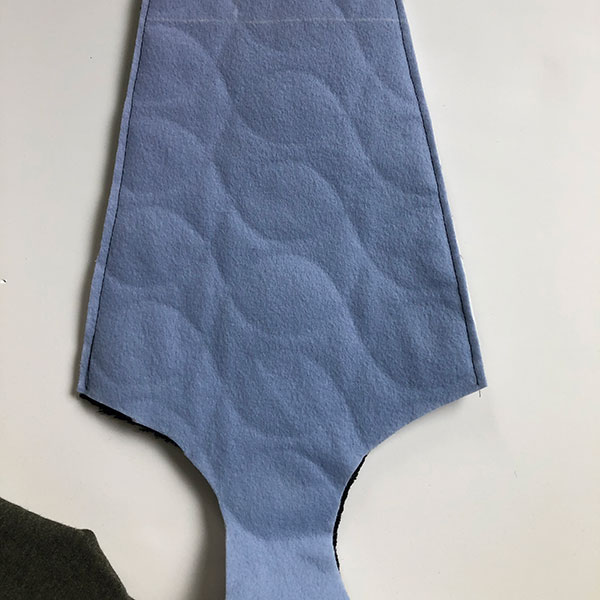
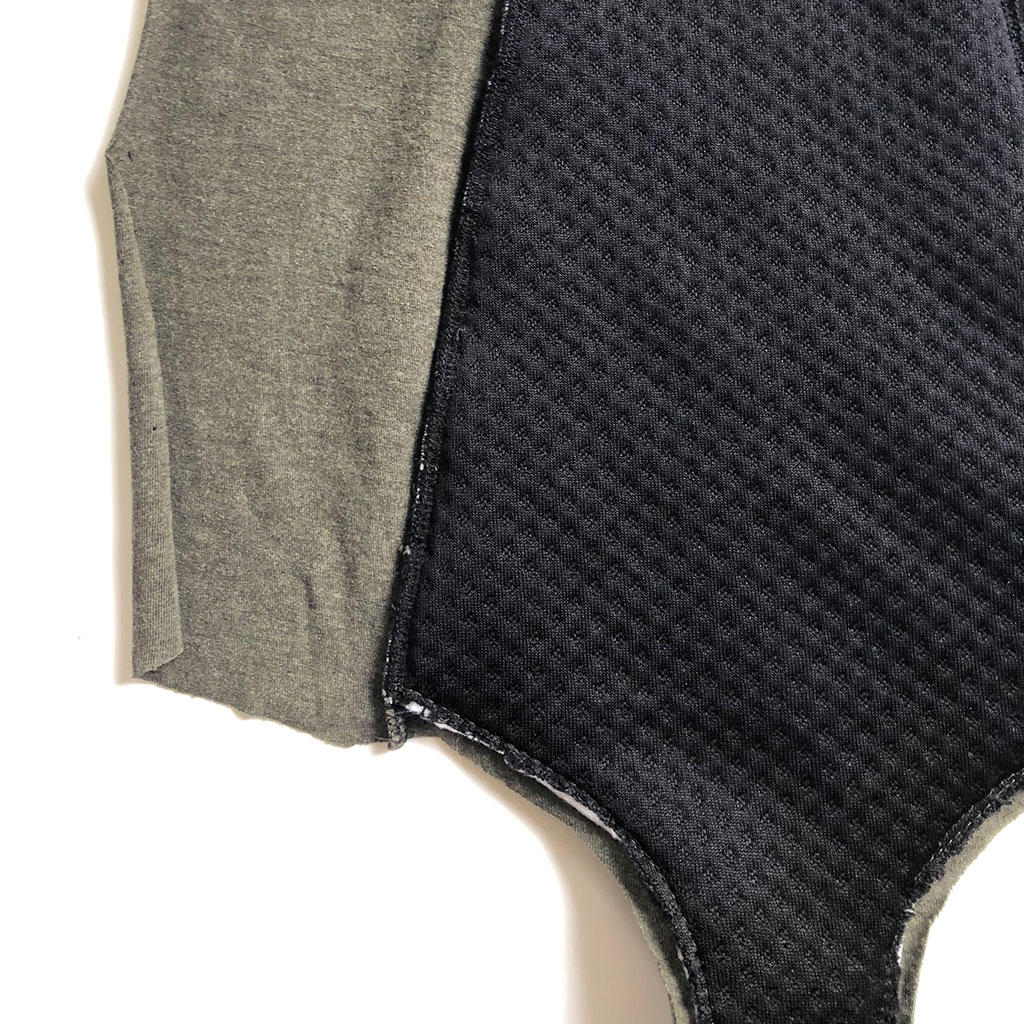
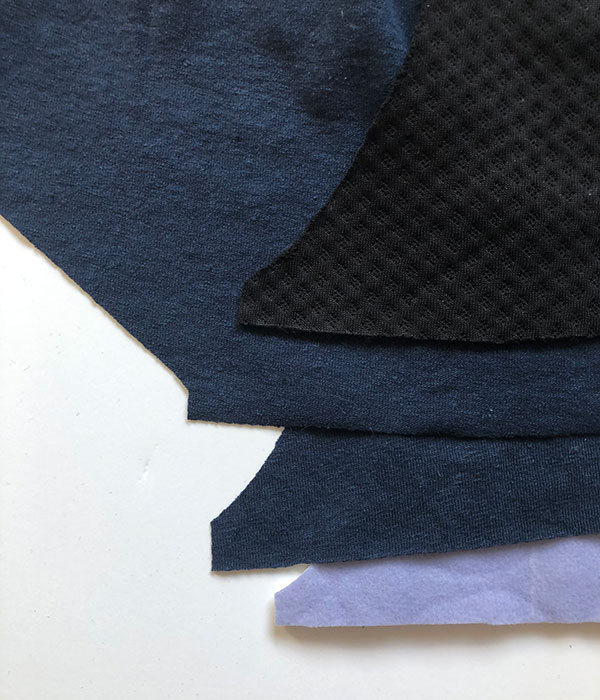
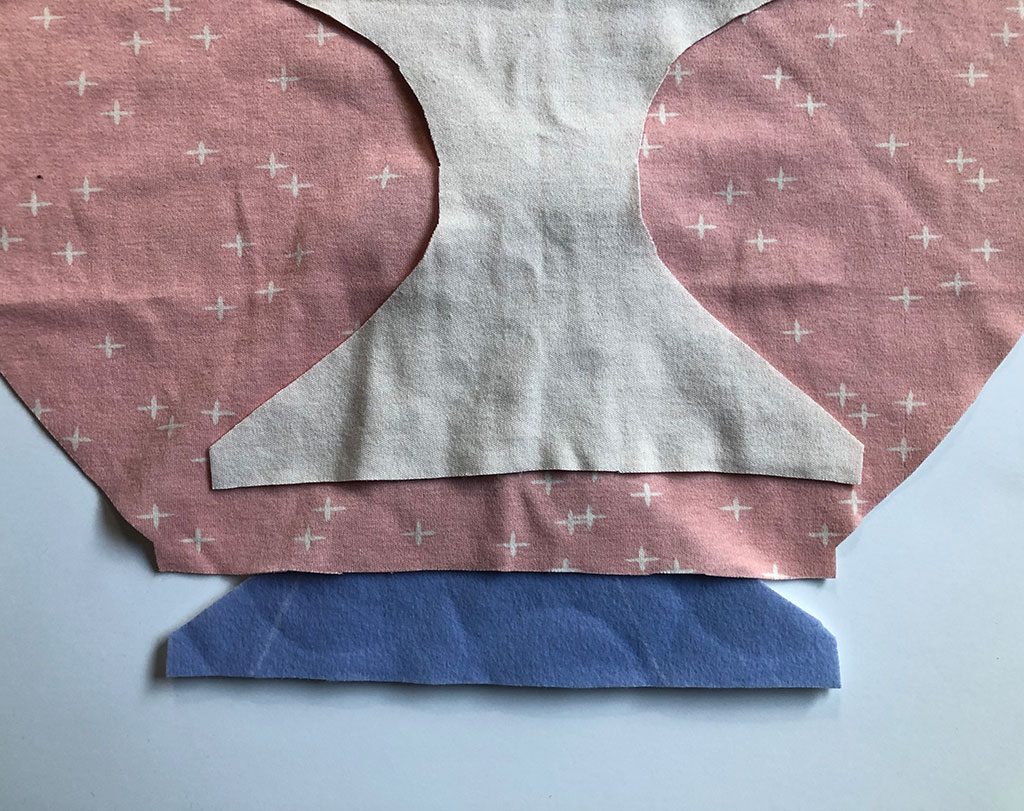
1. Follow cutting instructions for the front center, side panels, and back. For this pair, I cut one layer of Zorb Bamboo Dimple for the outer gusset and 1 layer of Zorb Waterproof Soaker Absorbent Silver for my inner gusset, both cut from the new gusset pattern piece.
2. Create a "sandwich" by layering your pieces in the following order—inner gusset face down (this is the bottom of your sandwich), front center panel face up, back face down, inner gusset face down (this is the top of your sandwich). Do not use pins on a PUL layer because this will create tiny holes in the fabric that are not waterproof! Use clips instead if at any point you need to pin.

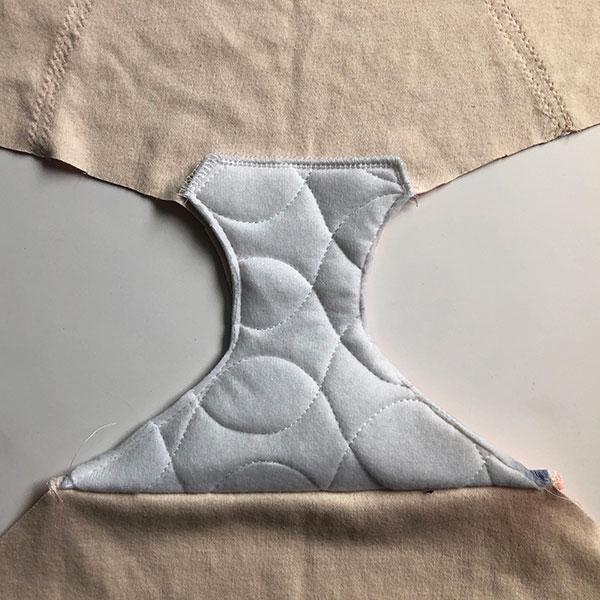
3. Sew the bottom seam of your sandwich together, keeping in mind that your gusset pieces are narrower than your shell pieces. I recommend basting one layer at a time together—I started with my shell pieces then did each gusset one at a time to make sure everything stayed neat and aligned.
4. Baste the sides of the two gusset pieces together.
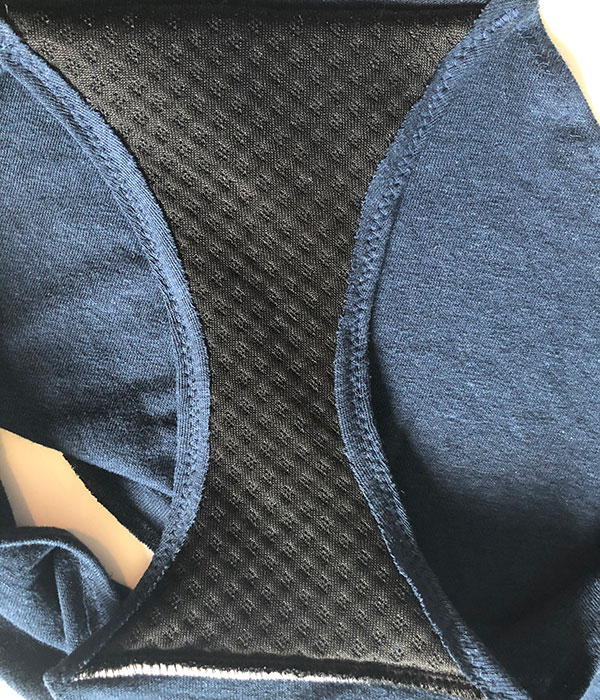
4. Lay the gusset unit onto the front center panel. Baste the gusset onto the front center panel along the leg openings, keeping in mind the gusset will be 3/8" narrower than the front center panel.
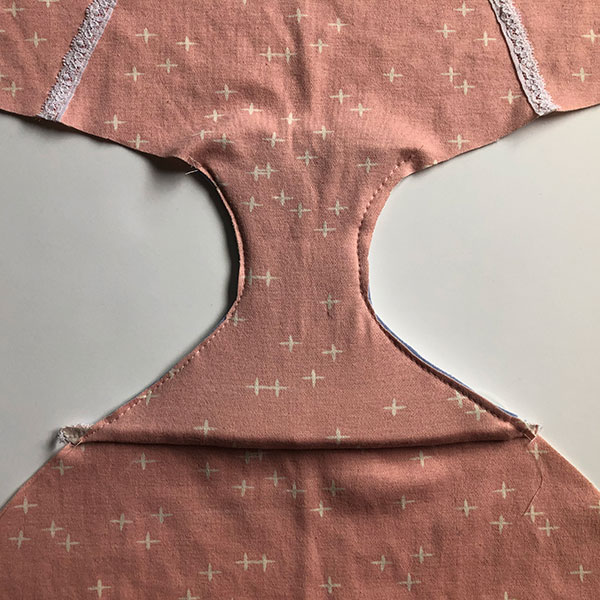
5. Sew the side panels to the entire front center unit making sure to catch the gusset layers as well. Press the seam allowances towards the side seams/away from center front. On the right side of the front topstitch the seam allowance using a zigzag or straight stitch—twin needle is not recommended since this seam will be thick.
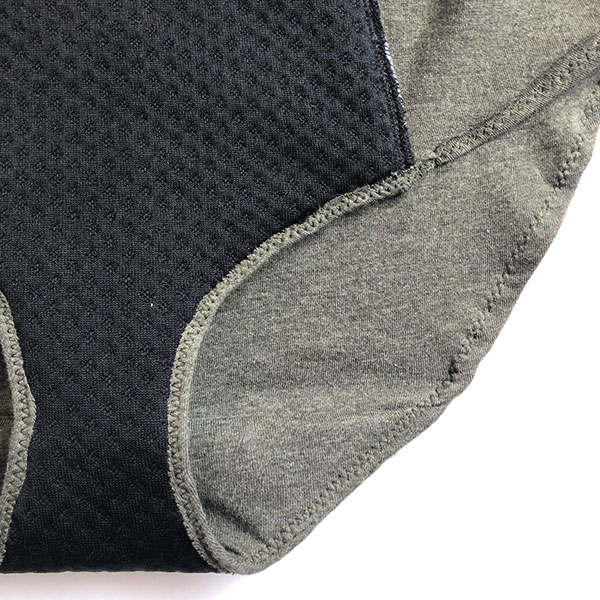
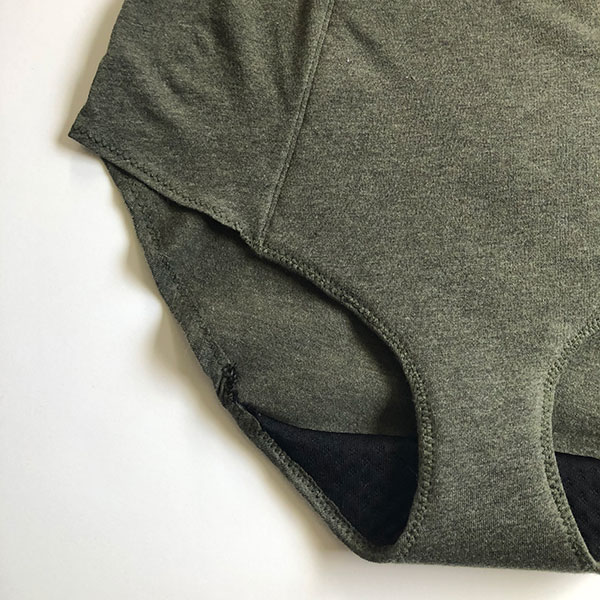
6. Hem the leg openings using a 3/8" hem and zigzag stitch. At the gusset, I recommend stitching close to the edge of the leg opening and trimming any extra seam allowance. Every stitch in the PUL layer creates a hole that is not leakproof, so it's better to have them on the edges of the gusset rather than towards the middle where you need the waterproofing!
7. If you cut your gusset piece to be shorter at the top than your shell pieces, simply attach your elastic and fold over to hem. Since I missed this step, I had to do the best I could to cut 3/4" off of the top of my gusset before attaching the elastic.
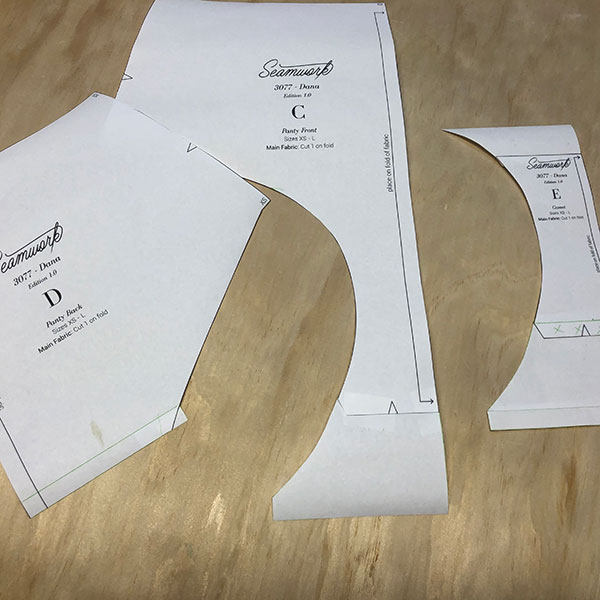
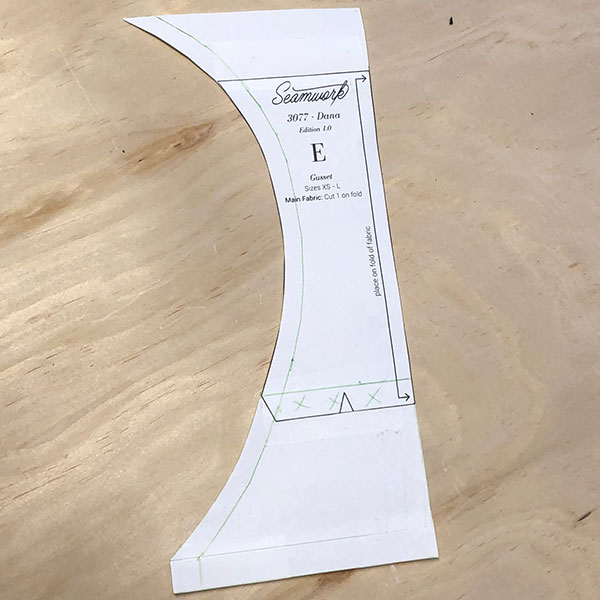
Dana: For Moderate Days
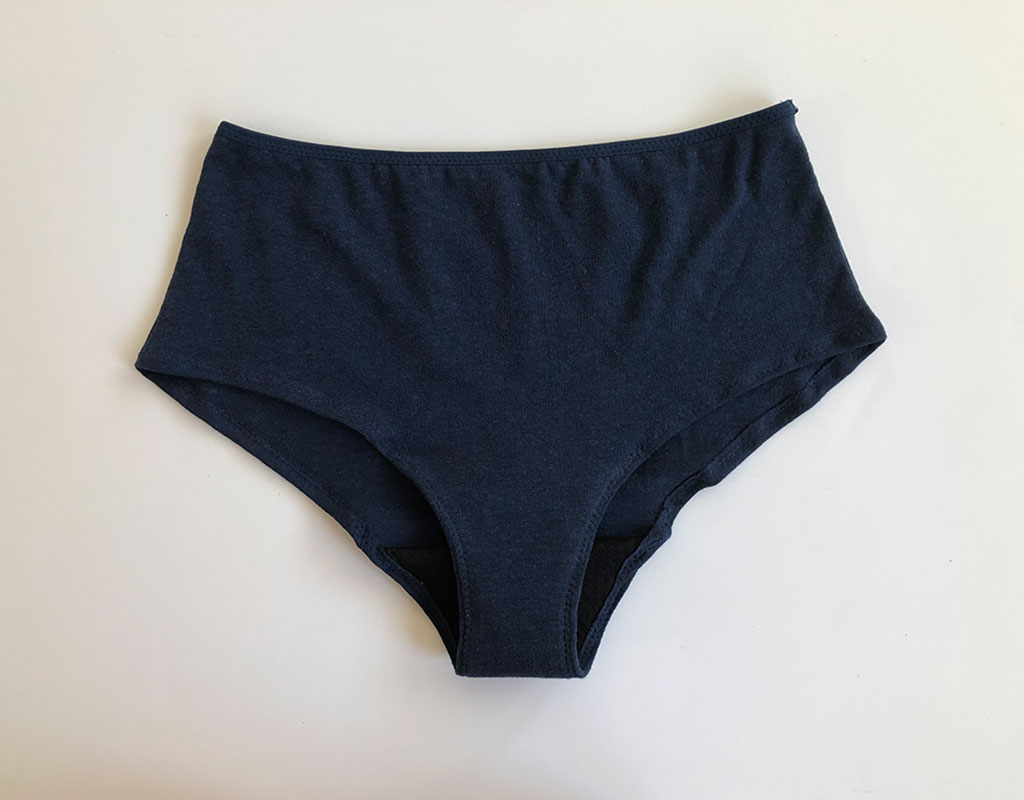
Dana is a straight-forward underwear pattern. I used organic hemp jersey for this pair.
Pattern Adjustments
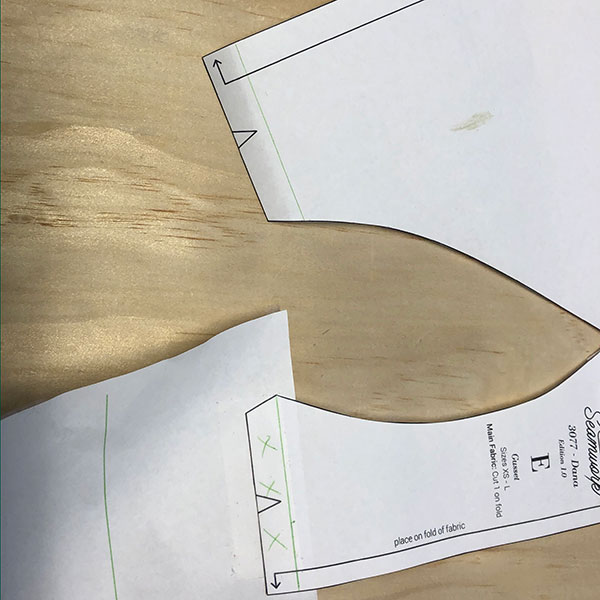
1. Remove 3/8" seam allowance from the bottom of the front and the back.
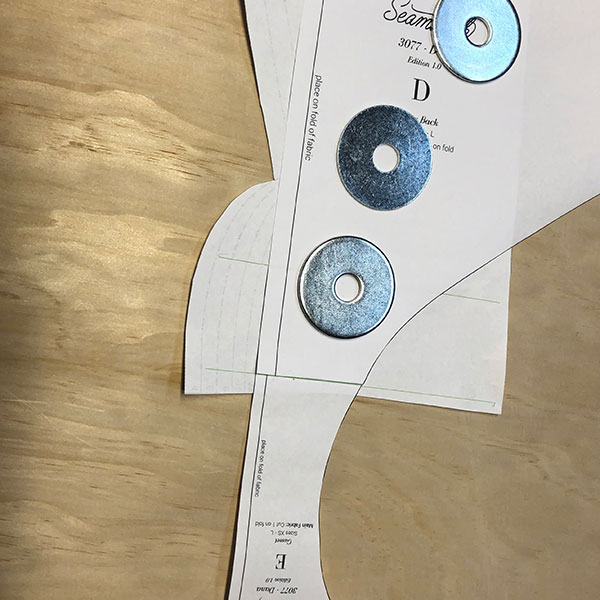
2. Tape paper to the top and bottom of the gusset. Lay the gusset and the back together along the bottom seam. Extend the bottom of the gusset by 2" following the shape of the back piece by tracing onto the paper underneath. Add 3/8" seam allowance.
3. Trace this new shape onto the bottom of the front. Then I added an additional 1" to the top of the gusset following the shape of the front. You now have extended the gusset to better replicate the length of a pad.
4. Remove 2" from the back and add 3/8" seam allowance.
5. If you plan on turning and hemming the leg openings (like I have), remove 3/8" seam allowance from the leg openings on the gusset piece.
Sewing
1. Follow cutting instructions for the front and back. For this pair, I cut one layer of Zorb Bamboo Dimple for the outer gusset and 1 layer of Zorb Waterproof Soaker Absorbent Silver for my inner gusset—these are both cut from the new gusset pattern piece.
2. Create a "sandwich" by layering your pieces in the following order—inner gusset face down (this is the bottom of your sandwich), front face up, back face down, inner gusset face down (this is the top of your sandwich). Do not use pins on a PUL layer because this will create tiny holes in the fabric that are not waterproof! Use clips instead if at any point you need to pin.
3. Sew the bottom seam of your sandwich together, keeping in mind that your gusset pieces are narrower than your shell pieces. I recommend basting one layer at a time together—I started with my shell pieces then did each gusset one at a time to make sure everything stayed neat and aligned.
4. Baste the leg openings of the two gusset pieces together. Serge or zigzag the top of the gusset to finish the edge.
5. Lay the gusset unit on to the front. Baste the gusset onto the front along the leg openings keeping in mind the gusset will be 3/8" narrower than the front.
6. Sew the side seams of the front and back together.
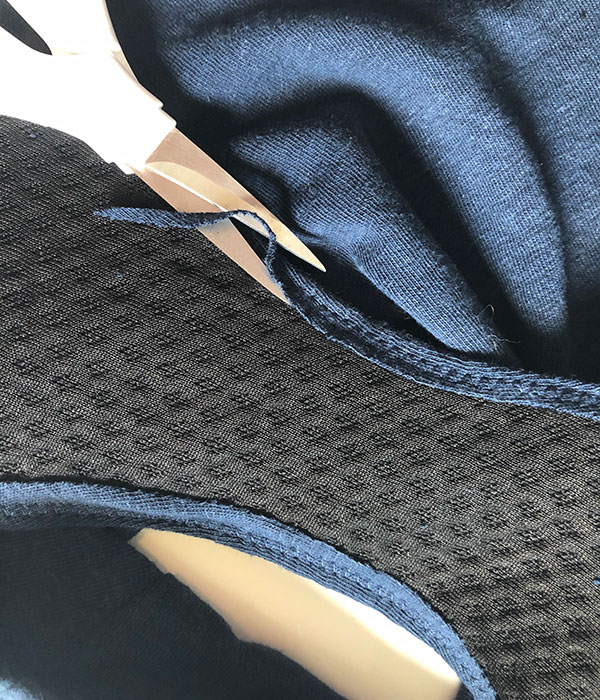
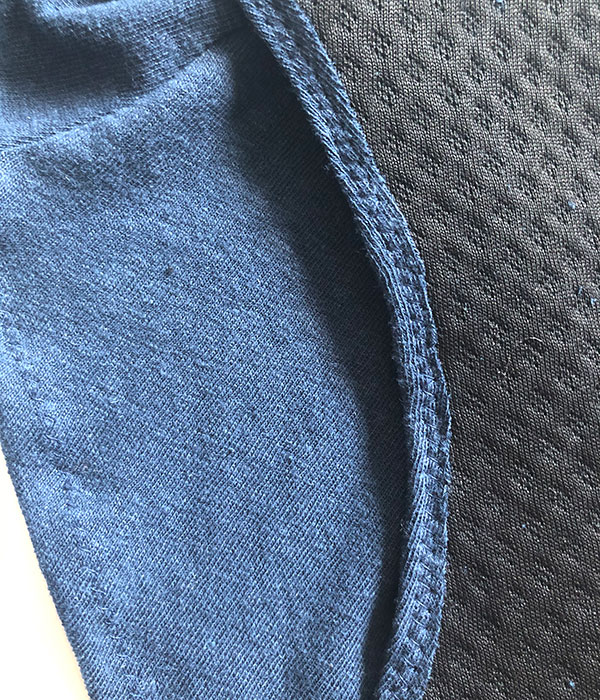
7. Hem the leg openings using a 3/8" hem and zigzag stitch. At the gusset, I recommend stitching close to the edge of the leg opening and trimming any seam allowance. Every stitch in the PUL layer creates a hole that is not leakproof, so it's better to have them on the edges of the gusset rather than towards the middle where you need the waterproofing!
8. Apply fold-over elastic to the waist according to the Dana instructions.
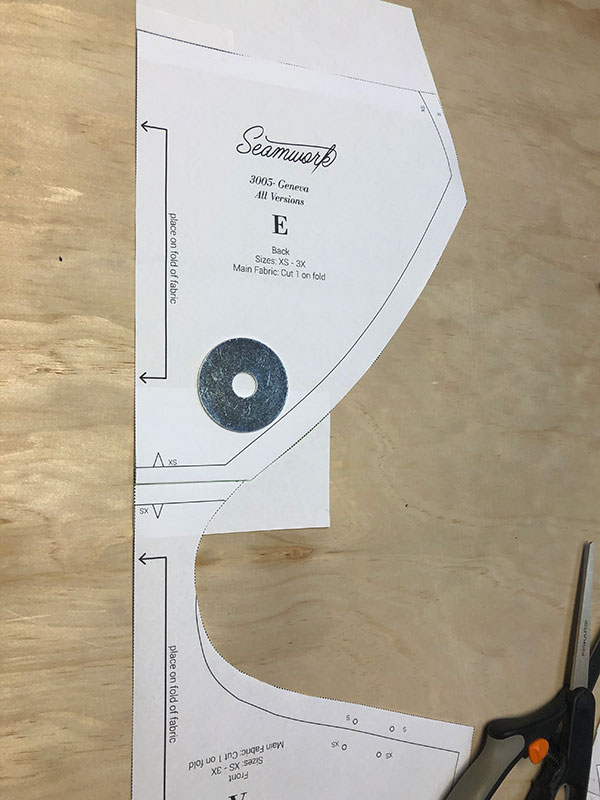
Geneva: For Light Days
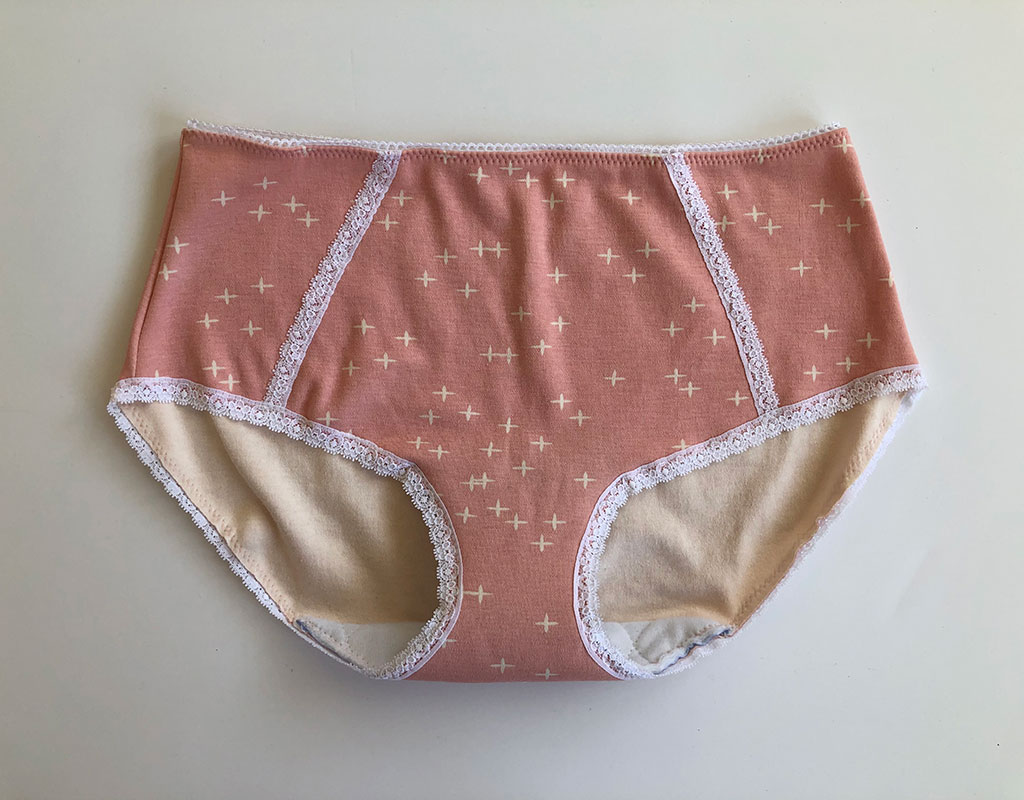
The Geneva pattern is great for a more delicate pair of underwear. I used a Birch organic cotton spandex.
Pattern Adjustments
1. Geneva is intended to be a low rise panty, so I added 2" to the rise.

2. Since this is for lighter days, I'm only extending the bottom of the front by 1 1/2". Start by removing 3/8" seam allowance, then add 1 1/2" following the shape of the back piece. Add 3/8" seam allowance.
3. Lay your new front piece on top of the gusset piece and trace this new shape onto your gusset.
4. Remove 3/8" seam allowance and then an additional 1 1/2" from the bottom of the back. Add 3/8" seam allowance to the new back piece.
5. If you topstitch a narrow lace along the edges of your leg openings, there's no need to remove seam allowance from the leg openings of your gusset—but if you plan to turn the hem, now is the time to remove seam allowance from the leg openings.
Sewing
1. Follow cutting instructions for V1, V2, or V3 shell pieces. For this pair, I cut one layer of Zorb Bamboo Dimple from my new gusset pattern piece. My stretch lace is 1/2" wide.
2. If you're using lace, sew that onto the front now. If you're sewing V3, sew the center panel and side panels together to create a front unit.
3. Create a "sandwich" by layering your pieces in the following order—gusset face down (this is the bottom of your sandwich), back face up, front face down (this is the top of your sandwich). Do not use pins on a PUL layer because this will create tiny holes in the fabric that are not waterproof! Use clips instead if at any point you need to pin.
4. Sew the bottom seam of your sandwich together.
5. Serge or zigzag the top of the gusset to finish the edge.
6. Lay the gusset onto the front. Baste the gusset onto the front along the leg openings as close to the edge as possible.
7. Sew the side seams of the front and back together.
8. Place the wrong side of your lace on top of the right side of your leg openings and topstitch on using a zigzag stitch—I overlapped the lace by 1/4". At the gusset, I recommend stitching as close to the edge of the leg opening as possible. Every stitch in the PUL layer creates a hole that is not leakproof, so it's better to have them on the edges of the gusset rather than towards the middle where you need the waterproofing!
9. Apply elastic to the waist according to the Geneva instructions.
You'll want to treat your underwear like you would a pad or tampon—change every 8 hours or less for best results. Right after removing your underwear, I recommend rinsing under cold water in the sink or tub, then wringing out and hanging to dry (unless it is laundry day, and in that case, I just toss into the washer with everything else). Zorb and PUL should not be dried in the dryer. It causes the fabric to warp and possibly melt! Instead, hang dry all of your new period undies.
If you're on a tight budget, I recommend purchasing a standard Zorb that is not approved for direct skin contact and a light PUL layer. The first pairs I made, I cut up an old black running shirt I no longer wanted to use on top of my layers of Zorb. Don't be afraid to get creative when sewing up underwear that works for your body and style! Try out mesh princess panels, lace, or pretty elastics—because sewing is magic.

Wallis Smith-Owens
Patternmaker
Wallis is a patternmaker here at Seamwork, and she loves to see what you make from the patterns she drafts. When she’s not sewing, she’s fostering dogs, so you’ll most likely find her running around with her rescue golden retriever and gang of foster pups.