
 Sign In

Many years ago, I was visiting Florence, Italy and stopped into a stationery shop. The tiny store was filled with creamy papers, handmade leather books, and beautiful fountain pens. On a table, I saw a small stack of notebooks with colorful marbled covers. Their swirling patterns were so intricate and dynamic, I couldn't help but imagine them on clothing.
Marbling is a technique used to create these surface designs that resemble the patterns found in stone. It's been used for many years to create book covers and end papers, but its history and application go far beyond that.
The earliest known examples of marbling date back to Japan in the 12th century, where a technique known as suminagashi, meaning "floating ink" was used to create papers. Some scholars believe this artform was practiced even earlier in China, though no known examples exist. Suminagashi is still practiced in Japan today.
Similar methods also arose in central Asia in the 15th century. In Turkey, marbled papers were used to help prevent document forgery, since the designs were impossible to replicate exactly. This gave marbled papers a greater significance within the powerful Turkish empire, and the tradition remains strong in countries such as Iran and Turkey.
Finally, these methods spread from the middle east to Europe in the 17th century, where various countries each made their own adjustments and created signature patterns. This is the period in which marbled endpapers became popular in bookbinding, and you can still find these in use today.
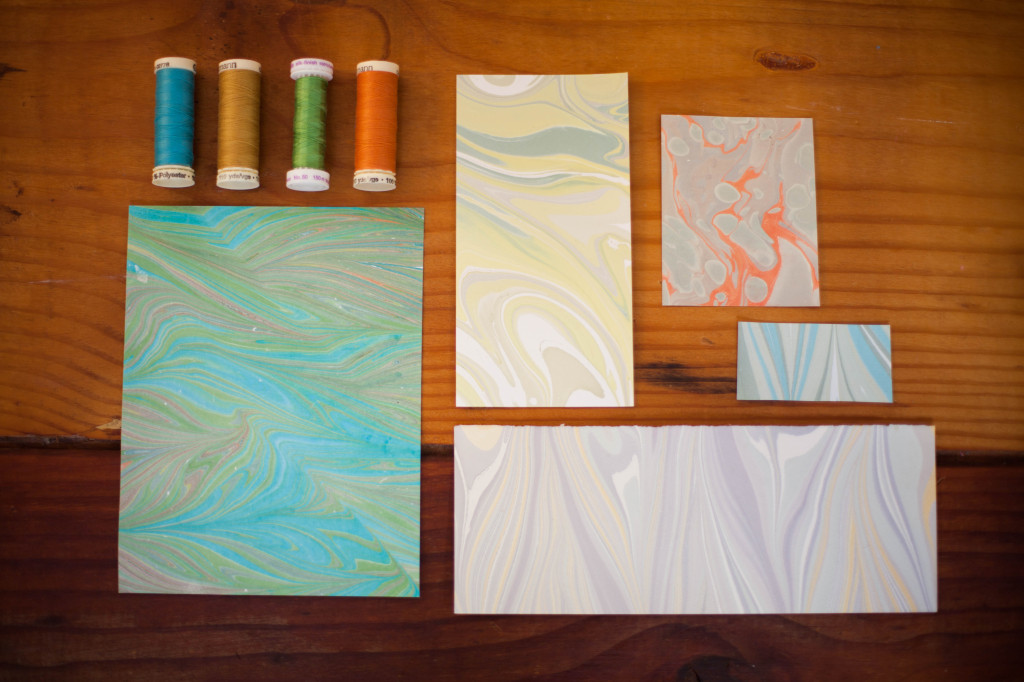
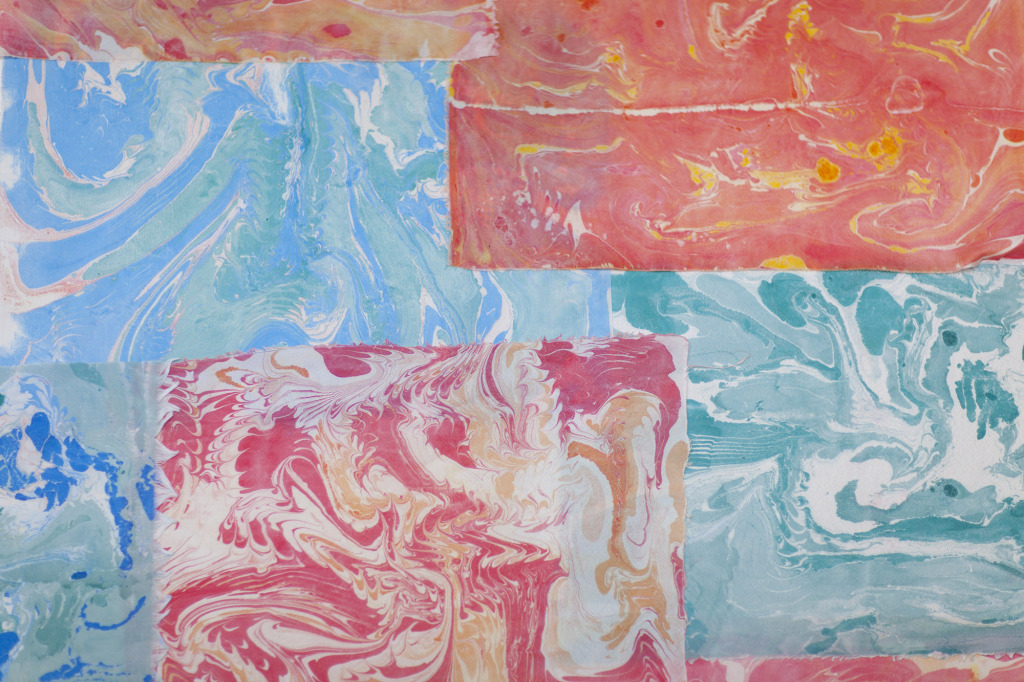
Marbling has been used to create decorative papers and books for centuries. These papers were marbled by textile artist Natalie Stopka.
But marbling is no longer limited to these traditional applications. Today, it's used to create artwork, fine papers, and fabric designs. Part of the beauty of marbling is that no two finished pieces are exactly alike, as the Turks discovered centuries ago. Textile artist Natalie Stopka, who creates marbled works and teaches workshops on large scale fabric marbling, says, "Marbling is a very expressive art. Each print is the culmination of a tiny performance in which the artist interacts with a fluid medium, revealing their temperament. Whether you are a fastidious craftsperson or relish experimentation, the marbling process will manifest your hand and aesthetic."
01 Section
Getting Started
Marbling at home requires just a few special tools and supplies. Get set up with the basics before beginning to experiment.
Despite the intricate results, the practice of marbling is simple at its core. Paints are floated on top of a gelatinous solution thick enough to allow them to remain on the surface. The craftsperson then creates patterns in the paint by raking through with simple utensils. Finally, a pretreated piece of cloth is lowered onto the surface, removed, rinsed, and set.

You'll need fabric, a frame, combs or other tools, paint, mixing tools, medium, and alum.
Choosing your project
For the beginner, it's best to start with small pieces of fabric. As you will see, marbling large pieces requires a great deal of workspace and the construction of large frames, whereas small pieces can be marbled in kitchen tubs or pans. This makes marbling a perfect technique to try on lingerie pieces such as silk bras and panties, but you can also use it on pillows, kerchiefs, bias tape trims, or small insets or pieces in larger garments. For example, you could use marbling on the yoke of a shirt, the placket of a blouse, or anywhere else a small pattern piece is used.
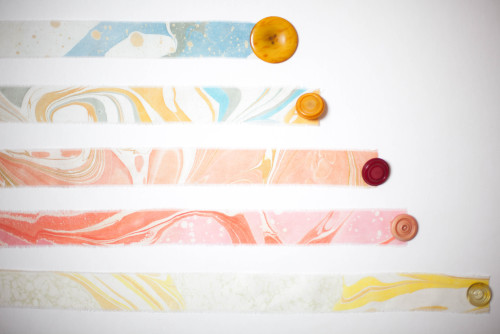
Try marbling small pieces for projects such as intimates,
small bags, handkerchiefs, or napkins. These marbled silk ribbons
were created by artist Natalie Stopka. Use any
leftover scraps to make your own ribbon or bias tape.
The frame
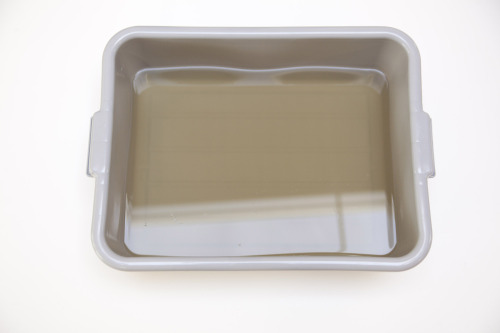
You will need a frame to hold the medium (also known as "size"), and it must be large enough to accommodate your fabric piece with at least an inch of room on all sides. For small pieces, you can use an inexpensive cake or lasagna pan from the grocery store, or a larger dish pan. This is what we will cover in this demonstration, since they are easy to find and perfect for beginner projects. Small frames are also easier to work with and provide more surface tension, so paints float more easily.
Once you've developed greater skills and want to branch out into larger projects, you can construct your own frame for marbling using 1 inch by 4 inch framing wood of any length you'd like. Create a large rectangle and use metal angle brackets at the corners to secure the shape. Finally, line the bottom and sides with clear plastic to hold the medium and paint. The plastic keeps the paint and medium from seeping out, without requiring you to build a bottom for your frame, which makes it heavier and harder to store.
Marbling pattern tools

Collect wide toothed combs, chopsticks, whisks, and old forks. Or
make your own marbling comb from skewers taped to a
piece of cardboard.
In addition to the frame, you'll need tools to create the designs on the surface. The most common readymade implements are wide-tooth combs, forks, or chopsticks. These are all easy to find and make sense to start with.
Many experienced marblers use combs specifically designed for marbling, and these extend almost to the edges of the frame, allowing you to create even designs. You can easily create your own marbling comb using toothpicks or skewers pushed through a piece of sturdy foam, or taped securely to a piece of cardboard. You could also force heavy pins through a piece of cardboard. Just make sure the tines of your comb are evenly spaced, and that the total length is at least 1 to 2 inches shorter than the frame.
Paint mixing and dropping tools
You will also need a few simple tools for mixing up the paint, thinning it as needed, and dropping it onto the surface of the medium. Small plastic paint mixing cups with lids work fine and allow you to see the colors easily. You can also use disposable cups if you like, or other small cups dedicated to paint.
For dropping the paint, I prefer an eyedropper. Eyedroppers allow you to release small quantites of paint at a time into the medium, which prevents it from sinking to the bottom. Pouring in too much paint at once, or from too great a height, will keep it from floating on the surface where it comes into contact with the fabric.
Medium
Many sorts of medium (also known as "size") are available for home marbling. The job of this substance is to provide a thick, gelatinous, but still aqueous surface for the paint to sit on. Some home marblers have even used watered down wallpaper paste! The amount of medium you need will depend on the size of your frame. You want enough medium to fill the frame 1 to 2 inches deep. You can easily determine how much you need by pouring water into the frame until it reaches this depth, then measuring the water as you pour it out.
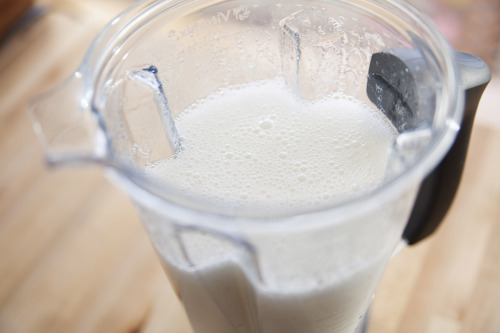
The most popular option for medium is carrageen, a non-toxic thickener made from seaweed. There are two types of carrageen: blender carrageen and heated carrageen. Both should be prepared 12-24 hours before use, to allow time to thicken. Blender carrageen is easier to make in small batches, whereas heated carrageen is useful for large quantities.
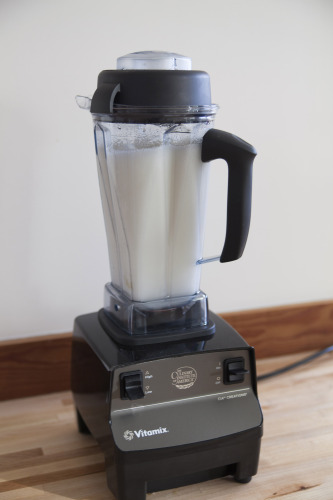
Blender carrageen is easy to make and
non-toxic.
To prepare blender carrageen, place water in your blender and begin blending. With the blender running, add 1 teaspoon or carrageen for every 2 cups of water. Make the medium in batches if necessary. Blend for about 30 seconds. You should have a thick, uniform consistency. Place the substance in the refrigerator overnight, and remove and allow to come to room termperature before using.
For heated carrageen, use a gallon of water. Pour 4 cups of this into a pot and heat to a simmer. Pour into a bucket and add 5 tablespoons of the carrageen powder along with a little more water to cool the mixture enough to immerse your hands. Mix thoroughly with a stick, or use your hands to break up any clumps. Stir in the rest of the water, and refrigerate overnight. Again, allow the mixture to come to room temperature before using.
Methocel is another option for medium. The advantage of methocel is that it can be mixed just 30 minutes before you begin, so there is no need to let it sit overnight. To create this medium, place a gallon of warm water in a bucket, then add 1 Tablespoon of ammonia. Finally, stir in 1/4 cup of methocel, a little at a time, stirring constantly with a large stick or a whisk. Once dissolved, let the medium sit for 30 minutes.
Fabric
Many types of fabric can be used for marbling, but for best results, use a fabric with a smooth texture and fine weave. Heavily textured fabrics will not show the patterns quite as well.
Experiment with different fibers to see what works best with your paints. Silk is always a great choice because it absorbs color well and often has a luxuriously smooth, fine texture. For the Florence bralette and Geneva panties, we used a silk/spandex charmeuse, also known as stretch silk. Linen, cotton, and other fibers can also be used, as well as synthetics. This is a great excuse to use up the scraps you've been saving.
Alum
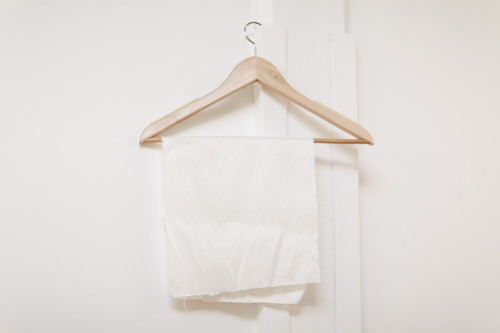
Alum will help the color from the paint set on the fabric, preventing them from bleeding out later. Begin by pre-washing the fabric with detergent, preferably an industrial textile detergent such as synthrapol. This will remove any manufacturing chemicals, dirt, or oil before you begin. It's best to do this 12-24 hours before you marble, so do it at the same time that you create the medium.
Dissolve alum in hot water, at a ratio of 3 tablespoons per quart. Allow the mixture to come back to room temperature. Swirl the fabric in the mixture, allowing it to become saturated, and then remove it quickly. Squeeze to remove excess water and hang dry. Don't apply heat after treating with alum until you rinse it out later, as this can damage the fabric. Line drying helps prevent wrinkles from forming.
Paint
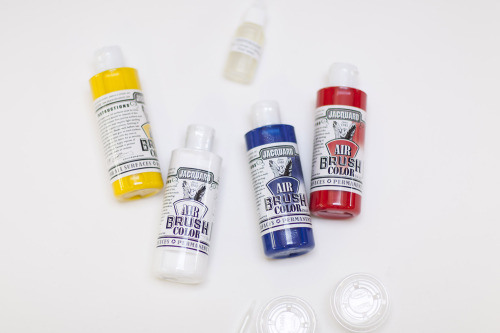
You can mix a variety of colors from red, yellow, blue, and white.
Acrylic paints or airbrushing ink are the most common choices for fabric marbling. Acrylic paints can be purchased from any art supply or craft store, but it's best to be consistent with the brand so that they mix well and have similar viscosity.
Airbrush inks create gorgeous colors that work well on many fabrics, though they sometimes must be mail ordered. For this demonstration, I used Jacquard airbrush inks.
You do not need many colors to begin, since the paints can be mixed. Red, yellow, and blue will allow you to create a large range of colors from these primary hues. You may also wish to purchase black and white. These few colors should get you started.
Depending on the type of paint you use, you may need to dilute them a bit to allow them to float on the surface. Test a bit first on your medium before you begin, gently placing one drop of paint on the surface. If it seems to sink to the bottom, start thinning the paint. In a small mixing cup, add a couple drops of water or dispersant to the paint and mix. Try adding it to the medium again. Repeat until the paint floats easily on the surface, but still remains in a roughly circular shape.
02 Section
How to marble silk
Now that you have all the supplies and basics down, let's walk through a single marbling project together. We'll dye a piece of silk charmeuse that can be used for creating the Florence bralette cups and Geneva panties.
You'll need:
- One piece of silk
- Alum
- One plastic bucket for pre-treating fabric
- One large rectangular dishpan to use as a frame
- Carrageen (blender type)
- Jacquard airbrush inks
- Eyedroppers
- Small paint mixing cups
- A large comb, chopsticks, and/or homemade marbling comb (see above)
Experiment with colors and patterns on small pieces of fabric, then pick your favorites to make into projects.
Want to keep it simple? Dharma Trading Company sells Marbling starter sets that contain many of these supplies. All you need to add are the tools: frame, mixing cups, comb, and eyedroppers.
Step | 01
12 to 24 hours before marbling, prepare the medium using the blender method (see instructions above, under "Medium"). The mixture will be foamy at first. Rest in the refrigerator overnight to allow air to come to the surface.
Step | 02
At the same time, pre-wash and pre-treat your fabric using alum (see instructions above, under "Alum"). Allow to dry while your medium rests.
Step | 03
About one hour before marbling, remove the medium from the refrigerator and allow to come to room temperature.

Step | 04
Mix your paint colors. Add a few drops to the medium and check to see if they float, yet remain consistent in the medium. If not, adjust the paint by thinning it with water or dispersant. Continue adding paint, drop by drop.
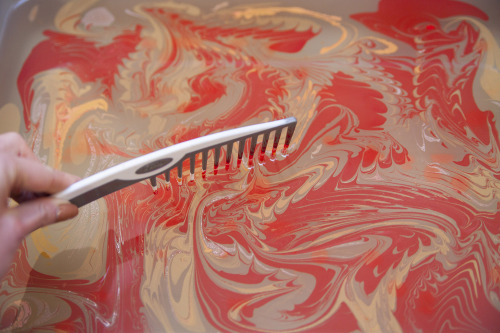
Step | 05
Using tools such as a wide comb, fork, or chopsticks, drag lightly through the surface to create patterns. Drag in straight lines, swirls, or any other pattern you'd like.
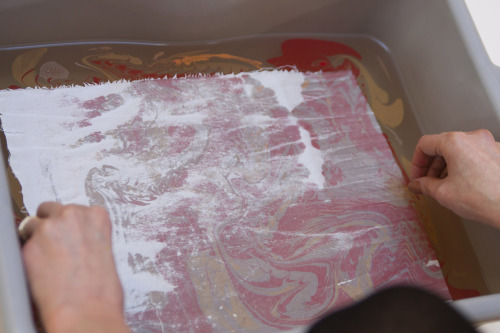
Step | 06
Lay your piece of fabric on the surface, allowing the middle of the fabric to contact the solution first, then lower the edges. It can be helpful to have a friend help, to keep the fabric from falling, but this isn't strictly necessary for small pieces.
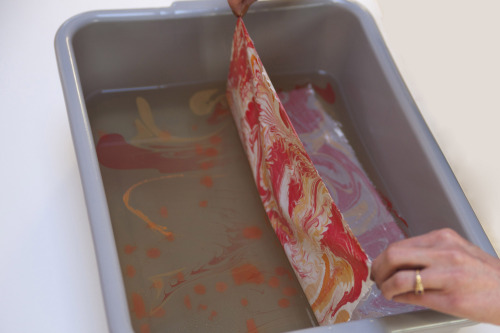
Step | 07
Lift the fabric out of the water, gently peeling it away from the surface. The remaining paint can be scooped from the surface of the medium with strips of newspaper, allowing you to marble the next piece.
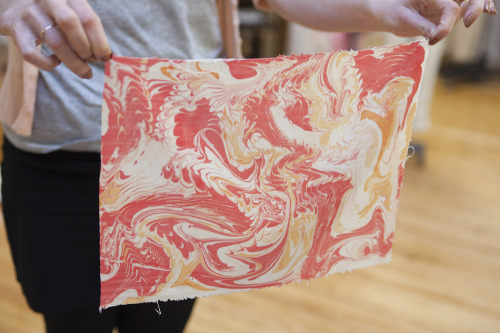
Step | 08
Rinse the fabric in cool water, being careful not to wring or twist the fabric. Line dry, or lay flat. Once dry, iron the fabric to heat set the design and prevent future bleeding.
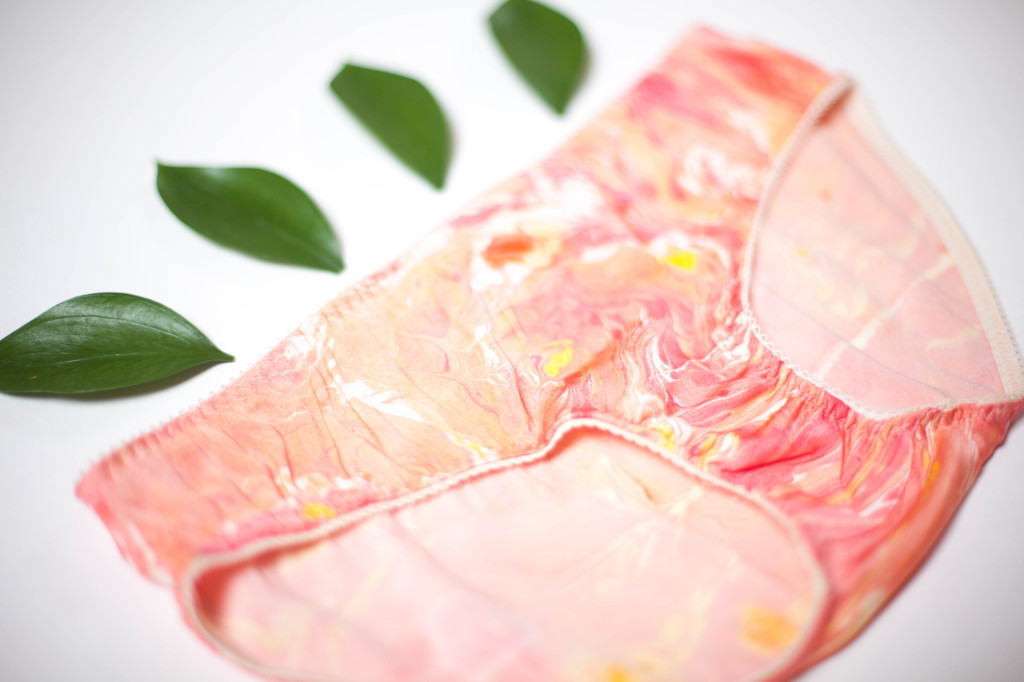
Your fabric can now be used to create beautiful garments, crafts, or home decor. Try marbling silk and using it to create the geneva panties from this month's issue!

