
 Sign In

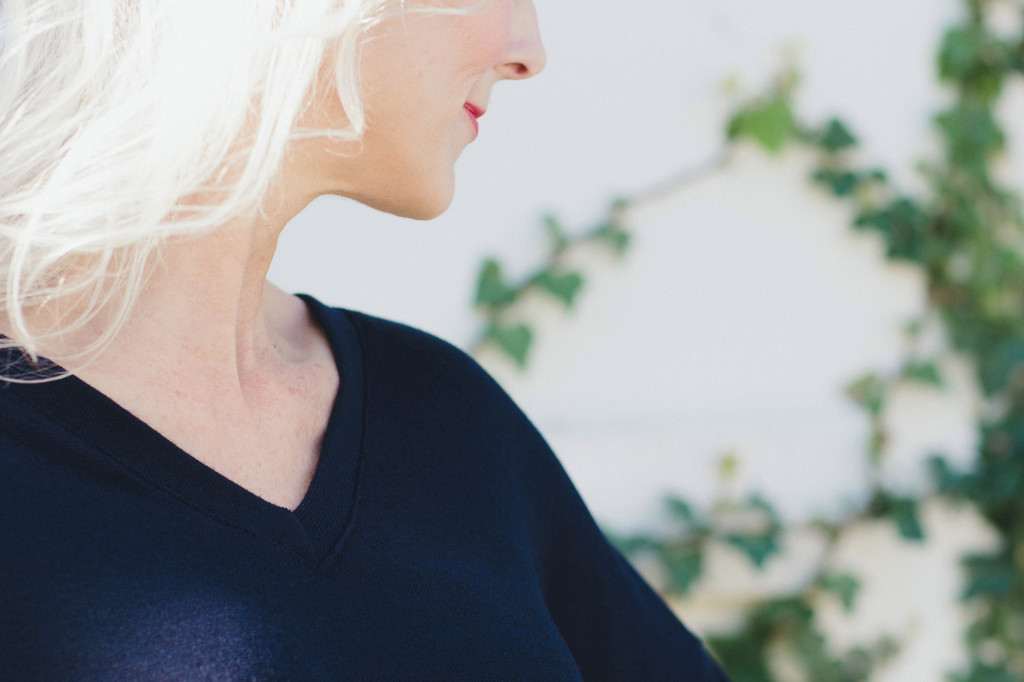
V-necks are one of the most flattering necklines out there. Formed by two straight edges that meet in a point below your chin, the v-neck draws the eye toward your face (provided it's not very low, in which case the eye might be drawn elsewhere!).
According to stylist and blogger Sally McGraw, v-necks tend to make the face look slimmer. "The v-shaped opening becomes an illusory reflection of your facial shape: Even if your face is oval or triangular or square, the eye sees a heart shape when a 'v' of colored fabric is placed directly below," she says. V-necks also tend to elongate the body, making them one of the most popular necklines for women of all body types.
If you've avoided sewing v-necks in t-shirts or other knits because of the seemingly difficult construction, we have a few tricks to show you that will dispel that myth. Beautifully finished v-neck t-shirts and sweaters might take an extra step or two, but they're nearly as easy as any other banded neckline. If you've got a pattern for a shirt with a less-than-flattering neckline, we'll show you how to swap a v-neck in by drafting a new neckband.
01 Section
How to sew a v-neckband
A clean, finished v-neck is simple to sew once you know this secret.
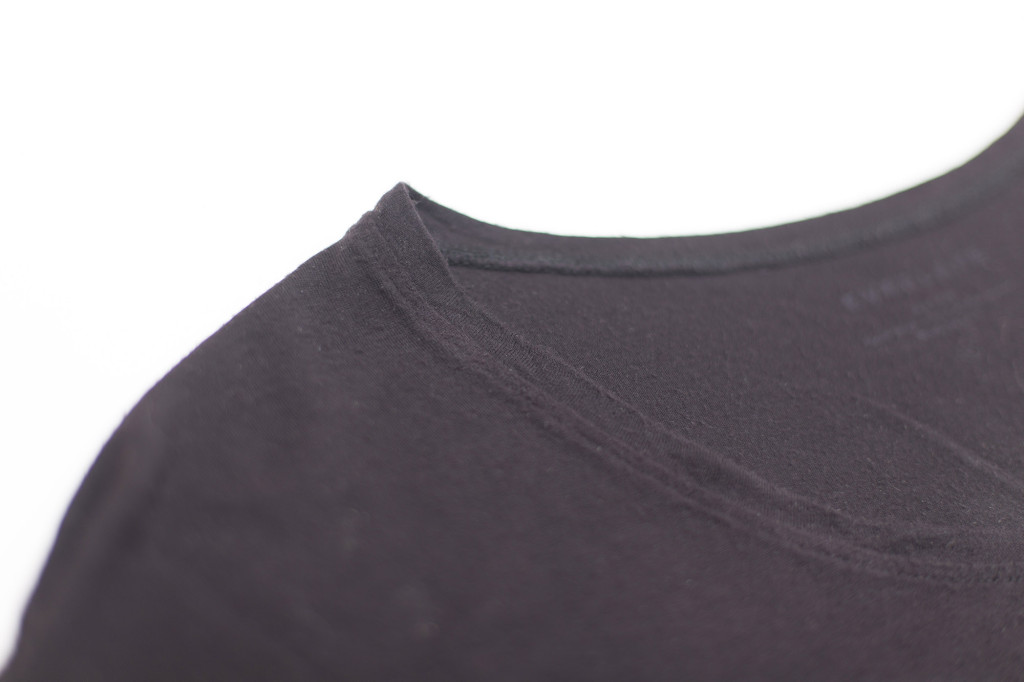
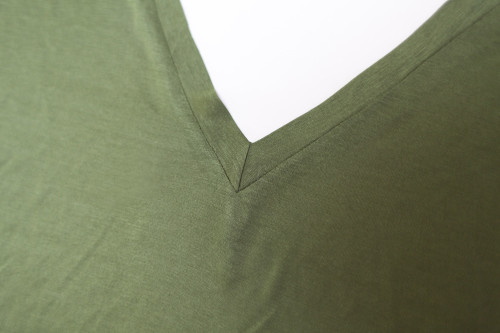
Most t-shirts have a band around the neckline.
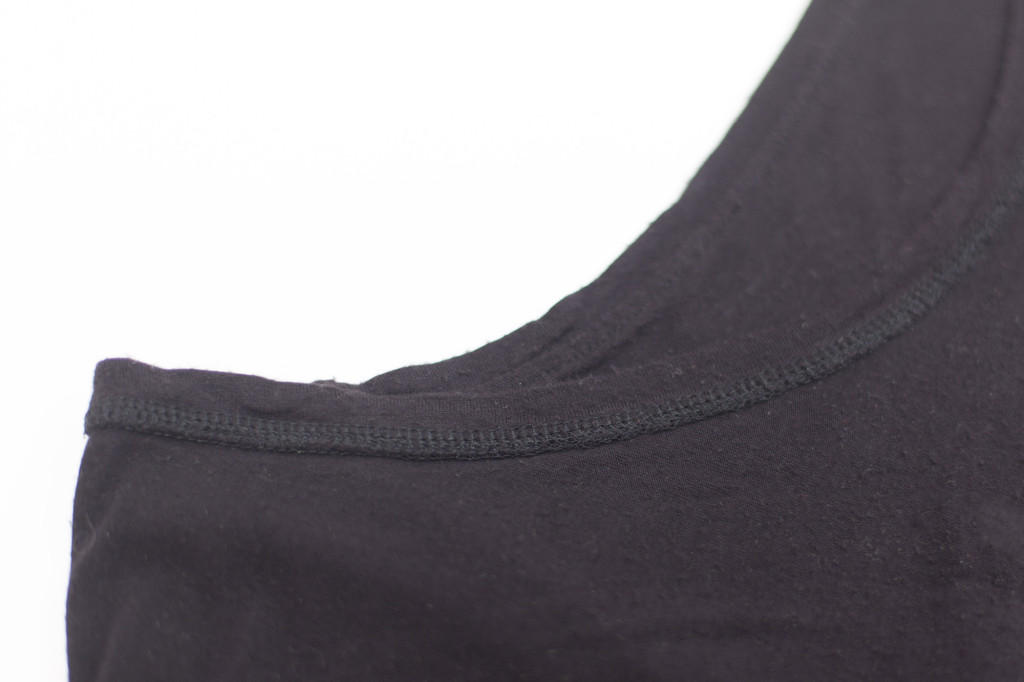
Bands are simply folded strips of knit fabric sewn to the neck opening, with the seam on the wrong side.

The sharp interior corner of a v-neck makes the band slightly more
challenging than sewing a single strip in a circle.
Fabric shown: Forest green rayon jersey from fabric.com.
Most t-shirts and other knit tops are finished with a band at the neck. These bands are relatively easy to sew. A strip of knit fabric is folded in half lengthwise to create the band. This band is then sewed to the neck opening, and the neck seam is turned to the inside. These bands can either be sewn in the round, or a seam such as the shoulder or back seam can be left open until the band is in place. The final seam then closes the band.
V-necks are a little different. There is a sharp corner right at the center front, which requires the band to form a mitered corner. Theoretically, if your shirt has a center front seam, you could make that your final seam, closing up the band along with the center front seam. But this is not the tidiest option, since it leaves a small seam in the band in the most obvious spot, the center of the neckline. Plus, do you really want a seam down the front of your t-shirt?
A cleaner solution is to sew the v-corner before installing the band, as we've done on the Aberdeen top. Here's how to sew it, step by step.
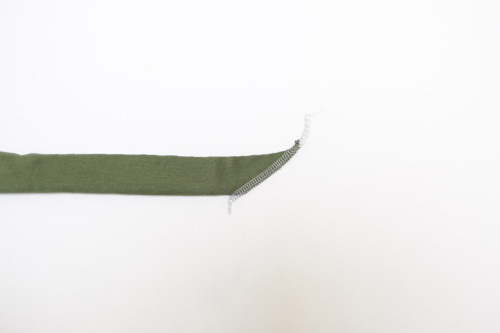
Step | 01
Place the two neckband pieces with the right sides together.
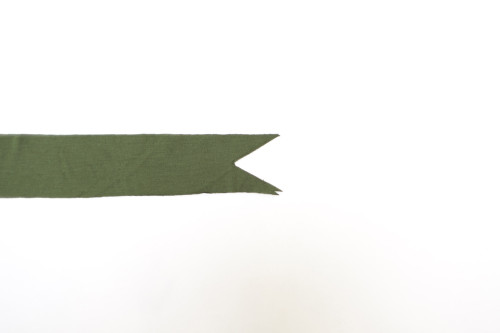
Step | 02
Fold the pieces lengthwise, matching the raw edges.
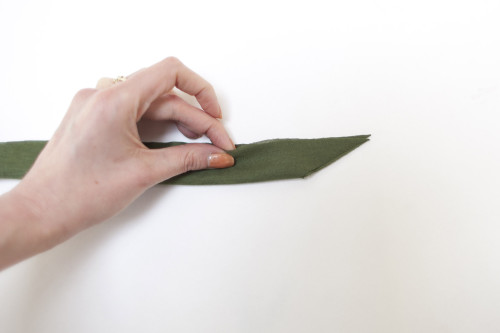
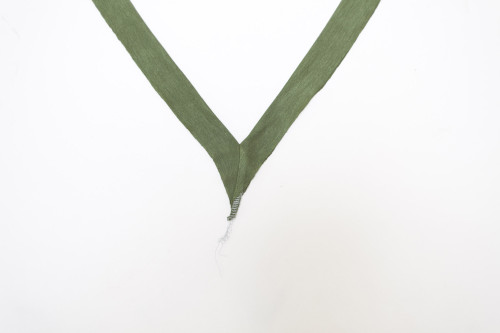
Step | 03
Stitch along the slanted short edge, using a serger or a stretch stitch on your sewing machine such as the zigzag or mock overlock. Even a straight stitch will work here, as the seam will not need much elasticity.
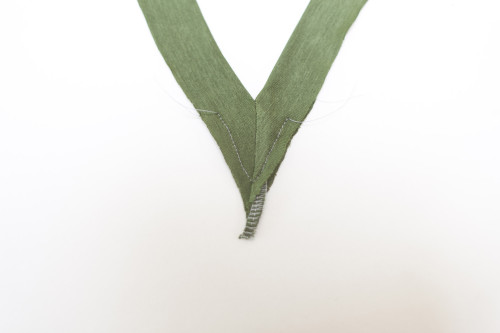
Step | 04
Open the neckband up and fold along the seamline with the wrong sides together. You should now see a v-shape at the center front.
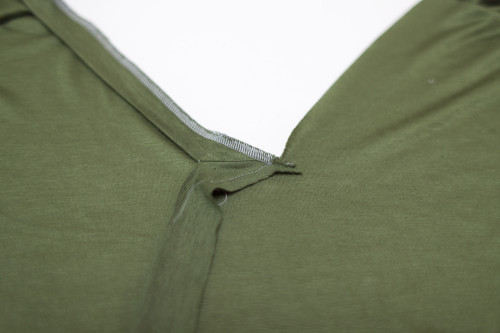
Step | 05
Finger press the seam flat and baste along the bottom raw edge of the v-shape to hold the band in place.
Step | 06
Stitch the band to the neckline. Begin at the center back and stitch to the center front. Remove the work, turn, and sew the other side from center front to center back.
Step | 07
Stitch the remainder of the neckband into the neckline. If the neckband is one piece, it can be sewn in the round. If it is two pieces, close the center back of the neckband along with the center back seam.
02 Section
Draft your own v-neck
Create your own band for a v-neck to transform scoop necks, crew necks, and more.

If you have a pattern you'd like to change into a v-neck, drafting the neckline band is easy. You can create that divot at just the right angle to keep your neckline lying flat and looking good. For this example, we'll create two separate pieces for the band that meet at the center back seam, but this can also be adapted to sew the neckline in the round.
Step | 01
Draw the v-neck shape that you'd like on your front pattern piece. Make it as high or as low as you'd like. Also draw in the seam allowance on the shoulder seam.
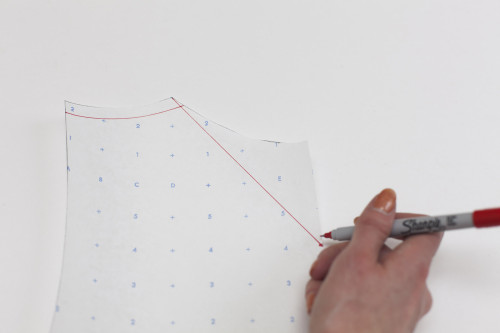
Step | 02
On your pattern, measure the length of the front and back neckline, minus the seam allowance at the shoulder seam. Add about 1 inch to this number to allow room for trimming the center front. This is measurement A.
Prevent gaping
If you've sewed rounded knit necklines, you know that the neckband is often cut a little smaller than the opening and stretched as it's sewn. This prevents rippling along the inner curve. While a v-neck does not have the dramatic curve of a round neckline, it can sometimes gape around the shoulders. To prevent this, cut the neckband about 1/2 inch shorter on each side and stretch to fit around the shoulder seam.
Step | 03
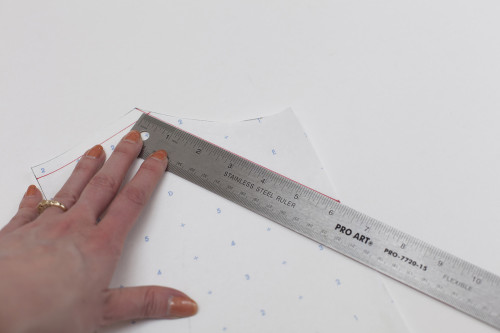
Decide how wide you would like your band to be. Double this number. Multiply your seam allowance by two and add this to the width. This is measurement B. Using a ruler, draw a rectangle with measurement A as the length and measurement B as the width.
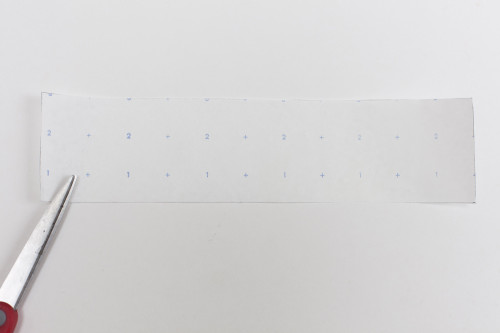
Step | 04
Fold the band pattern piece in half lengthwise. Measure and mark the seam allowance along the long raw edge. Mark the seam allowance along the front neckline as well. Walk the band piece along the neckline, with the fold facing up.
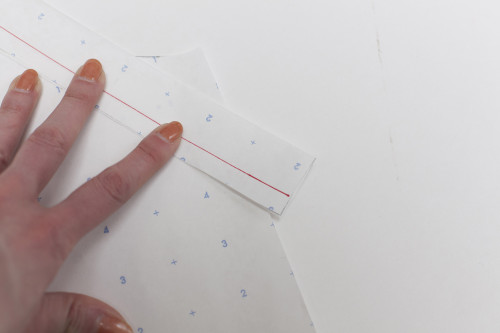
Step | 05
Using a ruler, draw a line extending the center front of the top straight up across the band.

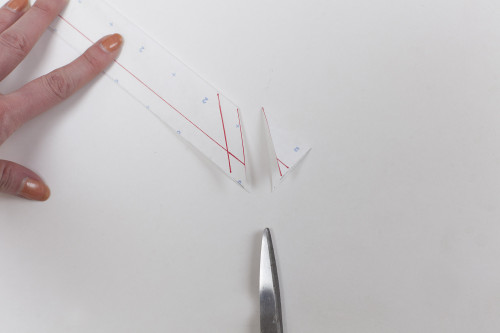
Step | 06
Measure and mark an additional seam allowance at the center front of the band. Trim the excess beyond the seam allowance.
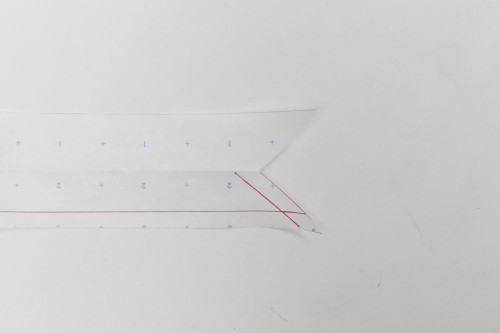
Step | 08
Open the pattern piece up. You should now have a divot at the center front of the band. Sew the band as instructed in the previous section.
Try your hand at sewing v-necks this way (without the need to draft your own) by trying our Aberdeen top, in this month's issue.

