
 Sign In
My first encounter with scanned floral prints was not in a fabric store, but on a gardening blog. Craig, the writer and gardener behind Ellis Hollow, scanned various flowers, sometimes grouped by color, to create images reminiscent of antique botanical prints. The idea was captivating, not just because of the visually stunning results, but because of the personal connection the creator had to the image.
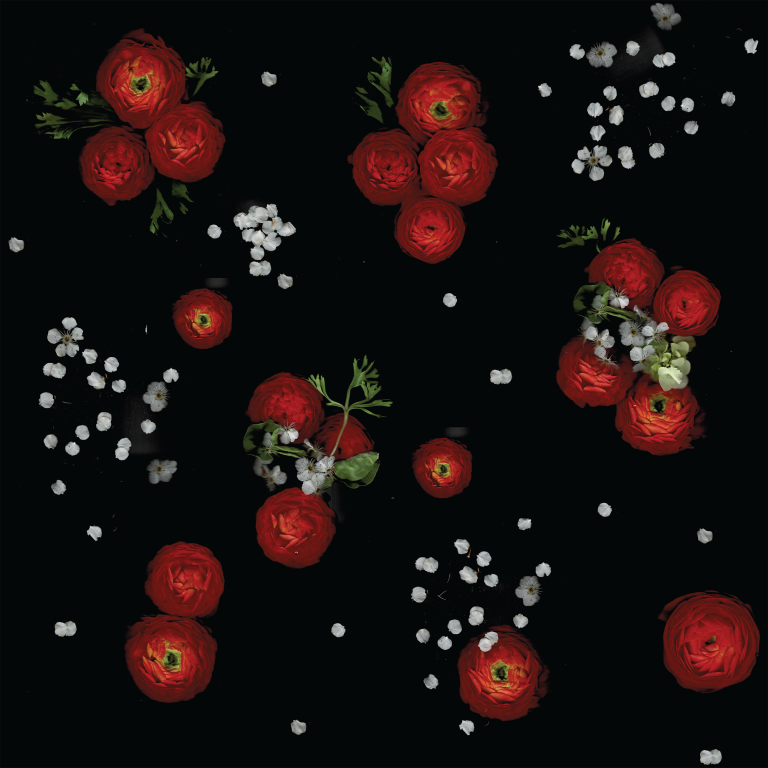
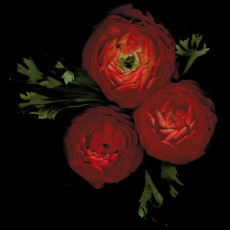
This fabric design was created with flowers placed directly on a flatbed scanner.
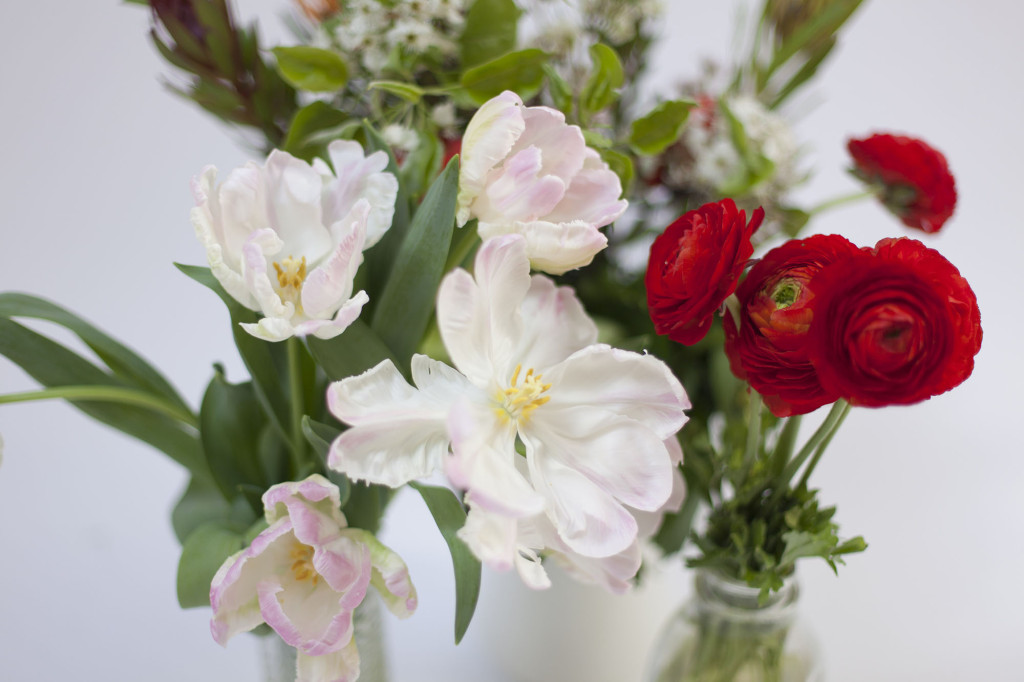
My thoughts quickly turned to textiles, as they often do. The vibrant, realistic flowers placed against the stark black background would make incredible fabric, I thought. Not only that, but by using flowers with special significance to you, you could create meaningful garments from beginning to end. Imagine sewing yourself a summer dress decorated with plants you'd grown in your own garden that year. Or you could sew a friend a skirt using flowers left over from her own wedding bouquet. Imagine a fall blouse covered in vibrant leaves you collected in your own neighborhood. In these ways, the natural world can become a partner in creating a story, one that you wear close to your skin.
The natural world can become a partner in creating a story, one that you wear close to your skin.
To create fabric from flowers, you scan each flower or arrangement of flowers directly to your computer. You can then collage the images together in an image-editing program such as Adobe Photoshop or Photoshop Elements. Finally, have the fabric digitally printed using a service such as Spoonflower.
Equipment
Creating a print like this is easy, but takes some special equipment. You will need access to a flatbed scanner. Various models of scanners render images and backgrounds differently, but nearly any scanner of decent quality can work. For this demonstration, we used a Brother combination printer/scanner.
Some scanners allow you to remove the lid entirely, which makes scanning three-dimensional objects easier. If the lid on your scanner does not come off, try pushing it out of the way as much as possible.
You will also need software, such as Adobe Photoshop or Photoshop Elements, for collaging your images together in order to create a repeat. You can also try a free option, such as the open source program Gimp. You don't need complicated functionality or a great deal of experience to create a simple repeat. In fact, you could even scan a single arrangement and use that as a repeat with no editing at all.
Choosing Flowers
Finally, you will need flowers or other plant matter to scan. Flowers with flat faces, such as daisies, are the easiest to scan. Flowers that have less contact with the platen of the scanner, such as blossoms on a branch, might prove more difficult to capture. In many cases, flowers can be flattened out to achieve a clearer image.
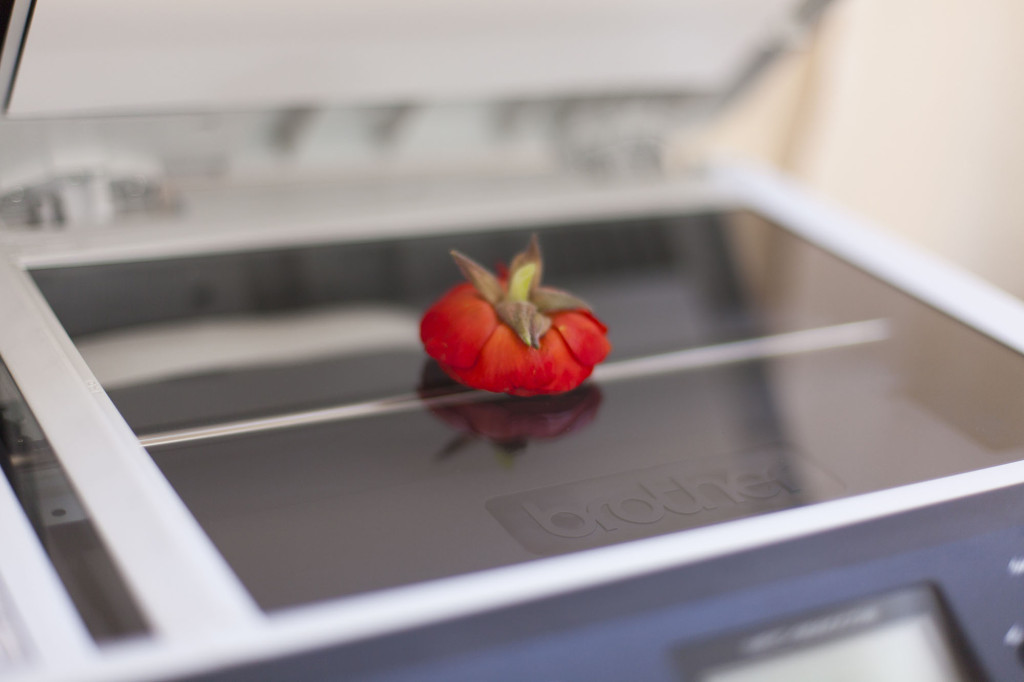
Look for flowers that can easily be placed facedown on a scanner or flattened.
Leaves are perfect for scanning because they are usually quite flat. You can scan leaves individually, or use them in compositions before scanning. They can also be used to hide the ends of stems, or to create interesting geometric patterns or motifs.

Snip heads off flowers as you work.
Keep your flowers in water as you work, snipping off the head of one flower at a time as you scan to keep the remaining flowers fresh. If you're creating a composition with multiple flowers, cut only what you need rather than cutting all of the flowers at once.
Scan Single Blooms
Begin by scanning a single flower. Keeping it simple for your first attempt will help you troubleshoot any problems you may encounter with your scanner, software, or flowers before you put in more effort. Think of this as a test run. Don't be discouraged if you need to tweak things the first few times.
Scan your first flower several times until the image looks right to you.
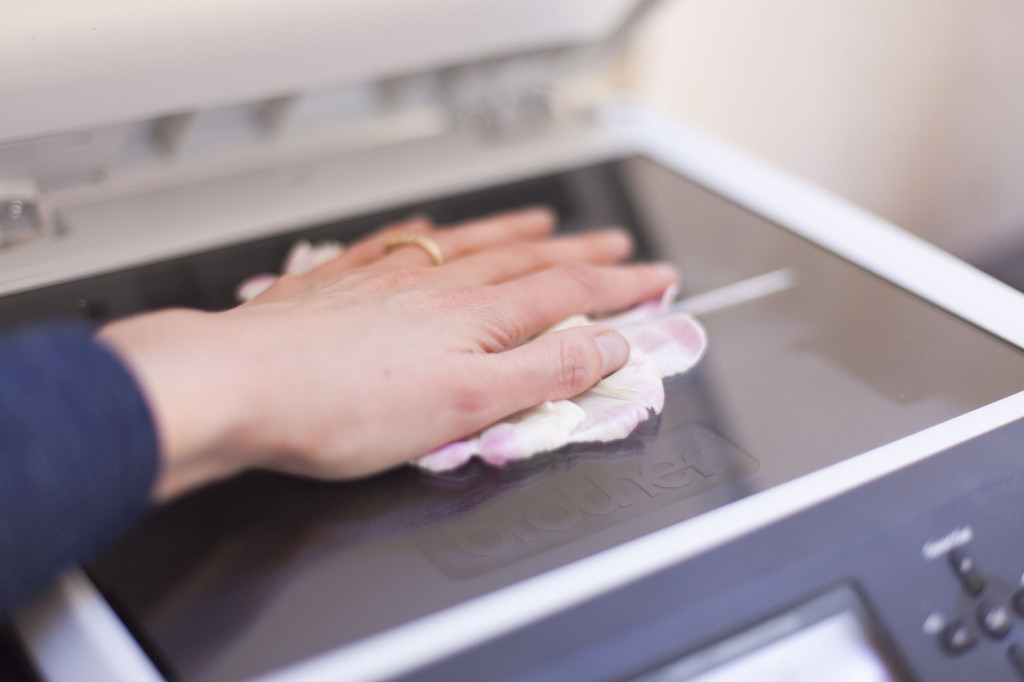
If necessary, use the palm of your hand to flatten flowers so they are flush with the glass.
Most flatbed scanners will interpret the background of the object you scan as black. If you find that your scanner is not creating the deep black background you want, try placing a cardboard box over the object on the scanner. If necessary, you can even line the inside of the box with colored paper to get different effects.
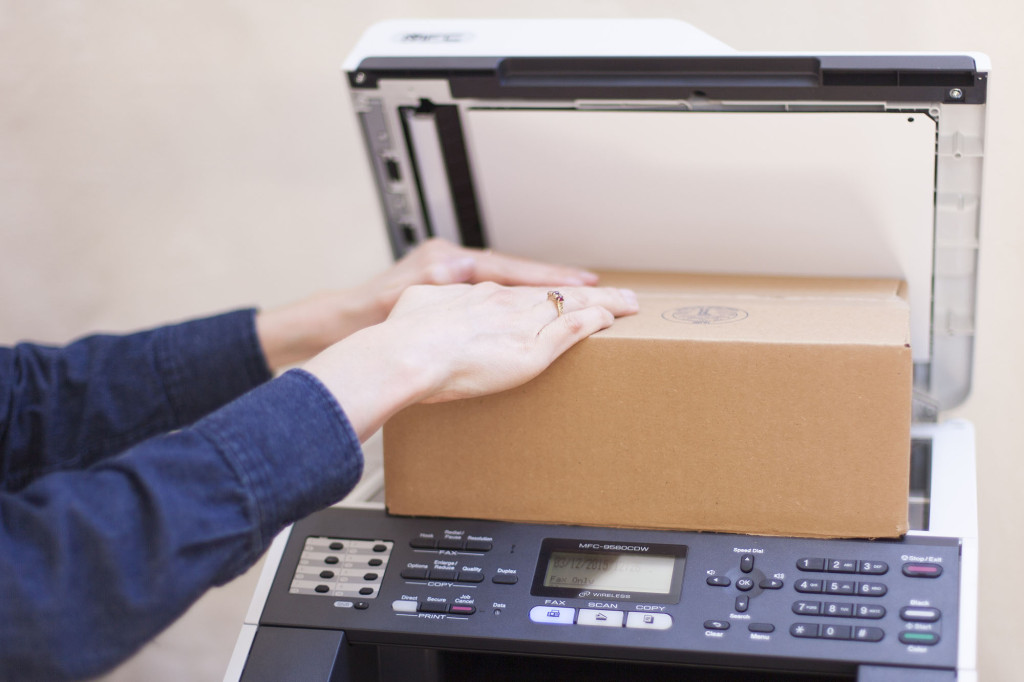
Place a box over the object while scanning if necessary.
If your flower is not flush with the glass of the scanner, it may not be captured clearly. If your flower appears faded and blurry because of its shape, try pressing it down to flatten. This can often create a better effect, even if the flower does not look exactly the same as it would in nature. Be sure to wipe down the glass periodically to remove any pollen, unless you want it in the image.
Layer flowers together to
create arrangements.
Create Arrangements
Once you've got the hang of scanning, try creating more complex arrangements on the scanner bed. Position multiple flowers together in the center of the scanner bed. Your scanning software most likely has a way to preview an image from the scanner before scanning the image. Use this feature to see different arrangements and make adjustments.
Keep all objects toward the center as much as possible. When a flower or stem falls off the edge of the image, it will make it more difficult to create a good-looking fabric repeat, since the edge of each image will be clearly visible. You are aiming for pure, black edges and background, so that the images can be pieced together seamlessly.

Petals make a nice
background filler in a design.
Don't forget to scan interesting pieces and shapes, such as individual petals, groups of petals, or leaves. A mix of small and large objects can help you create a wider variety of designs later. Try scanning a small scattering of petals to place between larger flowers, for example.
Create a Simple Repeat
By now, you should have a variety of images of individual flowers, flower pieces, and layered arrangements to create a repeat. If you really want to keep your fabric simple, look through these images and choose the one that speaks to you the most. You could upload this image directly to the fabric printing service, using their interface to tile the pattern and create a design.
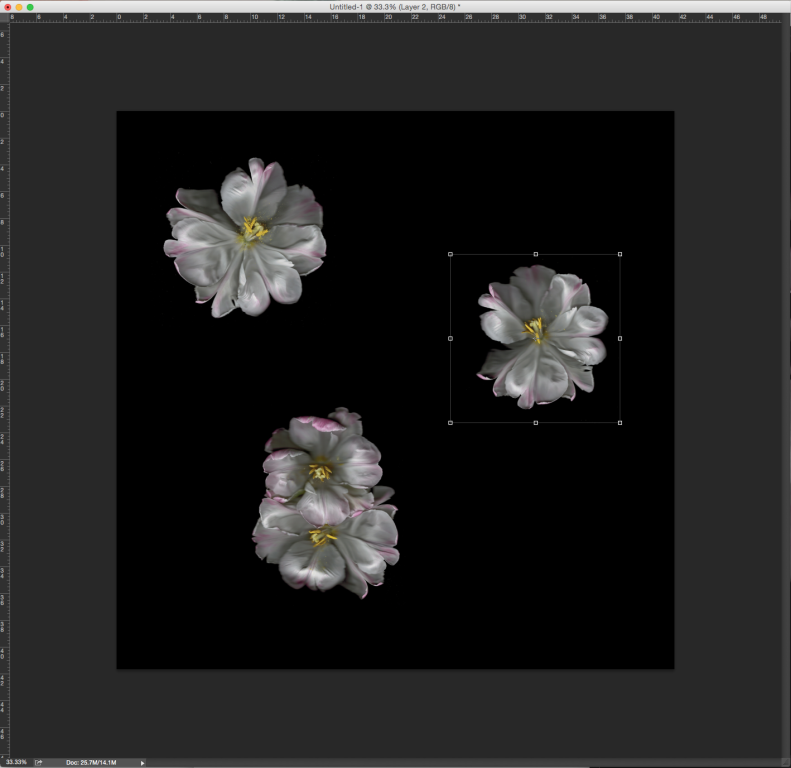
Simple repeats that include negative space between objects are easy to create. Cutting and
pasting three flowers onto a black background took about 2 minutes once they were scanned.
Because there is enough background in the image, the final fabric design does not show obvious
seams between the squared repeats.
If you'd like to design your own repeat with multiple flowers, create a new image in your image-editing program of choice. Set the resolution to 150 pixels per inch and make the image as large as you'd like. Fill the background with black. Begin cutting and pasting the scanned flower images onto the new image, arranging them as you'd like. Leave plenty of space between the motifs. This will help camouflage the edges of the design once it is tiled, so that your design will not reveal the "seams" between each tile.
Create a Complex Repeat
If you'd like to create a repeat that is packed with flowers and imagery but still appears seamless, you will need to use some of the other features available in Adobe Photoshop. If you are comfortable in Photoshop, you'll see how easy this method is.
Use the offset filter in Photoshop to help you create more visually complex seamless designs.
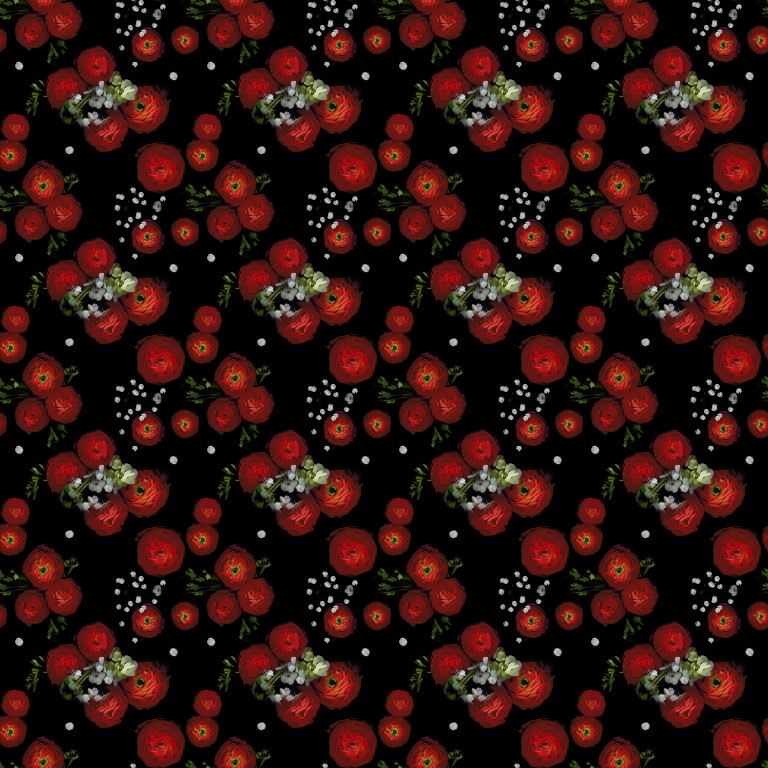
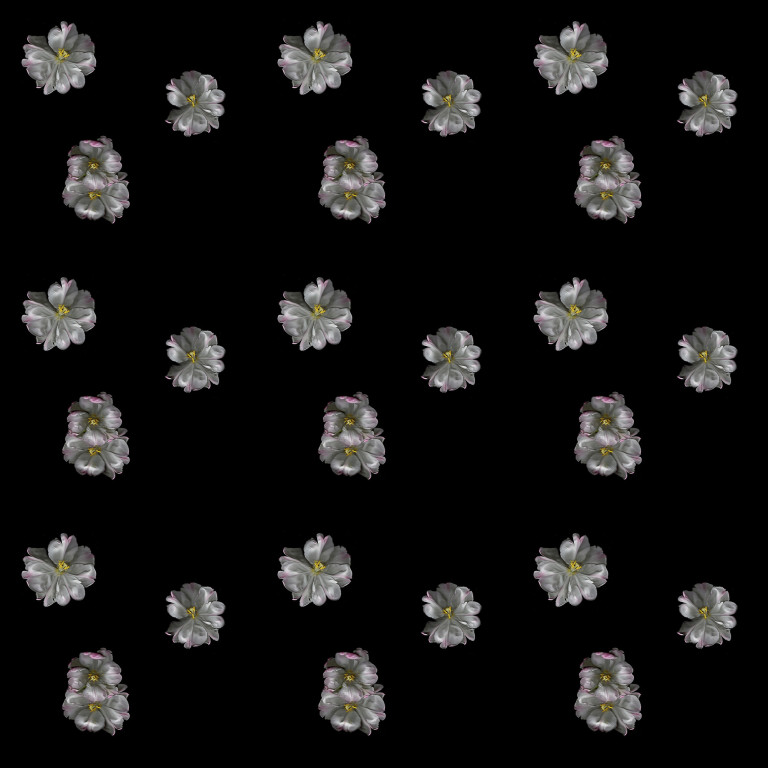
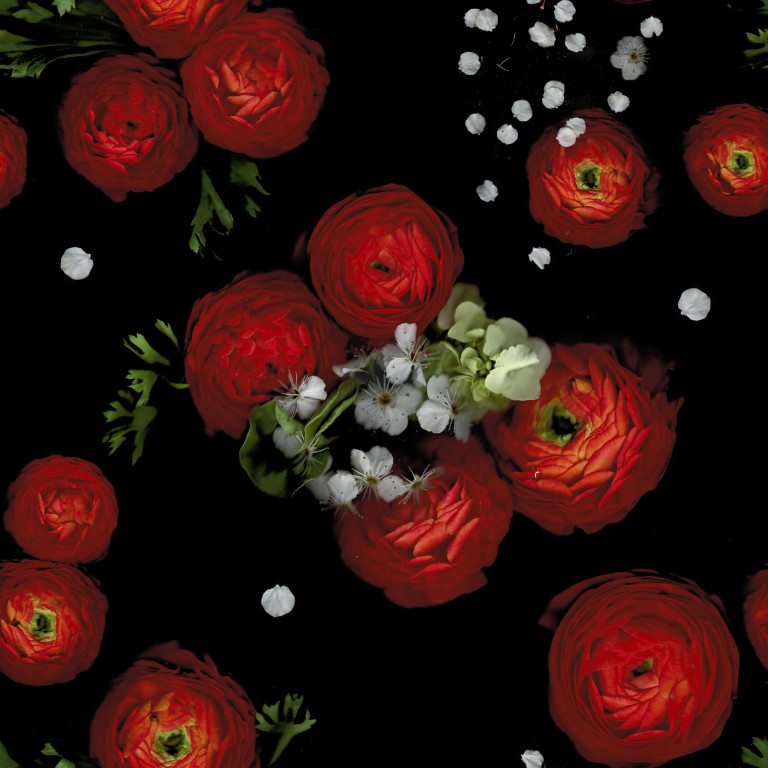
When this design is placed in a basic repeat, the design is busy and seamless.
Create a new image. You can make it whatever size you'd like, but be sure to make it a square. For this repeat, we created a 2000x2000 pixel image. Once again, set the resolution to 150 pixels per inch and fill the background with black. Cut and paste your images to create a more tightly packed design in the center of the image. Make it as complex as you'd like, but do not let any part of the image touch the edges. Once you have it the way you like, choose Layer > flatten image.
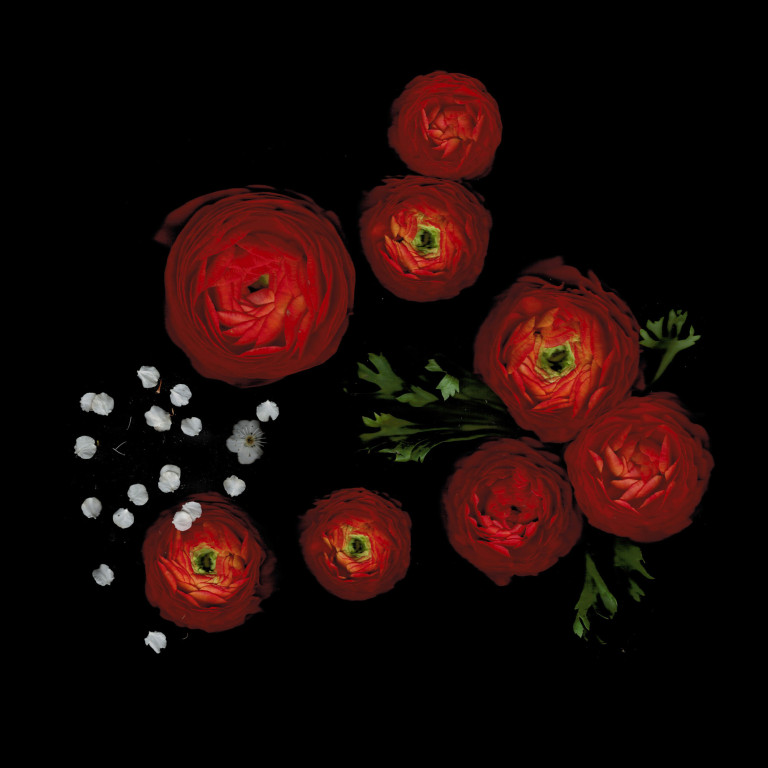
Create a design in the center of your square image.
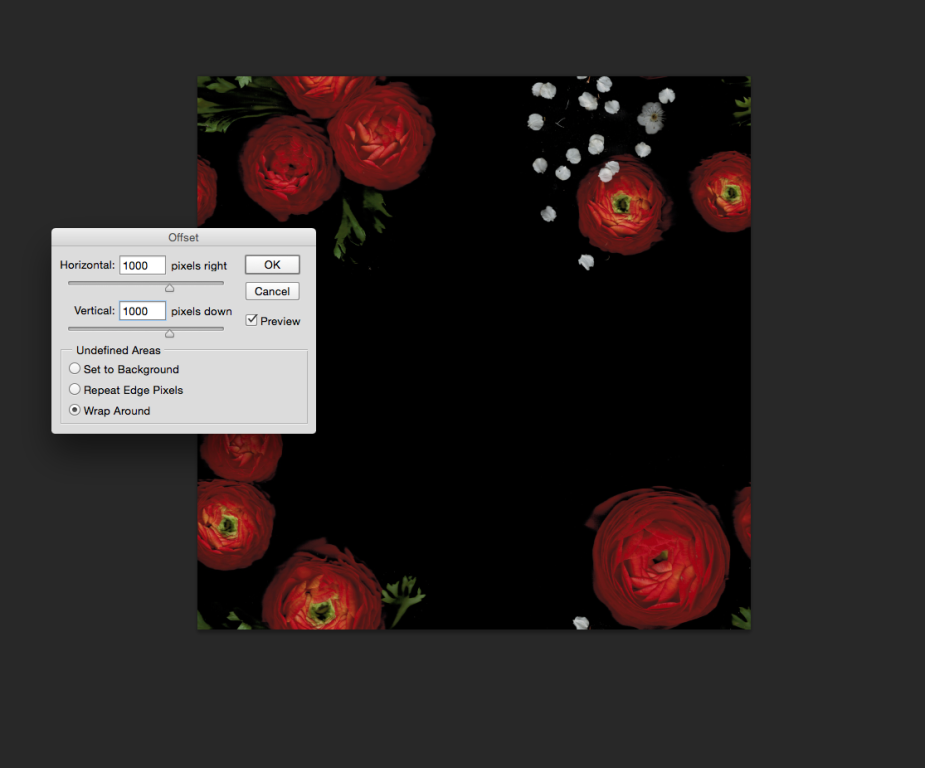
Use the offset filter to wrap the design around the edges.
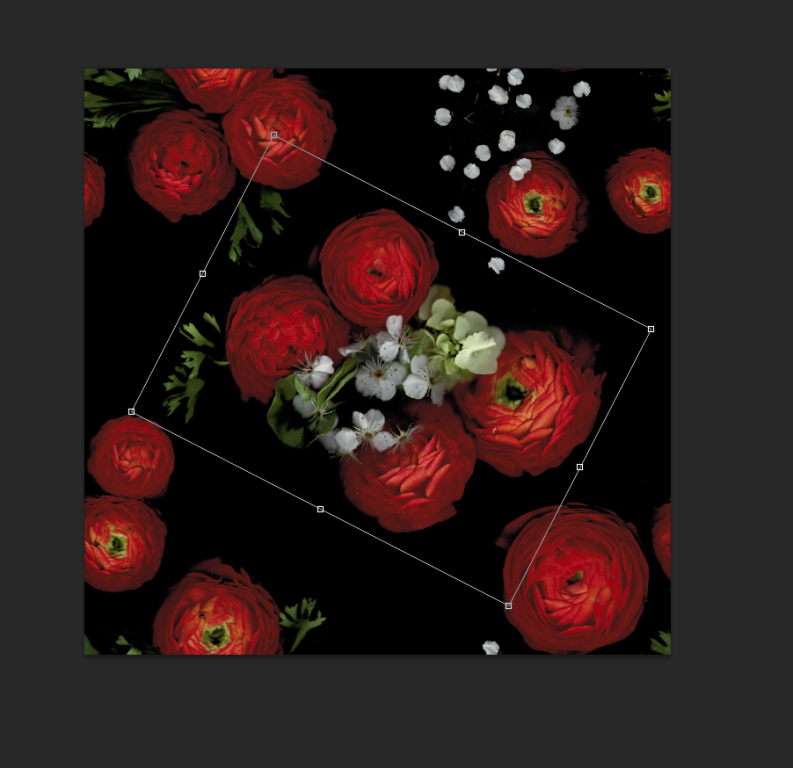
Fill in the remainder of the design with more flowers.
Once you have your center motif complete, choose Filter > Other > Offset. In the dialog that appears, enter half the length and width in the horizontal and vertical fields, and set the radio button to "wrap around." Select OK, and you will now see your image quartered and placed at the corners of the image.
Cut and paste more flowers to fill the center of the image. Once you're happy with how it looks, you're done. You now have a complex, tightly packed floral design that conceals the seams between the tiles! This method can be used to create all kinds of repeats within Adobe Photoshop, not just from scanned images.
See the Resources section below if you'd like to learn more about creating fabric designs.
Print Your Fabric
Use a digital fabric printing service to bring your fabric repeat to life. Spoonflower offers several options for repeating patterns, including a basic repeat, half-drop repeat, or half-brick repeat. For the designs created here, a basic repeat is usually best. However, if you opt to create a fabric with a single strong center motif, you can play around with the other options online and preview how they'll look before ordering.
Depending on the fabric substrate you choose, the black background may not appear as dark as you'd like in the final product. To test your design, be sure to order swatches first. Be aware that colors will appear more muted and images less sharp than they do on screen.
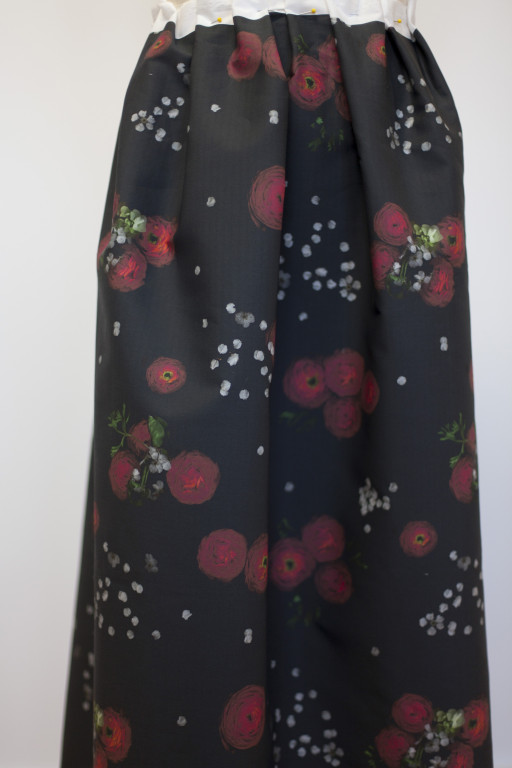
This print was printed digitally onto cotton poplin.
Resources
-
Spoonflower: The most popular site for ordering custom printed fabrics. -
Fabric On Demand: Another digital fabric printing service which offers lighter cottons and several forms of polyester. -
By Hand London: Offers digital fabric printing services in the United Kingdom. -
A Field Guide to Fabric Design: This book by Kim Kight offers a fantastic introduction to designing your own fabric.

