Sign In
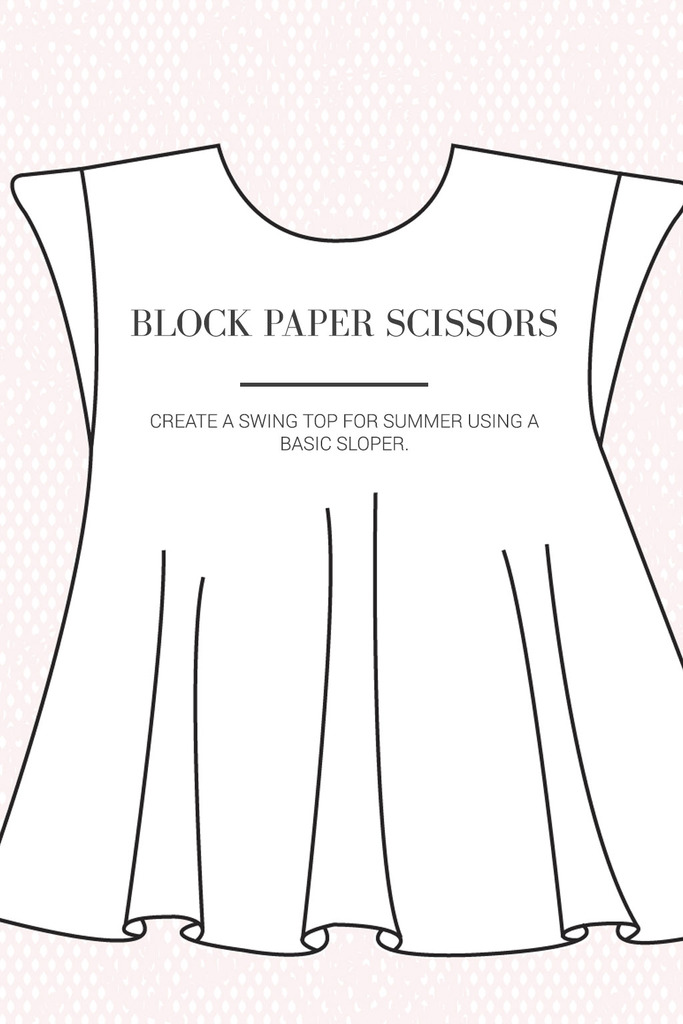
Block Paper Scissors is a patternmaking series featuring dart manipulation – no experience necessary to join in! Every month, we start with a basic bodice pattern (also called a "block" or a "sloper") with an underarm bust dart and a waist dart. We use that as a jumping off point to create a different bodice design each time.
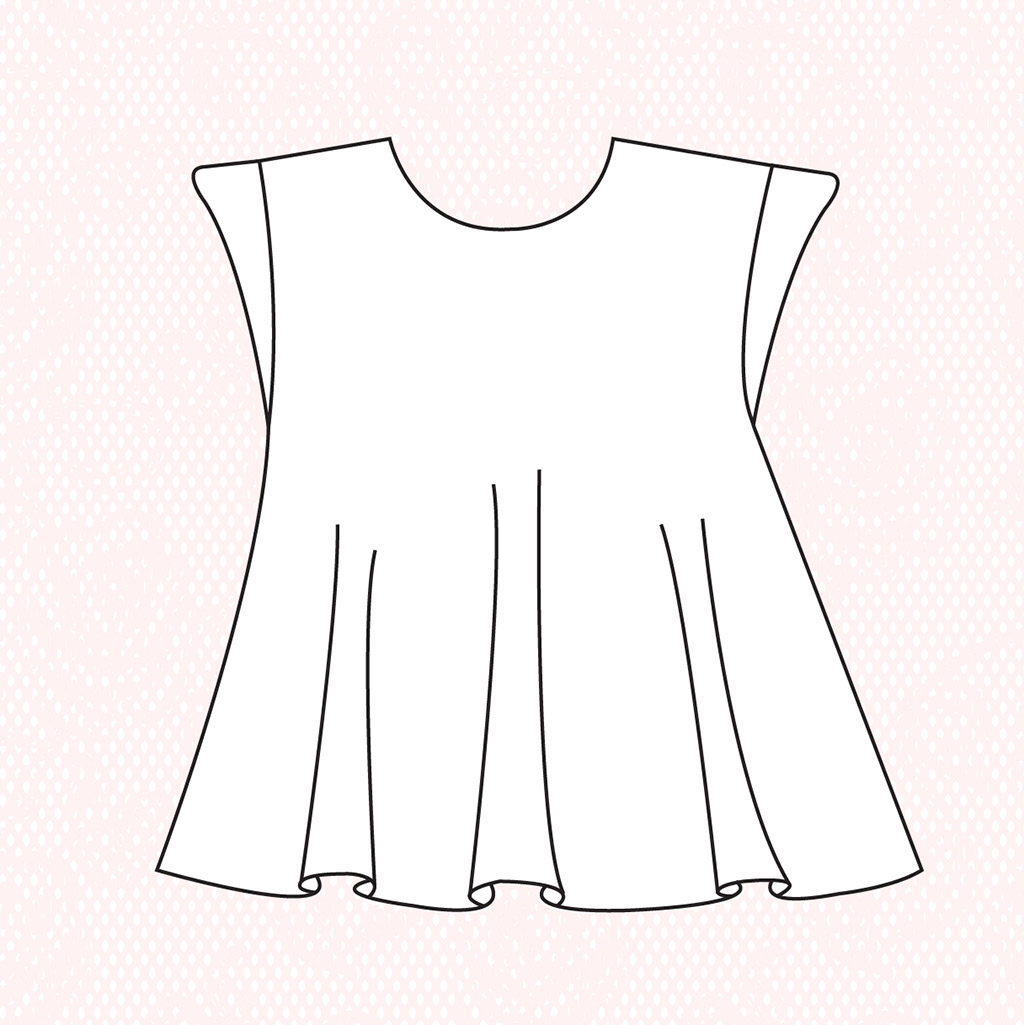
This month, we’ll be transforming our basic block into a looser fitting swing top. This would be super cute stitched up in a drapey material like rayon or silk.
How to:
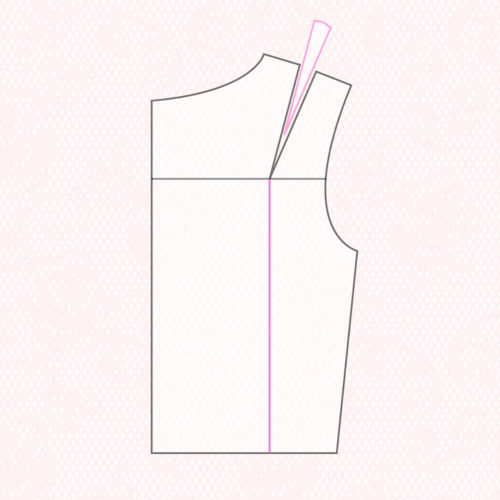
Step | 01
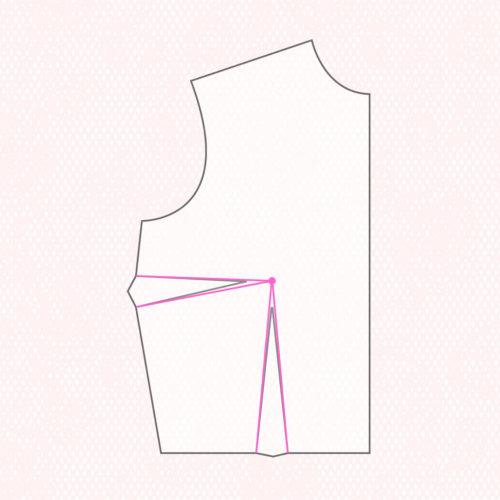
Mark your bust apex on your front pattern piece by placing the pattern piece over your body and aligning the center front and side seam. Mark the fullest point. Draw lines from the ends of both sets of dart legs to the bust point.
Step | 02
Cut along lines to (but not through) the bust point. Remove wedges.
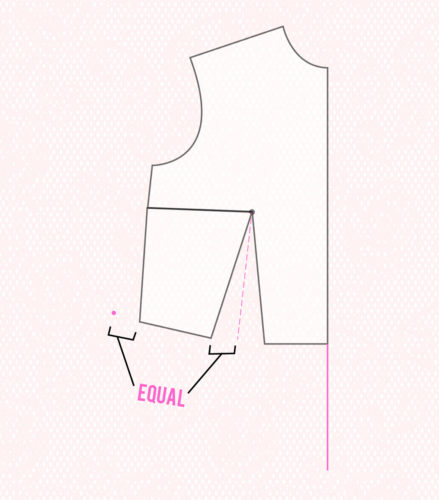
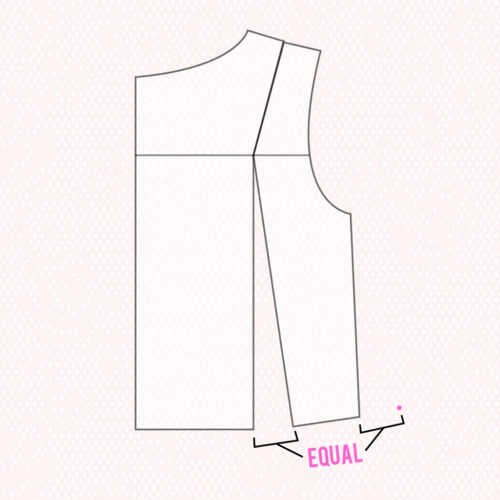
Step | 03
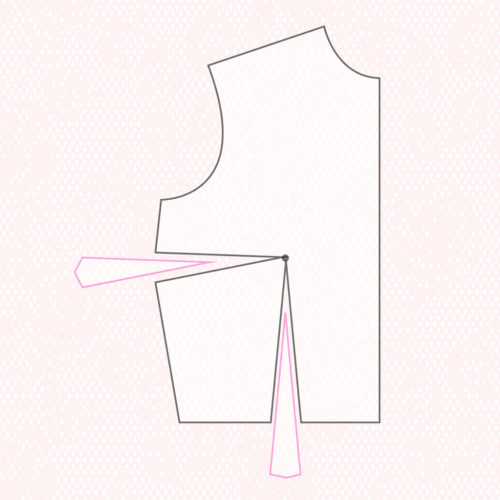
Rotate pattern piece to close bust dart and tape. Consider how much longer you’d like your top and extend the center front line by this amount. Measure half of the width at the bottom of the waist dart, and mark this distance out from the side seam.
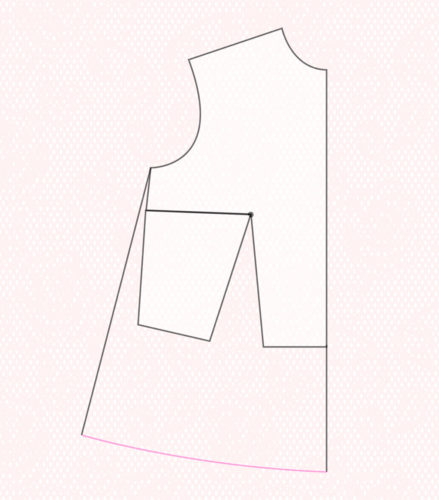
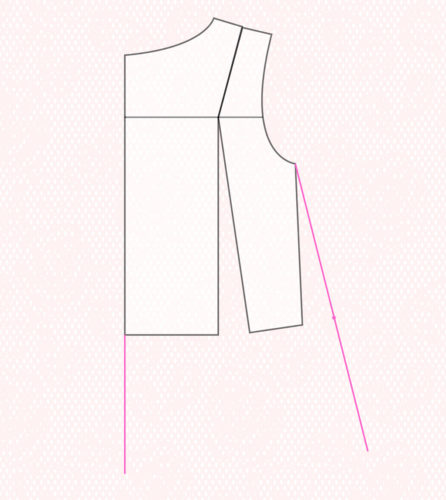
Step | 04
Draw a line from the top of the side seam to the mark. Extend line the same amount added to the center front. Use a curved ruler to draw bottom hem edge.
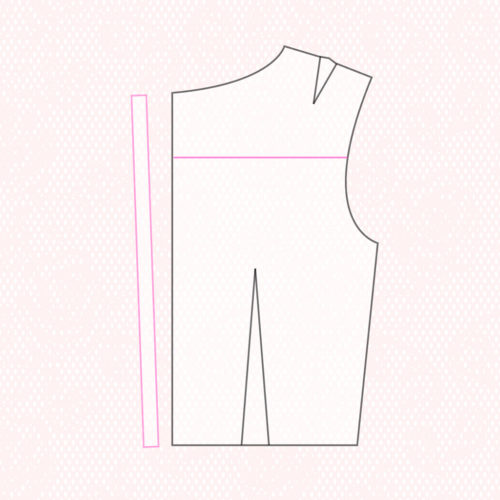
Step | 05
On bodice back, remove seam allowance along center back edge. (Pattern modifications should make a zipper unnecessary.) Draw a line perpendicular to center back and about halfway up the armscye.
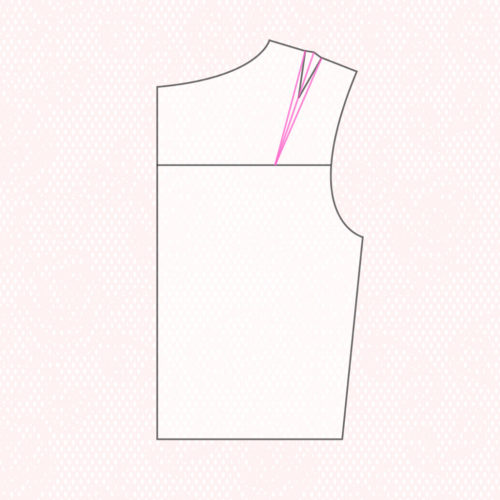
Step | 06
Draw a line straight through the shoulder dart to the perpendicular line to create an intersection. Then draw lines from the end of each dart leg to this intersection.
Step | 07
Cut along lines and remove wedge. Draw a line down to bottom parallel to center back. Slash along line to but not through end of open wedge to create hinge.
Step | 08
Close shoulder dart and tape. Measure width of open slash at bottom and mark that distance out from the bottom of side seam.
Step | 09
Draw a line from top of side seam to mark. Extend line the same amount you added to the center front. Extend center back by same amount.
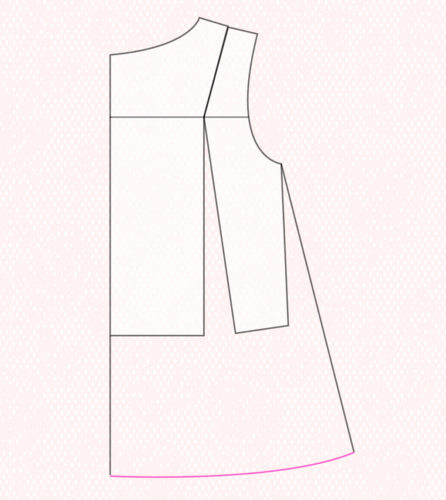
Step | 10
Use a curved ruler to draw bottom hem edge.
cutting and sewing notes:
Cut one front and one back, both on fold.