Sign In
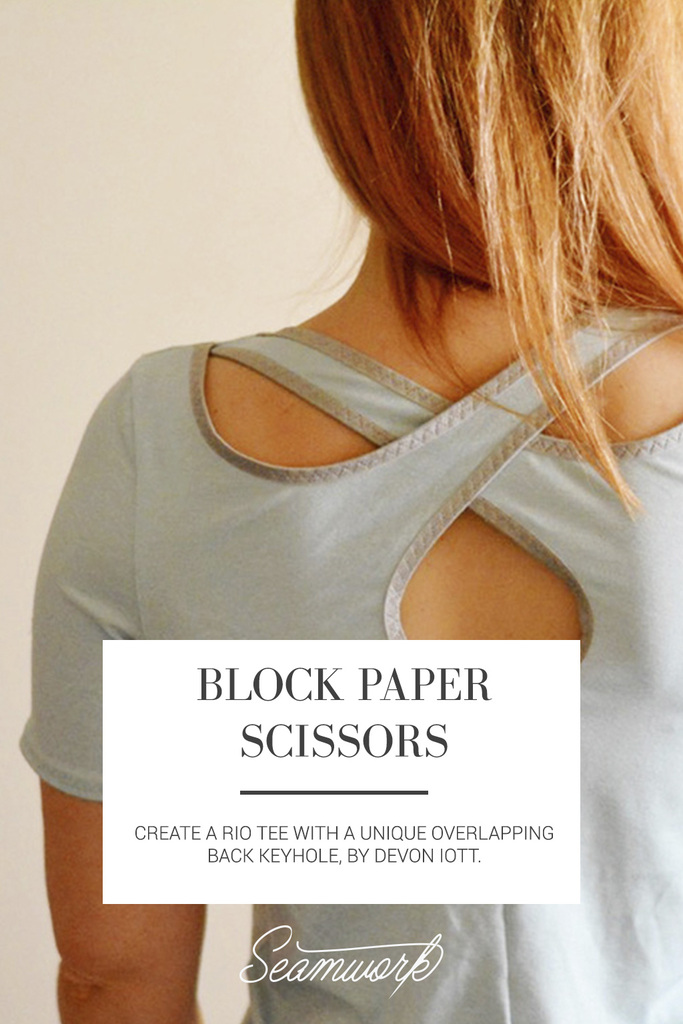
Block Paper Scissors is a monthly column featuring patternmaking hacks that will help you give your Seamwork patterns a custom spin—all you need is paper, a ruler, and a pencil!
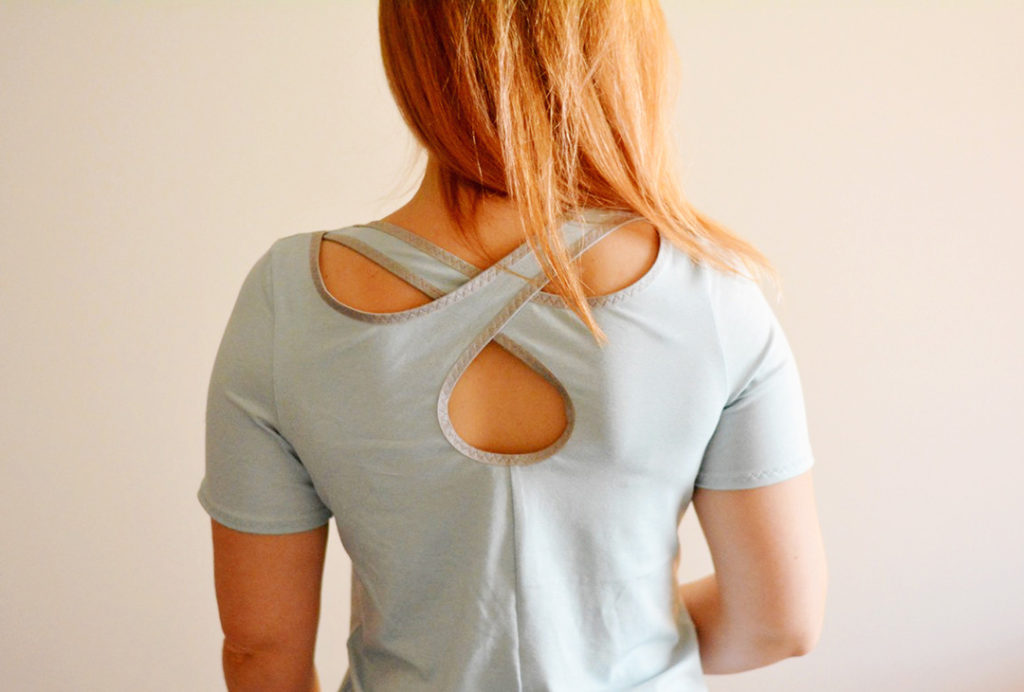
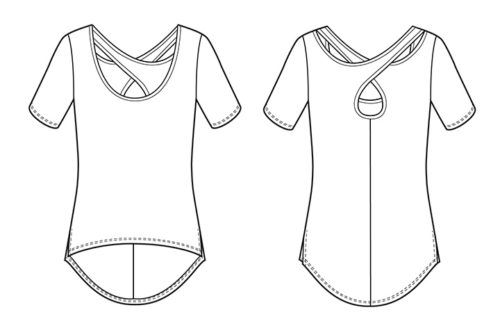
This Rio tee pattern hack adds a unique and interesting design detail to the back of the shirt—a cutout with overlapping sides that are edged in fold over elastic. The finished product might look like a magical brainteaser, but the steps to get there are a piece of cake. Follow along below to whip up your own creation, and then wear your hacked Rio to your next yoga class! Be sure to throw that mat down in the front so everyone can see your new duds. We won’t judge.
Prep Notes
Extra supplies: 3 yd. 5/8” fold over elastic
Other notes: Do not cut neckband piece
Instructions:
Step | 01
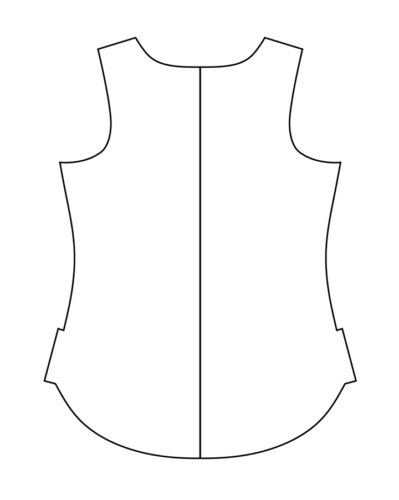
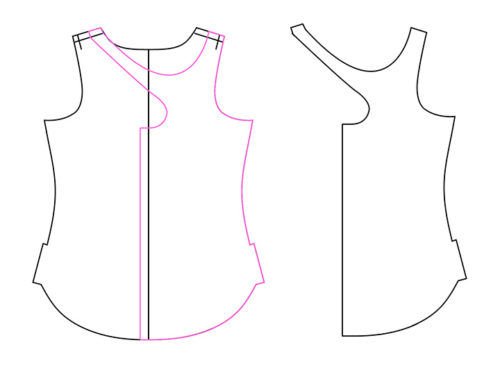
Trace off the back piece. Trace again in mirror image to create one full back piece. (Don’t cut it out just yet.)
Step | 02
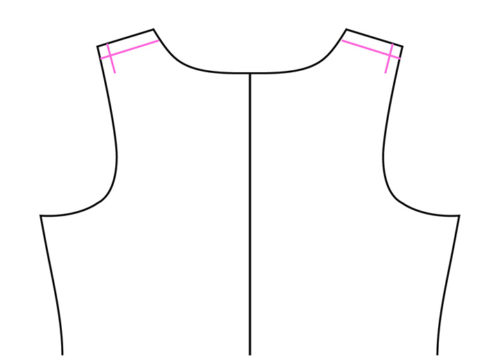
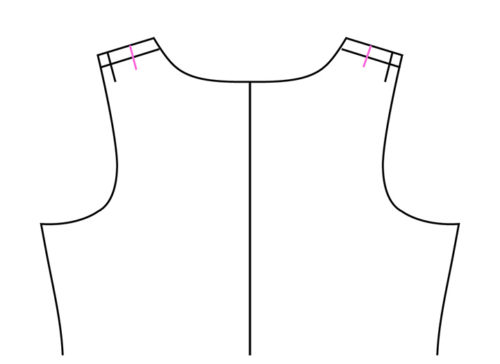
Mark the stitching line along the shoulder seams. Mark the armscye stitching line at the shoulder seam.
Step | 03
Mark the center of shoulder stitching line between the neck edge and armsyce stitching line.
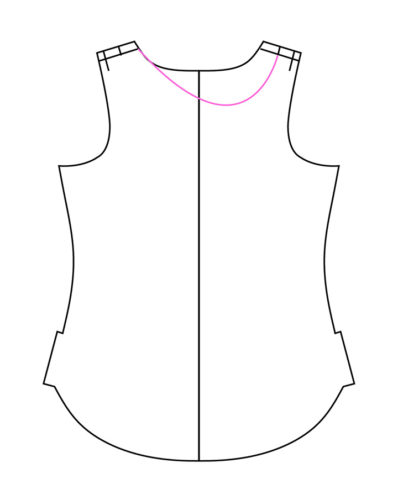
Step | 04
Draw a curved line as shown from the center mark on the right shoulder to the neckline edge on left shoulder. Curve the line deeper on the right side of the pattern so that it’s mostly straight as it approaches the left neckline edge.
Step | 05
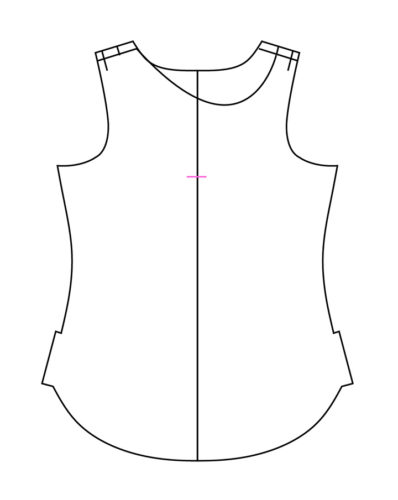
Mark 6–7” down from the top of the pattern at the center back, approximately even with bottom of armscye. This mark will be the bottom of the round cutout.
Step | 06
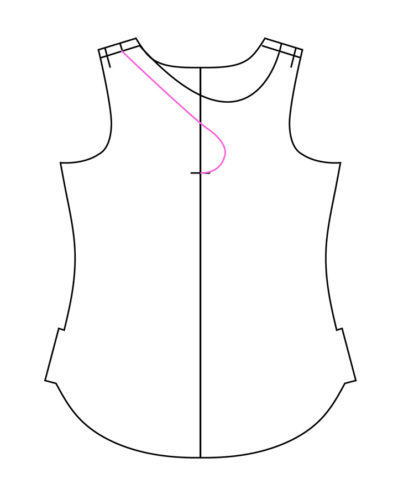
Draw a curved line as shown from the center of the left shoulder, across the center back, then curved back around to the mark. Be sure that the line is perpendicular to the center back where it meets the mark. The lower curve should be about 1.5” from the center back at widest point.
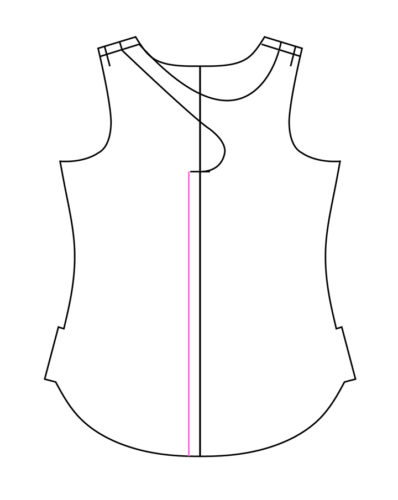
Step | 07
Add the seam allowance to the center back by drawing a line 3/8” to the left of center back.
Step | 08
Cut around the pattern piece as shown. Be sure to include the seam allowance at the shoulder seams.
Sewing notes:
Step | 01
From fabric, cut 2 of back piece. Cut other pieces as indicated. Join backs, right sides together, along the center back, using 3/8” seam allowance.
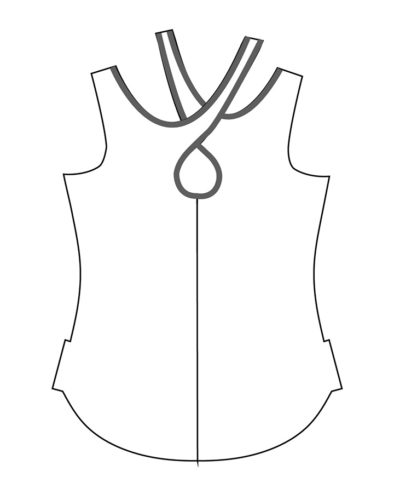
Step | 02
Bind the edges of back cutout as follows: Place elastic and shirt edge wrong sides together, with cut edge of shirt aligned with centerfold line of elastic. Use a medium zigzag stitch to attach the elastic to the fabric, stretching elastic slightly around the sharper curves. Fold the elastic around the raw edge of the fabric to encase the edge. On the right side, stitch through all the layers using a three-step zigzag to secure. Press carefully with a press cloth to flatten elastic.
Step | 03
Repeat the elastic process with the front neckline edge.
Step | 04
To join the shoulders, pin each half of the back cutouts to the corresponding shoulder seam, right sides together and overlapping them slightly. It is important that the front and backs are aligned at the neck edge, as this is what creates the neckline. Sew or baste together at 3/8”, first with a straight stitch to be sure of the placement, then serge or overcast. Press the seam allowance to the front, and topstitch from right side 1/8” from seam on shirt front.
Step | 05
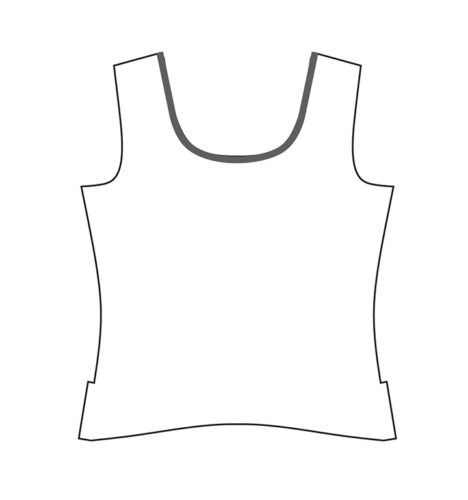
Finish the pattern according to the instructions.

About the Author
Devon Iott is a sewing teacher that works for Husqvarna Viking and Pfaff brand sewing machines. She blogs at Miss Make and lives in Nashville, TN with two chickens and a cat.