
 Sign In
For the last decade, I have worked in the apparel industry in Portland, Oregon. Because of the number of activewear companies here, both large and small, much of that work has been with athletic apparel. I’d like to share what I’ve learned about creating activewear that really lasts, and how some ready-to-wear techniques can be applied at home.
When creating an athletic wear garment, it is important to make sure it will move with you. No matter what your activity—from a walk in the park, to yoga, to rock climbing, to Zumba—you want to create something that moves with your body.
How Much Should My Stitching Stretch?
Nothing is worse than starting an hour-long dance class, only to discover that you are losing your leggings, or that you’ve popped stitches in a crucial seam. Both have happened to me with ready-to-wear garments, but thankfully my dance class turns the lights down during class.
Many athletic garments have negative ease, meaning that the finished garment is smaller than your body and must be stretched when worn. If you are working with a pattern with no ease or negative ease, you must make sure your stitching can withstand the repeated stretching of the garment. To get it on your body and to perform your activity, both the fabric and the stitching must stretch. In an ideal sewing world, your stitched seam will stretch proportionally with the stretch in your fabric.
With knits, each fabric can stretch differently, so unfortunately there is no exact guideline on how much a stitch should stretch. If a legging must go over the hips and yet sit snug at the waist, it must be elongated enough to stretch over the hips and return to the waist size repeatedly.
Whenever I start a project with new fabric, I take the time to do sample stitching. It is important to make sure the seams can withhold being stretched. If you are sewing a garment with negative ease, keep in mind that your stitches will most likely be stretched when put on the body; when you do movements, that could elongate them even further.
What is ease?
Ease is the difference between the garment’s measurements and the body measurements of the wearer. Positive ease means the garment is larger than the body. Negative ease means it is smaller than the body, and zero ease means it is the exact same size.

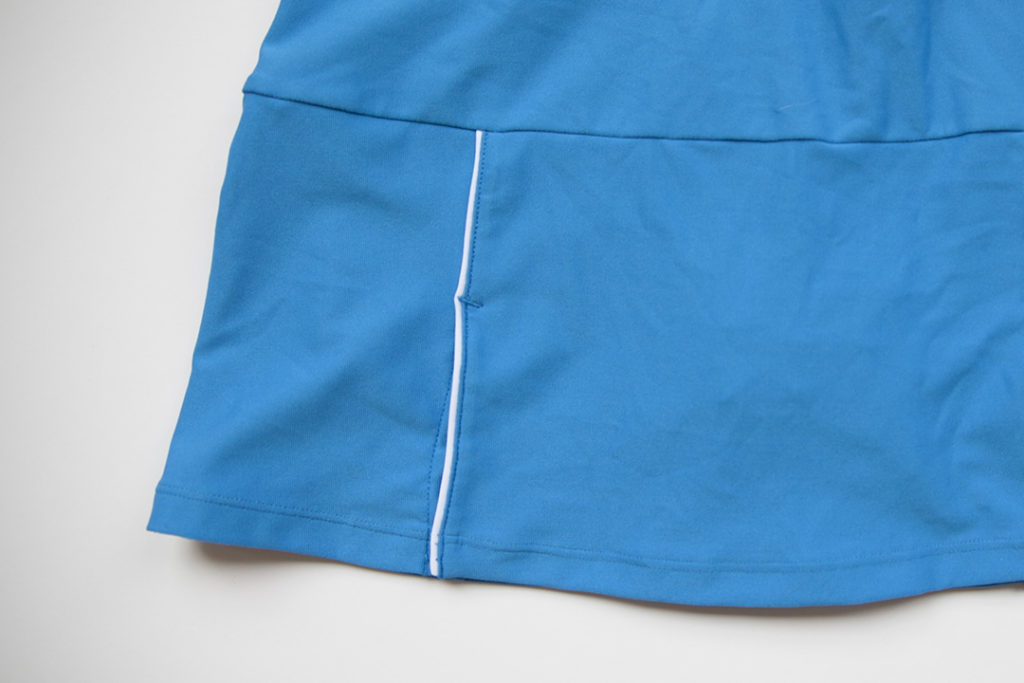
The side seam of a garment, sewn with a four-thread serger, held flat.
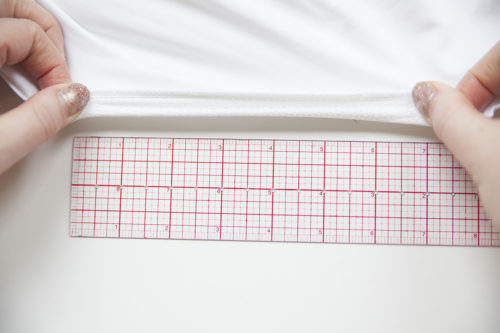
A seam that has been stretched. You can see it easily goes
from about 4” to 7” elongated.
I should also point out that you could stretch just about anything until the point of breaking if you really try. The important thing is to make sure that you can stretch at least 25 percent without getting any resistance from the threads holding the seam together. If possible, aim for at least 50 percent stretching, especially if you are sewing a garment that will remain stretched when on the body.
Types of stitching in athletic wear.
I will preface this with the not-so-wonderful news: some of the stitches you see on ready-to-wear athletic wear are stitches you may not be able to do at home. However, I do want to explain what they are, and why you see them. This will make it easier to study the athletic wear you may have at home, and to determine where you can substitute other stitches.
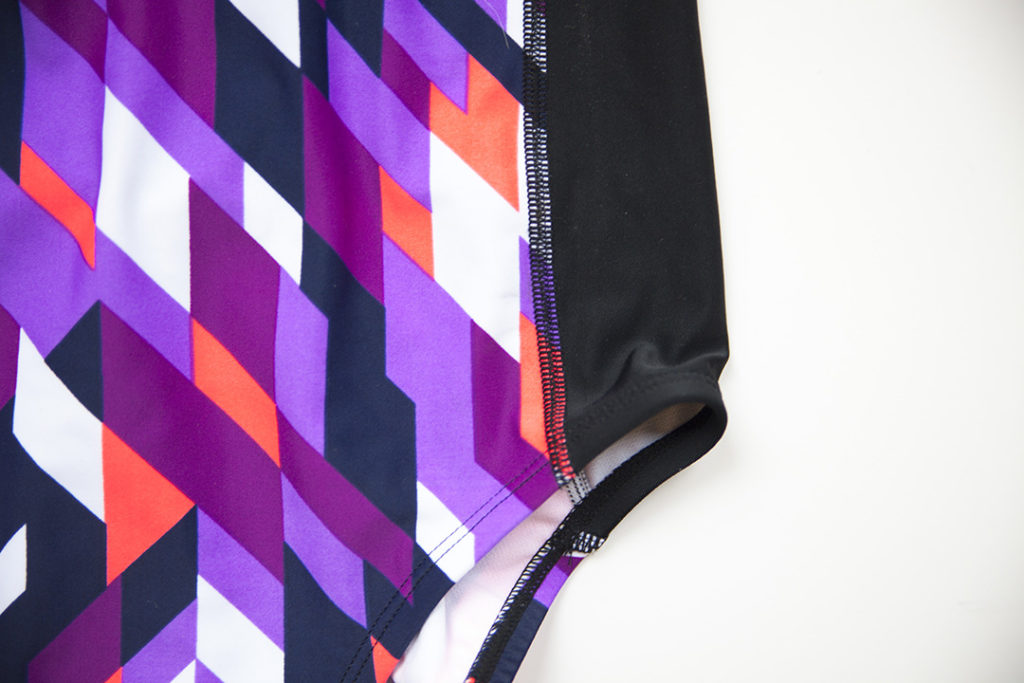
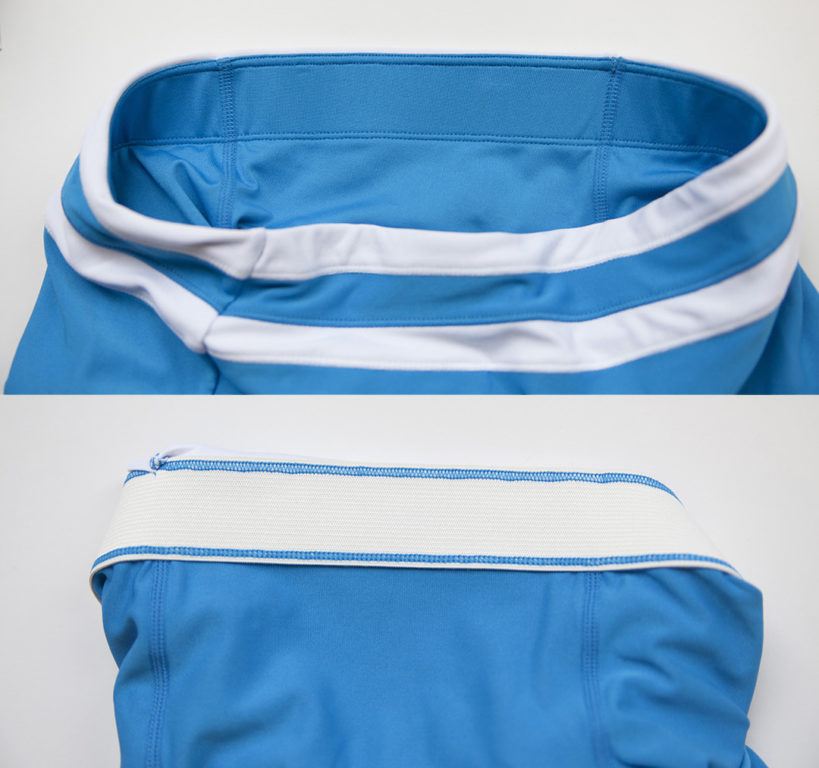
This garment is a performance swimsuit, and uses this stitch on body seams.
Flatseaming or Flatlocking – The function of this stitch is to provide the least abrasive and strongest stitch possible. It is mainly found in areas that are stretched when wearing or will be stretched a lot during movement of a sport. A flatlocking machine has three to four needle threads, and has loppers on each side. There is no fold-back seam allowance, because the fabric is overlapped 1/8” on each side. With that narrow lap, this machine requires one of the most skilled machine operators in a factory. It is also sewn straight, so you cannot sew 90-degree angles or sharp curves. The loopers most often have a “fluff” thread or texturized polyester for softness.
Loopers Out Coverstich, also called Reverse Coverstitch – In industrial coverstitch settings, you can have a looper thread on both sides, whereas home coverstitch machines only have a looper on the underside. While this stitch looks like a flatlock, it is bulkier than a true flatlock, which is important when working on garments like swimwear or base layer compression, where less bulk is ideal.
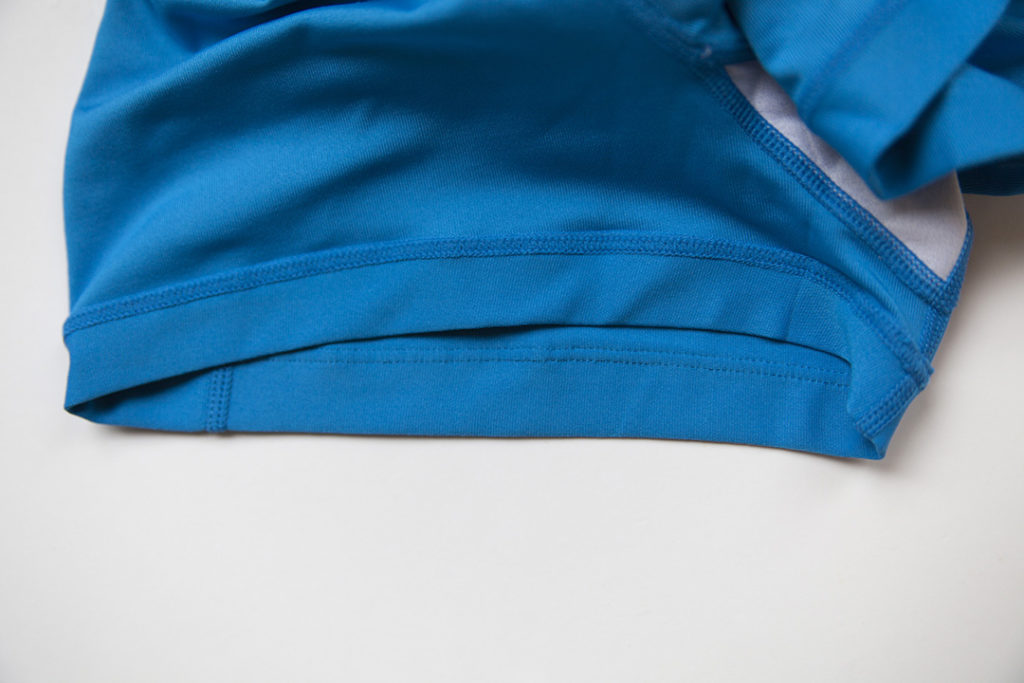
This garment is shown turned inside out, and is the hem of a compression short. You can see a fluff thread was
used as the looper and a two-needle stitch was used as the outer hem.
Coverstitch
This is one of my favorite machines. It hems, understitches, topstitches, and can be decorative. It is commonly found at the hems of knit garments. It can have two or three needles, and the underside is a looper, allowing the seam to stretch. You may also take this machine down to one needle for chainstitching, which is used a lot for topstitching. The good news is that some sergers have a coverstitch function. There are also home coverstitch machines, and I highly recommend the Janome Cover Pro.Serger
This is the bread and butter for sewing with knits. From low- to high-end, it is the machine you use when you need seam stretch and clean finishing. If you are just getting into knits or considering purchasing a serger, a great entry-level machine is the Brother 1034D. It has lots of features, and it is the home serger I have at my studio space.Zigzag
This is one of my favorite and strongest stitches, typically found on bras, elastics, and even medical garments. It is known for its ability to stretch and recover repeatedly due to the nature of stitch angles. You may see multiple settings for your zigzag stitching on your regular machine. A one-step zigzag is when it is one stitch length per angle. Three-step is where there are three small stitches at each angle. If you do not have access to a serger, this would be your go-to stitch for construction. Zigzag is also used as topstitching and to install elastics.Others
Depending on your machine options, there may be some stitches available for stretch fabrics. Do test them out with your fabric and stretch to test their durability before sewing a garment.If you are getting into sewing knits, especially with Spandex, my primary equipment recommendation is a serger. If you haven’t tried one out before, see if there are any classes or open studio times at places around you. We are fortunate in Portland to have Modern Domestic, which offers both.
Construction Techniques
Construction techniques and applications to make your garment perform.
Did you know that in the apparel industry a garment has a “life”? This means that the maker sets a reasonable amount of time that the garment will hold up to washing and wearing. When I am creating something, I expect it to live at least twenty-five times.
These are my tips for creating garments that can be in your closet for a long time.
Extra seam structure with elastic
When I think of elastic, the first thing that comes to mind is gathering. In athletic wear, there is often elastic in a few places that you may not realize. I have even had to take apart ready-to-wear garments on a few occasions to verify if there was in fact elastic inside a seam.
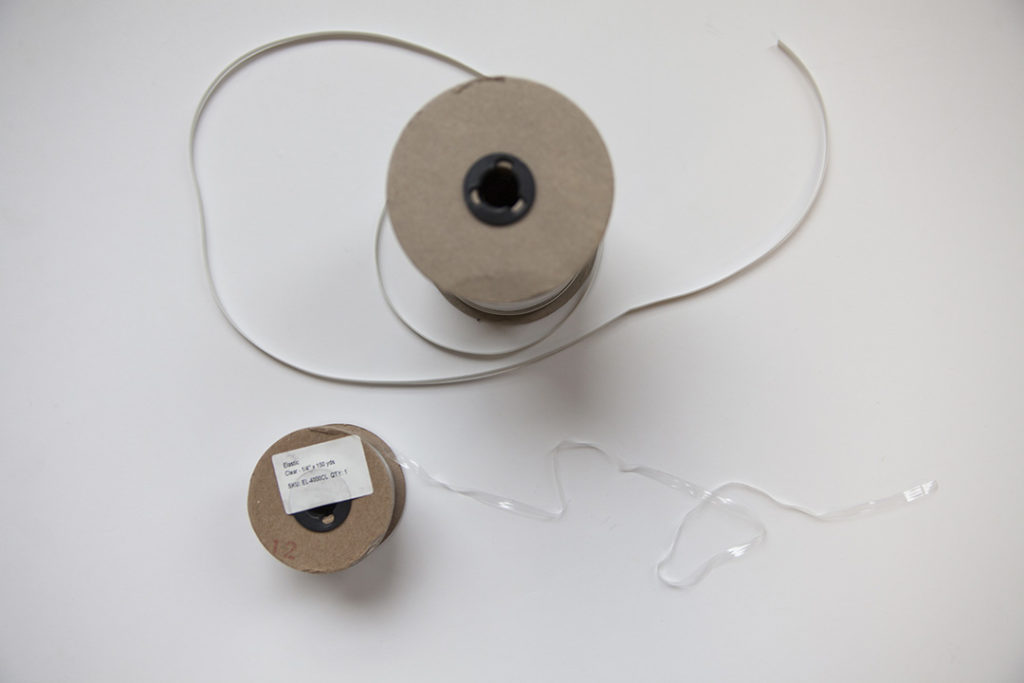
Clear elastic is something you may already be familiar with. The structure of this elastic is a film, meaning it is not knit or braided together. I look at this more of a stabilizer, than something that does well being stretched repeatedly. It can be stretched during wear, but it is not as strong as other types of elastic. In athletic wear, I would recommend using it in the following applications:
–Necklines that will be stretched repeatedly but are not stretched when on.
–Around pockets, for extra stability.
–In shoulder seams, or any short body seam. If you are doing a lot of handling around a shorter seam when sewing, this can help stabilize it. Braided or woven elastic is what you want to use for your seams that are going to be stretched a lot, and possibly stretched when worn. It is tougher than clear elastic, and comes in many different widths and weights.
–If you are sewing the top of a waistband on leggings or tights with a yoke, add some elastic for extra stability. You can add it within the seam, or select a larger width. For activewear leggings made of natural fibers, I love a good 1”-wide elastic in the seam for some extra hold, since natural fibers can stretch out more than their polyester friends.
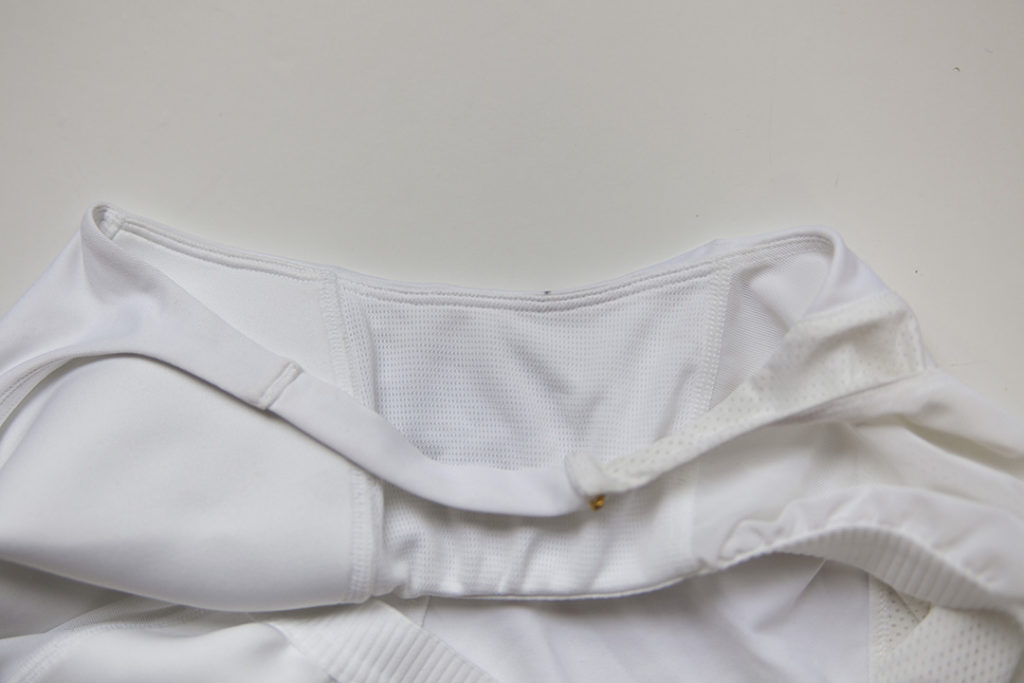
In this example, there is a 1” piece of elastic at the top of this tennis skirt. You can see how it looks at the interior of
the waistband. It is not always necessary to stitch through twice but can help stabilize depending on your garment.
–Leggings with a rolled-over waistband. The elastic is what is keeping the pant up where it should be on your body. I always go for at least 1”-wide elastic with these, if not larger.
–Bottom bands of sport bras, or shelf bras in garments. You can use fun exposed elastics in some of these applications, or have it be covered.
–Leg openings, on things like bodysuits or leotards. Even if there is no gathering, this is an area you do not want to let get stretched out.
If you are sewing with a serger check to see if your machine has a foot available to feed the elastic into your seams while sewing. This is referred to as 1:1 sewing with elastic, meaning there is no stretching of the garment or elastic when installing it. Look at it as a strong and silent helper.
Extra stitching for a clean finished look and extra stability
I’m a huge fan of both understitching and having a clean-finished garment. Working with knits is no exception to this. I almost always want to have understitching where it can be helpful to a garment. In ready-to-wear garments, you would see this stitching done with a coverstitch or chain stitch.
Understitching
Understitching is done close to a seamline, and stitches the seam allowance to the inside of a garment, such as a facing or lining. This prevents the inside of the garment from rolling outward.
Where to use understitching:
–Top inner yoke of a yoga pant. This will make the outside of your pant clean finished, and the inside stable.
–Along inner bras. This helps keep the bra portion from rolling to the outer side of the garment, and again, creating a nice clean outer finish.
Topstitching can also be a helpful tool, but remember to make sure it is stretching as much as your seam stitch.
–Banded necklines look especially clean when there is a nice stitch holding down the seam allowance, allowing the neckline to lay flat.
–Finishing piping or trims. Adding a trim to your athletic wear garment can go beyond being decorative. Often in running, a reflective tape is used in key seams for safety visibility. You can buy reflective tape that stretches, which will really add to the functionality of your garment.
Last but not least: thread
I touch on this a lot in The Colette Guide to Sewing with Knits, but I can’t express enough the importance of using the correct thread.
In athletic wear, this not only is for the performance of your garment, but also for comfort. Most thread used in activewear is the T18–T27 range. The lower the number, the lighter the thread. Thread sold on spools at stores is often a T40. If you are wearing a garment with a lot negative ease, thread that is heavy can cause abrasions where the seams are held against your body, especially of you are doing a lot of repetitive movements.
Thread in the T18–T27 range is sold in cones. If you are unsure of the weight, look inside the cone for the sticker.
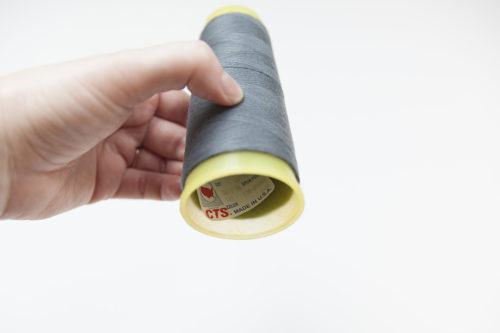
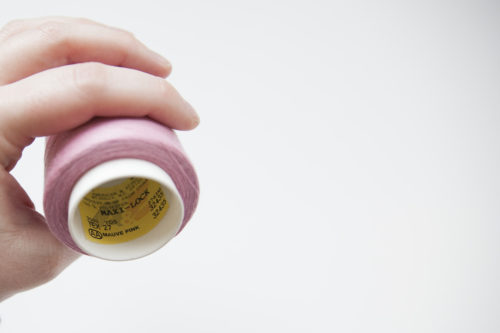
Here are two examples of thread: T21 and T27.
If are you sewing a compression garment or something that will be worn very tight, there is another option for softer seams. Fluff thread, also known as Woolly Nylon, is textured and softer against the body.
Threading fluff thread
If you are threading a machine with this type of thread, use a normal thread to tie it on to, and then pull the fluffy thread through the machine.
All of these things will help you create long-lasting and great performance athletic wear garments. Not only are all of these things important when sewing a knit garment at home; they are also things that are used as best practices in the apparel industry.
I know that I enjoy well-made clothing very much, and I also enjoy high-performance garments. Dance is my favorite athletic activity. I love being able to move however I need to, and have my garment move with me. When something fits, and you feel great, you will perform at your best. Happy sewing!

About the Author
Alyson Clair is the designer behind knitwear line Clair Vintage Inspired and a senior apparel developer in the activewear industry. She lives in Portland, Oregon with her husband and rescue dogs and cats.


