Sign In

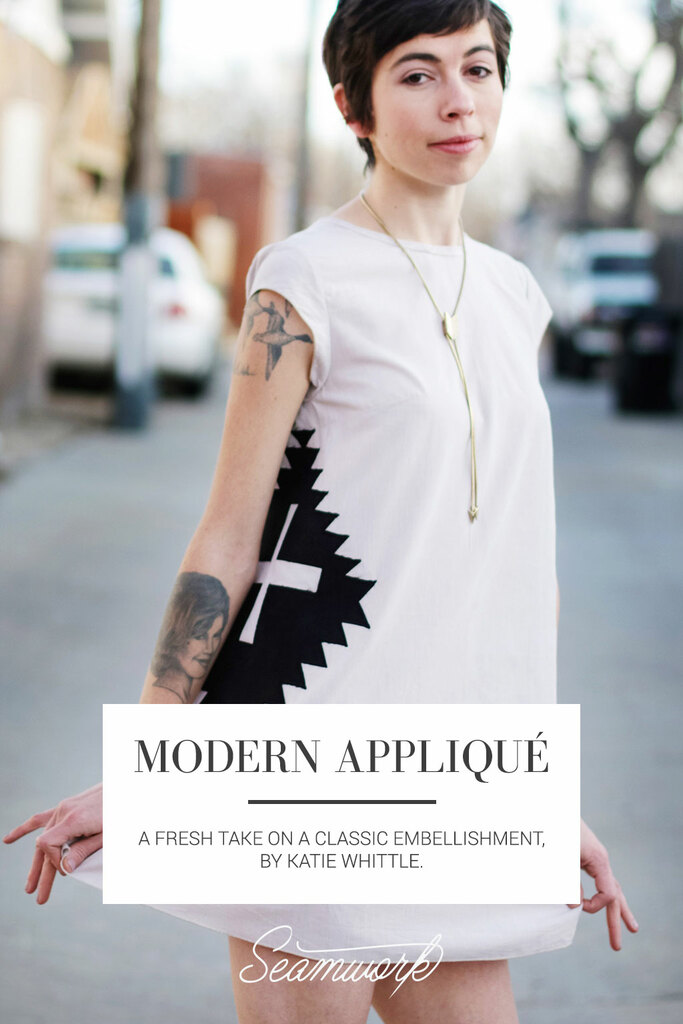
Appliqué has been around for just about as long as sewing. This technique was originally used as a way to repair clothing and has since transformed into its own art-form. Appliqué is simply the act of applying a piece of material to another, usually for decorative purposes. As you can guess, this technique can be used in all sorts of ways; from fine lace appliqué on couture dresses to funky daisies on mod skirts.
Recently, I have been seeing modern appliqué work utilizing color and shape to create very dramatic and gorgeous garments. I realized that I could do the same with my own me-made wardrobe by simply adding interesting shapes to garments.
There are multiple ways to appliqué onto garments. But for now we will focus on the two most common techniques: hand-sewn appliqué and machine appliqué. I encourage you to take what you learn here and find a way to make these techniques work with your own designs.
Design
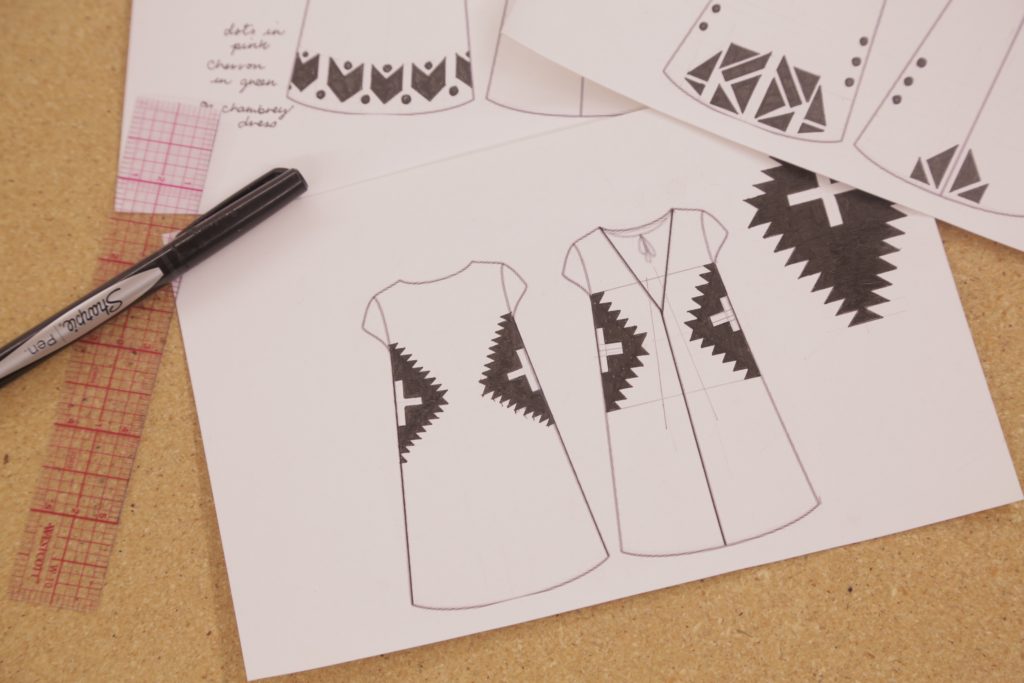
Try out designs by sketching directly onto the technical drawing of your pattern.
When designing appliqué motifs, you have the freedom to experiment with texture, color, and shape. I have seen all kinds of appliqué online that take motifs from nature—leaves, birds, and an array of scenes. Personally, I tend to be more attracted to modern and clean designs. The great thing about this technique is that there are endless possibilities for what you can do by simply sewing one fabric to another.
I suggest starting by making a few photocopies of your pattern’s technical drawing. From there, you can sketch right onto your garment and see exactly how your finished garment will turn out. Like they say in art class, “Just keep sketching!” You’ll be surprised by how your designs get more interesting as you sketch along. Try playing with proportions, varying the types of shapes, and, of course, color!
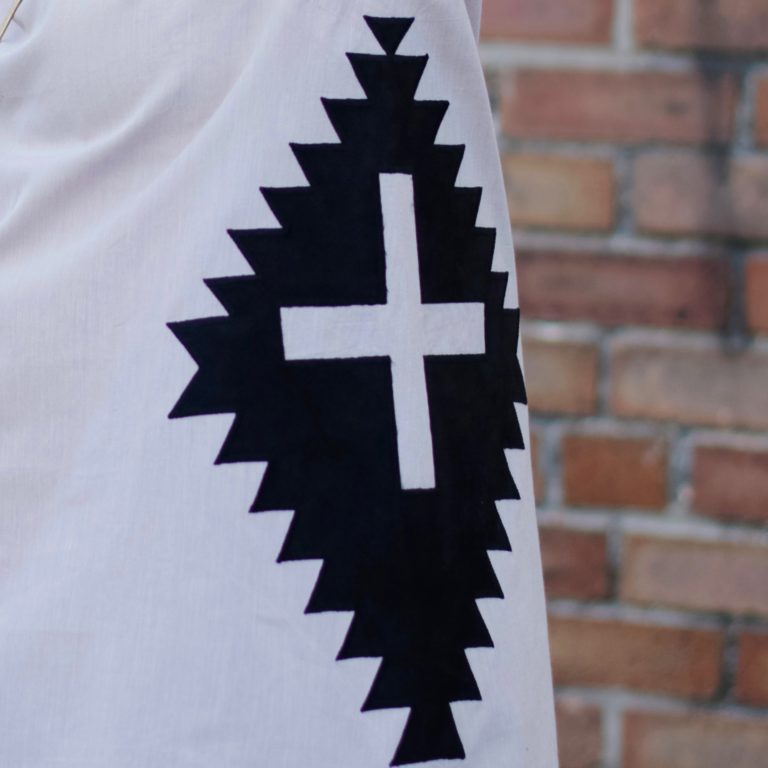
I sketched out about seven different designs. After coming home to get some opinions on the sketches, my partner suggested that I move the triangle and cross design up to the beginning of the side seam. The result was great! Not only did I have a wraparound design, but the new placement created the illusion of shaping in the dress.
Fabric
Using fabrics with similar weights keeps the garment's drape consistent.
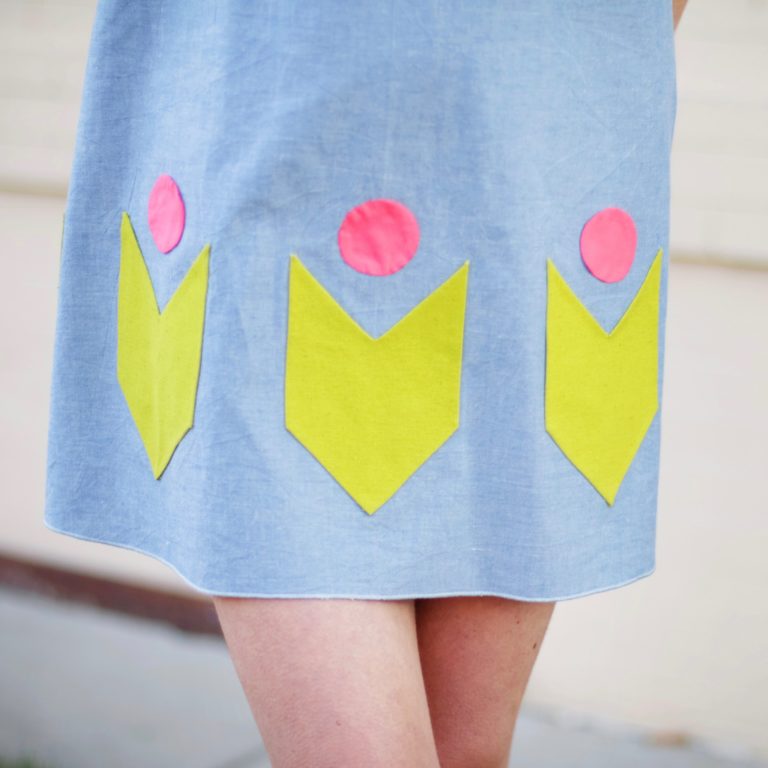
Fabric choice is key when designing appliqué. All fabrics involved should have the same relative weight and drape. Fiber content isn’t as much of a concern, but if you do plan on machine washing your garment then stick with similar fiber content for both your garment and appliqué motifs.
Try mixing opacity and texture
in fabric choices.

I suggest using a crisp fabric for handstitched appliqué, as it’ll be much easier for you to turn under those ¼” seams later. I chose a combination of shirt weight fabrics for my hand appliquéd dress. They were light enough to give my dress a great drape, but not so light that I was fighting with my fabric when pressing.
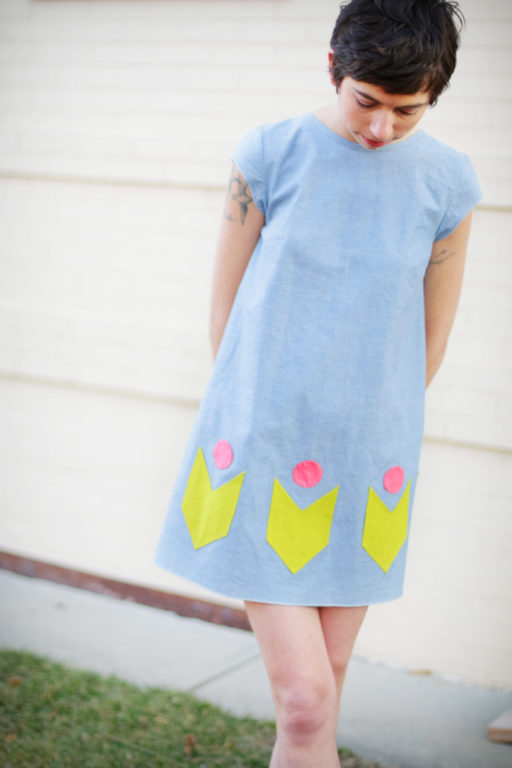
For my machine appliquéd dress, I found a lightweight synthetic suede to match with my linen/cotton blend dress. I love the way the suede pairs with the slight heathered effect of the linen. In addition, both fabrics are quite structured, therefore the drape of each fabric is consistent.
Method One: Hand Appliqué
We’ll start first with the more traditional hand-sewn method of appliqué. In this technique, shapes are cut and then the raw edge and allotted seam allowance are sewn under the shape to create a finished edge. Depending on who you're talking to, there are different ways to go about this. In quilting, the seam allowance and raw edge is turned while sewing. I prefer the press n’ sew method. In this process, the seam allowances are first pressed under and then hand sewn.
You'll Need:
- Pattern paper
- Tagboard or cardstock
- Fabric for appliqué
- Matching thread (match the color of your motif, not your garment)
- Fine sharp needle, size 10-12
- Fusible seam tape (optional)
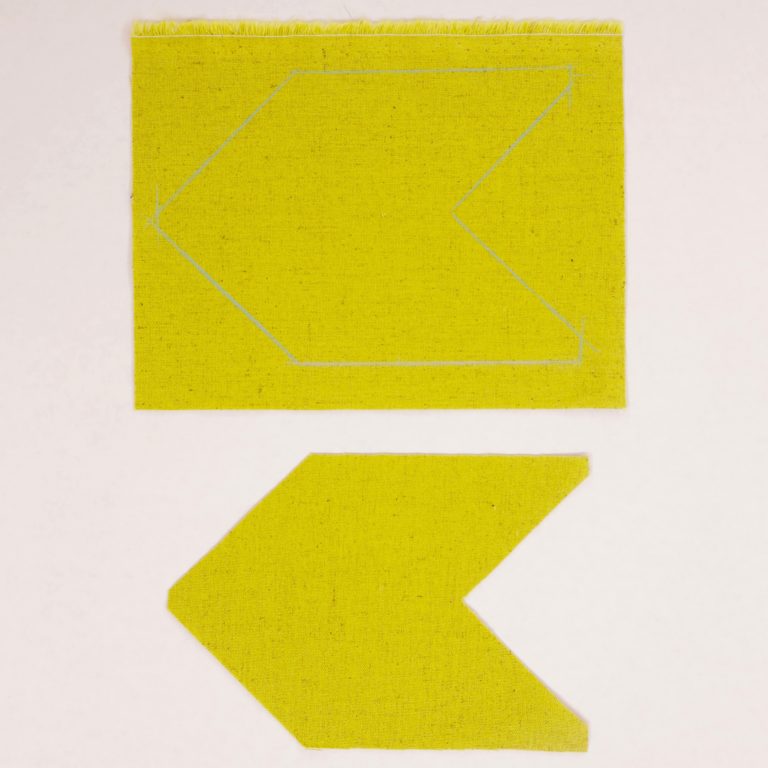
Preparing the Motifs
Step 1
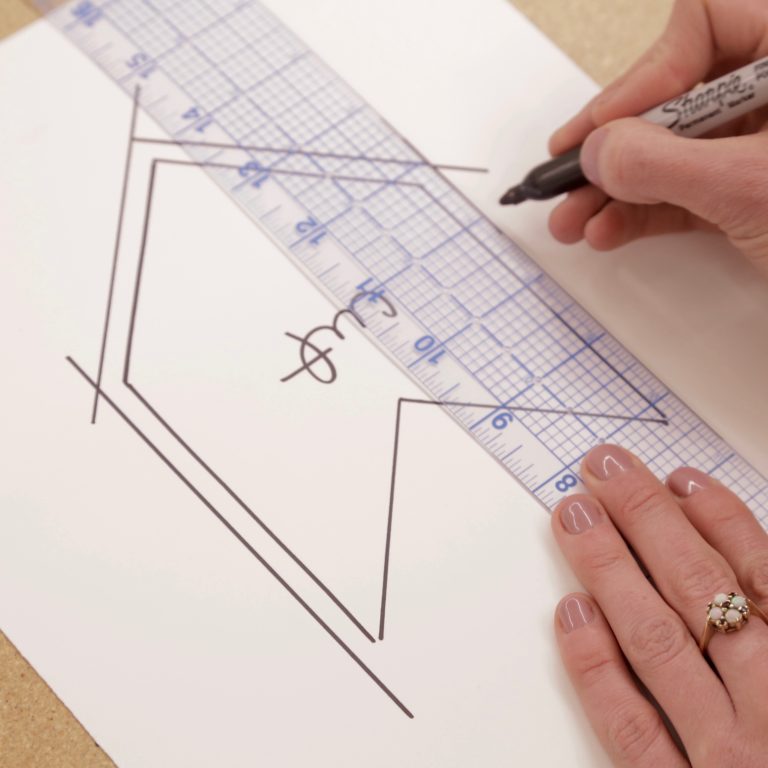
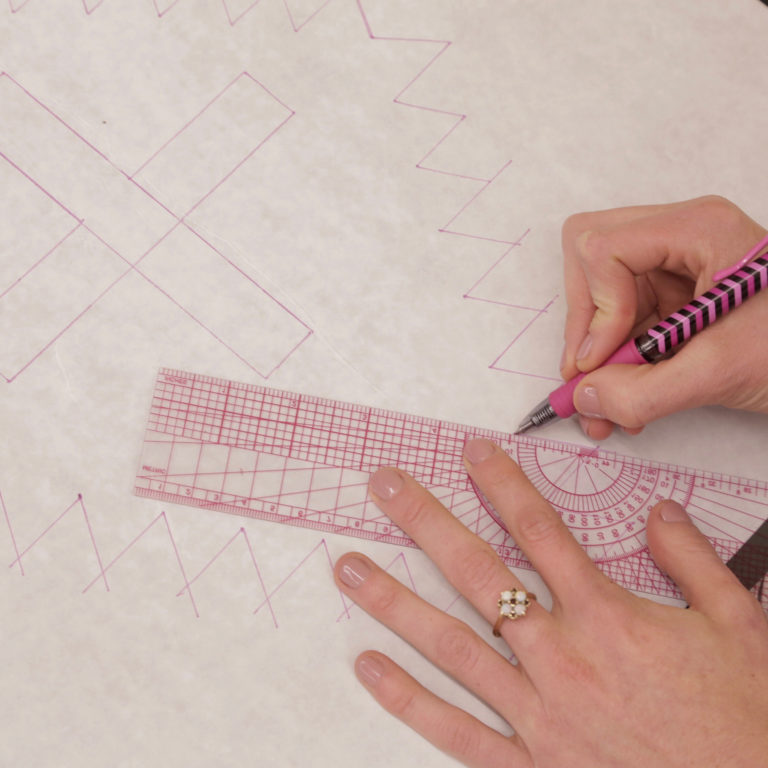
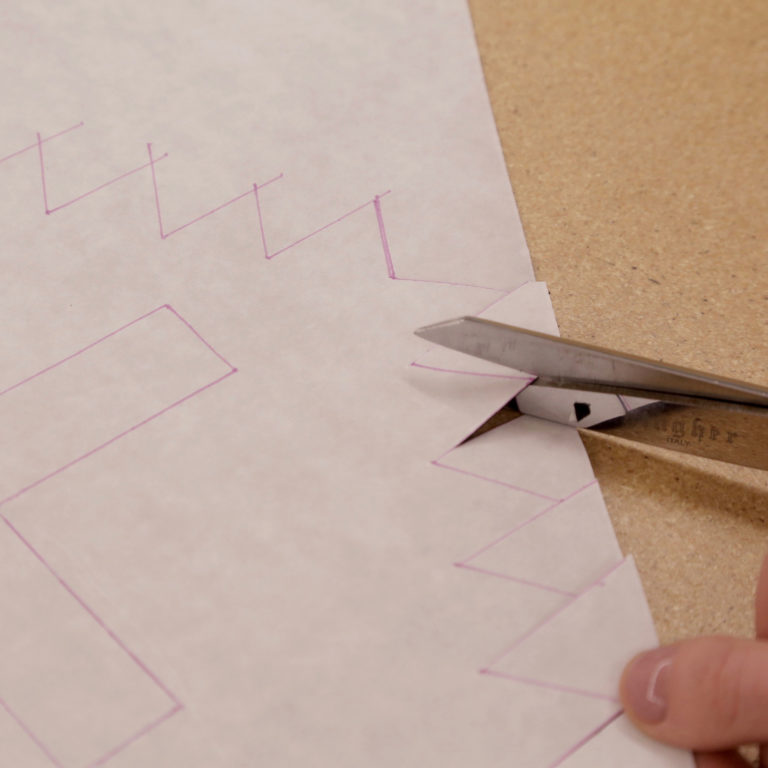
Draw your shape out! I like to use tag board or cardstock for appliqué templates. The paper is sturdy and will hold up to a lot of cutting and pressing. After drawing out your shape, add a ¼” seam allowance to every side. For my circle, this was a bit more difficult. Just make sure to “walk” your ruler around the curve; it will keep the seam allowance consistent. If you have a fancy compass, that's even better!
Note:
If you have sharp points on your motif, measure out ¼” away from the tip of your point and draw an additional cutting line. This snip line removes unneeded bulk. Clipping the bulk makes turning the seam allowance under less difficult.
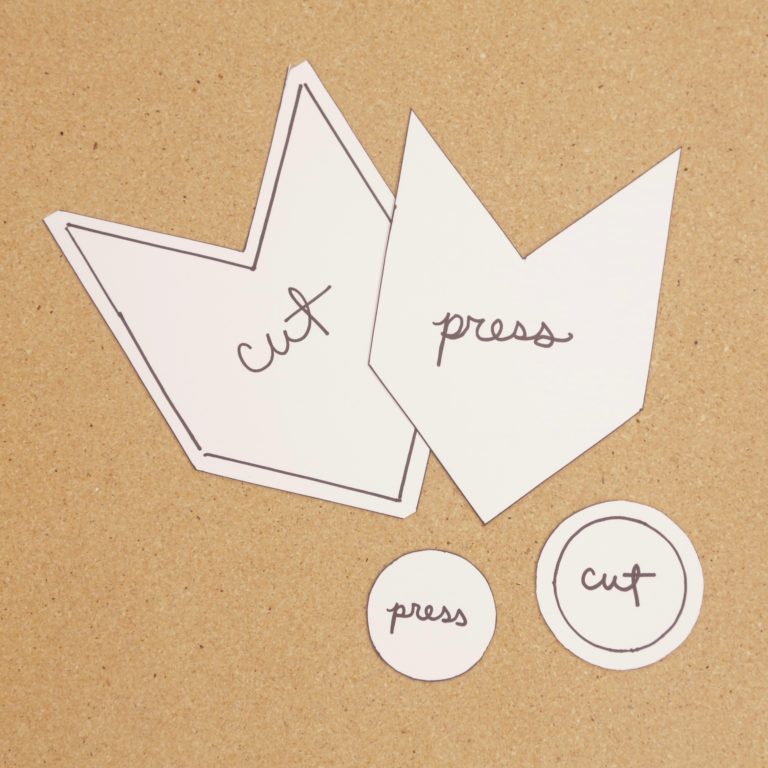
When all is said and done, you’ll end with a sweet little collection of templates that look something like this.
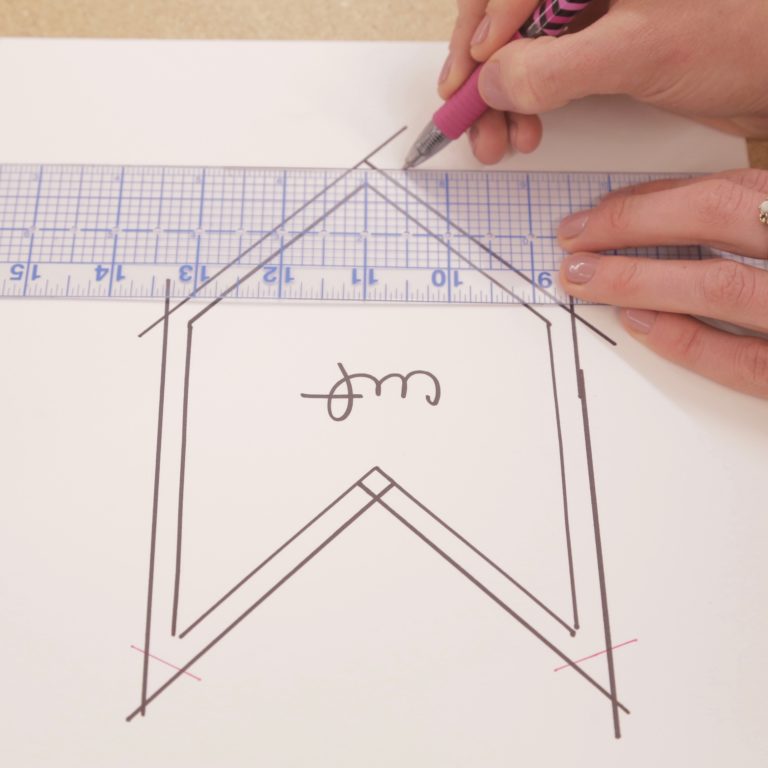
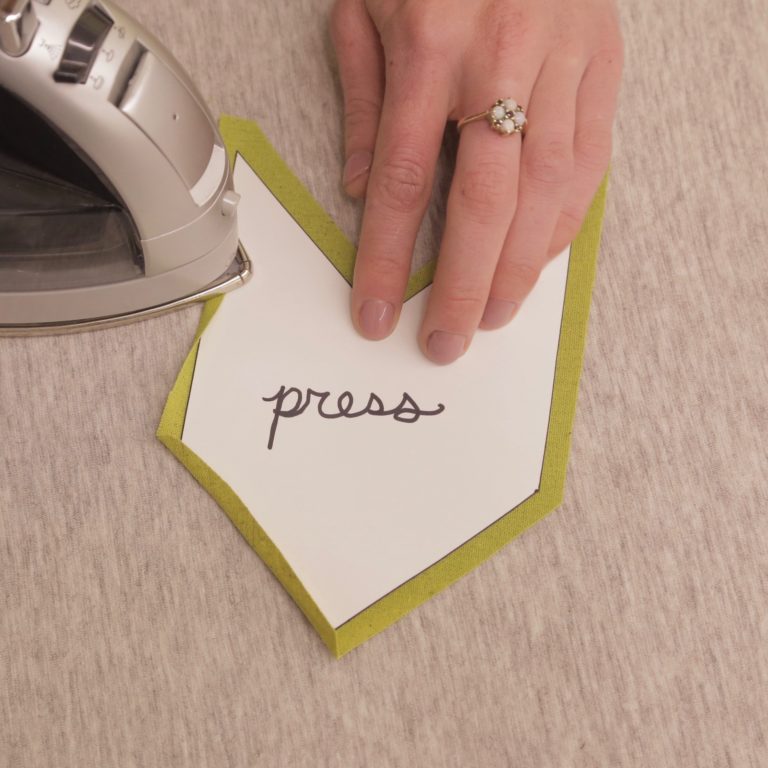
Step 2
After creating your cutting pattern, you’ll need to create a pressing pattern. I learned about this technique from my friend David Page Coffin, who uses tag board templates to achieve perfectly shaped pockets and plackets. It works just as well with appliqué, as it eliminates the guesswork and bit of inconsistency that sometimes happens when pressing seams in. Next, re-draw and re-cut your original pattern without seam allowances.
Step 3
Cut out your motifs in fabric, using the cut template. I find that using a rotary cutter and mat is helpful. It insures that I get those perfect straight edges that I need to keep my motifs nice and modern looking. For the circles, I marked around the template with chalk and then cut them out with scissors.
Step 4
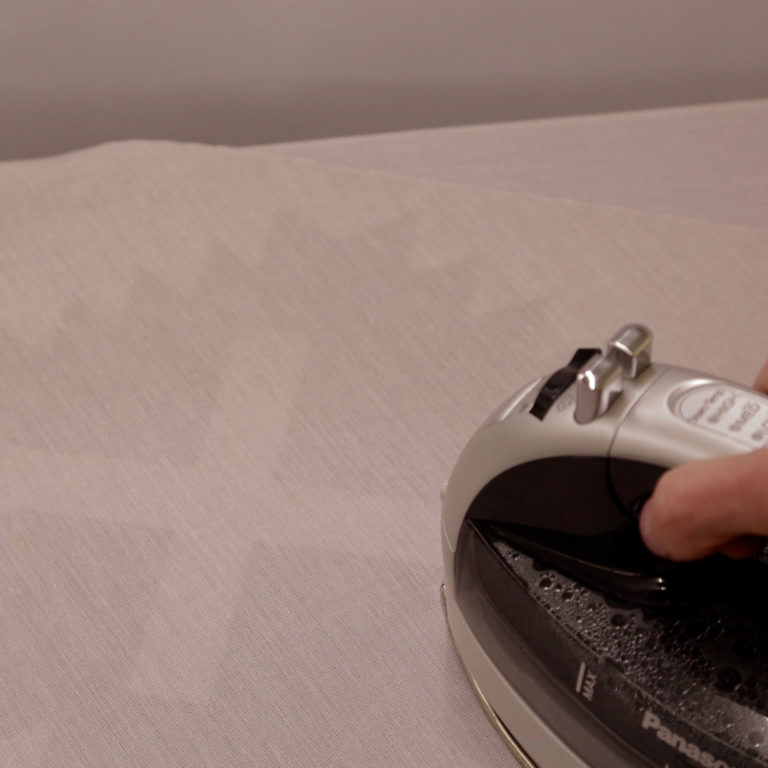
Now for the fun part. Place your pressing template directly on the wrong side of your fabric motif, with a ¼” of fabric off the edge. Place the tip of your iron on the ironing board and glide the iron over both the template and fabric, creating a fold. Using the very tip of your iron helps you manipulate the fabric and press small areas.

Glasshead pins are safe to press over, making them an ideal match for appliqué projects.
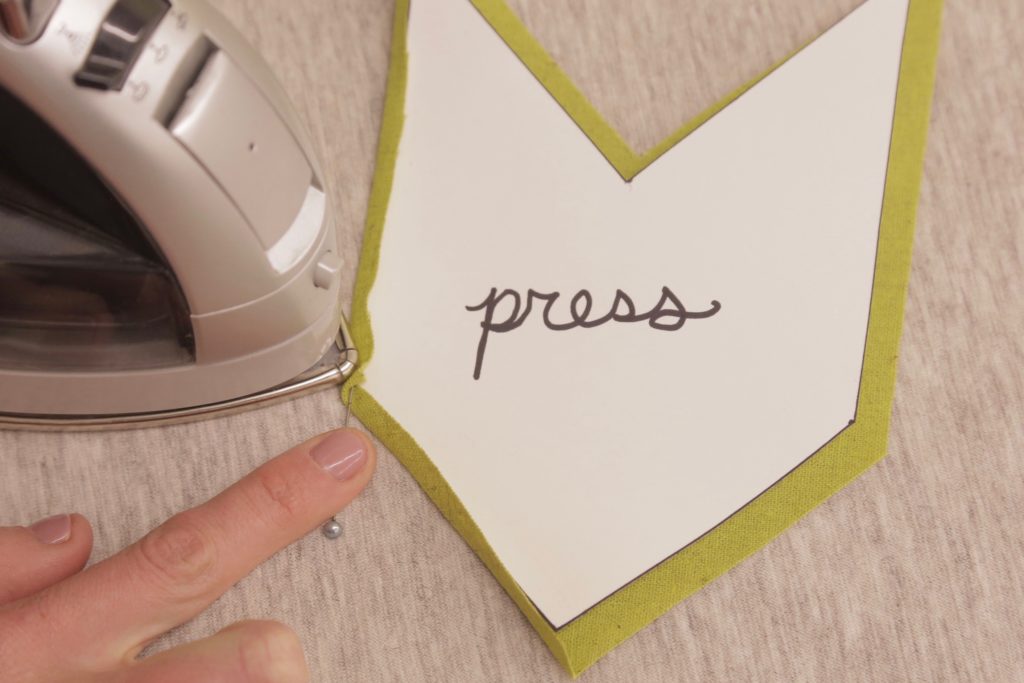
Step 5
When you approach a convex corner, it’s best to ignore the impulse to clip the extra bulk out. Instead press one side, then use a pin to keep the previous fold in place. Then press the other side over the top of the pin. This will keep both edges of the corner perfectly straight and beautiful.
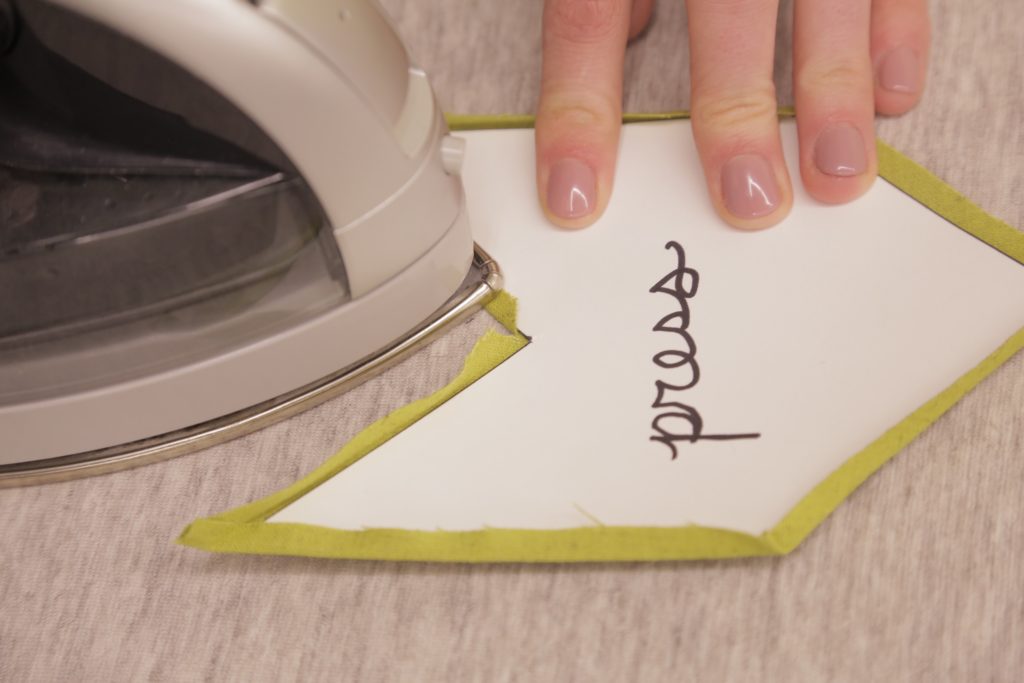
Step 6
If you do come across a concave corner, you have my blessing to clip into the very point, all the way to template. Opinions vary as to whether or not to clip out the bulk. But for my purposes a simple clip works splendidly.
Step 7
For the circle, I took a little tip from the quilting playbook. Yoyos are a specific motif used for handsewn appliqué on quilts and garments. Making one involves sewing a basting stitch around the edges of a circle and gathering the edges around the template.
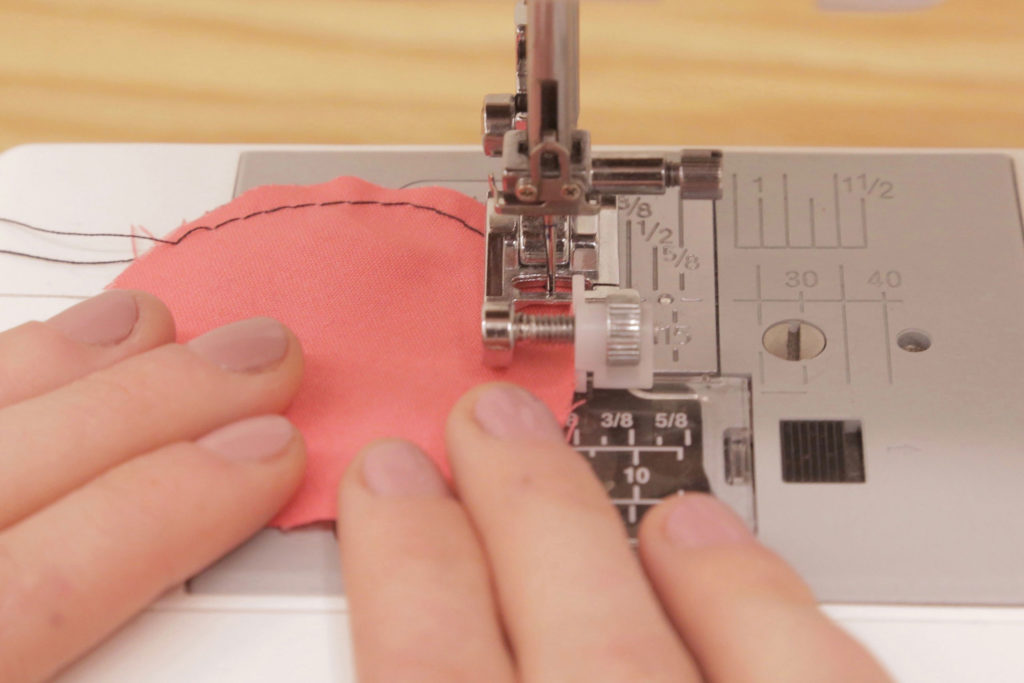
First, sew a ⅛” basting stitch all around the circle motif. This can be a bit tricky. I suggest switching to your straight stitch plate to avoid the machine eating up your seam allowance. If you don’t have one, never fear, just take your time and keep your stitches inside of the seam allowance.

Step 8
Now for the magic. Place your pressing template onto your circle, same as before. Then, take a hold of your basting tails and slightly gather the edges. Pull from the starting tail and ending tail to keep the gather even.
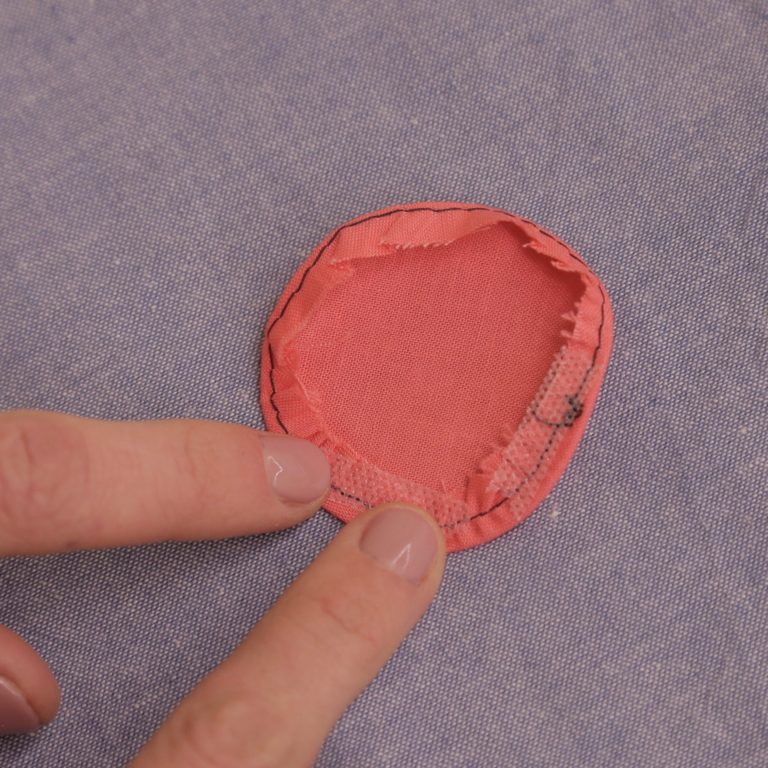
As you can see, the seam allowance did not stay consistent all around the circle. As long as you have some sort of seam allowance to sew down, you are safe.
After all your yoyoing is done, press the heck out of your circle, with the template still in place. I even sprayed a bit of spray starch on my fabric to give it an even better hold.
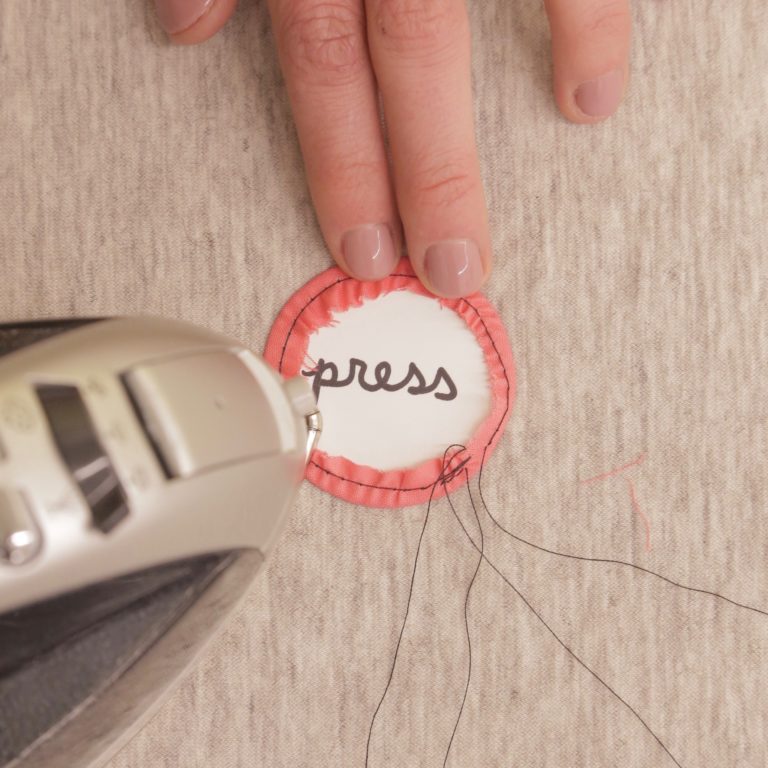
Step 9
After pressing, pop your template out and you’ll have a perfectly turned-under circle. I hope you are just as satisfied by this process as I was. I love “magic” sewing tricks!
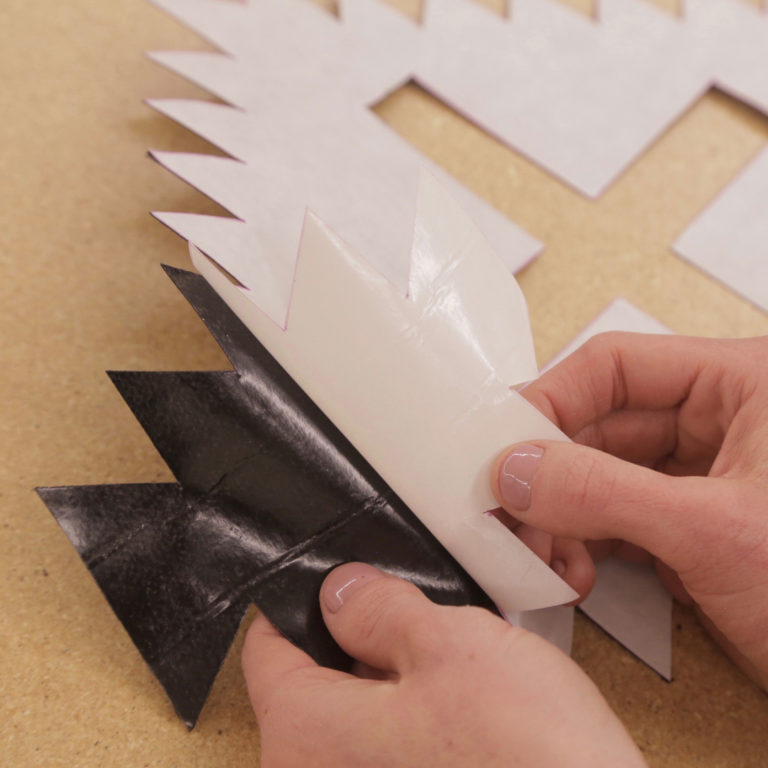
Double-sided fusible tape can offer
stability while you stitch.
Sewing the Motifs to Your Garment
Once all of the motifs have been successfully pressed, you are ready to hand-sew your motifs to your garment. Begin by measuring your garment and do the math to decide exactly where to place each piece.
Since I was creating a border completely around the hem of the dress, I divided my dress into eight different sections and chose to place the designs 2” up from the hem. After making your placement decisions, mark the placement of each motif directly on your garment with chalk.
There are a few ways to secure your shapes down while hand-sewing. I find using small pieces of fusible seam tape gives me more control when placing my motifs. If you have not used this stuff before, it’s amazing! I use it all the time to temporarily hold bias binding and hems.
If you prefer to take the more couture route, simply baste the piece to your garment.
The Blind Stitch
I used contrasting thread for this tutorial for demonstration purposes. I recommend using thread that matches your motif’s color.
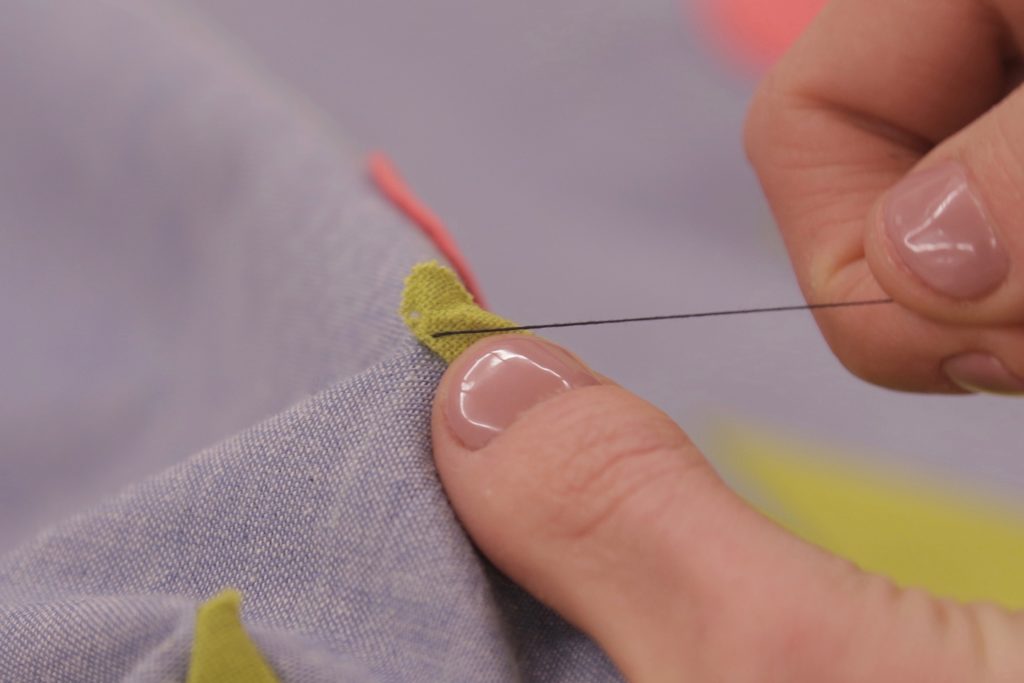
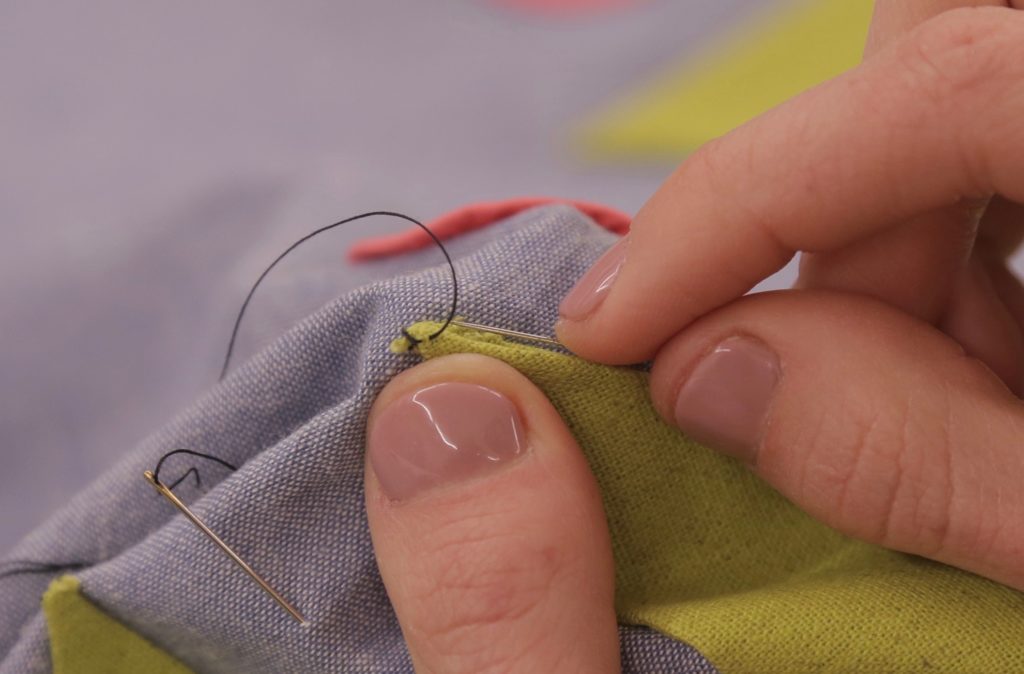
Step 1
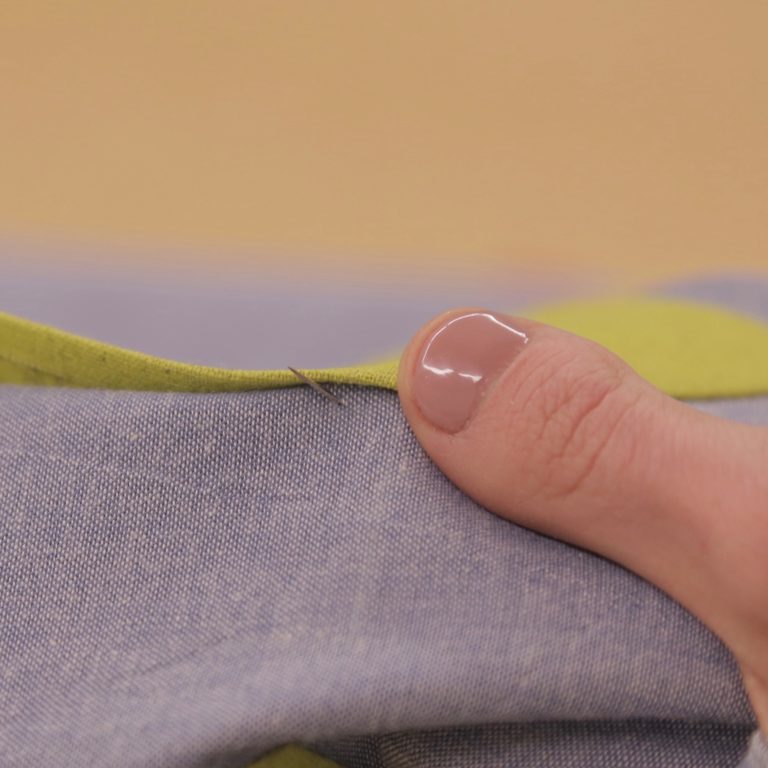
Starting from the wrong side of your garment, bring your needle up through the fabric to the front side, directly below the turned edge of your motif.
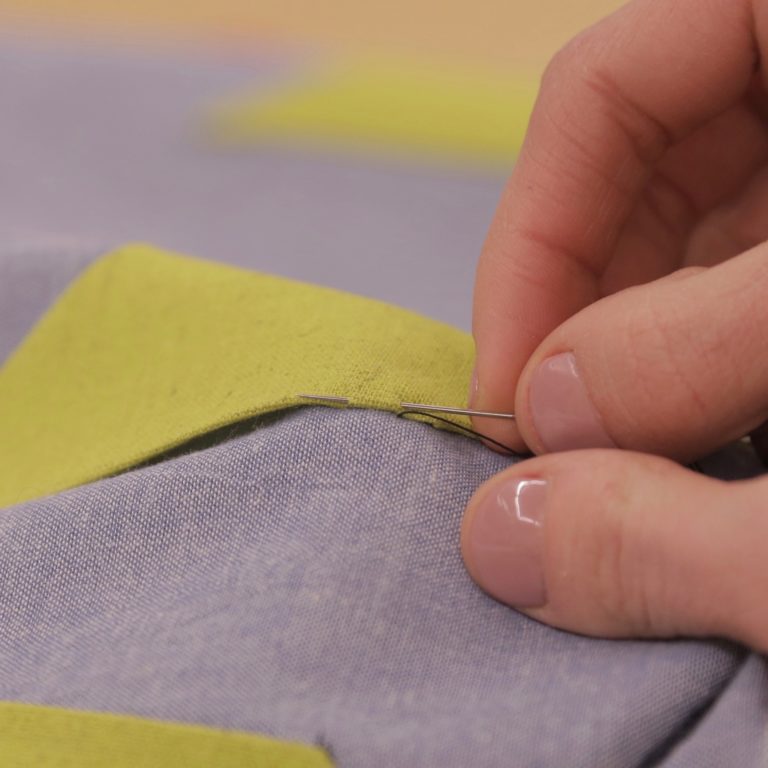
Step 2
Bring your needle directly into the fold of your motif, travel about ⅛” and come back out of the motif at the fold.
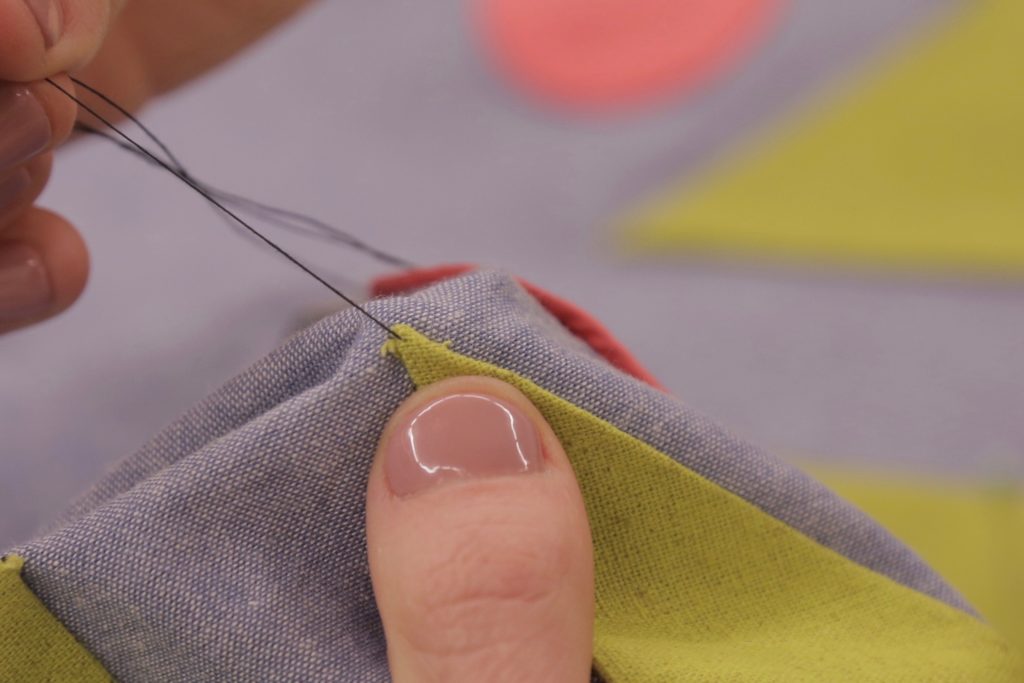
Step 3
Bring your needle back into the garment, directly below the folded edge.
Step 4
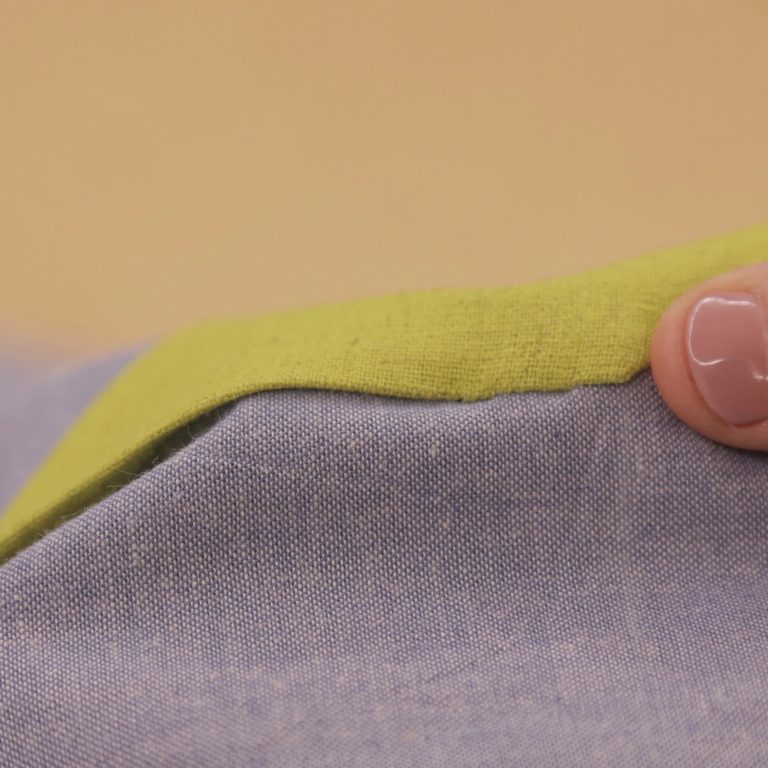
Pull the stitch taut and repeat this technique throughout the curves and straight edges of your appliqué.
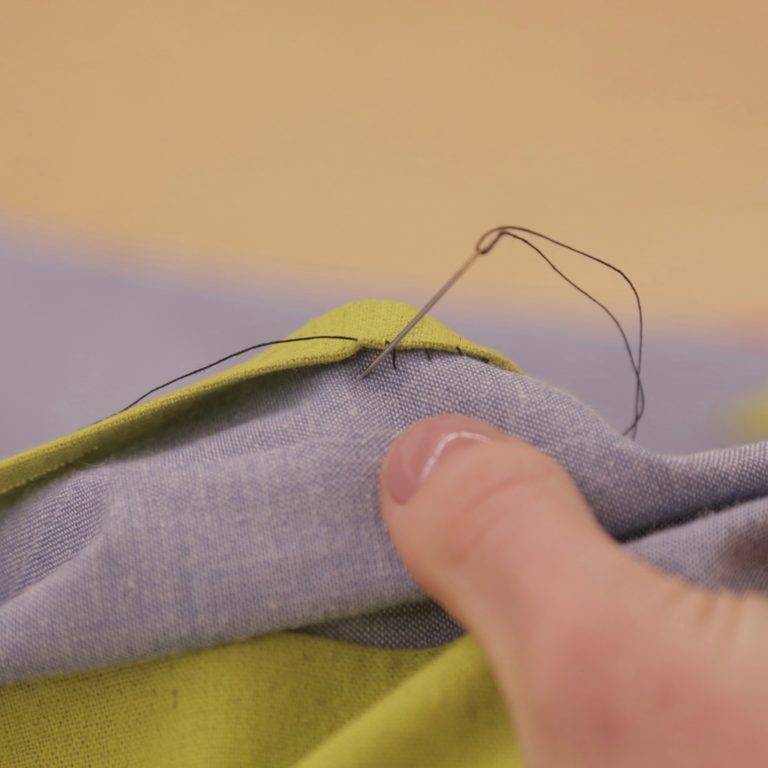
Blind Stitching Convex Motif Corners
When blind stitching down a sharp convex point, there are a couple tricks to get it to turn out perfectly.
Step 1
When approaching a corner, stitch all the way to the very tip of your stitching line before the turn. Make a couple stitches there to reinforce the point.

Step 2
Place a pin under your motif and fold over the extra bulk on the top of the point to create a hospital corner.
Step 3
Place a pin under your motif and fold over the extra bulk on the top of the point to create a hospital corner.
Step 4
After making your hospital corner, hold that fold in place with your thumb. Use your pin to bring the other side of the point’s seam allowance under the motif.
Method Two: Machine Appliqué

Machine appliqué is the far less time-intensive method of appliqué. The motifs are secured to the garment with a topstitch and if you choose to, you can play with texture by allowing your fabric to fray at the edges after being sewn. There are multiple stitches you can use to secure your motifs to your garment and I used the satin stitch method.
Step 1
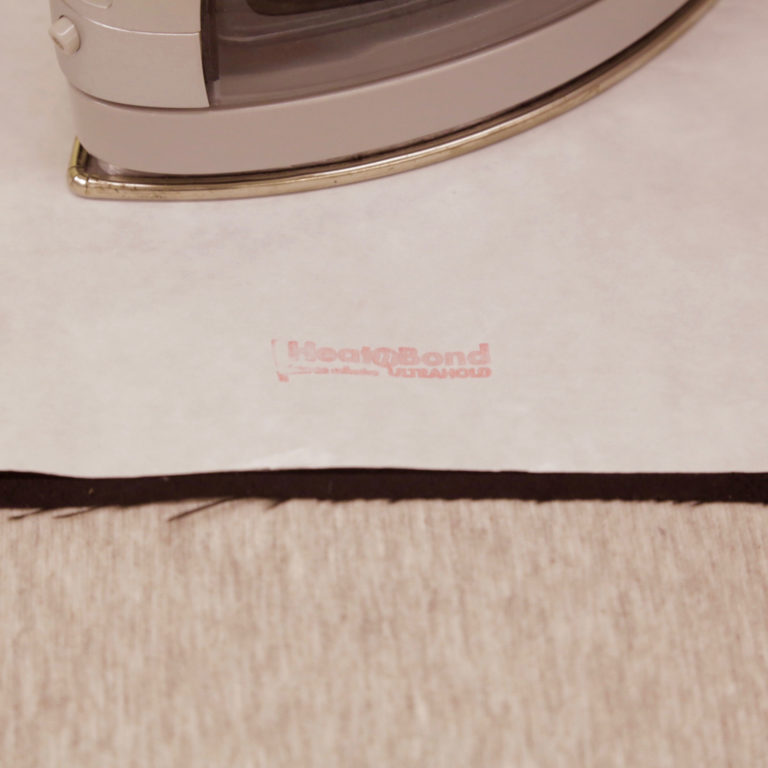
Cut one piece of your motif fabric and one piece of iron-on adhesive paper a few inches larger than your design. My design measured 8”x13”—I cut one 9”x14” piece of suede and one 9”x14” piece of Heatnbond Ultra Hold.
After cutting, place both pieces together, with the adhesive side facing the wrong side of your fabric, and give it a good press.
Iron-On Adhesives
I prefer to make an adhesive piece of fabric, draw on the back side, and then cut my shape out. You may also cut your fabric and iron-on adhesive paper to the shape of your motif separately and iron them together.
Iron-on adhesive paper can be found in the interfacing/stabilizer section of your fabric store. It comes in different weights, and I recommend using a lightweight adhesive when doing garment appliqué, as it will help keep your fabric nice and drapey.
Brands include: HeatnBond, Vilene Bondaweb, Thermoweb, and WonderUnder.
Step 2
Draw your design directly onto the paper side of your appliqué sandwich.
Step 3
Cut your design out with a sharp pair of scissors. Some prefer specialty appliqué scissors with double-pointed blades to allow you to cut sharp angles and tight corners with ease. That said, I found my freshly sharpened Ginghers worked just fine.
Step 4
Peel away your adhesive paper! You have just created an iron-on patch that can simply be placed on your garment and ironed on. Isn’t that gratifying?
Step 5
Place your motif, adhesive side down, onto your garment and press. When pressing anything adhesive, it’s always best to have good manners and use a pressing cloth.
Step 6
You could stop here, but if you plan on washing your garment, I highly suggest sewing your motif down.
One option is to sew a straight stitch close to the edge of the motif. After washing the motif, the fabric will fray up to the stitch line and looks quite lovely.
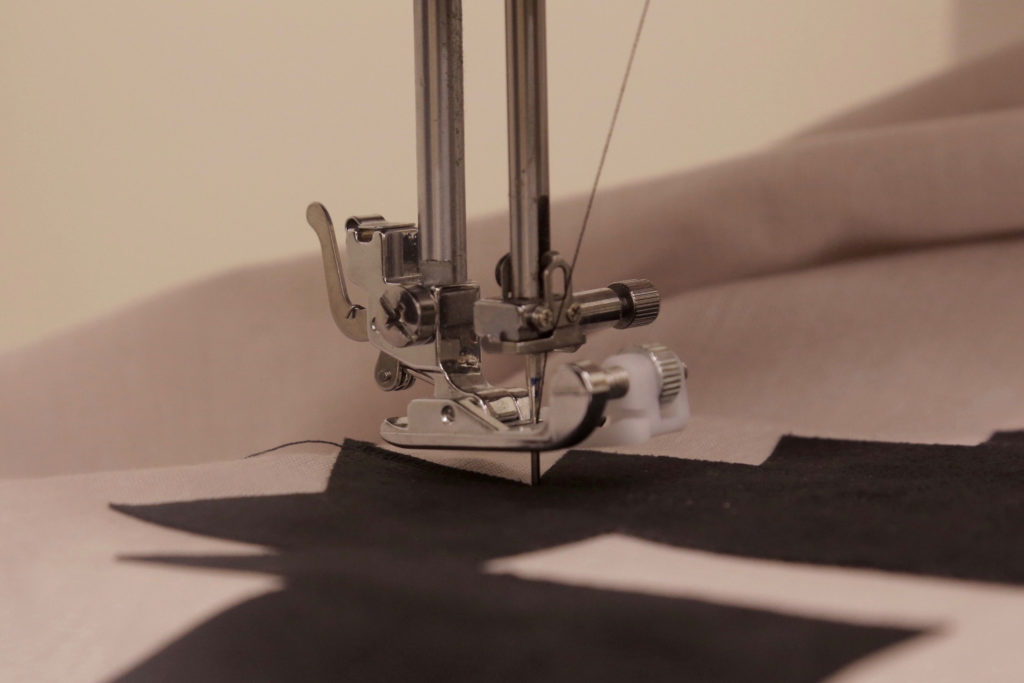
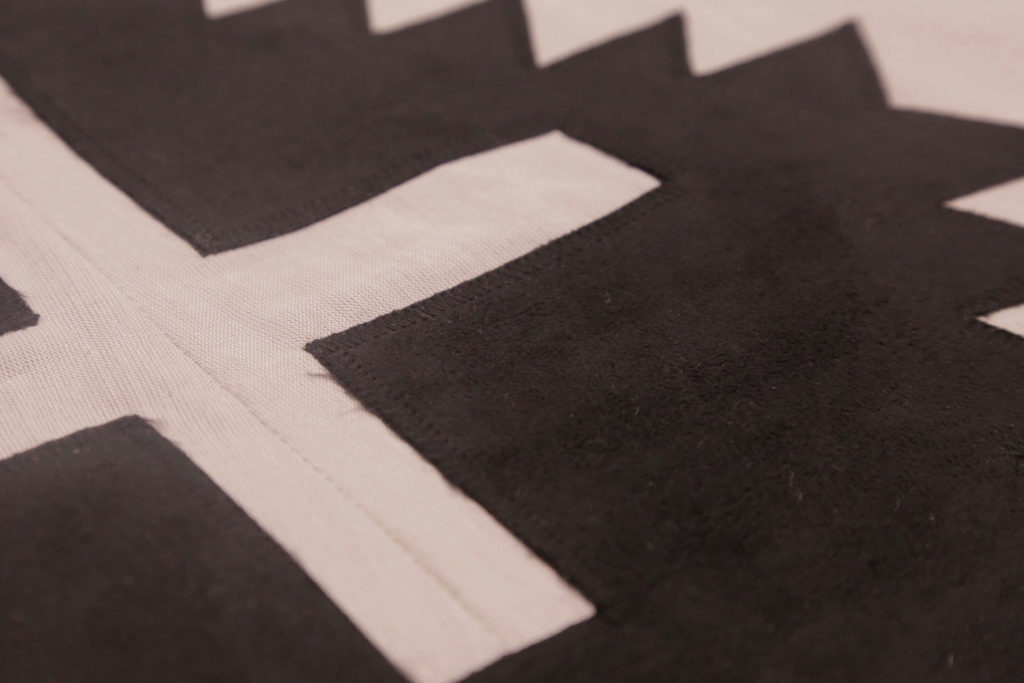
The most common way to do machine sewn appliqué is to sew the very edge of the shape with a satin stitch, zigging on the motif and zagging onto your garment.
Tips and Tricks for Machine Appliqué
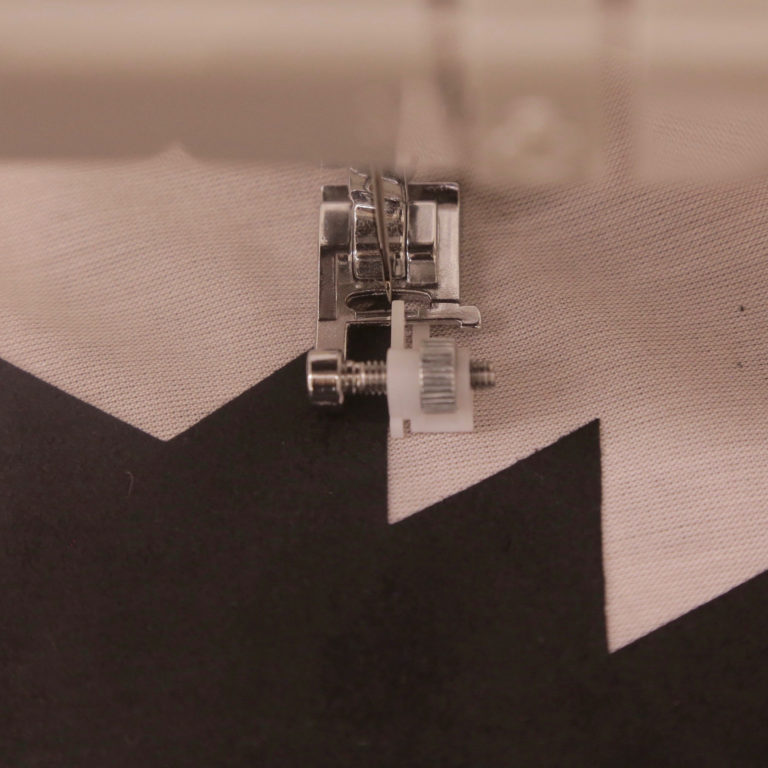
Use an edge stitching foot!
Some prefer to use an appliqué foot for satin stitching motifs but I prefer my edge stitching foot. I line up the edge guide of my foot exactly where the zag will land and the edge of my motif. After that, all I have to do is make sure that when I am sewing, the edge of the motif is lining up with the foot.
Use your hand wheel
When approaching a concave corner, slow down a bit (or use your handwheel if necessary) to bury your needle, on the zag, directly into the point of the corner, and then pivot. The same goes for convex corners.
Change your stitch width
Since my convex corner is so sharp, I had to change my stitch width by a hair, just for those first few stitches after the pivot, to avoid stitching onto my garment.
Step 7
After satin stitching around all of the raw edges of your motif, you're ready to give your appliqué one final press and then you’re done!

About the Author
Katie Whittle is a sewing teacher, writer, and pattern maker based in Denver, CO. She loves inspiring and encouraging new sewers to make what they think is impossible, possible.