Start your sewing adventure with us.

Join Seamwork Now

How to Sew a Hong Kong Seam

Add a couture touch to your seam finishes with this tutorial. By Katie Whittle.

Posted in: Tutorials & Techniques • August 31, 2016

Each month, Seamwork Magazine brings you two new wardrobe-building patterns along with inspirational articles and informative tutorials. Sewists tend to be detail-oriented by nature. We thrive when fussing over the perfect welt pocket or finding the perfect shade of thread to match.

Those times when we really slow down and cherish the details are when we shine the brightest. This series is dedicated to the small details that take your project to the next level. Whether it is a new seam finish or a fun embellishment, take the time to make your next me-made item one of a kind.


01-Sewing-Specifics


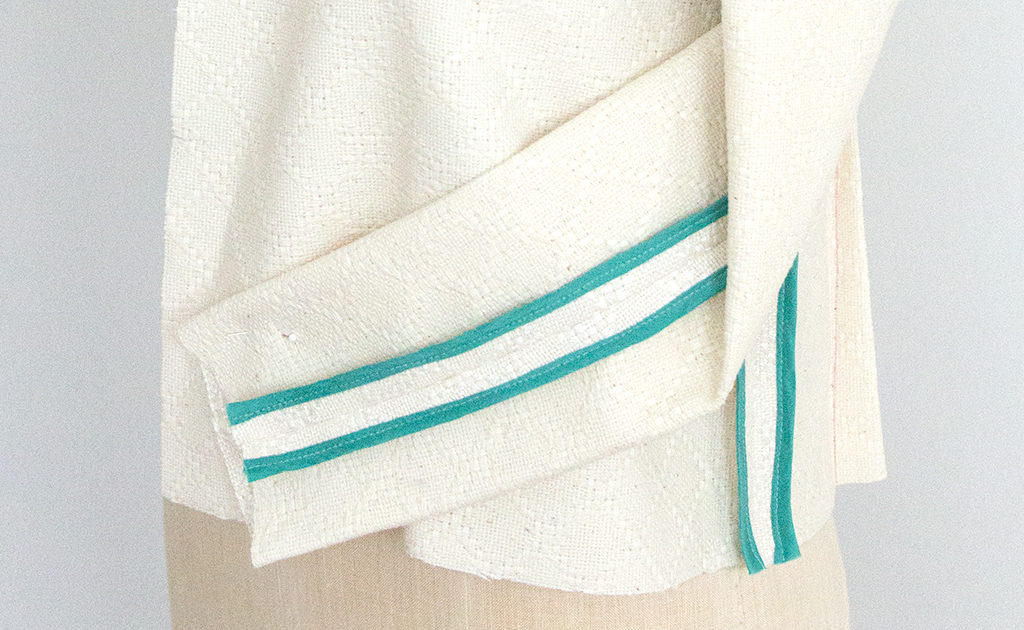
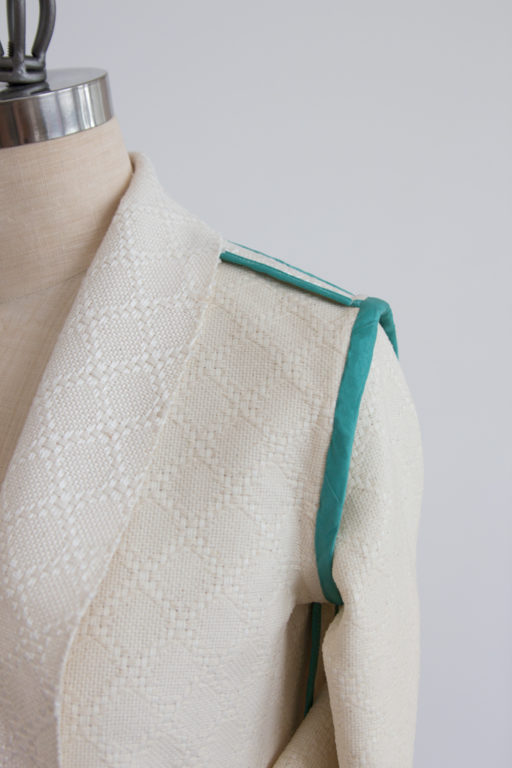
Unlined garments, like Delavan, are great projects to try out creative ways to finish seams. This month we will take an in-depth look at how to add a couture touch to our garments with a Hong Kong seam finish and bound seam finish.

Hong Kong Seam Finish

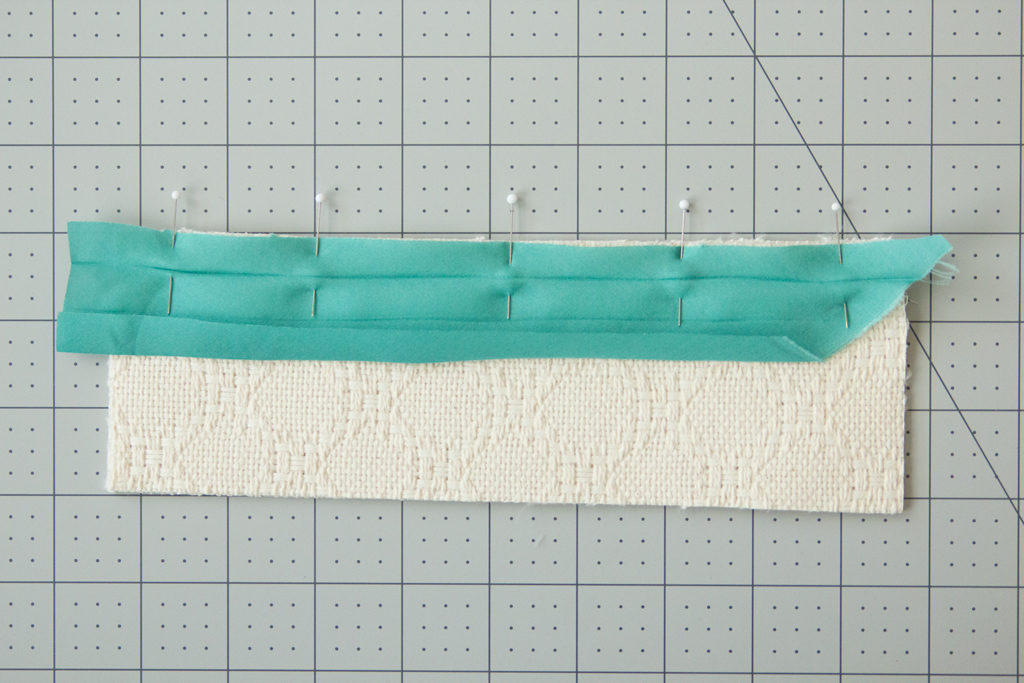
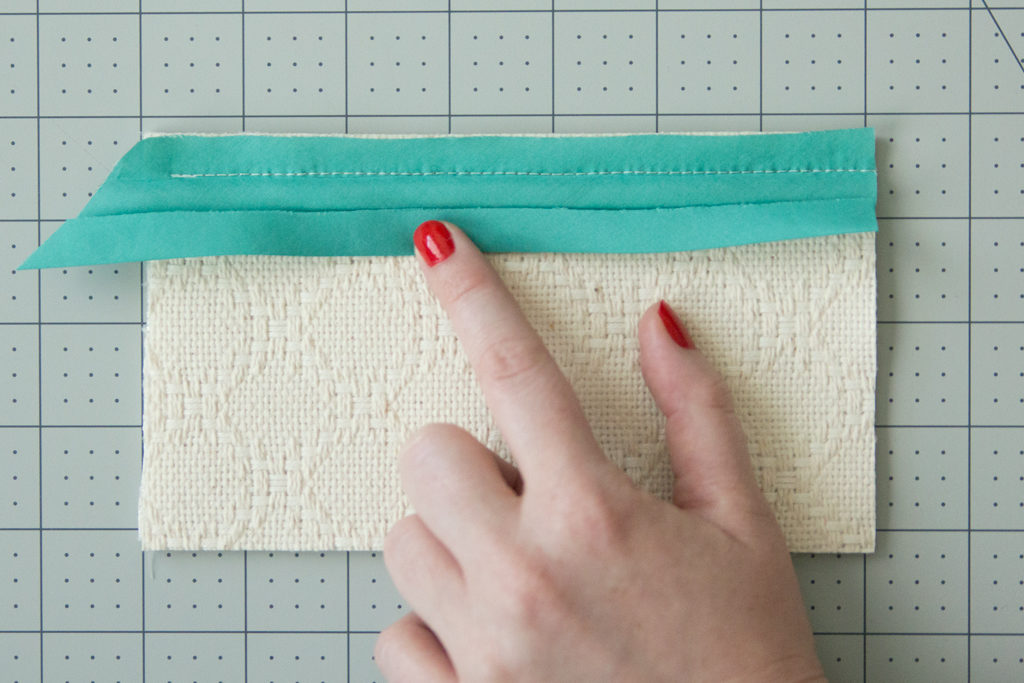
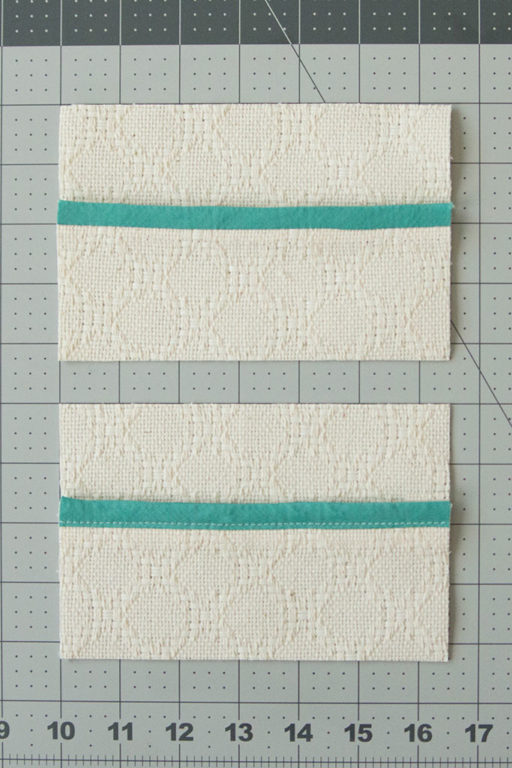
With a Hong Kong finish, each seam is bound with bias tape. Unlike traditional bound seams, the binding on the wrong side of the seam allowance is left unturned, which helps to reduce bulk.
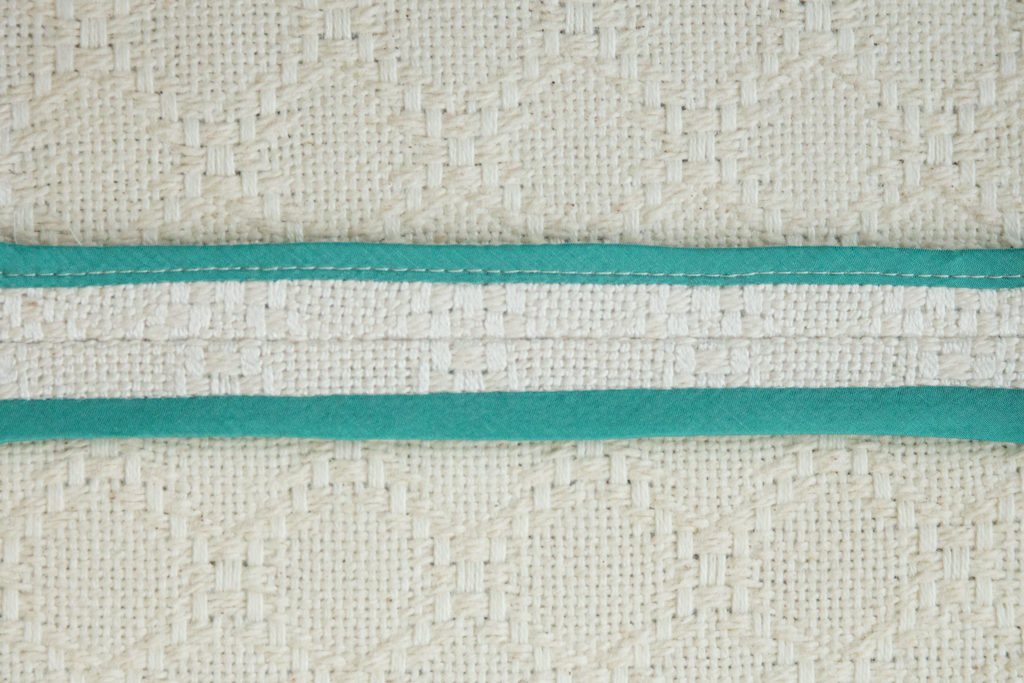
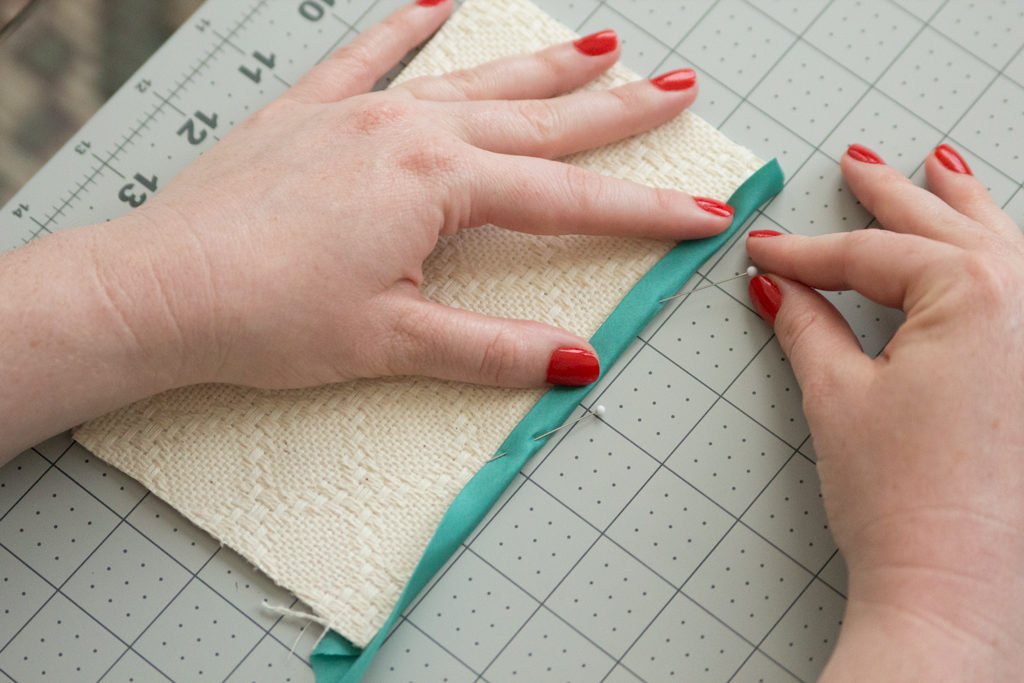


01-Sewing-Specifics


  • Begin by cutting a few yards (you may require more or less depending on the garment) of 1″ bias tape. You may also use pre-made bias tape and press it flat. Measure the seam you would like to finish and cut a length of bias tape at that measurement.


  • 02-Sewing-Specifics


  • To prepare your garment, press your seam allowance open and place the edge of the bias tape along one raw edge of the seam allowance, right sides together. Sew the bias tape to the seam allowance at 1/4".


  • 03-Sewing-Specifics


  • After sewing, press the bias tape away from the seam allowance.


  • 04-Sewing-Specifics


    05-Sewing-Specifics


  • Wrap the bias tape around the edge of the seam allowance to the wrong side and press. You'll notice that this is very similar to binding, yet the second long edge of the bias strip is not folded under.


  • 06-Sewing-Specifics


  • From the right side of the seam allowance, edgestitch along the pressed edge of the bias strip, catching the bias on the wrong side of the seam. Instead, you may stitch in the ditch from the right side at this step, which will add an even more professional look. Trim the excess bias tape on the wrong side. Repeat for all other seams.
  • Bound Seam Finish


    07-Sewing-Specifics


    It might be difficult to use a Hong Kong finish on some seams, like the armscye, for example. If it is more ideal to finish your seam allowances together (rather than separately, then pressed open), a bound seam is a great alternative.


    08-Sewing-Specifics


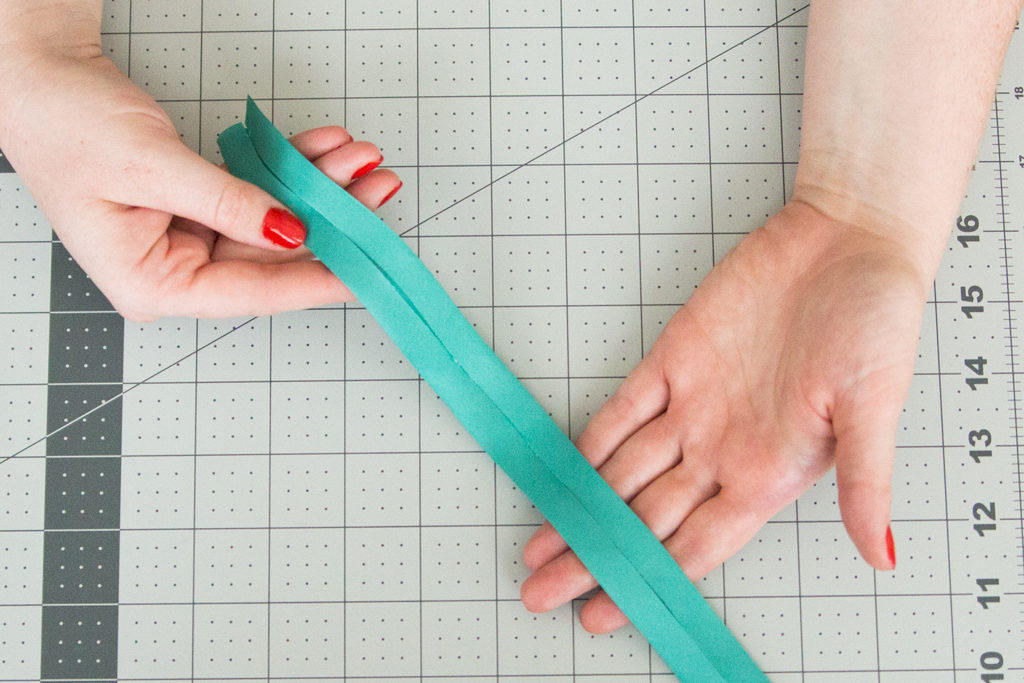
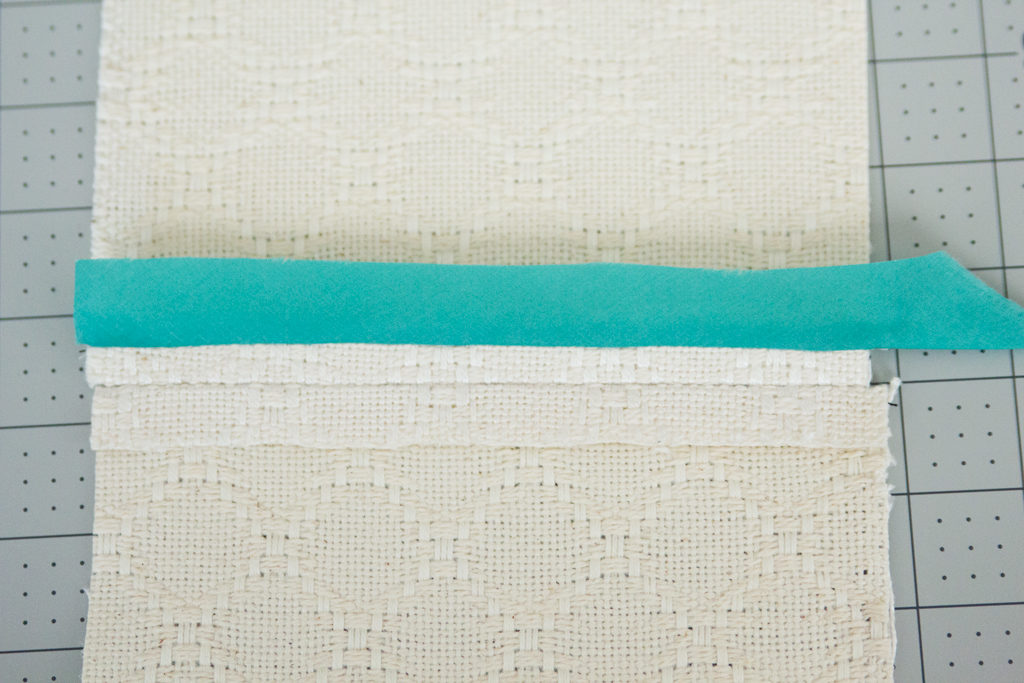
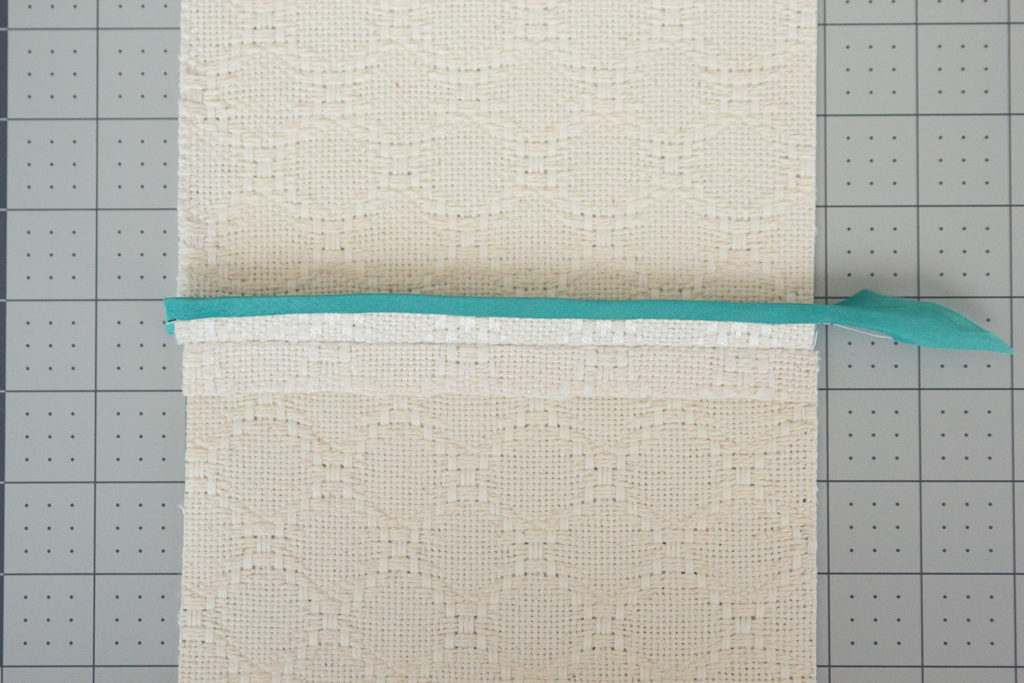
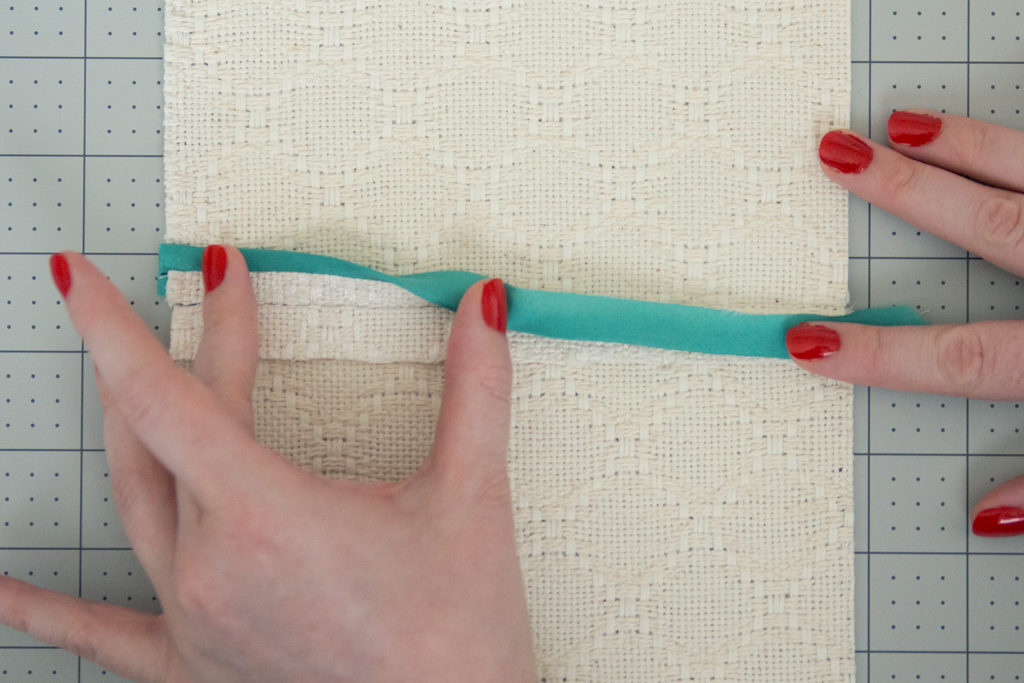
  • Begin by cutting a few yards (you may require more or less depending on the garment) of 2″ bias tape.


  • Use a bias tape maker to create double fold bias tape. If you do not have a bias tape maker, press the bias tape in half along the long edge, open this fold and press the raw edges to the previously made fold line.


  • 09-Sewing-Specifics


  • To start binding your seam, unfold the bias tape and line up the long, raw edge of your bias to one side of your unfinished seam and pin.


  • 10-Sewing-Specifics


  • Sew the bias tape to your seam at 1/2".


  • 11-Sewing-Specifics


  • Refold and wrap your bias tape around the raw edge of your seam allowance and pin.


  • 12-Sewing-Specifics


  • At this point you could go to your sewing machine and stitch the bias tape in place and be done! But, I prefer to take it one step further and blind stitch my binding. You can learn all about blind stitching in the Modern Appliqué article from Seamwork 18.

  • Join the Conversation

    Sign in or become a Seamwork member to comment on this article.

    Sign in            Join Seamwork

    You May Also Like

    Explore More Seamwork

    Seamwork members have access to hundreds of patterns, with two new patterns available each month. Membership starts at just $15 per month!