Sign In

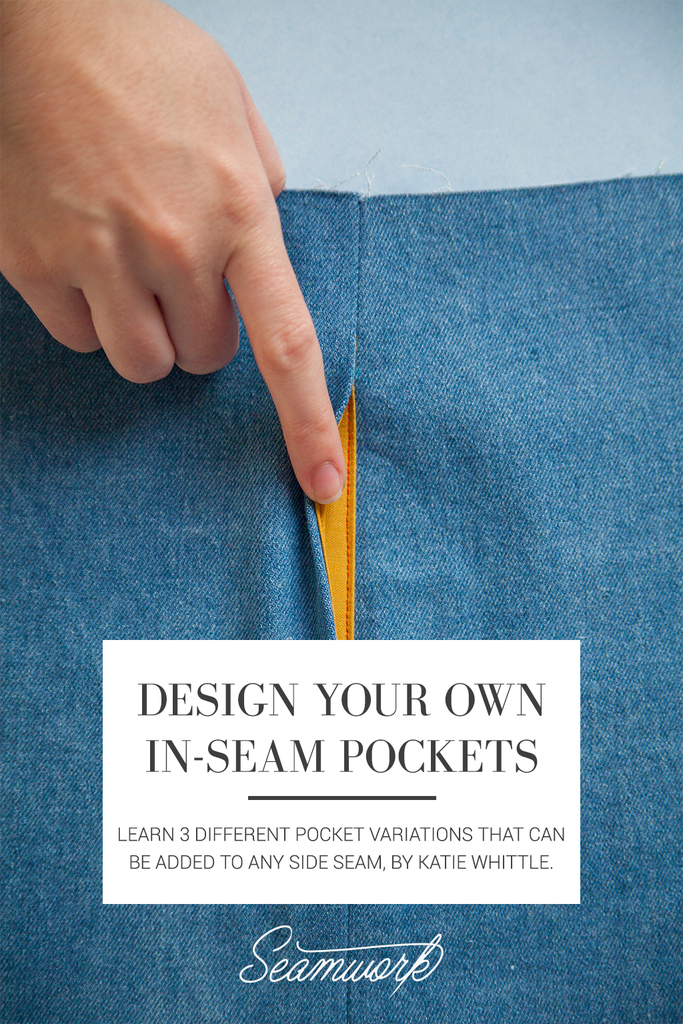
Pockets are delightful details that seem to make every garment just a little bit better. Whenever I’m ecstatically showing off a recent make, I always save the best for last,“…and it’s got pockets!”
There are all kinds of in-seam pockets, but there are a few that you will see more frequently than others. I will walk you through how to draft a classic in-seam pocket, an inserted pocket, and—my favorite—the diagonal pocket. Plus, I’ll share with you some fun variations that will help you customize your garments even more!
Throughout this tutorial, I will be referring to the garment body as the skirt. You may use all of the following pocket techniques for pants and dresses as well.
The Classic In-seam Pocket
This pocket neatly hides inside a seam and can be added to a side seam or even a skirt panel! The classic in-seam pocket can be used for a dress pattern with or without a waist seam.
Drafting An In-seam Pocket Bag
Step | 01
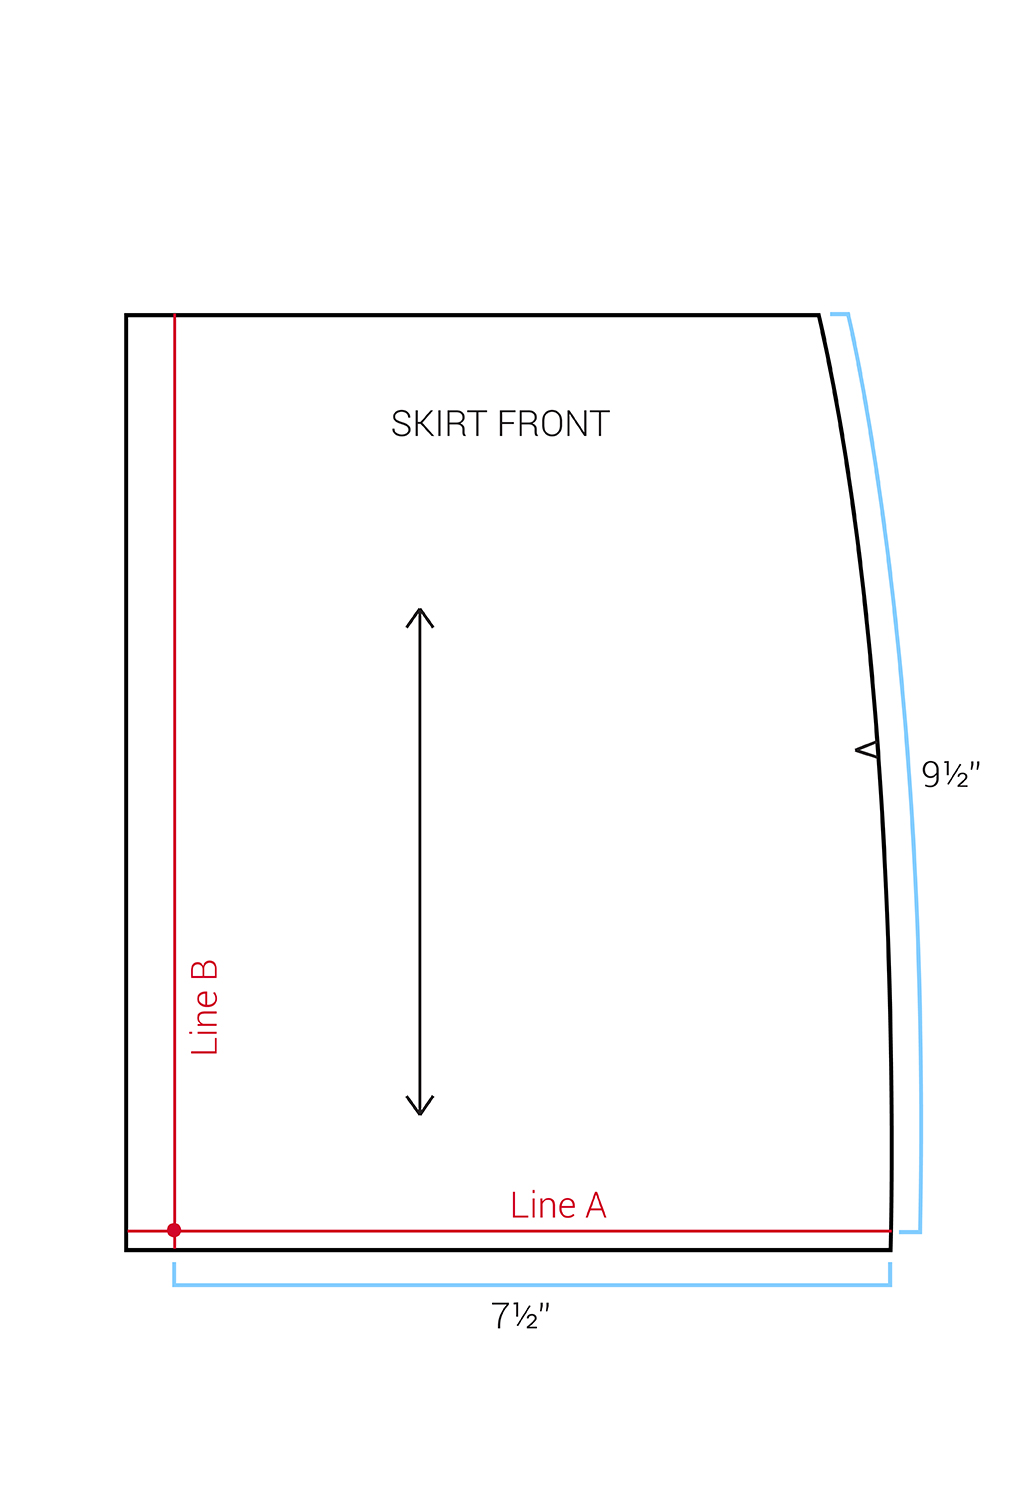
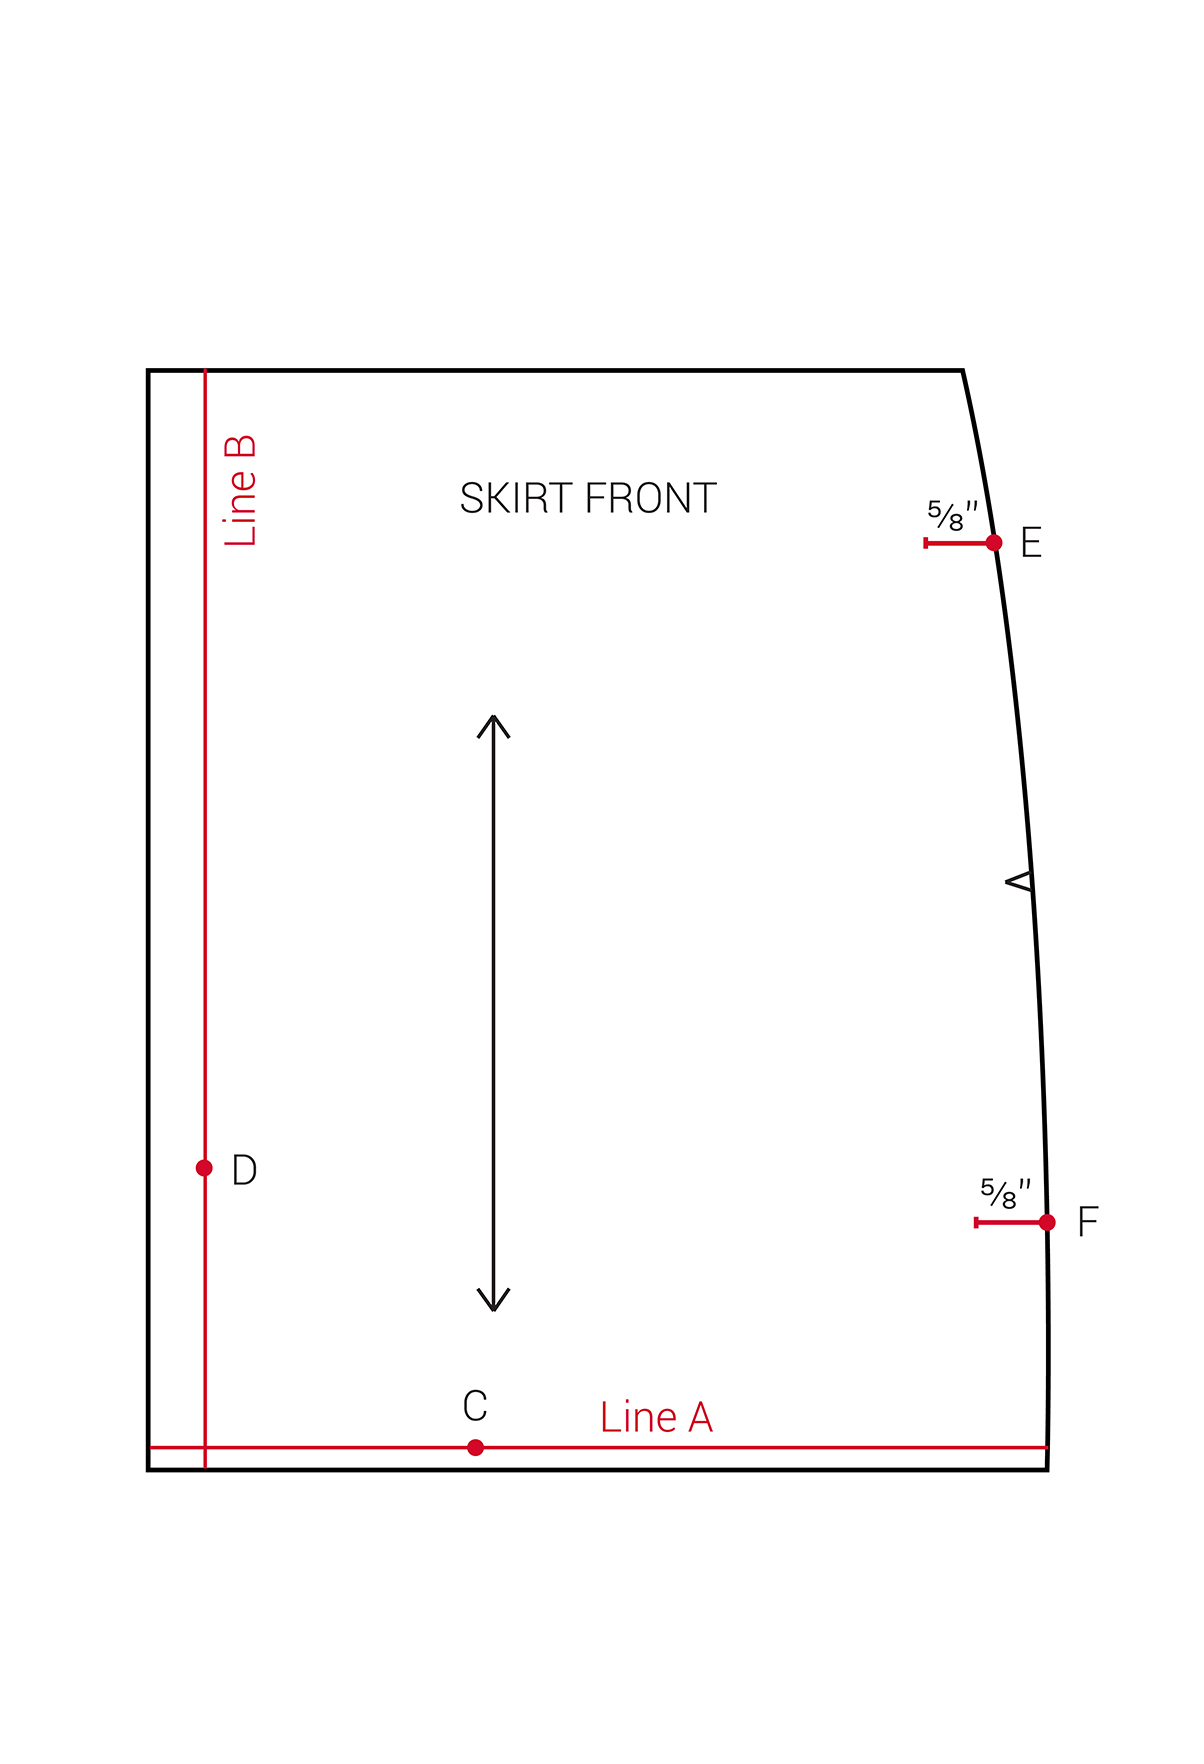
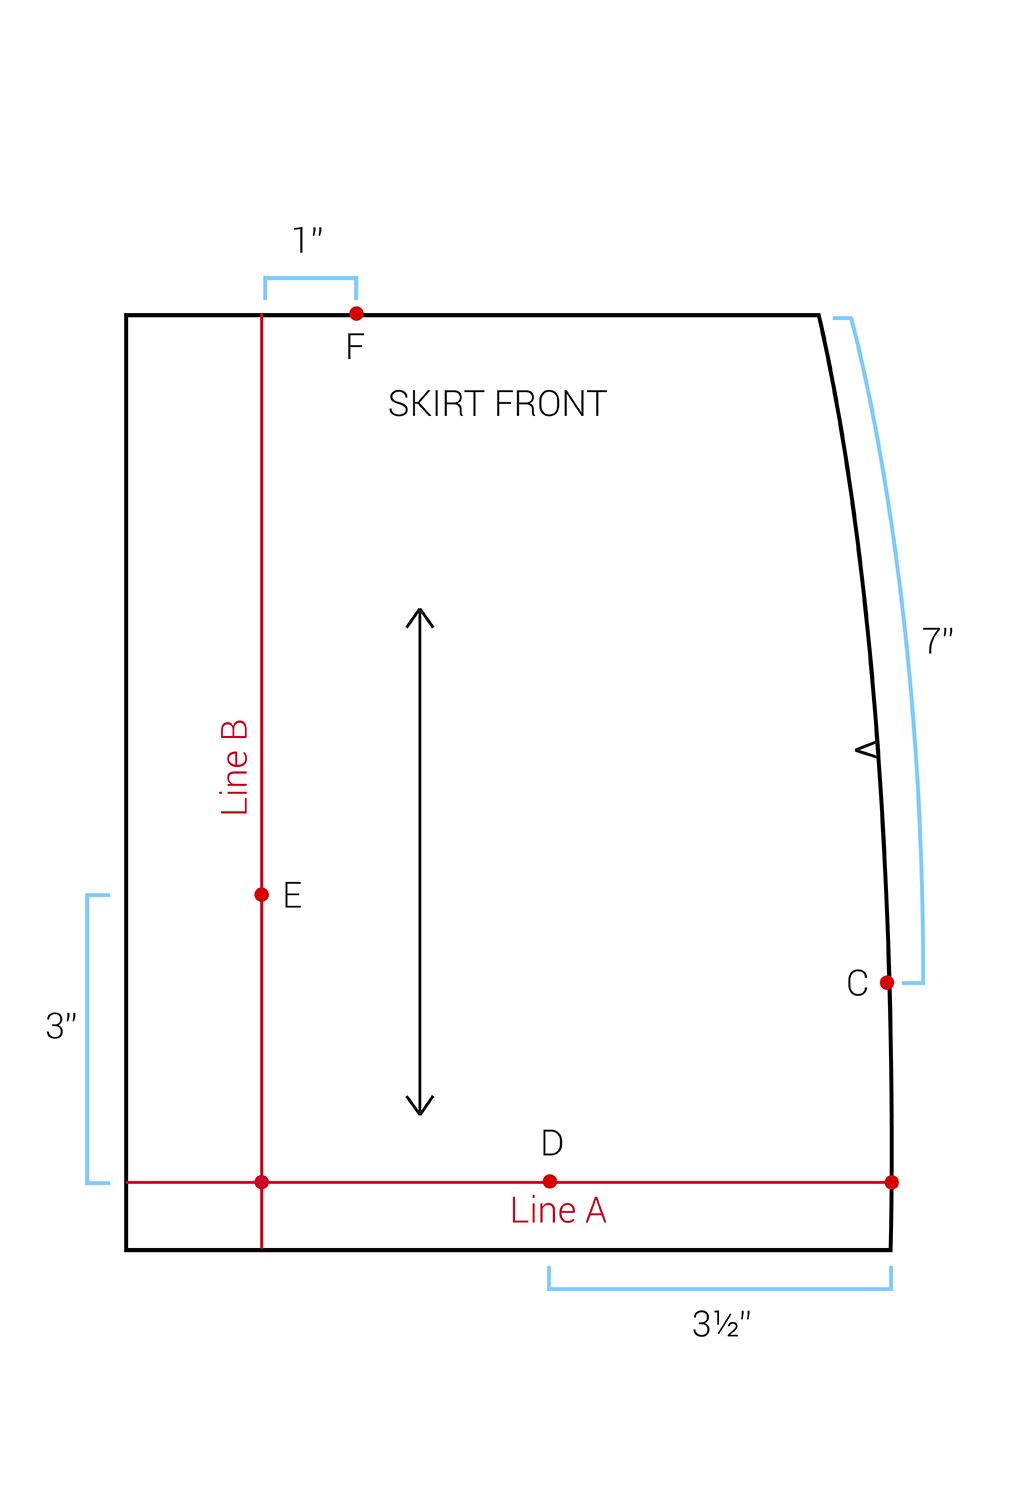
Trace one side of your pattern’s skirt front, including the grainline and notches.
Measure 9 1/2” down from the waistline, along the side seam, and mark. From this mark, draw a 7 1/2” line, perpendicular to the grainline. This is line A.
Draw an additional line from the end of line A, up to the waistline, parallel to the grainline. This is line B.
Step | 02
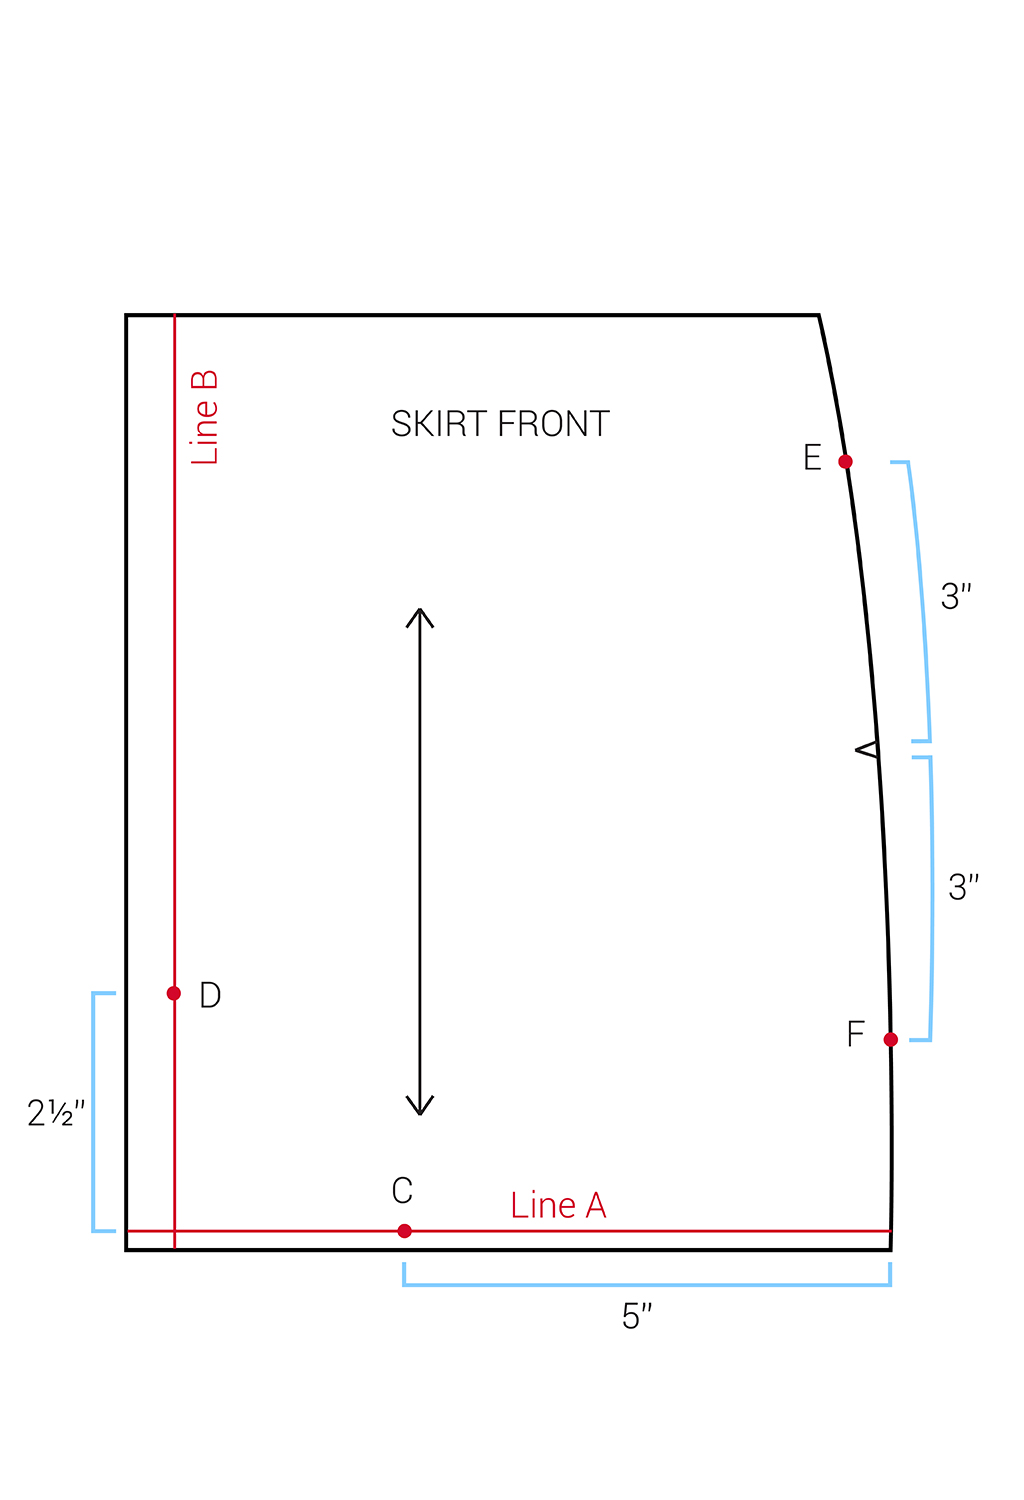
Measure 5” from the side seam, along line A, and mark. This is mark C.
Measure 2 1/2” up from line A, along line B, and mark. This is mark D.
Measure 3” up from the notch at the side seam and mark. This is mark E.
Measure 3” below the notch at the side seam and mark. This is mark F.
Step | 03
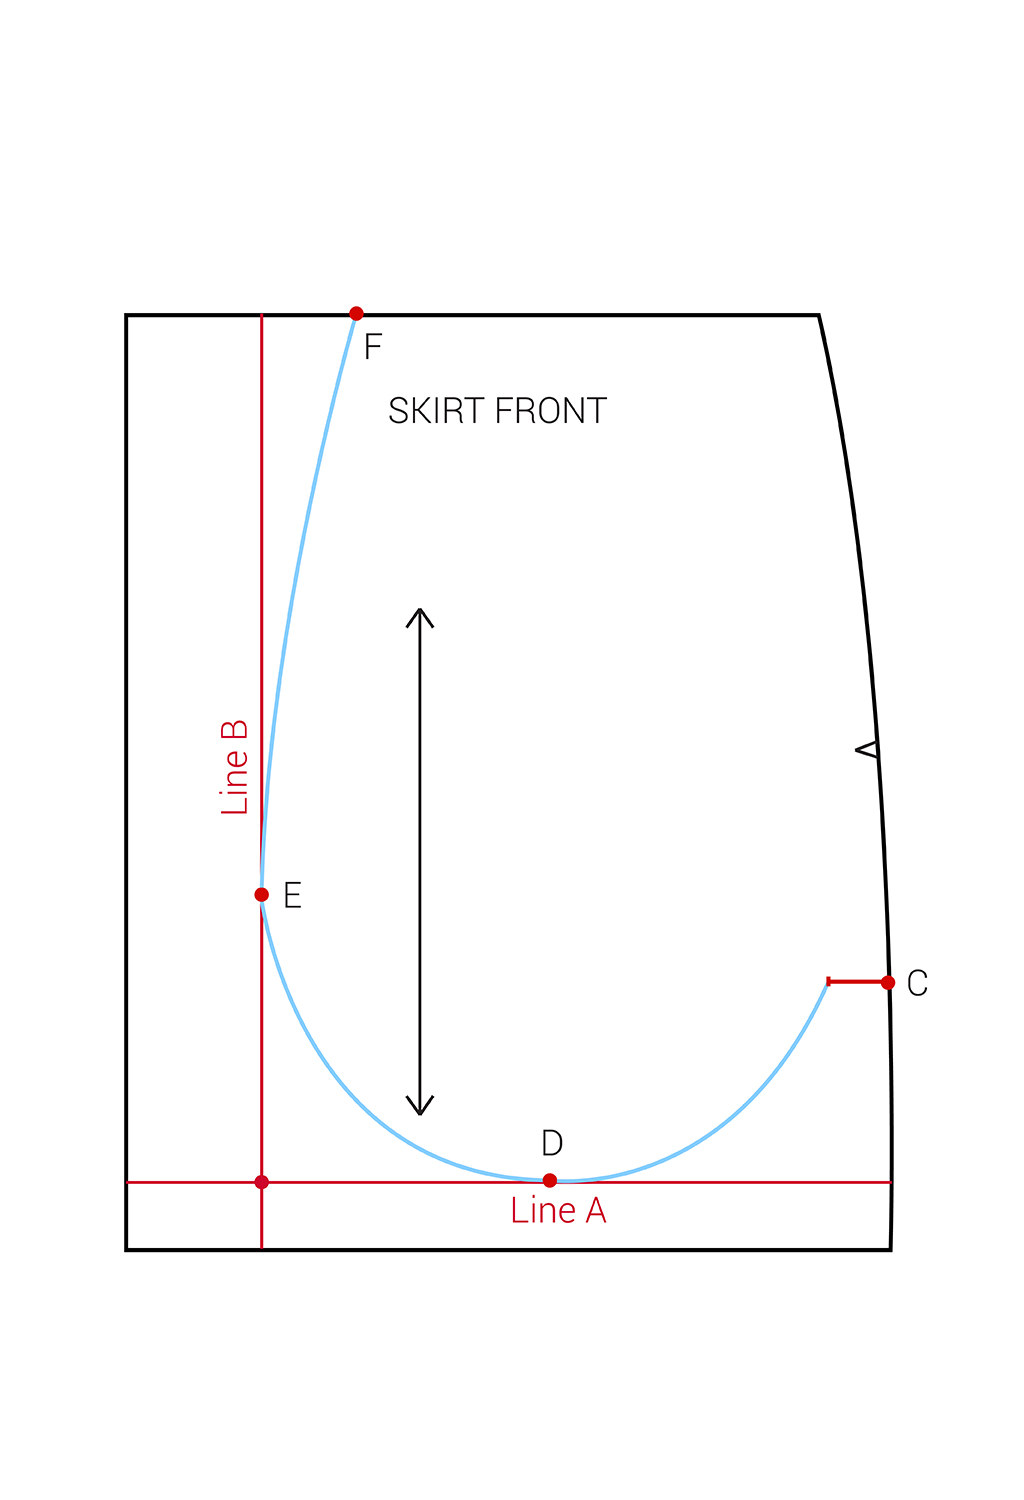
Draw a 5/8” long line toward center front from mark E, perpendicular to the grainline. Repeat for mark F. These are your pocket bag seam allowances.

Step | 04
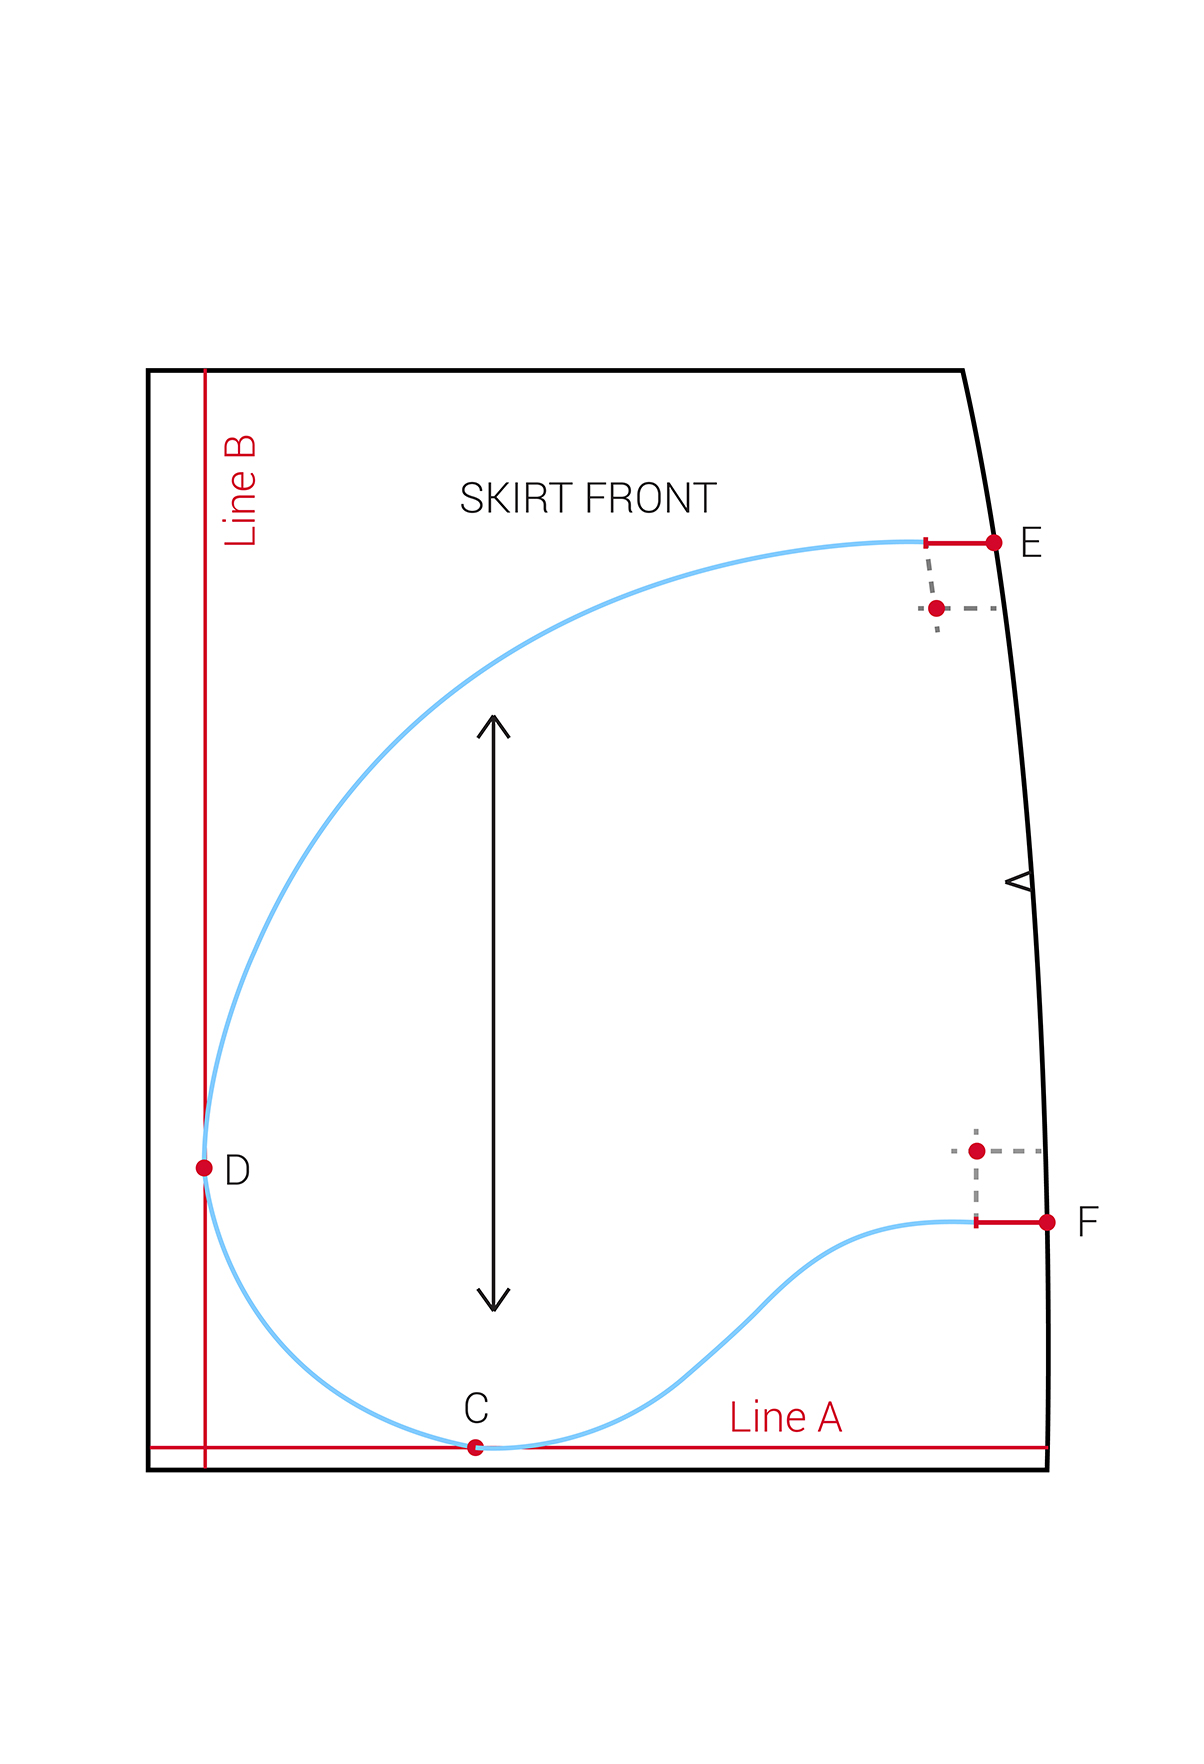
Use a French curve to connect mark E’s seam allowance to mark D. Continue to use the French curve to connect mark D to mark C.
Step | 05
Connect mark C to mark F’s seam allowance by first creating a concave curve from mark C and switching to a convex curve before meeting with mark F’s seam allowance.
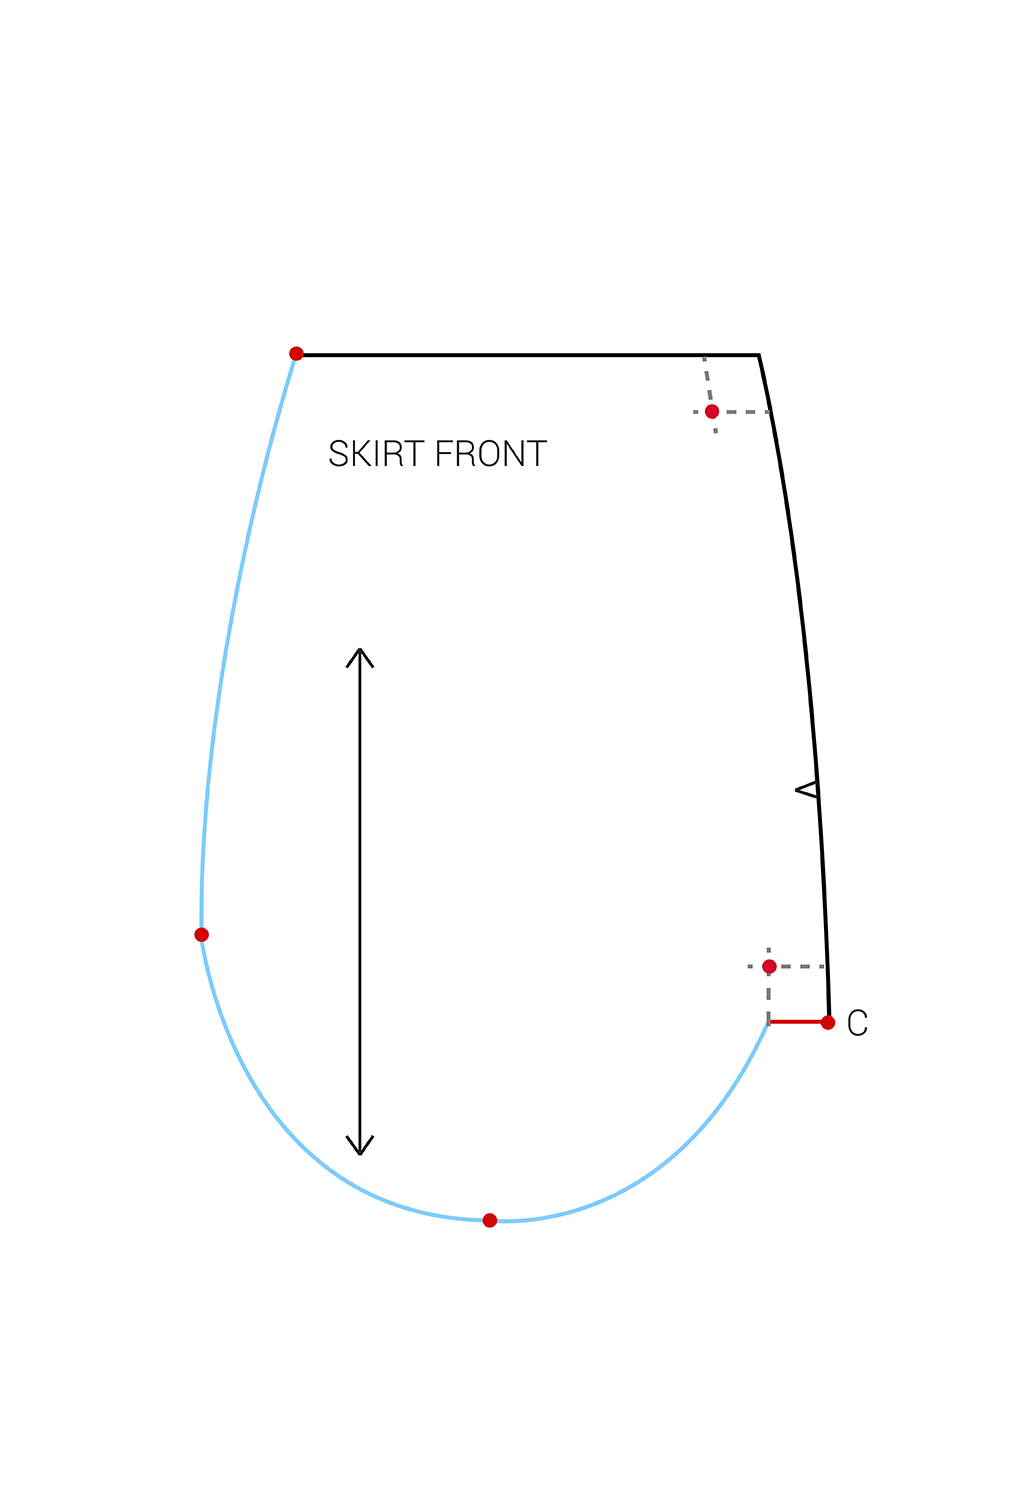
Measure 5/8” up from line F’s seam allowance and mark (red). This is your pocket placement mark. Repeat for line E.
Transfer these markings to your skirt front and back.
Sewing An In-seam Pocket
Step | 01
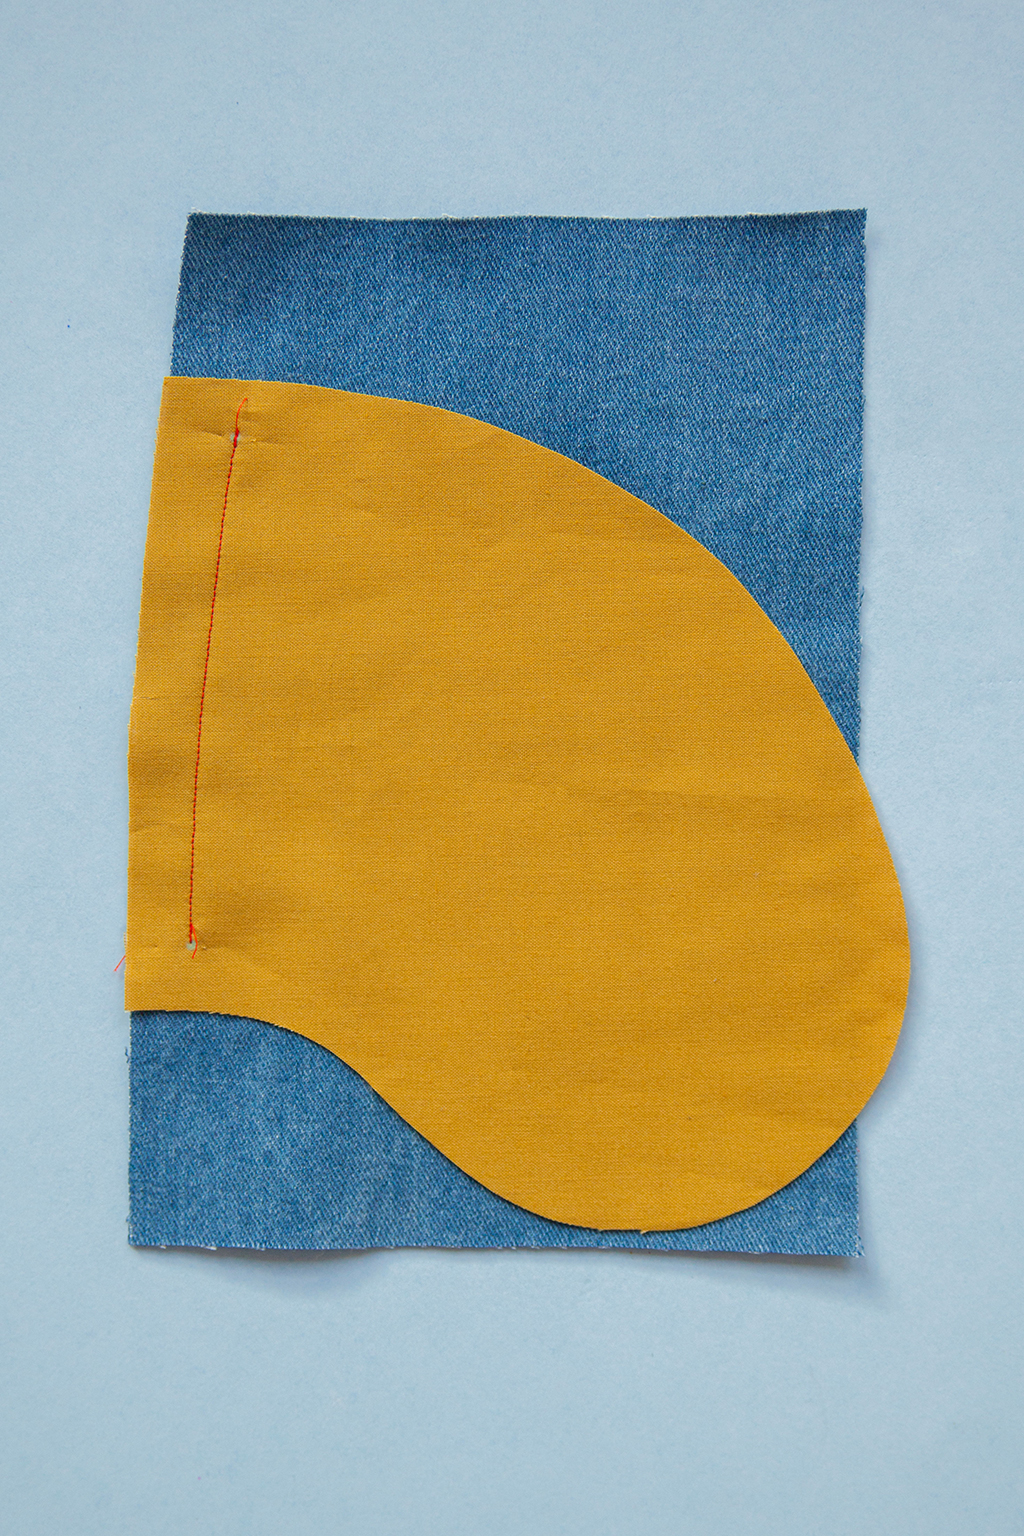
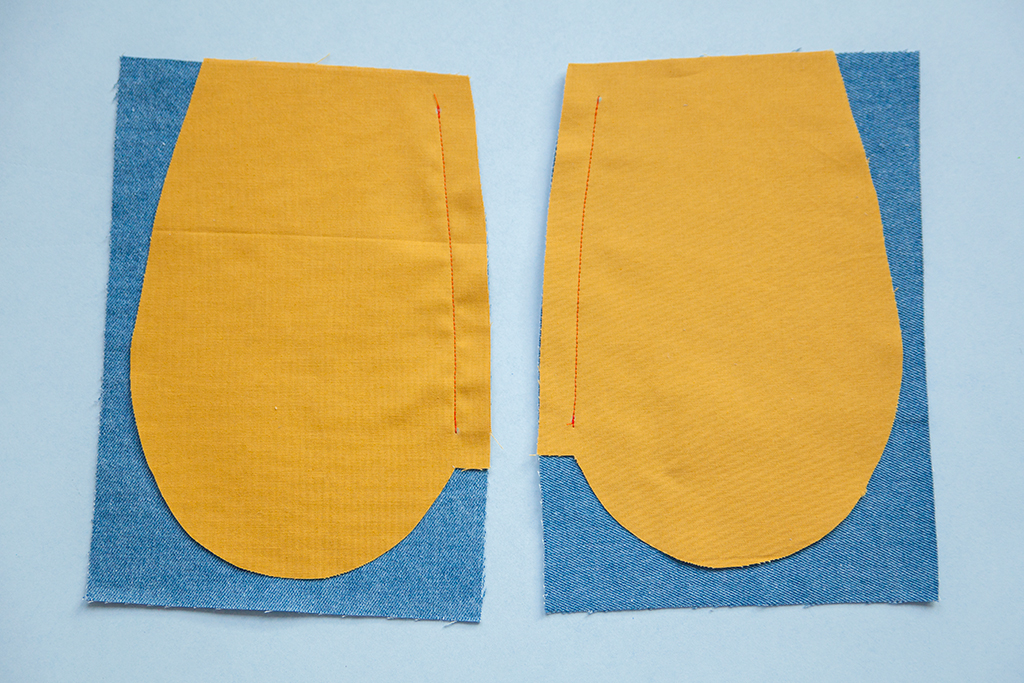
Finish your seams with your preferred method (not pictured). With right sides together and notches aligned, match one pocket to one side of the front skirt at the side seam. Pin and stitch between the two small circles at a 5/8” seam allowance.
Step | 02
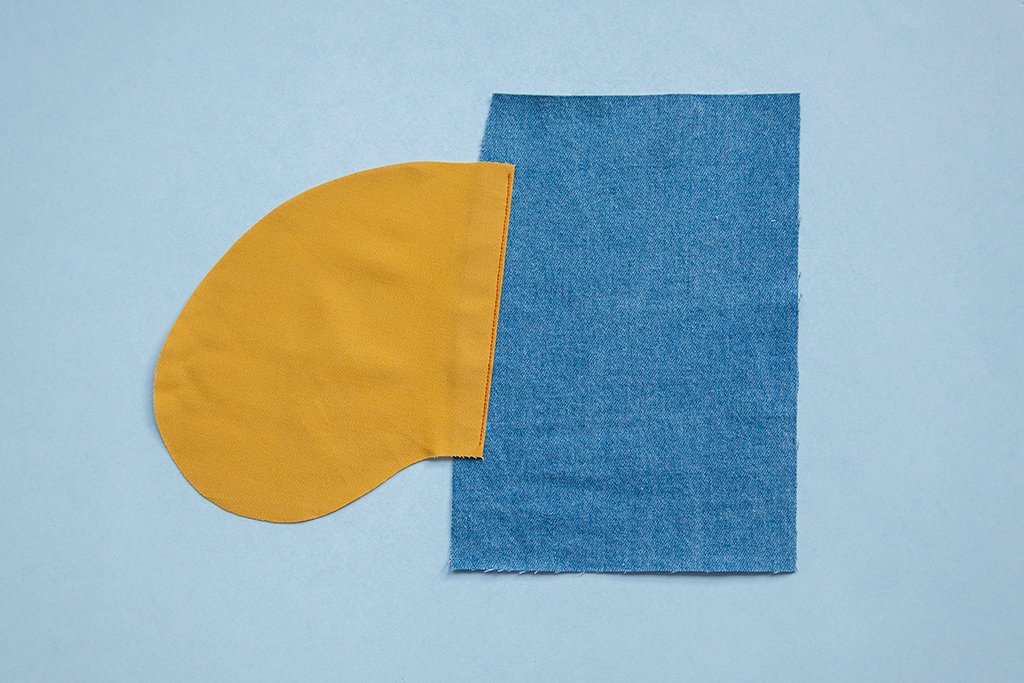
Press the pocket and seam allowances away from the skirt. Understitch along the pocket seam line.
Repeat steps 1-2 for the back skirt.
Step | 03
With right sides together, notches and pocket pieces aligned, match the front skirt to the back skirt at the side seam. Pin.
Step | 04
In one continuous stitch, sew from the waistline to the first small circle. Pivot, and continue stitching around the pocket to the second small circle. Pivot again and stitch down the side seam to the hem.
Step | 05
Clip the seam allowances at the small circles. Press the pocket toward the center front. Press the seam allowances open above and below the pocket.
The Inserted Pocket
This pocket has a slightly different shape from the in-seam pocket but can be endlessly altered to create all kinds of different pocket designs. The inserted pocket can only be added to a garment with a waist seam. Try adding this pocket to your favorite pants pattern or a dress with a full skirt.
Drafting An Inserted Pocket Bag
Step | 01
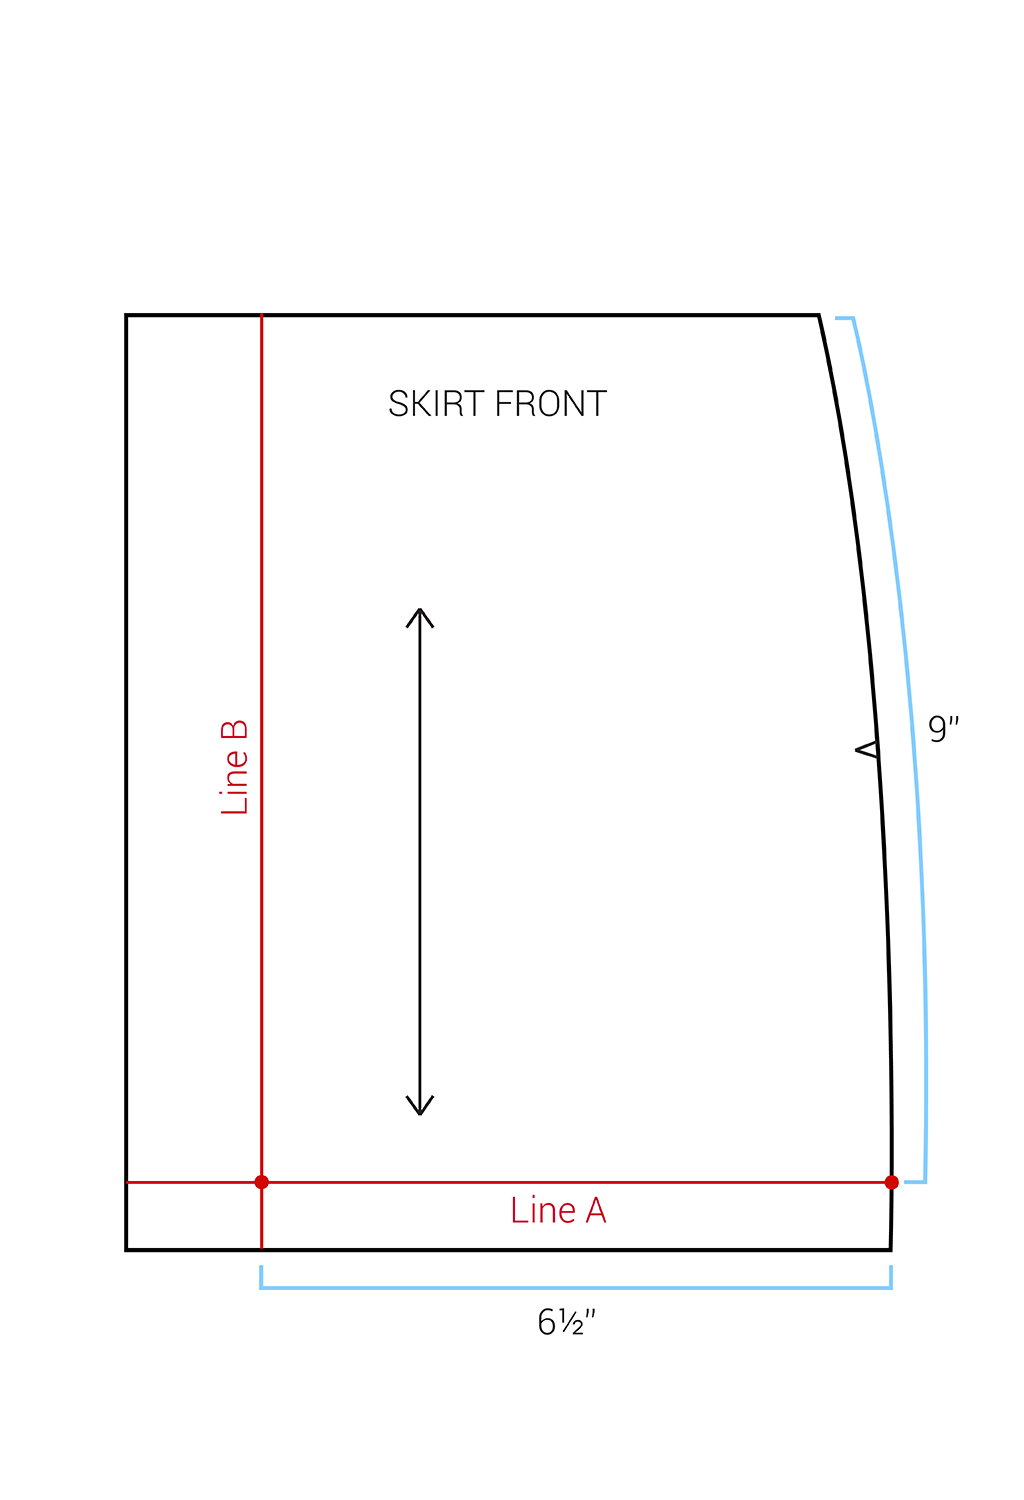
Measure 9” down from the waistline along the side seam and mark. Draw a 6 1/2” line toward center front from this mark. This is line A.
Draw an additional line from the end of line A up to the waistline, parallel to the grainline. This is line B.
Step | 02
From the waistline, measure 7” down the side seam and mark. This is mark C.
Measure 3 1/2” along line A from the side seam toward the center front and mark. This is mark D.
Measure 3” up line B from line A, and mark. This is mark E.
From the intersection of line B and the waistline, measure 1" toward the side seam and mark. This is mark F.

Step | 03
Draw a 5/8” long line from mark C, toward center front, perpendicular to the grainline. This is your pocket bag seam allowance.
Step | 04
Use a French curve to connect mark D to mark C’s seam allowance.
Repeat this technique to connect mark D to E, and mark E to F. You have now created your pocket bag shape.
Step | 05
Measure 5/8” up from mark C’s seam allowance and mark. Draw the seam allowances at the corner where the side seam and waistline meet. Mark the point where the seam allowances converge. These two marks are now your pocket placement marks.
Transfer these markings to your skirt back and front.
Sewing An Inserted Pocket
This technique is almost identical to sewing an in-seam pocket, with a slight variation.
Step | 01
With right sides together and notches aligned, match one pocket to one side of the front skirt at the side seam. Pin and stitch between the two small circles at a 5/8” seam allowance. Repeat steps for the back skirt and other pocket bag.
Step | 02
Press the pocket and seam allowances away from the skirt. Understitch along the pocket seam line.
Repeat steps 1-2 for the back skirt.
Step | 03
With right sides together, notches and pocket pieces aligned, match the front skirt to the back skirt at the side seam. Pin.

Step | 04
In one continuous stitch, sew from the top portion of the pocket at the waistline to the lower small circle. Pivot and continue stitching down the side seam of the skirt to the hem.
Step | 05
Clip the seam allowance at the small circle.
Step | 06
Press the pocket, seam allowances, and skirt front away from the skirt back. Baste the pocket to the skirt front at the waistline.
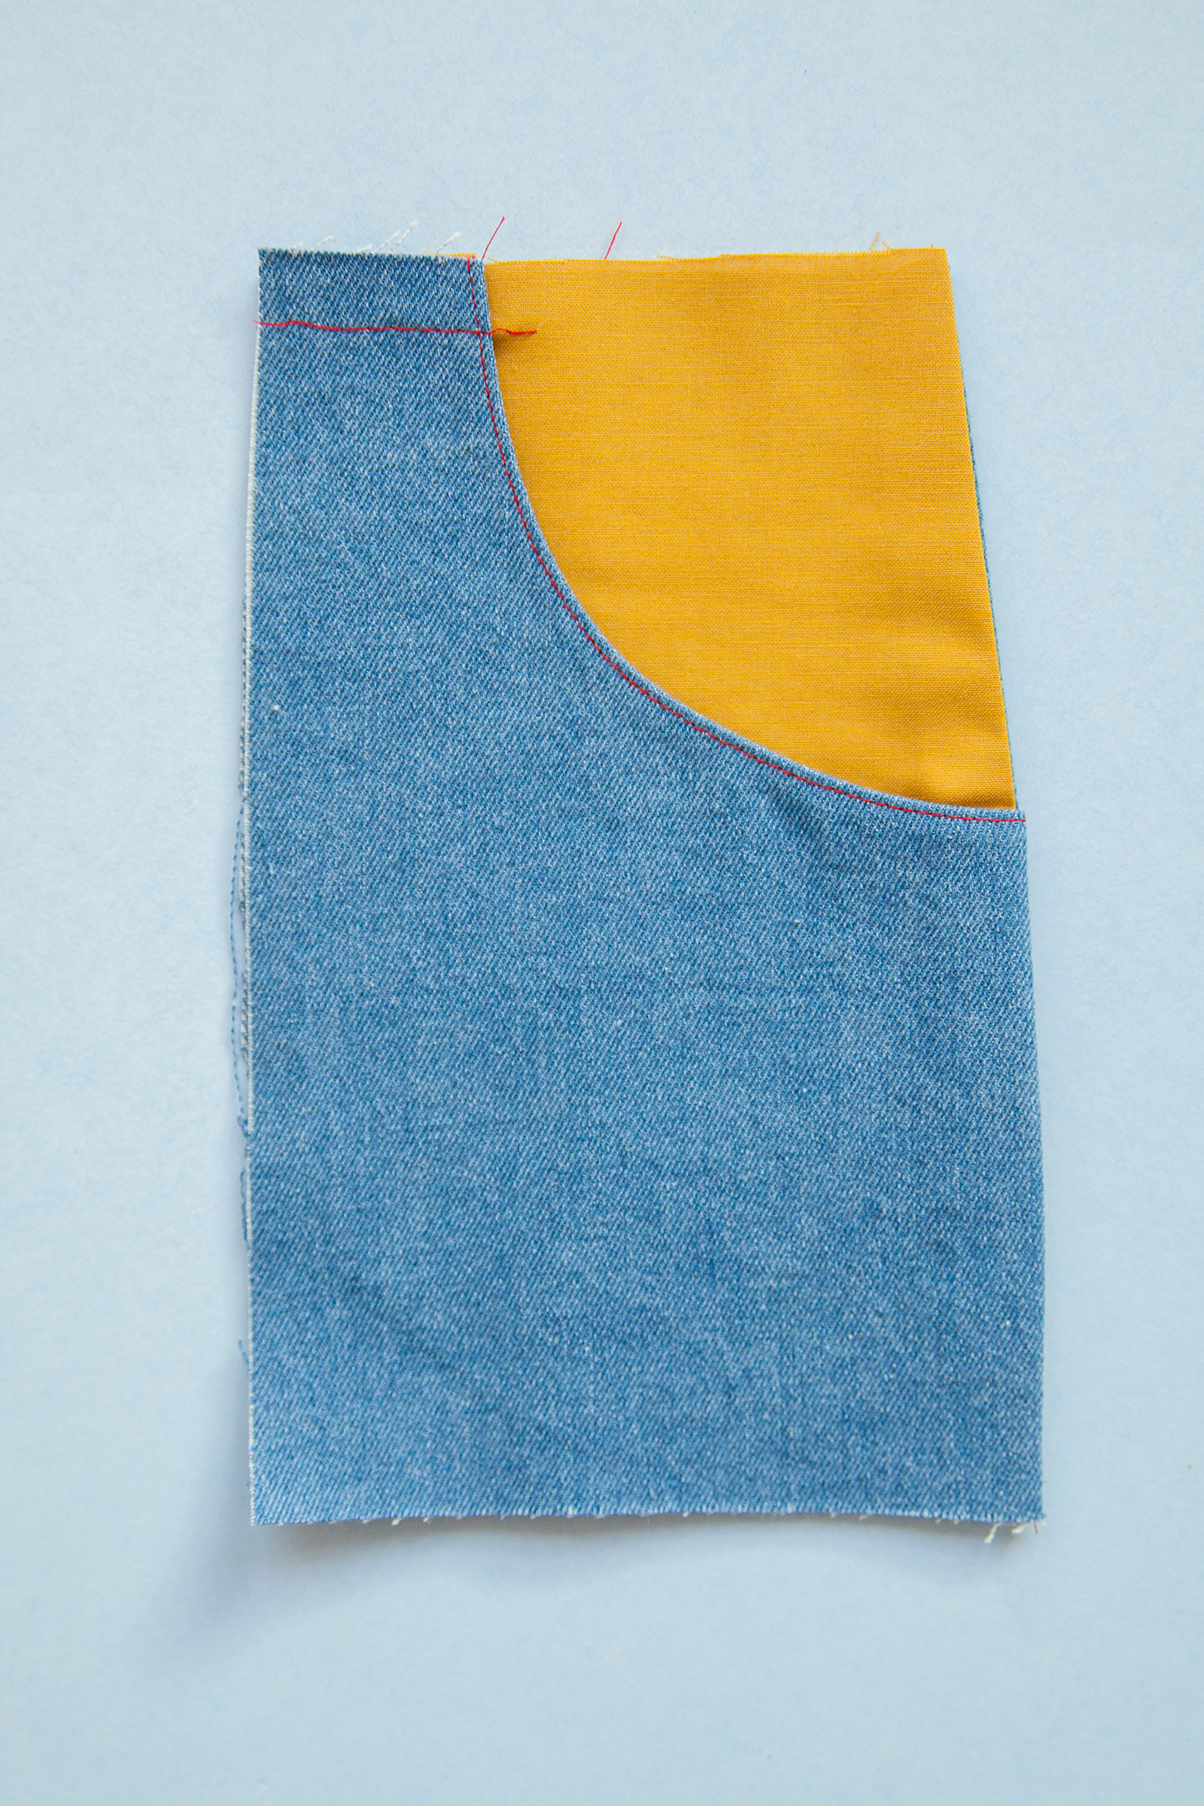
The Diagonal Pocket
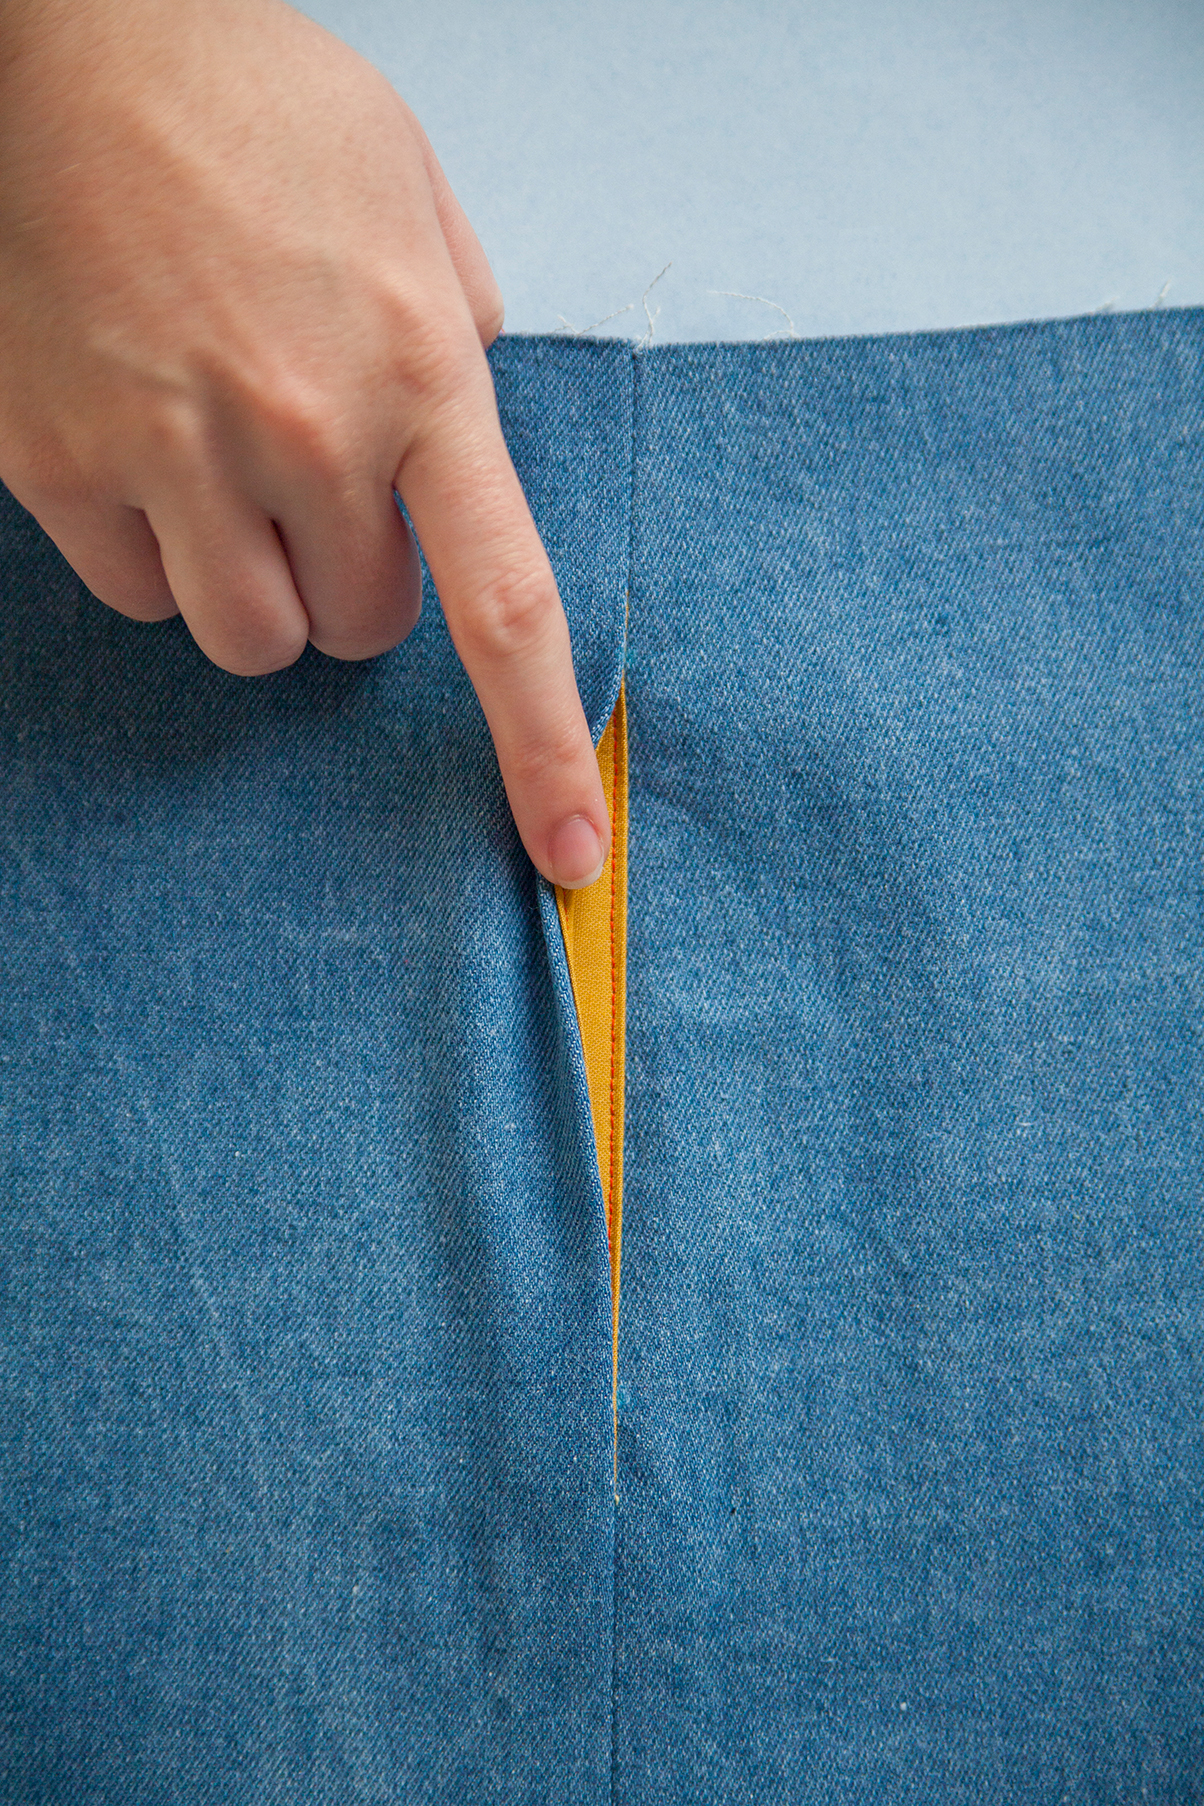
This pocket is perfect for casual dresses, skirts, and pants. The diagonal pocket fabric is visible which gives you a great opportunity to add a little "peek" of contrasting fabric to your garment.
The diagonal pocket has three parts: the skirt front, pocket bag facing, and pocket bag. If your shell fabric is a heavier weight, try using a lighter fabric for the facing to avoid unnecessary bulk.
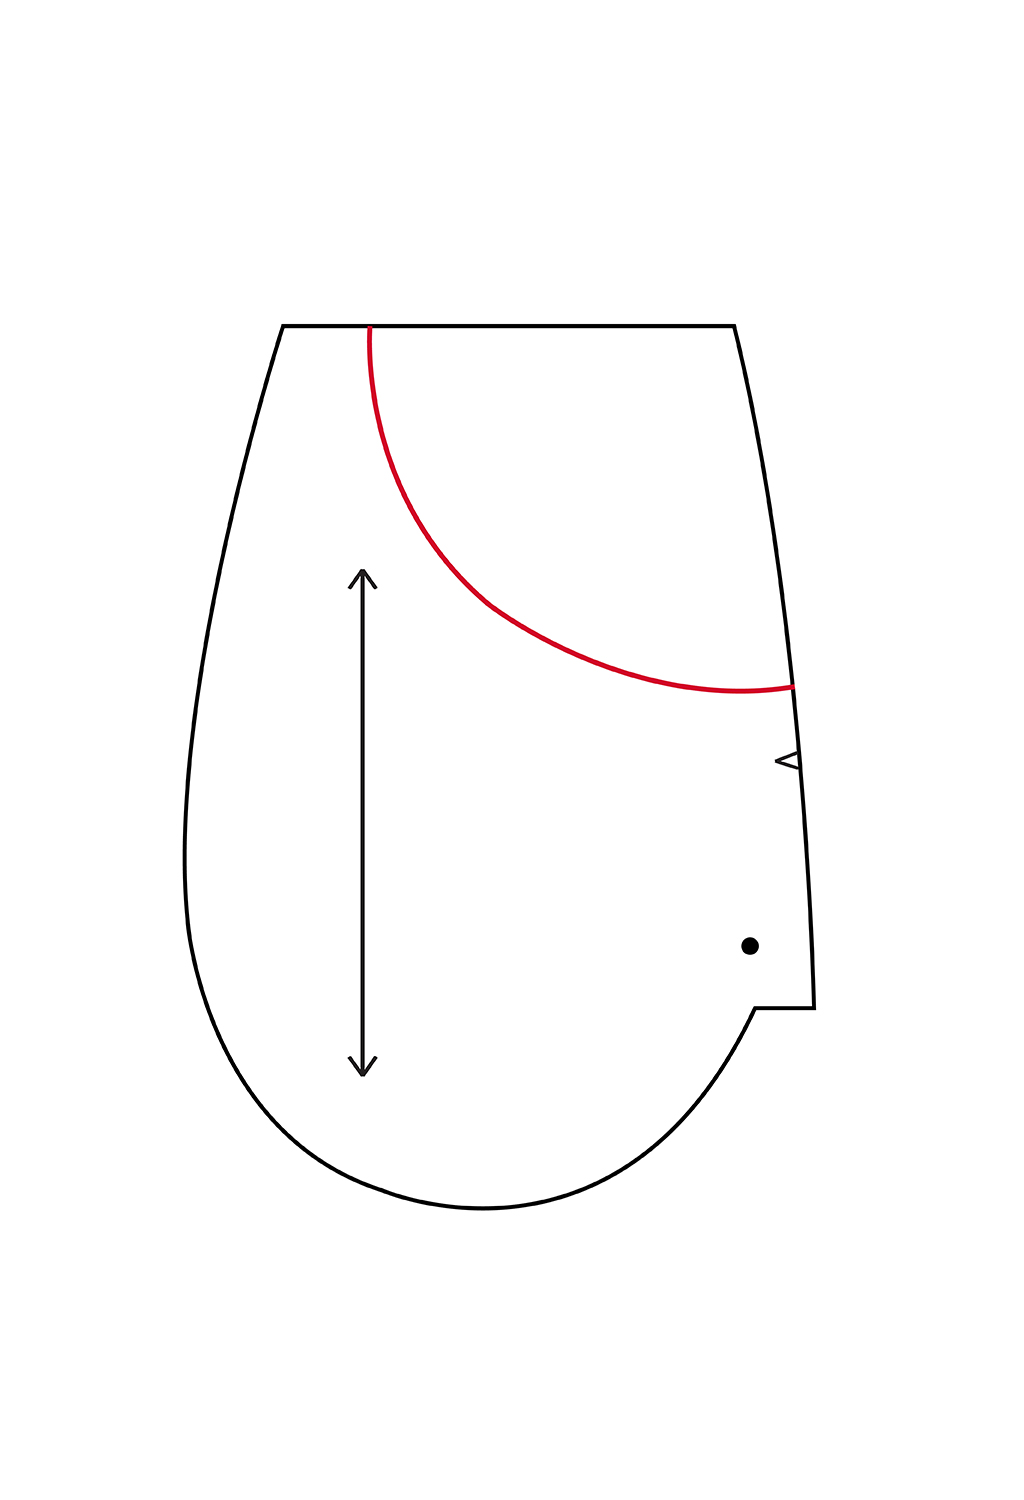
Altering The Inserted Pocket Bag and Shell

Follow the instructions for drafting the inserted pocket bag. We will be using this pocket bag as a base for our diagonal pocket.
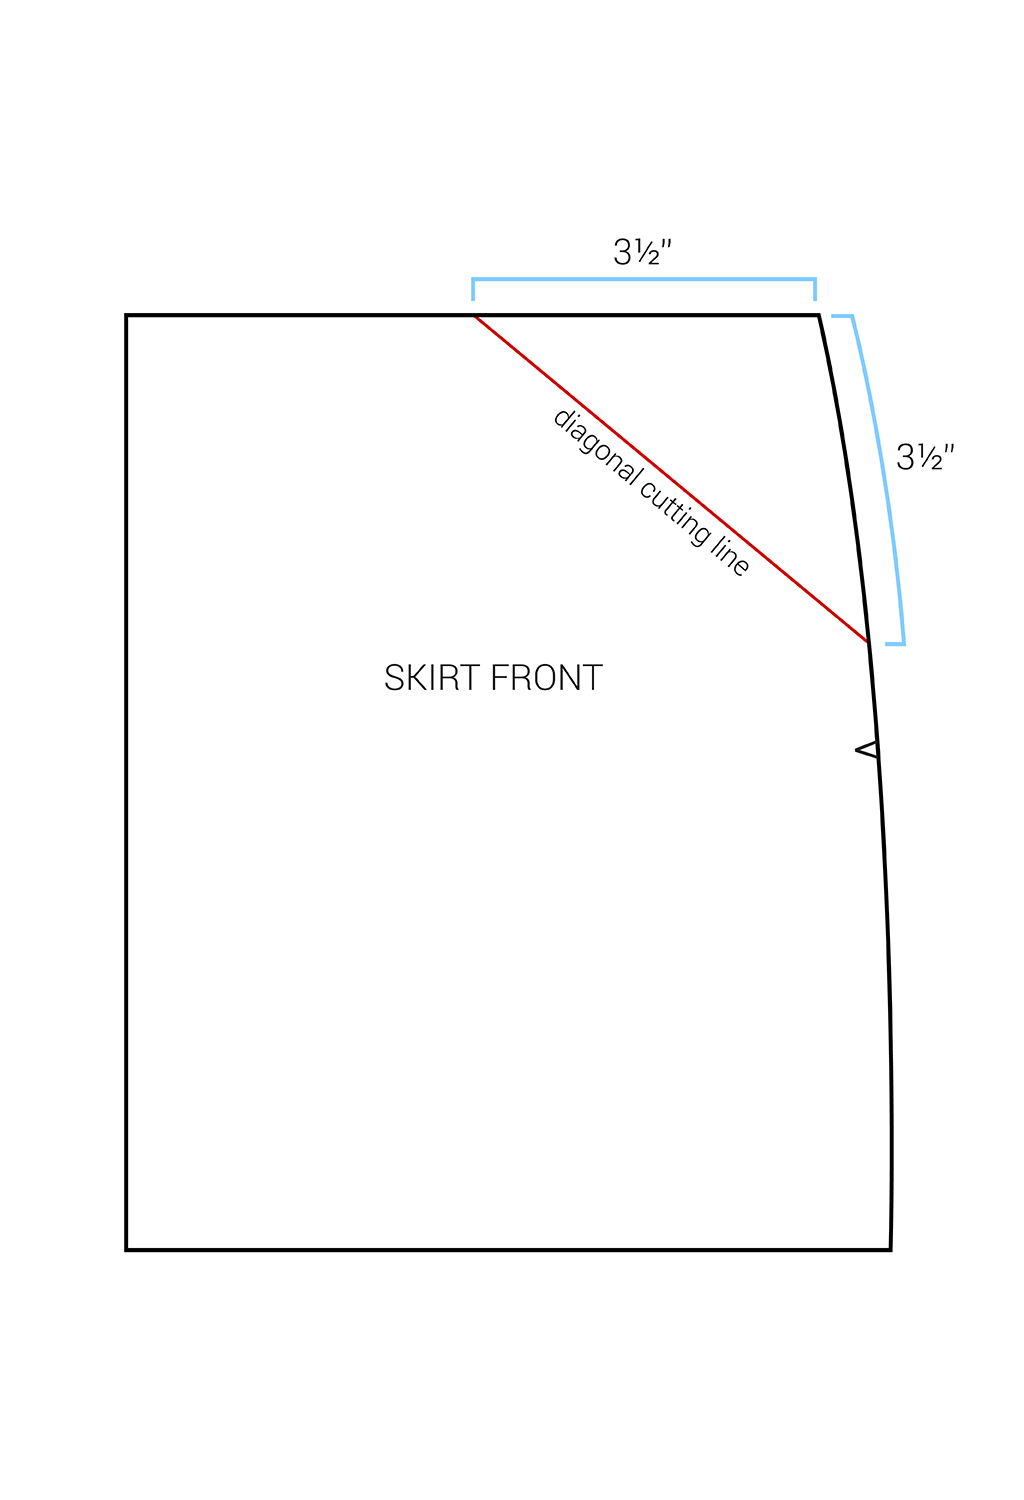
To alter the diagonal pocket bag, measure 3 1/2” toward the center front along the waistline and mark. Then, measure 3 1/2” down the side seam from the waistline and mark. Connect these two markings, creating a diagonal line from the waist to the side seam. This is now your pocket facing.
Repeat these steps for the skirt front.
Cut one pocket facing and one unaltered inserted pocket bag for each pocket.
Sewing A Diagonal Pocket
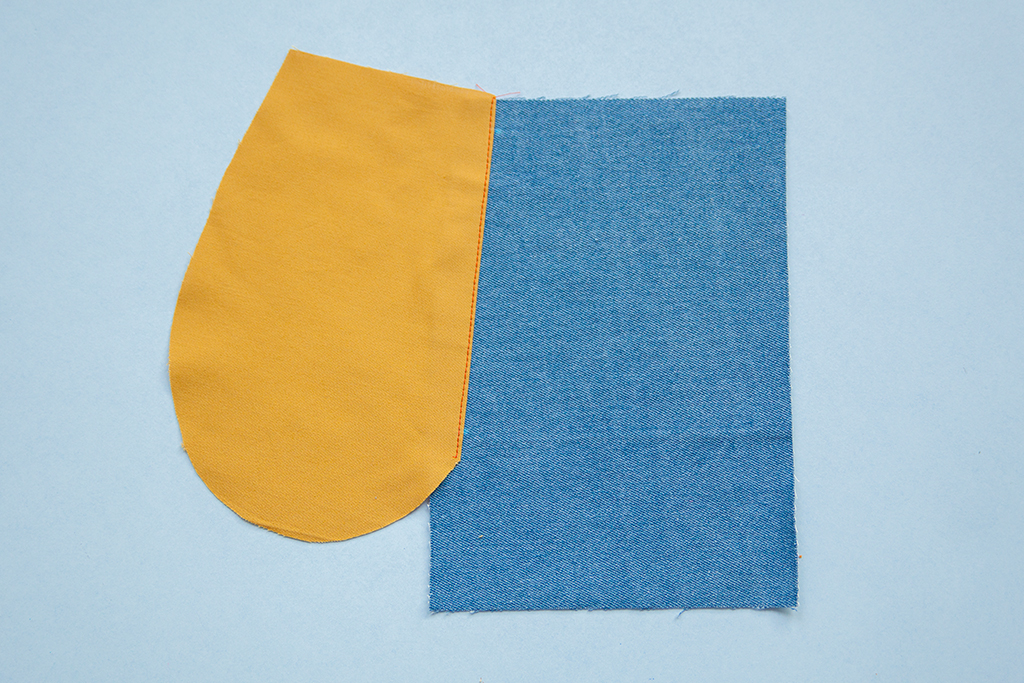
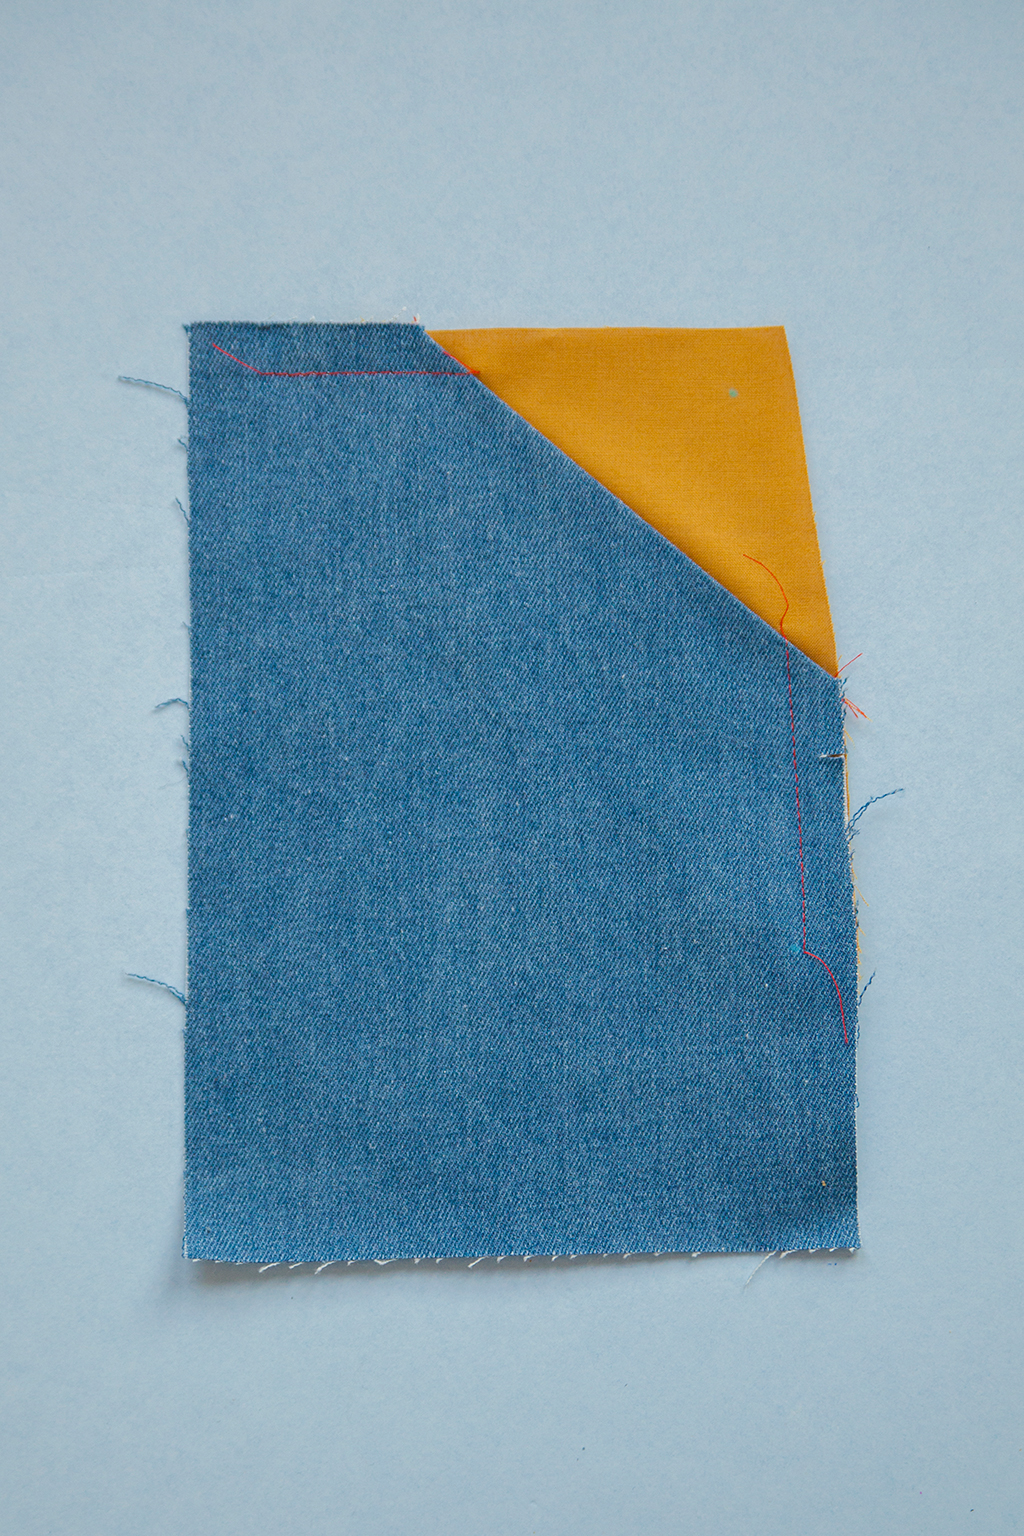
Step | 01
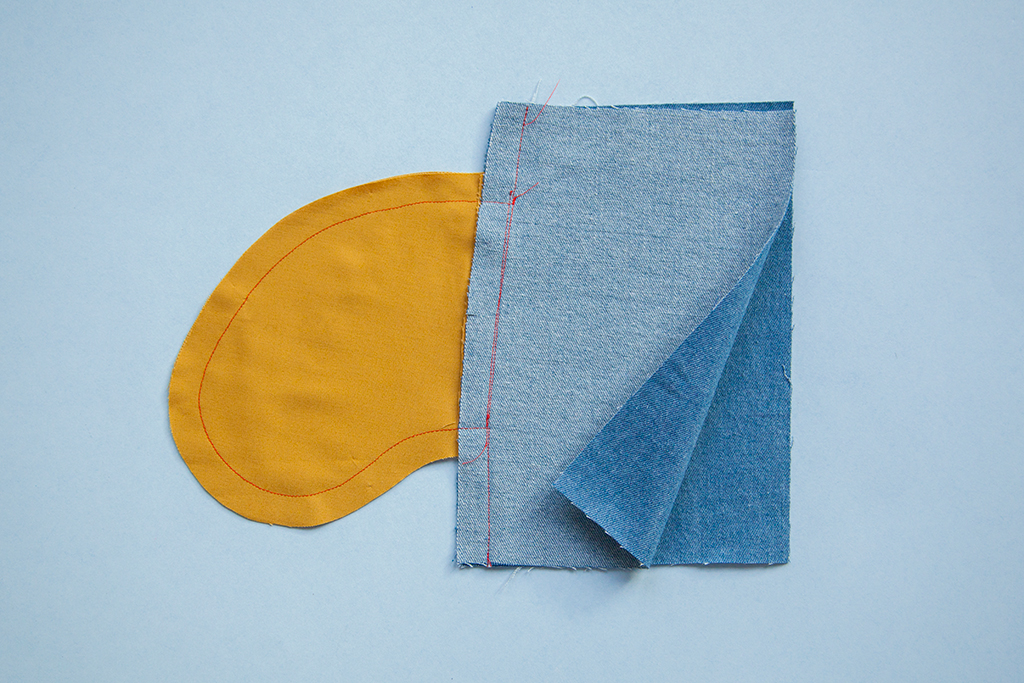
With right sides together and notches aligned, match the front skirt to the pocket facing. Pin and sew at a 1/4” seam allowance.
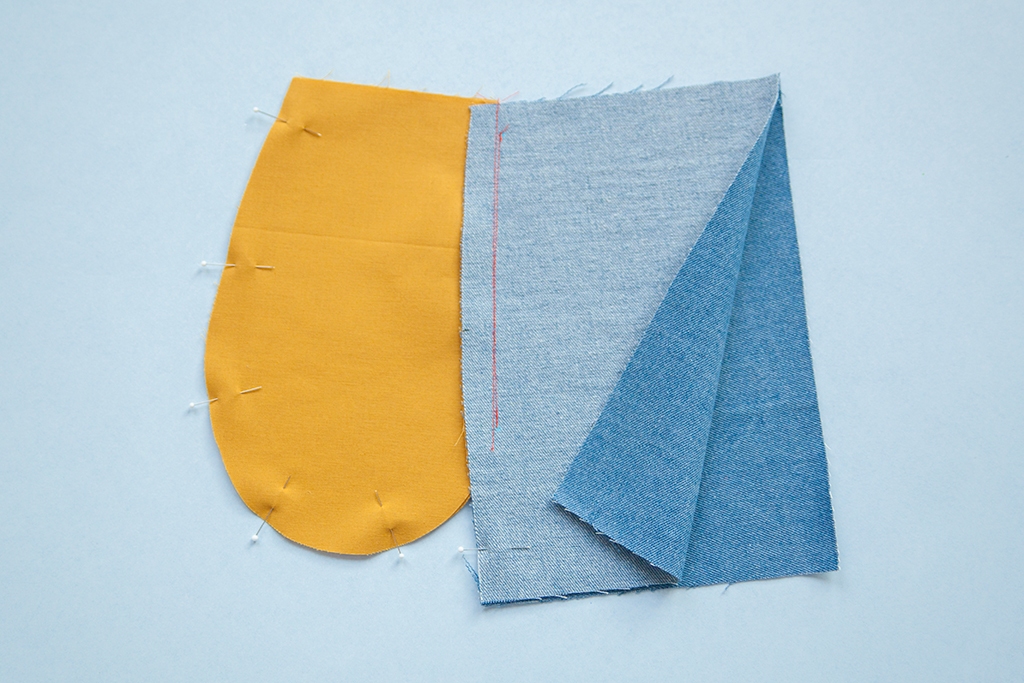
Step | 02
Press the seam allowance toward the skirt. Edgestitch the seam allowance in place.
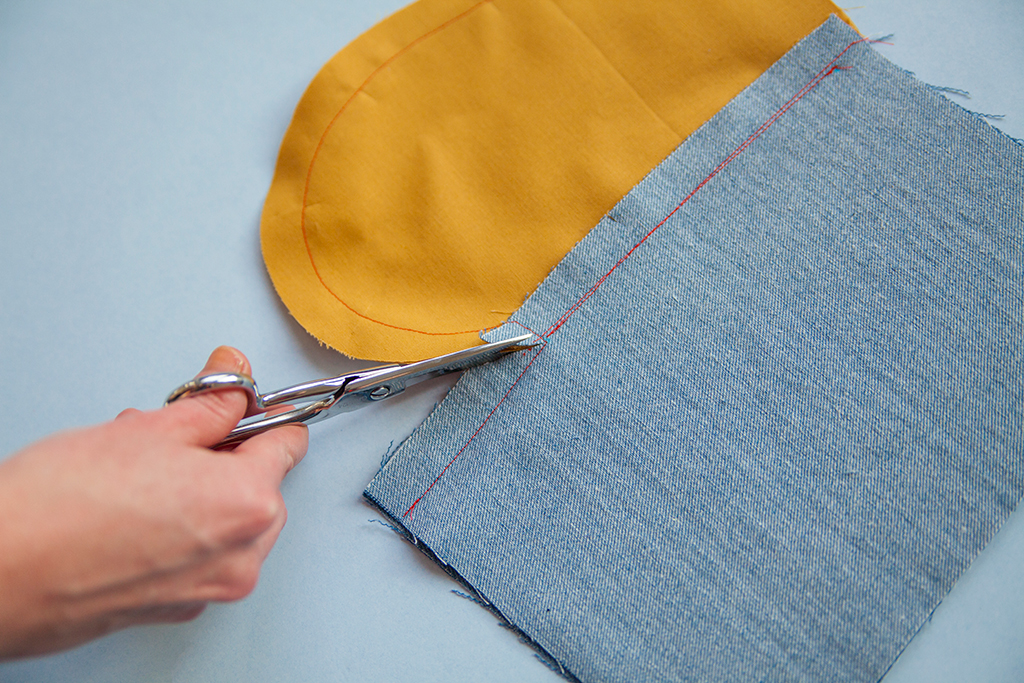
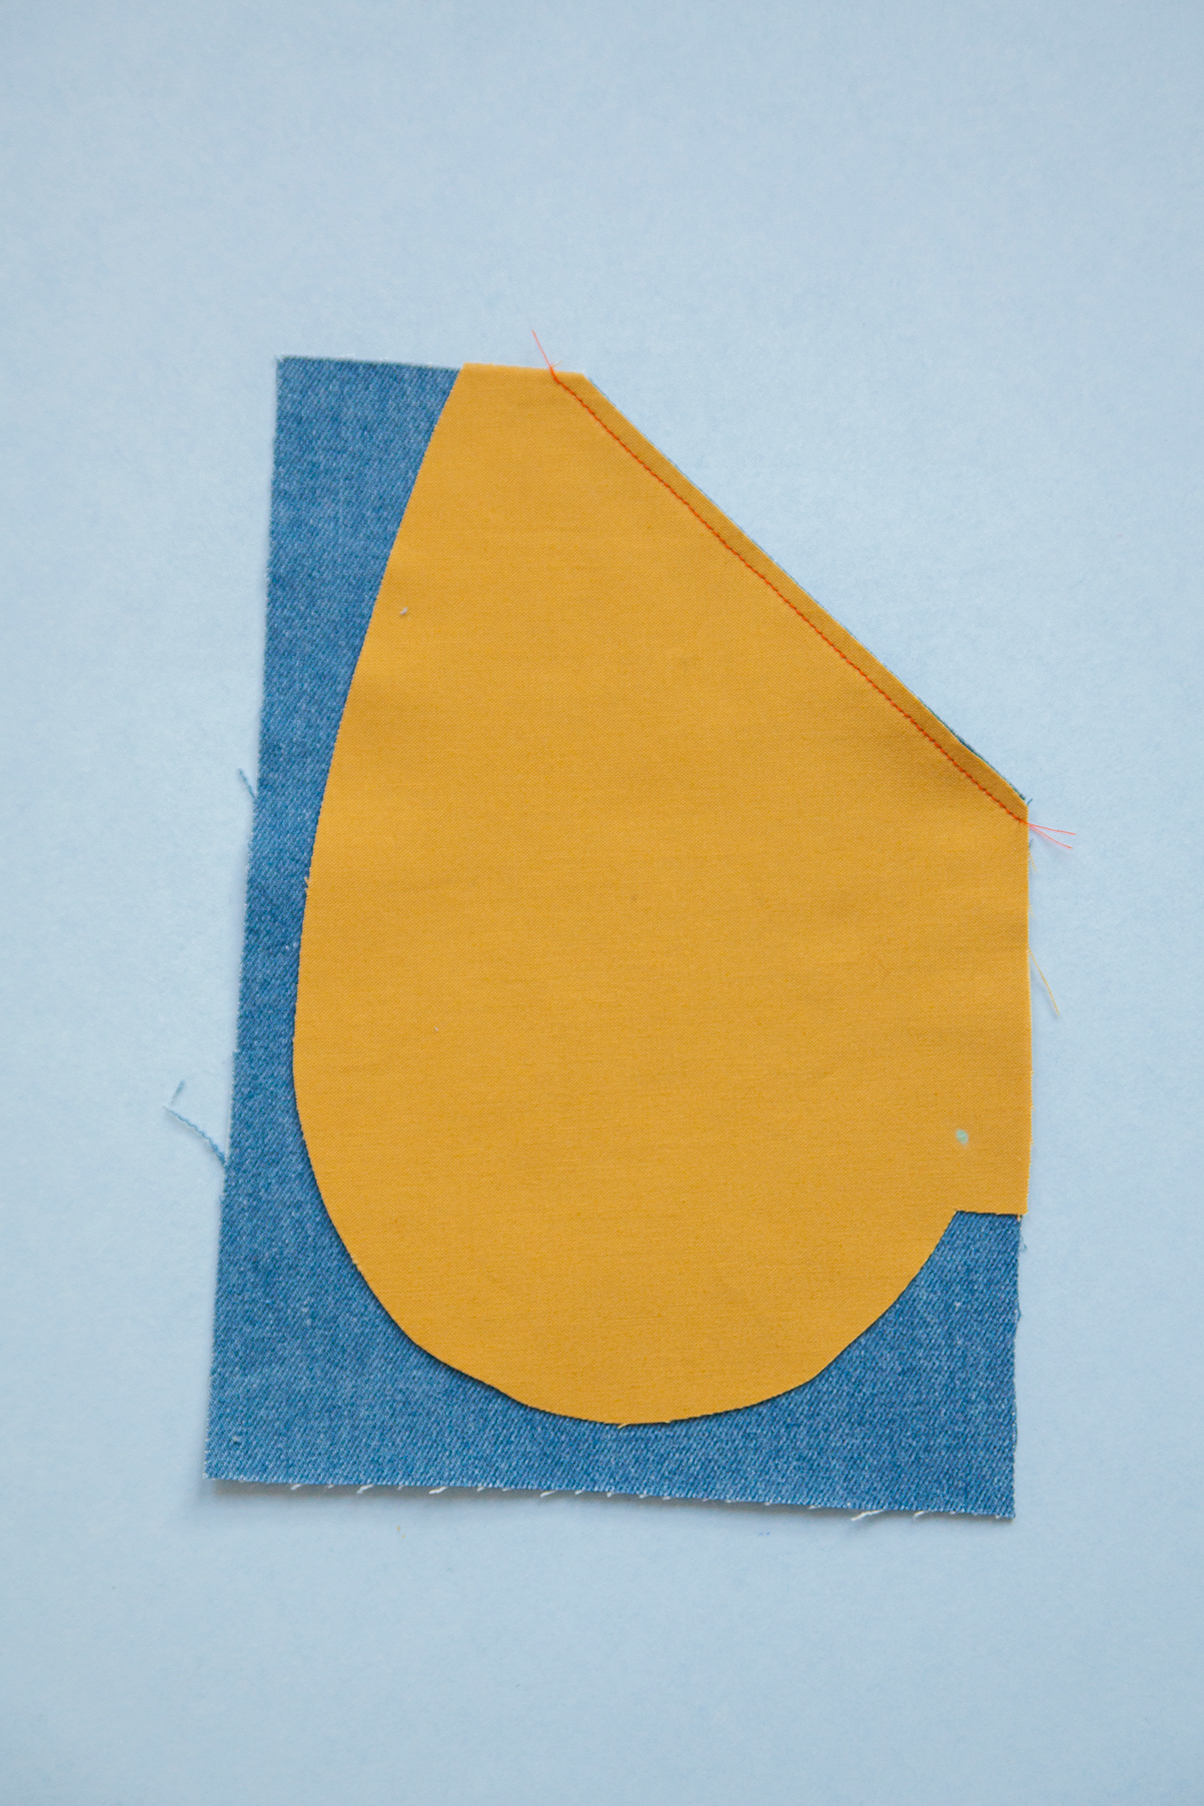
Step | 03
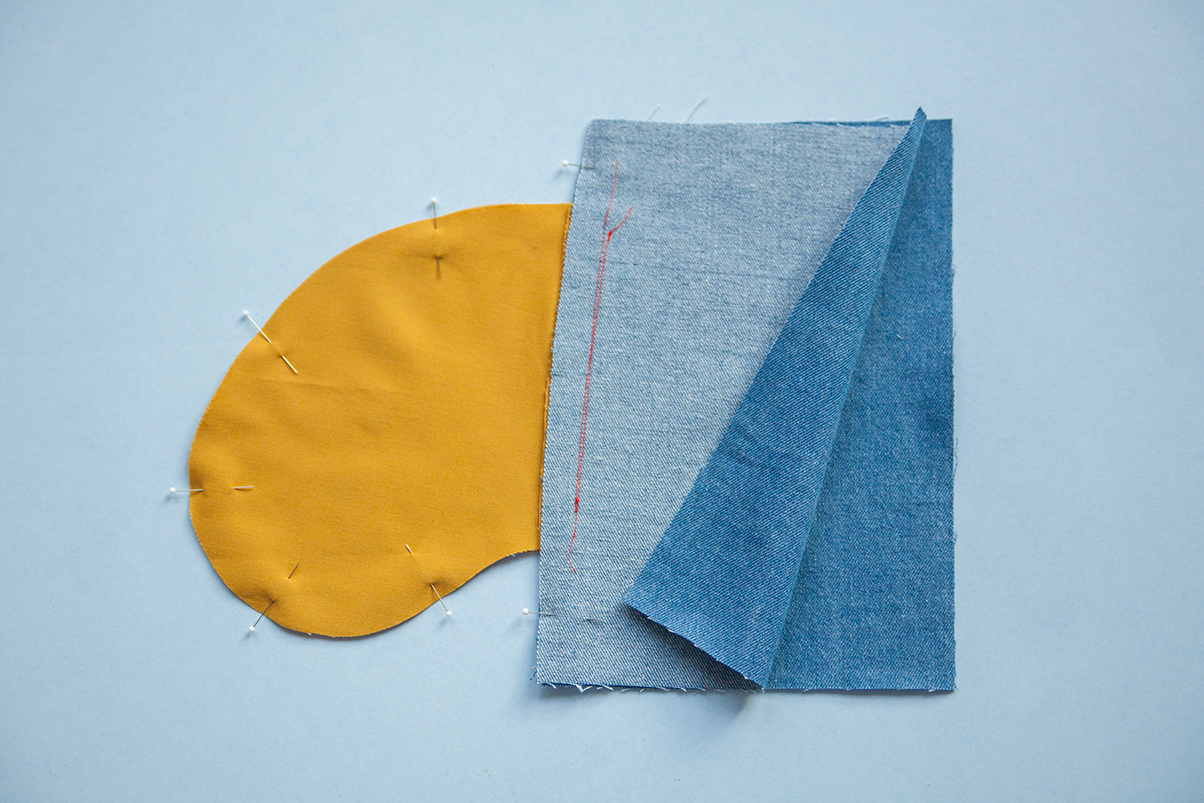
Move the skirt front away from the pocket facing. With right sides together, match the pocket bag to the pocket facing. Pin.
Step | 04
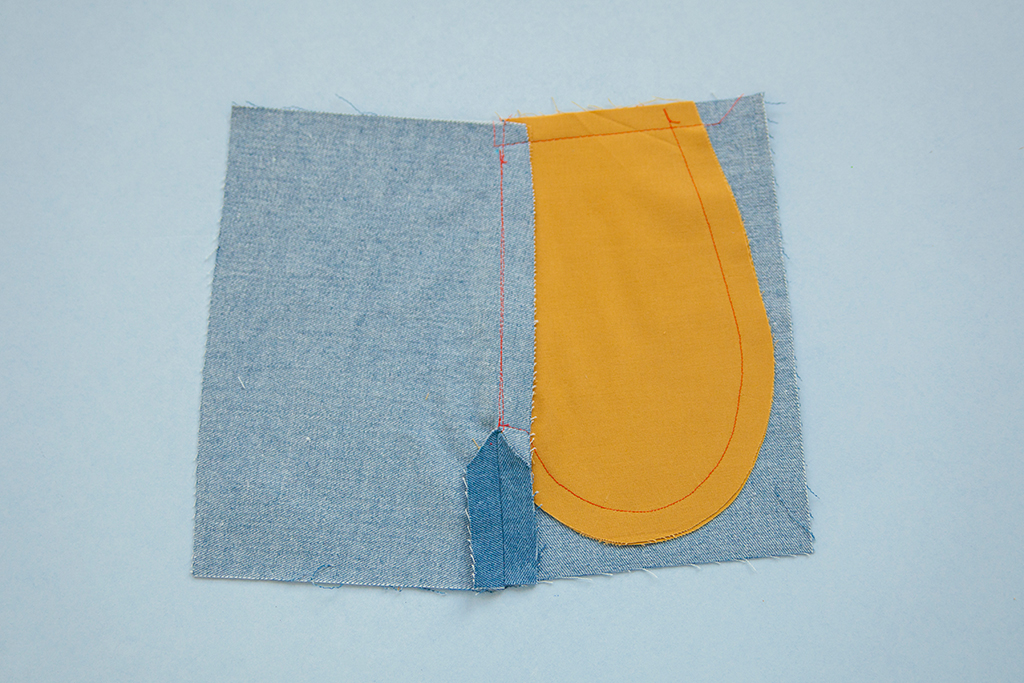
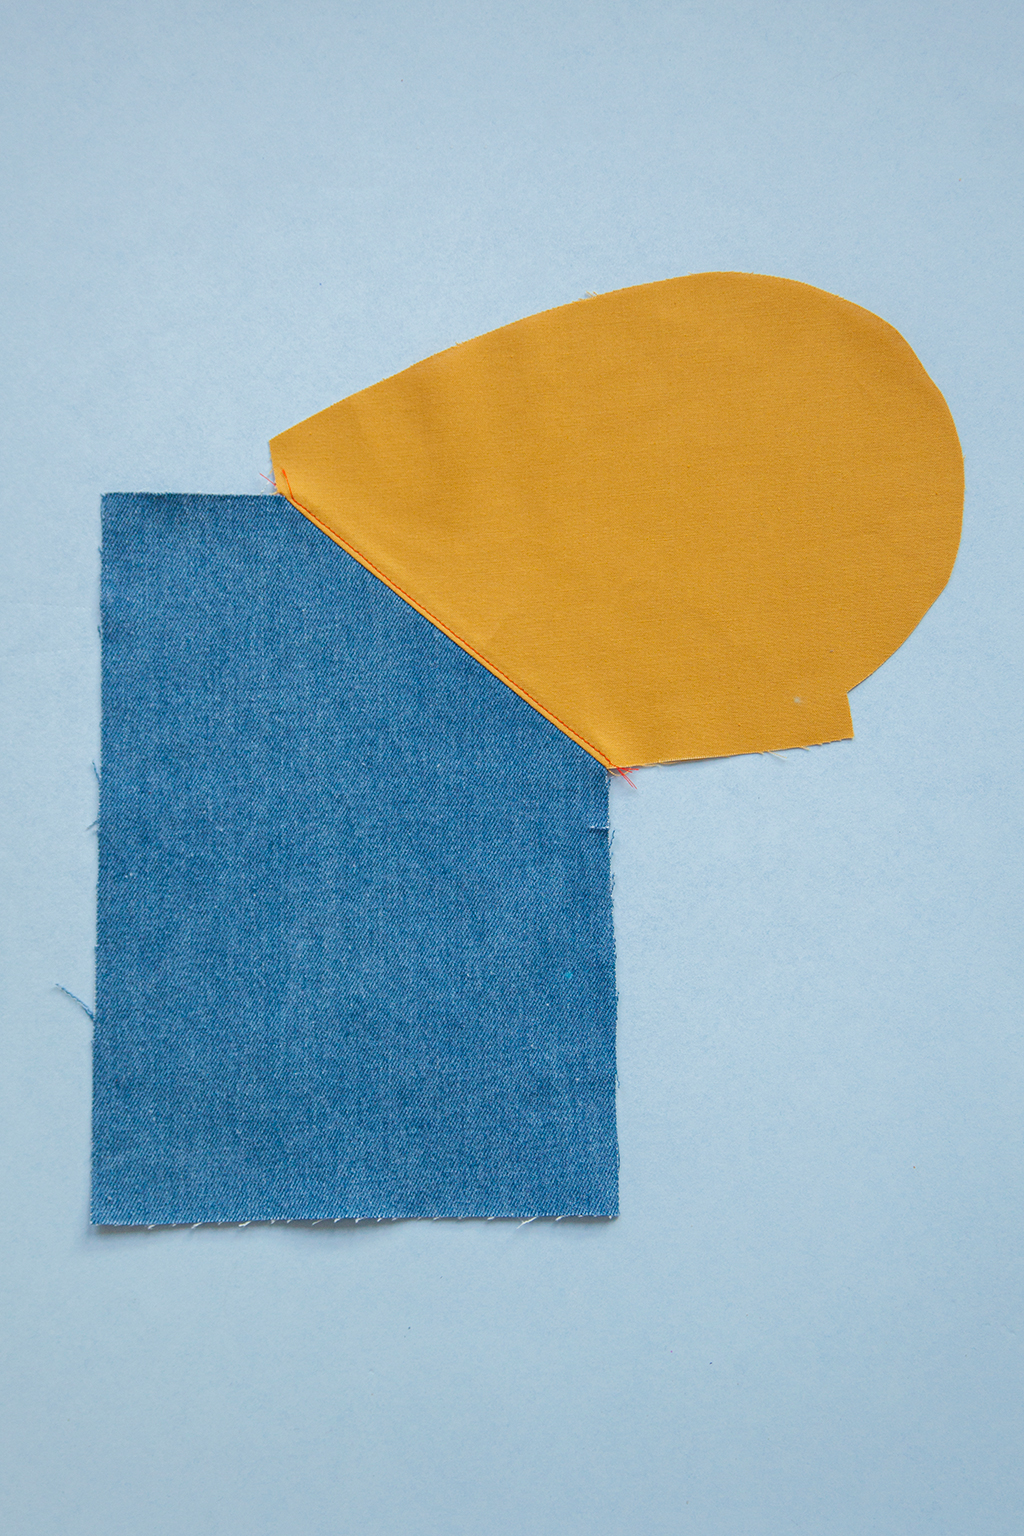
Begin sewing the pocket facing to the pocket bag at the intersection with the skirt front. Continue around the curve to the waist line, at a 5/8” seam allowance.
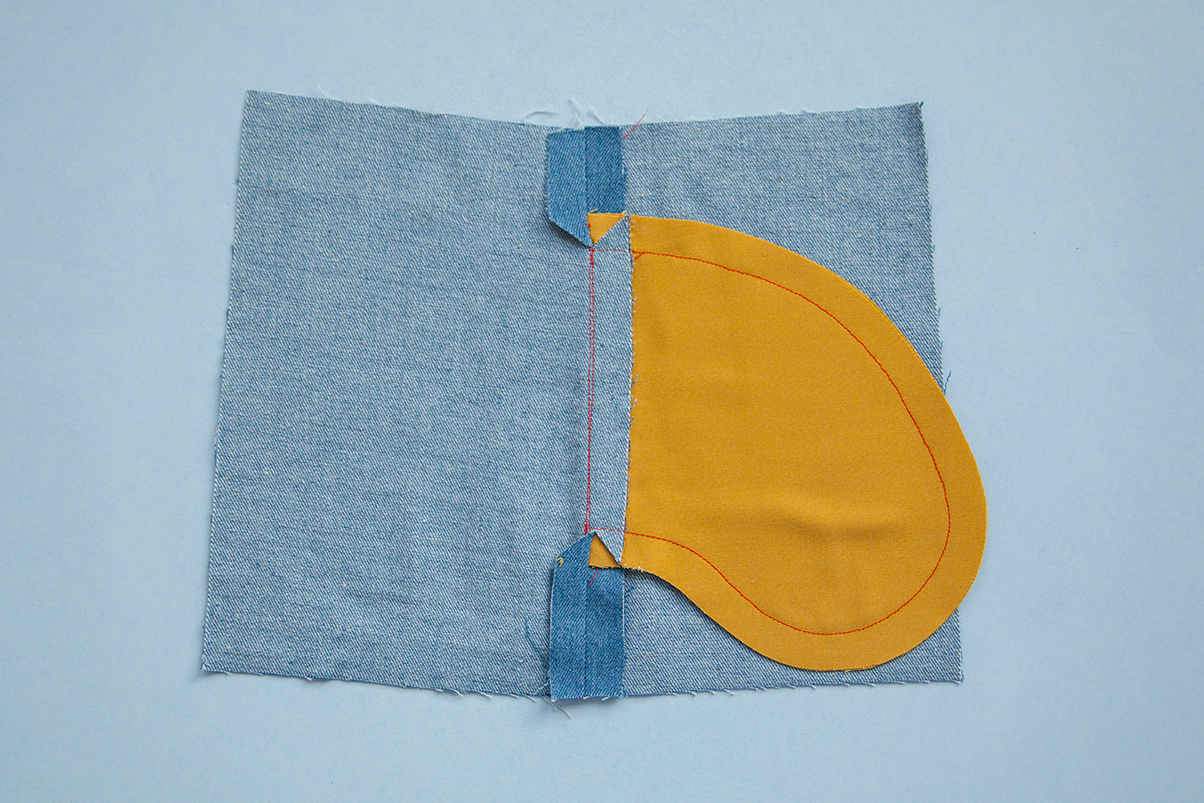
Press the pocket toward the skirt front. Baste the top portion of the pocket to the skirt waistline.
Diagonal Pocket Design Variations
Many different design variations can be made by simply changing the shape of the diagonal line on the skirt front and pocket pattern. Here are a few examples of the corresponding pattern changes.
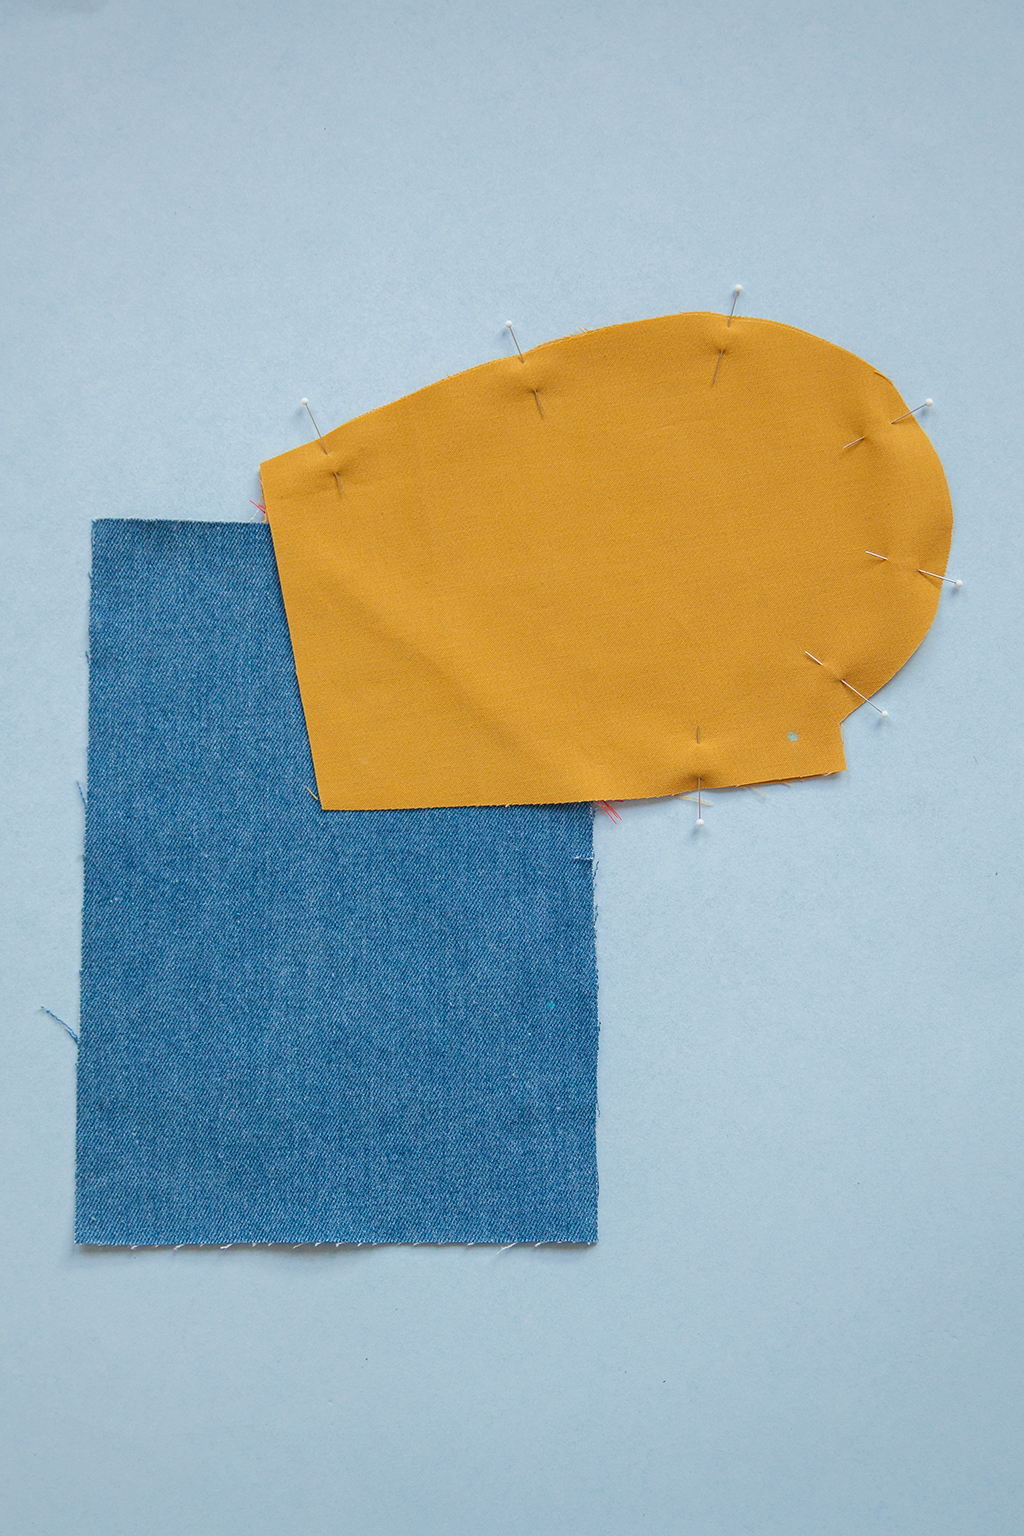
Notched Pocket
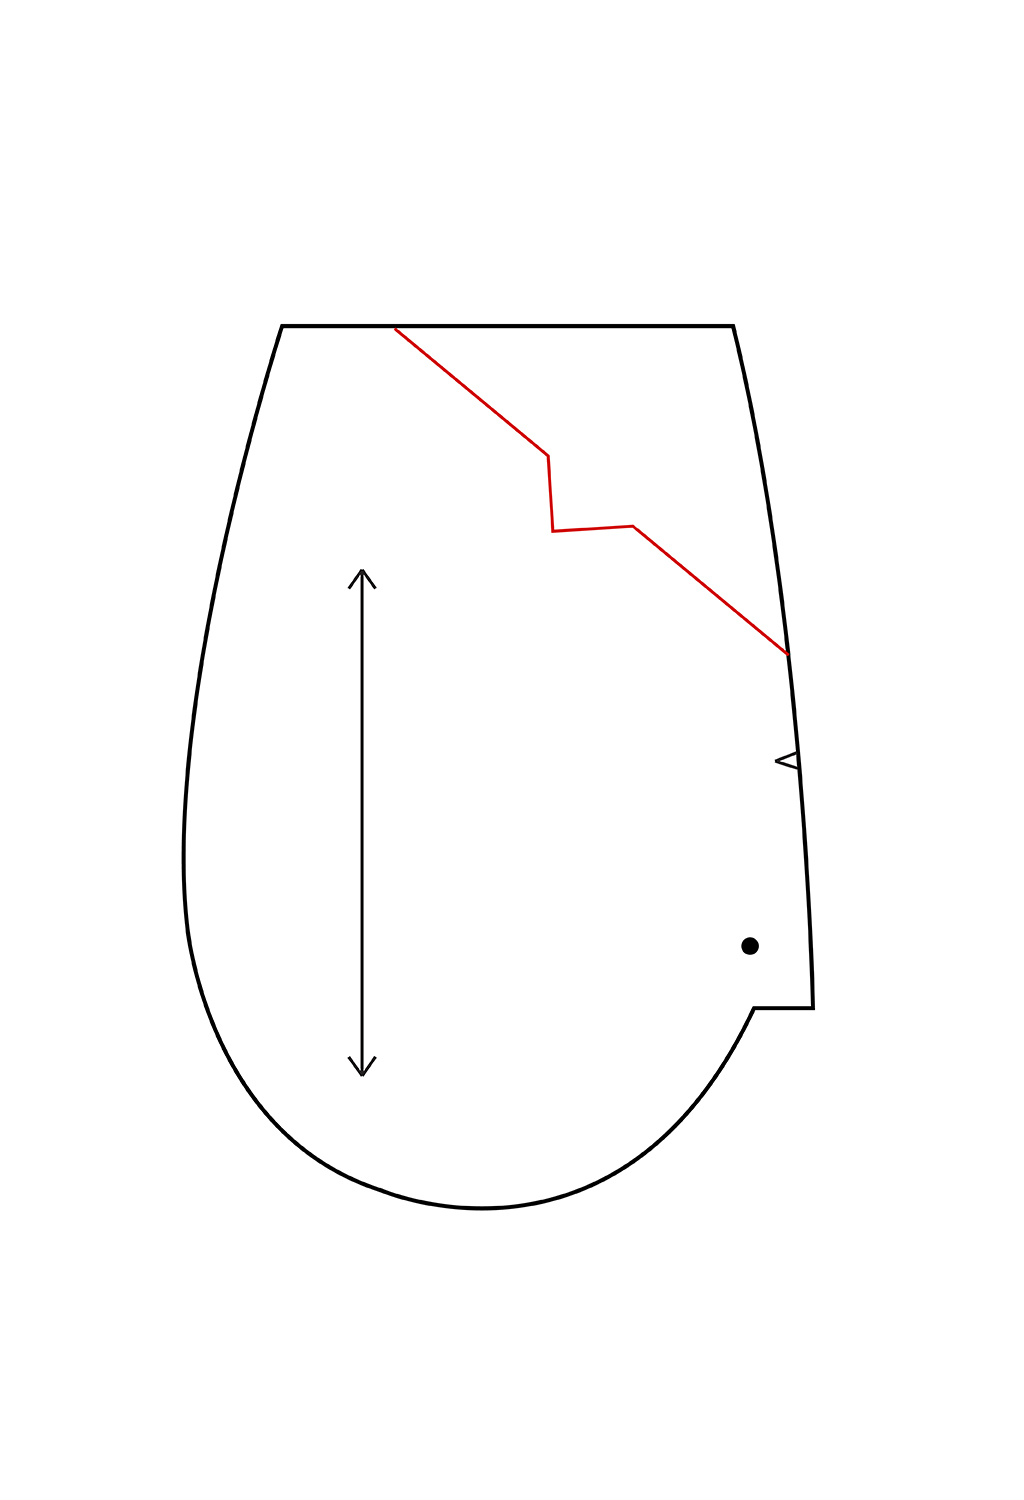
Follow the instructions for creating the diagonal pocket bag and shell. To alter the diagonal pocket into a notched pocket, find the center of your diagonal line and mark. Create a triangular shape at this mark, at the same angle as the diagonal line. Repeat these steps for the skirt front.
Cut one pocket facing and one unaltered inserted pocket bag for each pocket.
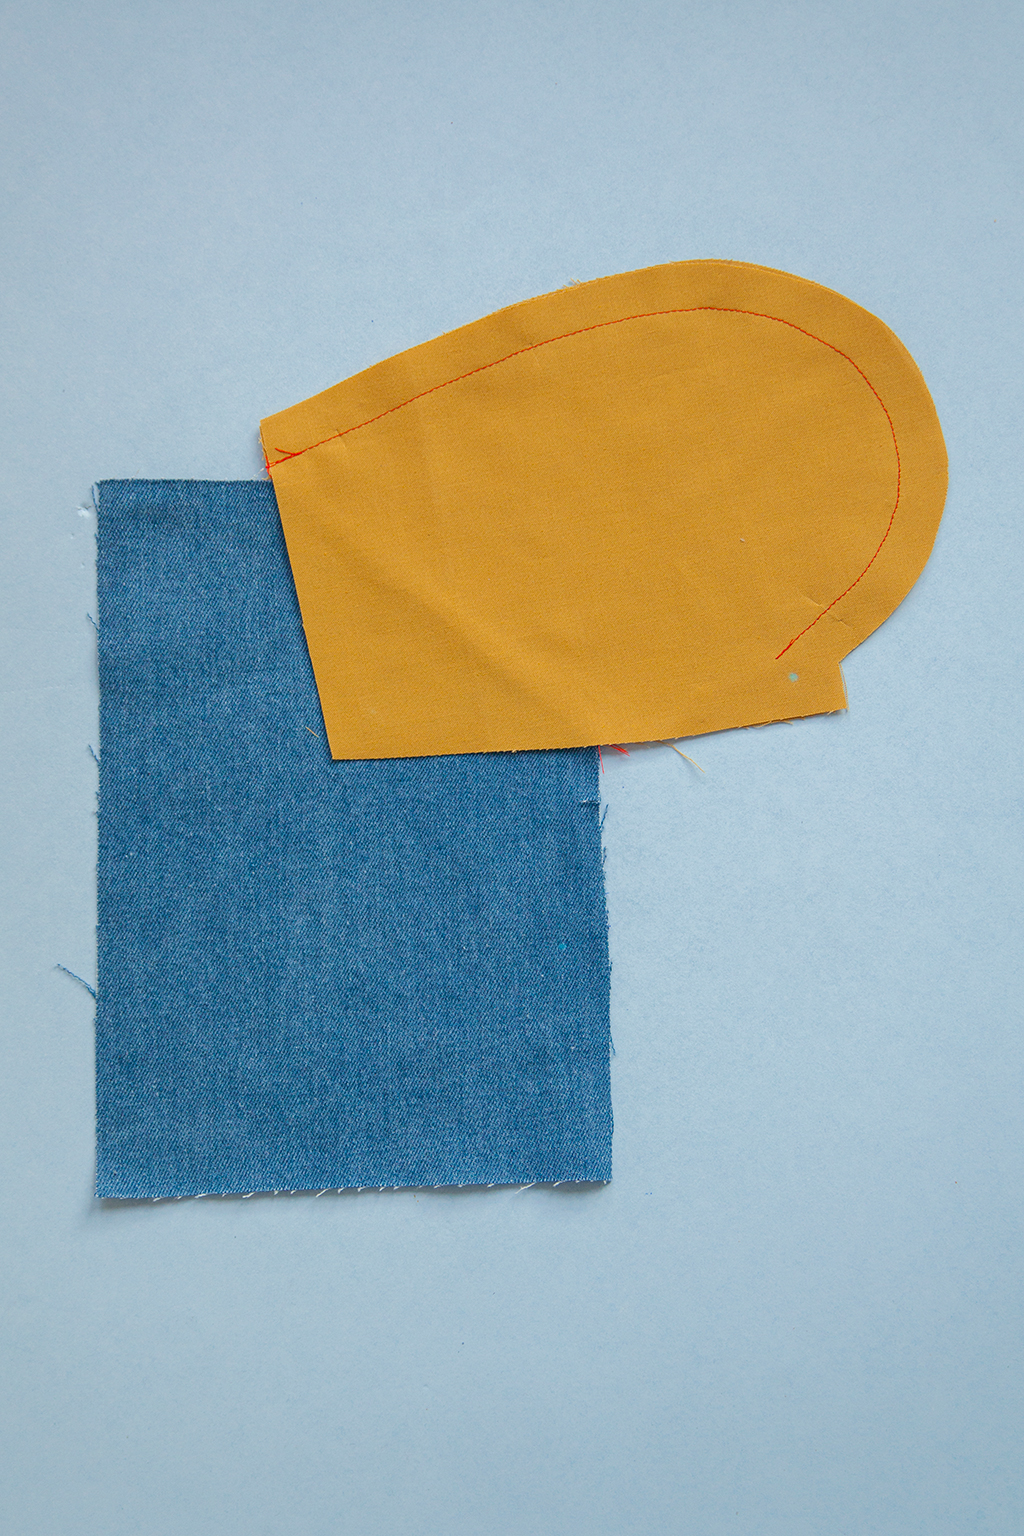
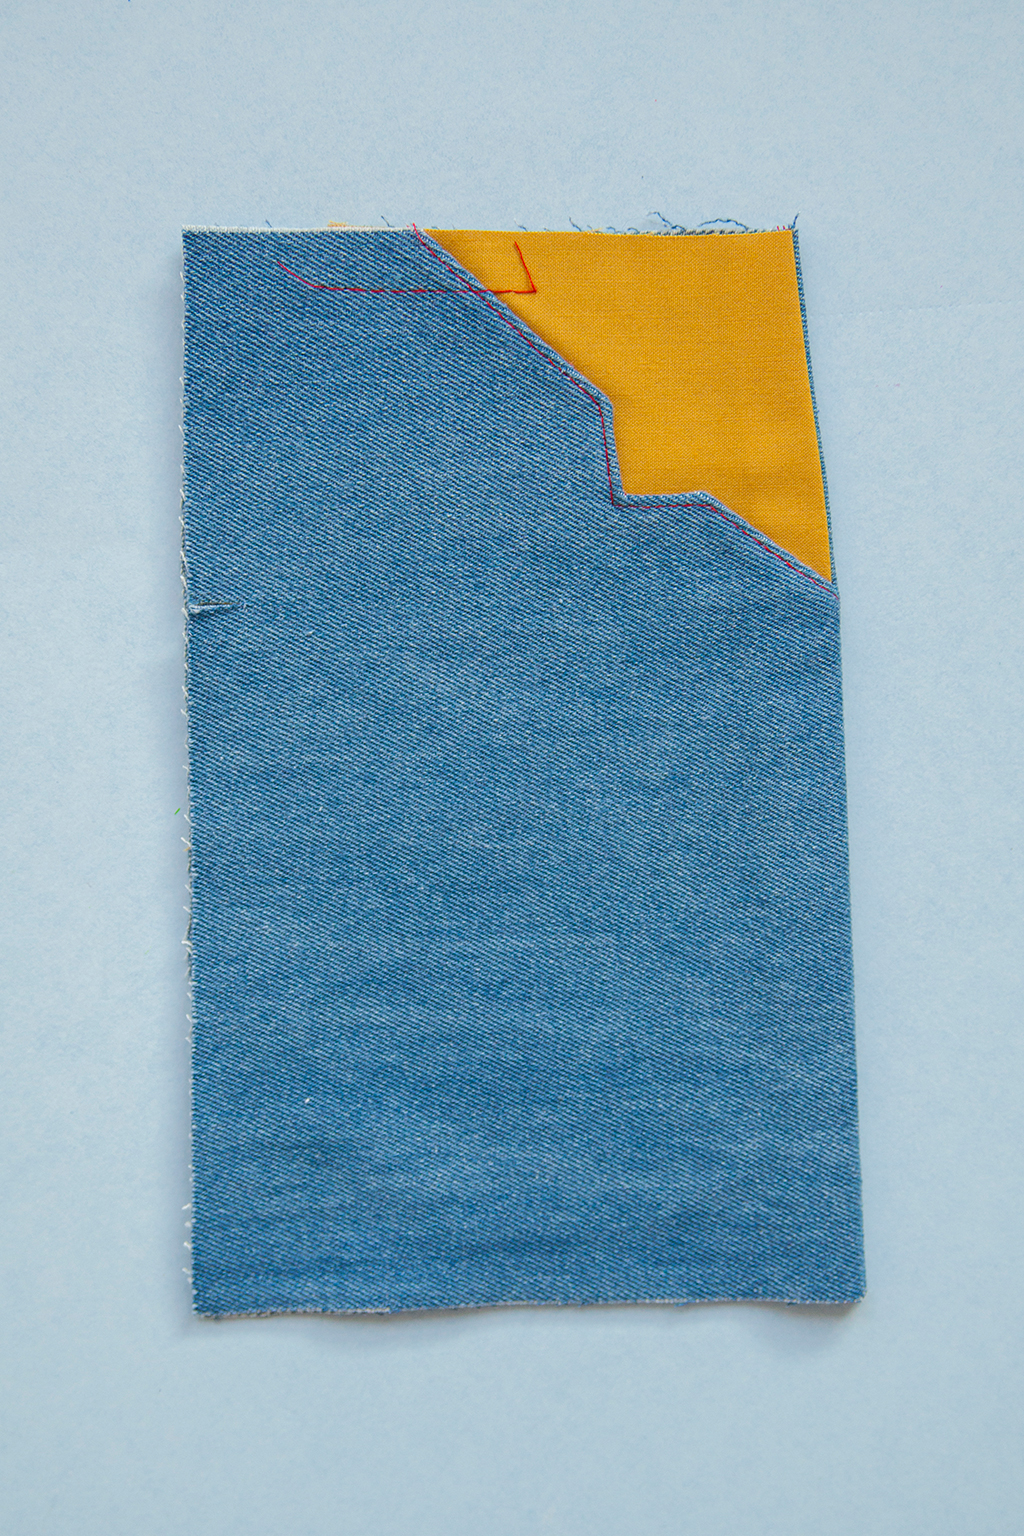
Follow the instructions for sewing the diagonal pocket. After sewing the front skirt to the pocket facing, clip the corners of the triangle for easier pressing.
Curved Pocket
Follow the instructions for creating the diagonal pocket bag and shell. Instead of drawing a straight diagonal line, use a French curve to connect the two markings at the waistline and side seam. Repeat these steps for the skirt front.
Cut one pocket facing and one unaltered inserted pocket bag for each pocket.
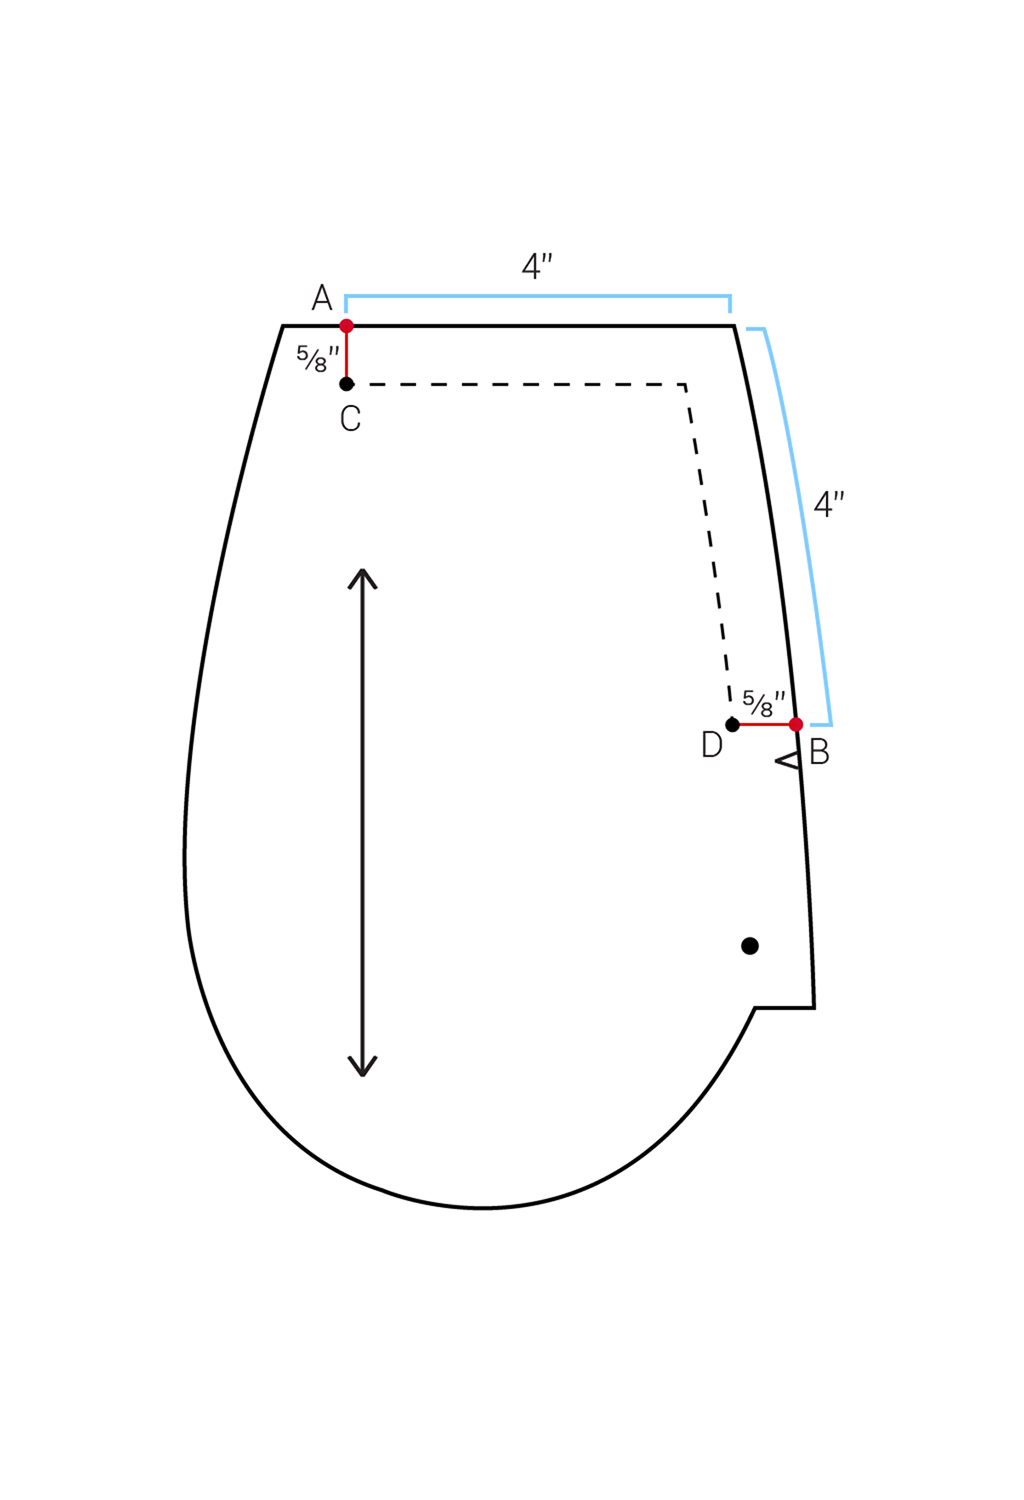
Western Pocket
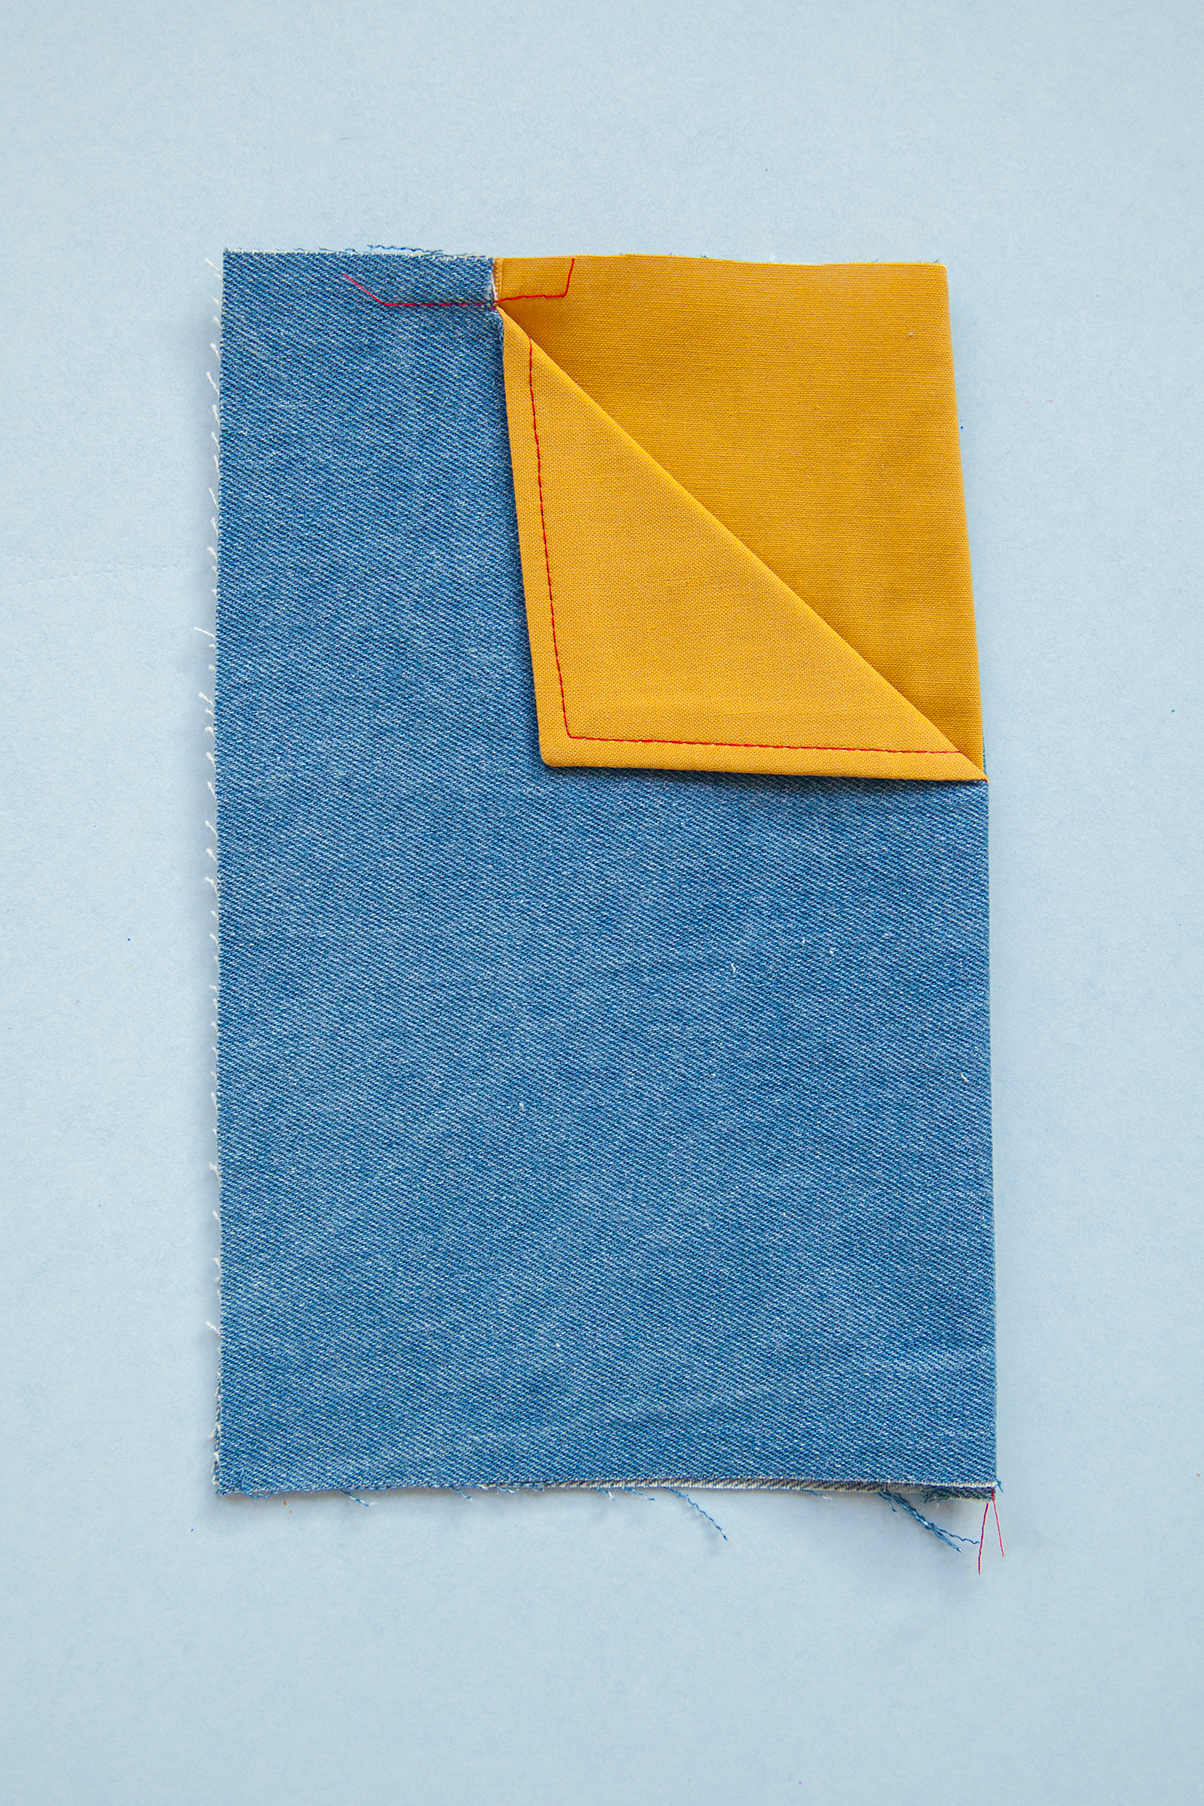
This is my favorite pocket!
To draft this pocket, start with the inserted pocket bag pattern. Measure 4” along the waistline from the side seam and mark. This is mark A. Measure 4” down the side seam from the waist and mark. This is mark B. Measure 5/8” in from mark A and mark, this is mark C. Measure 5/8” in from mark B and mark, this is mark D. These markings are the starting and ending points for stitching the pocket facing to the skirt front. Repeat these steps for the skirt front.
Cut one pocket facing and one unaltered inserted pocket bag for each pocket.
To sew, align the the pocket facing and the skirt front, right sides together. Pin. Sew from mark C to mark D, at a 1/2” seam allowance. After sewing the front skirt to the pocket facing, clip the corners of the triangle, turn the triangle flap right side out, and press the flap toward the hem. Continue to follow the instructions for sewing the diagonal pocket.
You could even add a button to the pocket flap for extra sweetness and vintage charm!

About the Author
Katie teaches new skills through in-depth tutorials, sewalongs, and articles for Seamwork Magazine and The Colette Blog. She’s all about encouraging sewers to try new techniques and create a personalized wardrobe that makes them feel great!