Sign In
Each month, Seamwork Magazine brings you wardrobe-building patterns along with inspirational articles and informative tutorials. Sewists tend to be detail-oriented by nature. We thrive when fussing over the perfect welt pocket or finding the perfect shade of thread to match.
Those times when we slow down and cherish the details are when we shine the brightest. Upgrade Your Sewing is dedicated to the small details that take your project to the next level. Whether it is a new seam finish or a fun embellishment, take the time to make your next me-made item one of a kind.

This month we take an in-depth look at how to prepare, assemble, and sew an exposed facing. Rather than hiding on the inside of the garment, an exposed facing is just that—exposed on the right side of the garment. This technique is perfect for the neckline of the Reggie dress or any garment that uses facings to finish raw edges. This finish may be difficult to achieve with an all-in-one facing. Try this technique on a simpler project before tackling a more advanced facing installation.
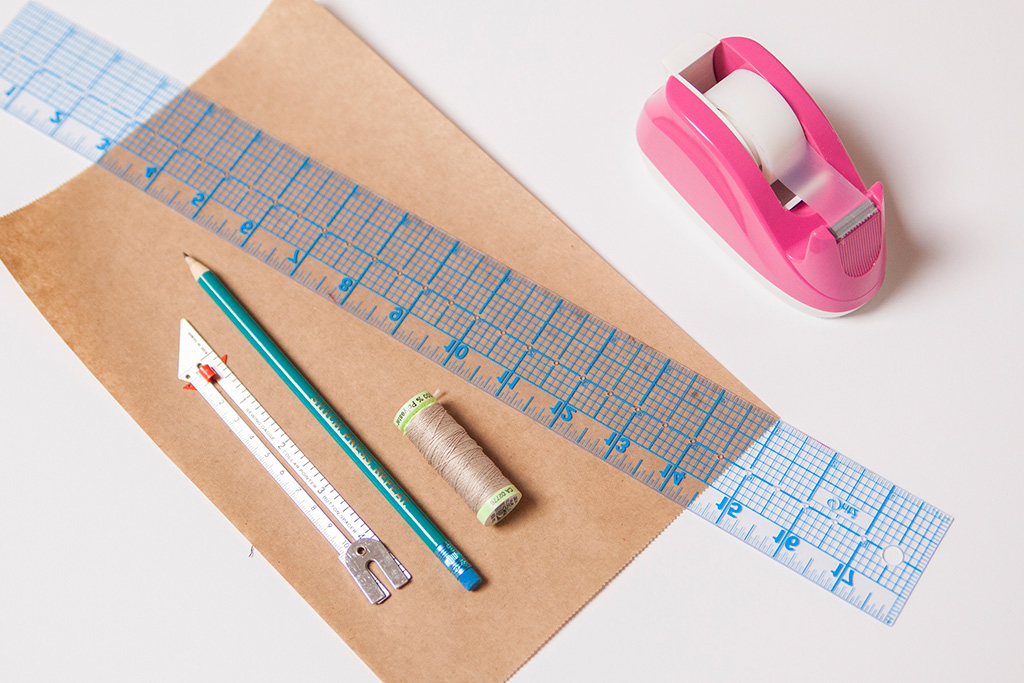
You'll Need:
- Reggie
- Topstitch thread
- Seam gauge
- Pattern paper
- Pencil
- Clear ruler
Prepare the Pattern
A hem allowance must be added to the bottom portion of the facing to ensure that your facing is still the correct width when finished. This hem allowance will be turned under and topstitched in place in later steps.
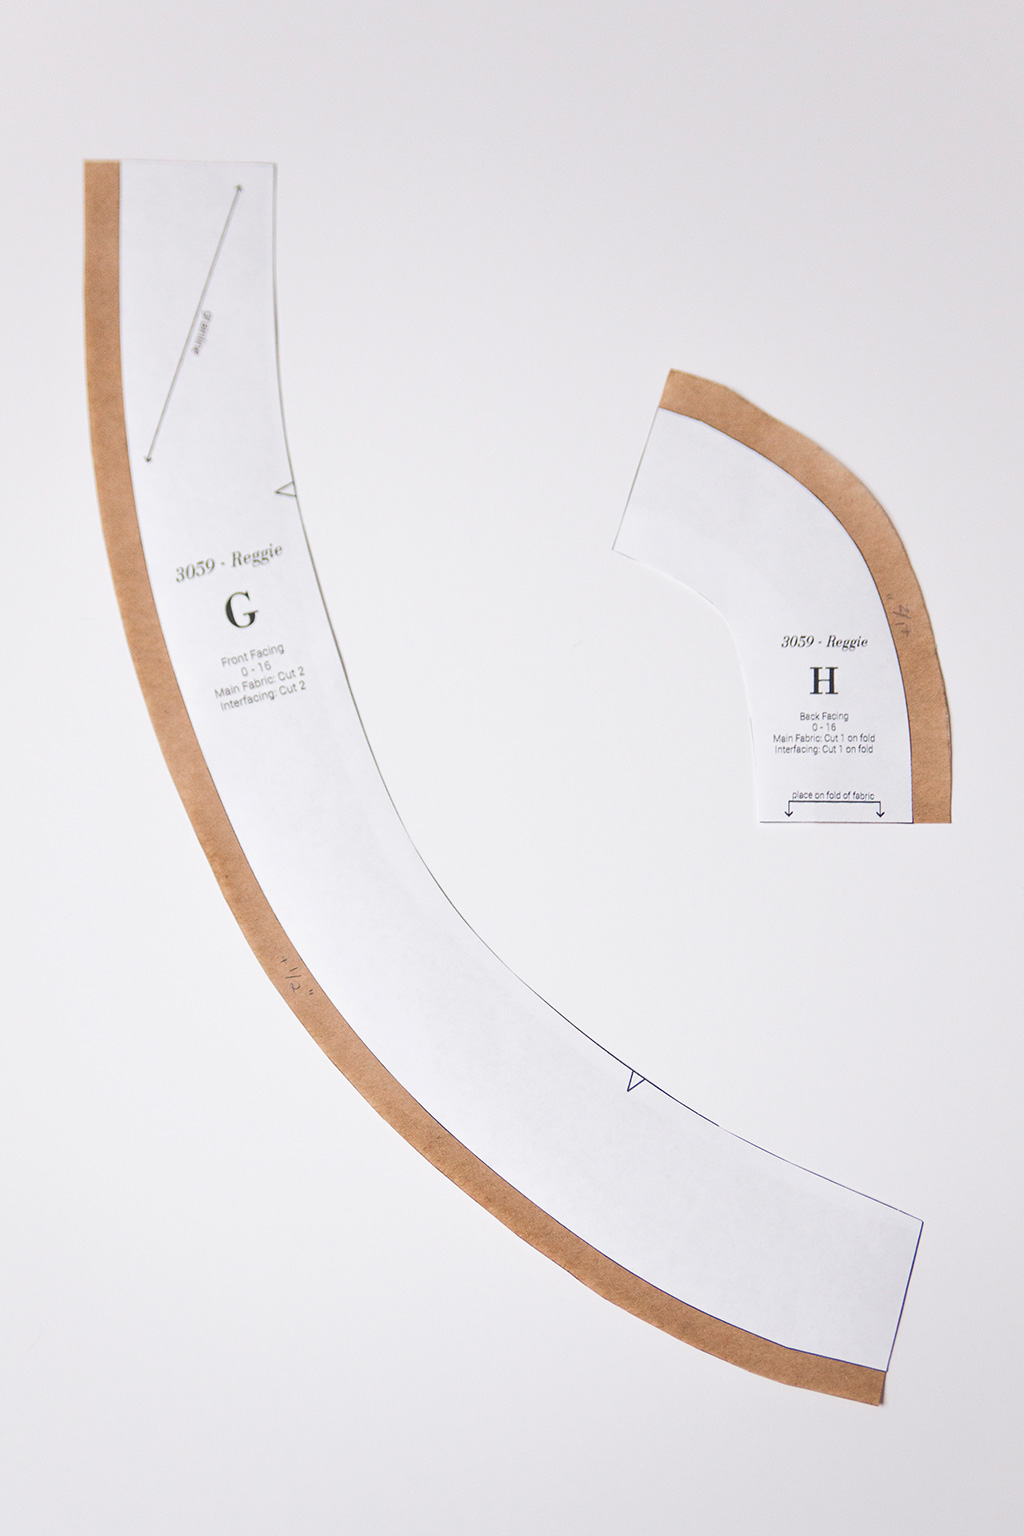
Cut the Pattern
The instructions for Reggie and most commercial patterns advise to cut the facings on the wrong side of the fabric. To have the exposed facing on the right side of the fabric when the garment is finished, all of the facing pattern pieces need to be cut on the right side of the fabric.
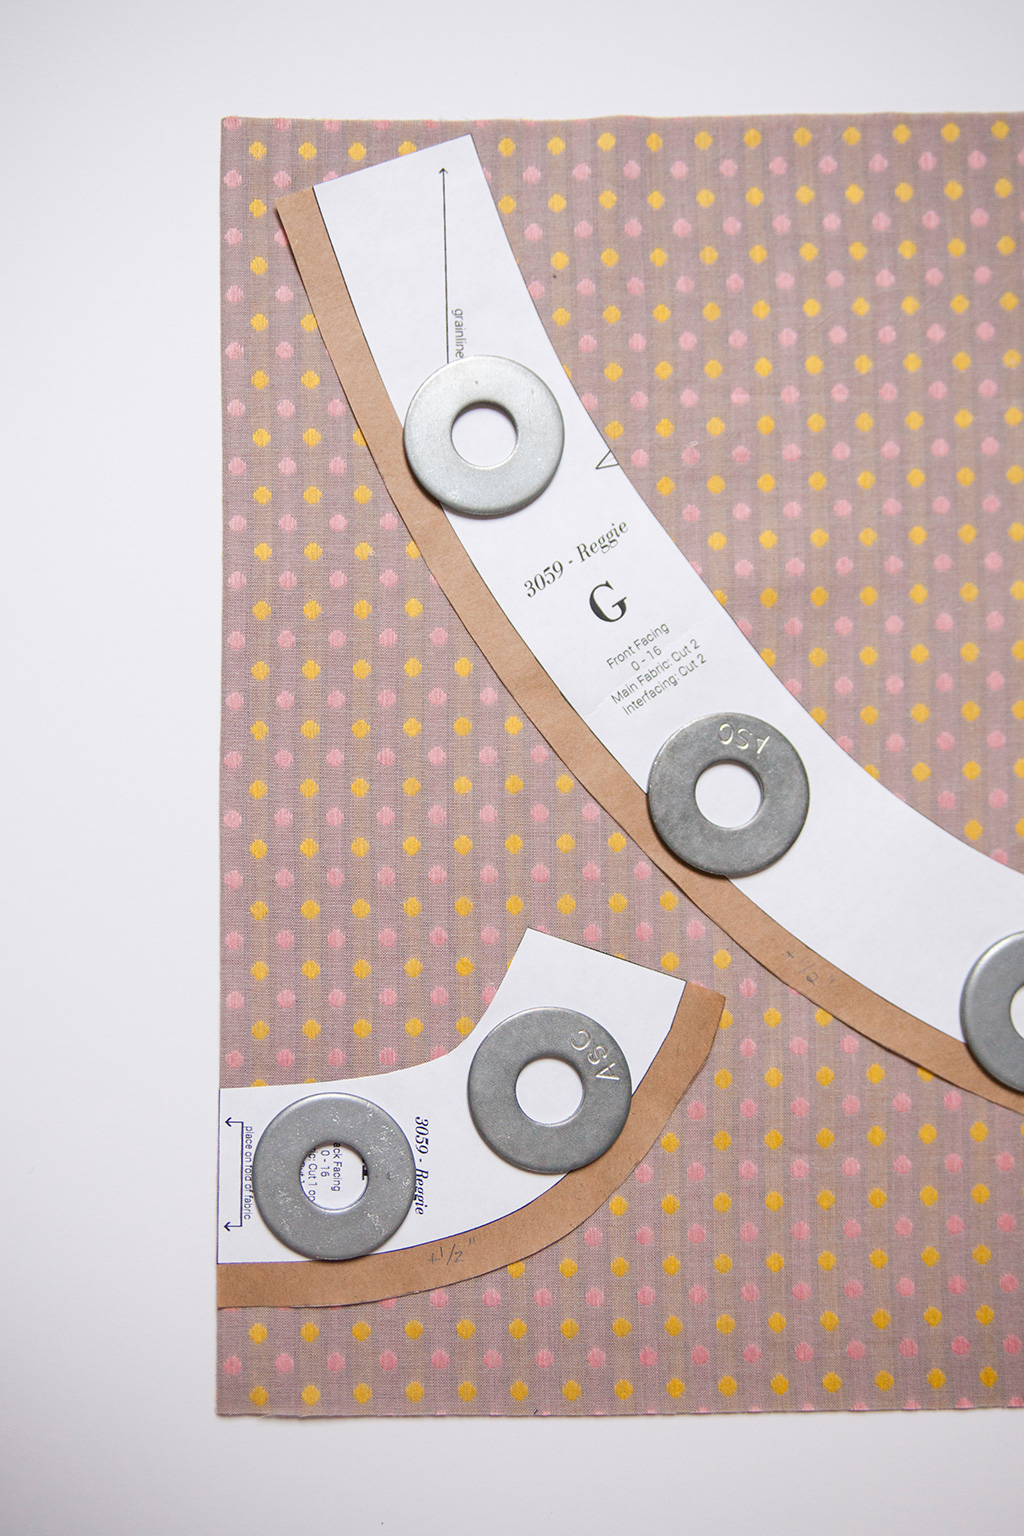
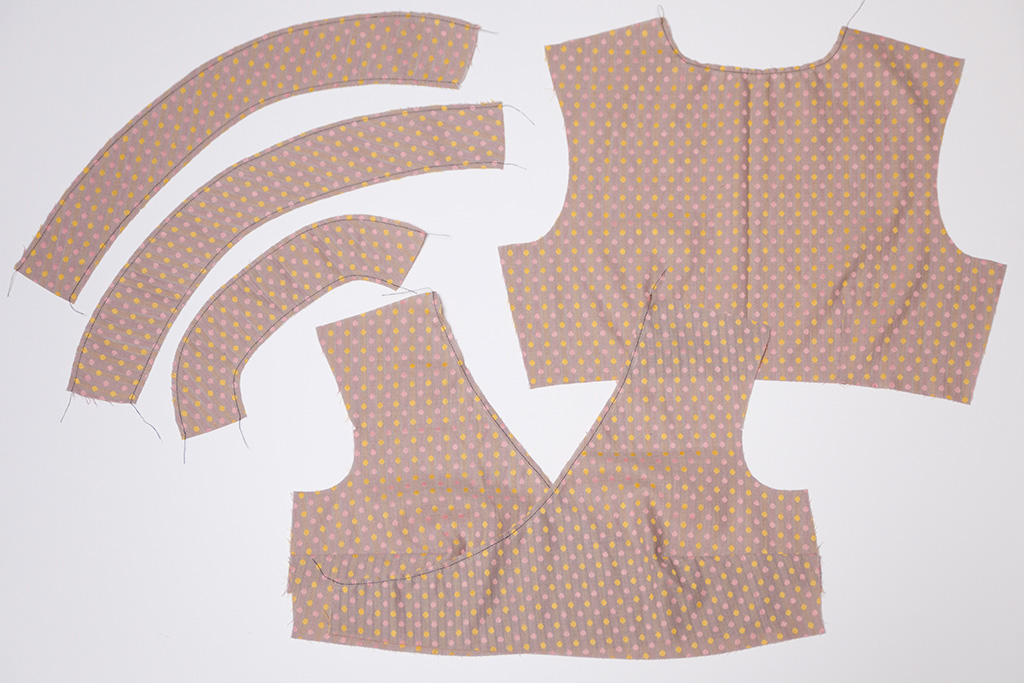
Fold the fabric with wrong sides together and place the pattern pieces on the right side of the fabric. Cut two front facings and one back facing. Follow the original cutting instructions for the remainder of the garment’s pattern pieces.
Staystitching
Raw edges that are cut across the bias are prone to stretching. Staystitching stabilizes a piece of fabric before it is sewn to prevent it from being stretched or distorted. The standard is to sew 1/8″ away from the sewing line, so if your seam allowance is 5/8″, then stitch 1/2″ away from the raw edge.
When creating an exposed facing, staystitch both the upper edge of the facing as well as the lower edge. By staystitching both the upper and lower edges, the entire facing piece will be stabilized, making it much easier to create a consistent facing width in later steps.
Staystitching Tip
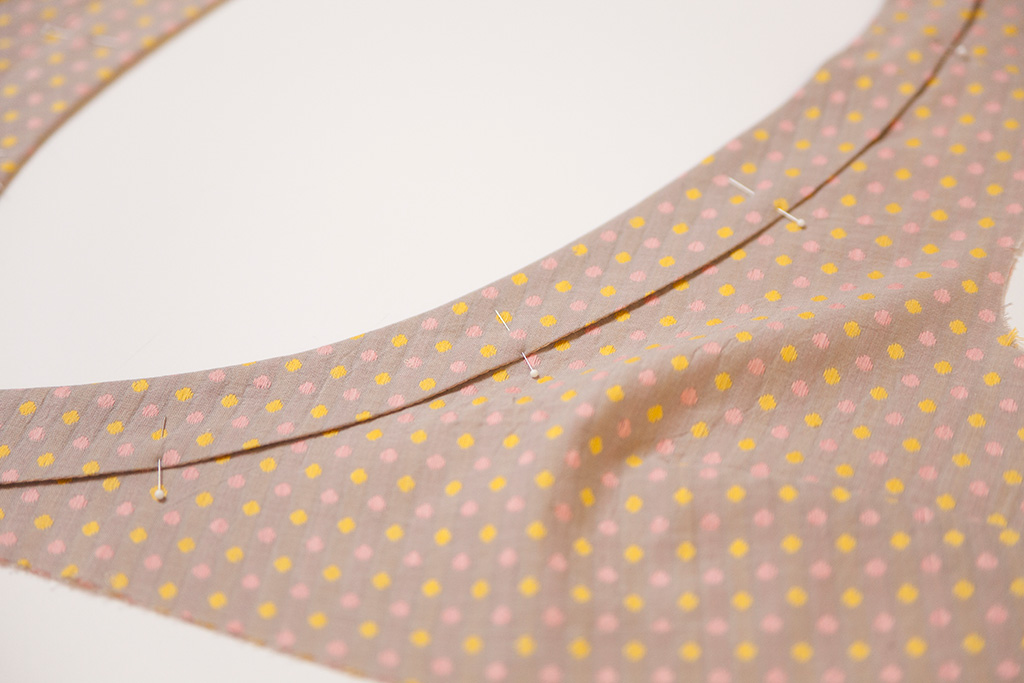
For curved areas such as necklines, stitch from the outer edges toward the center. For example, when staystitching a neckline facing, begin at one shoulder and sew to the center front. Cut the thread, then sew from the second shoulder to the center front. Staystitching each side separately keeps any amount of stretching balanced on both sides of the garment.
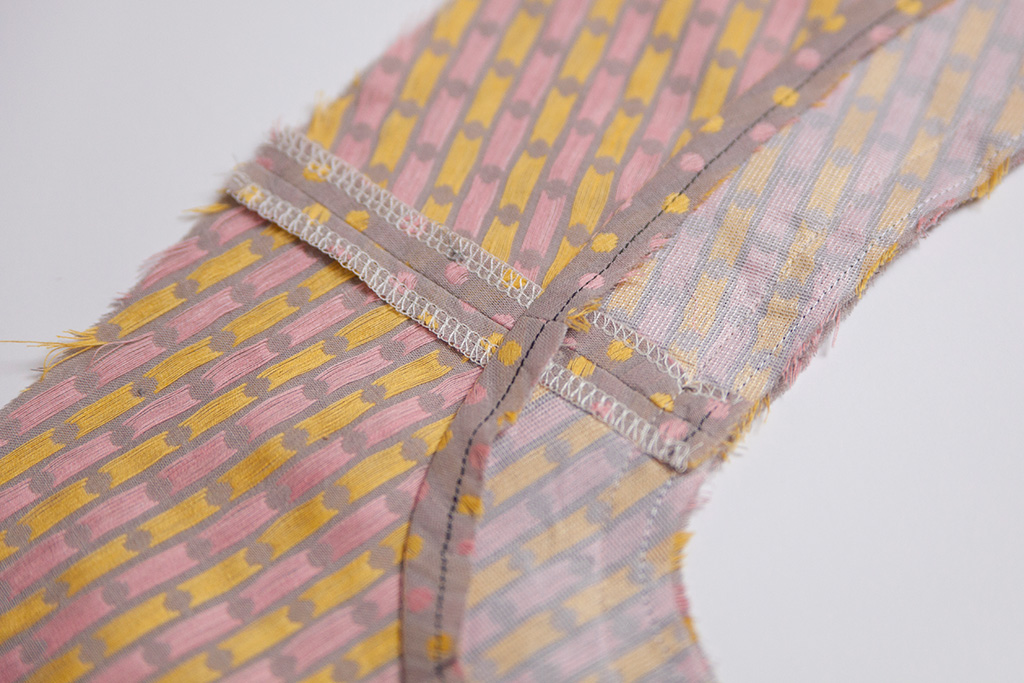
Assemble the Facing

With right sides together, match one front facing (G) to the back facing (H) at one shoulder seam. Pin. Stitch. Finish the seam allowances separately and press open. Repeat for the other shoulder seam.
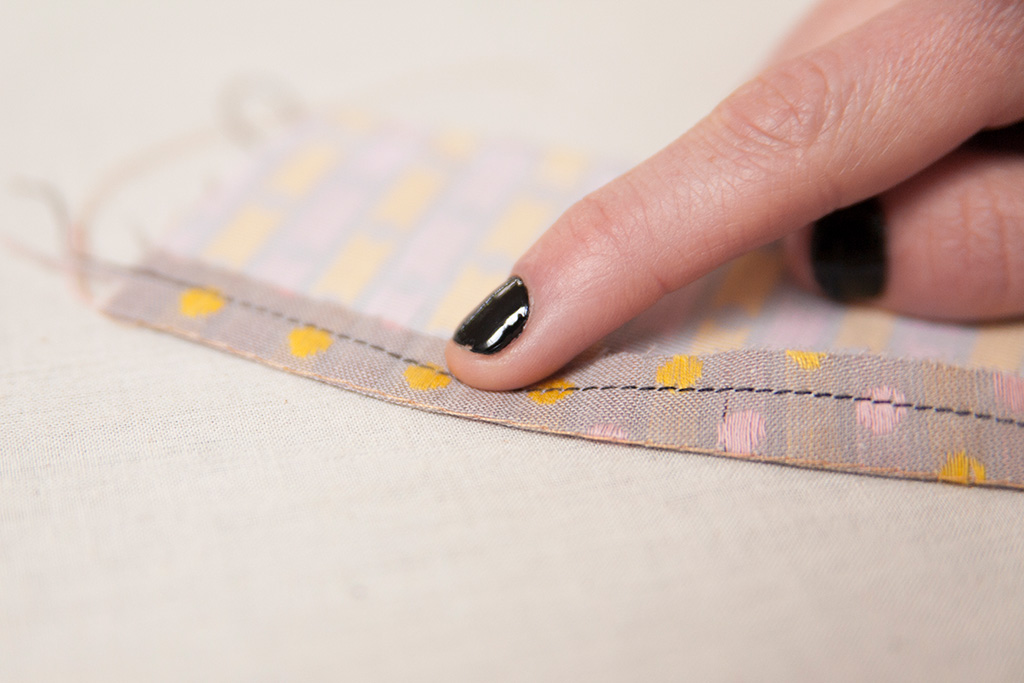
Fold the bottom edge of the facing unit to the wrong side 1/2”. Press.
Small Hem Tip
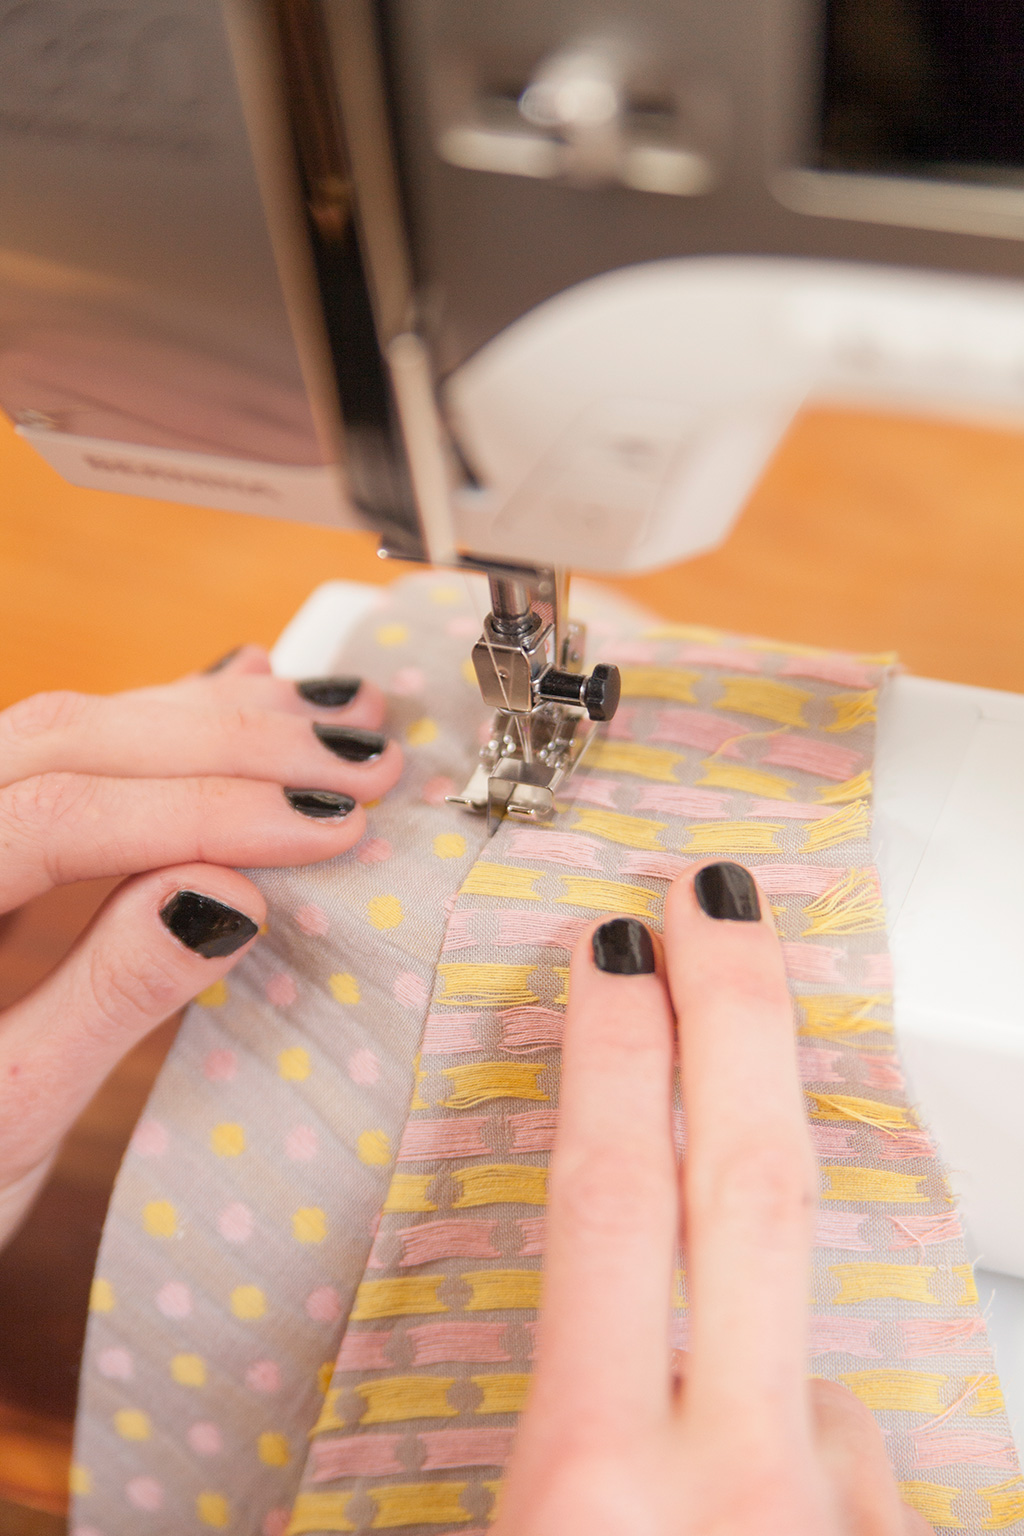
To make folding a small hem easier, start by sewing a row of basting stitches at the fold line. While pressing the hem, the basting stitches will provide a guide that will allow for more uniform edges.
Attach the Facing
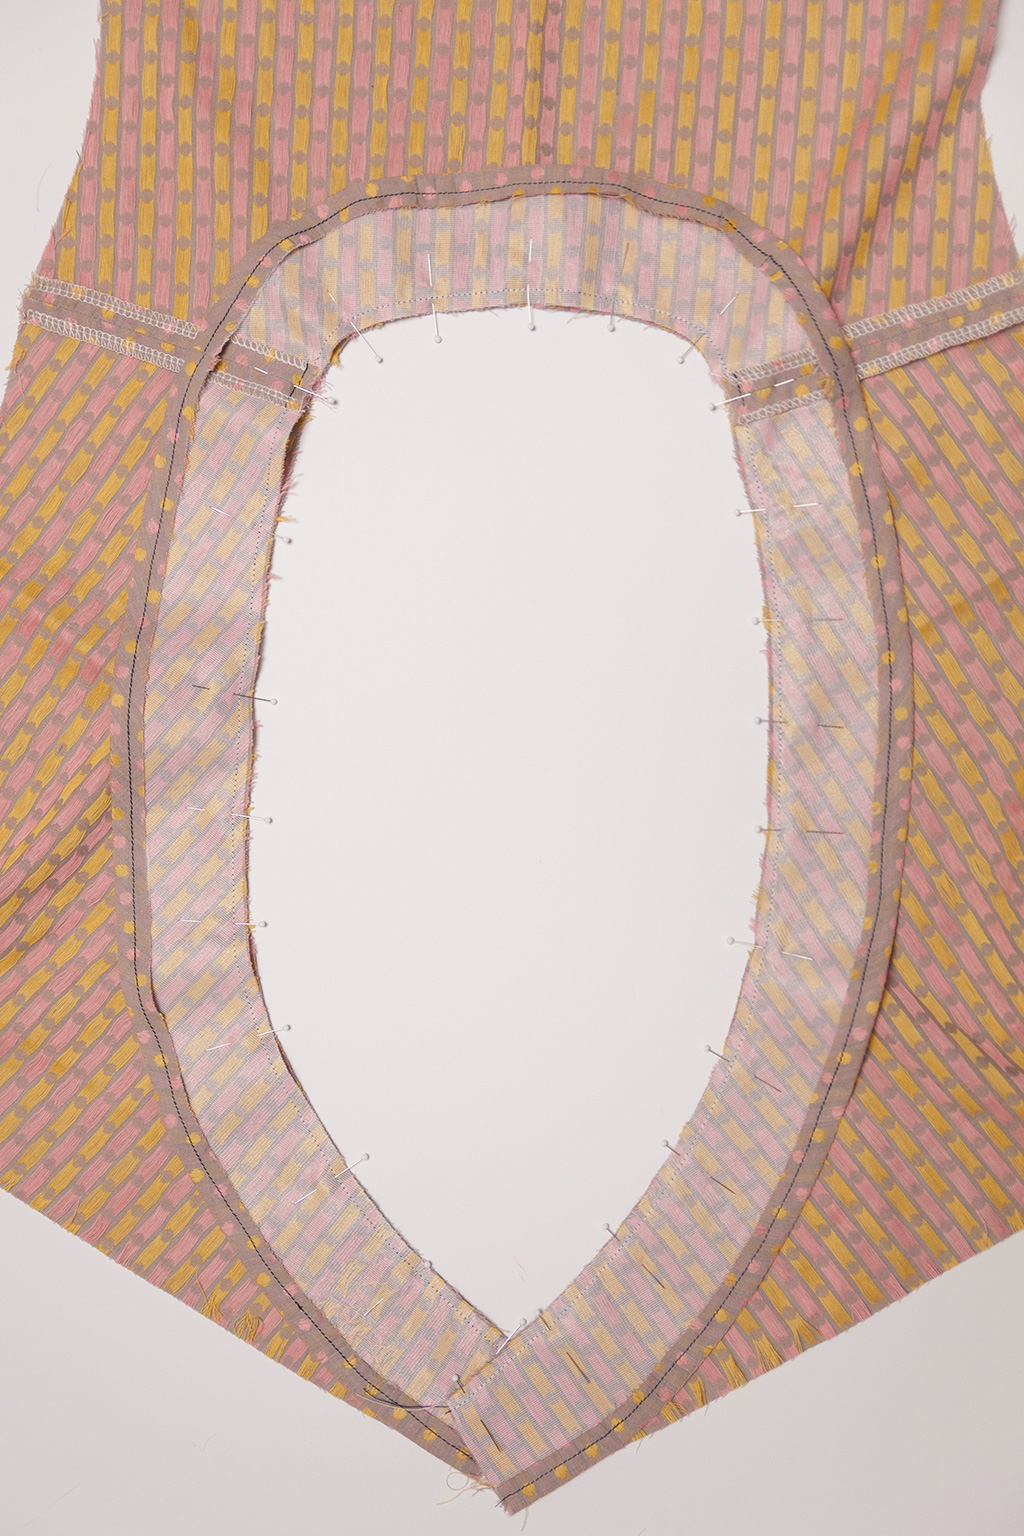
Step One
After sewing the shoulder seams, match the right side of the facing unit to the wrong side of the bodice at the neckline, aligning the center back, short edges, and shoulder seams. Pin.
Step Two
Stitch the facing to the bodice neckline at a 5/8” seam allowance. To avoid stretching the neckline, start sewing at the center back and sew down to the side seam on one side. Clip the threads and repeat for the opposite side of the neckline.
Step Three
Trim and grade the seam allowances. Press the seam allowance toward the bodice unit. Understitch along the bodice unit, catching the seam allowances underneath. You won’t be able to stitch all the way to the front bodice corners, but get as close as you can.

Step Four
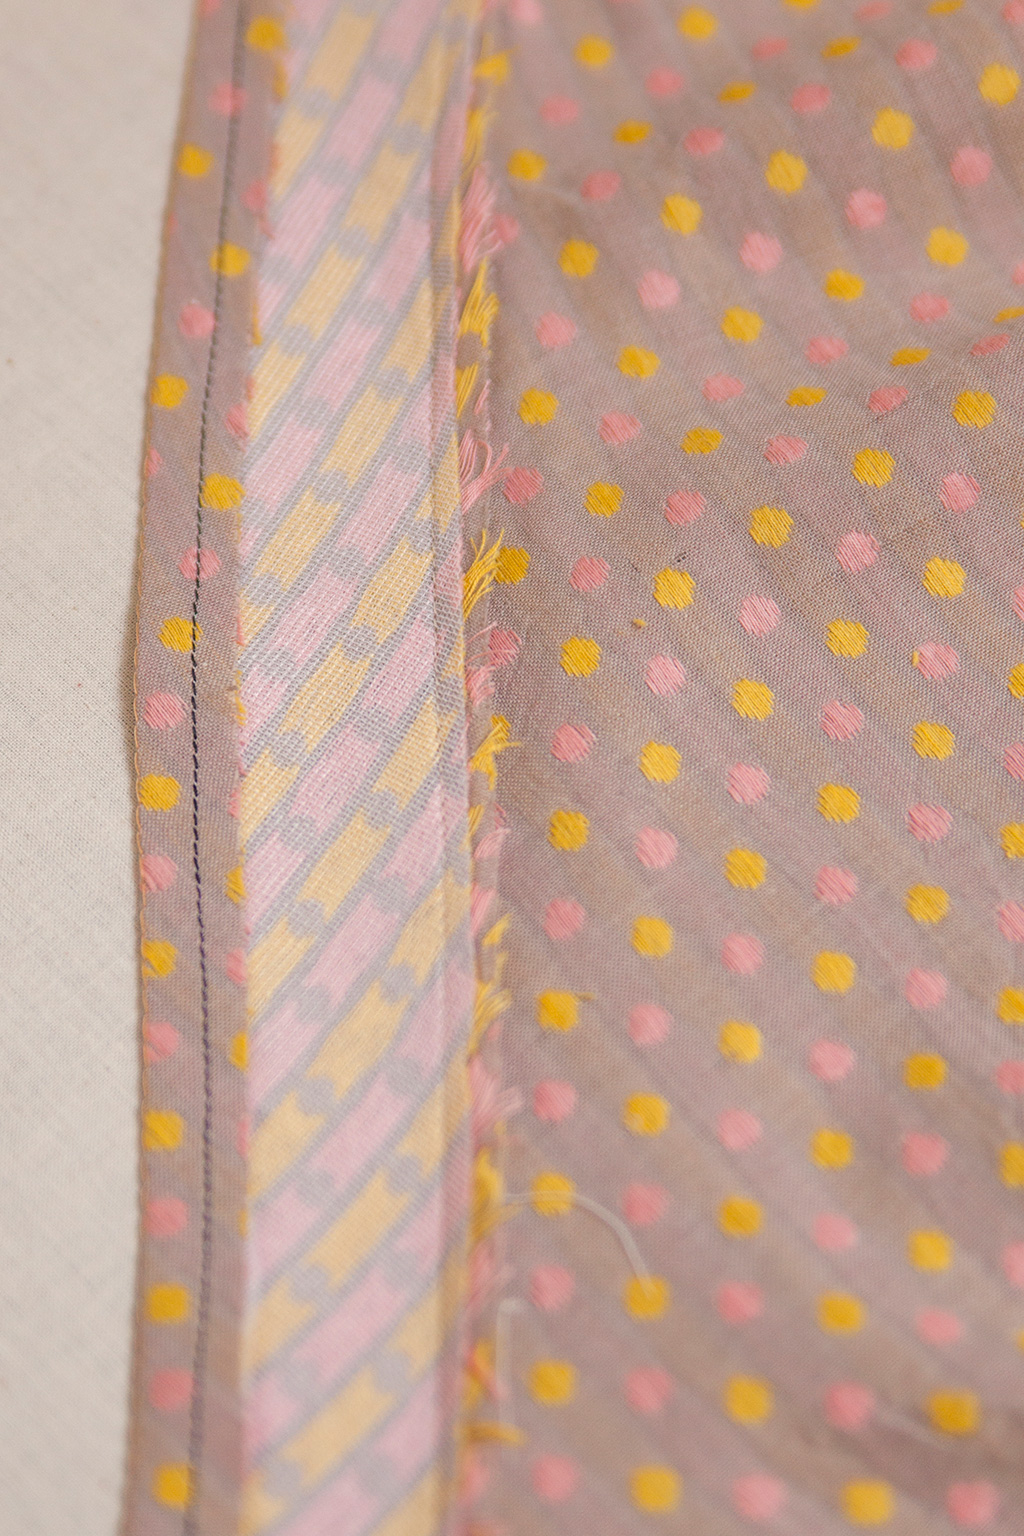
Turn the facing unit to the outside of the bodice unit. Neatly press in place.
Step Five
Pin the facing to the bodice along the outside edge of the facing. Edgestitch the facing to the bodice along the folded edge. Press.

About the Author
Katie teaches new skills through in-depth tutorials, sewalongs, and articles for Seamwork Magazine and The Colette Blog. She’s all about encouraging sewers to try new techniques and create a personalized wardrobe that makes them feel great!