Sign In
Zipper flys are tricky. A bunch of pattern pieces have to be wrangled into a highly functional part of a pair of jeans, which also needs to withstand the stress of your movement throughout the day. No wonder flys are intimidating!
Luckily, we have the help of an industrial sewing expert. Dawn Moothart, founder of Portland Apparel Lab—a member-based makerspace for the apparel community—can sew a zipper fly in a few minutes. It helps that she doesn’t use pins while she sews (you can read more about that here) and it helps that she’s got a wealth of industrial machines at her fingertips. Even so, Dawn assures that these same techniques can be used on any home sewing pattern. If your pattern pieces don’t look exactly like the pieces used in this tutorial, they are easy to adapt with the notes below!
How to use this tutorial
Dawn’s tutorial uses industrial techniques to sew a quick zipper fly at home. We’re using some of Dawn’s language throughout, in addition to her tips for skipping pins—but you can use pins or clips if you need them.
Since this technique can be applied to any zipper fly, the pattern pieces will be described as the wearer’s left side (WLS) or the wearer’s right side (WRS). Unless otherwise noted, use a seam allowance that is 1/8” shy of your pattern instructions. This will allow for turn of cloth and help with certain construction steps.
If you want to use this tutorial for the Tessa jeans, you just need to make a few simple adjustments to the pattern. Follow these instructions for altering your pattern pieces and drafting a fly guard and fly facing.
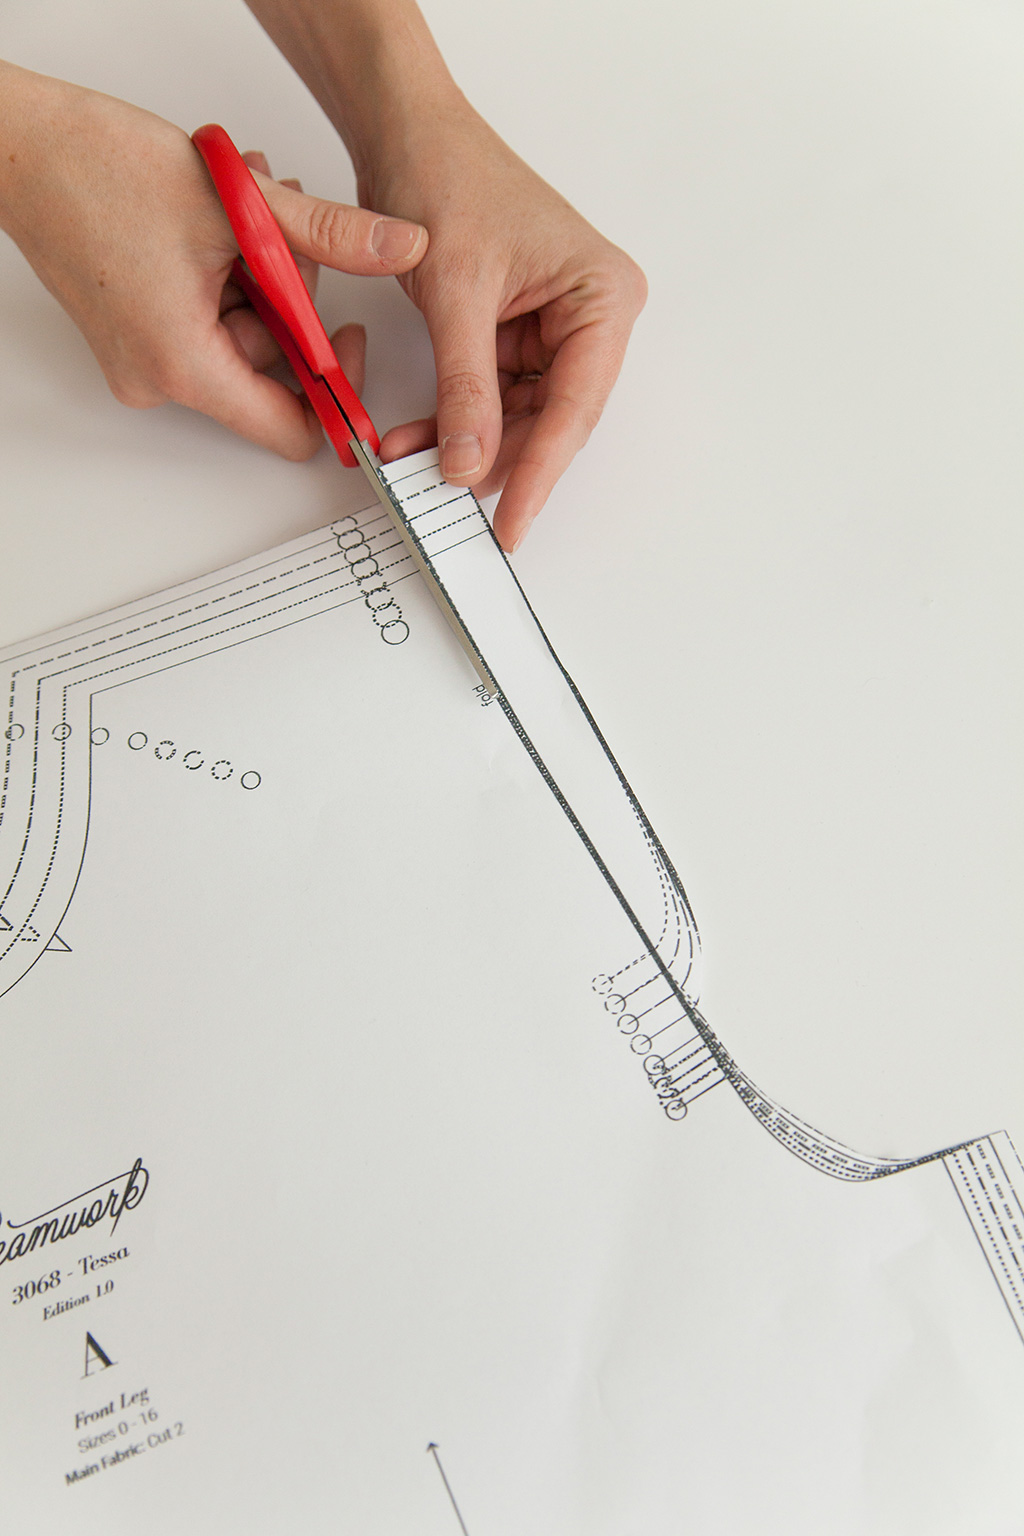
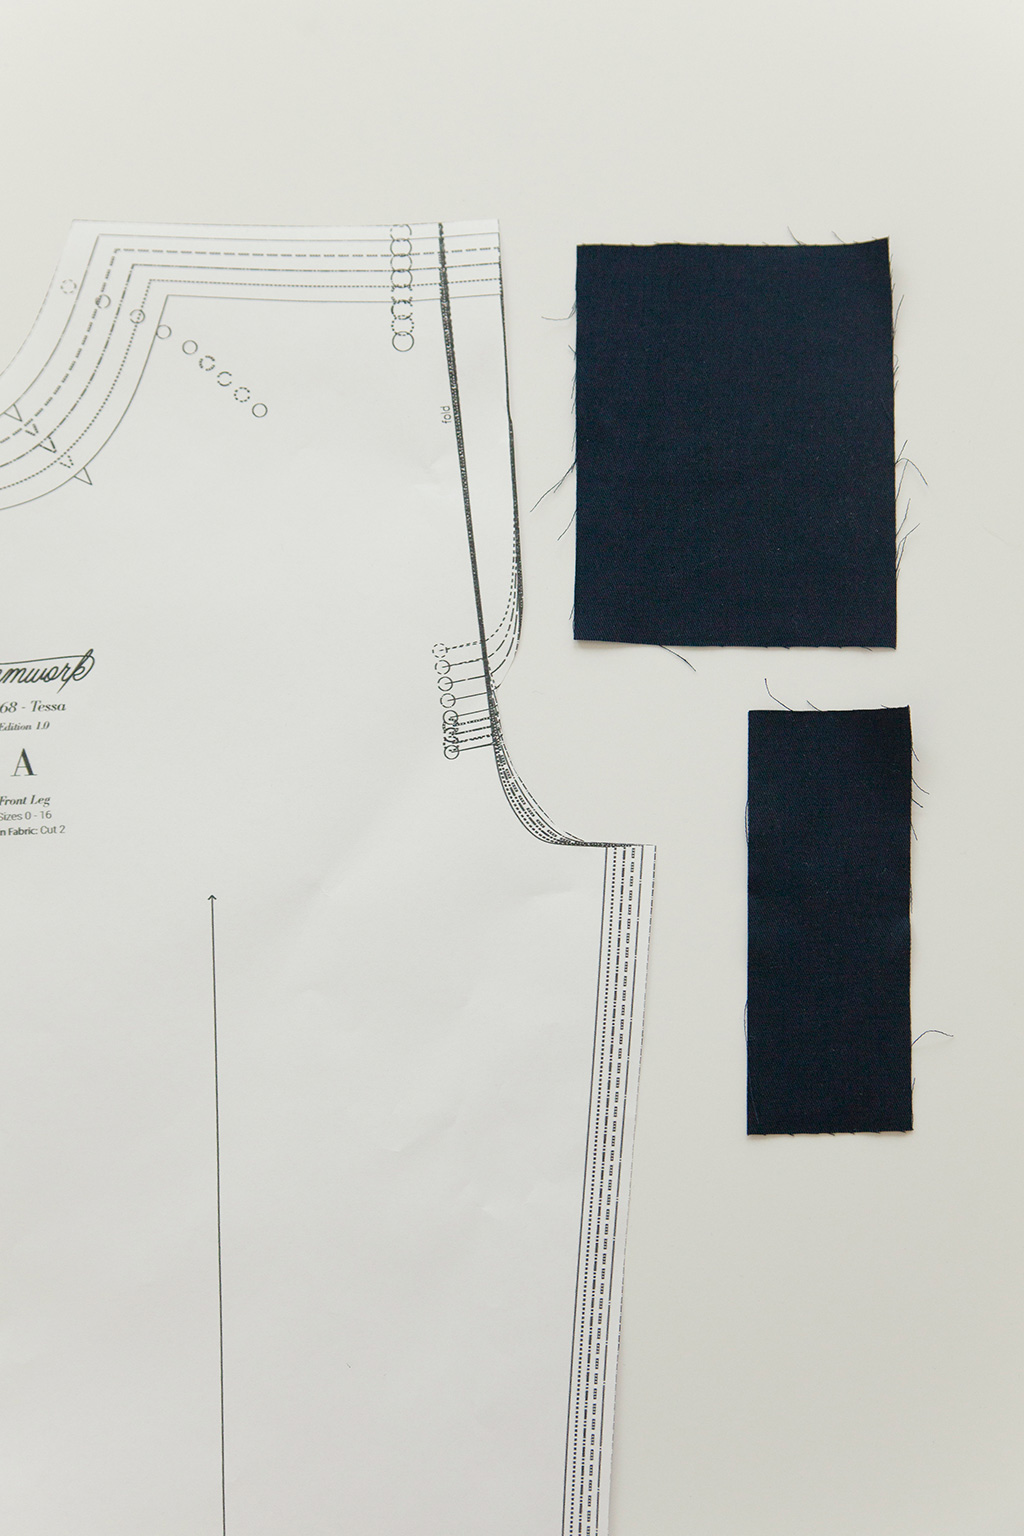
If your pattern looks different from this tutorial, or to use this technique for the Tessa jeans pattern—pictured above—you need to draft a fly facing and a fly guard. The fly facing covers the zipper from view. It should be the length of the zipper plus 1” and 2 3/8” wide. The fly guard sits between the wearer and the zipper. It should be the length of the zipper plus 1” and 4 3/4” wide. If your pattern piece has a fly extension—like on the Tessa jeans pictured above—trim the center front extension off the WLS, along the fold line.
Prepare the pieces
1. Apply fusible interfacing to the wrong side of the fly guard and fly facing pieces. Apply a 1/2” strip of fusible interfacing to the wrong side of the WRS of the pant front, at the fly edge.
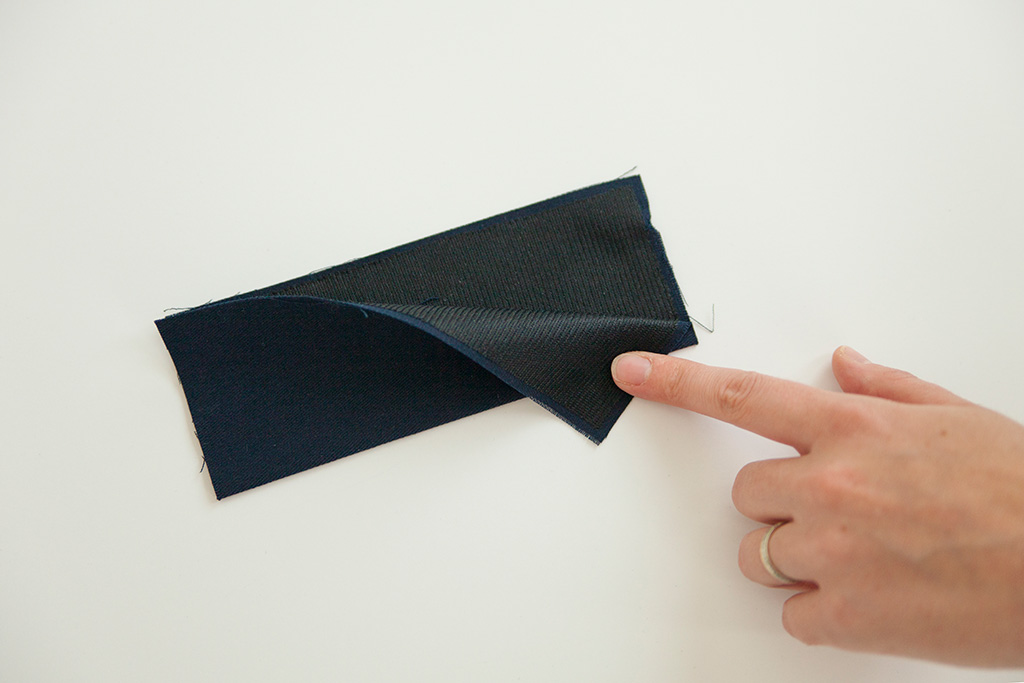
2. With wrong sides together, press fly guard in half.
Industrial sewing tip
Keep your pressing station next to, and at the same level, as your sewing machine. If all of your tools and machines are accessible from your chair, you’ll save time and energy.
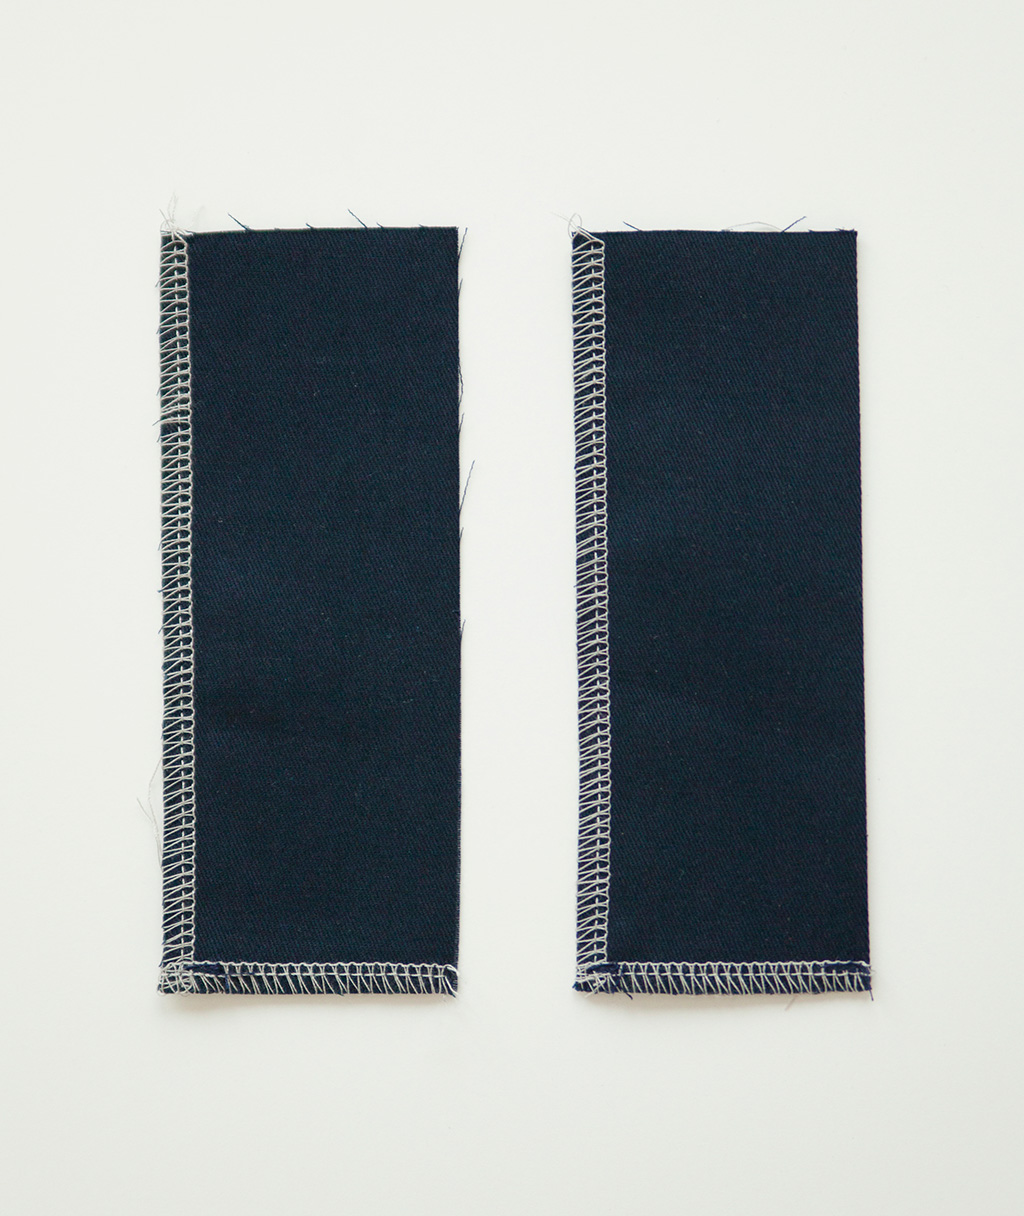
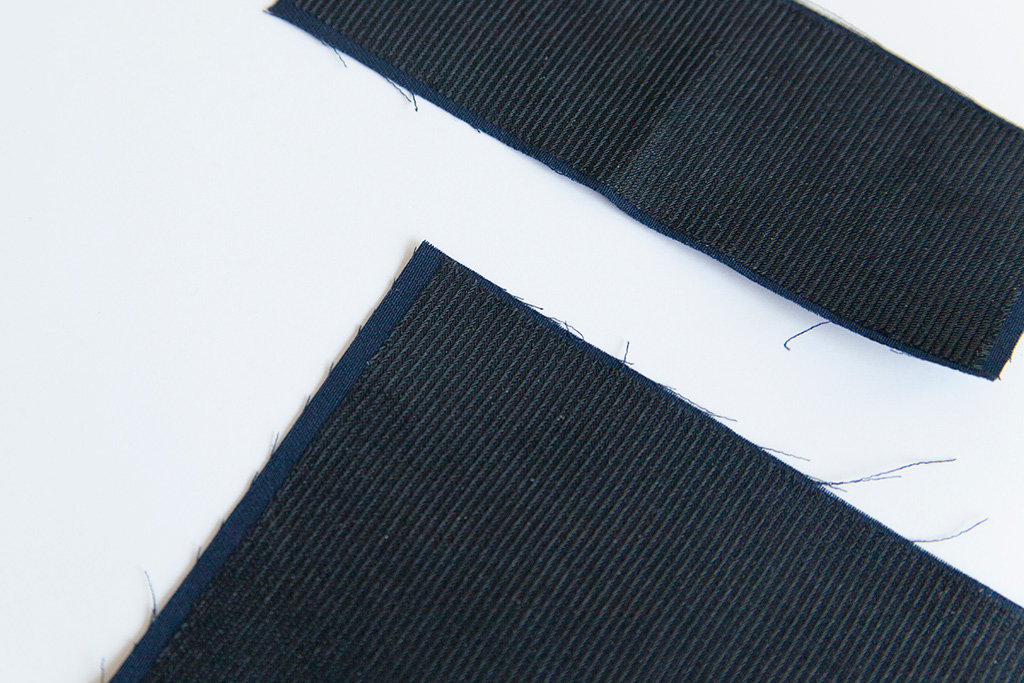
3. Using a serger or zigzag stitch, finish one long edge and one short edge of the fly facing and fly guard.
Industrial sewing tip
Tack your serger tails down using a straight stitch on your machine. Just stitch once or twice and backstitch. This prevents the serger tails from unraveling.
Install the zipper
Industrial sewing tip
Install your zippers as early in construction as possible, before sewing the pant legs, waistband, or pockets. It’s easier to insert zippers while the pattern pieces are flat, and if you make a mistake, it’s much easier to start over.
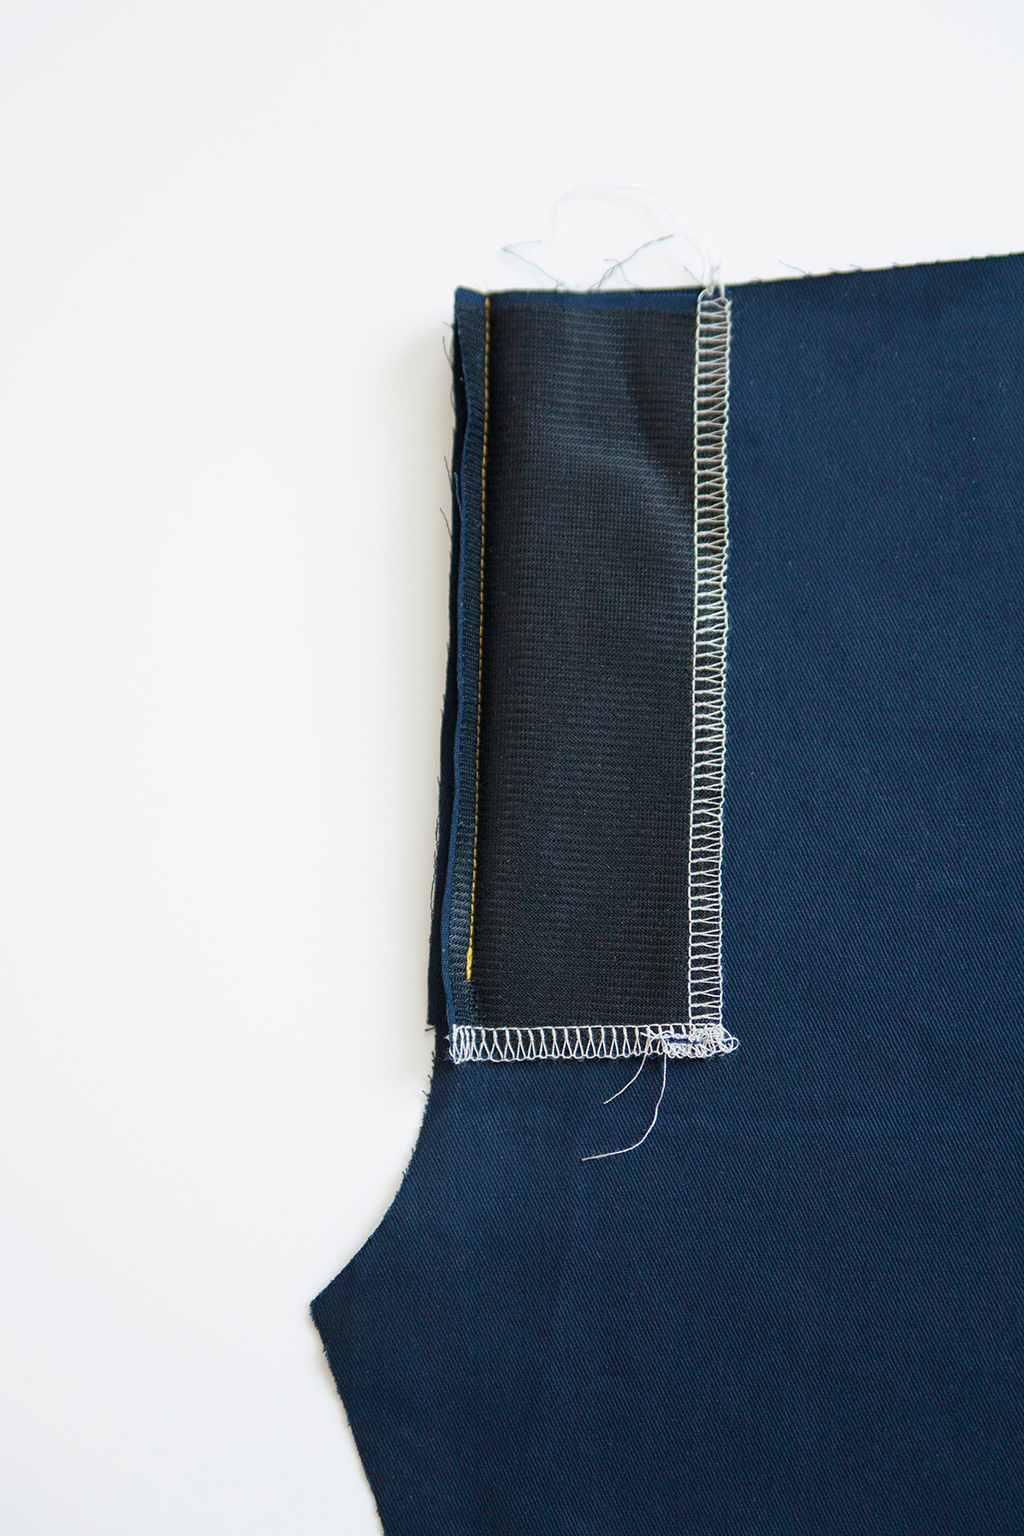
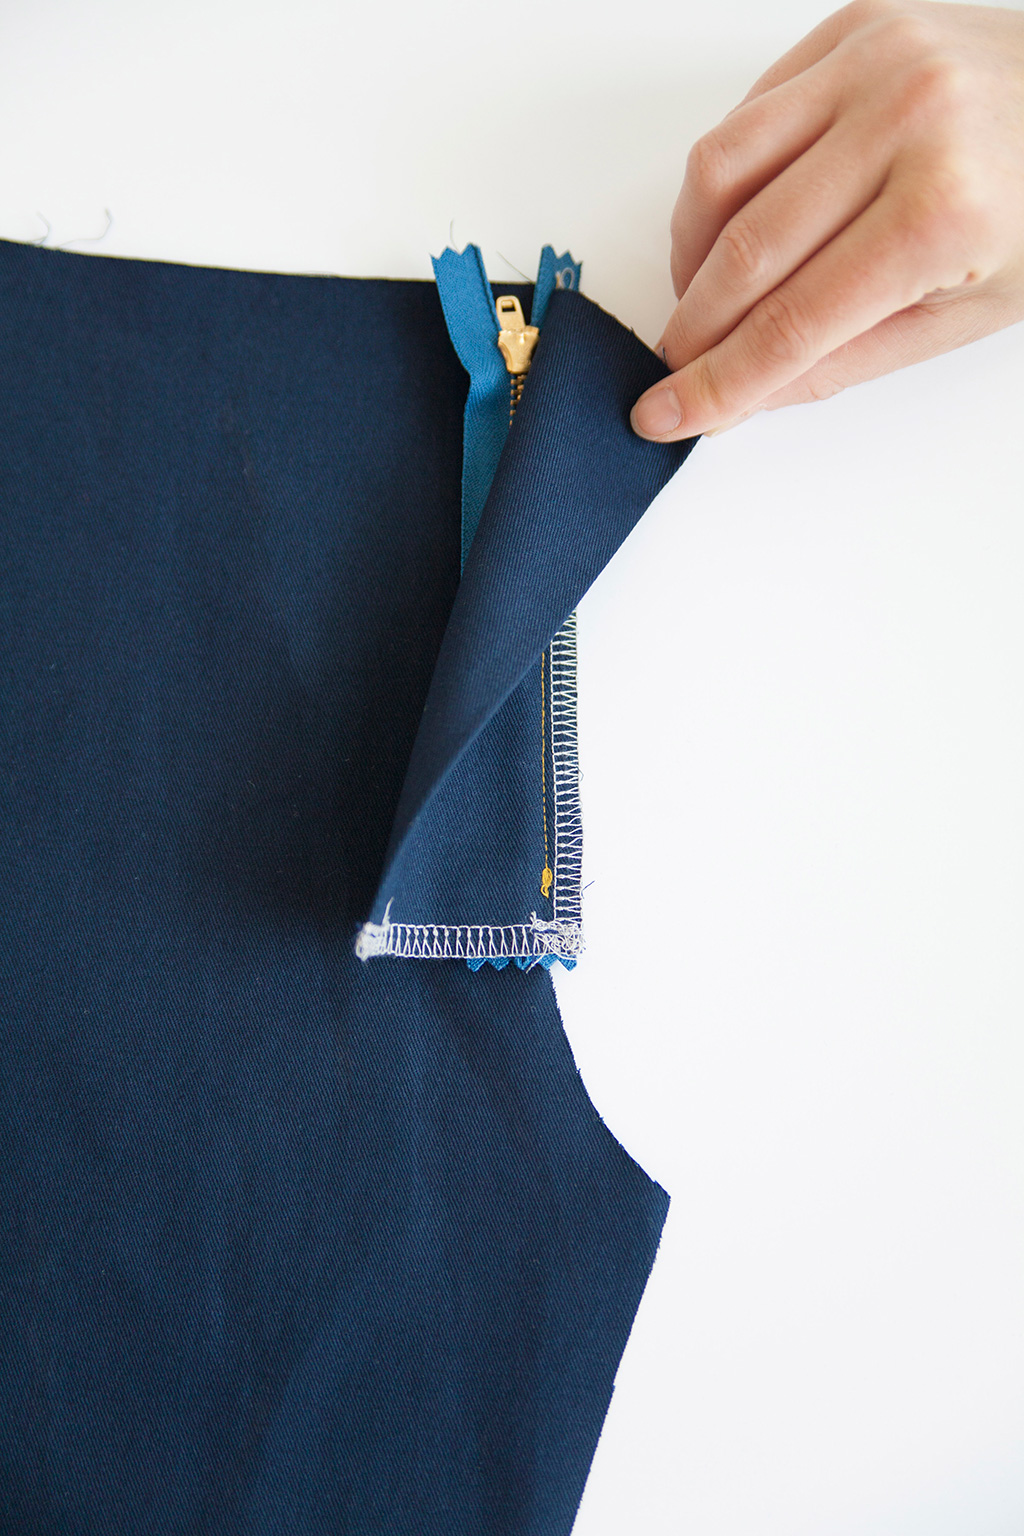
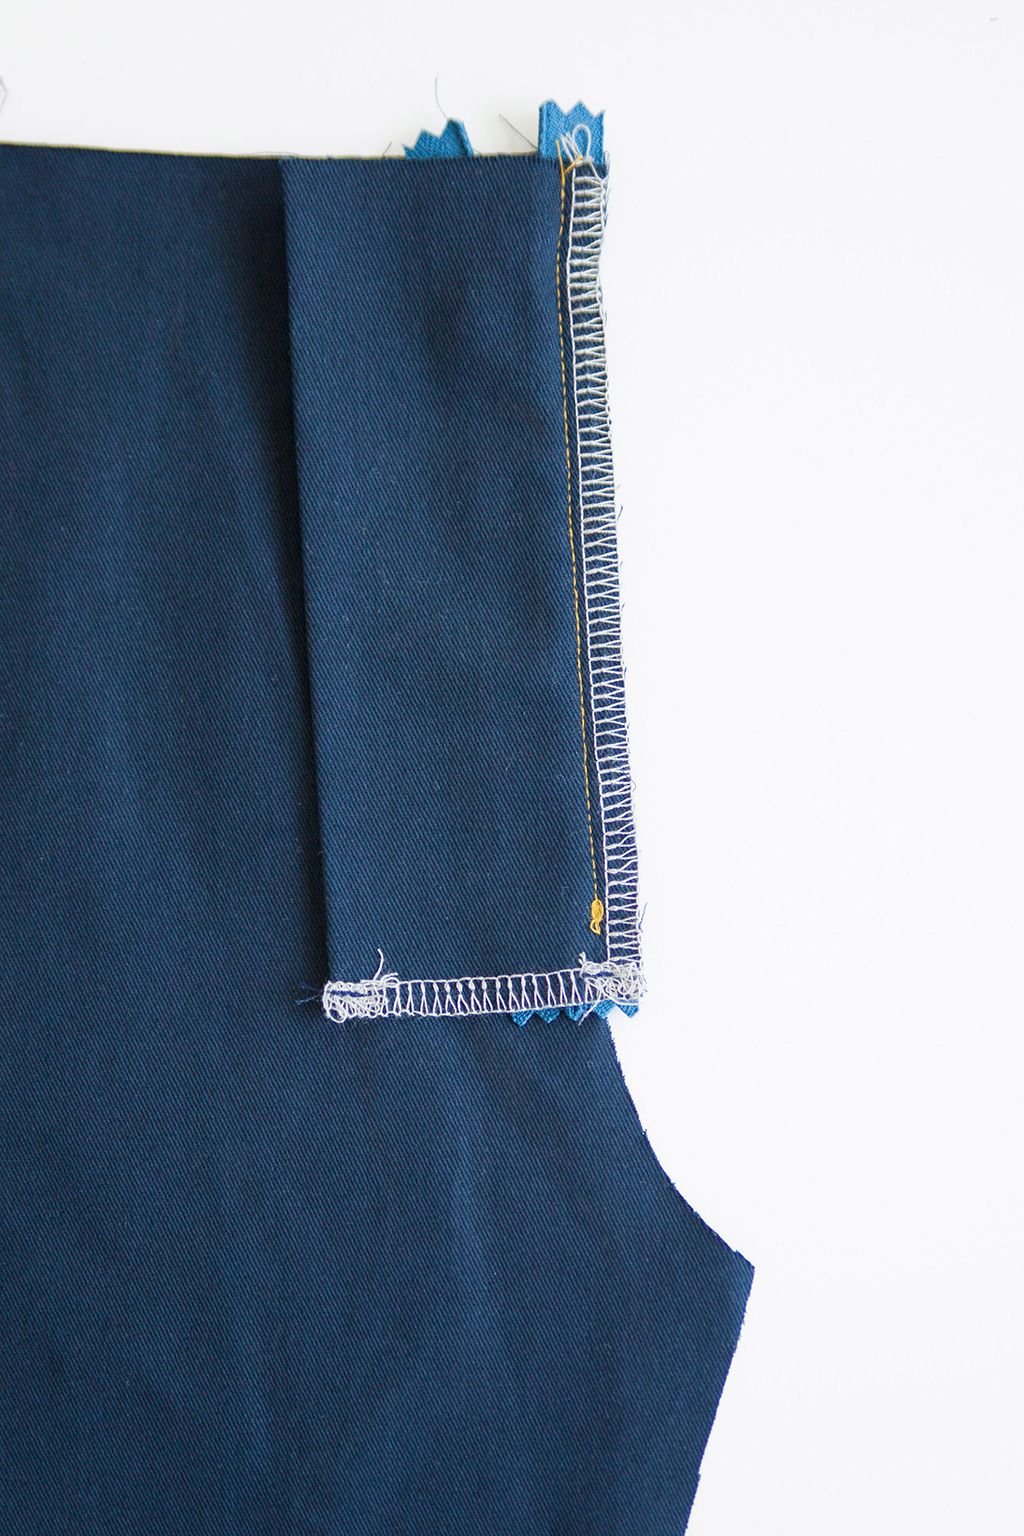
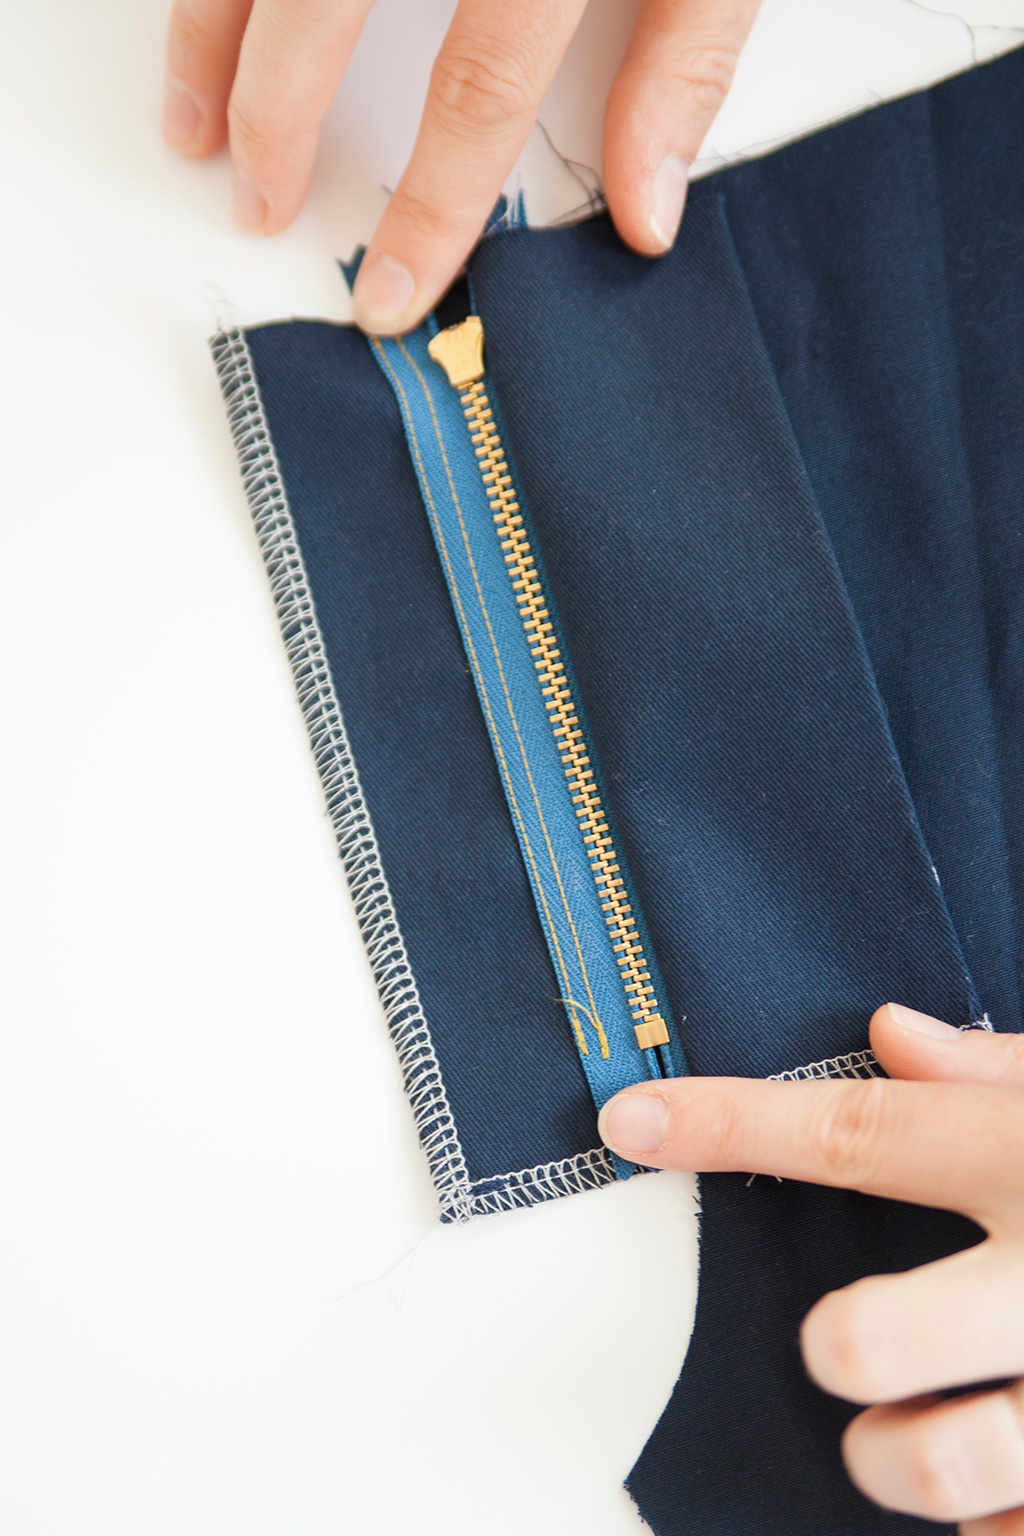
1. With right sides together, sew the fly facing to the WLS pant front. Stop stitching 1/2” shy of the bottom of the fly facing. Press the fly facing to the inside of the garment.
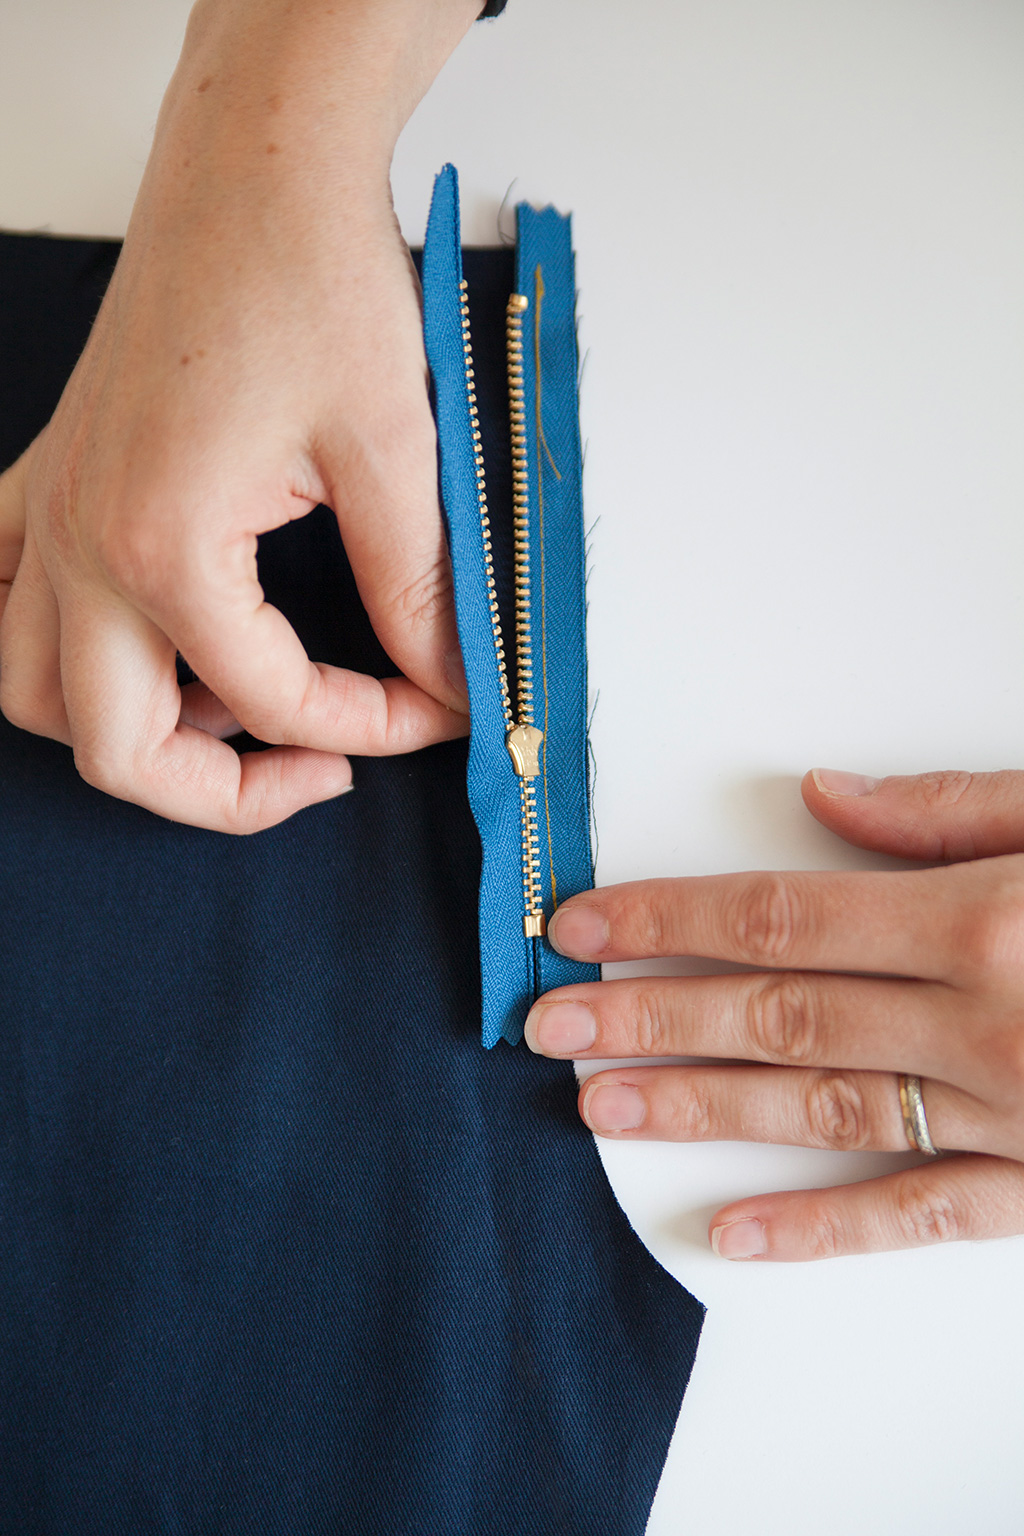
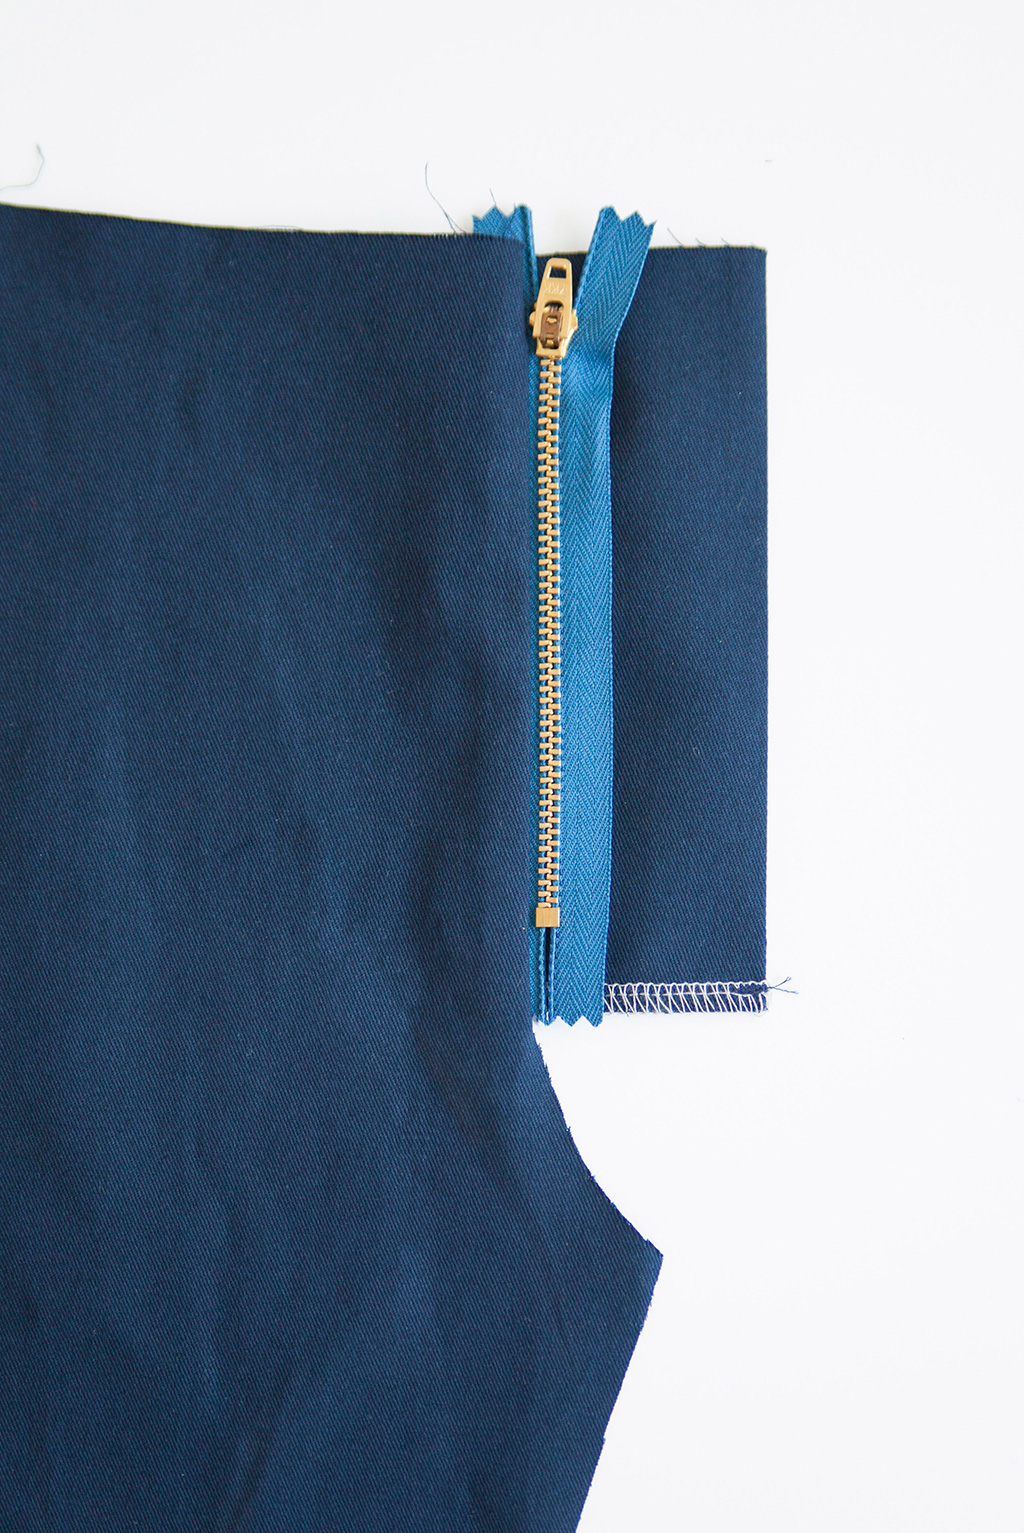
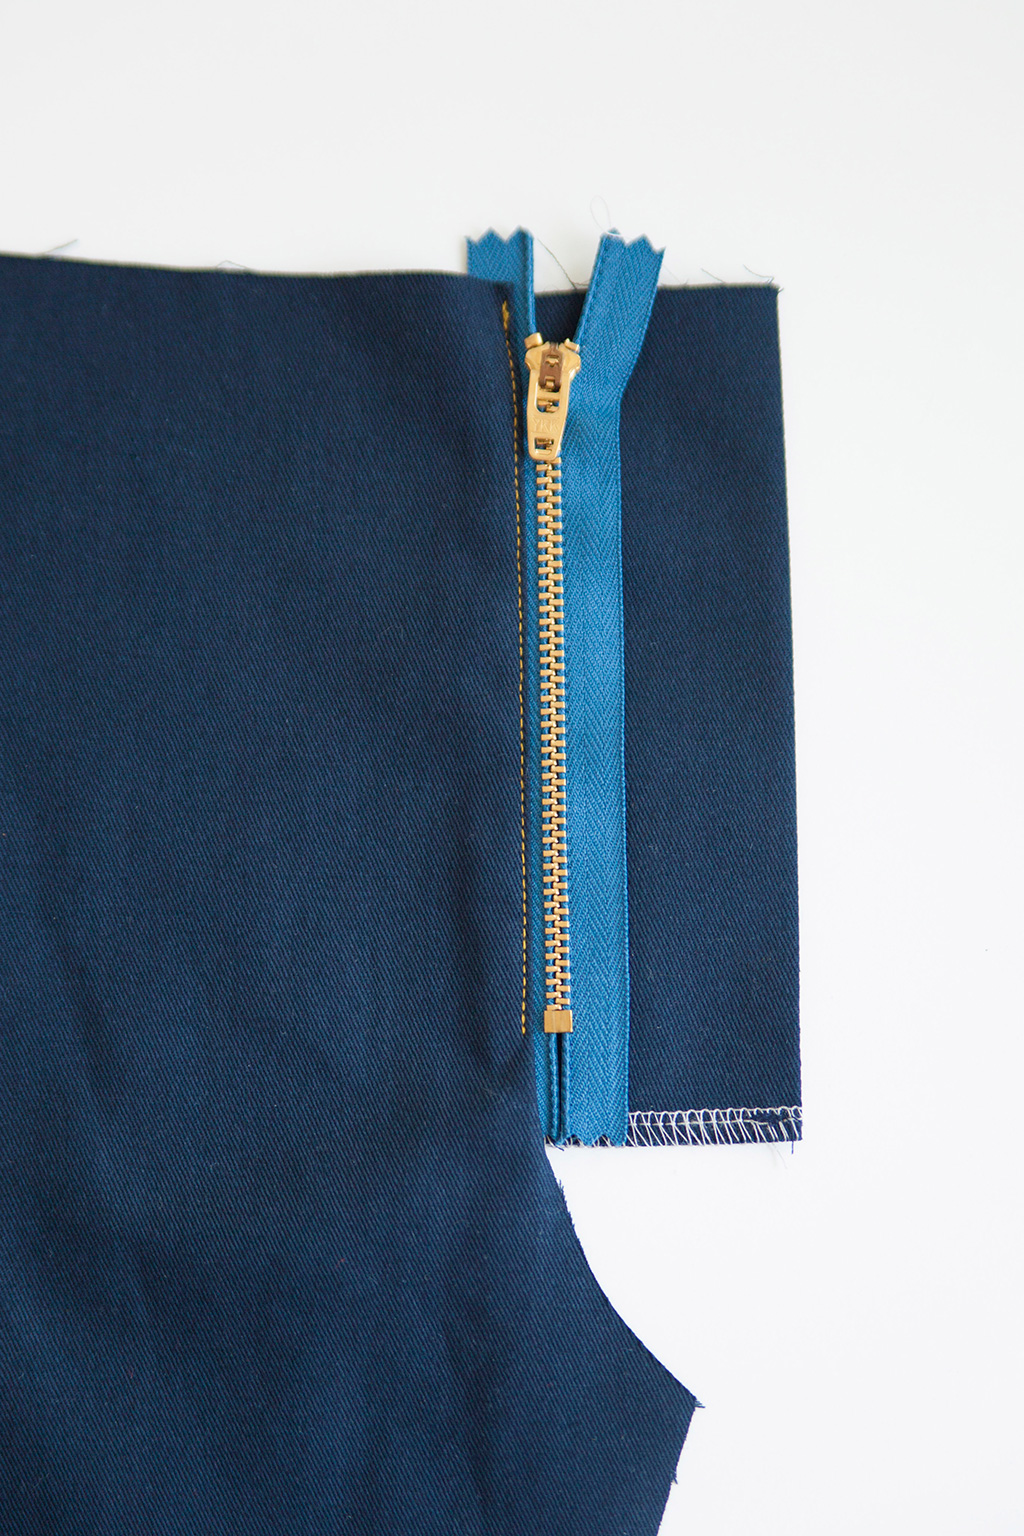
2. With the zipper open and right sides together, place the zipper on the WRS pant front. Position the zipper stop about 1/2” below the top of the pant front, to allow some extra room for the waistband. Stitch. Before you reach the bottom zipper stop, lower your needle and wiggle the zipper closed, so you can continue to stitch in a straight line. Stop stitching about 1/8” below the zipper stop.
Industrial sewing tip
Look closely at your zippers for little lines or other markings. Zippers are designed with seam allowances in mind. The stops are often located so the zipper can be aligned with the top of a pattern piece and have room for a 5/8” seam allowance. There is often a line that runs the length of the zipper. It’s usually 3/8” and is meant to be used as a guide for sewing a straight line to attach the zipper.
3. With right sides together, stitch the fly guard to the WRS unit. It’s easiest to stitch with the interfaced side facing up, so you can sew directly over your previous stitch line. Press—and watch out for a hot metal zipper!
4. From the right side, edgestitch the fly guard in place, along the center front. Remember to wiggle the zipper closed when necessary. Stop about 1/8” below the zipper stop.
5. With right sides together, match the fly facing to the fly guard. Make sure the facing overlaps the zipper, hiding both the zipper tape and edgestitching. This should be about 1/4”.
6. Flip the pieces over and stitch the zipper to the fly facing. Remember to wiggle the zipper out of the way. Edgestitch to secure the zipper tape.
7. Edgestitch the zipper facing—again, wiggling the zipper out of the way. This stitch will be visible, so use topstitching thread, if desired.
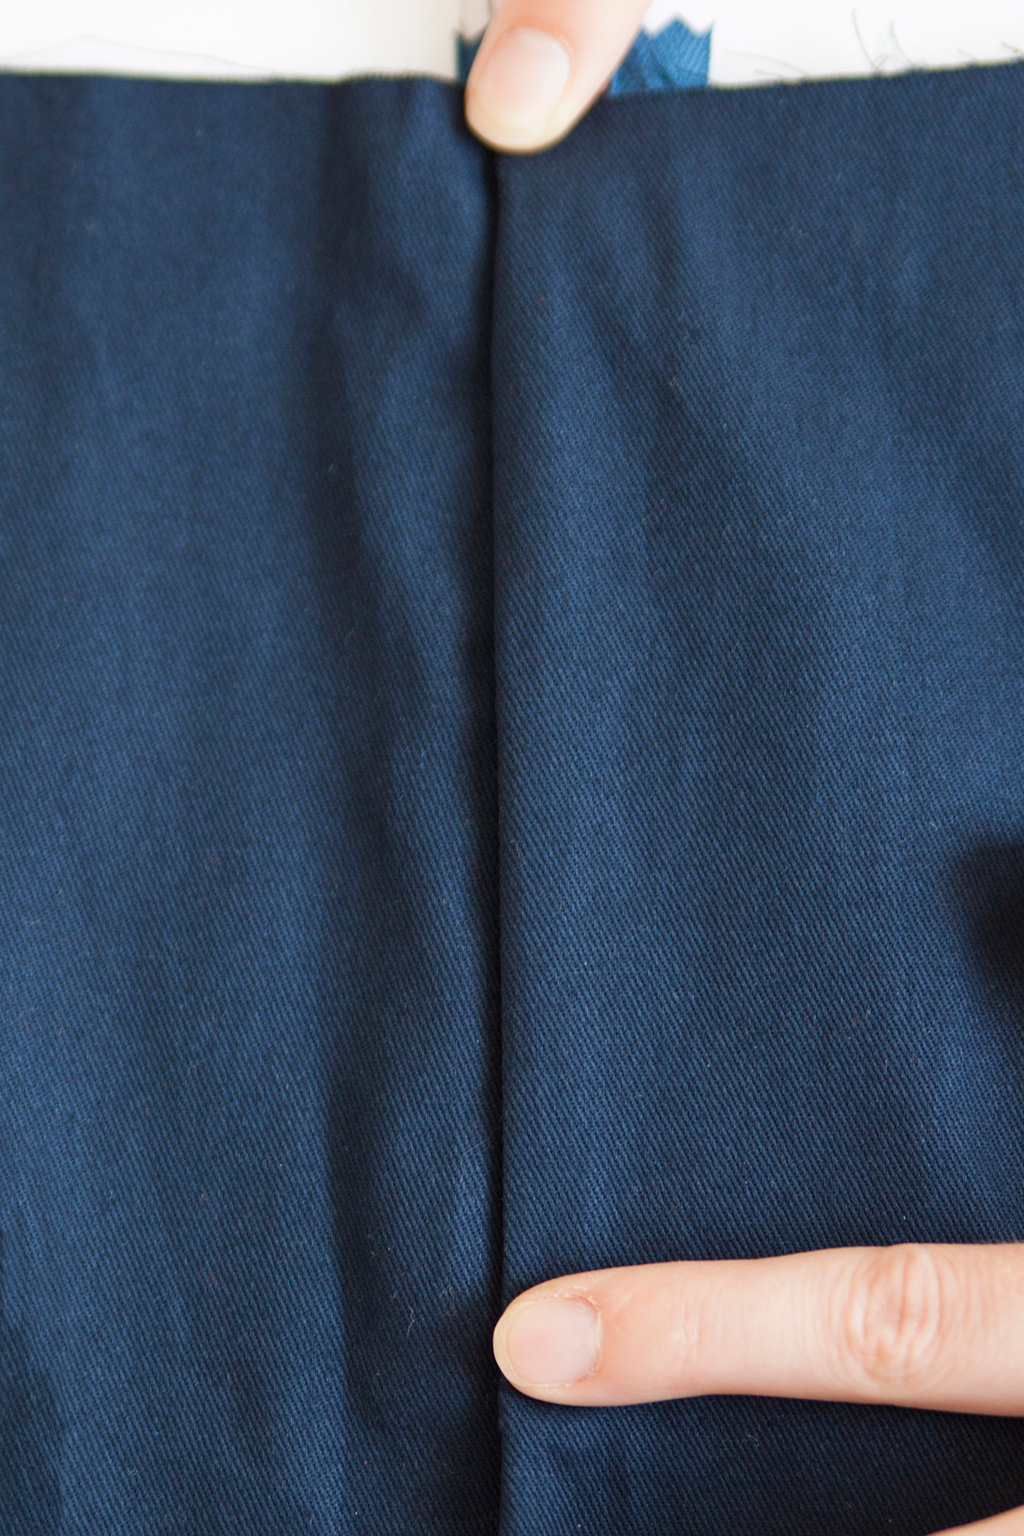
8. With right sides together, sew the crotch seam, making sure to overlap your previous stitch line by a few stitches. Press to WLS.
Topstitch and finish
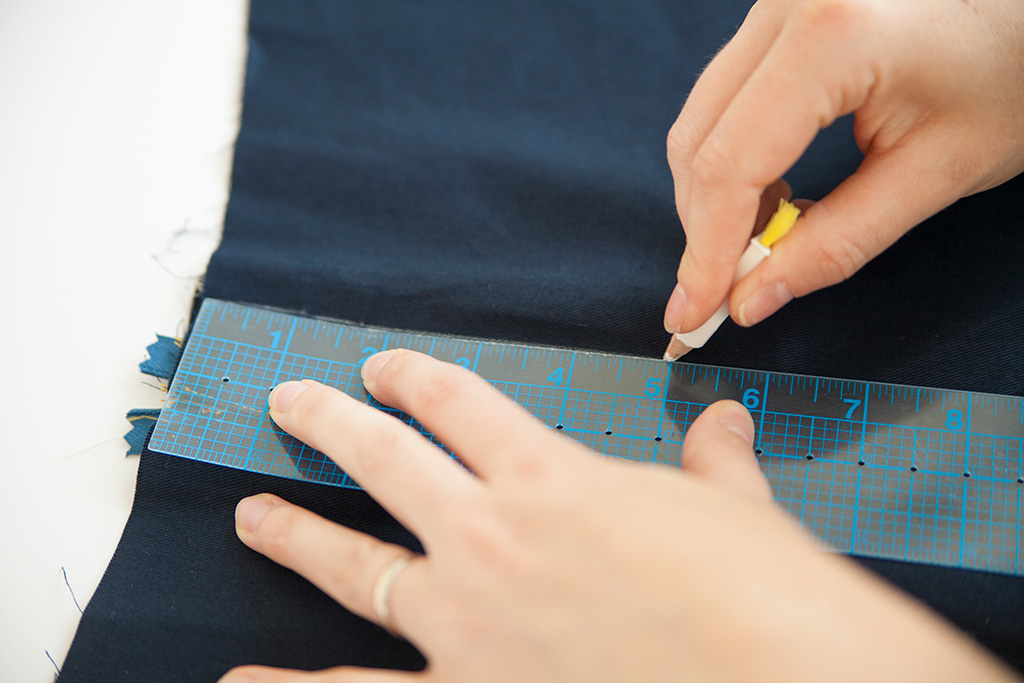
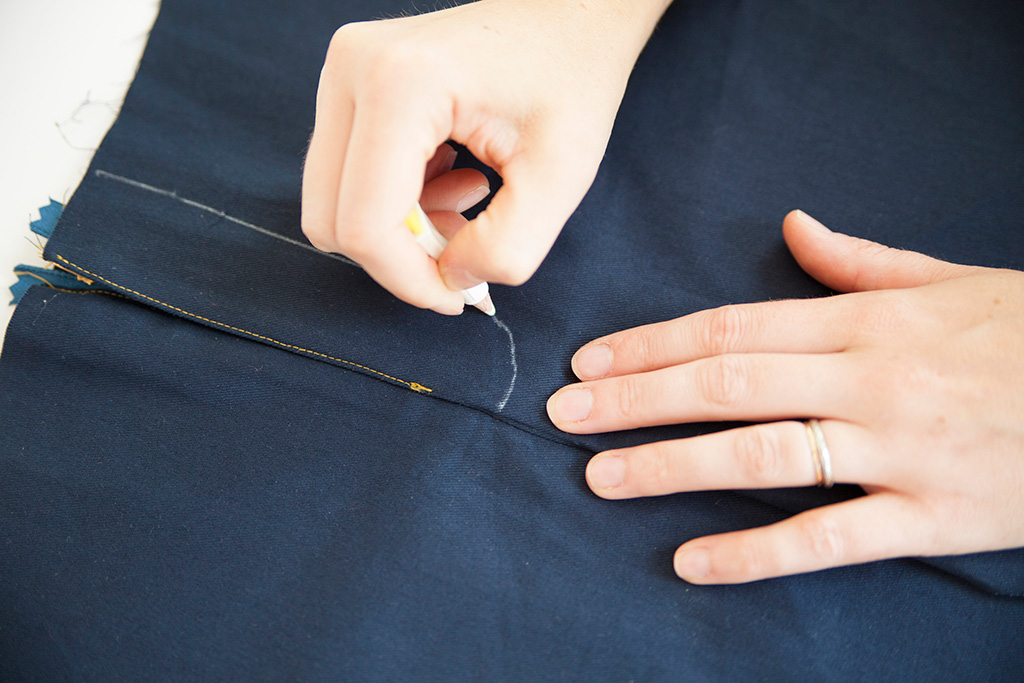
1. On the WLS, use a water-soluble marking tool to trace a J-shaped line around your fly, on the right side of the fabric. Make sure that the bottom of the zipper is not in the stitch line.
Industrial sewing tip
Create a template for your zipper fly! Use a curved ruler to sketch the J shape, or trace your favorite RTW jeans for inspiration. Making templates for small pattern pieces allows you to use your custom template on all of your patterns
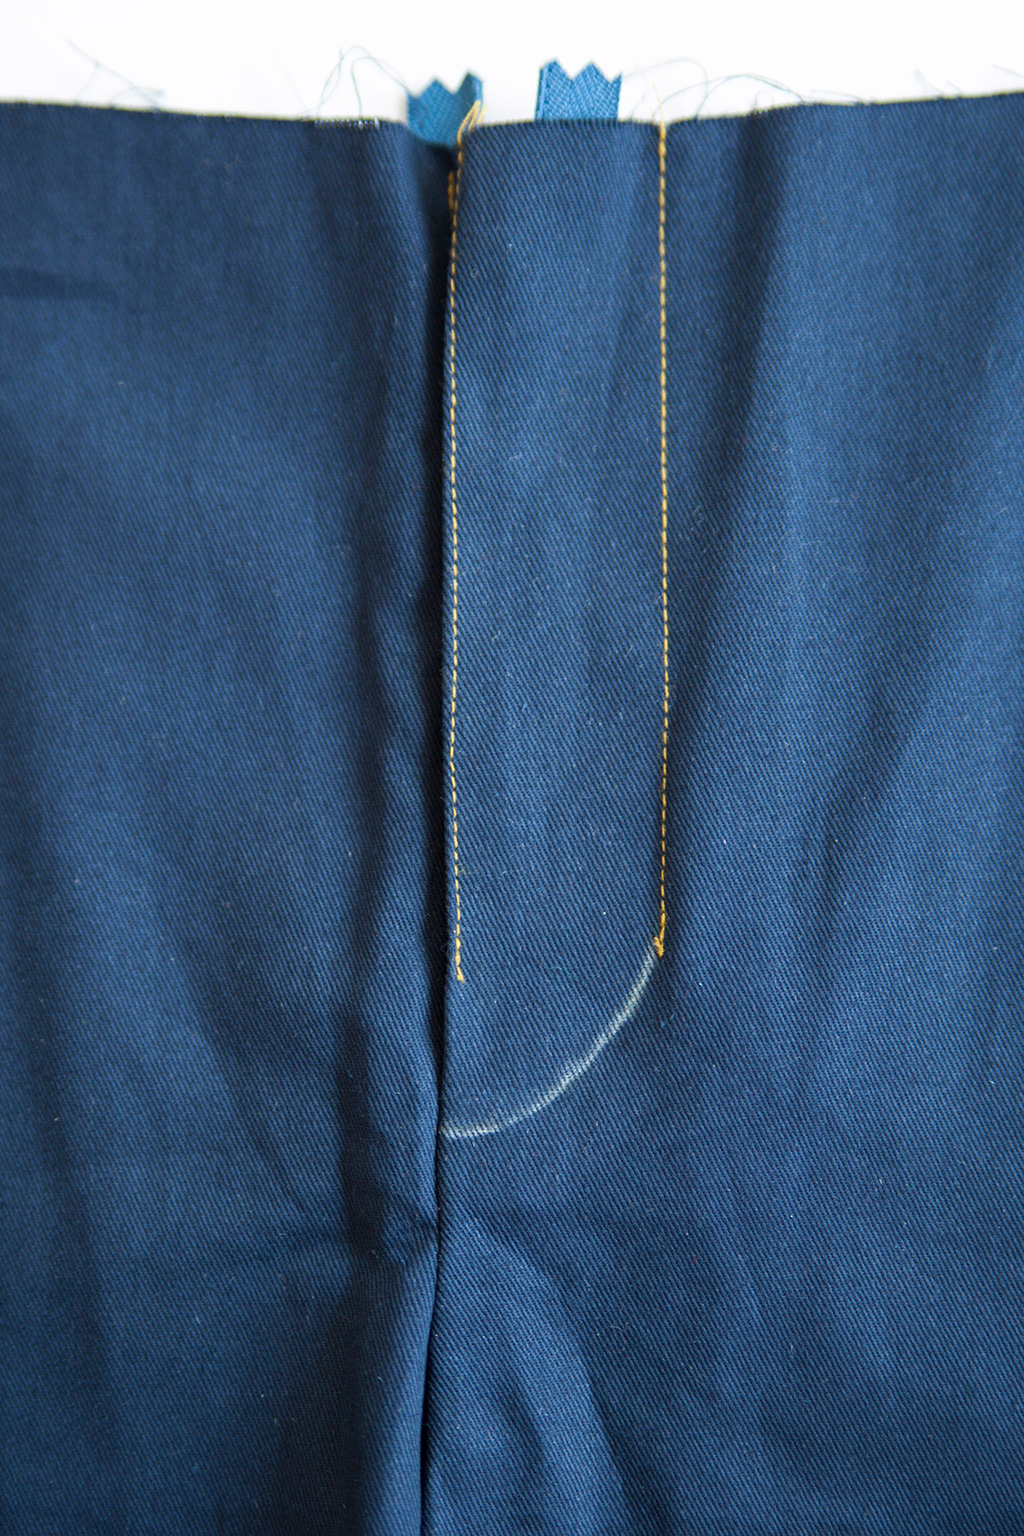
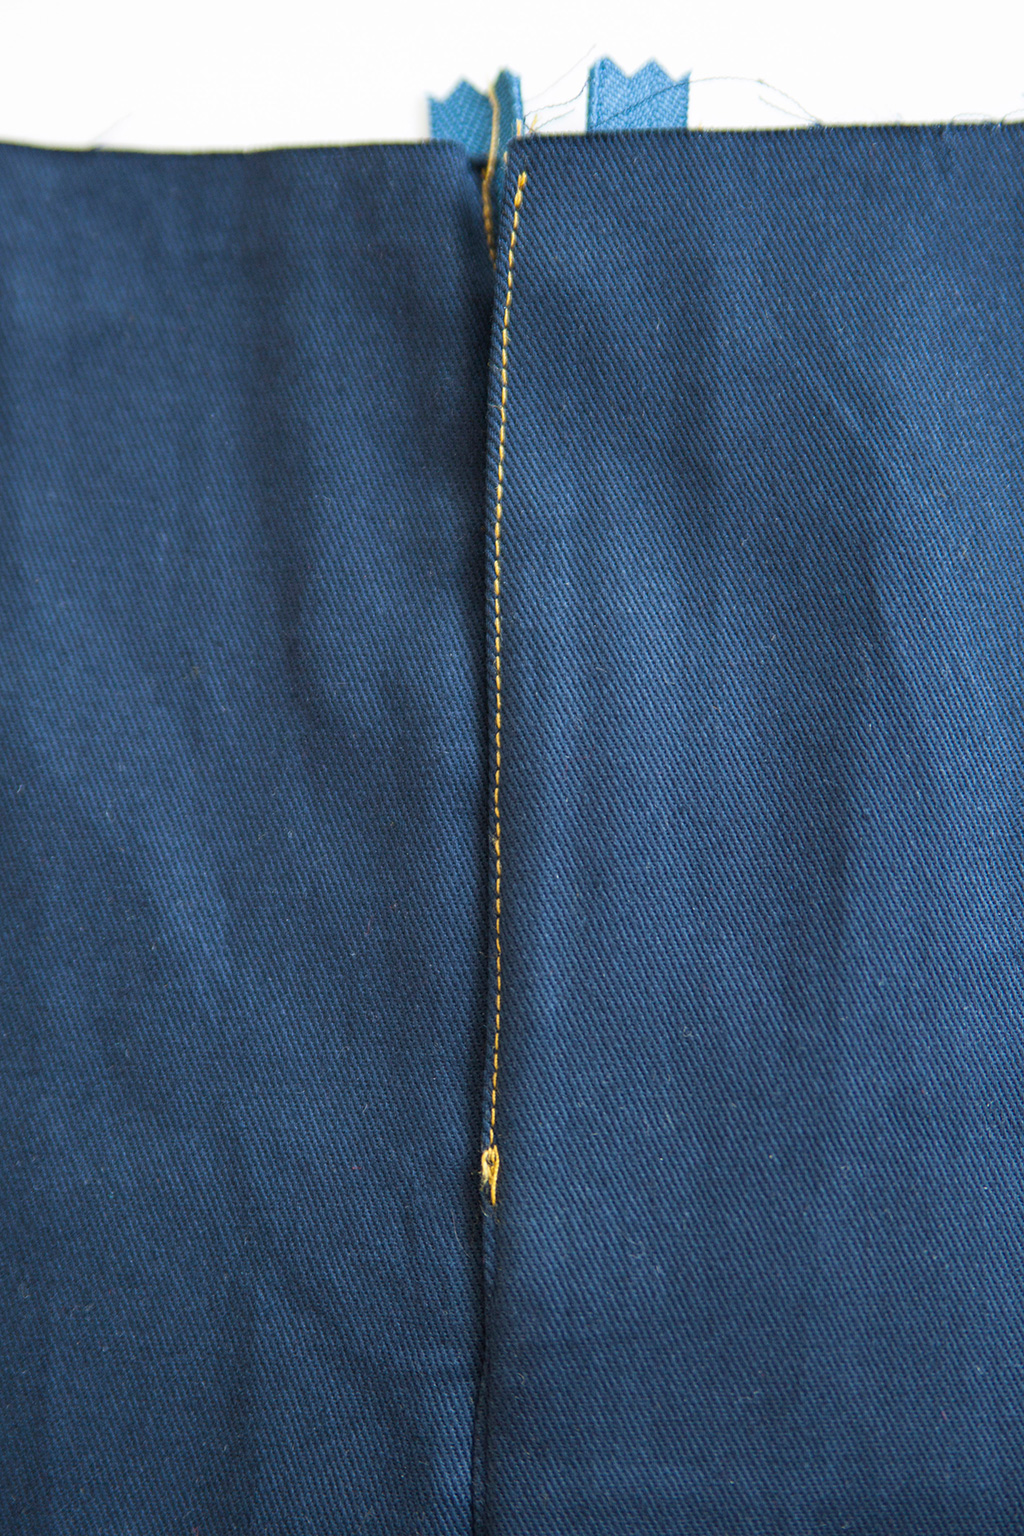
2. Topstitch the straight edge of your J, catching only the fly facing. This is a good time to use decorative topstitching thread, if desired.
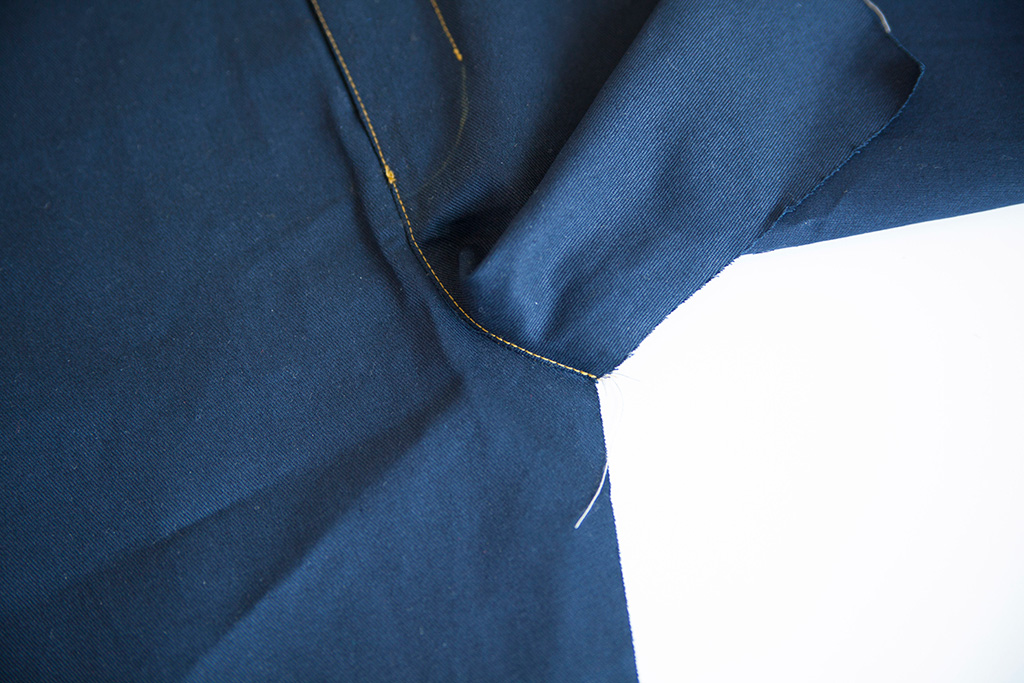
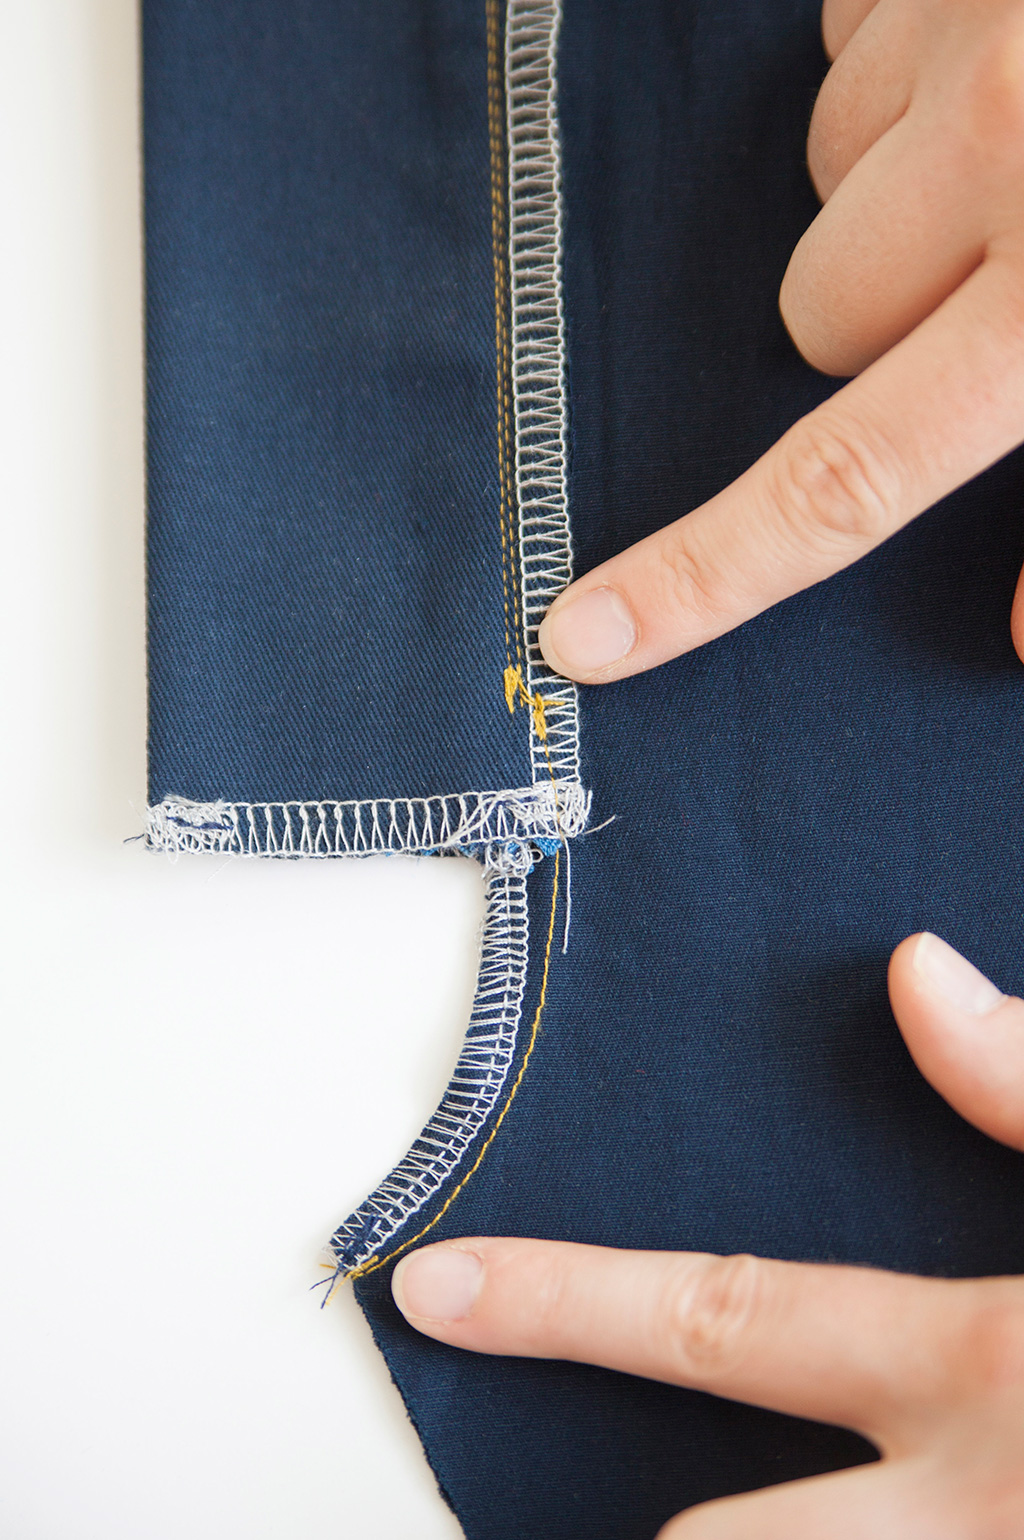
3. Finish the edgestitching at the crotch seam. Overlap your previous edgestitching by a few stitches, and continue to sew the rest of the crotch seam.
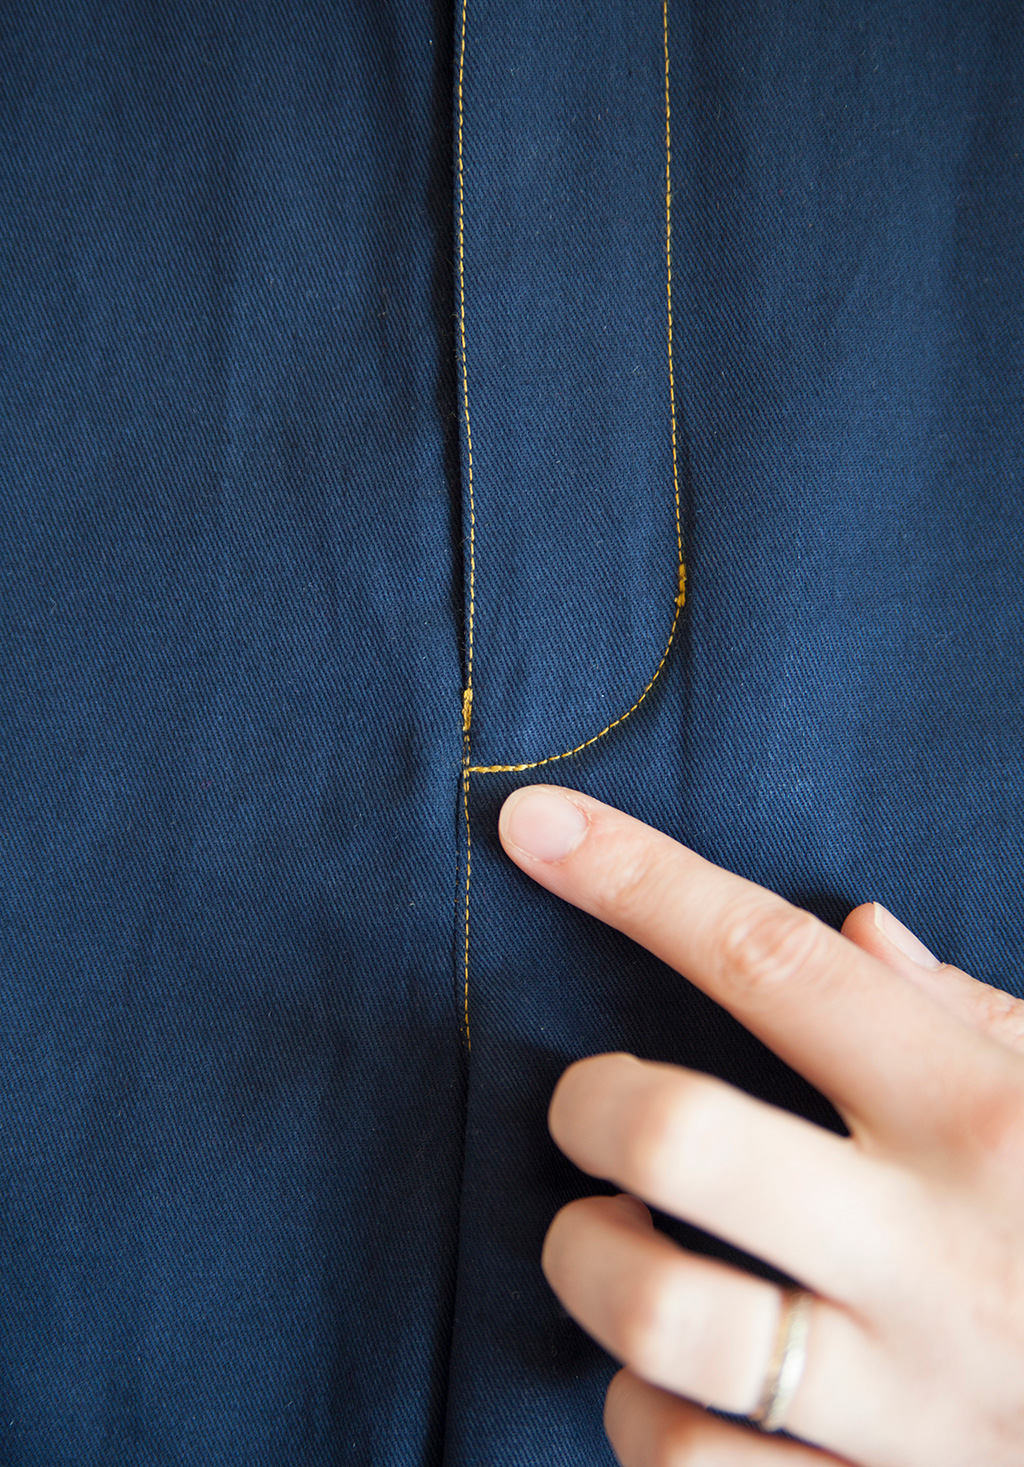
4. Finish stitching the curve at the bottom of your J. Stitch through all layers this time, being careful to avoid sewing the zipper stop. Bartack or backstitch at the crotch point, where your J meets the center front, as this is a stress point. Optional: Sew a second line of topstitching around the J.
5. Follow your pattern instructions to attach the waistband and assemble the rest of your pants!

About the Author
Meg is here to help you. She’s the smiling face behind our customer service and social media. Keeping in touch with our family of stockists, and shipping your orders all across the world, she loves seeing what you’re making with our patterns.