Sign In
Over the last few years, sewing lingerie went from a niche hobby in the sewing world to a common practice among many sewers. Thanks to trailblazers like Cloth Habit, Orange Lingerie, Ohhh Lulu, and Pin-up Girls—just to name a few—sewing your lingerie has not only become more popular but more accessible.
If you are looking to dip your toes into the vast ocean of handmade lingerie, learning to work with a variety of lingerie elastics will likely be one of your first conquests.
We sat down with Julia Studer, the lingerie sewing expert from Silhouette Boutique in Portland, Oregon, to demystify sewing with three types of elastic.
NOTE: In this article, we attach elastic to the waist of underwear to illustrate this technique, but you can easily apply this technique to any other lingerie project that uses elastic.
Julia’s elastic words of wisdom
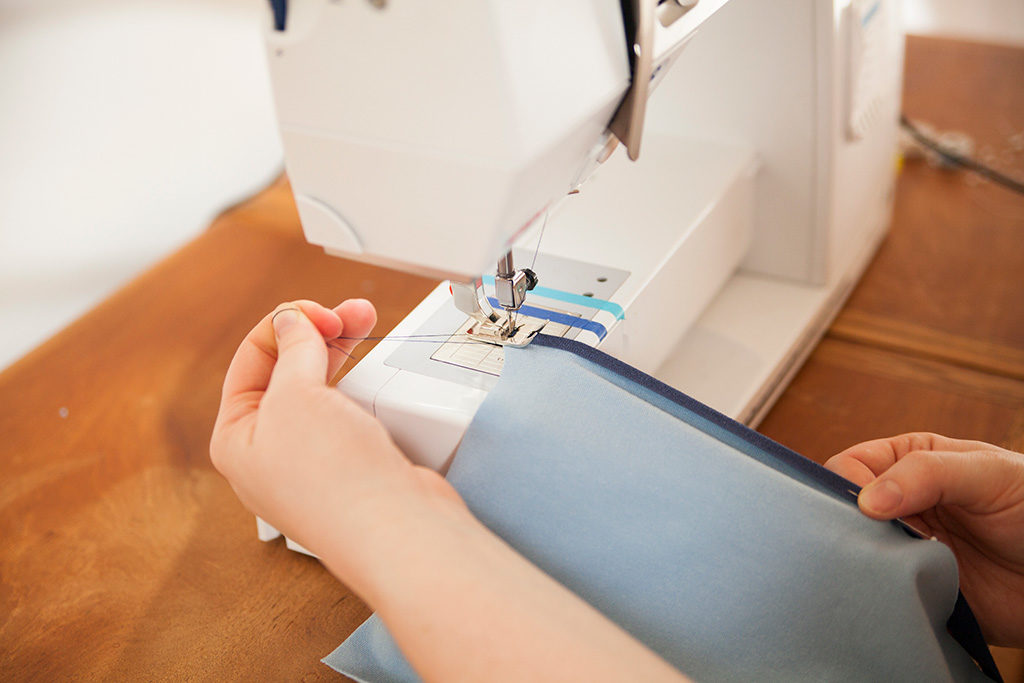
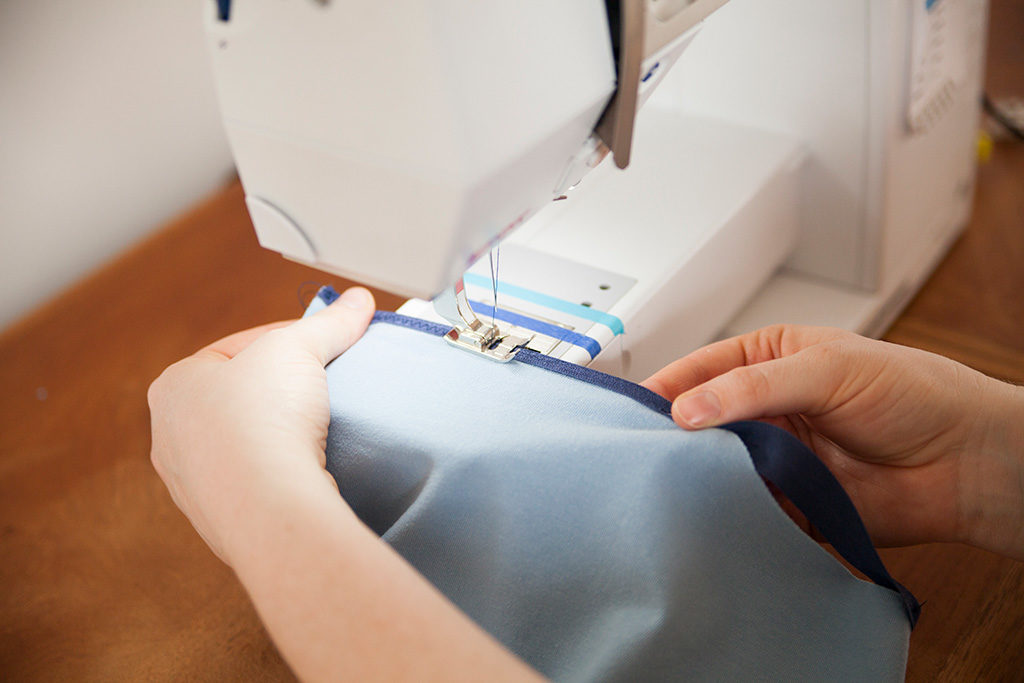
Gently pulling the thread tails when you begin stitching prevents the elastic from getting caught on the presser foot.
Before jumping into the specifics of sewing elastic, here are a few helpful tips to keep in mind.
- Your elastic should always be smaller than the edge that it is being applied to. If your elastic looks pretty and smooth when laying flat, then it is going to fall off your body!
- Elastic can vary significantly in stretch. If you are working with a new elastic, test it. You may find that firmer elastics do not need to be trimmed quite as much.
- If you are new to sewing lingerie, try working flat—rather than in the round—whenever possible.
- Always quarter your elastic and the edge it is being applied to before pinning. This gives you a reference point as you pin and ensures evenly stretched elastic.
- Always mark the center front and center back of the pattern when you are cutting.
- When sewing elastic, lower your needle into the elastic before lowering the presser foot. This will give you more control and prevent the elastic from snapping back.
- Pull the thread tails when you begin stitching to help prevent the elastic from getting caught on the presser foot.
- Do not overstretch your elastic! Only stretch elastic enough for the fabric to lay flat. Overstretching elastic can diminish the recovery of elastic.
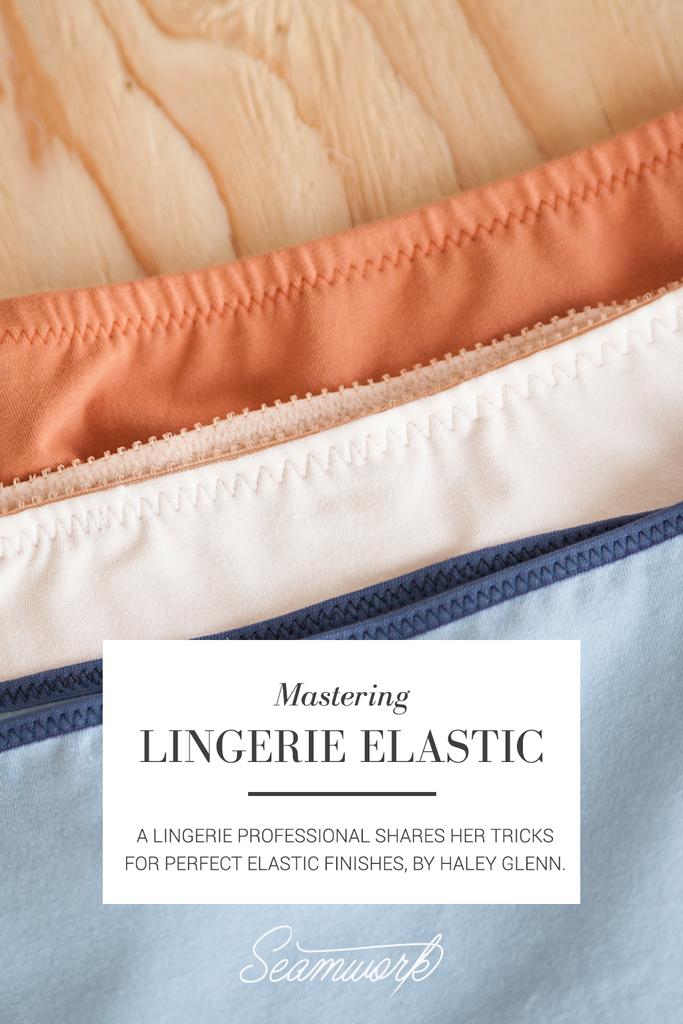
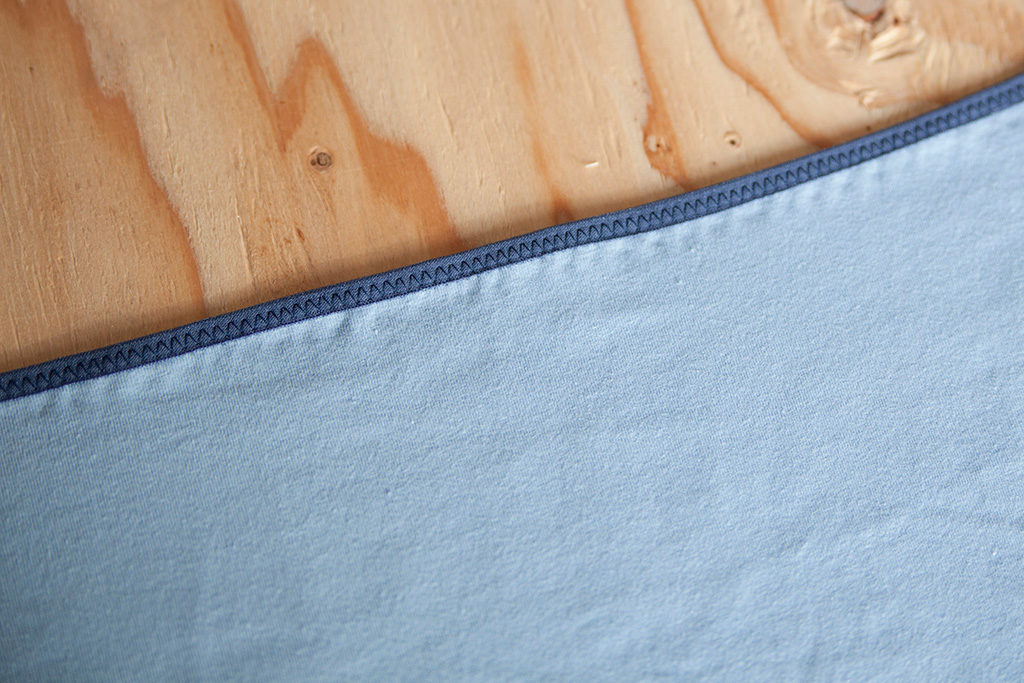
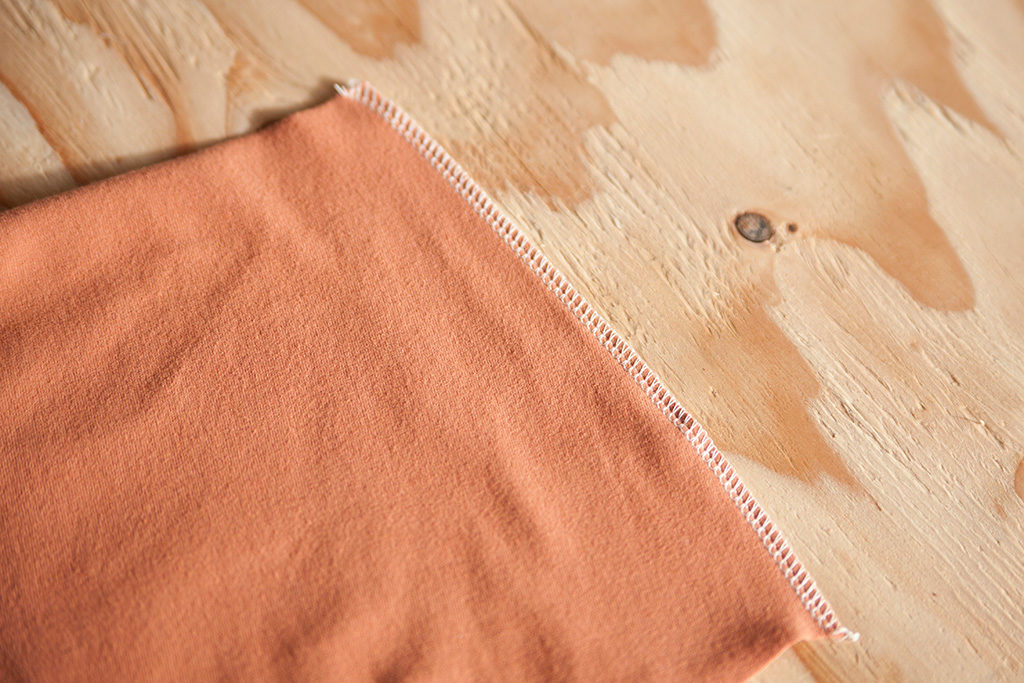
Plush-back picot-edge elastic
Tips for sewing plush picot-edge elastic
- Plush-back picot-edge elastic has a right and wrong side. The right side has the appearance of regular knit elastic, while the wrong side is plush. The plush side is soft so that it can be comfortably worn directly against the body.
- When topstitching picot-edge elastic, set your three-step zigzag stitch to be about half the width of your finished elastic width. Then stitch down the center of the elastic as you topstitch.
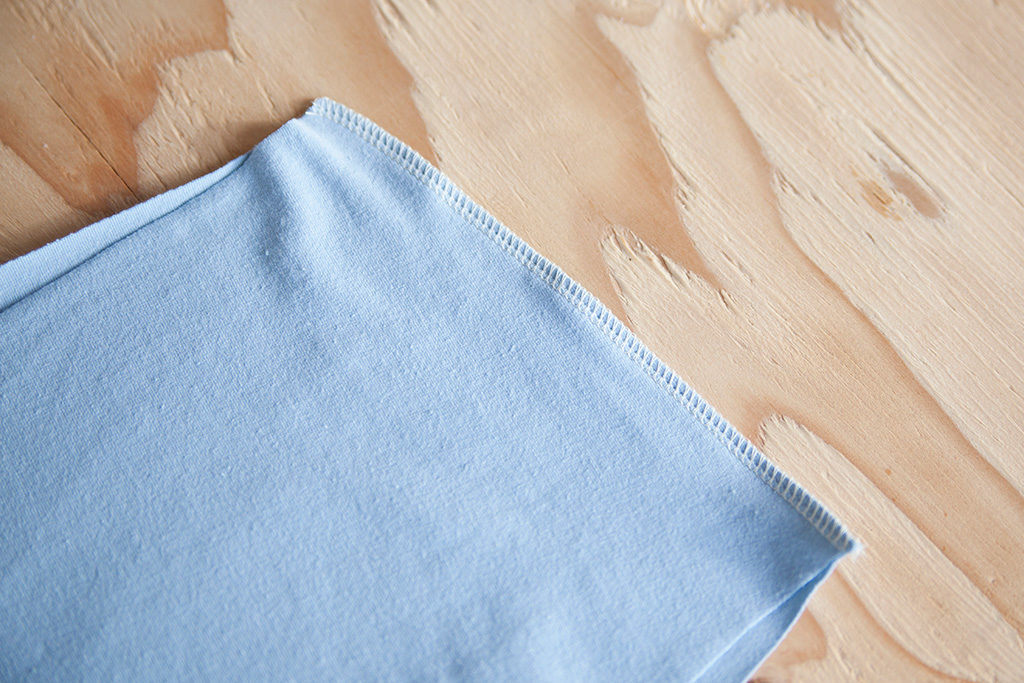
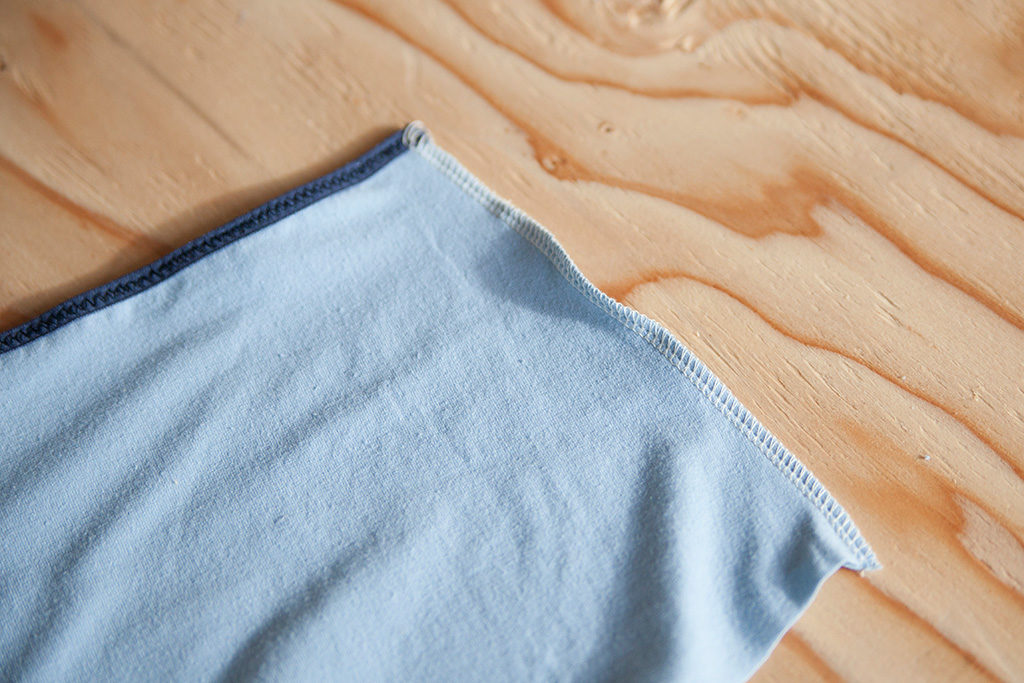
01 | Assemble your underwear pieces according to pattern instructions, leaving one side seam unsewn.
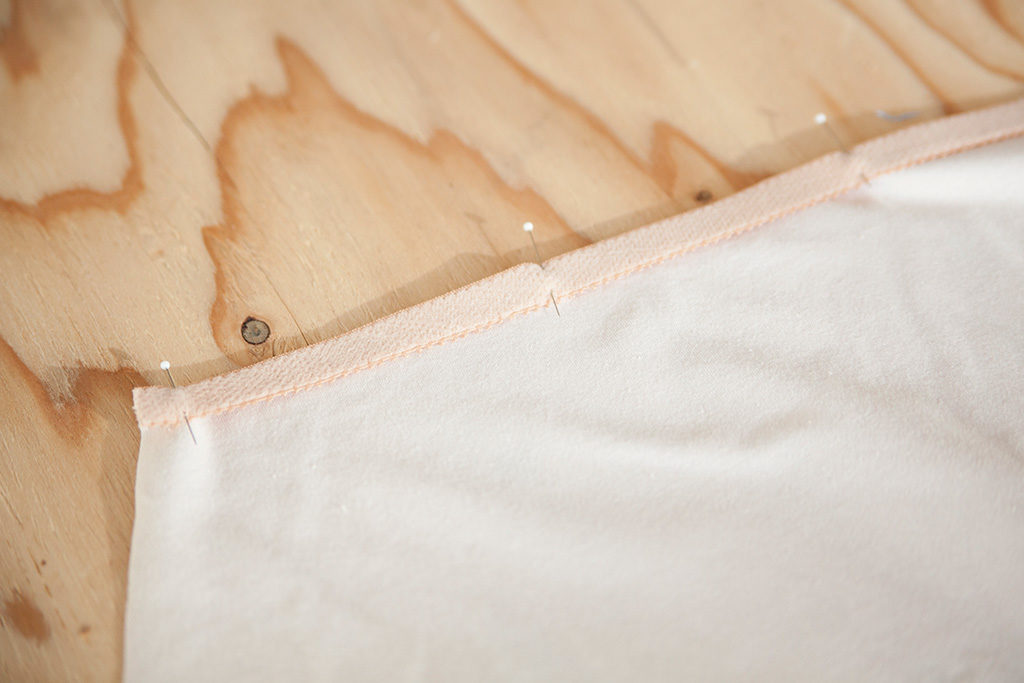
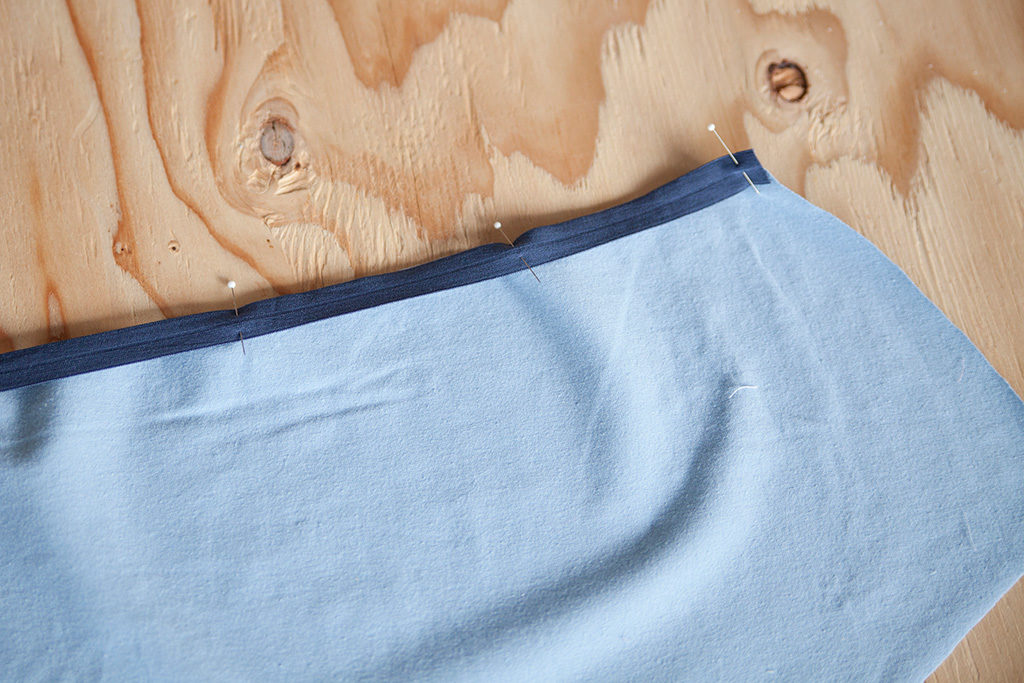
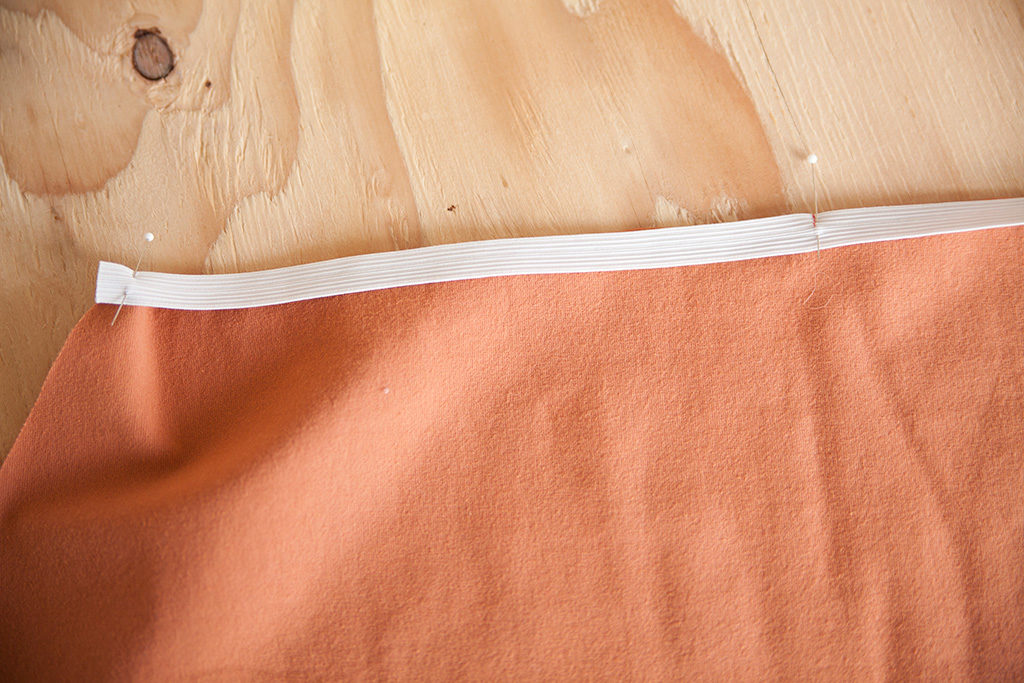
02 | With right sides together, pin the elastic to the edge of the fabric, aligning the plain edge of elastic with the raw edge of the fabric.
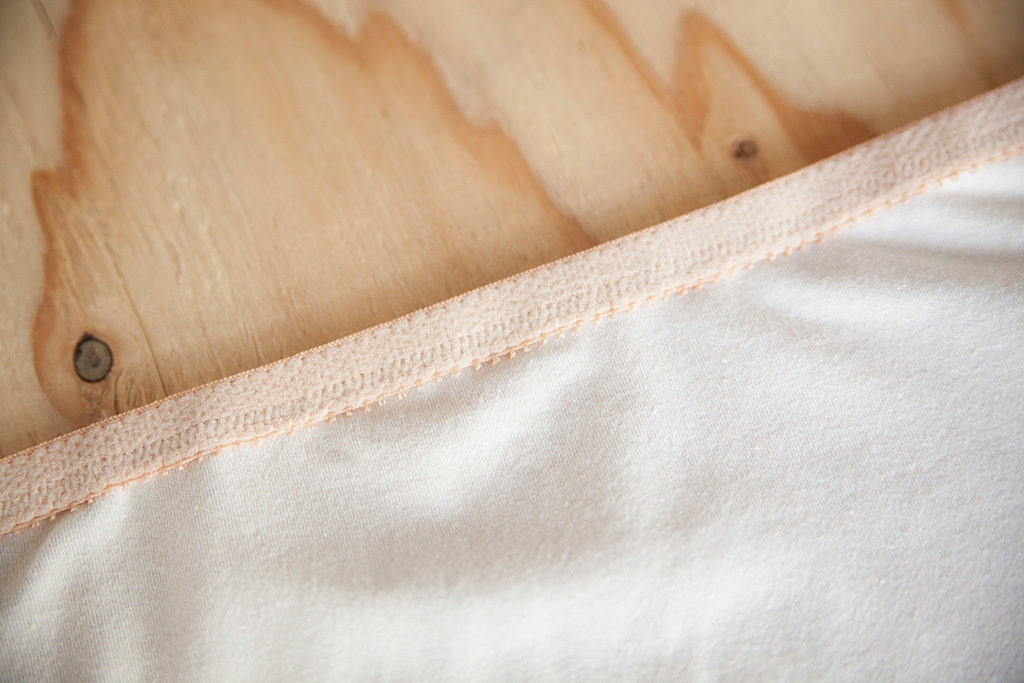
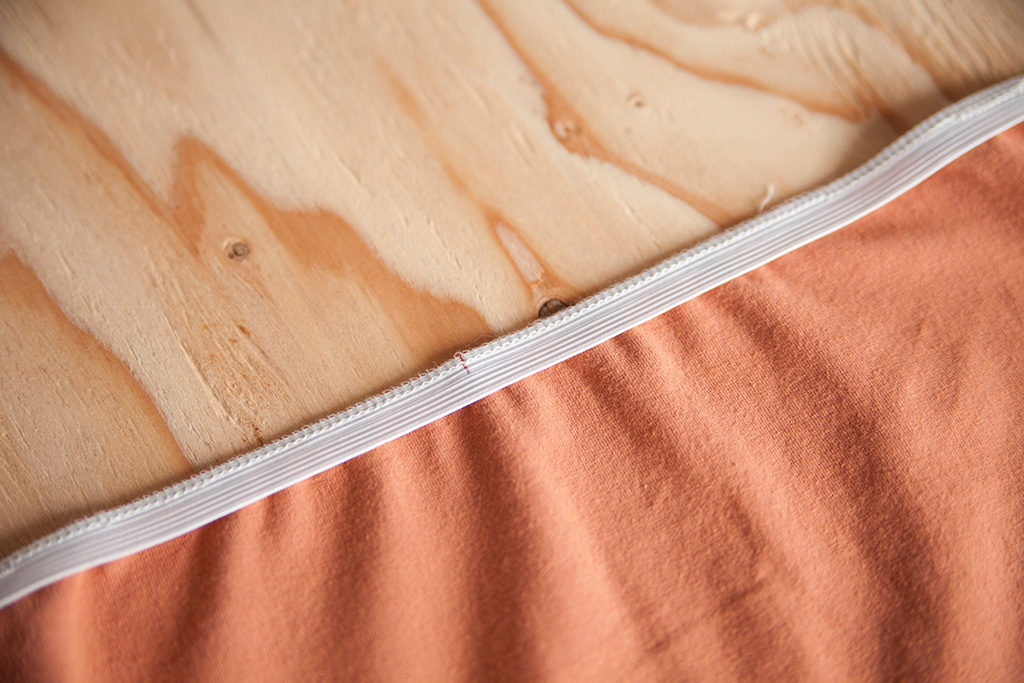
03 | Using a zigzag stitch, attach the elastic to the fabric, sewing 1/8” away from the decorative edge of the elastic.
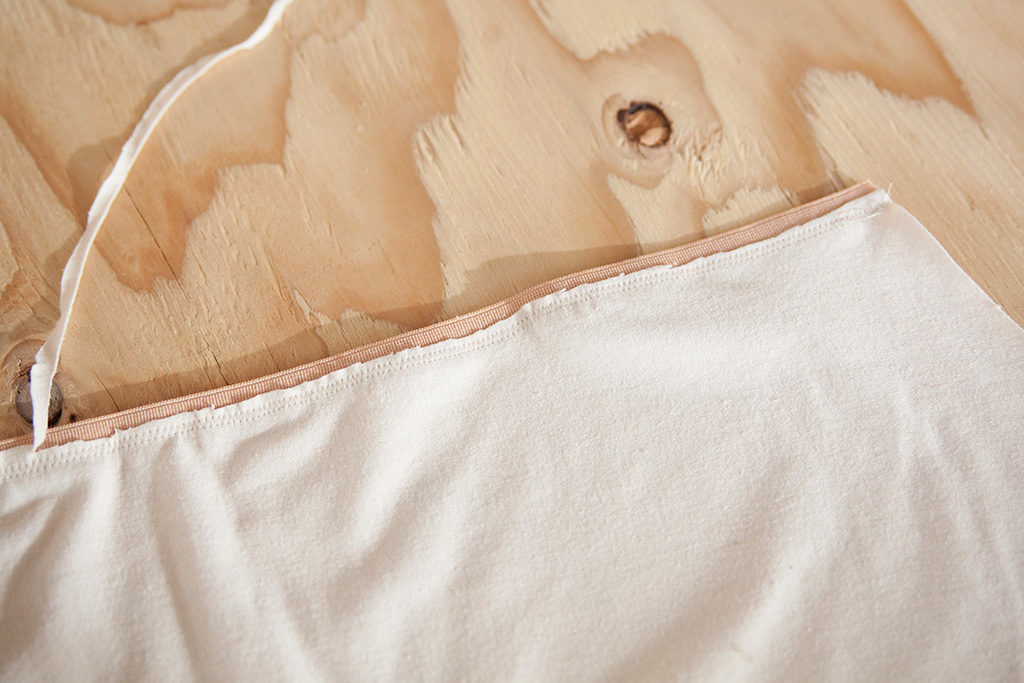
04 | Trim the excess fabric using a small pair of scissors.
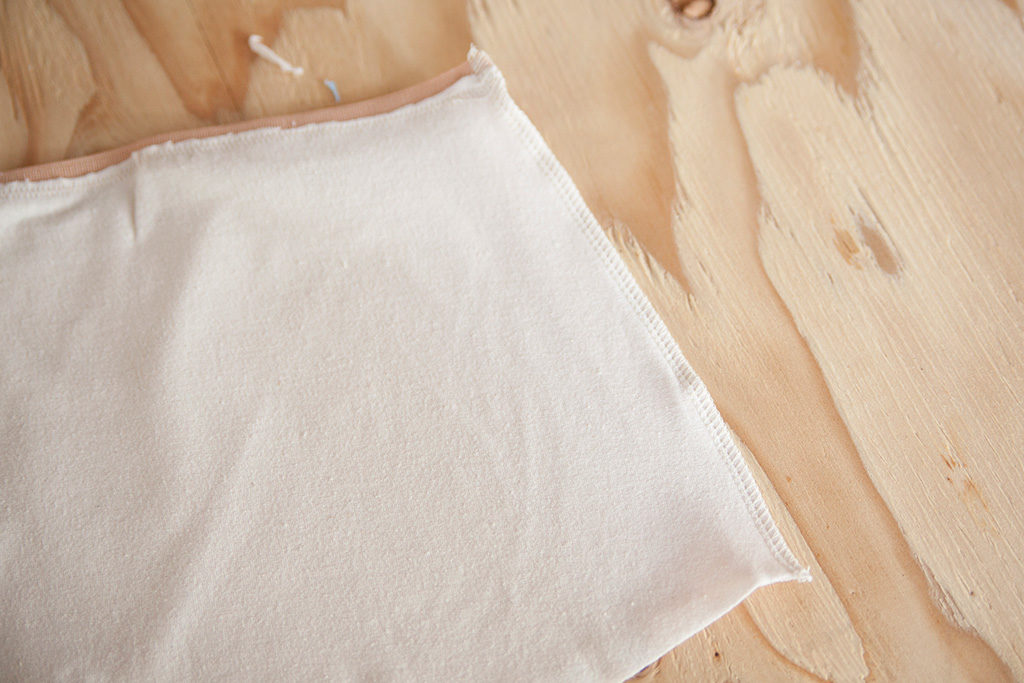
05 | Using a serger or stretch stitch, sew the remaining side seam.
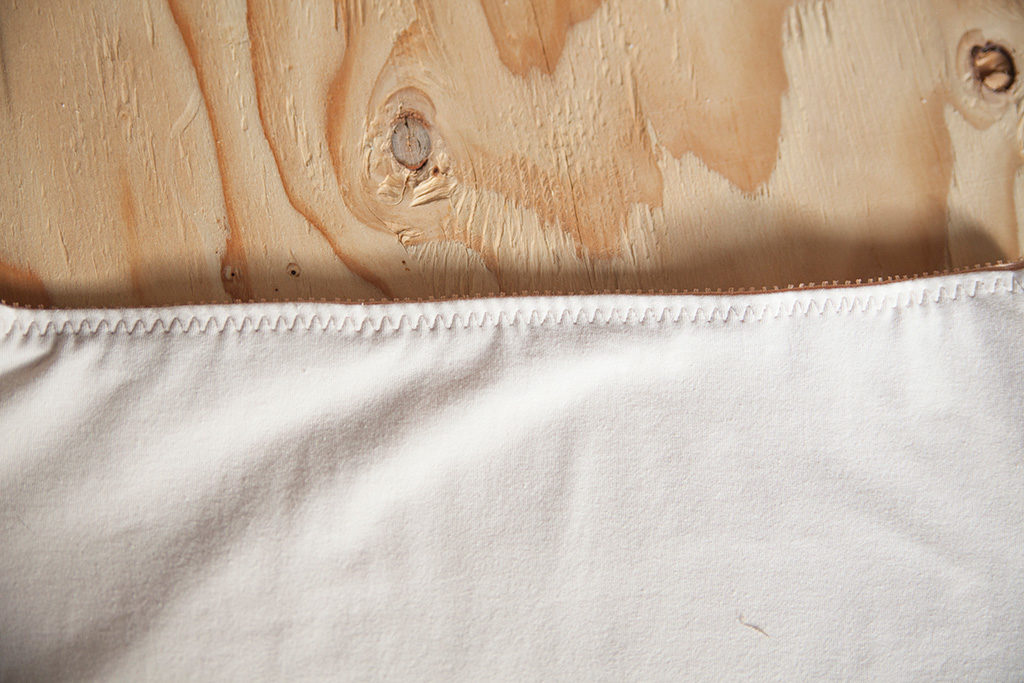
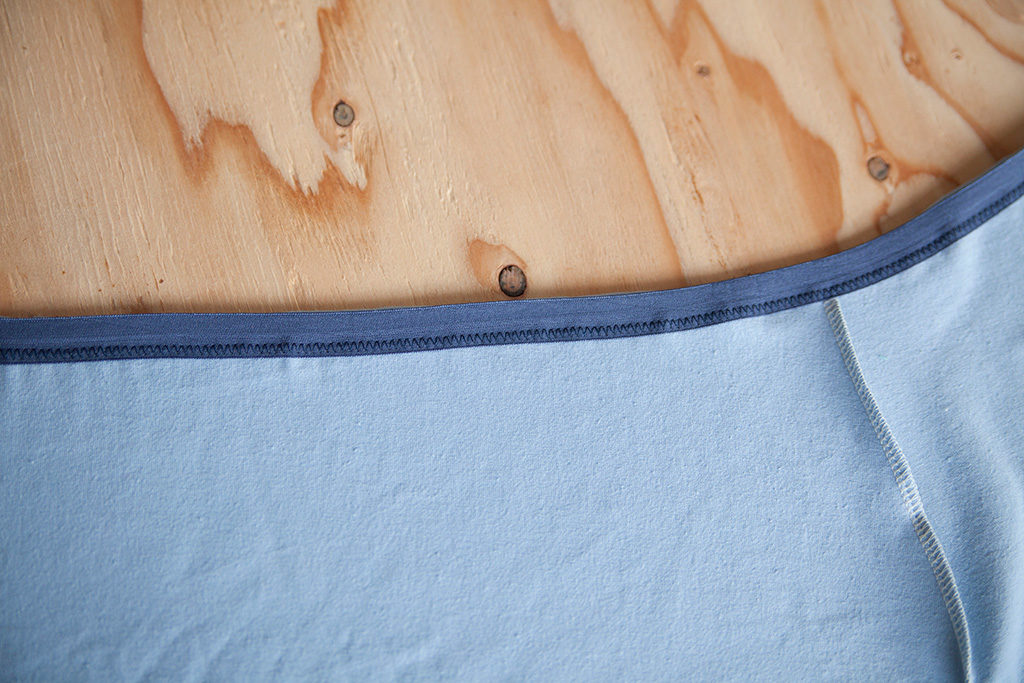
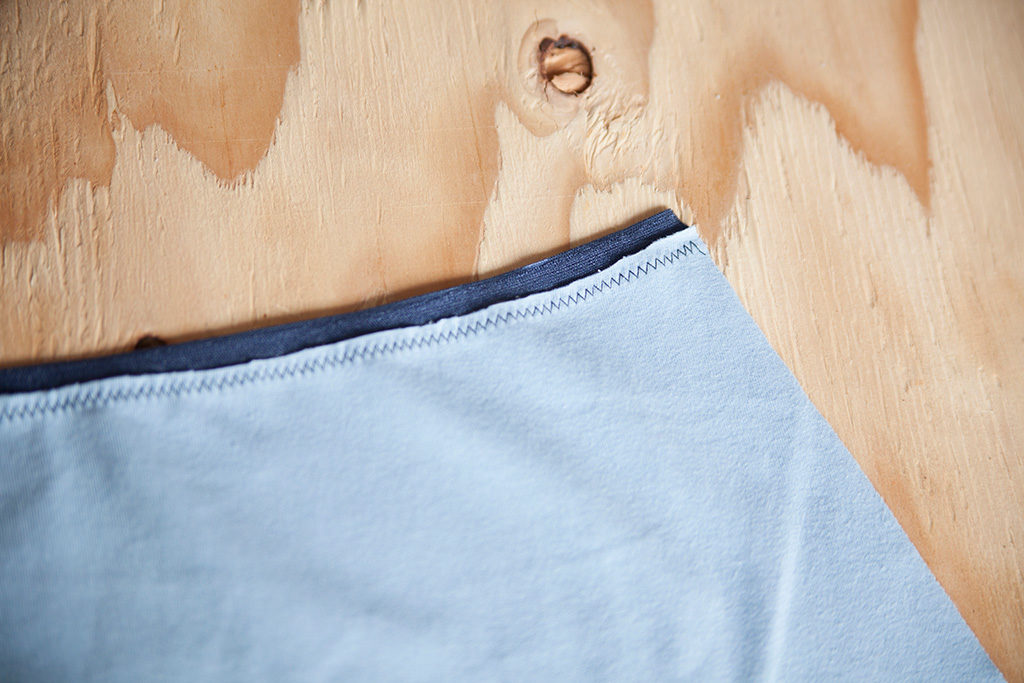
06 | Fold elastic toward the wrong side of the garment. Topstitch using a three-step zigzag.
Fold-over Elastic
Tips for sewing fold-over elastic
- This is why Julia likes to apply fold-over elastic with a single zigzag stitch rather than in two steps.(See alternative FOE method.)
- When topstitching fold-over elastic, set your zigzag stitch to be about half the width of your finished elastic width. Then stitch down the center of the elastic as you topstitch.
01 | Assemble your underwear pieces according to pattern instructions, leaving one side seam unsewn.
02 | With wrong sides together, align the edge of the fabric with the middle of the elastic.
03 | Use a zigzag stitch to baste along the innermost edge of the elastic.
04 | On the right side, trim any excess fabric.
05 | Fold the elastic along the fold line toward the right side of the garment. Topstitch using a zigzag stitch.
06 | Using a serger or stretch stitch, sew the remaining side seam.
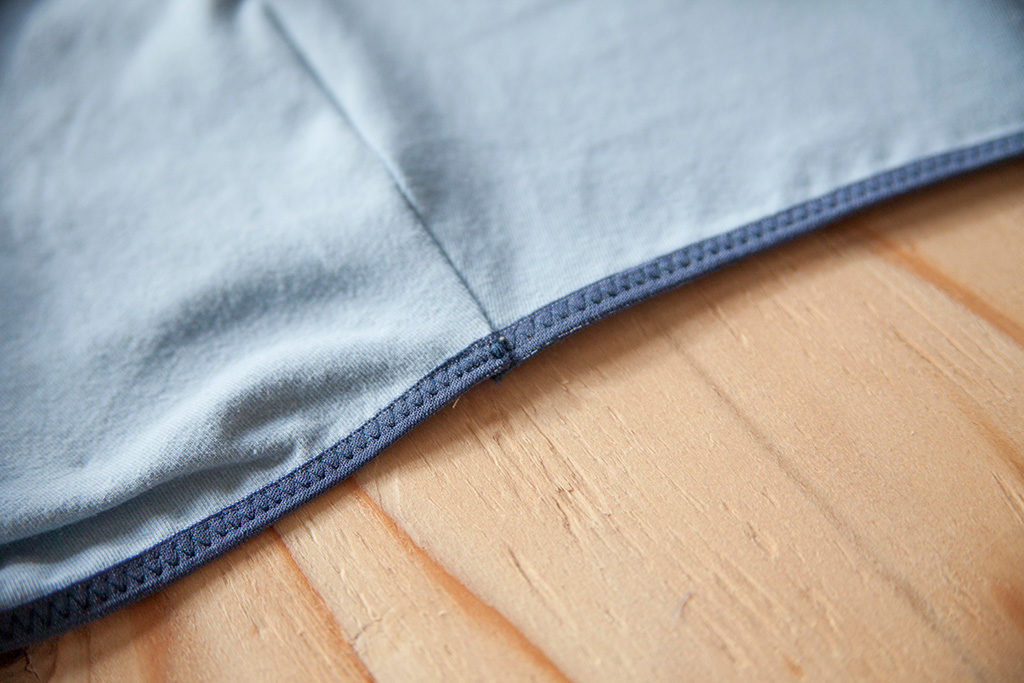
07 | Use a bar tack to reinforce the side seam at the elastic.
An Alternate FOE Method
Alternately, fold-over elastic can also be attached in a single step.
Assemble your underwear pieces according to pattern instructions, leaving one side seam unsewn.
Fold elastic in half and butt the raw edge of the fabric against the inner fold of the elastic. Pin along entire waist seam.
Use a zigzag stitch to topstitch the fold-over elastic in place.
Using a serger or stretch stitch, sew the remaining side seam. Sew a bar tack to the seamed elastic to reinforce.
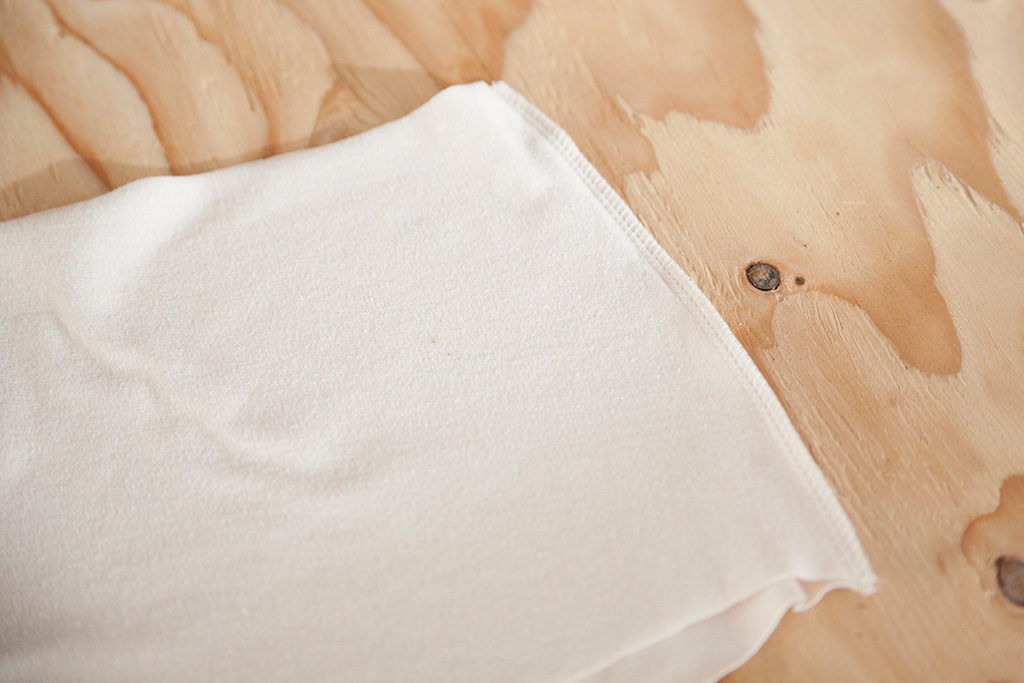
Knit or Braided Elastic
Tips for sewing knit or braided elastic
- When you are using braided elastic, the seam allowance—on the edge you are applying the elastic—should be the same width as your elastic.
- Attach elastic using a three-thread serged stitch. This helps minimize bulk.
- When topstitching braided elastic, try to get as close to the inner edge as possible. This will control the serged edge, creating a cleaner finish.
01 | Assemble your underwear pieces according to pattern instructions, leaving one side seam unsewn.
02 | Pin elastic to the wrong side of the fabric, aligning the edge of the elastic with the raw edge of the fabric.
03 | Sew the elastic to the wrong side of the fabric using a zigzag stitch or serger.

04 | Using a serger or stretch stitch, sew the remaining side seam.

05 | Fold elastic under, toward the wrong side of the garment. Topstitch using a zigzag stitch.

About the Author
Five years ago, Haley left the apparel industry to join the world of home sewing. She has been empowering women to sew ever since —first through years of in-person teaching at Sew LA, and now through her writing at Colette. Haley writes tutorials and articles on our blog, and writes and edits for our magazine, Seamwork.