Sign In
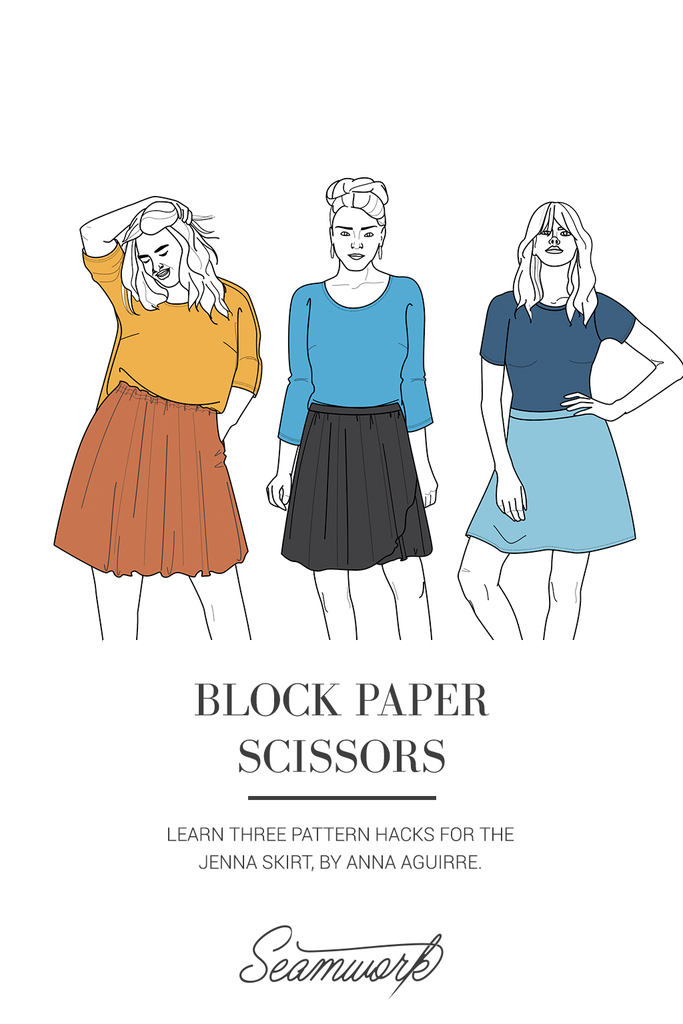
Block Paper Scissors is a monthly column that teaches three pattern hacks. These hacks help you give your Seamwork patterns a custom spin—all you need is paper, a ruler, and a pencil!
This month we walk you through three different pattern hacks for the Jenna skirt. Learn how to create a curved faux-wrap skirt, a paper bag skirt, and a circle skirt with a fitted waistband and side seam invisible zipper.
Note: For best results, be sure to make any necessary fit adjustments before hacking your pattern.
You'll Need:
- The Jenna skirt pattern
- Paper
- Pencil
- Scissors
- Clear Ruler
- French curve
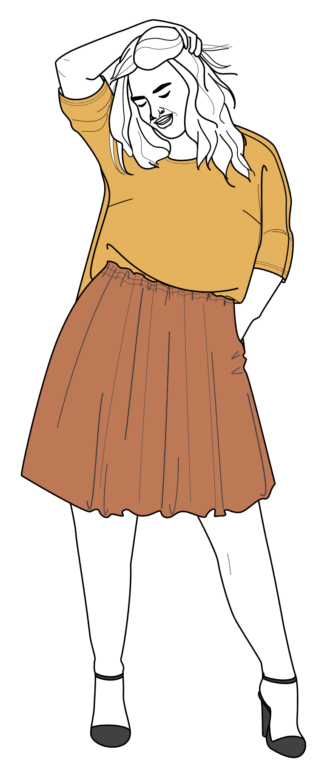
Curved faux-wrap skirt
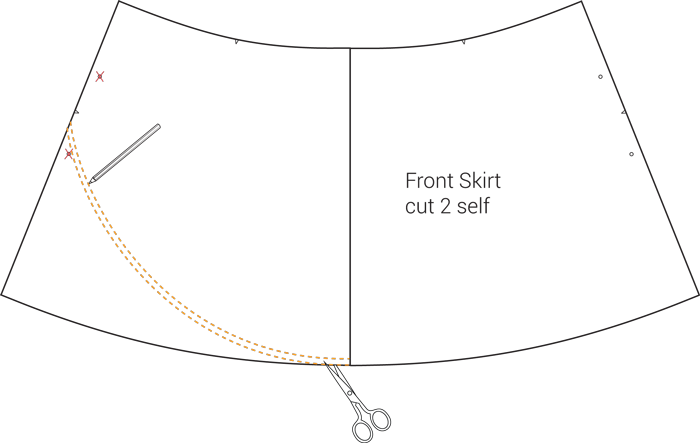
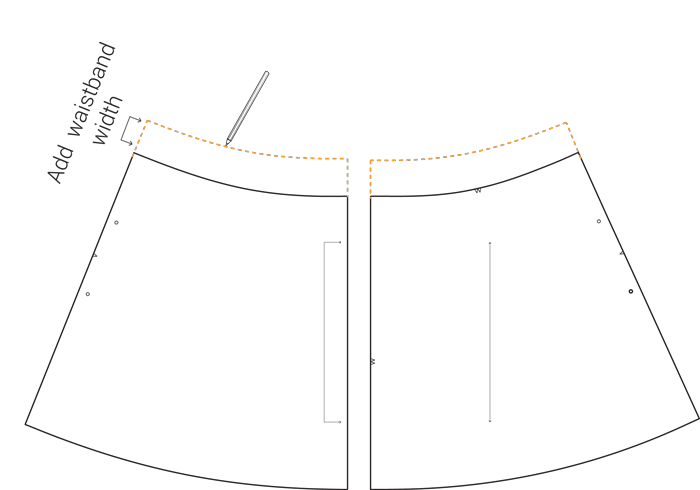
01 | Trace the front skirt pattern piece to be open, keeping a clear line at the center front.
02 | Draw a curved line connecting the center front hem to the side seam, just above the bottom pocket marking.
NOTE: Due to the high curve of the hem, the pockets have been eliminated.
03 | Add a 5/8” hem allowance to the curve line. Cut along the hem allowance line.
04 | Label this new piece “front skirt: cut 1 right-side up, 1 wrong-side up.”
05 | To sew, assemble the back skirt, and then hem the front and back skirts separately.
06 | With right sides facing up, align the waists of the front skirt pieces, baste.
07 | With right sides together, attach the front skirt unit to the back skirt at the side seams.
08 | Finish according to the pattern instructions.
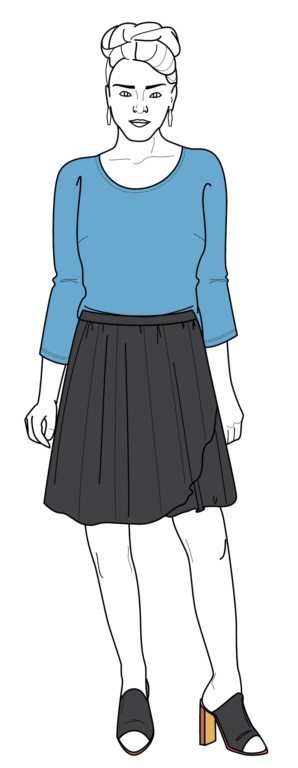
Paper bag skirt
01 | Trace the front skirt pattern piece to be open, keeping a clear line at the center front.
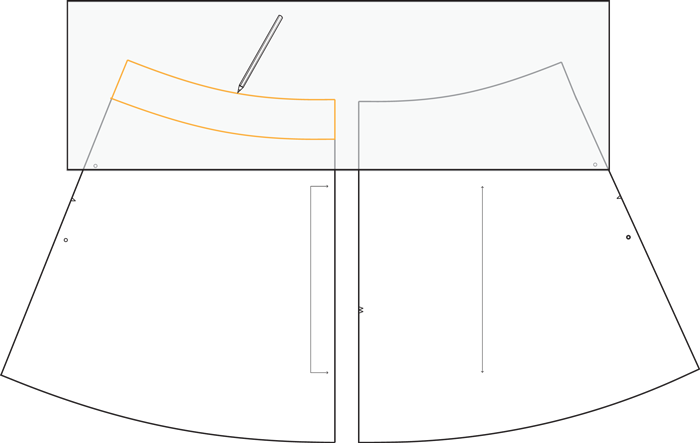
02 | Use trace paper to create a facing. To do this, trace the extended front and back waistlines that you drafted in the previous step. Label “front facing, cut on fold” and “back facing, cut 2,” respectively.

03 | On the waist of the front and back skirt pieces, mark the stitching lines. Draw the first line 1” below the waistline and the second line 1” below the first line.
04 | To sew, attach pockets and sew the center back and side seams according to the pattern instructions. With right sides together, assemble the waist facing.
05 | With right sides together, sew the skirt to the facing along the waistline. Clip the seam and press the facing toward the inside of the garment. Finish the bottom edge of the facing.
06 | Topstitch the facing to create the casing, leaving a 2” gap to insert elastic. After inserting and joining the elastic, sew the casing closed.
Circle skirt
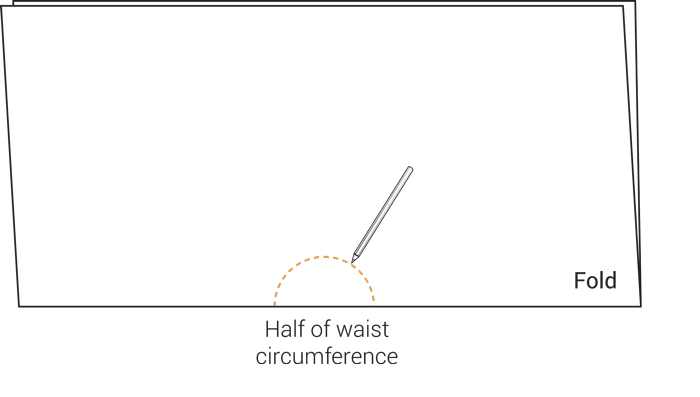
01 | Fold a large piece of pattern paper in half.
02 | Measure your waist circumference. Divide this measurement in half.
03 | Draw a half circle along the fold of your paper. The perimeter of this half circle will equal the measurement you made in the previous step. If you need help with your math for this step, check out this easy-to-use circle skirt calculator from By Hand London.
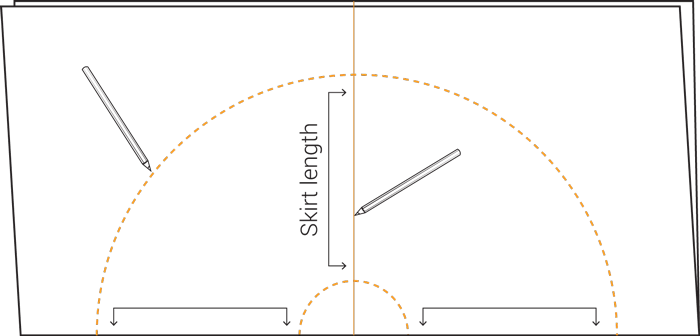
04 | Draw a line perpendicular to the fold line of the paper, through the center of your half circle. This is your side seam.
05 | Determine the length you’d like for your skirt and mark it on the side seam.
06 | Using that mark, create a second half circle, which will be the bottom of your skirt.
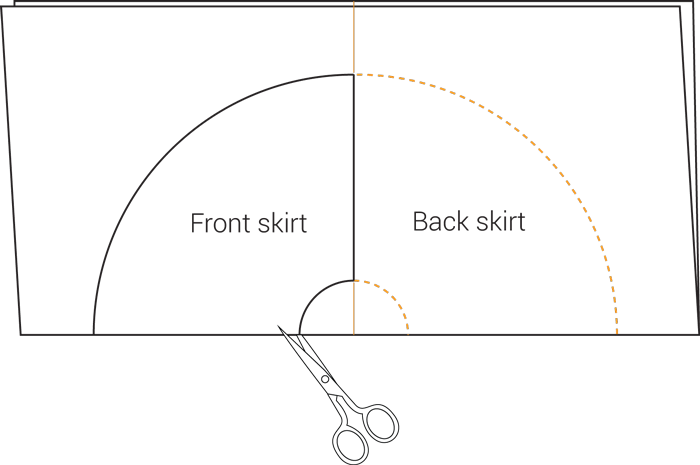
07 | Add seam and hem allowance, and then cut along the folded edge of the paper and around your pattern. Label both the front and back pieces “cut 1 on fold.”
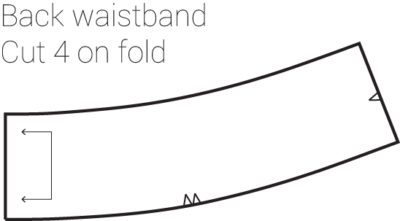
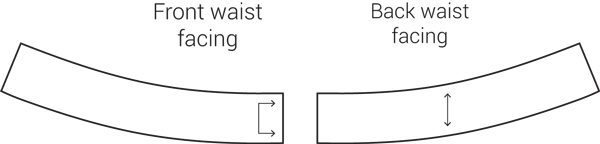
08 | To make a fitted back waistband, trace a copy of the front waistband and adjust its length to match the measurement of the skirt pattern piece. Label the piece “cut 4 on fold.”
09 | With right sides together, pin the skirt front to the skirt back along the right side. Stitch. Finish the seam allowances separately and press open.
10 | Assemble the waistband and sew the right side seam. With right sides together, align the skirt waist with the waistband. Pin and stitch.
11 | Insert an invisible zipper along the left side seam.
12 | Finish the waistband by folding the inner waistband to the wrong side of the garment. Fold the raw edge under and stitch in the ditch to finish the waistband. Hem.

About the Author
As pattern designer, Anna works hard to make sure our sewing patterns boast both great style and instructions. She believes in the power of chocolate and coffee to cure just about anything.