Sign In
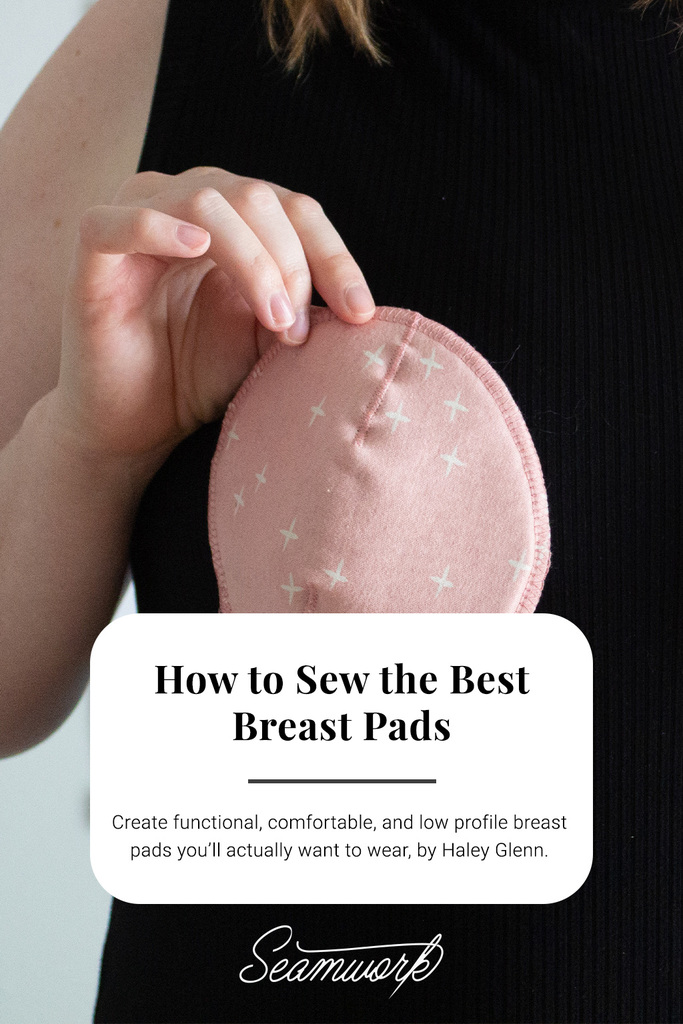
Being a lactating person is hard. From the midnight feeding, the dry, cracked hands from disinfecting pump parts and bottles, and of course the leaking. I have been that person in line at the grocery store, leaking through my shirt because I was unprepared. The thing is, I am normally a very prepared person, but the reusable breast pads that I bought were so bulky and annoying that I would end up ripping them out of my bra when I was at home, then forgetting to replace them when I went out in public. Oops! And while the disposable variety was definitely more comfortable, I knew that there had to be an option that was comfortable and didn’t produce so much waste. So I did what any sewist would do, and made my own. I decided I would reverse engineer the perfect breast pad by analyzing the ready-made options that fell short.
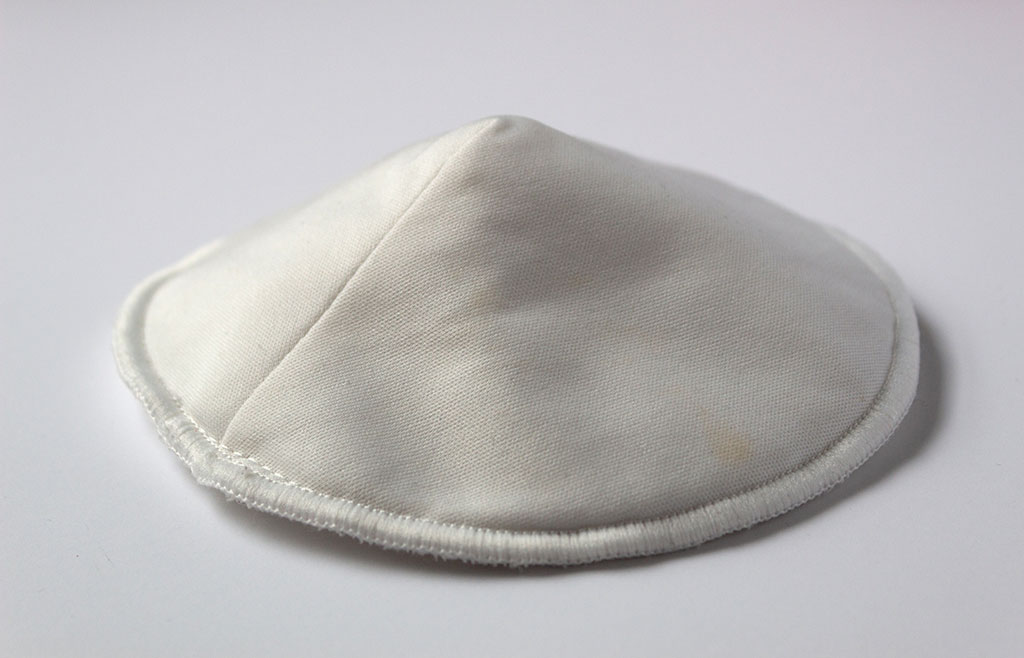
The offending breast pad.
When I took a closer look at ready-made breast pads, this is what I found:
- They were bulky underneath my clothing
- They didn’t breathe
- The shaping provided by darts left me with pointy boobs
- They were just generally uncomfortable!
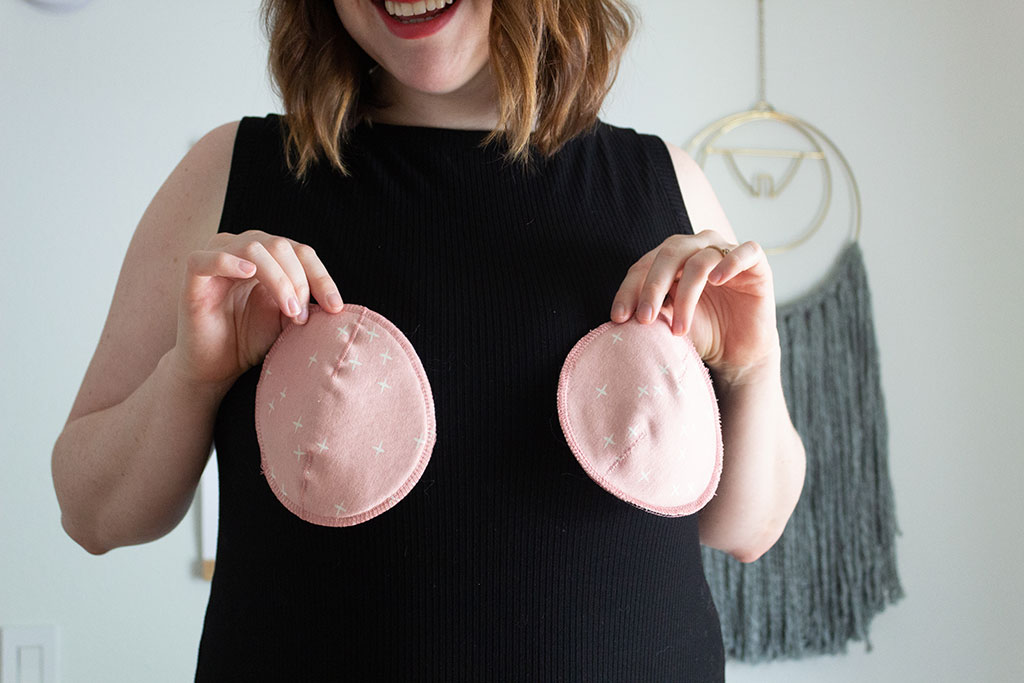
I know that by selecting better fabrics, finessing the shaping, and improving the construction, I could create something functional, comfortable, and low profile.
NOTE: if you are particularly prone to heavy leaks, I recommend wool jersey instead of cotton. Wool has superior moisture repelling properties that will help to keep your clothing dry.
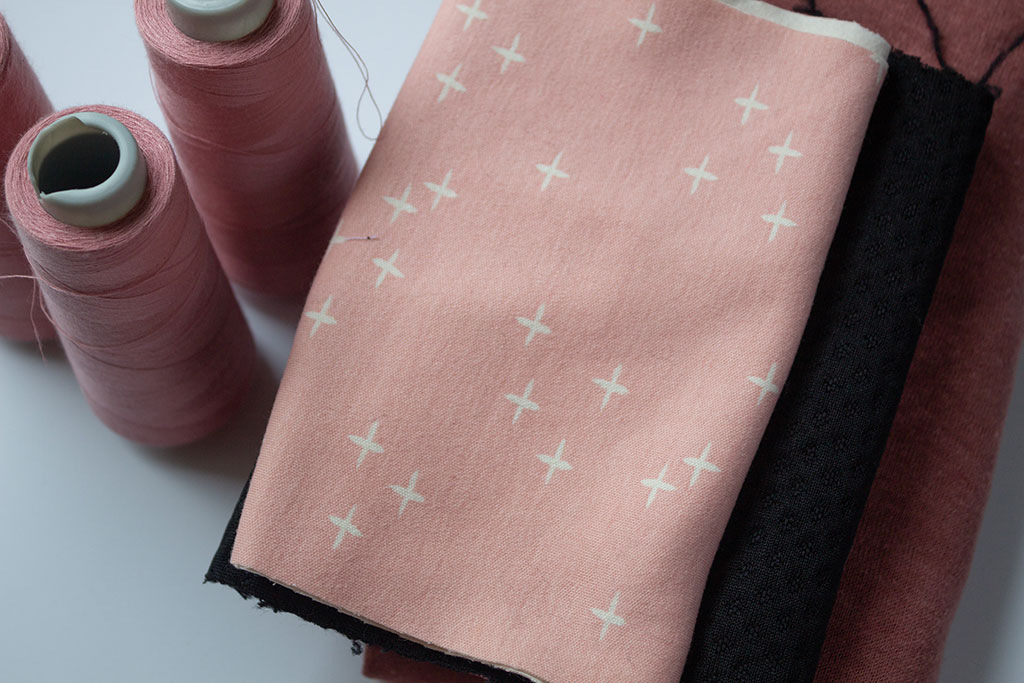
These great pads are designed to be lightweight and moderately absorbent. Bamboo fleece and terry are both soft and absorbent, creating the perfect “against the skin” layer. Zorb is a super-absorbent fabric often used for diaper inserts, reusable pads, or period panties. And finally, cotton or wool jersey provides a final layer. If you are a very heavy leaker, you may want to consider replacing the jersey with PUL (polyurethane laminate) fabric that will provide a completely leak-resistant layer. Just keep in mind that PUL does not breathe very well.
Creating the pattern
To improve the overall shape of these breast pads, I opted for two contour darts. By distributing the shaping to two darts and gently curving the dart legs, you will avoid creating a cone-like shape.
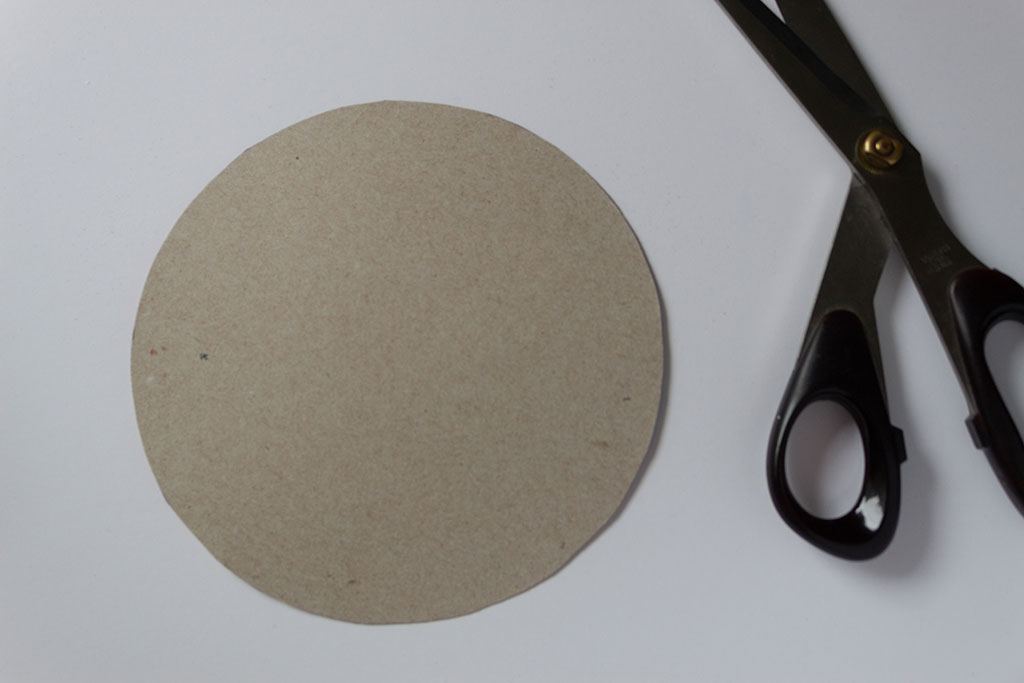
1. Draw a circle on a piece of paper. You can use a bowl or round object as a template or a protractor. I created circles that were 5 1/2" in diameter for my G-cup breast. You’ll want your circles to be smaller or larger relative to your breast size. If you have ready-made or disposable breast pads you like, you can use them as reference.
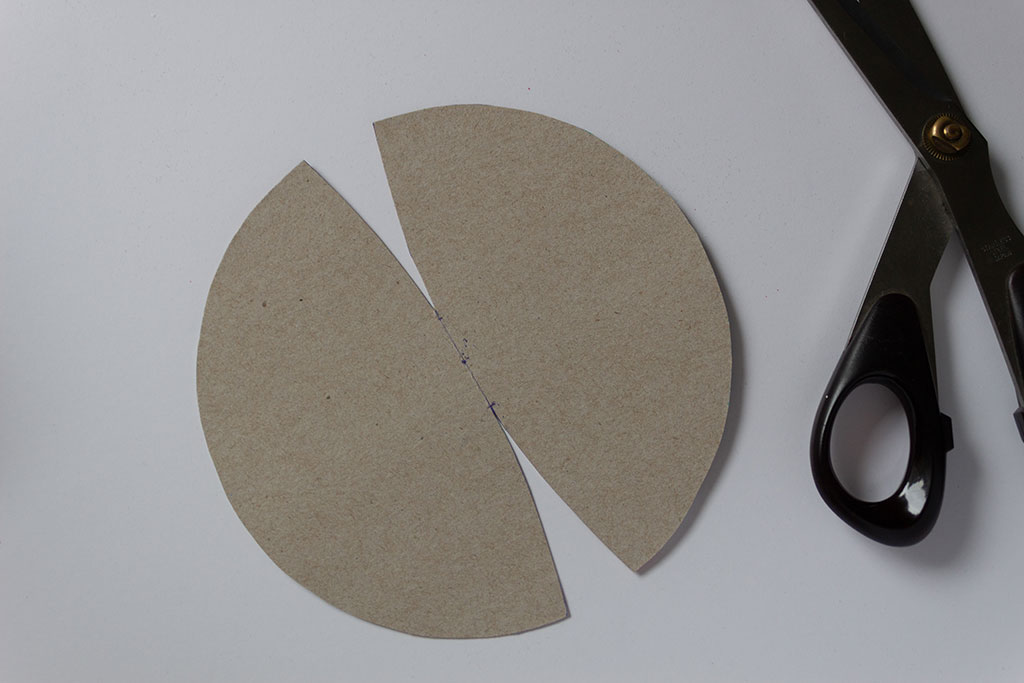
2. Create two contoured darts opposite of one another on the circle. For my breast pads, I created a set of darts that were 3/4” wide and stopped 1/2” from the center of my circle. Use a French curve to create softly curved lines. Use paper shears to cut along the curved dart legs.
Cutting and Assembling
This assembly method uses flat seams on the jersey and Zorb layers to reduce overall bulk. Additionally, pre-trimming the central Zorb layer helps to grade your seam allowance prior to finishing the edges.
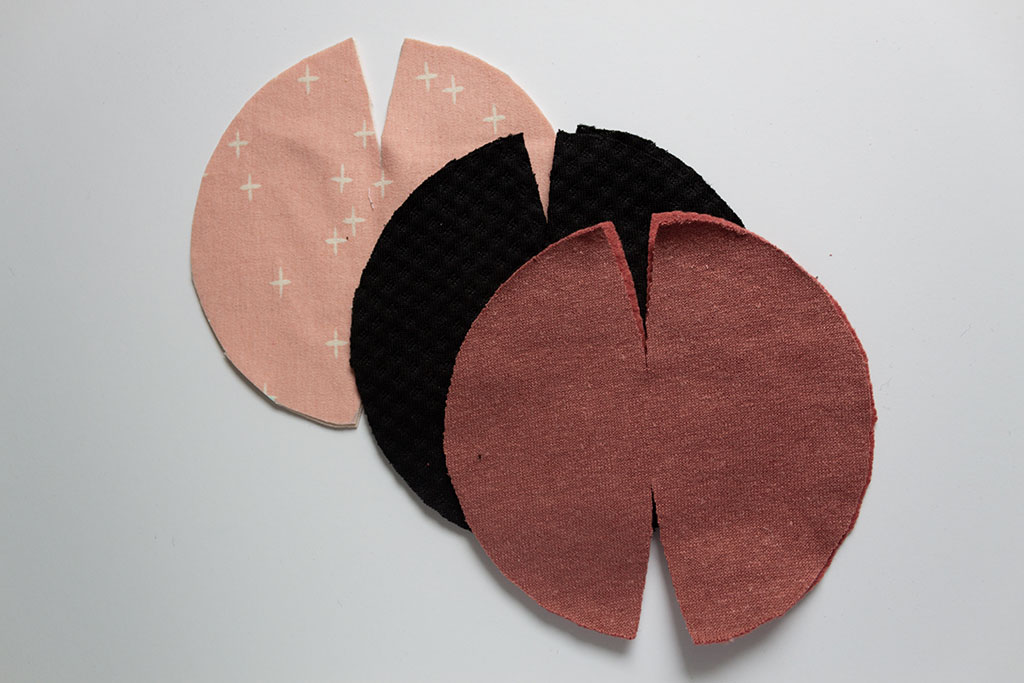
1. Use your pattern to cut your Zorb, jersey, and fleece (or terry). Cut two of each fabric to create one set.
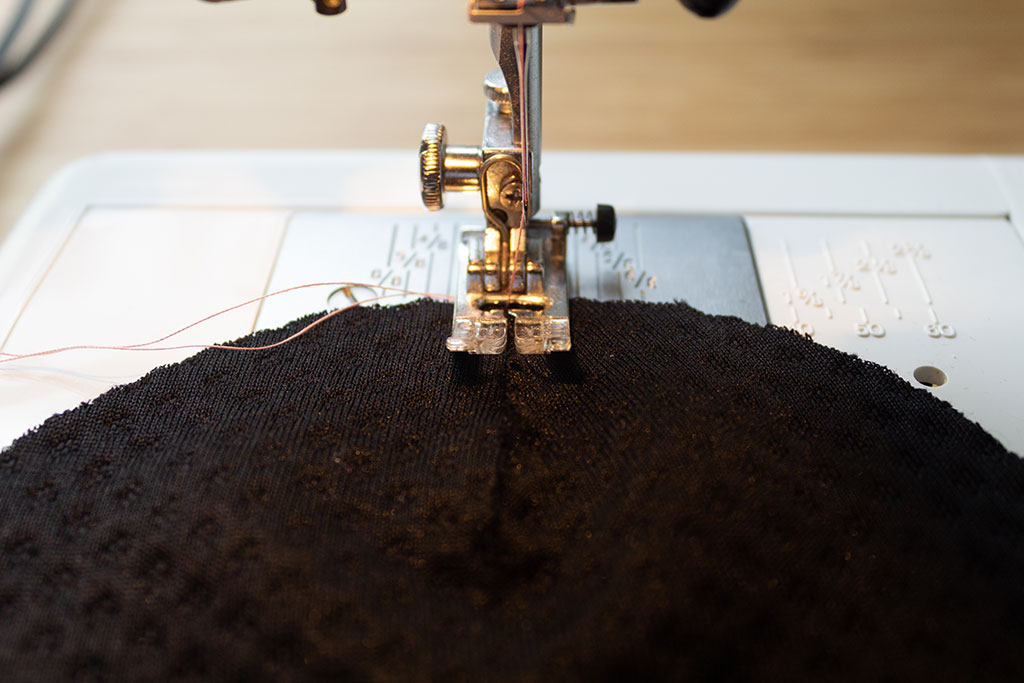
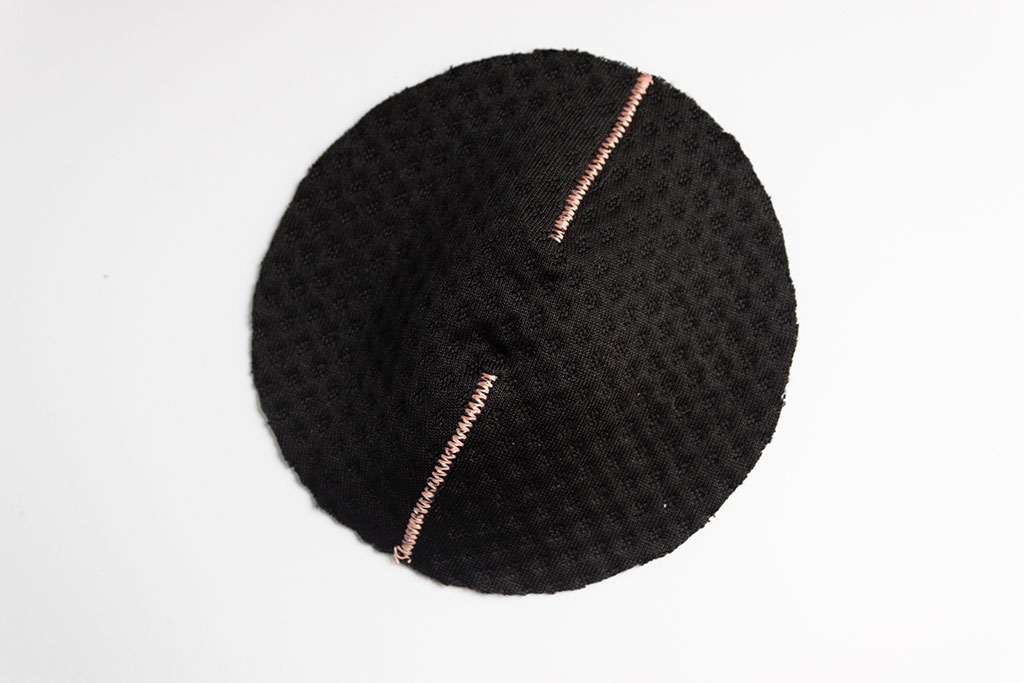
2. Set your machine up for a zigzag stitch, I used a width of 3.5 and a length of 1.5. On your Zorb pieces, butt the dart leg edges up against one another and sew with the right side facing up using a zigzag stitch. Pivot at the end of the dart and sew back towards the edge of the fabric to reinforce.

3. Repeat on your jersey pieces. TIP: If you find this step challenging, you can use knit stay tape or a piece of knit fusible to fuse the wrong side of the seam before sewing.
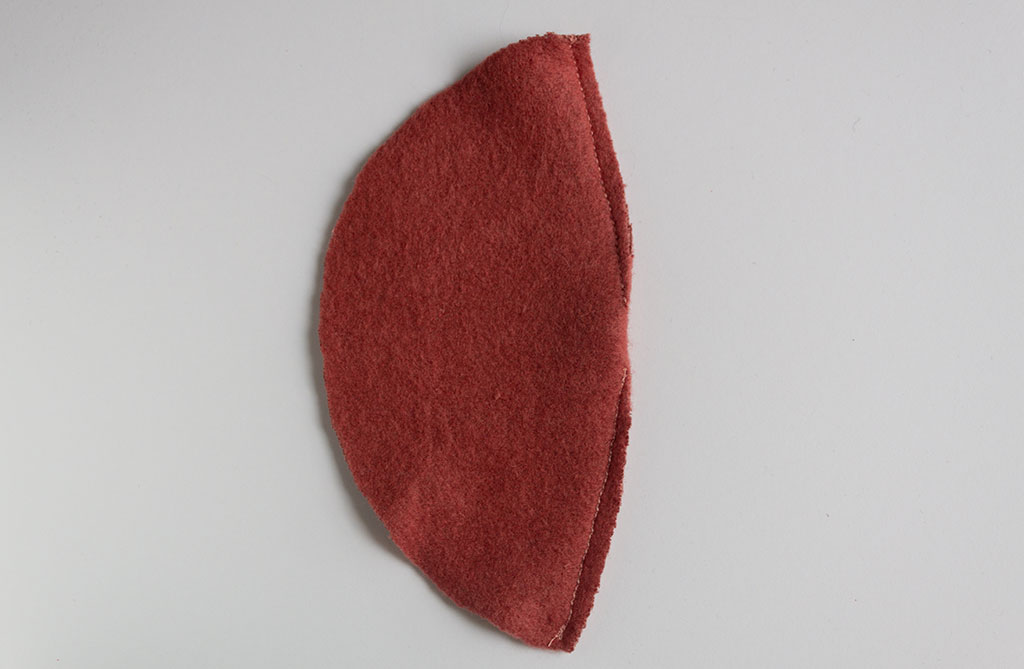
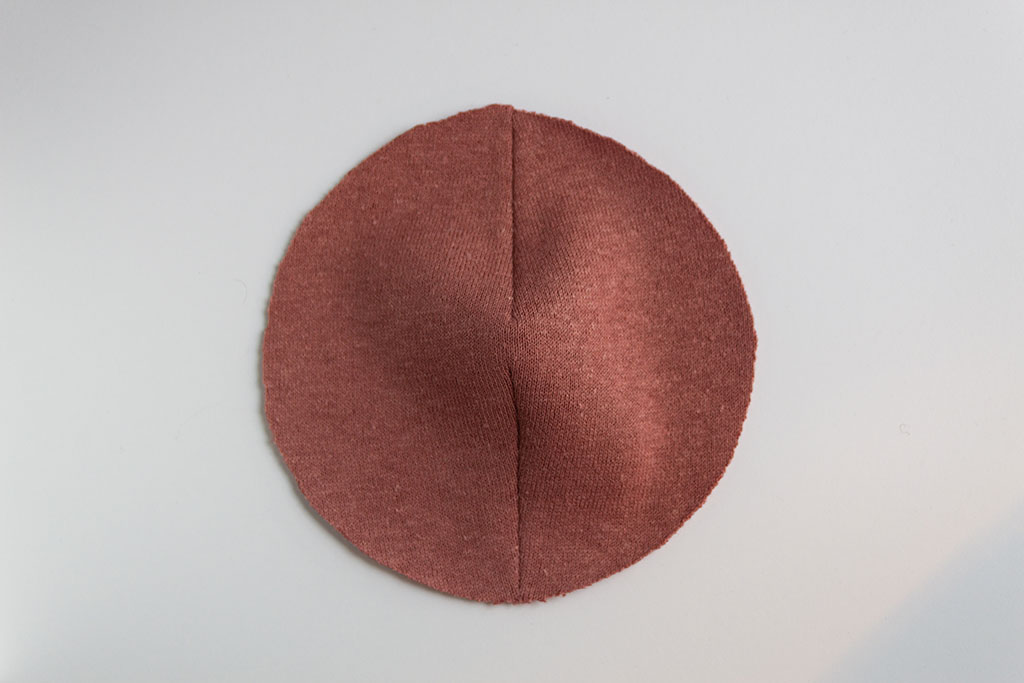
4. Next, we will sew the darts on our terry or fleece pieces. Since this fabric will lay directly against the body, we’ll use a more traditional darts construction to avoid itchy exposed stitches. Set your machine up for a straight stitch. With right sides together, sew along the darts legs at a 1/8” seam allowance. Press the seam allowance open.
5. Trim a scant 1/4” away from the outer edge of your Zorb pieces. This will help reduce bulk and create a more gradually graded edge.
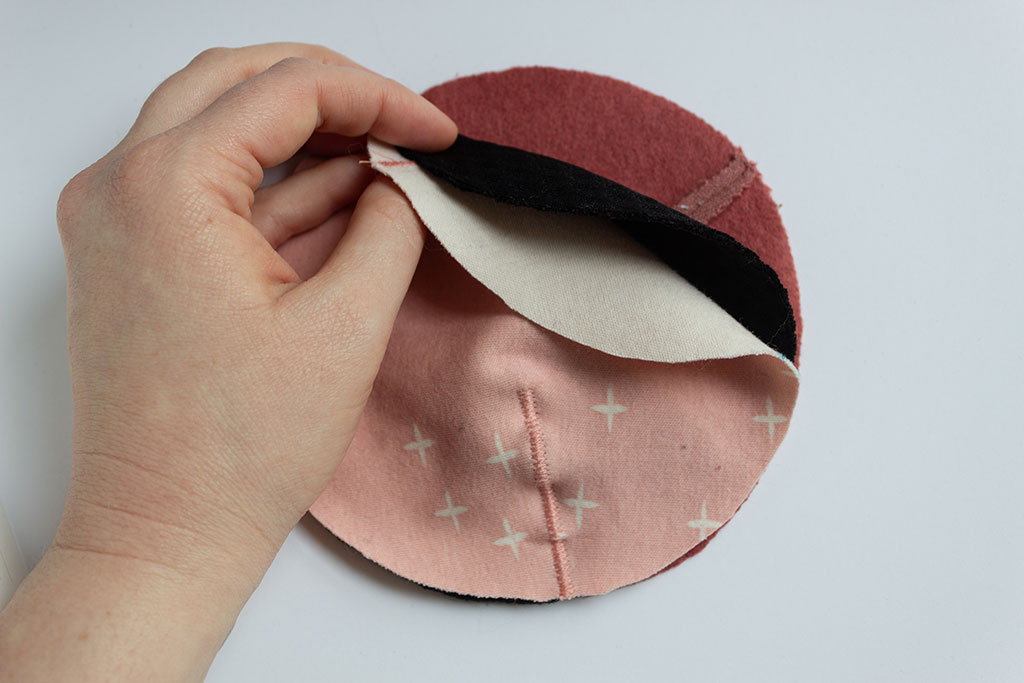
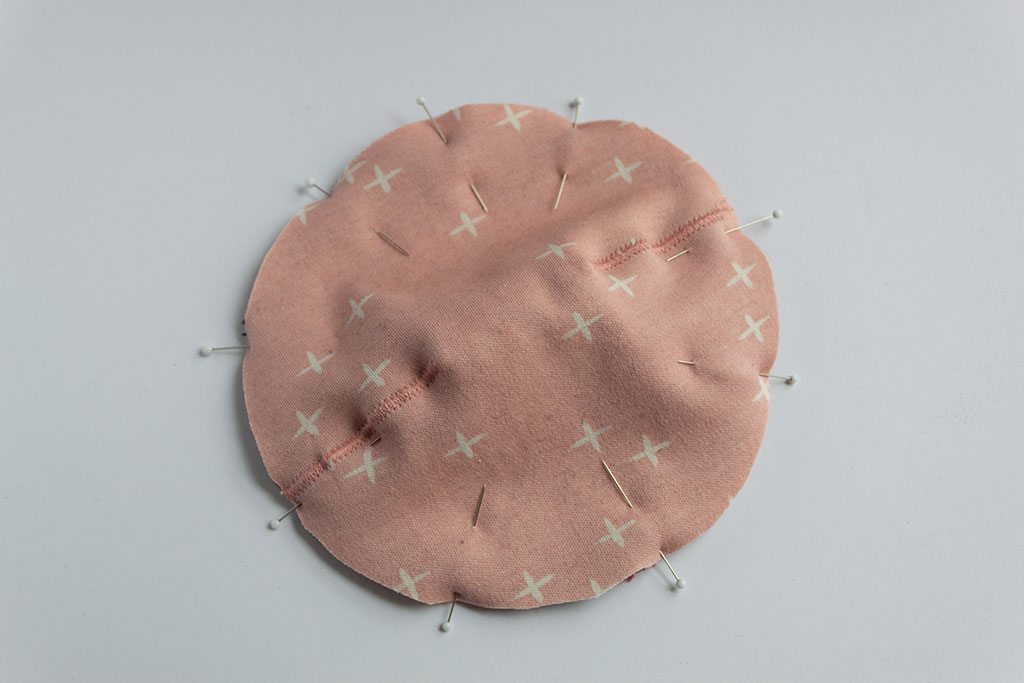
6. Stack your three layers of fabric, creating a Zorb sandwich. Make sure the right side of your outer layers are facing out. The central layer should be centered on the breast pad. Stagger the dart seams so that no two darts are on top of one another. Pin along the outside edge of the breast pad unit. TIP: It helps to mold your pad into a convex shape with the jersey facing out as you pin.

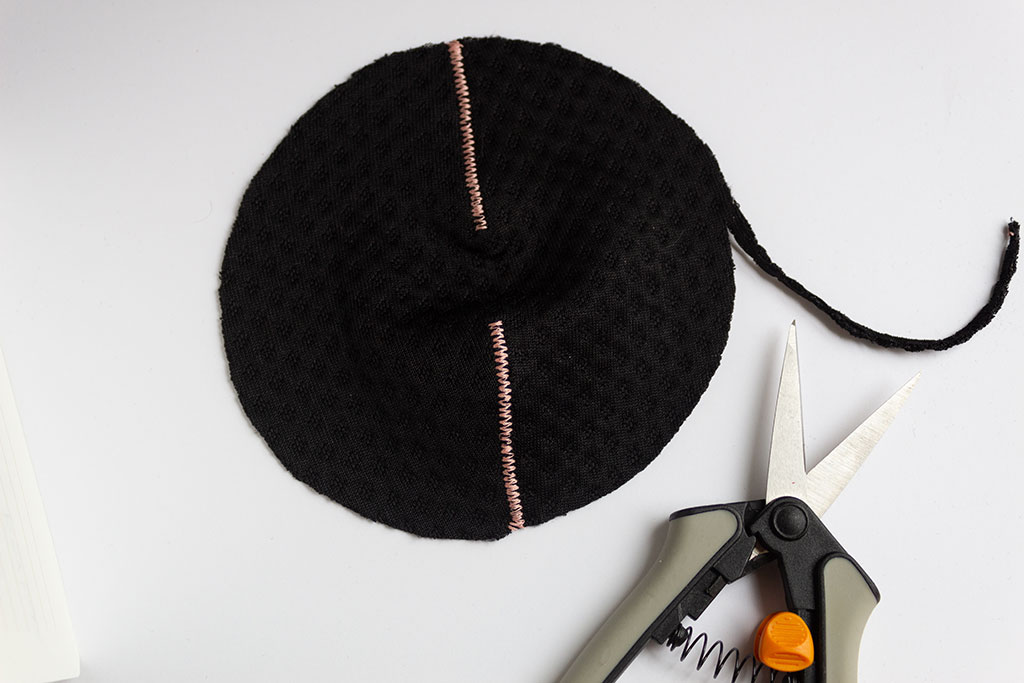
7.Using a serger or zigzag stitch, finish the outside edge of the breast pad. I found it best when serging to trim 1/8” as I sewed. This did a good job of cleaning up the edges as I sewed. If you are using a zigzag stitch, just sew 1/8” from the edge then trim away the excess.
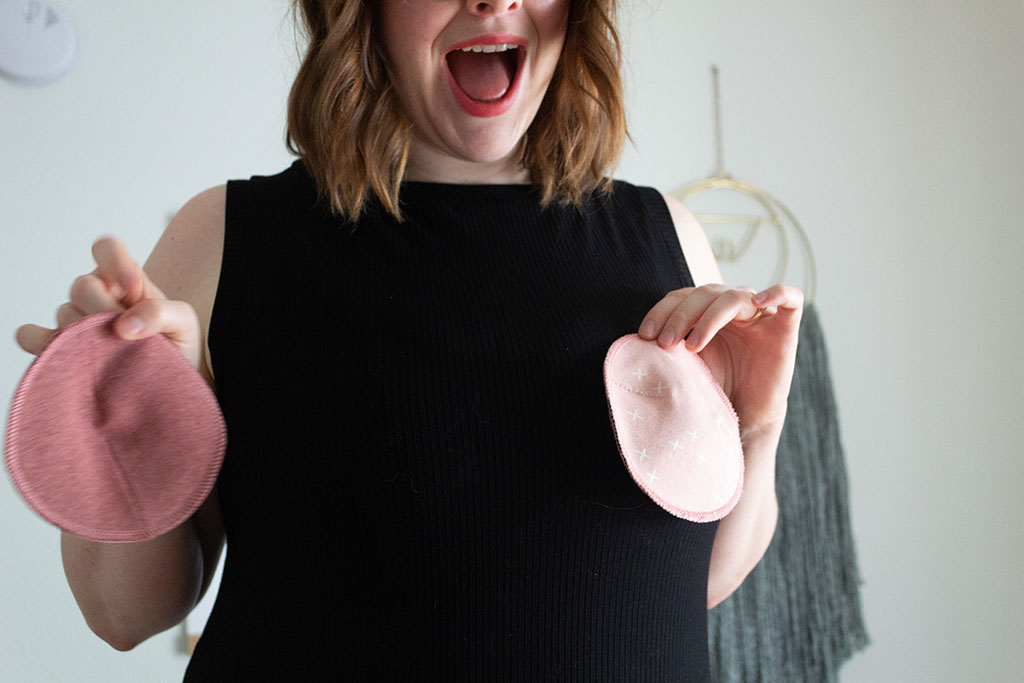
You did it! You created some awesome breast pads. Repeat and make as many as your heart desires, using up all the awesome jersey scraps you have been hoarding for years.

Haley Glenn
Designer
Haley doesn’t just want to design clothing you’ll love to wear, but clothing you’ll love to sew. With a background in both design and teaching, she combines her talents to imagine patterns with thoughtful details that build your skills as you sew.