Sign In
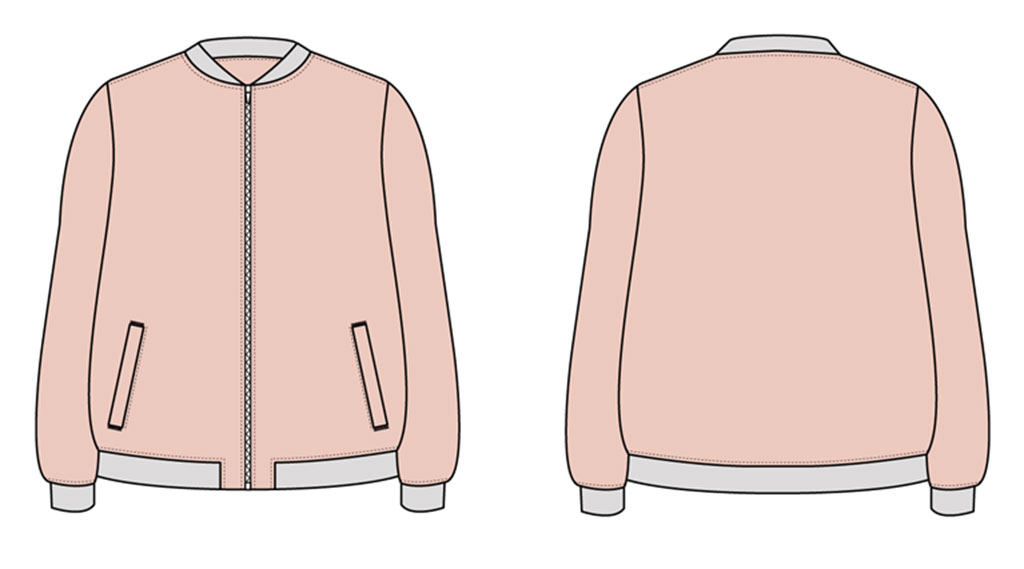
Lumberjackie? Lumber Jill? Take your pick! I was immediately attracted by the Larkin bomber jacket, which makes the perfect fall or spring outer layer. A few of us Seamwork ambassadors were chatting about what we might do with the pattern at the beginning of the month, and it’s been really fun to see how everyone’s turned out. They are so great!
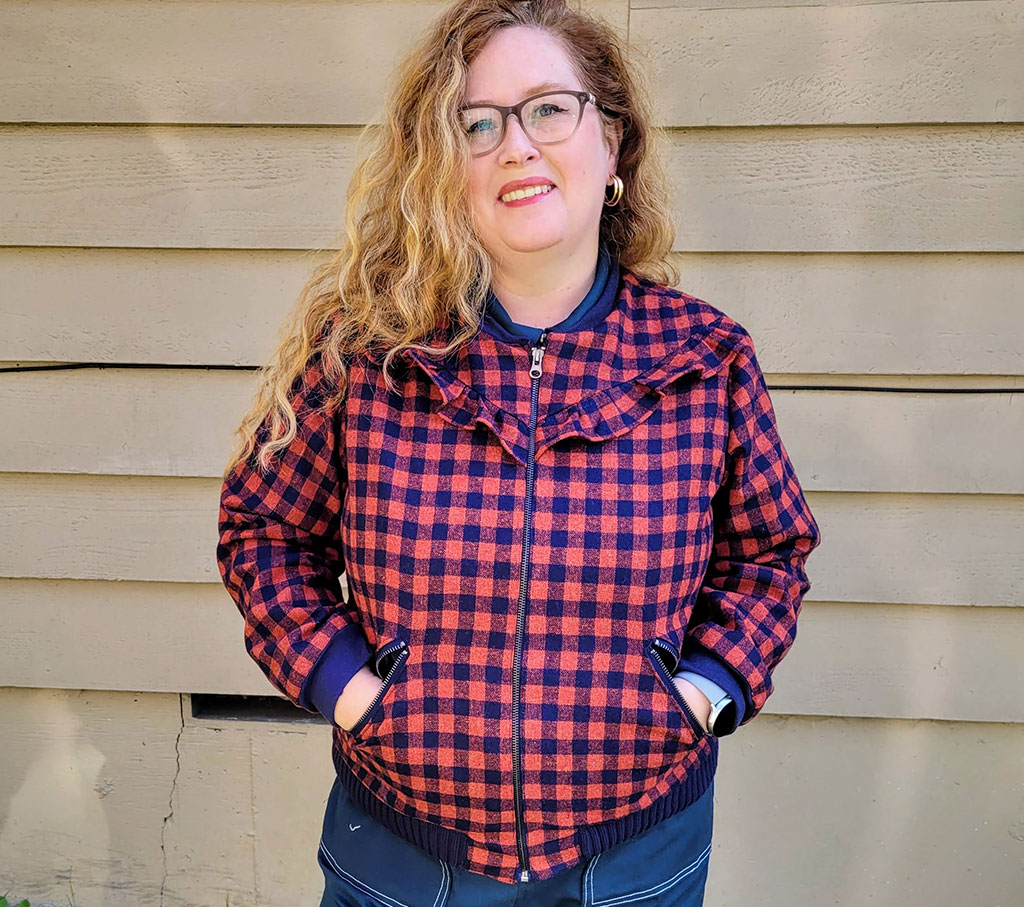
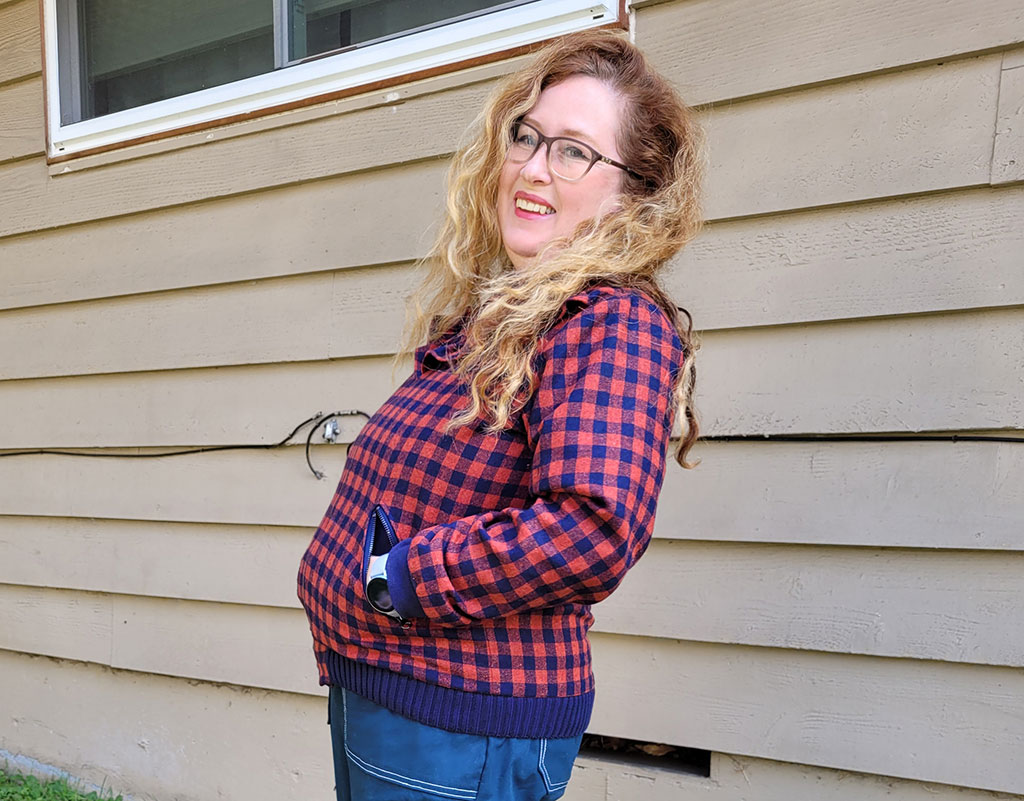
For my jacket, I decided to add a little ruffle at the shoulder and also to use exposed zipper pockets instead of the pattern’s regular welt pockets. I have absolutely nothing against a welt pocket, but I’ve made a few recently, so fancied a wee change. I also thought the exposed zip would look quite good against the plaid and break it up a little.
In this project diary, I’ve included a short tutorial for both in case you wanted to try them and weren’t sure how to approach the process.
Sizing, Fabric, and Fitting
Larkin has a relaxed fit, so I sized down one size to get a good shoulder fit and made size 14 from the 00-14 size range. It is definitely relaxed and not oversized though, so I was glad I didn’t size down any further. If it had been a B cup draft, I might even have had some strain, but since Seamwork patterns are drafted for a C cup, as compared to my own D cup, I was okay.
However, when I measured the pattern pieces against myself, I could see the shoulders were still quite wide, so I made a further 3/4″ narrow shoulder adjustment and probably could have gone the full inch. In any case, a narrow shoulder adjustment is a quick one, but just be sure to make the adjustment on both back and front pieces as well as the lining front and back pieces.
I also shortened the sleeves by an inch and I think that was about right. It’s a normal adjustment for T-rex arms over here, so most people won’t need to bother.
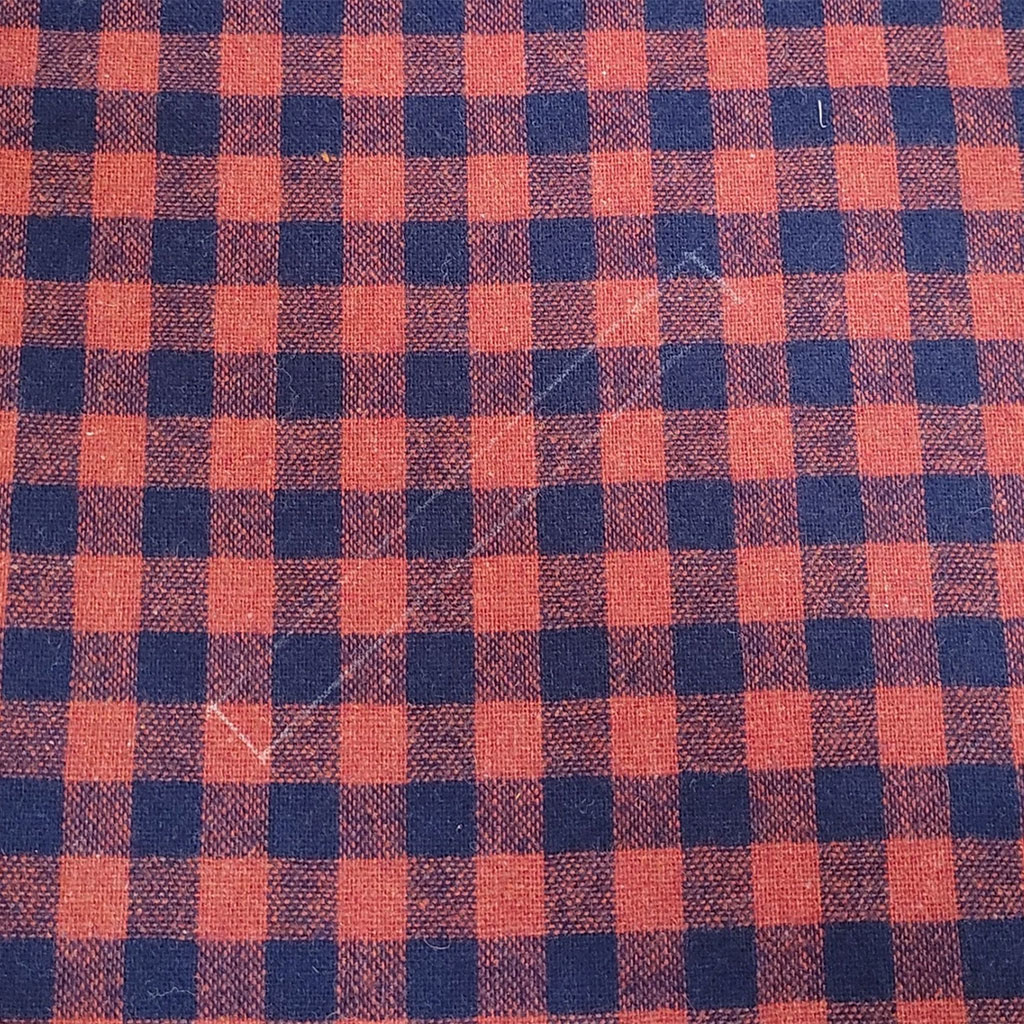
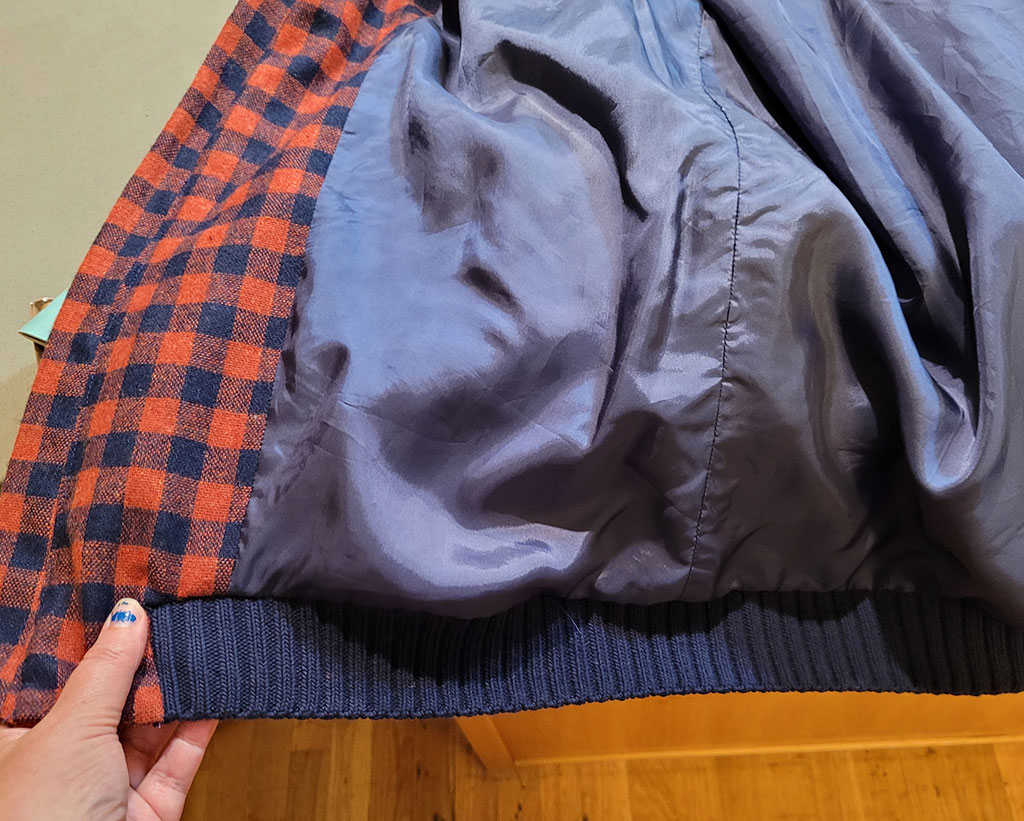
Fabric-wise, I had originally intended to make this jacket from black denim, but I wanted a very soft denim with that almost grey tone to it. Know the type I mean? Naturally, it was impossible to source, so I turned to this thrifted wool plaid I had in my stash, thinking that might look kind of cool as a bomber. It’s quite a simple check, so it was fairly easily to match and it actually matched so well at the side, front and arms that I think it’s sort of invisible. Just don’t look at the little bit above the front ruffle—that wasn’t so successful.
It’s quite a loose weave for a wool, so I did overlock a few hems despite the fact there was a lining, but generally it was very easy to work with. I used a rayon bemberg for the lining, which is a bit more slippery, but it does make for lovely fancy innards!
Pattern Modifications and Tutorials
Exposed Zipper Pockets
I made the exposed zipper pockets in the same way I would for a bag. They’re fairly similar to a welt pocket in many ways, but easier!
First, decide on your pocket length. My zipper was quite chunky, so I decided to lengthen the pocket by about 3/4″. You can totally use the pattern length though—whatever you prefer. The width of the welt opening was fine for my zipper as I wanted the exposed look with a thicker zipper. If you prefer a thinner zipper or sleeker look, you will want to narrow it.
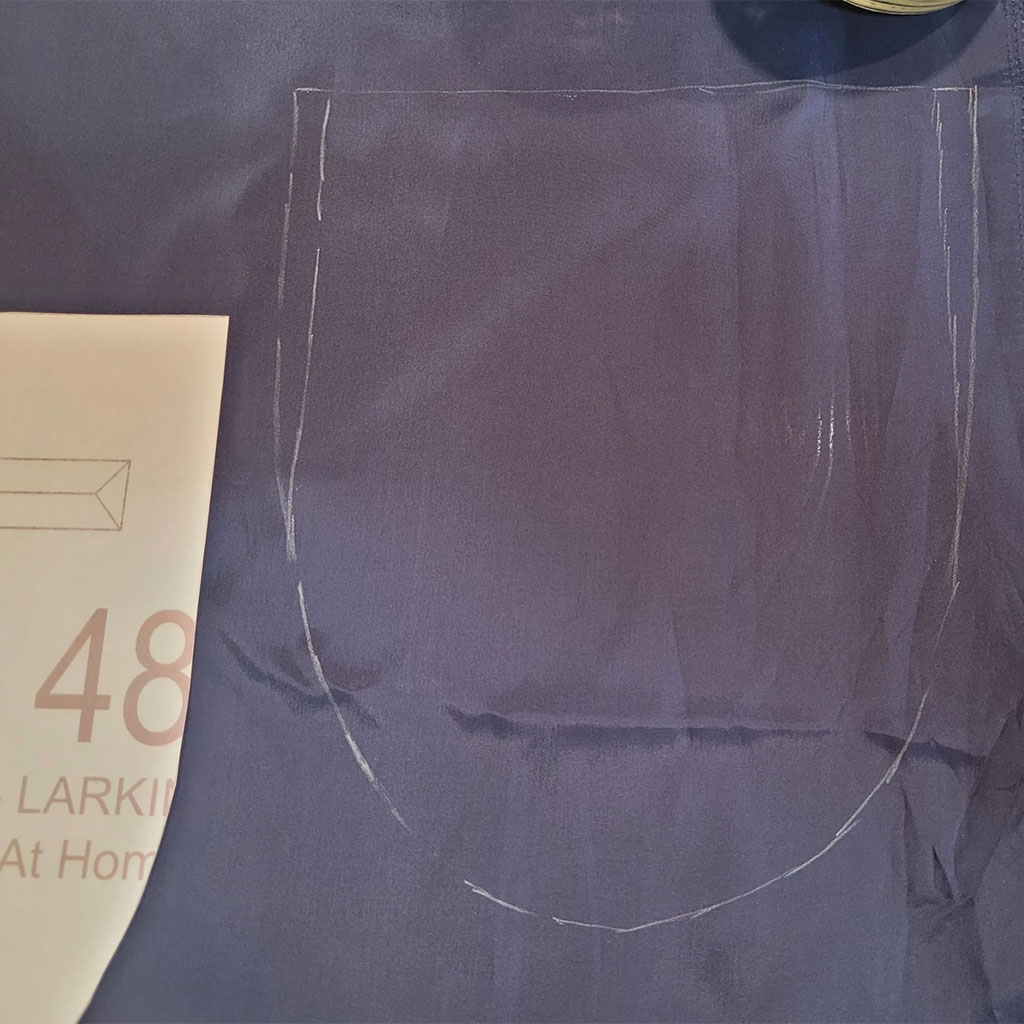
Note: If you do decide to lengthen the pocket, just remember to widen the pocket piece and facing, to give yourself enough seam allowance.
Mark the opening on your pocket location and the pocket piece. Lay the pocket piece right sides together with the jacket front so that the two rectangles match up and stitch around the entire rectangle.
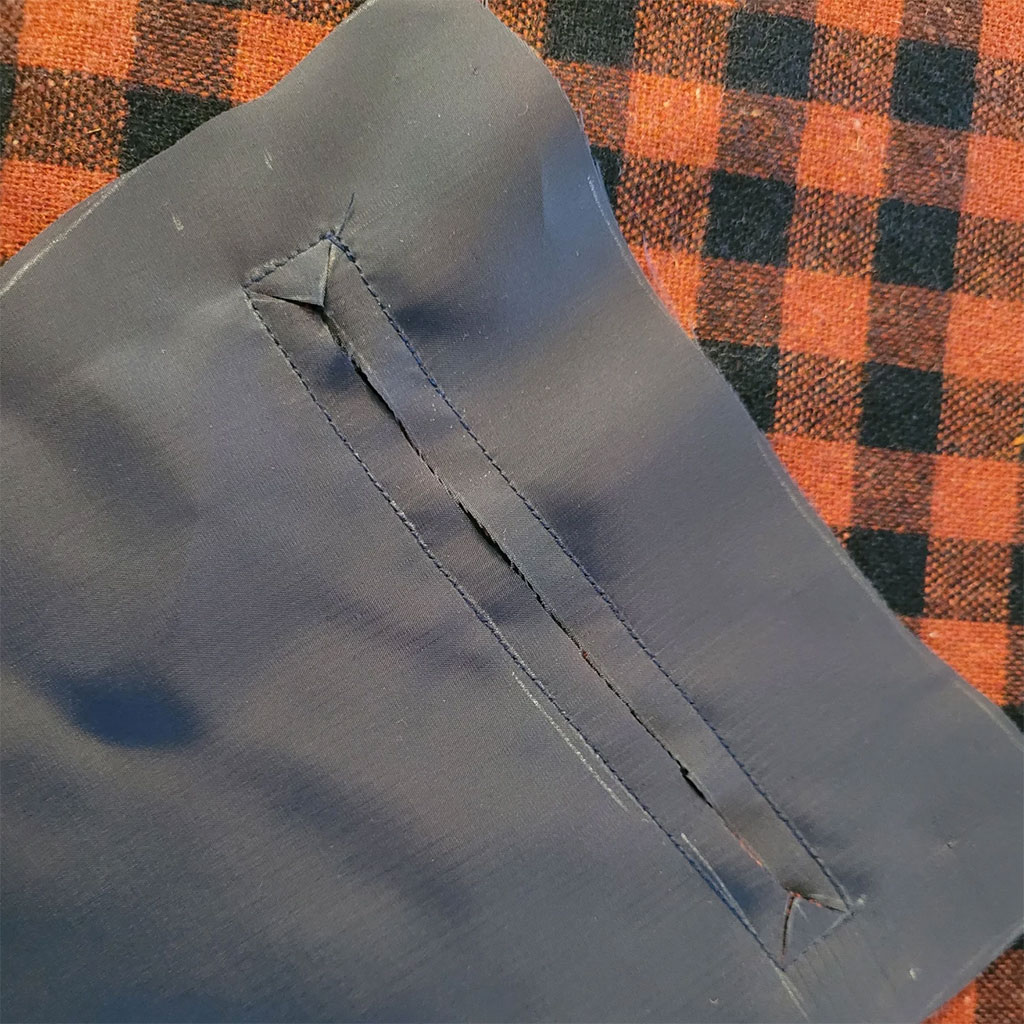
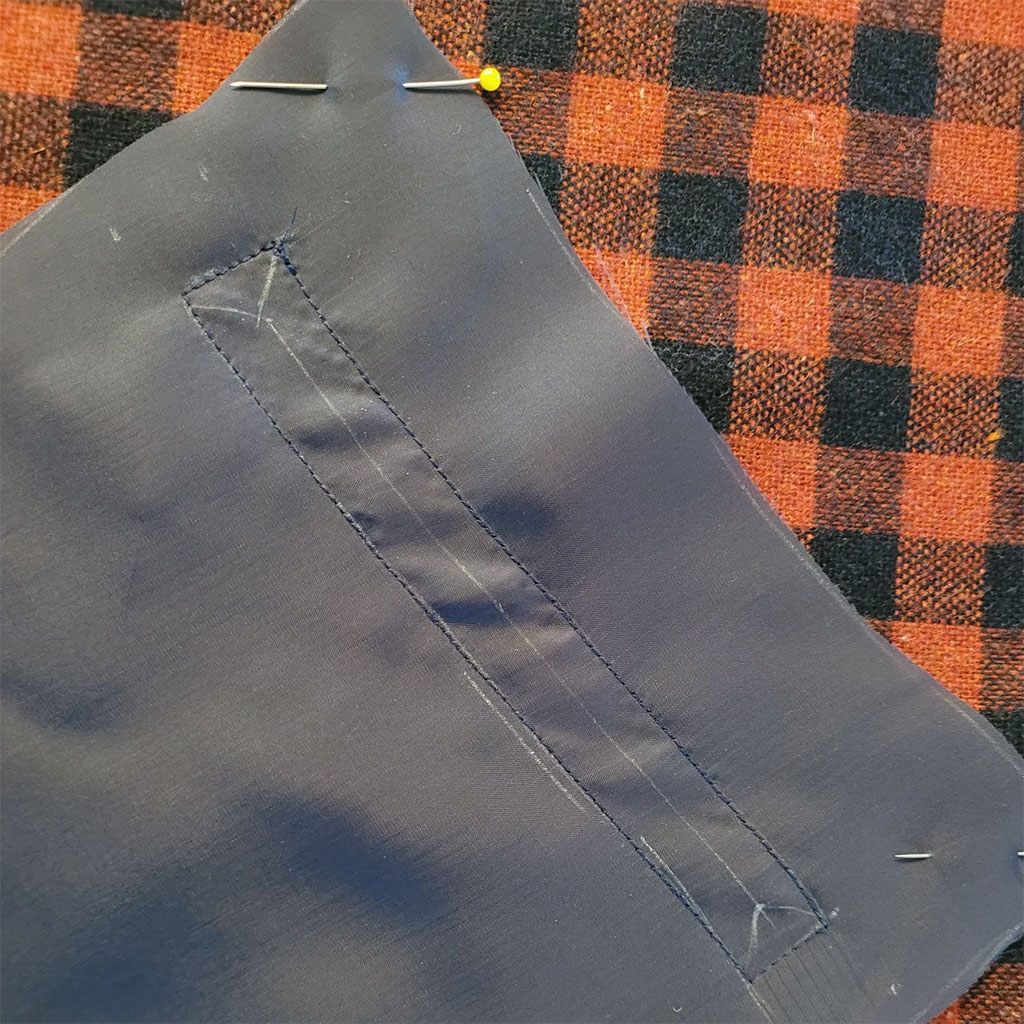
Cut along the center line and then out at the diagonal lines at the end. Try and snip right into the corners, without snipping through your stitches.

Push your entire pocket piece through the hole to the wrong side of your jacket front and flatten so you get a nice rectangle on the right side. Press well on both sides.
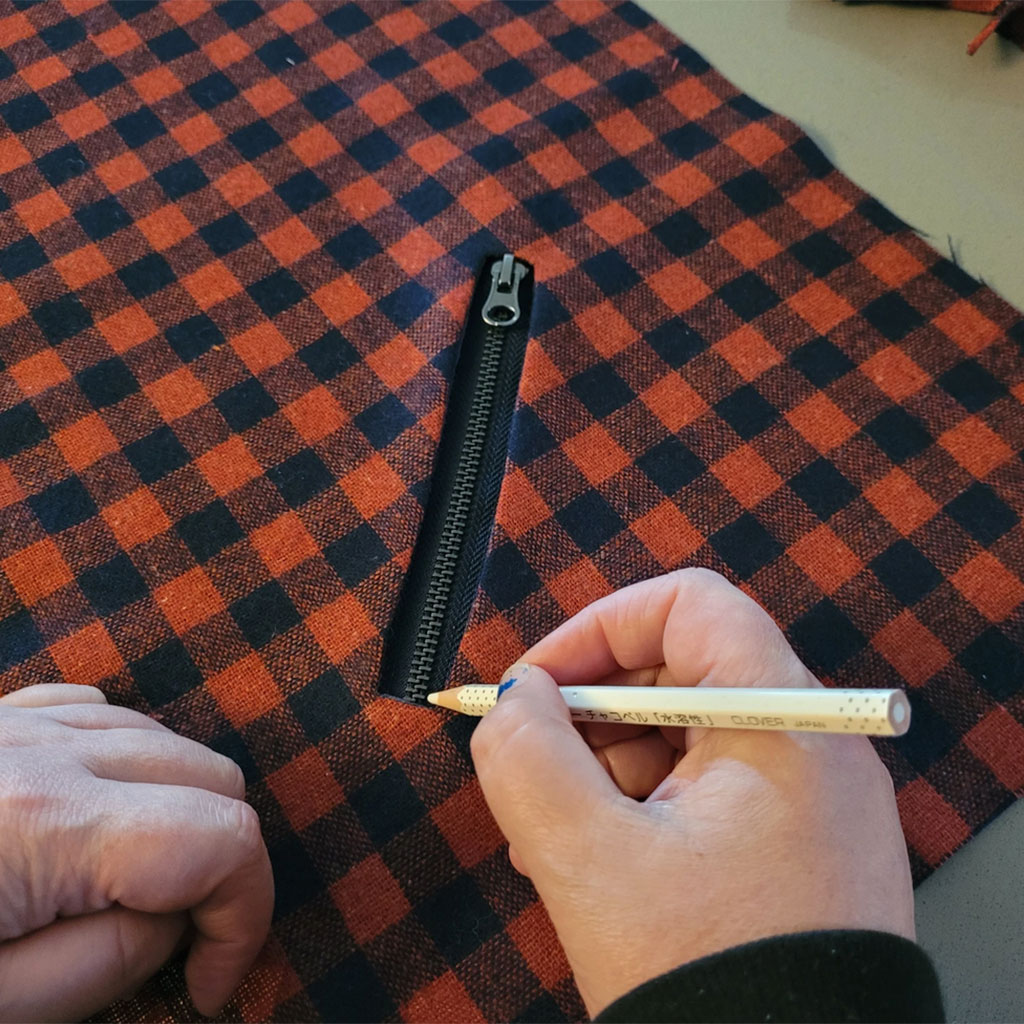
Now pop your zipper under the pocket piece and lay it in the hole in its final position. At this point you can trim your zipper to the length you want it if it is too long. I trimmed mine at the bottom and zigzagged over the metal teeth to make sure the zip pull didn’t fall off. I also put a few hand stitches in the top to keep it neat, but that’s definitely optional.
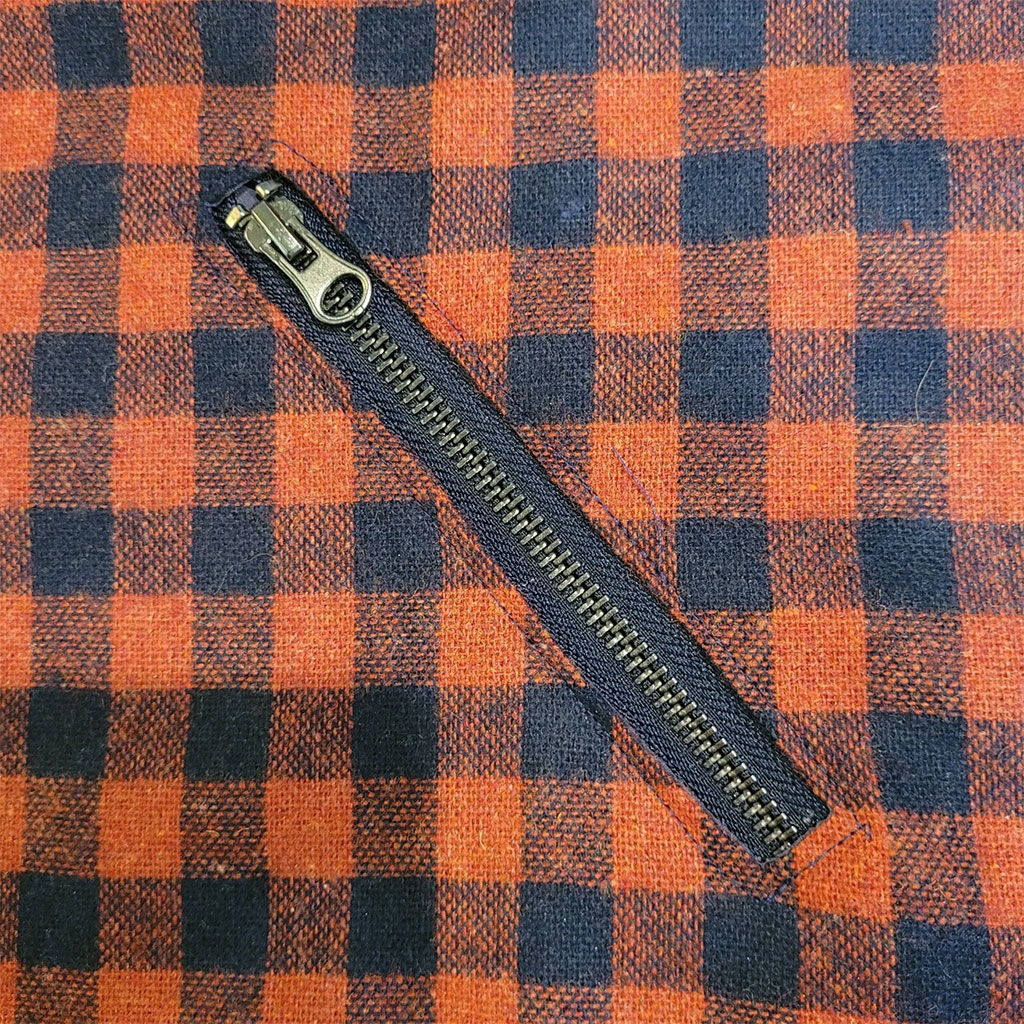
Secure it with pins, Wondertape or basting. I like Wondertape, but it didn’t work too well with my wool for some reason. I got the best result by handbasting the zipper in, but just use your favorite method and then topstitch all the way around the rectangle. I did it at around 1/8″ from the edge.

Turn your piece over and match up the facing piece to the pocket piece. Stitch all the way around the edges to form the pocket. You could finish the edges, but as there’s a lining for the Larkin I didn’t bother in this case.
Ta-da! You’re done! Pretty easy eh?
Ruffled front
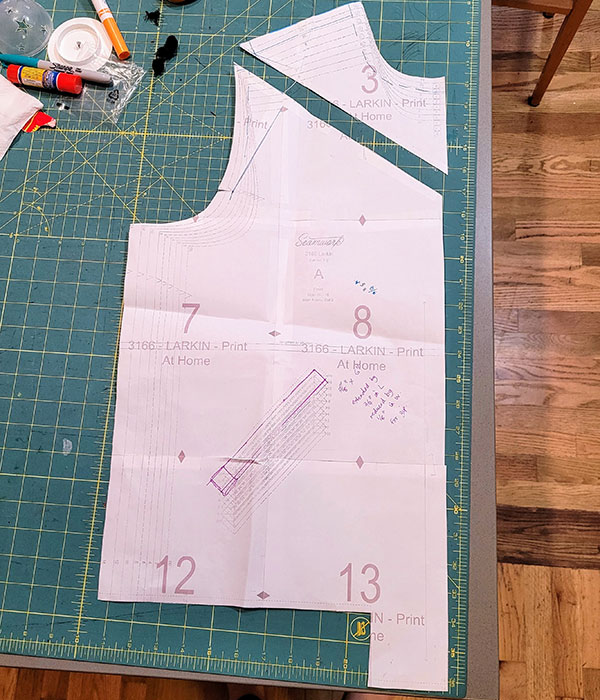
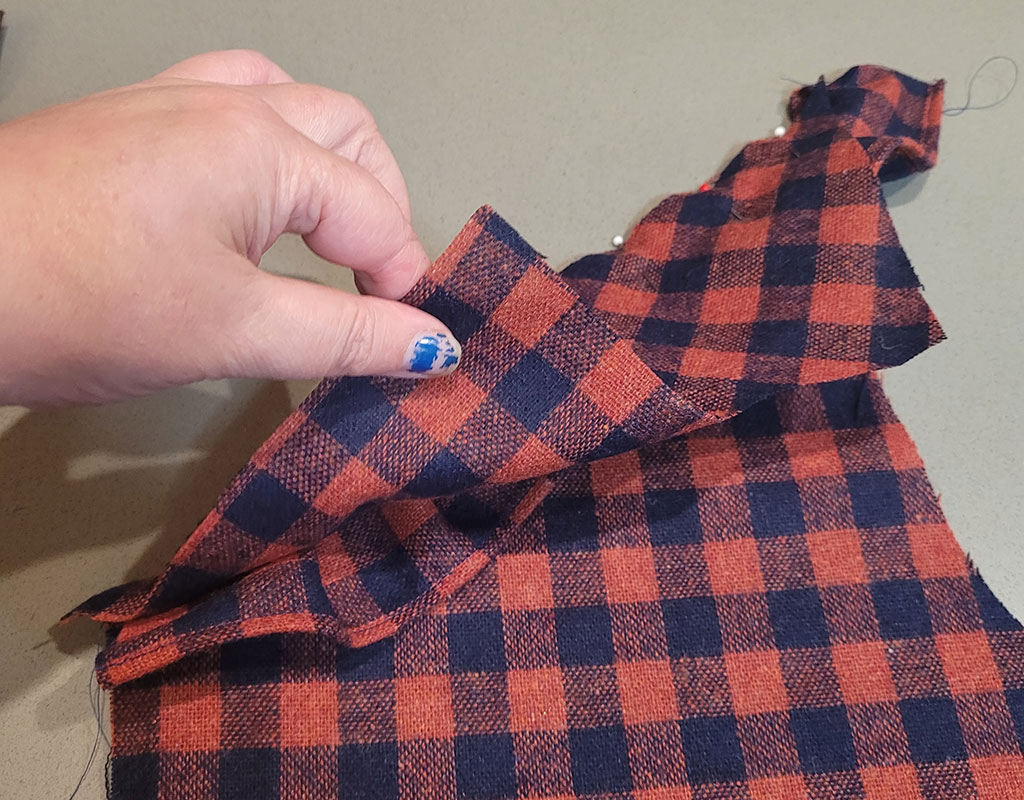
For the ruffle, I sketched out a few angles on the line drawing to see what kind of diagonal line I liked. Then I simply divided the front piece into two pieces along the diagonal from shoulder to a point I picked at center front. I added a seam allowance to each cut edge when I cut the fabric, but you can add it on the paper piece if you prefer.
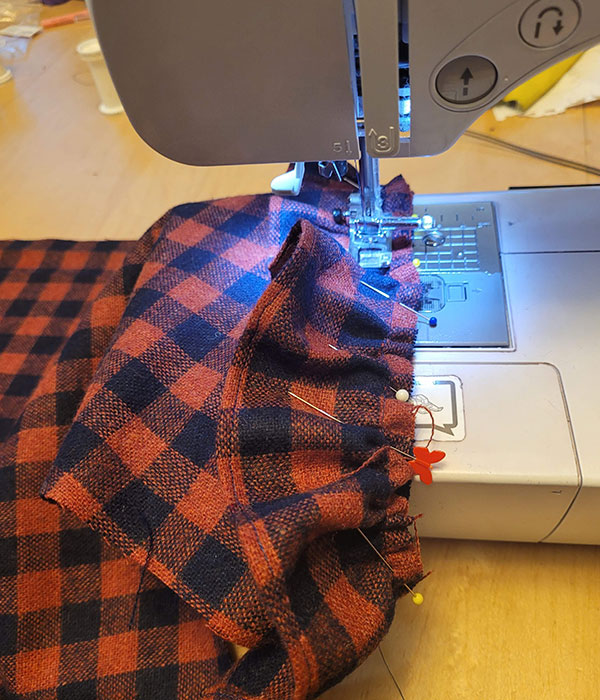
For the ruffle, I cut 2 pieces of fabric 2 1/2 inches in width by 20 inches long. I sewed a long gathering stitch and then gathered it until I liked the ruffle. I then placed it right side up on the lower jacket piece and basted it at around 1/4″.
 >
>
I checked it looked okay and then placed the little diagonal top piece right side down on top of the ruffle and stitched all layers together at the 5/8″ seam allowance.
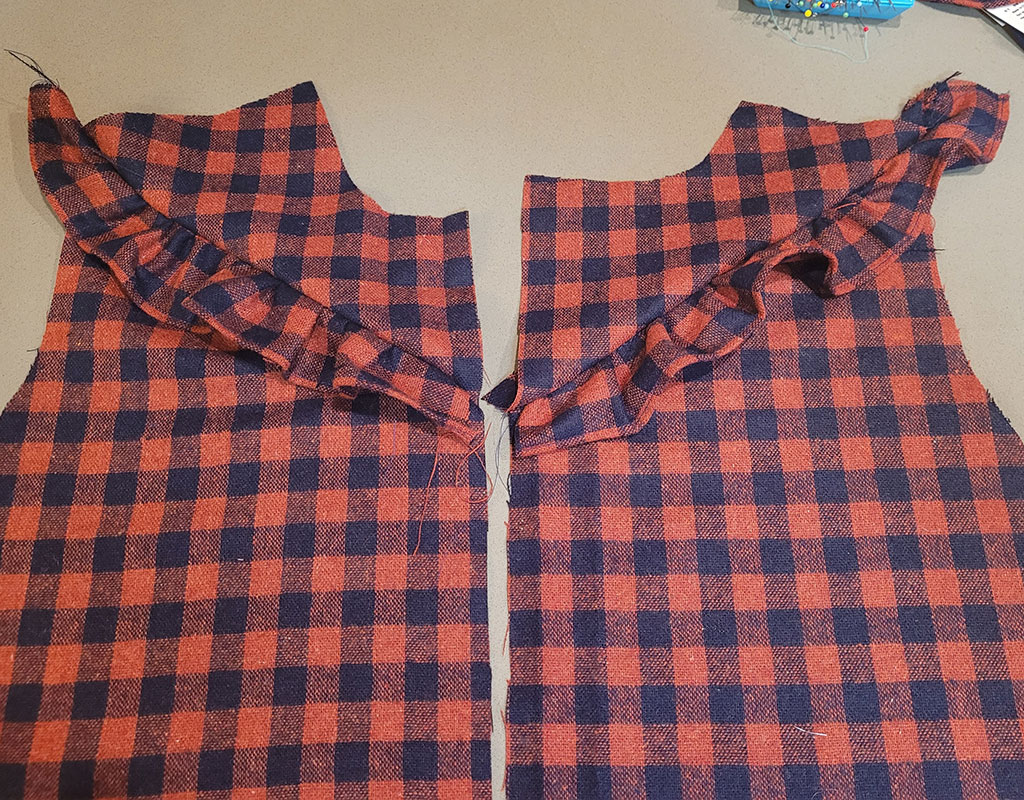
I made sure to grade and trim the seams as well as trim down the ruffle to match the front jacket piece shape. After that, you can just carry on as normal as per the instructions!
My Finished Bomber Jacket
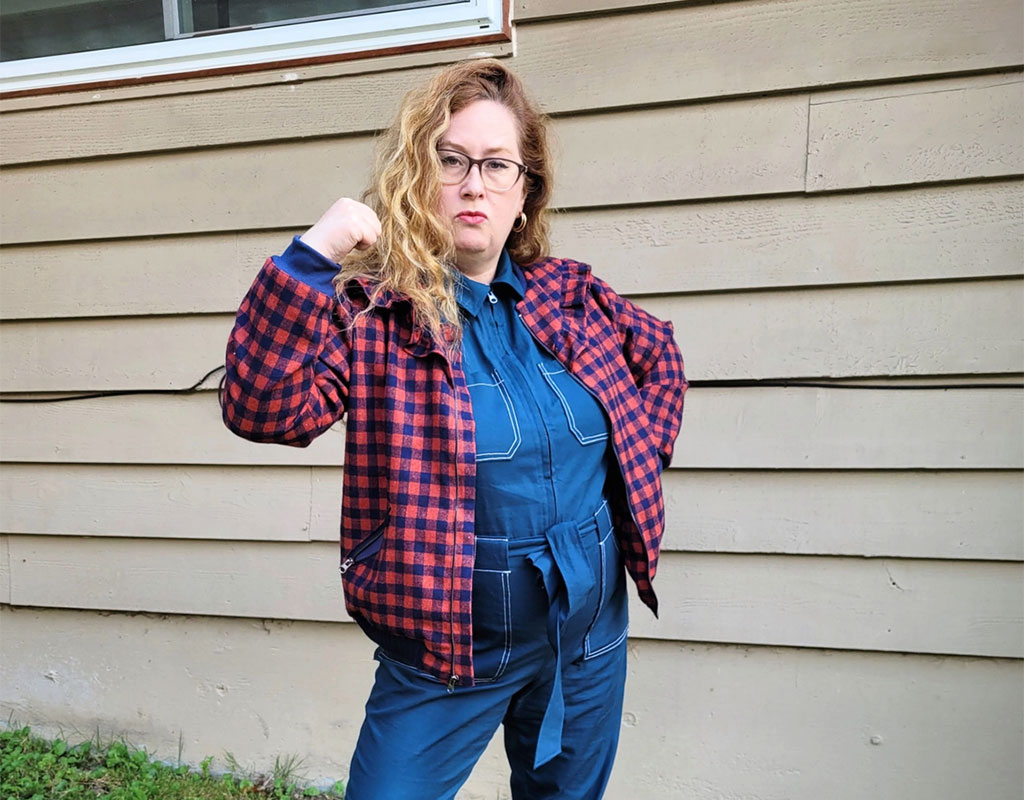
Overall, I really enjoyed this project. It had a satisfying level of difficulty and it was fun to come up with a few embellishments of my own. As I said at the top, take a look at some of the other jackets already made this month to see how everyone put their own spin on it. There’s something for everyone!

Claire MacPherson
Contributing Writer
Claire is a Scottish sewist who currently calls the Pacific Northwest home. She took up sewing while on maternity leave with her son and it quickly developed into an obsession that shows no signs of abating. There are worse obsessions, frankly. Find her on Instagram at @belle_citadel or at her blog.
Related Articles


10 Easy Seamwork Patterns for Beginners
If you’re new to sewing, these patterns will help you start building your handmade wardrobe.