
 Sign In
Summer sewing should be about creating pieces you actually want to wear when it's hot, humid, and you just want to feel comfortable in your own skin. This year, I challenged myself to sew a small but intentional summer wardrobe—and honestly, the results surprised me in the best possible way.
I'm sharing these four projects in order of success, from the ones that taught me hard lessons to the absolute winner that's become my most-worn piece of the entire season. Each project revealed something important about my personal style and sewing process that I think will help you with your own summer sewing.
The Kari Romper: When Volume Doesn't Work (But the Lessons Do)
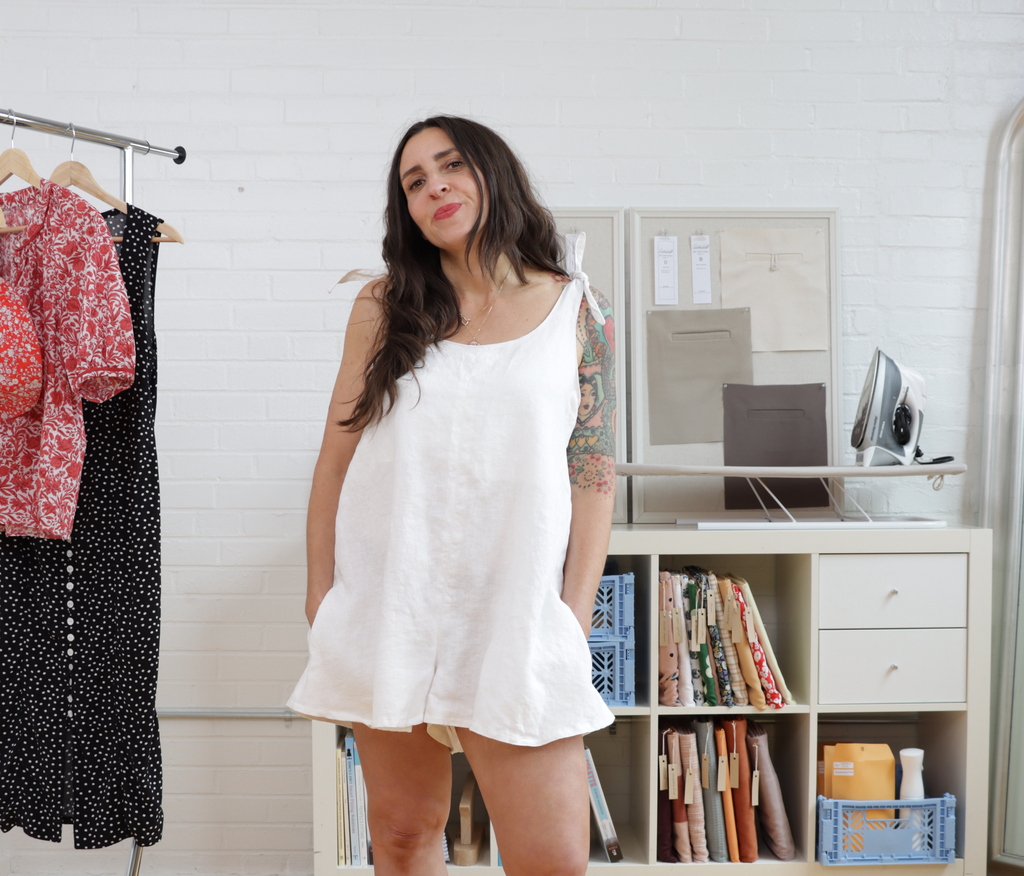
Let me start with the project that taught me the biggest lesson about my personal style—the Kari romper in white linen.
I've had this vintage romper in my closet that I absolutely love wearing in summer, so naturally I thought I'd make another. The Seamwork Kari pattern has this lovely trapeze silhouette that looks like a dress in drapey fabrics, with tie shoulders and patch pockets. I really like rompers because you get all the comfort of a one-piece, but the shorts make me feel more sporty and mobile than a dress does. Plus, those shoulder ties mean no closures to sew—always a win in my book.

Fabric Choice: Sometimes Simple is Best
I was originally thinking about using a white rayon challis with pink rosebuds, but after getting some input from Haley, I realized it looked a bit baby-ish. Rompers are already pretty youthful, and adding a really girly print was just not the move for me.
So I went with plain white linen I already had in my stash. White linen pretty much always looks elegant, and sometimes you need something simple to balance out a distinctive shape like this.
Adding Topstitching for Structure
As I started sewing the center seams, I thought some topstitching would look nice to give more detail and structure to such a plain fabric. I used my edgestitch foot and lengthened the stitch to 3.5 millimeters. It's easy to forget that you can add topstitching just about anywhere to get a slightly different look—it's such an easy little detail that makes a big difference.
Of course, I accidentally sewed one pocket upside down after I'd already finished the edge! But you know what? It was only a ten-minute setback to rip it out and fix it.
Do you ever make a silly mistake like this and freak out a bit? I used to do that a lot, but I've gotten so much better at just taking a deep breath, moving on, and fixing it. Sometimes the emotional toll of a mistake is way out of proportion to the actual time it takes to fix. It's just not worth getting upset over, even if it's not a quick fix.
The Pocket Problem (And How I Fixed It)
The most time-consuming part was turning those straps using the needle and thread method—threading the needle through the strap, dull end first. I find it really satisfying, for some reason.
I chose to topstitch the neckline and armholes rather than understitch, to match the other topstitching throughout. Then I decided to shorten the hem since I like shorter lengths and thought it would balance all that volume.
But that's when I ran into a problem I didn't anticipate: the pocket bags stuck out! Even when it looks like pockets will fit just fine in a pattern when you lay it flat, you have to account for gravity. Once I put it on, of course the pocket bags collapsed toward the floor and were visibly poking out.
But again, it's not a big deal. I just had to tack the bottom of each pocket to the hem so they wouldn't collapse and peek out the bottom of the shorts. Problem solved!
The Big Personal Style Revelation
This romper came out very light and breezy, perfect for hot days when you don't want to feel anything against your skin. It's also great to throw on over a swimsuit for going to the river. But here's the thing—I don't think I needed to shorten it. Because there's so much volume in the shorts, the short length makes me feel a bit exposed. So I've mostly been wearing this around the house when it's really hot.
And here's my biggest lesson from this project: I had a huge realization about my personal style. I love volume and loose shapes on other people, but I just feel better in things that have at least a little waist definition. My favorite shapes are ones that skim my body and feel sleek without being tight. Going forward, I think I'm moving away from anything with tremendous volume, even though it's very comfortable in summer.
The Rey Bucket Hat: When Testing Makes All the Difference
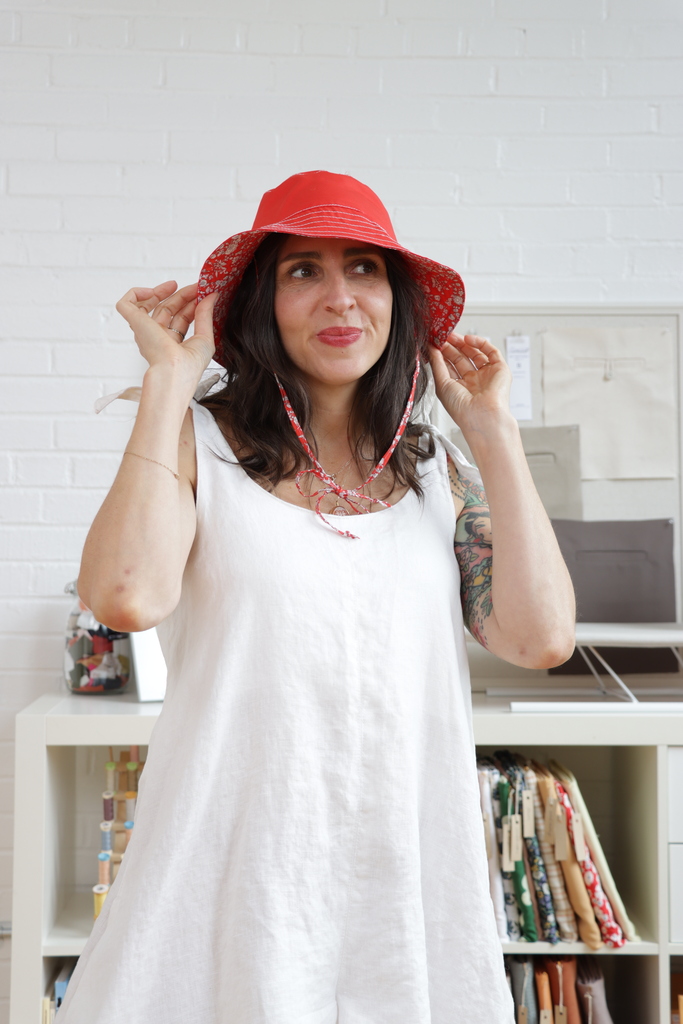
Next up is the Rey bucket hat in red. If you need a little break from sewing clothing, this pattern is perfect. Wouldn't it be great to say you made your own hat? This reversible, lined hat comes in three sizes and is perfect for scrap-busting, which is exactly how I used it.
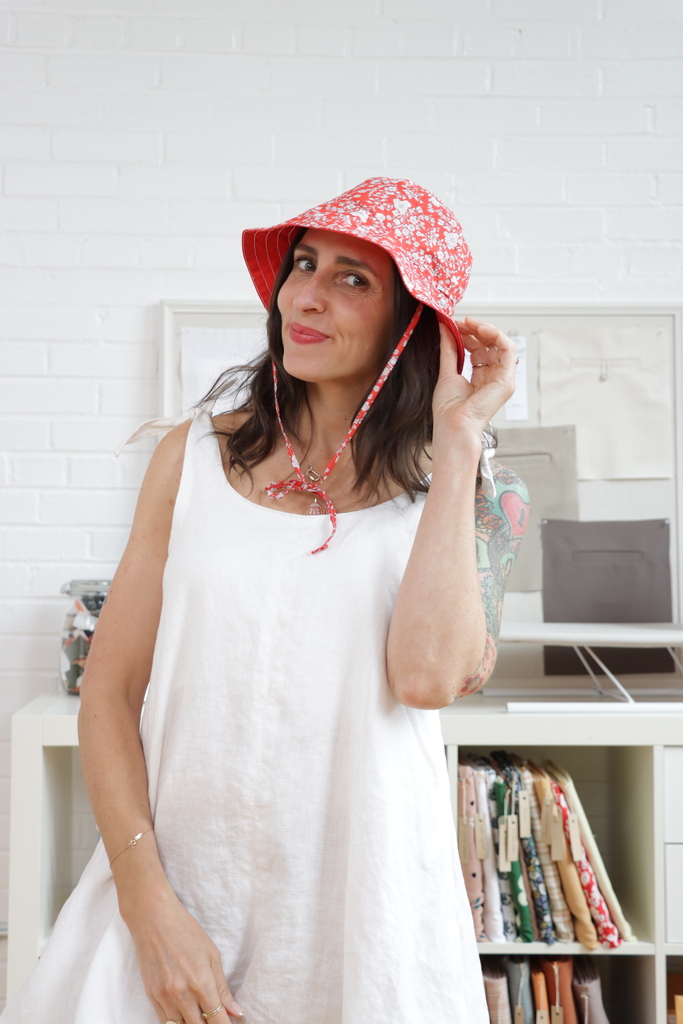
I spend a lot of time outdoors in summer and wanted something to protect my face and neck while gardening or taking long walks with the dogs. Since this hat is reversible, I needed two fabrics. I love wearing red in summer, so I used leftover Liberty lawn from my Sage blouse—you might remember that from my winter sewing videos. For the other side, I found some tomato red heavy cotton poplin.
I decided to add contrasting white topstitching on the solid side using topstitching thread, which is heavier and more visible than all-purpose thread.
Getting the Right Fit
To choose my size, I measured my head. I thought I'd be a small, but at 23 inches, I'm actually a medium. I once had a massage therapist tell me I had a small head, and I've kind of felt self-conscious about it ever since. Seriously, she even asked me if I had to shop in the kids department for hats. Isn't that rude? And it turns out, my head is pretty average!
I used woven fusible interfacing for the brim—something that would provide body and stiffness without being too bulky. It worked pretty well. I always advise sampling some different interfacings with your fabric to get the amount of stiffness you really want.
Sewing Curves and Creative Problem-Solving
One of the trickier parts is sewing those curves when you stitch the hat band to the top circle. I made sure to clip the curves before stitching to get everything aligned.
A tailor's ham is really helpful for pressing those curves. There are lots of curves and circles with a hat like this, and a little extra TLC at the pressing station does wonders. The whole thing took about an hour and fifteen minutes after cutting out. Super fast and fun to sew.
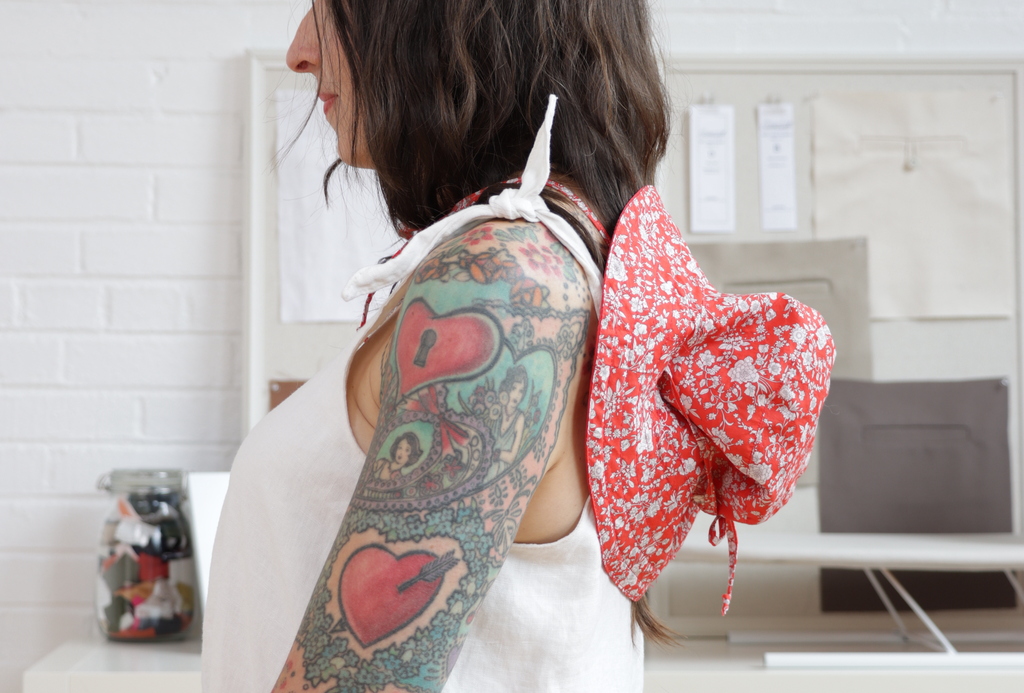
Now, I knew I wanted to add ties because I like being able to take a hat like this off and hang it from my neck. But since the hat is reversible, what's the best way to attach ties that work on both sides? I thought about this for a while and considered a few different options.
I decided to add stitched eyelets at the sides, then make two ties that I could thread through and tie at both ends. So the hat would have a little bow at the back, and then be tied under my chin.
The Importance of Testing Techniques
I tried sewing eyelets on scraps with topstitching thread first, but they looked pretty bad from the wrong side. That's because of the difference between the thicker thread in the needle and lighter thread in the bobbin.
I switched to regular polyester all-purpose thread and they looked much better on both sides. For the ties, I cut one-inch strips of the Liberty fabric and used a bias tape maker for folding and pressing, then topstitched to create the ties.
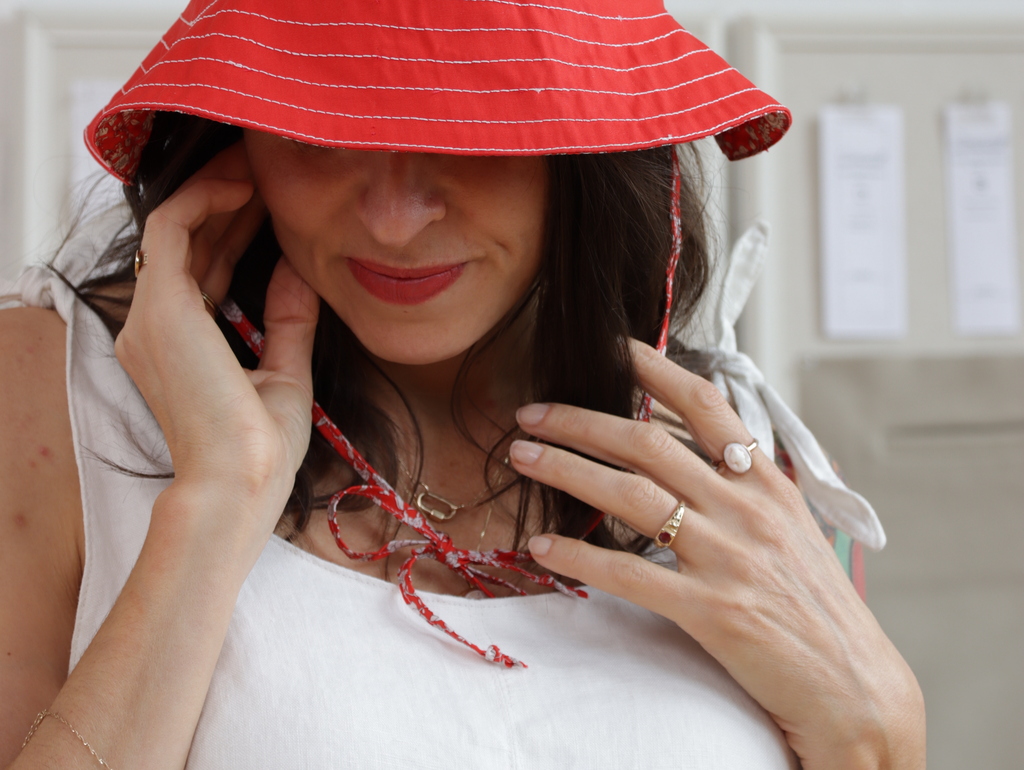
This hat is absolutely adorable and really works to keep the sun out of my face! I wasn't sure if I'd like a bucket hat, but the color and fabric make all the difference.
My biggest lesson here? Take the time to test! Figuring out what works and what doesn't is half the fun of sewing. Instead of rushing to finish, enjoy the process of problem-solving creatively and deciding which tools and techniques really help you achieve your vision.
The Fern Blouse: When Splurge Fabrics Are Worth It
Now let's talk about my Liberty Fern blouse. The Fern is a stylish raglan sleeve blouse with a gathered neckline, band collar, and those gorgeous staggered buttons. I absolutely love this pattern and was so excited to make it! I wear tops like this quite a lot, and this one has really pretty details that I knew would make it a tried-and-true pattern for me.

I loved the idea of making this in red and white, and when I saw this Liberty tana lawn on the B&J Fabrics website, I fell in love. I also wanted to add solid piping, so I used leftover red linen scraps from our studio.
Working with Directional Prints
Since the print is directional, I made sure to cut everything in one direction. Sometimes directional prints aren't obvious, and I hadn't even realized this print was directional until I was about to cut. It's always worth taking a moment to really look at your fabric before cutting.
I used that red linen to make bias tape, folding it just once to create flat piping. But then I ran into a problem—I realized the placket is folded at center front, so I couldn't add piping there! I hadn't thought about this. So I recut one piece in two parts, added a seam allowance, and sewed piping down the center.

Even when you give your projects plenty of forethought, from time to time you're bound to run into issues like this that you hadn't considered. Again, that's why being willing to solve problems creatively is such a key skill in sewing.
Adding Piping Successfully
When making the neckband, I basted the piping to the outer neckband before attaching it. I made sure to try it on at each stage to see how it was progressing. I had just enough piping left for the sleeve bands.
For the sleeves, I sewed the piping in a circle first, then the binding, then basted them together. The reason is I didn't want the piping caught in the seam where I couldn't press it toward the sleeve. With trim and piping, always think about which way you want to press it.
This blouse is just gorgeous. The fabric is really impactful, and the piping is subtle but adds such a thoughtful touch. The piping is actually more subtle than I imagined it would be, and I'm really glad I added it.
The Power of Planning and Splurging Wisely
Here's what I learned: If you find a fabric you're absolutely in love with, pair it with a pattern that will really let it shine and sew it sooner rather than later. I had this fabric saved on Pinterest for months and couldn't stop thinking about it. Even though it was a splurge, I'm so glad I bought it and sewed something special right away, instead of letting it languish in my stash.
I have other fabrics I've been in love with but didn't have a plan for, and they've remained in my stash for months or even years. Once again, that's the power of planning and designing your wardrobe intentionally.
The Lilac Dress: My Summer MVP
Finally, my absolute favorite of the season—the Lilac dress in polka dots. I chose the bonus version of this dress, which is sleeveless and has a sweetheart neckline rather than a v-neck. This slim-cut midi dress features under-bust seams with gentle gathers and princess seam construction.
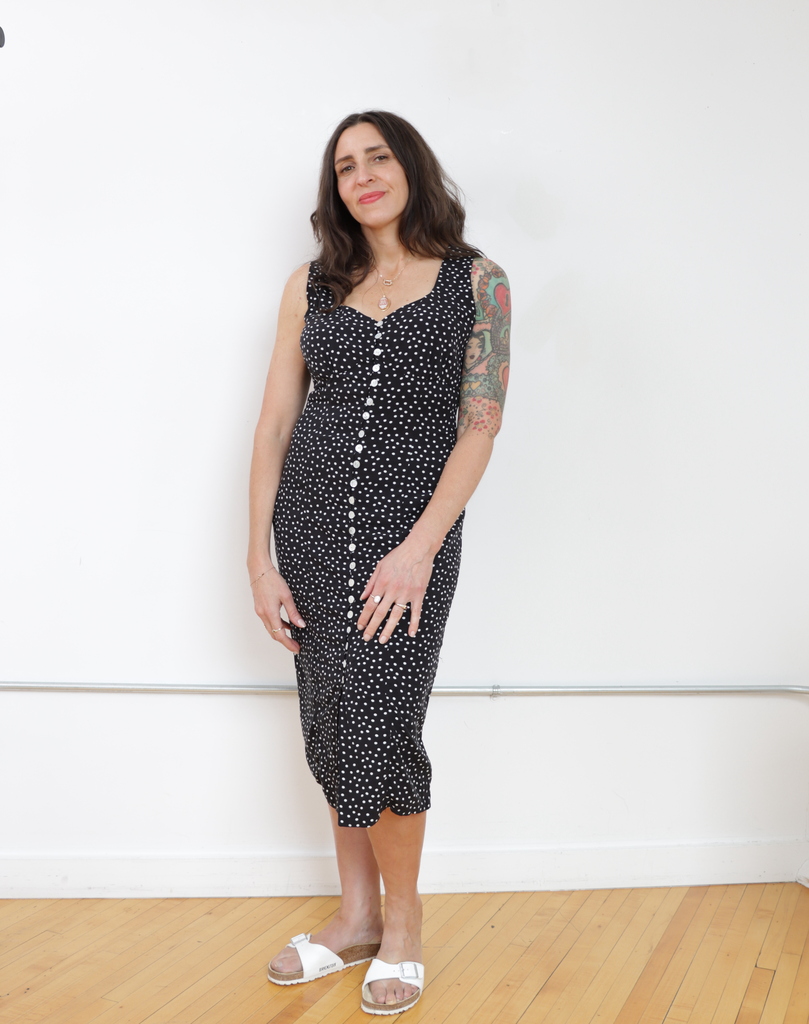
I love the vintage style of this dress, and I especially love that it's body-skimming. It's not tight at all, so it's still comfortable, but it shows the contours of my body—exactly what I learned I prefer from making that voluminous romper.
Fabric Choice and Customization
I used rayon challis in black with white polka dots. Rayon challis is so nice and cool in summer with lovely drape for a dress like this. And I'm just really into dots right now—it's such a classic print.
I decided I wanted more buttons before I started sewing. I really like the look of lots of buttons with button loops, so I drew in button marks between each existing one, essentially doubling the number.
Reinforcing Stress Points
Because of the sweetheart neckline, I wanted to make sure there was no stressing or fraying. I reinforced the corner stress points at the neckline with tiny squares of interfacing to prevent fraying or popped seams later. This is such an important step that many sewists skip, but it really makes a difference in longevity.
One thing I often do is chain pieces when stitching, then cut threads between. I did this with the stay stitching on the four bodice fronts, for example—it's a little trick I picked up from quilters that saves time and thread.
Working with Curves and Managing Overwhelm
There were parts where I had to sew opposing curves, so I clipped into the seam allowance and used lots of pins. At one point, I realized I had many steps left and started feeling overwhelmed. I decided not to put a deadline on it and just work a couple hours at a time. This made the process so much less stressful.
I made my own bias tape using the continuous bias tape method since I knew I'd need more for button loops. Read this article for detailed instructions on making continuous bias tape. I sewed the tube for the loops using a narrow zigzag with 2.0 length and 1.5 width for stretch and to prevent fraying. I then used the needle and thread method to turn them—very satisfying!
Smart Construction Techniques
I attached the loops with Wonder Tape, which worked beautifully. When I tried the dress on at this point, I was really excited about how it looked!
I was planning covered buttons but didn't have enough—I thought I had enough but only had twenty. I decided these shell buttons from my stash would actually look better because you can really see them. Covered buttons wouldn't be very visible on a black dress anyway.
I used Wonder Tape to stick the buttons in place before stitching—the buttons stayed securely in place the entire time. I highly recommend this trick for button placement.
The Result: A True Wardrobe Staple
I am absolutely in love with this dress, and it's been one of my most worn pieces this summer! I love that it has a vintage, classic style yet it's light and comfortable for everyday wear. I think I'll be able to wear it in fall with tights and a cardigan too, so it's super versatile.
This dress wasn't fast or easy to sew, but the construction is beautiful and I love the result. My biggest lesson? Taking time to make something I'll really cherish and wear all the time is worth the effort. I consciously tried to slow down and avoid rushing because I wanted to enjoy making something special.
What These Projects Taught Me About Personal Style
The most interesting thing is how much I've learned about my personal style and how it's evolving. The Kari romper showed me that billowy, voluminous pieces without waist definition aren't working for me right now, and the Lilac dress proved that even more because I loved the sleek, body-skimming shape.


It shows you can learn so much about your style from both wins and misses if you just spend time reflecting. Nothing is wasted—you always learn something about yourself when you're sewing.
Whether you're drawn to vintage-inspired pieces like the Fern blouse, practical accessories like the Rey hat, or figure-skimming dresses like the Lilac, the key is paying attention to what makes you feel confident and comfortable. Your handmade wardrobe should reflect who you are and how you want to feel in your clothes.
If you're planning your own summer sewing, remember that every project teaches you something—about technique, about your preferences, and about what makes you feel like your best self. Sometimes the lessons from the "failures" are just as valuable as the wins.

