
 Sign In
We've all been there: you start a simple top on Saturday morning, and somehow you're still stitching away on Sunday evening, wondering where the weekend went. If you're tired of sewing projects that drag on forever, you're not alone. The good news? There are specific techniques that can dramatically cut your sewing time without compromising the quality of your finished garments.
After years of sewing and teaching others, I've discovered that the secret to faster sewing isn't rushing through steps—it's working smarter, not harder. These 10 efficiency tips will transform your sewing sessions from frustrating marathons into satisfying, productive time well spent.
Why Speed Matters (Without Sacrificing Quality)
Before we dive in, let me address the elephant in the room: many sewists worry that sewing faster means cutting corners or producing sloppy results. Actually, the opposite is true. When you eliminate time-wasting habits and streamline your process, you can focus more energy on the actual construction, leading to better results in less time.
Think of it this way—when you're not constantly hunting for tools or restarting your setup from scratch, you maintain better focus and flow. Your muscle memory develops faster, and you make fewer mistakes because you're not mentally juggling a dozen inefficient steps.
1. Cut and Sew on Different Days
This simple change completely revolutionized my sewing routine, and I can't recommend it enough. Instead of cutting out one project at a time, I designate entire "cutting days" where I prep 2-3 projects at once. Then, when I'm ready to sew, everything is cut and waiting for me.
It's like meal prep for sewing—instead of starting from scratch every time you want to cook, you've got ingredients ready to go.
Here's why this works so well: switching between cutting and sewing requires completely different setups, tools, and mindsets. When you batch these activities, you eliminate all that transition time. Plus, if you find cutting tedious (and many of us do), it's actually nice to get it done on a day when you don't have much brain power. Just put on a good podcast and work through multiple projects.
Later, when you step into your sewing space and see a beautiful new project cut and ready to go, it feels like a gift you gave your future self.

2. Label Your Pattern Pieces Immediately
This seems obvious, but I see so many sewists skip this step and then waste 20 minutes trying to figure out which piece is which. Trust me, I've done it myself more often than I care to admit—it's so easy to get confused, especially when working with similar-shaped pieces.
Now, I label each piece with a small piece of masking tape and a Sharpie right after I cut it. Make sure you let the marker dry completely so you don't smear it onto your fabric! I write the pattern letter and a brief description, like "A - Front bodice" or "C - Sleeve."
This two-second step saves you from that frustrating puzzle-solving game later and keeps your momentum going when you sit down to sew.
3. Fuse First, Then Cut
Here's a trick I learned from a friend who worked in ready-to-wear manufacturing, and it's a complete game-changer for efficiency. Instead of cutting each piece and then fusing interfacing separately, fuse interfacing to your fabric first, then cut everything out.
This is especially helpful when you're working with lots of small pieces like cuffs, collars, and facings that all need interfacing.
Here's how it works: First, figure out how much fabric you need for all your interfaced pieces. I lay them on my fabric to estimate, usually after cutting the larger pieces. Cut a rectangle of fabric that will accommodate all these smaller pieces.
Next, lay your interfacing fusible-side up on your ironing board. Place the fabric rectangle on top and fuse, being careful not to touch your iron directly to the interfacing—use a press cloth just in case. Trim away any excess interfacing around the edges.
Now you have a pre-interfaced "fabric sandwich" that you can use to cut pieces like facings and cuffs. You'll cut your prep time in half and get more consistent results.
4. Invest in Good Tools and Learn to Use Them
I know this sounds like I'm telling you to spend money to save time, but hear me out. The right tools genuinely make you faster—not just because they work better, but because they eliminate entire steps.
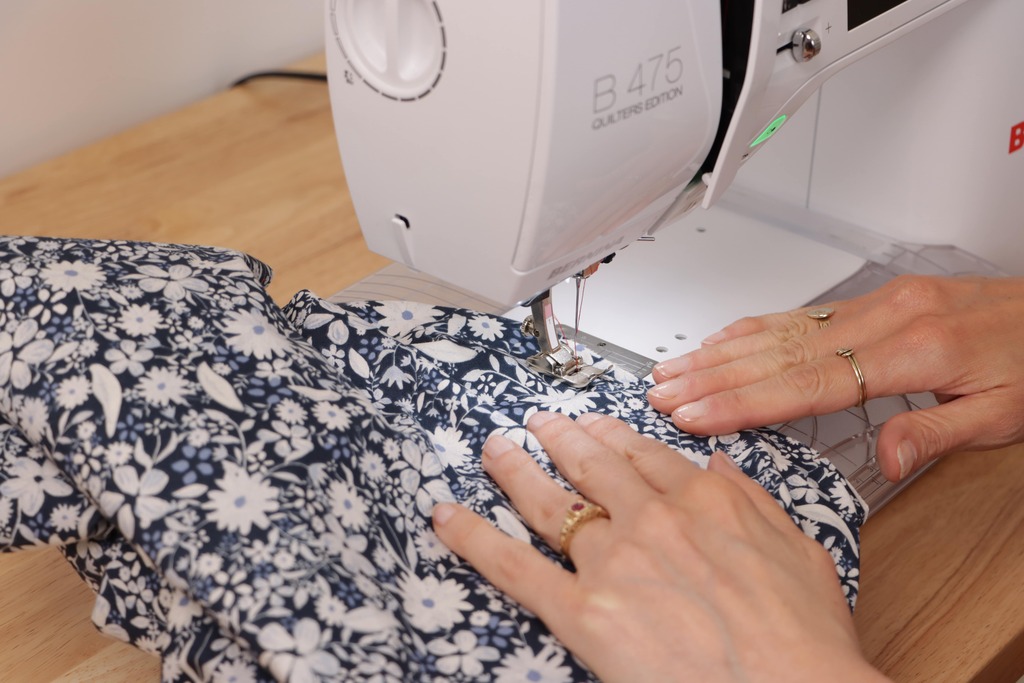
For example, learning to use specialty presser feet like a blind hem foot means you can spend way less time hand-sewing hems. A walking foot prevents fabric from shifting, reducing the need to rip out and re-sew seams. These tools help you do many jobs faster and more efficiently.
Here's something many people forget: take care of your tools. Cutting goes much faster when your shears are sharp and your rotary blade is fresh. A dull blade doesn't just cut poorly—it makes you work twice as hard and increases the chance of mistakes.
Want to learn more about essential sewing tools? Read this article about building your sewing toolkit for tips on choosing quality tools that will serve you for years.
5. Keep Your Space Organized
Nothing kills sewing momentum like spending 15 minutes hunting for your seam ripper when you need it right now. Here's my approach, and it's honestly changed my relationship with sewing.
I don't mind if my space gets messy while I'm working—creativity is messy! But between projects, I always tidy up, putting everything back in its designated place. Labeling drawers and containers helps too, so I know where everything belongs without thinking about it.
If you struggle with cleaning motivation like I do, here's a tip from our designer Haley (who co-hosts the Seamwork Radio podcast with me and always gives great life advice): Set a timer for 15 minutes. Tell yourself you can tolerate just 15 minutes of organizing. Often, when the timer goes off, you'll want to keep going if there's more to do. It's like tricking yourself into productivity!
6. Batch Press Your Seams
This tip alone will probably cut 30% off your sewing time. We all know we should press seams after sewing them, but that doesn't mean you need to press after every single seam.
Instead of running back and forth to your ironing board constantly, sew as much as you can before moving to press. Remember, when it comes to efficiency, batching is your friend.
Just be sure to stop and press before sewing any intersecting seams—otherwise, you'll be stitching puckered, bubbled seams into place, which defeats the purpose.
Here's a bonus setup tip: Arrange your sewing station, cutting table, and pressing area in a triangle so you can move between them efficiently without crossing your entire sewing room every time.
[image-07: sewing room layout showing triangle arrangement of sewing machine, cutting table, and ironing board]
7. Use a Rolling Chair Between Machines
If you use a serger to finish seams, this simple setup trick feels like magic. Position both your sewing machine and serger next to each other on a table, and use a rolling chair to easily move between them.
It sounds so simple, but before I started doing this, I was constantly getting up and down. Now I just roll from machine to machine like I'm in some kind of sewing command center. This small change eliminates dozens of interruptions during a typical sewing session.
8. Use Adhesives for Basting
This is where modern sewing gets really smart. Temporary adhesives can help you achieve precise placement and hold pieces in place without spending hours hand-basting like our grandmothers did.
I keep a fabric glue stick on hand for positioning elements like zippers or patch pockets. It washes out completely later, so there's no commitment. Basting spray, originally made for quilters, works wonderfully when you need to secure multiple layers of fabric together.
Wonder Tape is another favorite—this wash-away tape is perfect for hems, button placement, and anywhere you need temporary but reliable hold. It keeps everything exactly where you want it while you focus on precise stitching.
Want more details on using these products? Watch this video about basting techniques for step-by-step demonstrations.
9. Find Your Tried-and-True Patterns
We often get so excited by new patterns that we forget about the ones we already love. But here's the thing—if you want to create clothing you're sure to enjoy, don't overlook your past successes.
Establish a few go-to patterns you can make repeatedly. You'll get faster every time because you already know the construction quirks and can anticipate the tricky spots. You'll become familiar with the instructions and won't need to reference them constantly. This really builds sewing confidence.

For me, it's the Alice tee (which I've made four times) and the Ash dress (three times and counting). Each time I make them, the process flows more smoothly because I'm not learning the pattern and techniques simultaneously. It's like having a conversation with an old friend versus meeting someone new—both are valuable, but one definitely flows more easily.
The Alice tee is particularly great for building speed because it's a classic fitted tee with princess seams that goes with everything. The construction is straightforward enough that you can focus on perfecting your technique rather than deciphering complex instructions.
10. Learn to Use Your Seam Ripper Properly
Here's my favorite speed trick that really does feel like having a second pair of hands. Mistakes happen, and spending hours ripping them out can be absolutely discouraging. Learning to use your seam ripper efficiently changes everything.
For most seams, insert your seam ripper with the ball side down as you cut through stitches—this prevents tearing the fabric. But here's the game-changing technique for long seams: use your sewing machine foot as an assistant!
Place your garment under the presser foot and lower it to hold the fabric in place. This creates tension on the seam, making it much easier and faster to cut through stitches. It's like having someone holding everything steady while you work.
This technique is especially useful when you need to remove long side seams or sleeves. The controlled tension prevents fabric distortion and makes the whole process much more manageable.
Putting It All Together
These efficiency techniques work best when you combine several of them. For instance, you might have a cutting day where you prep multiple projects (tip #1), label everything immediately (tip #2), and batch your interfacing (tip #3). Then, on sewing day, you can batch your pressing (tip #6) and use your organized space (tip #5) to maintain good flow.
The key is starting with one or two techniques that appeal to you most, then gradually incorporating others as they become habit. You don't need to overhaul your entire process at once—small improvements compound over time.
Remember, the goal isn't to rush through your sewing. These techniques simply eliminate the friction points that slow you down, allowing you to spend more time on the parts you actually enjoy: creating beautiful garments that fit your style and make you feel amazing.
Once you've mastered these speed techniques, you'll want to make sure you're not accidentally undoing your efficiency gains with common mistakes. For more ways to improve your sewing process, read this article about the most common sewing pitfalls and how to avoid them.
What's your biggest time-waster when sewing? Have you tried any of these efficiency techniques before?

