
 Sign In
Have you ever looked at a gorgeous vintage jacket or couture blouse and wondered how the buttons looked so perfectly integrated with the garment? Those aren't just regular buttons—they're covered buttons made with techniques that create richer texture, cleaner finishes, and details you almost never see in basic sewing tutorials.
Most covered button tutorials show you the same basic kit method, and while that's a great starting point, it's just the beginning. There are other techniques that can take your buttons from looking homemade to thoughtfully designed, adding those distinctive details that make garments feel truly custom.
After almost 30 years of sewing, I've discovered that the right button technique can completely transform a garment. Today I'm sharing three covered button methods—including two unusual ones that most sewing classes never mention. These techniques feel like insider secrets that can help you create designer-level details on any project.
Why Covered Buttons Make Such a Difference
Before we dive into the techniques, let me tell you why covered buttons are so special. They let you use up those beautiful fabric scraps you can't bear to throw away, and they create this seamless, intentional look that ties your whole garment together. It's like the garment was always meant to have exactly those buttons.
I found this incredible vintage book at a thrift store a while back, all about making heirloom buttons. Page after page of gorgeous buttons made with crochet, needle lace, fabric, and ribbon. Some of these techniques are really advanced, but the ones I'm sharing today? They're completely doable with just a few tools and a little time.
If you're looking for a project to try these techniques on, our FREE Marlow blouse pattern is perfect. Marlow is a short-sleeved button-up with a relaxed fit, meant to be sewn in fabrics like shirting, chambray, lawn, or flannel—all fabrics that work beautifully for covered buttons. This pattern is a free download for spring only, so be sure to grab your copy while it's available.
Method One: Perfecting the Classic Covered Button Kit
Let's start with the most straightforward method—using a covered button kit. These kits are perfect when you want reliability and speed, especially for garments where you need multiple matching buttons. You can find these kits in different sizes at most fabric stores or online.
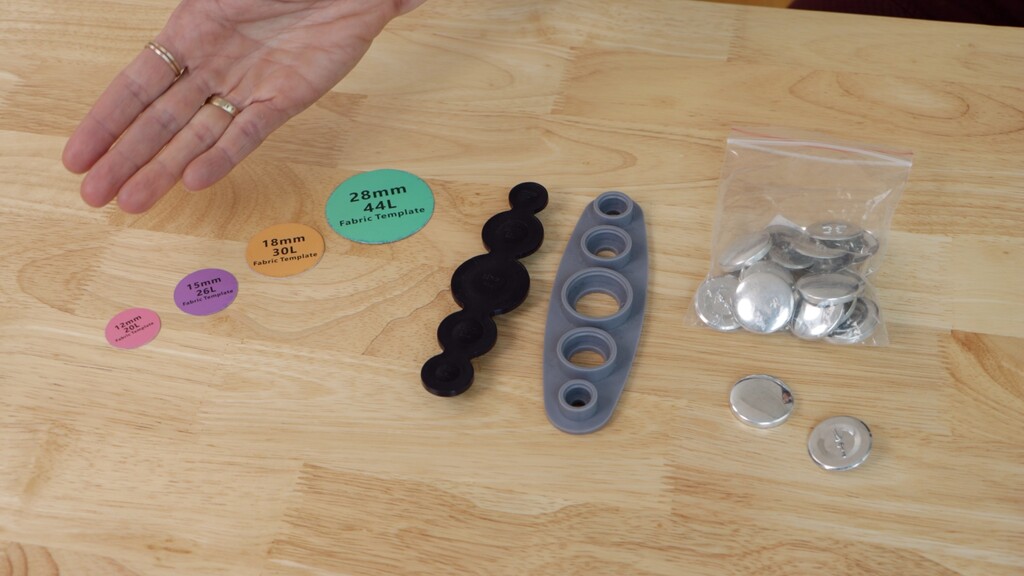
The kit includes several key pieces: the front mold that gives your button its shape, the back piece that creates the shank and snaps onto the front, and a little pushing tool that's your best friend for getting fabric edges down evenly. What I love about these kits is how they come with templates that help you get the perfect fabric circle every time—no guesswork involved.
The Secret to Smooth Covered Buttons
Here's my foolproof method for getting perfect covered buttons every time:
Step 1: Use the template to cut your fabric—it's sized perfectly with just enough extra for wrapping around the mold.
Step 2: Sew a running stitch 1/8" from the edge. This makes gathering so much easier and gives you control over the final result.
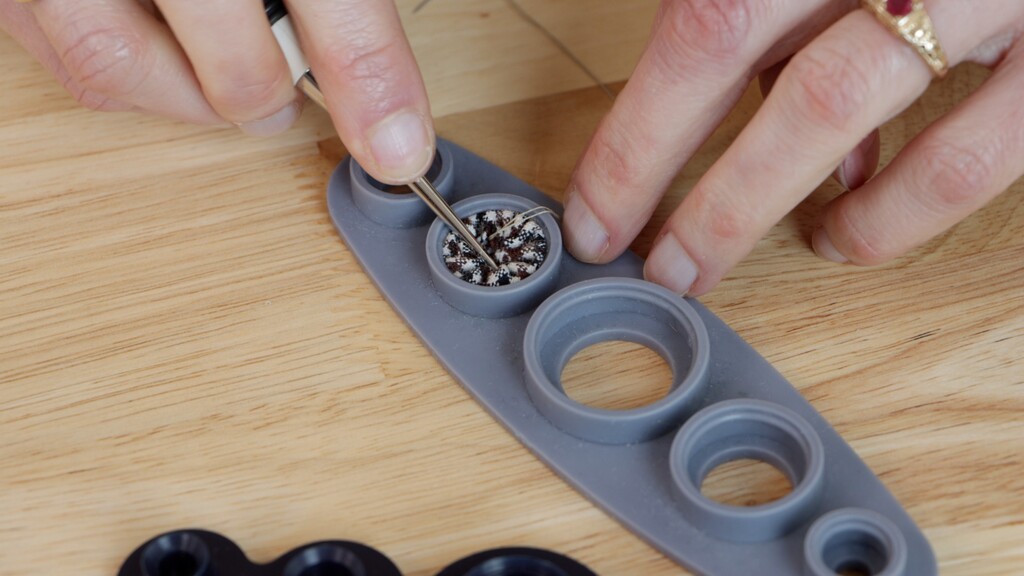
Step 3: Place your fabric face-down in the attachment tool, and center your button mold on top.
Step 4: Here's the secret—don't gather everything at once. Work gradually around the edges instead, pulling the fabric taut and using an awl to push the edges into the mold.
Step 5: Once everything's tucked in nicely, snap on the back piece. You'll hear a definitive click when it's right.
The beauty of this method is its reliability. Every button comes out perfectly shaped, and they're incredibly durable. I've been using these on garments for years, and they hold up beautifully wash after wash.
Choosing the Right Fabrics
There are a couple of things to keep in mind when selecting fabrics for covered buttons:
Loose weave fabrics like flannel can sometimes allow the metal of the button mold to show through, which doesn't look great. Try wrapping some fabric around the mold to test if it shows through. If it does, apply some lightweight fusible interfacing to the back for more opacity.
Very thick fabrics can be challenging to gather and fit into the mold. When I made my grey and white vintage jacket, I spent quite a bit of time working that wool into the button mold. Here's a trick: stretch the fabric along the bias and apply heat and steam from your iron. Stretch in both directions to open up the weave and flatten the fabric as much as possible. You can also use a clapper to press it even flatter.
Method Two: Plaited Ribbon Buttons for Added Texture
Now let's elevate things with plaited ribbon buttons. This technique builds on the covered button method but creates something truly special with gorgeous texture that's perfect for coats, jackets, or anywhere you want the buttons to be a design feature.
The secret that makes this technique work is sheer interfacing. It's lightweight but stable, giving your design the perfect foundation while allowing the ribbon colors to show through beautifully.
Creating Your Woven Fabric
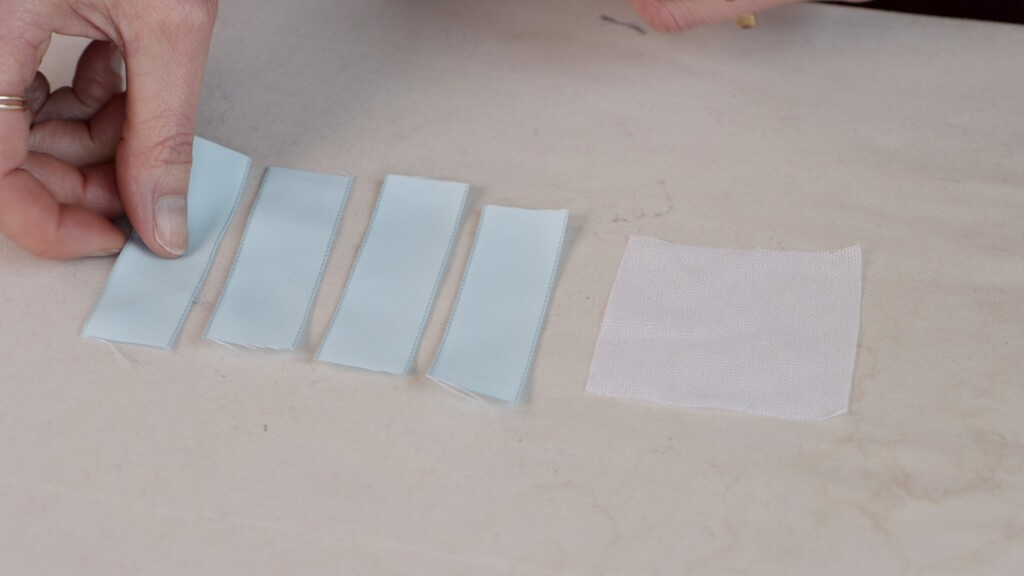
Step 1: Cut a square of interfacing using your template as a guide—this becomes your foundation.
Step 2: Cut 4 pieces of ribbon slightly longer than the interfacing. These will create your button "fabric."
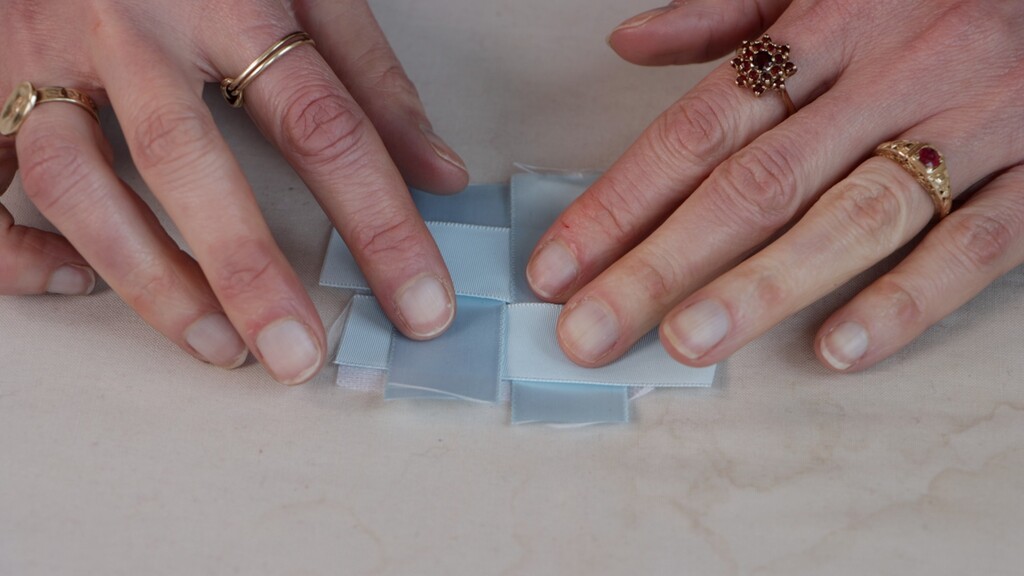
Step 3: Lay your first ribbon across the interfacing and start weaving the remaining ribbons through it. Work your way across, alternating the weave pattern.
Step 4: Don't worry about perfection—irregularities add handmade charm and character.
Step 5: Fuse the interfacing to the ribbons with your iron. This locks everything in place so the ribbons won't shift during construction.
Here's a step most people skip: sew a small X right at the center where the ribbons meet. This prevents the ribbons from pulling apart over time and ensures your button will last.
From here, it's just like making any covered button—except now you have this amazing handwoven fabric to work with. When gathering your fabric around the mold, double-check that your design stays centered with the ribbons crossing right at the middle of your button.
I found that the button mold sometimes has trouble accommodating the thickness of two ribbon layers. If you run into this issue, try snipping away some ribbon closest to the mold in areas where thickness is doubled up. You'll still have enough ribbon to keep the button secure, and the back piece will attach properly.

The result is a basket-weave covered button that's truly one-of-a-kind. These buttons would look absolutely stunning on a coat—imagine a whole row of them catching the light.
Method Three: Singleton Buttons for Couture Details
My absolute favorite technique is the Singleton button. It's a type of Dorset button, but instead of working a needle-lace pattern, you cover a small ring with fabric and then stitch around the edge using blanket stitch or backstitch.
It's a few more steps than the other covered buttons, but it creates this incredibly refined look that you just can't get any other way. They're ideal for skirts, dresses, or any garment where you want the buttons to feel really tailored.
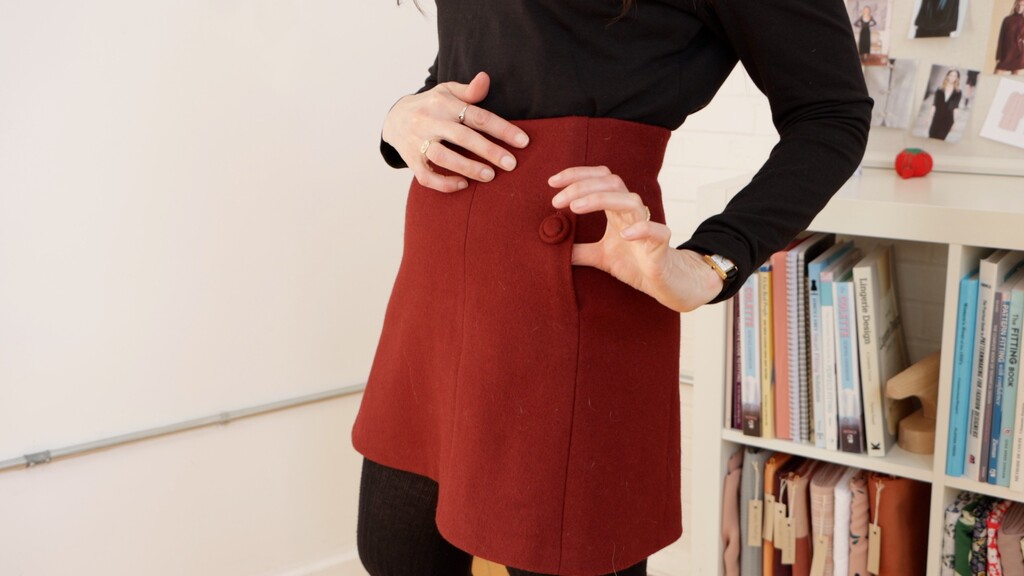
I actually used this technique for the buttons on my wool knit Orla skirt. I've seen this kind of button on vintage couture garments, but I never knew exactly how they were created. This small detail completely elevates the look of the garment.
Materials and Proportions
For this button, you'll need a three-quarter inch plastic ring, which you can find online or in the jewelry-making section of craft stores. You can also find rings meant for making Roman shades and blinds—they're surprisingly easy to come by.
Here's the magic ratio: cut your fabric circle two and a half times the size of your ring. So for a three-quarter inch ring, you'll cut a circle that's one and three-quarter inches across.
The Construction Process
Step 1: Run a gathering stitch about 1/8" from the edge of your fabric circle. This becomes your drawstring for pulling the fabric snugly over the ring.
Step 2: Place the ring in the center of your fabric circle, then pull the thread to gather the fabric up and over the ring.
Step 3: Here's where it gets interesting—tuck that raw edge to the inside of the button. This hides the raw edge and adds padding that gives your button height and dimension.
Step 4: If you want even more height, add fabric scraps or a little stuffing at this point. Just a small amount—you don't want your button to look puffy.
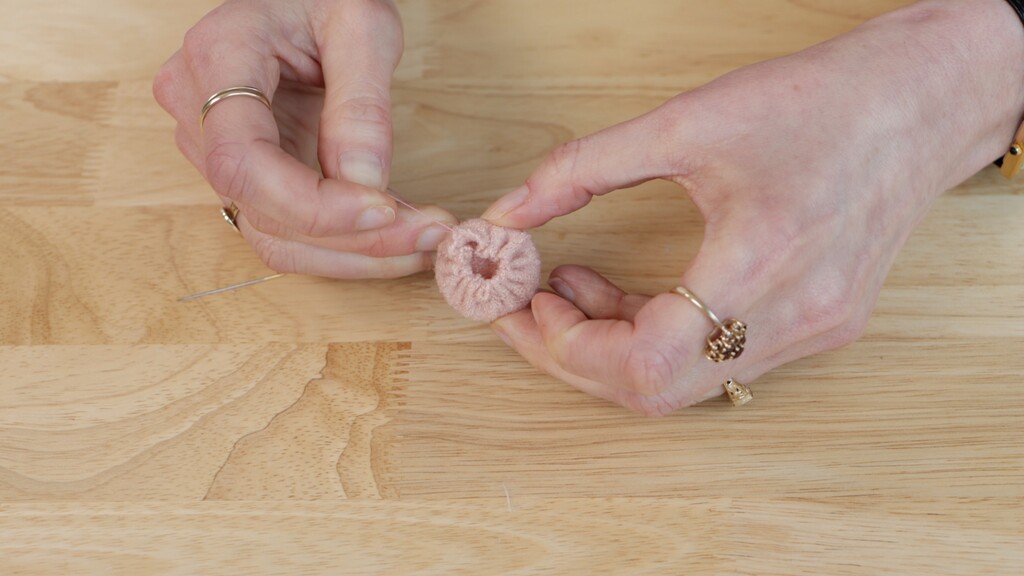
Step 5: Tie off your gathering thread, but don't cut it yet. We'll use that same thread for the next step.
Step 6: With that same thread, stitch in a clock pattern across the hollow back into the fabric around the back edge. Work from 12 o'clock to 6 o'clock, 1 o'clock to 7 o'clock, and so on until you've crossed the center back at least 5 times. This pulls the fabric tight over the ring and neatens the center area.
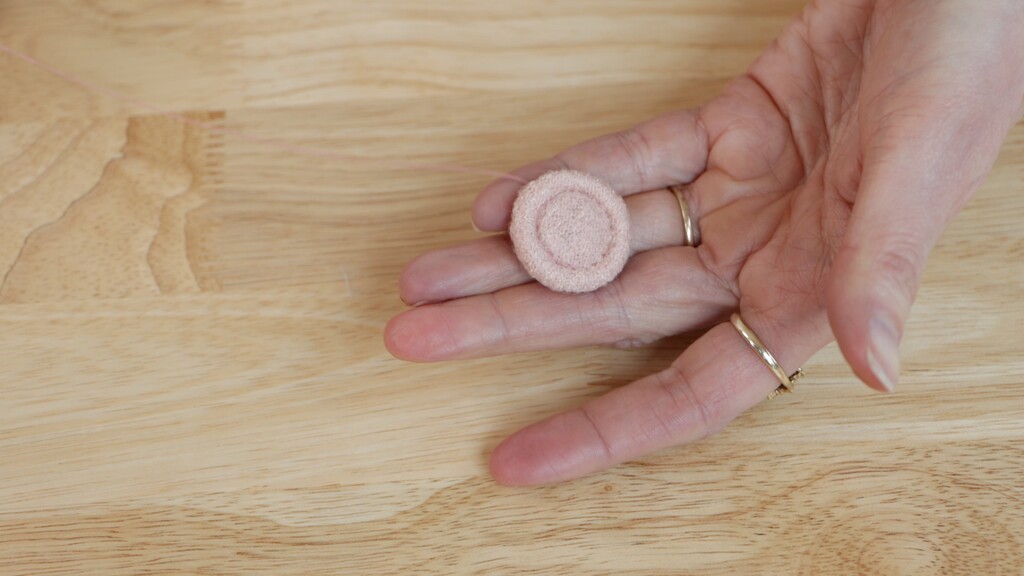
Step 7: Flip to the front and sew backstitches just inside the ring. This is crucial—it secures the ring and keeps it from shifting. Take your time with this step because these stitches will be visible and contribute to that tailored look.
The result is a button with this beautiful hand-crafted quality that gives garments a special vintage character. There's a softness and dimension that elevates everything about your garment.
Adding a Thread Shank
To finish your Singleton button, you'll want to add a thread shank for easy attachment:
Step 1: On the back of your button, sew two long parallel stitches.
Step 2: Weave your needle around these stitches in a figure-8 pattern, working from one end to the other to create a secure bar of thread.
This creates a professional shank that makes your button easy to attach and ensures it sits properly on your garment.
Choosing the Right Technique for Your Project
Each of these methods has its perfect application. Standard covered button kits are ideal when you need multiple matching buttons quickly and want guaranteed consistency. They're perfect for shirts, blouses, and everyday garments where you want that seamless, coordinated look.
Plaited ribbon buttons shine on outerwear like coats and jackets where the buttons become design features. The texture and visual interest they add can transform a simple garment into something special.
Singleton buttons are your go-to for couture-level details on skirts, dresses, and special occasion garments. They require more time but create that refined, hand-crafted quality that makes people stop and look twice.
Taking Your Skills Further
Now that you know how to create these stunning covered buttons, you'll want to master other construction details that complement them. Understanding how to create perfect button plackets is essential for adding these beautiful buttons to shirts and jackets professionally.
These covered button techniques are part of what makes the difference between sewing and creating a truly handmade wardrobe. They're the kind of details that elevate your work from homemade to thoughtfully designed, giving your garments that special quality that makes people ask, "Where did you get that?"
The beauty of mastering these techniques is that once you know them, you'll start seeing opportunities to use them everywhere. That special fabric you've been saving? Perfect for covered buttons. Those gorgeous ribbon scraps from your last project? They're calling out to become plaited ribbon buttons.
Start with whichever method appeals to you most, and don't be afraid to experiment. The worst thing that can happen is you'll need to start over with a new piece of fabric—and you'll have learned something valuable in the process.

