
 Sign In
Adding a lining transforms any garment from basic to beautifully finished, but if you've ever stared at a pattern without lining pieces wondering how to create your own, or struggled with linings that pucker, pull, or peek out where they shouldn't, you're about to learn exactly how to fix that.
I'll be honest—linings used to intimidate me. Early in my sewing journey, I'd skip them entirely or fumble through with mixed results. But once I understood the science behind proper lining construction, everything changed. Now I add linings to almost everything because the difference in how garments feel and look is just that dramatic.
Why Linings Are Game-Changers (Beyond Just Hiding Seams)
The magic of a well-sewn lining goes far beyond just hiding seam allowances. Think of it as the foundation garment for your outer fabric—it adds opacity when you need it, provides that smooth glide when you're putting on jackets and coats, and creates a barrier between your skin and potentially scratchy fabrics.
But here's what most sewists don't realize: a lining should never be the exact same size as your outer garment.
This seems counterintuitive at first, but there's real science behind it. For most garments like skirts and dresses, your lining needs to be slightly larger than your shell. Picture trying to wear two identical t-shirts at the same time—the inner one would pull and restrict the outer one. The same thing happens with linings that are too tight. They create tension that shows up as pulling, puckering, and that rumpled look we all want to avoid.
The Exception: When Linings Should Be Smaller
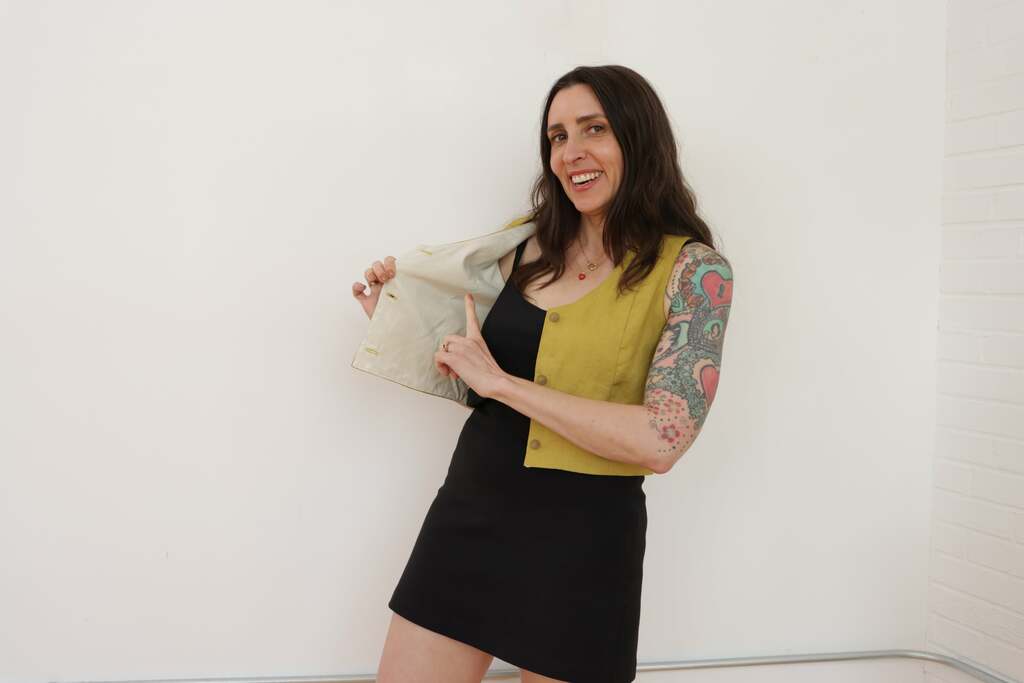
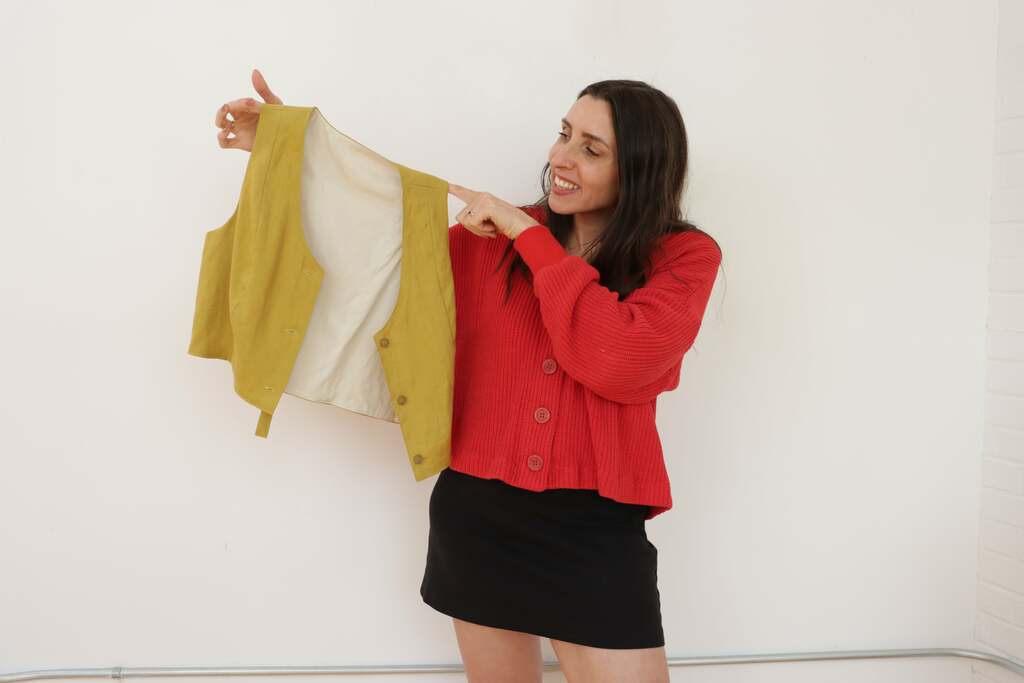
But here's where it gets interesting—some garments actually need smaller linings. Vests, for example, work best when the lining is slightly smaller than the shell. Since the edges are exposed and the fit is more tailored, you want that lining to pull the outer fabric in just a touch, creating clean, crisp edges that curve toward your body instead of flapping outward.
This principle applies to any garment with exposed edges, like the Otto vest I'll be demonstrating with today. The Otto pattern actually comes with lining pieces already drafted, but I'm showing you this method because most patterns don't include them. Once you understand these principles, you can add a lining to absolutely anything in your wardrobe.
How to Draft Your Own Lining Pieces
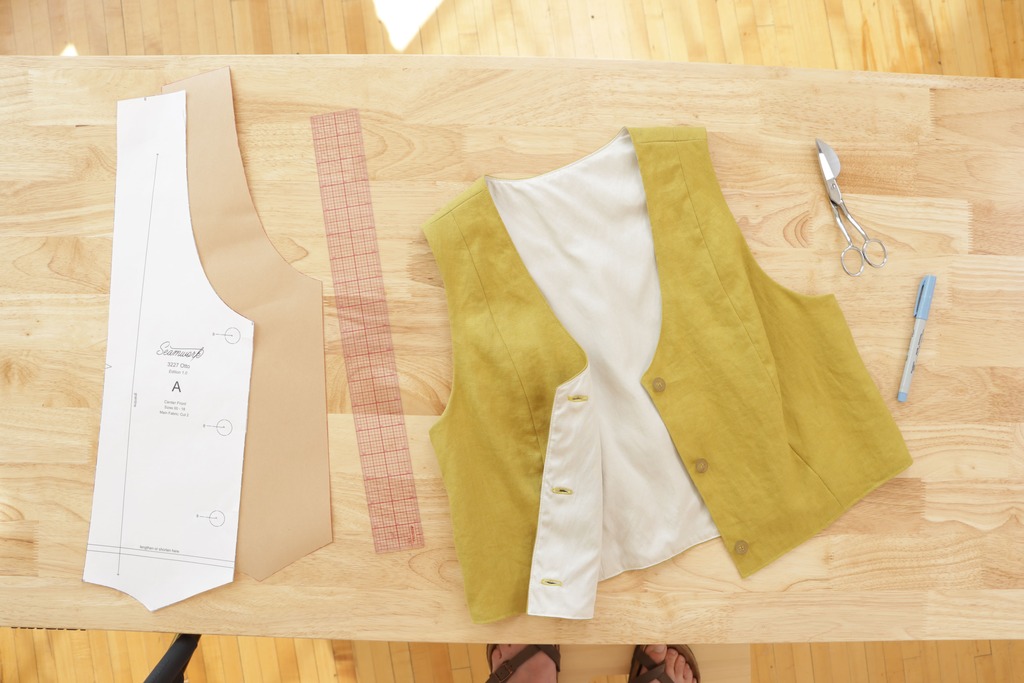
For most patterns without lining pieces, you'll start with your main shell pieces as your template. Here's exactly how to modify them:
For skirts and dresses: Add about 1/8 to 1/4 inch at the side seams and hem. This creates the ease your lining needs to move freely inside your garment.
For fitted garments like vests: Subtract 1/4 inch from the length—both at the side seams and the center front—and remove the same amount from the neckline. This creates just enough negative ease for the lining to sit perfectly without any pulling or peeking.
For jackets and coats: You'll typically add ease similar to skirts and dresses, but the construction method differs significantly (more on that later).
Step-by-Step: Installing a Vest Lining
Let me walk you through the complete process using a vest, which includes all the key techniques you'll use for other garments.
Prepare Your Pieces
The construction process starts with treating your shell and lining as two completely separate garments. Assemble each one fully, so it looks like you have two almost identical garments—one in your outer shell fabric, and one in your lining fabric.
Attach at the Neckline
Here's where the real technique begins. Place your vest lining against the outer vest with right sides together, carefully aligning all your notches and seams. This step requires patience—rushing here creates uneven edges that are hard to fix later.
Pin thoroughly, then stitch at 3/8 inch, easing the lining onto the outer vest as you go. After clipping those curves (crucial for a smooth finish), grade your seam allowances by trimming them to different lengths so they don't create bulk when pressed.
Press everything toward the vest lining, which helps the seam roll slightly to the inside when turned.
Handle the Armholes
The armholes get the same treatment. Right sides together, align everything perfectly, then stitch at 3/8 inch. Here's a technique that makes all the difference: understitch as far as possible along both the neckline and armholes. This keeps the lining from rolling to the outside, which instantly elevates the finished look.
The Magic Turn
Now comes what feels like a magic trick. Reach up through the hem edge of the back and pull both vest fronts out to turn the entire vest right side out. It seems impossible at first, but once you see how it works, you'll use this technique on everything.
Sew the Side Seams
Fold the outer vest up and away from the lining—think of it like peeling back layers. With right sides together, align the side pieces of both the shell and lining, matching all seams and notches perfectly. This is where precision really matters. Stitch, then press those seam allowances open for the flattest possible finish.
Create the Perfect Hem
For the hem, we're using a technique that creates a completely enclosed edge. Start with everything wrong sides out. Bring the outer vest and lining together at the front and hem edges, matching everything carefully. But here's the crucial part—leave about a four-inch gap in your stitching. This opening is your escape hatch for turning everything right side out.
After trimming and grading those seam allowances and clipping the corners, turn the vest right side out through that gap. The transformation is incredible—suddenly all those raw edges disappear and you have clean, finished edges everywhere.
The Final Touches
Press everything well—and I mean really well. This is where the difference between a good finish and a great one becomes obvious. Those seam lines should roll slightly toward the lining, creating that couture-quality edge.
The final step is edge stitching around the front, neckline, and hem edges. This not only looks beautiful but also closes that gap at the back hem and keeps everything lying perfectly flat.
Choosing the Right Lining Fabric
Not all lining fabrics are created equal. Here's what to look for:
Silk habotai or China silk: Classic choice with beautiful drape and breathability
Rayon Bemberg: Eco-friendly option that feels luxurious and resists static
Cotton voile: Great for washable garments, though less slippery than silk
Polyester lining: Budget-friendly and durable, perfect for everyday garments
The key is matching the care requirements of your lining to your shell fabric. If your outer fabric needs dry cleaning, silk linings work beautifully. For machine-washable garments, stick with cotton or polyester options.
Beyond Basic Linings: What's Next
The Otto vest pattern makes a perfect introduction to lining because it has all the key elements—curves, fitted seams, and exposed edges—without the complexity of sleeves or elaborate closures. Once you master this technique, you'll find yourself adding linings to everything.
But not every lining is sewn exactly the same way. For jackets with sleeves and facings, you'll often need what's called a bagged lining—a completely different approach that creates that loose, floating effect you see in high-end tailoring.
If you're working on a sleeveless garment without button closures, the burrito method creates the cleanest possible finish by essentially rolling the fabric out of the way as you work. Read this article to learn the burrito method that creates perfect finishes on sleeveless garments.
Your Lining Success Strategy
Start with a simple vest or sleeveless dress to practice these techniques. The Otto vest is perfect because it includes lining pieces, so you can focus on construction rather than drafting. As your confidence grows, you can tackle more complex garments.
Remember, the goal isn't perfection on your first try—it's understanding the principles so you can apply them to any garment in your sewing queue. Every lined garment you complete builds your skills for the next one.
The transformation from unlined to lined garments is so dramatic that once you experience it, you'll never want to go back. Your clothes will feel more comfortable, look more polished, and last longer too.

