
 Sign In
Have you ever avoided sewing pants because fitting seems like an overwhelming puzzle? You're not alone. After years of helping sewists tackle this challenge, I've learned that most pants fitting problems come from taking a random, trial-and-error approach rather than following a systematic framework.
The truth is, pants fitting doesn't have to be the intimidating process most sewists think it is. With the right approach, you can create pants that fit your unique body beautifully—and actually enjoy the process along the way.
Let me share the exact framework that Robin, our lead pattern maker with decades of experience, uses to approach pants fitting. This isn't about achieving some impossible standard of perfection. It's about understanding your body and making targeted adjustments that actually work.
Why Most Pants Fitting Goes Wrong
Here's what I see happening over and over again: sewists make random adjustments without understanding how each change affects the overall fit. They'll adjust the waist, then the hips, then the length, creating new problems with each modification. Before long, they're completely lost and ready to give up on pants altogether.
The secret is approaching fitting systematically, in a specific order that builds logically from one adjustment to the next. When you follow this framework, each step sets you up for success in the next one.
Step 1: Choose Your Starting Size Strategically
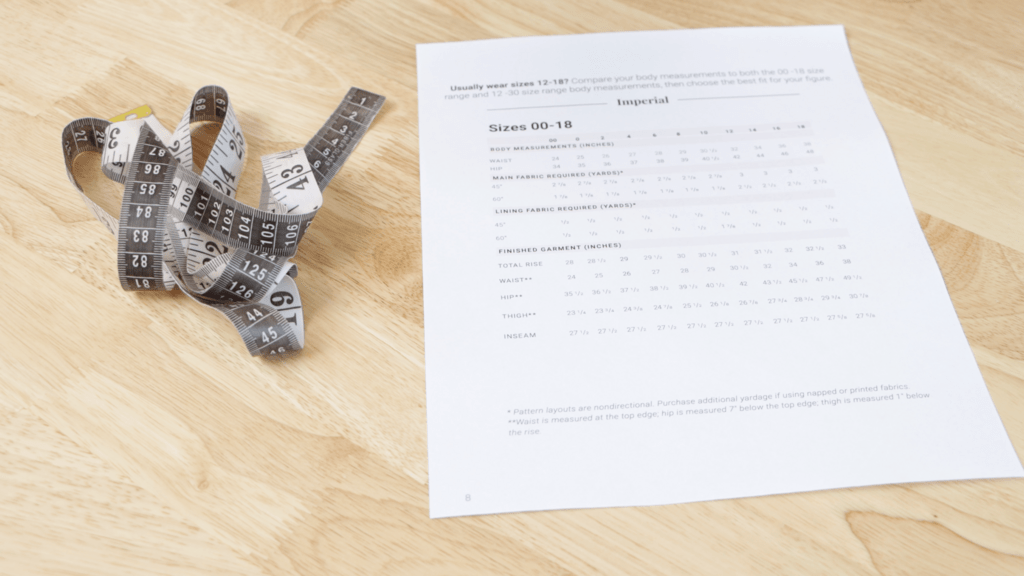
Most fitting problems start before you even touch your fabric. The single best thing you can do for better fitting pants is to measure twice, measure often. I know measurements can feel loaded, but think of them as data that helps you create clothes that make you look and feel amazing.
Take your body measurements accurately, but here's what many people don't think to do: measure your favorite pair of ready-to-wear pants and compare them to the finished garment measurements on your pattern. Just make sure you're comparing apples to apples—skinny jeans measurements won't help you fit drapey wide-leg trousers.
The Game-Changing Size Blending Technique
What should you do if you fall between sizes? For example, what if you're a different size at the waist and at the hips? This is where many sewists go wrong—they just pick one size and hope for the best.
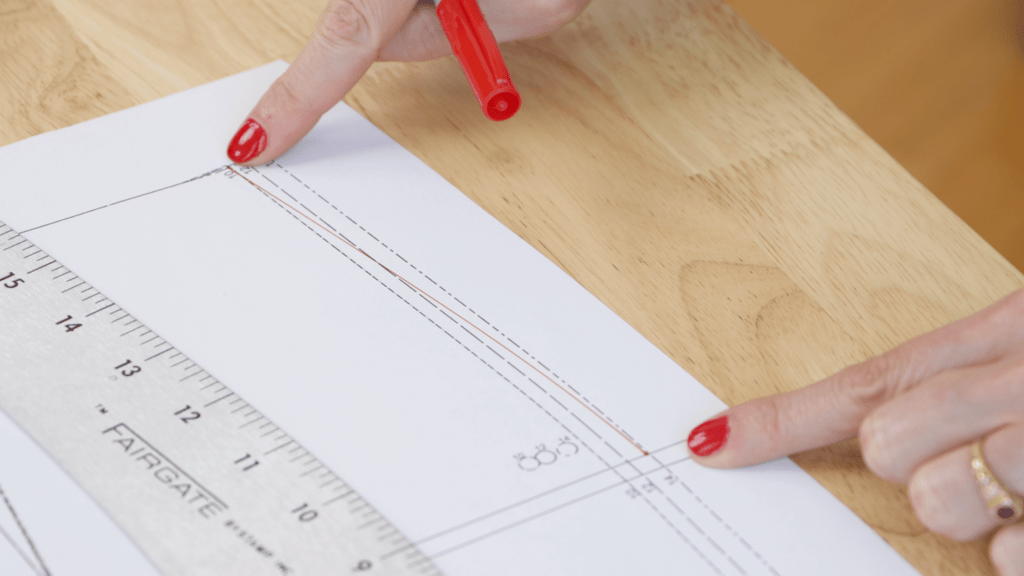
Instead, you're going to create a custom size that actually fits your body. Here's how blending works: let's say you measure a size 10 at the waist but a size 12 at the hips. Start by tracing your size 10 waist on your pattern paper. Then, at the hip line, gradually transition to the size 12 measurements.
Robin recommends choosing your size based on your hip measurement, then blending to your size at the waist. That way, the rest of the pattern is based on your hips, which creates better proportion on your body.
Use a French curve or just your eye to create that smooth transition. Think of it like connecting the dots with a curved line rather than making sharp jumps between sizes. You might start transitioning at the natural waist and complete it by the full hip.
The Secret to Built-In Fitting Insurance
Here's one more game-changing tip: add extra width to your inseam and side seam to create 1-inch seam allowances. This simple change gives you room to assess and adjust your muslin for more ease if needed.
Even if you're confident about your primary measurements, you might discover you need a little extra room in the thigh or calf once you try on your test garment. You'll see how this comes in handy in just a minute.
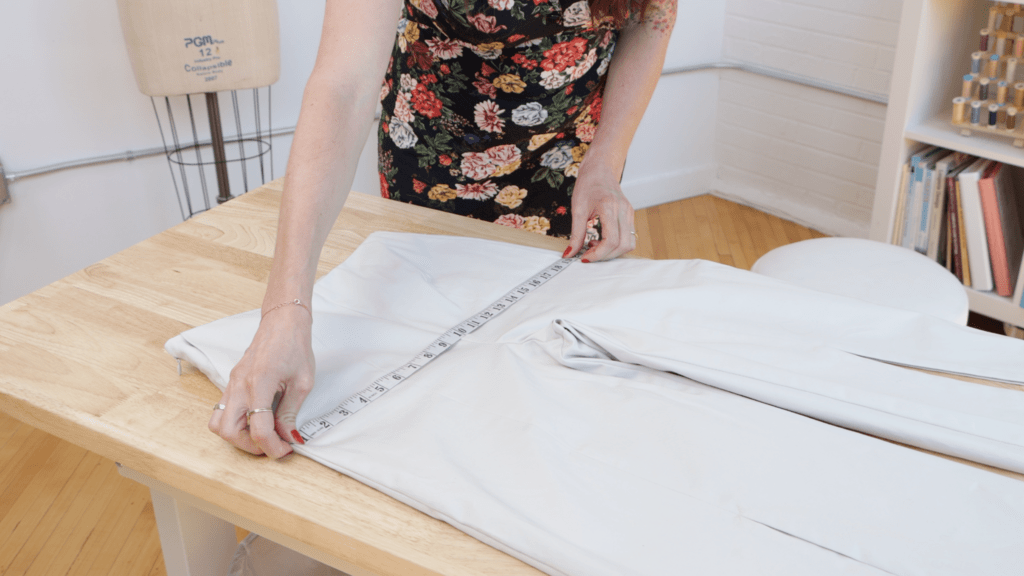
Step 2: Sew a Smart Muslin
You probably think making a muslin means essentially sewing the same pants twice, but that's not true. A muslin can actually be way faster than your finished garment.
Use actual muslin fabric—it shows fit issues clearly without hiding information like drapier fabrics can. I use muslin for 90% of my woven projects for exactly this reason.
Skip everything that doesn't affect fit. No pockets, no hems, no topstitching—you can even skip the zipper fly at this stage. Focus on the critical elements: the pants legs and the waistband.
Stay stitch along any unsewn edges to prevent stretching and indicate your stitch line. Use a long stitch length to speed up both the sewing and the inevitable seam ripping process.
How to Assess Your Muslin Like a Pro
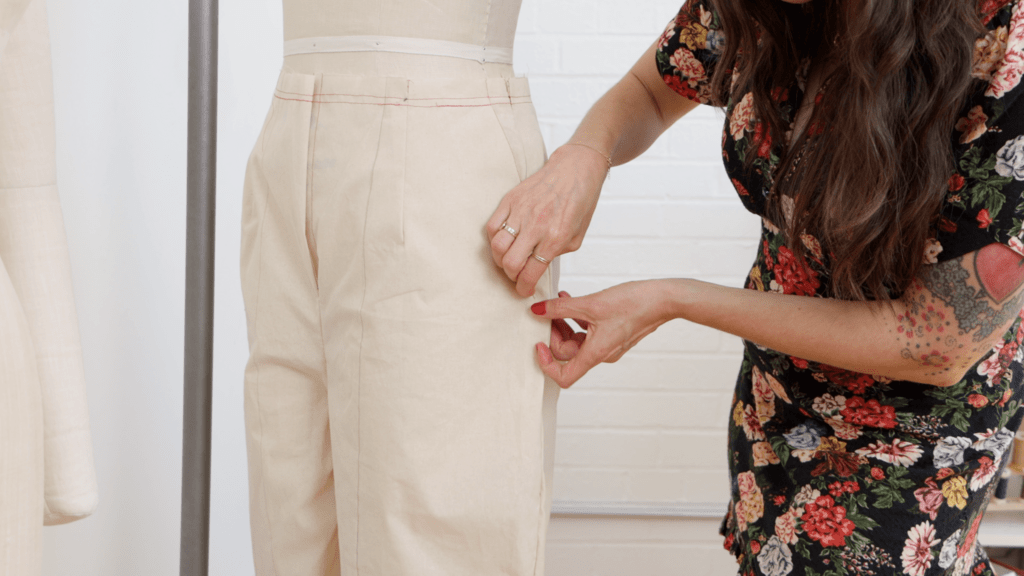
Now comes the assessment. Look for areas that appear too loose or baggy. Pinch out excess fabric, keeping in mind the intended ease for your pants style. Pin it in place, then measure that amount so you can subtract it from your pattern pieces later.
If areas feel too tight, unpick those basting stitches and re-sew with more room. Just note how much you add so you can reflect that on your pattern piece. Don't be precious with your muslin—mark it up, write notes, pinch it out, even cut directly into it if you need to.
Step 3: Width Adjustments Come First
This is where people get tripped up. They try to fix everything at once, creating cascading problems and confusion. Robin suggests a specific order for adjustments, and we're starting with the easiest one.
Remember those extra-wide seam allowances we created? Now they come in handy. If your muslin feels too tight or too loose anywhere, you can adjust your seams to simply add or subtract width. The beauty is you won't need to create a whole new muslin to test this change. Simply add or remove fabric at the seam allowances, re-sew, and check the fit again.
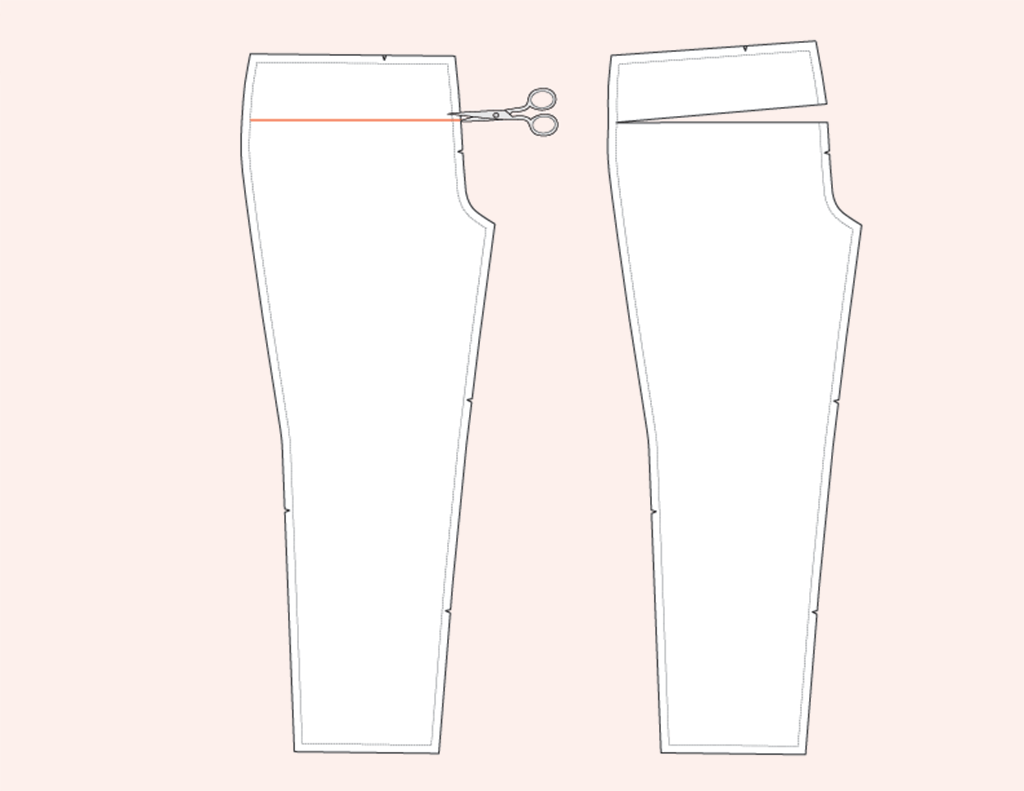
Step 4: Crotch Length Adjustments
Next, assess whether you need crotch length adjustments. If your overall rise feels too long or your crotch point hangs too low, you can reduce the length from waist to crotch. If the waist hits lower than intended and you can't pull it up because the crotch point hits your body, you need to lengthen that distance.
Be sure to lengthen around the entire circumference of your pants. Also make sure you add or remove length below the zipper fly, if your pants have one, so you don't accidentally lengthen the fly itself.
Step 5: Front Adjustments
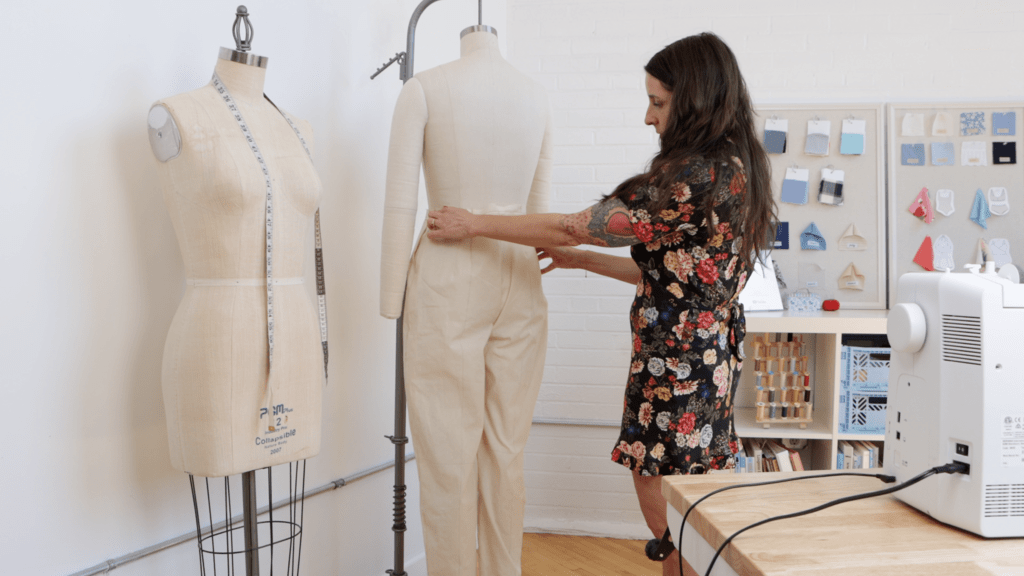
Now that you've handled width and crotch length, Robin recommends looking at the front of your pants. A full belly adjustment is common here. If you have a curvy front abdomen or notice diagonal wrinkles across the front, you might need this adjustment.
To fix this, you'll add length to the center front rise. This accommodates the curve and eliminates those pulling wrinkles.
If you want to see Robin walk you through all of these adjustments while actually sewing a pair of pants together, check out our class on how to sew pants with the Nolan pattern. It's free with a Seamwork membership, and not only will she talk you through this whole fitting process, you'll also see how to sew the pants start to finish, including a zipper fly.
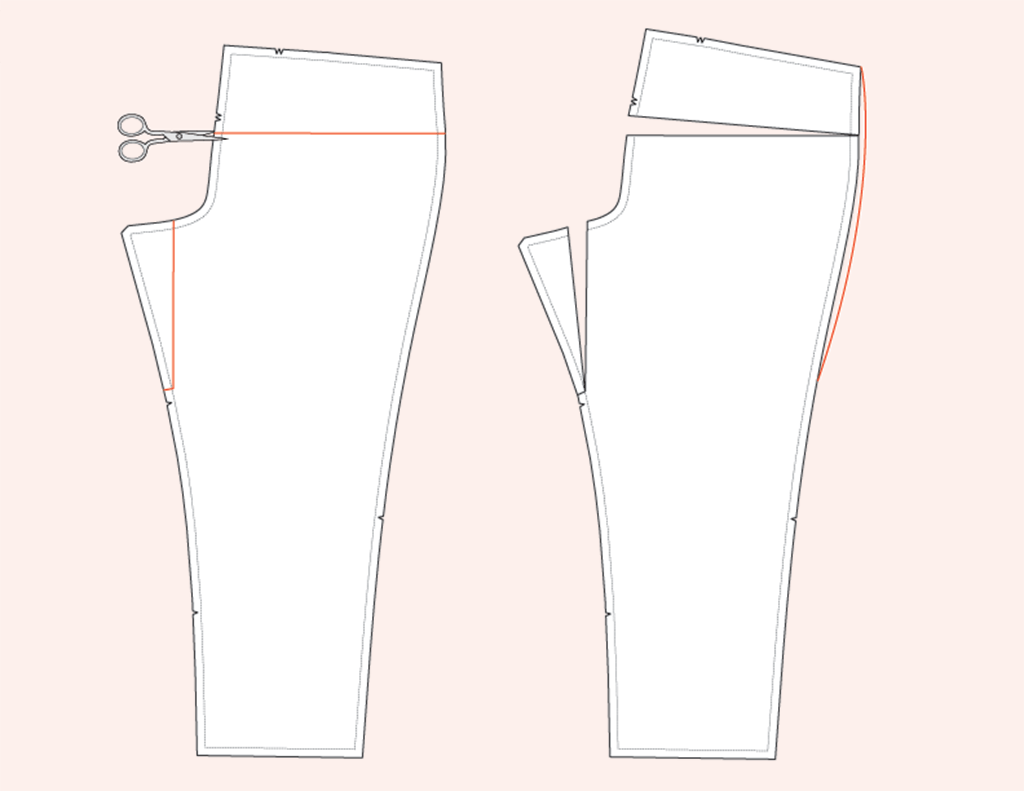
Step 6: Thigh Adjustments
If your pants pull across the thigh and create diagonal wrinkles, you need a full thigh adjustment. You'll extend the front and/or back rise out at the bottom of the rise/inseam point, then blend that new point to somewhere on the inseam, creating a smooth line. In other words, you're adding a wedge of fabric here.
This adjustment specifically addresses tightness in the thigh area without affecting the overall silhouette of your pants.

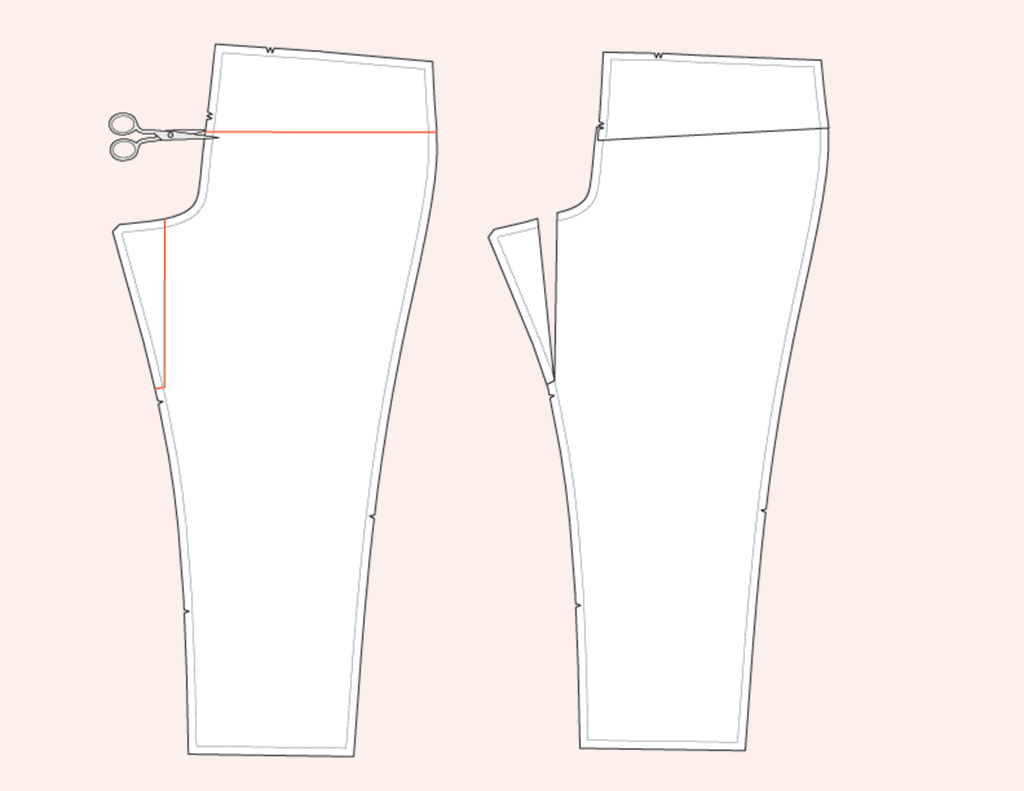
Step 7: Rear Adjustments
There are two common rear adjustments, and they solve opposite problems. If you notice excess fabric and wrinkles under or at the fullest part of your bottom, you need a flat rear adjustment. Draw your slash line low on the back piece, cut from the back rise ending just before the outseam line, overlap half to one inch, and tape it down. Then gently blend your outseam and rise.
If the back waist pulls down or you have tightness across your bottom with fabric pulling above your hip, you need a full rear adjustment. Same slash line placement, but this time you'll open it up half to one inch instead of overlapping, then blend those seam lines.
Step 8: Swayback Adjustments - Handle These Last
When you notice fabric pooling at the lower back, you might think you need a swayback adjustment. But Robin has complicated feelings about this term because other fit issues are often misdiagnosed as swayback problems.
That's why she suggests saving this adjustment for the very end of your fitting process. Once you've made all your other alterations and the fit is perfect everywhere else, if there's still a small bubble of extra fabric just under the waistband, then you can trim a small amount—usually a quarter to half inch—from the top of the back rise and blend smoothly along the waist seam.
Determining Your Perfect Inseam Length
Now you can decide on the length you want for your inseam. This is the perfect time to figure out where you want the hem to hit and adjust your pattern accordingly.
You might be wondering how many adjustments to make before sewing a new muslin. I like to make no more than two or three adjustments before testing again, but it depends on what those adjustments are. Think about whether your changes intersect with each other and might be throwing off other areas before moving to the next step.
The Power of Systematic Fitting
The key is approaching this systematically instead of randomly. Each adjustment builds on the previous one, creating a logical path to better fit instead of a confusing maze of changes.
Once you master this framework, you'll never look at pants fitting the same way again. You'll have the confidence to tackle any pants pattern, knowing you have a proven system for achieving the fit you want.
What's your biggest pants fitting challenge? Have you tried any of these adjustments before, and what was your experience like?

