
 Sign In
If you've ever walked past pre-quilted fabric in the store because it seemed too intimidating or bulky, I totally get it. For years, I thought these fabrics were only good for baby quilts and pot holders. But here's what I've learned after working with them for countless projects: pre-quilted fabrics can create some of the most gorgeous, cozy garments in your wardrobe—if you know how to handle them properly.
The problem is that one wrong move with these multi-layered fabrics can leave you with wonky seams, shifting layers, and a finished piece you'll never actually want to wear. I've been there! But once you understand how to work with their unique characteristics, you'll discover they're actually quite forgiving and create that enviable texture and warmth without any quilting work on your part.

Today I'm sharing five techniques that completely changed how I approach pre-quilted fabrics. These aren't just basic tips—they're the game-changing methods that'll have you working with quilted fabric like you've been doing it for years.
Understanding Pre-Quilted Fabric Basics
Before we dive into the techniques, let me explain what makes pre-quilted fabric so special. This material consists of three layers—typically two fabrics with batting sandwiched between them—that are already machine-quilted together in beautiful patterns. You get built-in texture and warmth without spending hours at your quilting machine.
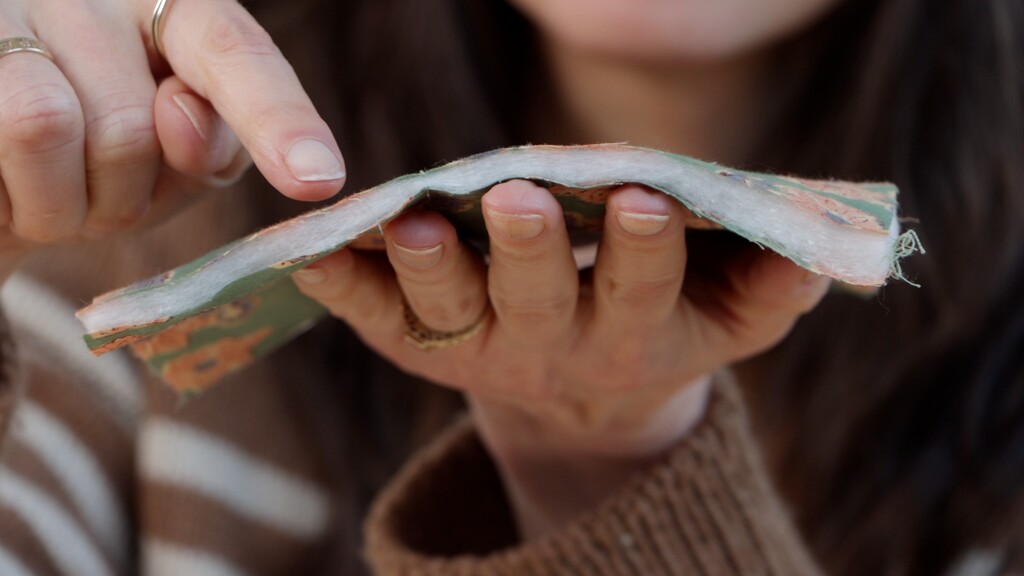
You'll find these fabrics in both knit and woven varieties, and they behave quite differently. Knit versions like quilted jersey create those soft, drapey garments that just melt onto your body, while woven options give you structure and hold their shape beautifully for outerwear.
The variety available might surprise you! I've found cotton, nylon, linen, and even some truly spectacular novelty options online. Search "pre-quilted fabric" and you'll discover couture-level materials with metallic threads, embroidered details, and unusual fiber combinations that'll make your finished piece an absolute showstopper.
Technique #1: Always Pre-Wash Your Fabric
This step is absolutely non-negotiable, and here's why: all those layers can shrink at completely different rates when washed. When this happens, you get shifting and puckering around the quilting lines that can ruin your finished garment.
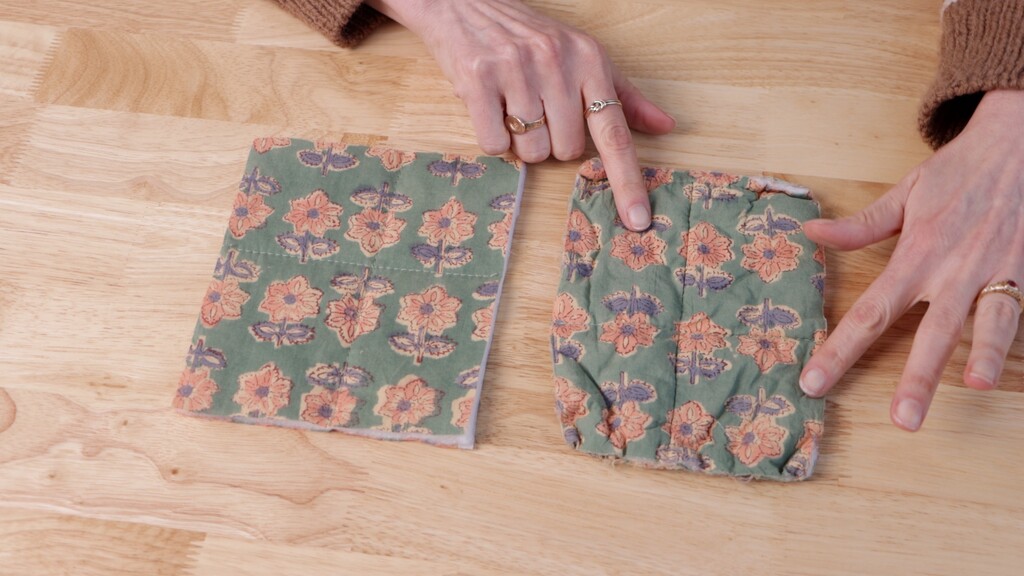
Here's the thing about that puckering—it's actually inevitable as the fabric shrinks around the stitching, and I've found it adds character and texture that improves the final look. You just want it to happen before you cut your pieces, not after you've invested hours in sewing.
Always pre-wash using the exact same settings you plan to use for your finished garment. Planning to wash in cold and hang dry? Do that with your fabric. Want the convenience of throwing it in the dryer? Test that too.
Different batting types behave differently during washing. Cotton batting shrinks more than polyester, while wool can felt with too much heat. Understanding your specific fabric composition helps you choose the right pre-washing method and avoid disasters later.
Technique #2: Cut in Single Layers for Perfect Accuracy
Folding fabric to cut two pieces at once might save time with regular fabric, but pre-quilted fabric changes the game completely. When your fabric already has three layers, folding it means you're cutting through six layers total. With lofty batting, that's serious bulk for your scissors or rotary cutter to handle cleanly.
I've seen people try to force this and end up with pieces that are different sizes—one sleeve smaller than the other, or side seams that don't match. It's frustrating and wastes expensive fabric.
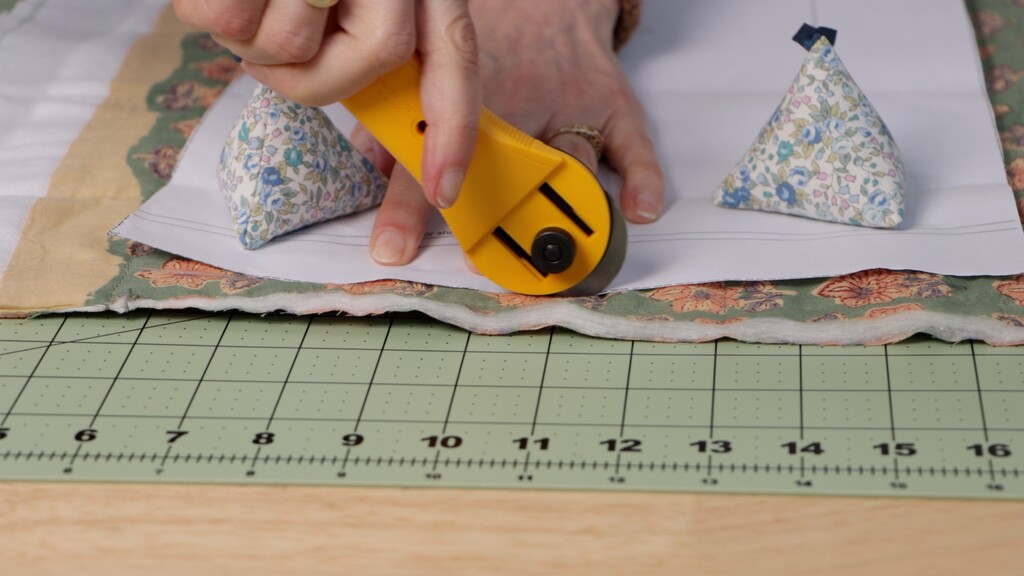
For the most accurate results, cut one layer at a time using a rotary cutter with a fresh blade. Blades dull faster when cutting through multiple layers, so you want sharp tools for clean cuts through all those layers.
Pattern weights work better than pins when cutting since they won't shift or distort your fabric. I use traditional pattern weights plus some heavier options like large washers from the hardware store for extra hold.
For patterns that call for cutting on the fold, trace your pattern pieces onto tracing paper to create full-size pieces. I keep a roll of butcher paper specifically for this purpose—it's wide, affordable, and perfect for tracing larger pattern pieces.
One thing many sewists overlook is the quilting pattern direction when laying out pieces. Some pre-quilted fabrics have directional designs that need all your pattern pieces oriented the same way, similar to working with napped fabrics. This directional cutting usually means you'll need 10-25% more fabric yardage than the pattern envelope calls for.
Technique #3: Pin Like a Pro and Sew Slowly
Your main goal throughout construction is keeping all those layers perfectly aligned. Regular dressmaking pins are often too short to hold all these layers together securely.

Use longer quilting pins or sewing clips, and plan to use more pins than you normally would—think every inch or two along seams. This might seem excessive, but shifting layers are the number one source of frustration with quilted fabric projects. Better to over-pin than deal with wonky seams later.
When it's time to sew, a walking foot becomes your best friend. This tool feeds all layers through your machine evenly, preventing that annoying situation where the top layer bunches up while the bottom layer stays put. If you don't have a walking foot, you can sometimes achieve similar results by manually guiding the fabric and reducing your presser foot pressure.

As you sew, gently hold the fabric taut to maintain alignment without stretching. I like to support the weight of the fabric with my left hand while guiding with my right, especially when working with heavier quilted materials.
Don't rush your stitching speed either. Slower, steady sewing gives you better control and prevents the machine from jamming when it hits thicker seam intersections. If you hear your machine struggling, stop and readjust rather than forcing it through.
Technique #4: Reduce Bulk with Smart Trimming and Topstitching
With all these fabric layers, your seams can get seriously bulky. Don't be afraid to trim those seam allowances down—sometimes I'll trim them to just 1/4 inch to reduce bulk while still maintaining strength. Just make sure you're leaving enough seam allowance for your chosen finishing method.

Topstitching your seam allowances can help flatten everything beautifully. Just keep your final design aesthetic in mind since topstitching will be visible on the outside of your garment. Sometimes that adds to the sporty, technical look you're going for, but other times you may want a cleaner finish.
For curved seams like armholes, clip those curves carefully to prevent bunching when you turn everything right side out. With quilted fabric, you need to clip more frequently than usual because the batting prevents the fabric from stretching and easing into curves naturally.
One advanced technique is to remove some of the batting from seam allowances before sewing. This sounds complicated, but it's just a matter of carefully snipping some of the quilting stitches and trimming out the batting in a narrow strip along the seam line. This dramatically reduces bulk while maintaining the quilted effect everywhere else.
Technique #5: Master Professional Seam Finishing
If you skip seam finishing with pre-quilted fabric, you will immediately regret it. All those raw edges need to be contained and managed properly, and batting has a tendency to shed and create lint if left unfinished.
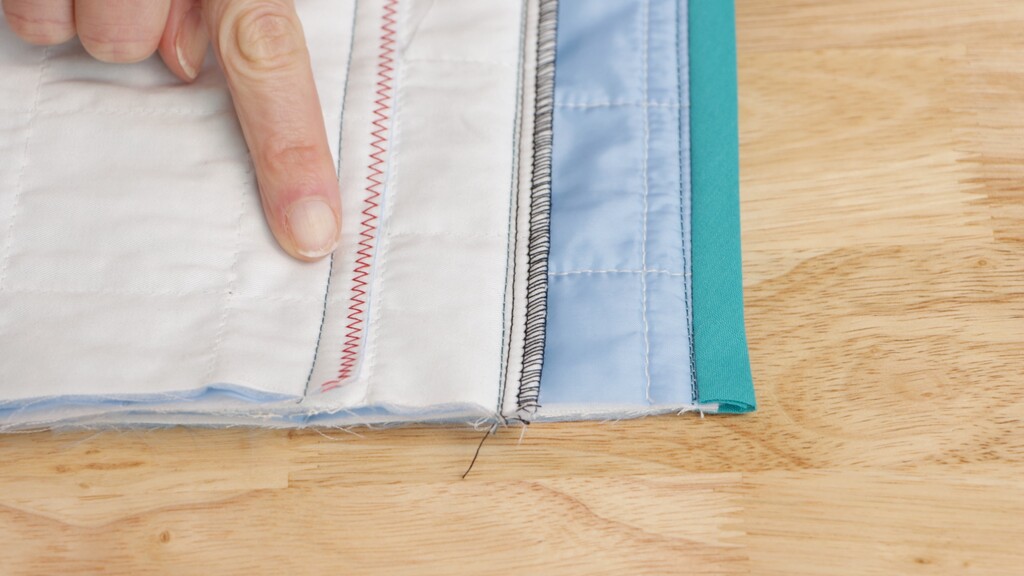
A serger or wide zigzag stitch works beautifully for seams that will be hidden inside your garment. The key is adjusting your settings for the extra bulk—you might need to loosen your tension or use a slightly longer stitch length than usual.
For seams you want to showcase, bias binding creates a gorgeous finished edge and gives you an opportunity to add personality with contrasting colors. I love using bright binding on neutral quilted fabric—it transforms the whole piece from basic to statement-making.
Choosing the Perfect Patterns for Pre-Quilted Fabrics
The key to success with pre-quilted fabrics is choosing patterns that embrace the bulk rather than fighting against it. These fabrics work best with clean lines, minimal seaming, and relaxed fits that let the fabric's texture be the star.
Consider sizing up from your usual size, especially if you're using a pattern that wasn't specifically designed for quilted fabric. The general rule is to go up one size, but if your fabric is particularly lofty, you might need even more ease.
Jackets That Showcase Quilted Fabric
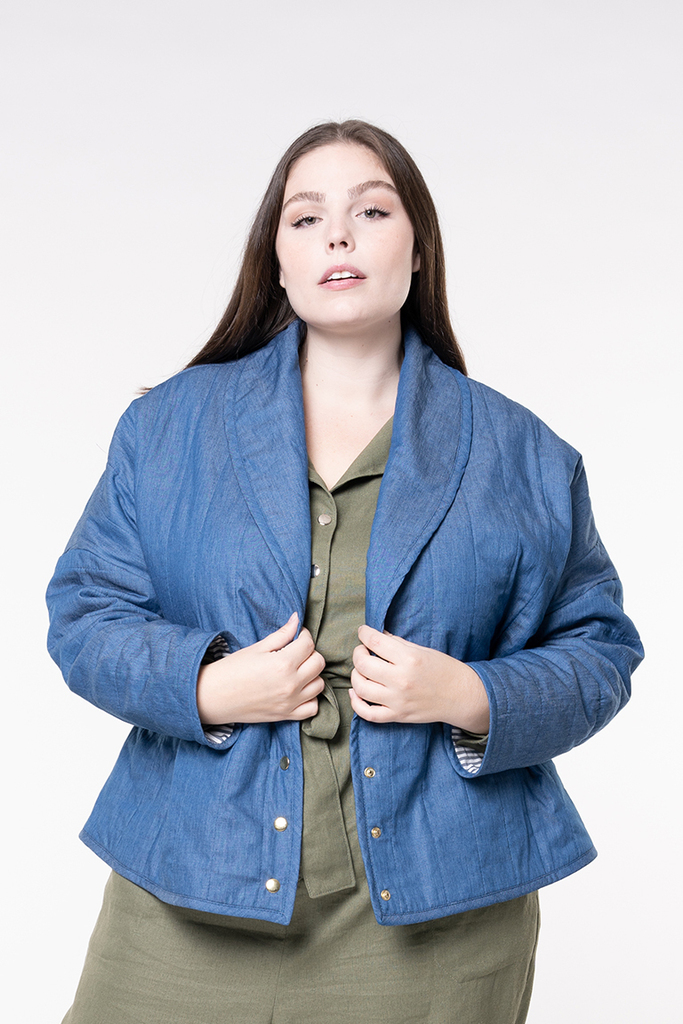
Jackets are an obvious choice for quilted fabrics. The Easton jacket pattern gives you that oversized fit with shawl collar and snap closures that work beautifully with bulky fabrics. The Basil jacket features dramatic curved sleeves that create such a modern silhouette, while the Larkin bomber offers a stylish, contemporary look.

Our newest release, the Ivy jacket, creates a beautifully relaxed silhouette with bound edges that showcase quilted fabric perfectly. It's an unlined jacket with a detachable scarf collar that practically begs to be made in quilted fabric.
Beginner-Friendly Vest Projects
Vests are fantastic for beginners since you can focus on the quilted fabric techniques without worrying about setting sleeves. The Jesse vest features a contrasting yoke and lined kangaroo pockets that really highlight the quilted texture.
Cozy Loungewear Options
Don't overlook loungewear—quilted joggers or wide-leg pants create incredibly cozy pieces that feel like wearing a hug. The Joss pants work beautifully with their elastic waistband and flowing wide legs, while the Witt joggers are perfect for a more fitted look with their tapered legs and practical patch pockets.
For pants, make sure to size up to accommodate the fabric's extra bulk. Both patterns already have ease built in, but it's much easier to take seams in later than to let them out if you find you need more room.
Functional Accessories
Pre-quilted fabric also shines in accessories where that extra padding serves both form and function. The Rocco lunch bag lets you skip additional insulated interlining, while the Jordan device sleeve gets extra protection for your electronics. Even something simple like the James glasses case becomes special when made with quilted fabric.
Finding Quality Pre-Quilted Fabrics
When shopping for pre-quilted fabrics, look beyond your local fabric store. Online retailers often carry a much wider selection, including those spectacular novelty options I mentioned. Search for "pre-quilted fabric" specifically, and don't forget to check quilting supply stores—they often have beautiful options that work perfectly for garment sewing.
Pay attention to the quilting pattern spacing when choosing fabric. Tighter quilting patterns tend to be more stable and easier to work with, while widely spaced patterns can be trickier to keep aligned during construction.
Working with pre-quilted fabrics opens up a whole world of cozy, textured garments that feel as good as they look. The key is understanding their unique characteristics and working with them rather than against them. Once you master these five techniques, you'll find yourself reaching for quilted fabrics again and again for projects that need that perfect combination of warmth, texture, and style.
Ready to dive deeper into fabric selection? Understanding the different types of cotton fabric will help you choose the best base fabrics for your quilted projects. Read this article about the twelve distinct types of cotton fabric and how each one behaves differently in your garments.

