I have a pair of flared wool pants that I absolutely love. When I saw the Chelsea jeans pattern, I thought I could hack them a little bit to duplicate the wool pair. But this time, I’m sewing them in corduroy.
In this project vlog, I show you how to modify the shape of the legs on a pair of pants. You can do this using a pair of pants that already fit you.
This works for minor reshaping, but I'd consult a patternmaking book first if you want to turn a pair of skinny jeans into palazzo pants.
And at the end of the vlog, I’ll share my top 6 tips for hacking pants.
In this case, I’m raising and reducing the flare on the Chelsea jeans, which already have a flared leg.
It’s not that difficult to change the legs on flared pants. You can make the flare slightly bigger or smaller or straighten it entirely without major adjustments.
With Chelsea, I needed to raise the flare to start closer to the knee rather than below the knee.
Here are the 6 tricks I used.
1. Always make a muslin
It’s always a good idea to make a muslin for a pair of pants, but it’s essential to make a muslin when you’ve adjusted the pattern in any way.
2. Make your muslin in the same kind of fabric
The Chelsea pattern calls for fabric with a bit of stretch, so I made a muslin using a fabric with a similar stretch percentage.
When you’re making pants, choosing a fabric with a similar weight to your final fabric can really help you assess the fit. Plain muslin can work, but not if you are testing a pair of pants with stretch.
3. Cut out all of your pattern pieces except the legs
Before you cut out your pattern entirely, you want to make your adjustments. You can cut out the small pieces like the pockets, zipper, and waistband. But keep your legs uncut. This will save you from having to trace the pieces with extra paper to make your adjustment.
Just a tip to save some paper and time!
4. Trace the pair of pants you already own
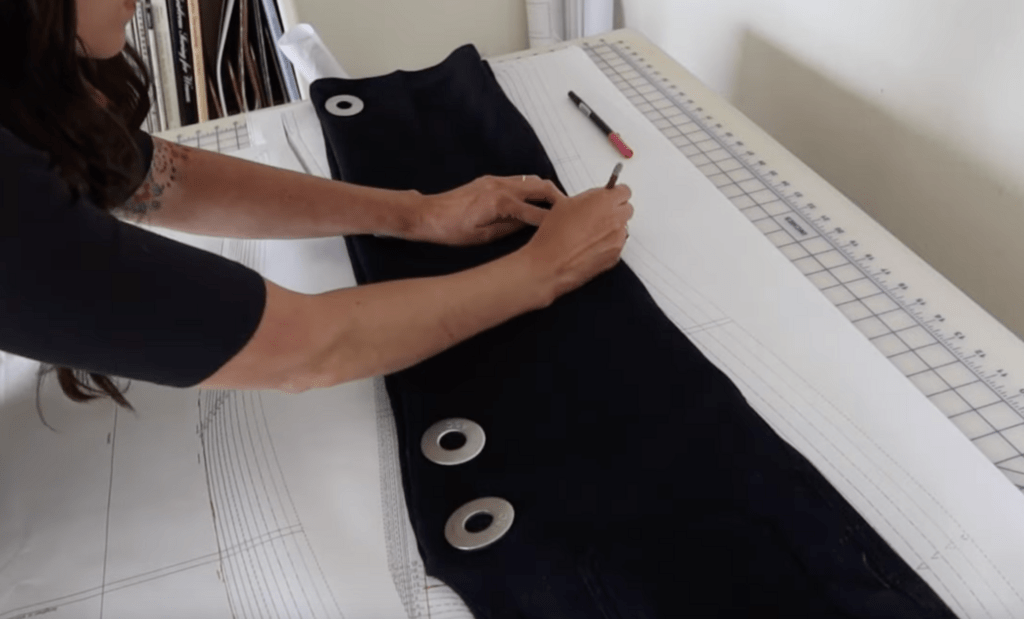
Now you need to lay your existing pants on top of your pattern and trace the shape you’d like.

First, mark your seam lines on your pattern. This way you will know where your actual side seams will be. I used a colored marker so it was easy to see.
Take the pair of pants you already own and fold them in half. Lay it along the seam line on top of your pattern piece.
Then take a pencil and sketch the general shape of the leg. In the next step, you’ll use measurements to get it precise. For now, just get a rough outline.
5. Refine your new shape using measurements
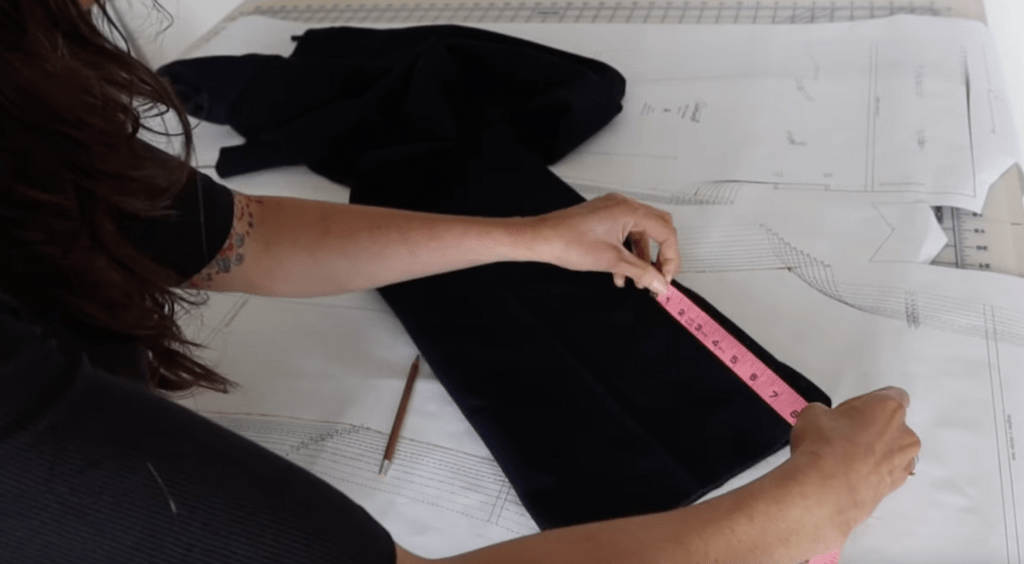
Now you want to officially measure your existing pants to refine your sketch.
To do this, measure points at equal places along the leg, until you get to the knee. For example, measure the hem, the calf, the knee, and even slightly above the knee if you need to.

Then transfer those measurements to your sketch and make all your new lines nice and even.
Add seam allowance to your new lines, and you’re ready to cut out your new pattern pieces and sew your muslin!
6. Make your muslin simple
When you’re sewing your muslin, skip any non-essential steps, like pockets, belt loops, and even the zipper. You can mark these things using a pen and pin your crotch seam shut to test the fit. This will save you some time.
As you can see, changing the legs on a pair of pants is pretty easy, especially flared pants. If I wanted to turn these into straight-leg pants, I would have measured at points all the way up to the hip and had them fall straight from there. Or, if I wanted to remove the flare entirely, I could use a pair of straight-leg pants to trace a new shape below the knee.
Have you ever modified a pattern using a pair of pants you already love? Comment and share your tips!

