Whether it’s just a sprinkling or an all-over design, rhinestones’ bursts of light add excitement to any style. They also elevate an otherwise easygoing outfit without changing the casual vibe.
Although a glitzy sweatshirt, dress or blazer may feel a bit dressier than your usual standbys, it’s easy to keep the tone casual. It’s all about mixing things up; work gem-studded pieces into your daily wardrobe to make a fun, vivacious yet unconstrained closet.
When adding rhinestones to store bought or handmade garments, choose items that have a simple silhouette (sheath dress) or a casual fabric (sweatshirt, jersey, wool) to avoid getting too frou frou.
As small as they are, there’s a lot to know about beading and rhinestones: Swarovski, Preciosa or acrylic? Pointed, mounted or flat back? Sew on or hot fix? There are many choices and it can get confusing. Lucky for you, below are the ABC’s of all things rhinestones so that you can put a twinkling spin on your favorite pieces this holiday.
When adding rhinestones to store bought or handmade garments, choose items that have a simple silhouette or a casual fabric to avoid getting too frou frou.

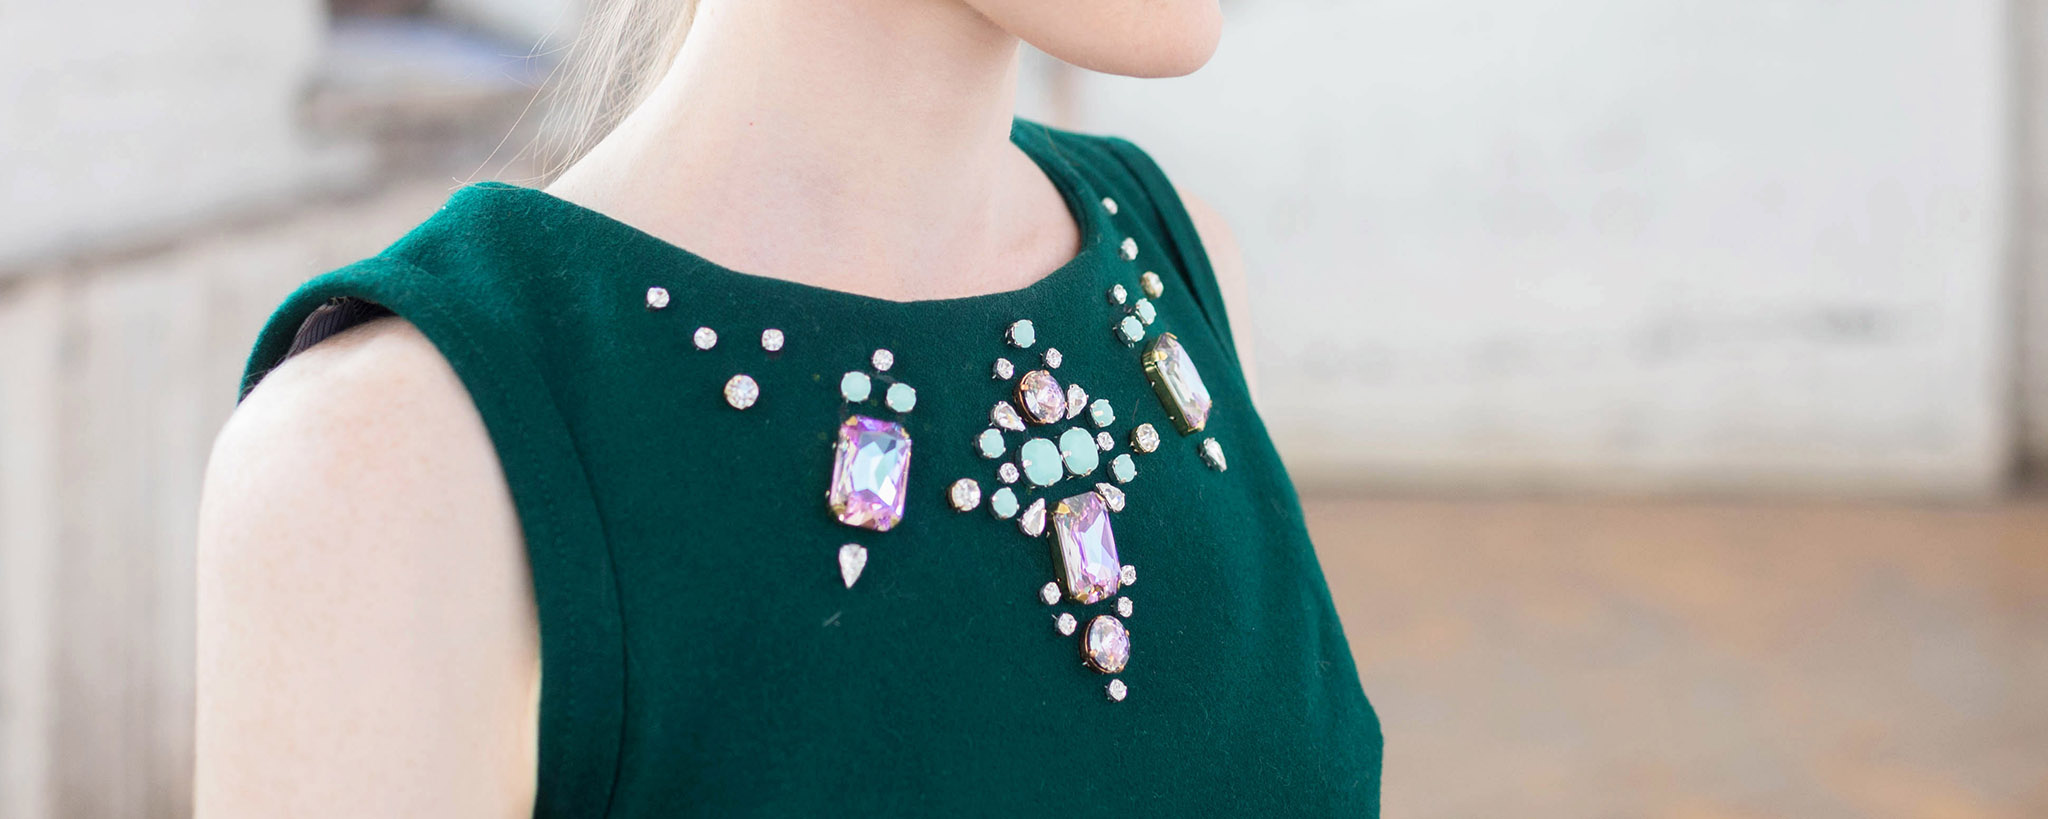
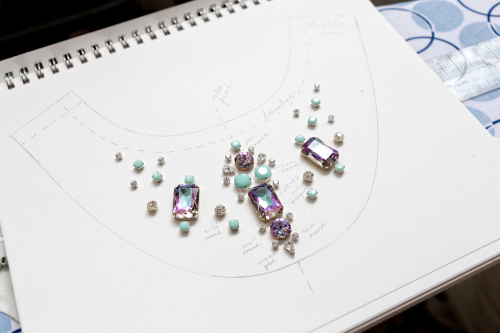
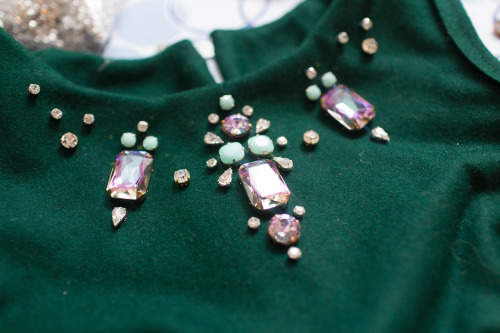
This collar of rhinestones was created using a variety of shapes and sizes on a simple top, made from Laurel by Colette Patterns.
01 Section
What are rhinestones?
Before exploring how to source and use rhinestones, let's first take a look at exactly what rhinestones are. We'll look at how they're classified by shape, material, and size.
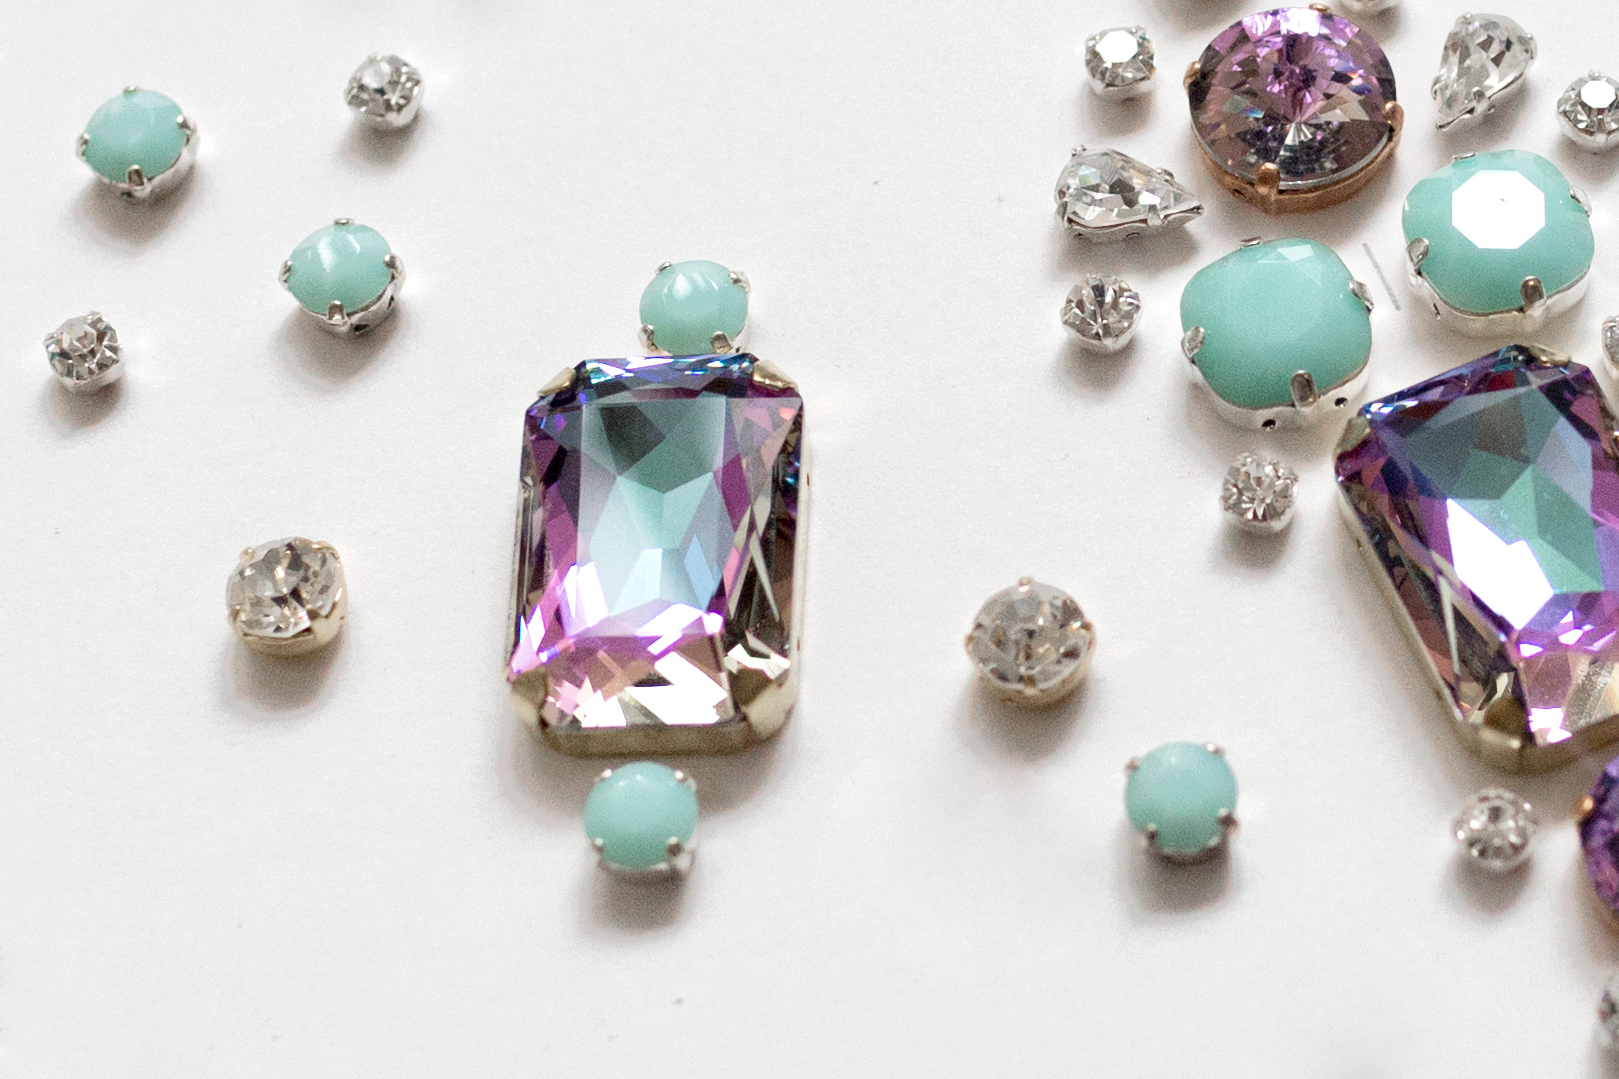
Rhinestones are decorative items that mimic genuine jewels. They’re made of lead crystal, glass, or acrylic, with lead crystal being the best quality, glass being the second and acrylic being the third.
The difference between the three is in light refraction, and this is determined by the quality and the cut of the glass. Only light entering the glass can be reflected back, and the clearer the glass, the more light that is bounced back without being absorbed. Lead glass transmits light better than glass without lead, which makes cut lead rhinestones more brilliant than glass ones.
Rhinestones can be machine cut or molded. Machine cut rhinestones are more brilliant than molded ones because each cut breaks light into a new fragment to be reflected. So, the more cuts, the higher the glimmer value.
Types of rhinestones
-
Swarovski: The highest quality rhinestone. Made in Austria, each stone has 14 facets unless it is vintage, in which case it has 12 facets. The more facets, the more light that is reflected. -
Preciosa: The leading crystal company before Swarovski (one of Preciosa’s employees left and formed Swarovski). Made in the Czech Republic, these rhinestones are slightly less brilliant than Swarovski, though it's not noticeable to the untrained eye. but are approximately 20% cheaper. When purchasing a large amount of rhinestones, it makes a difference. -
Acrylic: Worst quality rhinestones. Made in Korea, China or Asia, many vendors label these stones as Swarovski and Preciosa, but they’re imitation stones. If the price seems too low for what it is, then there’s probably a reason.
Shape
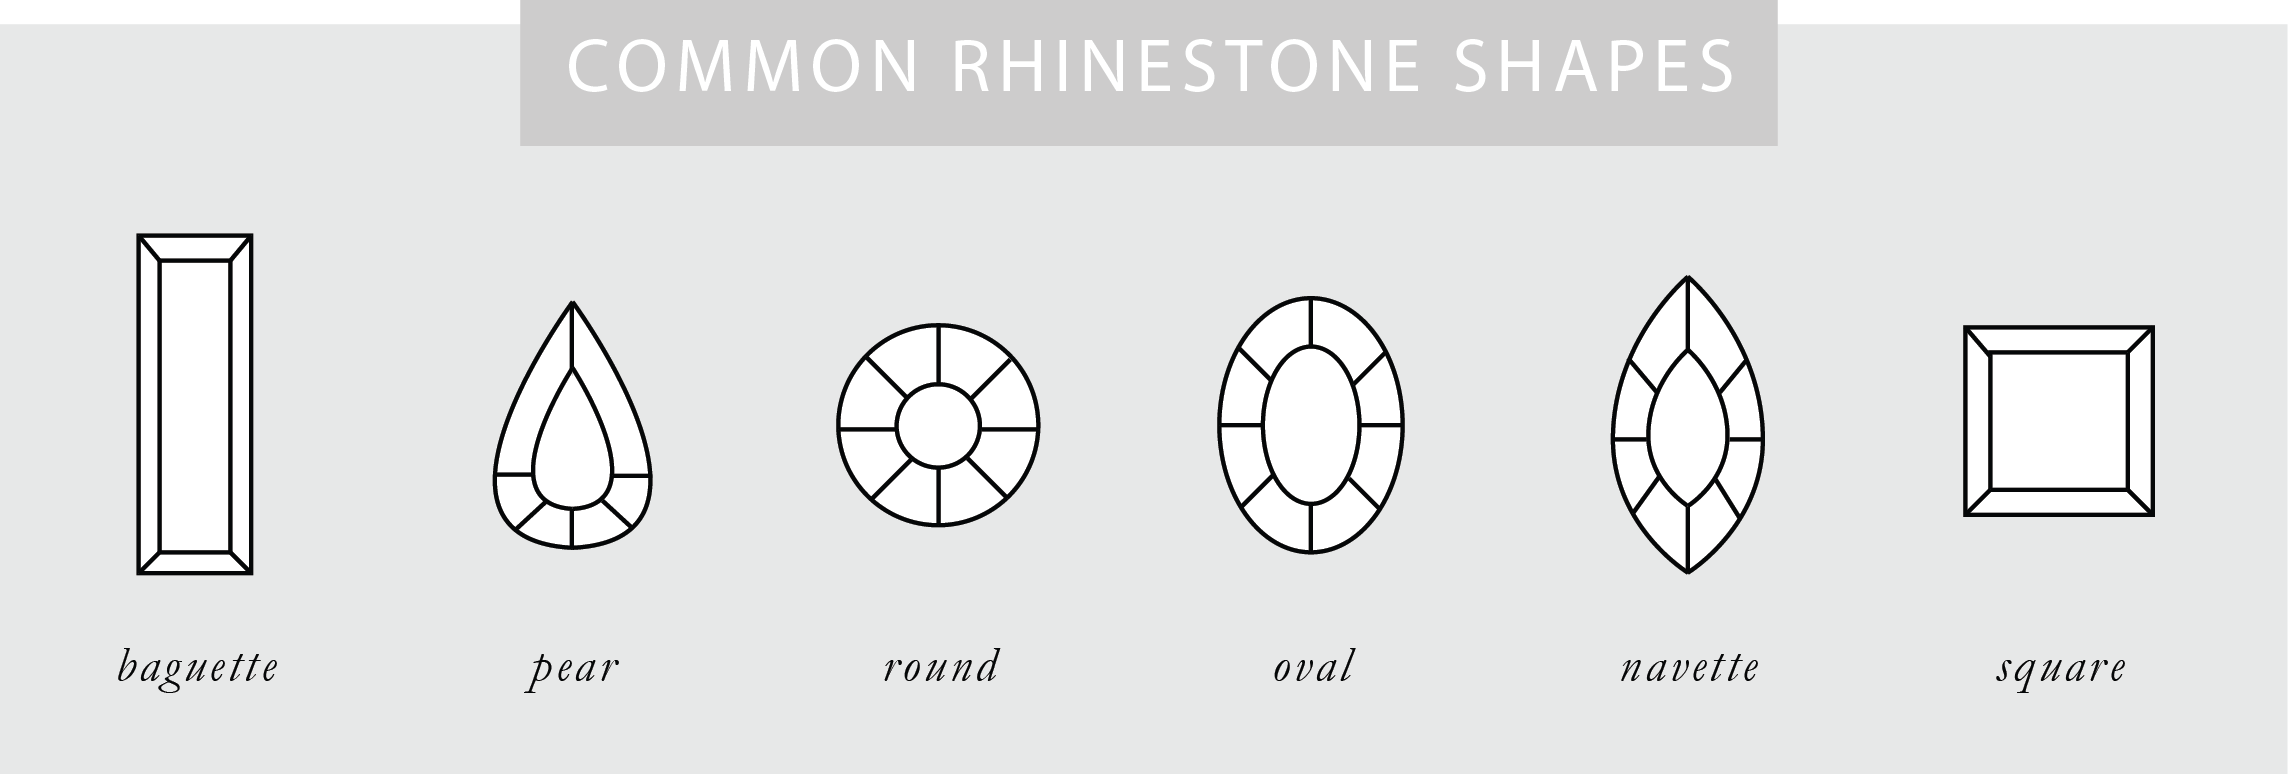
Rhinestones come in a range of shapes, and some common ones are navette, round, oval, pear, square, octagon and baguette.
Pointed, mounted, or flat back
-
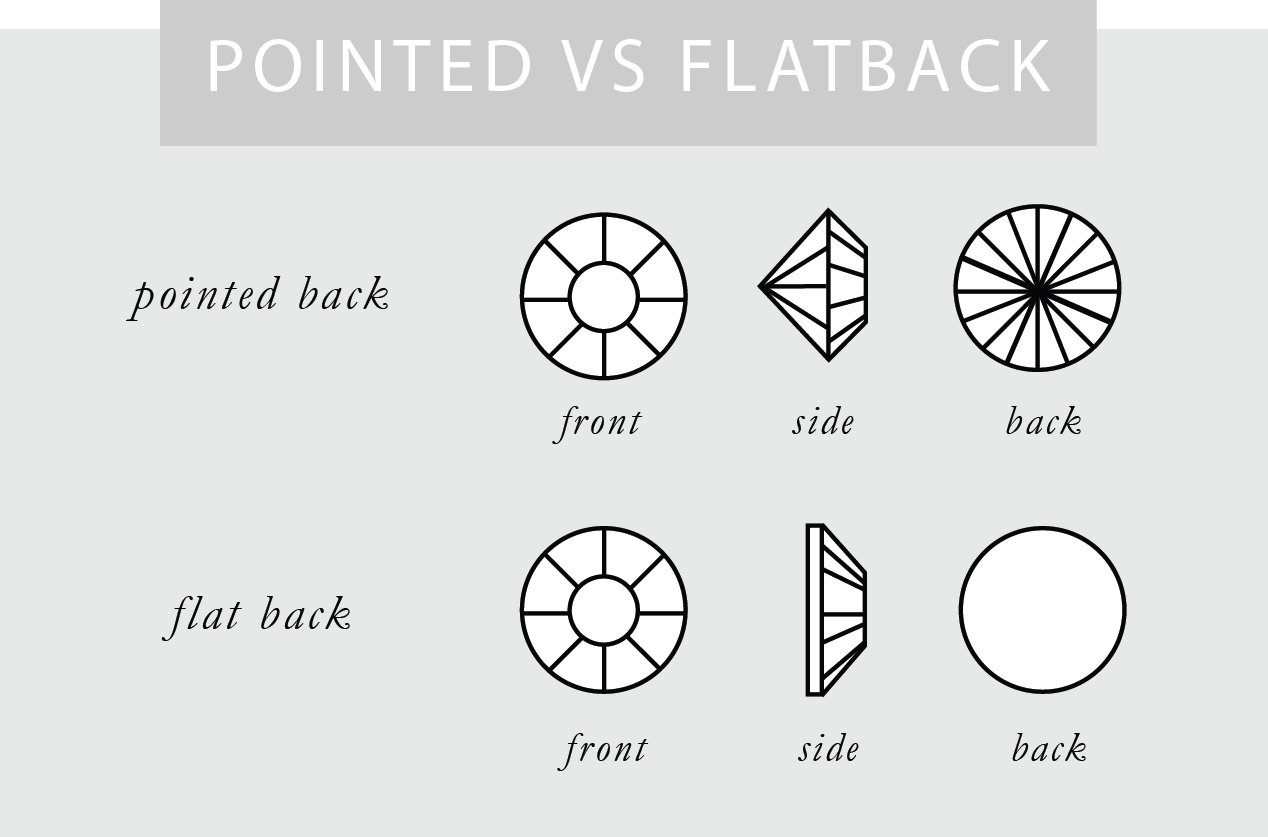
Pointed: Rhinestones with a pointed back, and are mainly used in jewelry, not as a decorative element to clothing. -
Flat back: Rhinestones that have a flat back. Used mostly for gluing or hot fixing. -
Mounted: Rhinestones that have a metal casing around it in one of the two ways. With a tiffany set, a metal casing either wraps around from the back to the front of the stone or from the front to the back of the stone. In the case where the casing wraps to the front, holes are inserted at the back so that the stones can be attached with needle and thread. When the casing wraps the back, prongs are used to affix the stones by piercing through the fabric. With a rim set, there is a metal ring around the edge of a stone. There are no exposed prongs, but holes for needle and thread.
Sizing
Most rhinestones are measured in millimeters. The exception to this is flat back rhinestones, which are sold by a number that is preceded by SS (stone size); that number bears no relationship to millimeters. This sizing is arbitrary and was created long ago, stuck, and never changed.
Rhinestone sizes
SS 9 = 2.5 mm
SS16 = 4 mm
SS 20 = 4 mm
SS 30 = 6 mm
SS 40 = 8.5 mm
02 Section
Buying supplies
Now that you know your options, what else will you need to complete a rhinestone embellishment?
Rhinestones
Rhinestones are bought by the single, dozen, ½ gross, or gross, depending on the vendor. A single is 1 piece, a dozen is 12 pieces, a ½ gross is 72 pieces and a gross is 144 pieces. The upside to buying a larger quantity is that the price per piece is lower.
Needles
Always use a beading needle when sewing rhinestones. They are very thin and flexible, and the eye is the same width as the rest of the needle, so it is very easy to pass through fabric.
Thread
-
Silamide: Two ply waxed nylon that works for all seed beads, rhinestones, size 13 beading needles and on and off loom beading. Doesn’t twist or tangle. -
Fire Line: Interknitted thread for beading and stringing (jewelry making). It doesn’t twist or tangle, and it resists abrasion against rough or sharp surfaces, which makes it a great thread for mounted rhinestones. Also, it is not damaged by UV rays. -
Nymo Nylon: Most popular choice for seed beads and rhinestones. It is lightweight and available in many thicknesses and colors. -
Silk: Most traditional thread option. Although available in many colors, it has a tendency to fray, which makes it hard to pass through the eye of a needle.
03 Section
How to attach rhinestones
Attaching rhinestones to your garment is simple, but depends greatly on the type of rhinestones you purchase and the nature of your garment.
There are many ways to attach rhinestones and several factors should be considered when deciding how you’re going to affix them. First, how will your garment be cleaned and how often? While glued rhinestones are said be machine washable, there’s no guarantee. Also, does your method of application parallel the garment’s care instructions? If your garment is dry clean only, then use the method of application that is dry cleanable.
Other factors to consider are that tiffany set rhinestones snag on clothing and hair, and pronged rhinestones can bother the skin. In the end, which method you choose depends on your personal preferences and the nature of your project.
-
Sew on: Rhinestones are mounted or have a carrier (tiffany or rim), and are attached using needle and thread. Sewing each rhinestone takes more time than the other methods, but it has a couture touch. -
Glue on: Rhinestones are attached using glue such and Gem-Tac or Aleene’s. Surprisingly, rhinestones that are glued on are just as strong as rhinestones that are sewn on. -
Hot Fix: Rhinestones with glue on the back, which is activated when heat is applied. Very quick application and the rhinestones and garment are both dry cleanable. Depending on size, hundreds of rhinestones can be set at one time. Not recommended for rhinestones larger than 30SS.
04 Section
Create a rhinestone bib neckline
Want to try your hand at adding rhinestones to a neckline? The steps below outline how to add rhinestones to the Colette Patterns Laurel dress, version 1 without sleeves, but you can adapt the tutorial for many necklines.
How to:
You'll need:
- Sew-on, mounted rhinestones
- Drafting paper
- Tracing wheel
- Marking pen or pencil
- Awl or hole punch
- Aleene’s Fabric Fusion
- Silamide Thread
- Beading needle
- Blouse or dress (example is the Laurel blouse by Colette Patterns, made without sleeves)
- Fabric and appropriate interfacing
Step | 01
Create the design. Using a regular pencil, map out your rhinestone motif on your facing piece. You can follow my design or create your own. If you've already purchased rhinestones, play around with the placement using the actual stones until you have a design. Then, mark layout with a pencil. If you haven’t purchased rhinestones, you can sketch it out. For my design, I wanted it to resemble a necklace, so I made the center motif the most intricate and scaled down as it got closer the shoulder seam. Also note that the height/width of your facing will be determined by your design.
Step | 02
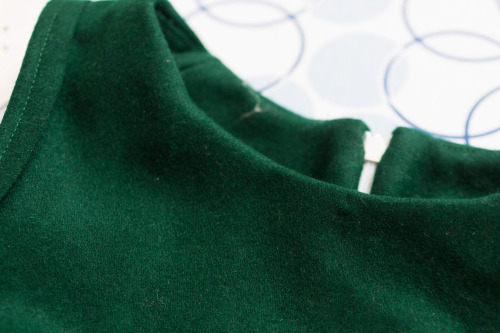
Finish garment. Finish neck with facing and complete remainder of garment according to pattern instructions. Be sure to interface the facing using an appropriate fusible or sew-in. If your pattern does not have a facing, see the instructions in the sidebar below.
Drafting a neckline facing
If your pattern does not have a facing, draft one large deep enough to include your desired design. The facing will not only provide structure, but it will conceal the stitching from sewing the rhinestones.
Make sure the motif starts at least ¼” below the neck seamline and above the facing’s bottom edge. You don’t want the stones to sit too close to the edge.
You can design on a half pattern, but I like to map out rhinestone placement on a full pattern so I can see the whole picture. Also, this will help when marking the design on the garment later on.
- Lay your front pattern piece on top of a large piece of drafting paper
- Using a tracing wheel, trace neckline and shoulder seam. Draw in seam allowances.
- Depending on your design, mark the appropriate distance down from center front. For my design, I needed a facing that was 5” at center front to accommodate the large center motif, but yours might be smaller.
- Mark the appropriate distance from shoulder seam at neck. Again, the width will depend on your design. For mine, it was 2”, but yours might be smaller.
- Using a French curve ruler, connect the two points in a smooth curve.
- To draft the back facing, repeat the steps 1-5.
Step | 03
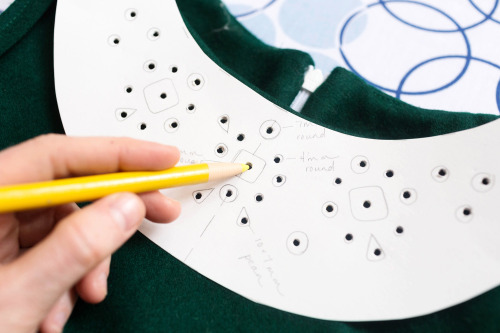
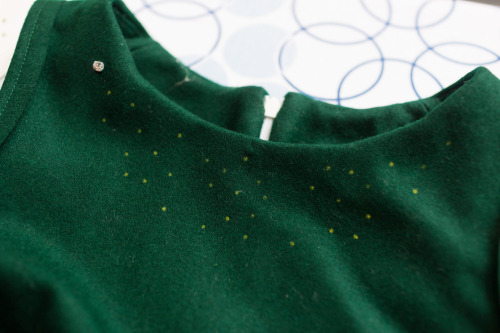
Mark placement. On facing pattern with outline of rhinestone motif, use an awl or a hole punch to puncture through the center of each rhinestone. Lay facing pattern on top of garment, making sure center front and shoulder seams are aligned. Pin to secure in place. Then, use a marking pen to mark the placement of each rhinestone.
Step | 04
Glue baste rhinestones. To make beading easier and ensure that each rhinestones is sewn according to the design exactly, use a tiny amount of Aleene’s Fabric Fusion to affix the rhinestones to the fabric. Be sure not use too much glue because if the glue extends past the perimeter of the stone, it will fuse the fibers of the fabric and make passing a needle through difficult. And if you don’t believe a little amount of glue will be enough to secure the stones, think again. Not one bead fell off when I was attaching them during a bus ride to New York City!
Step | 05
Sew on rhinestones. Using silamide thread and a beading needle, sew the rhinestones through self fabric only. Do not stitch through facing (remember, the facing is meant to hide the stitching). Tie off after every motif so that if the thread breaks, only one will come undone, not the whole design. Continue until all rhinestones are attached. Once finished, tack down facing at shoulder seams and center front.

Rhinestone supplyresources
-
Dreamtime Creations: An enormous selection of rhinestones at wholesale prices. -
Fusion Beads: This bead store carries a large selection of swarovski crystals. -
Rhinestone Guy: A great source for both swarovski and preciosa. -
Marty’s Gems: Recommended for small quantities and rare finds. -
Sew on Crystals: As the name says, this is a one-stop shop if you're looking for the sew-on variety.

