Sign In
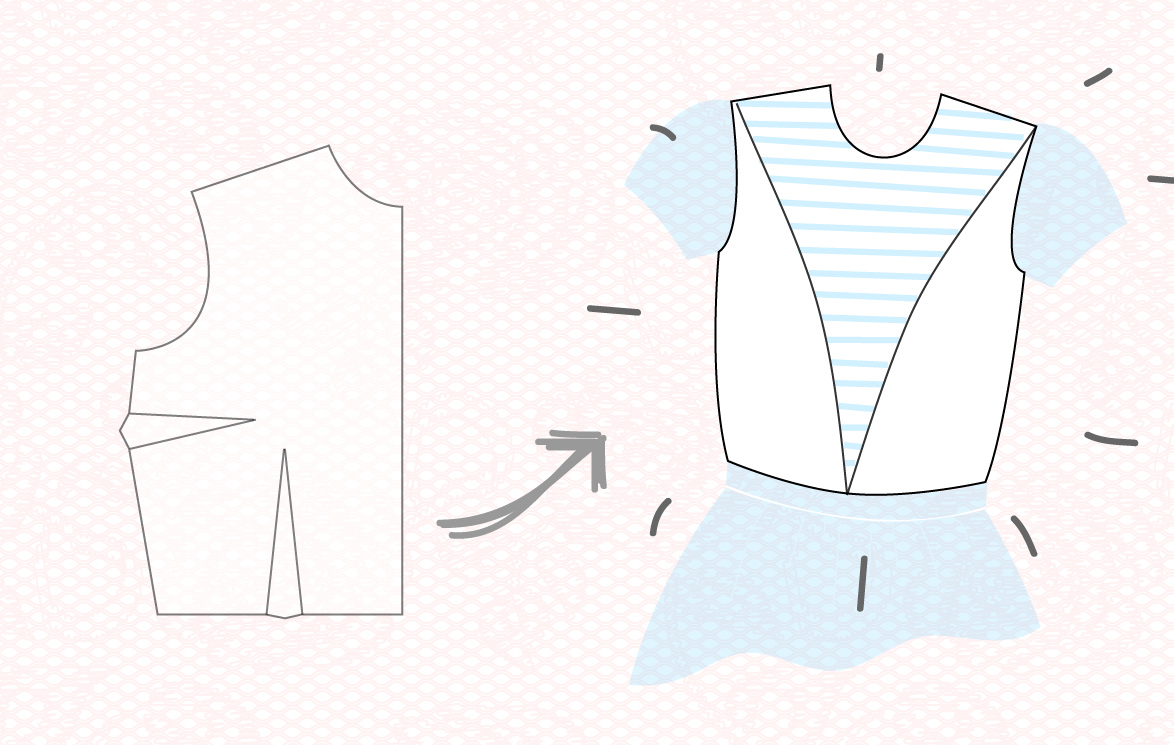
Block Paper Scissors is a patternmaking series featuring dart manipulation – no experience necessary to join in! Every month, we start with a basic bodice pattern (also called a "block" or a "sloper") with an underarm bust dart and a waist dart. We use that as a jumping off point to create a different bodice design each time.
This month, we’ll be transforming our basic block into a bodice with a V-shaped princess seam detail. This would be a great project to use contrasting color blocking or striped fabric.
How to:
Step | 01
Mark your bust apex on your pattern piece by placing the pattern piece over your body and aligning the center front and side seam. Mark the fullest point.
Step | 02
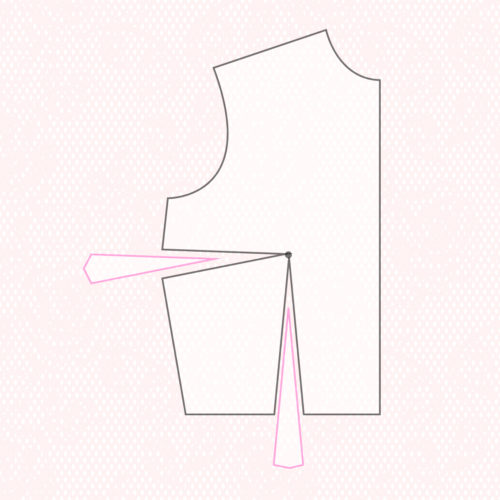
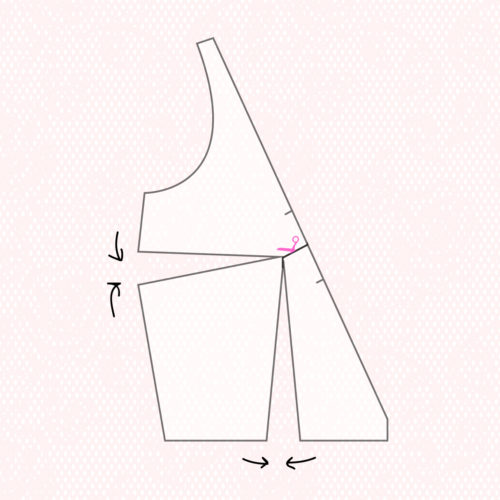
Cut along the lines to but not through the bust point. Remove wedges.
Step | 03
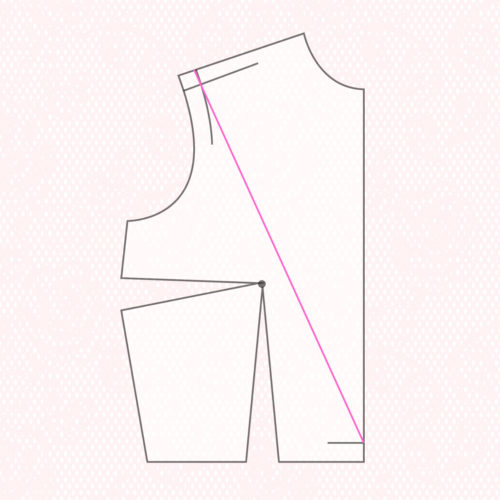
Draw stitching lines at the outer corner of the shoulder and at the center front waist. (This means drawing a line along the edge at the seam allowance.)
Step | 04
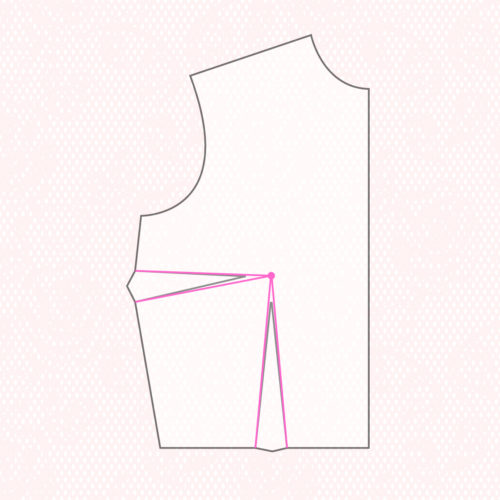
Draw a line through the intersection of the stitching lines at the shoulder to the stitching line at center front.
Step | 05
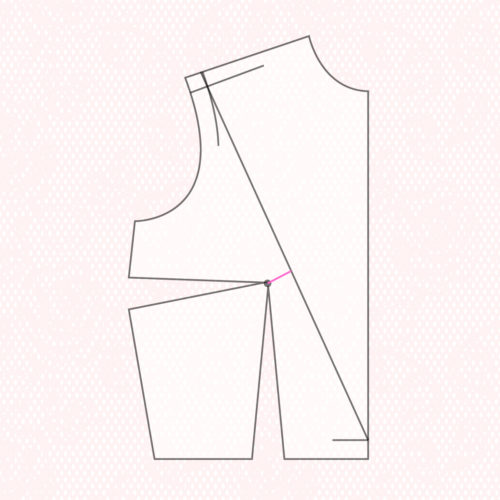
Draw a line from the bust point to the diagonal line. This line should be 1” or shorter. If it isn’t, redraw the diagonal line until it is, curving the line slightly if necessary.
Step | 06
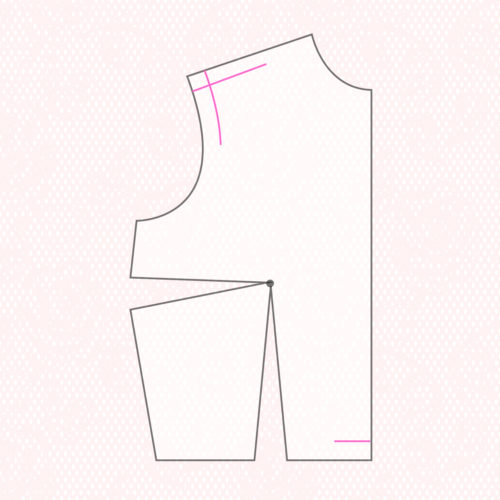
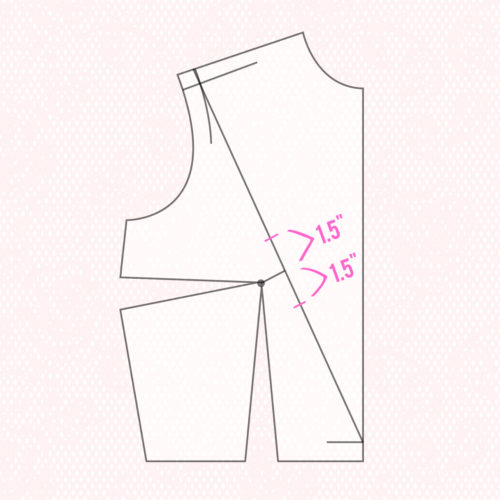
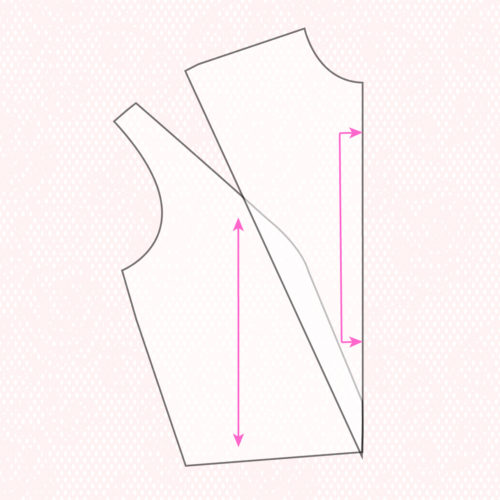
Mark notches across diagonal line: 1.5” above and below the 1” line.
Step | 07
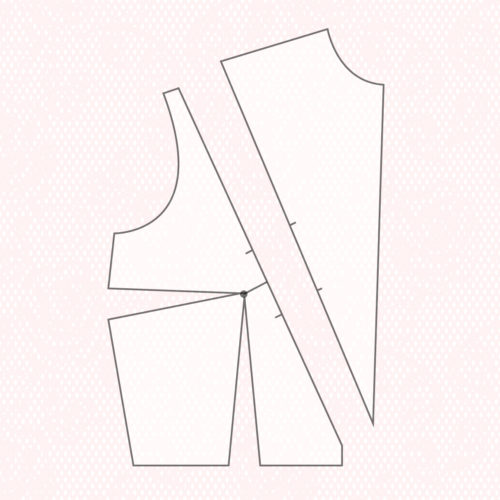
ISlash along the diagonal line.
Step | 08
Cut along the short line to but not through the bust point to create hinge.
Step | 09
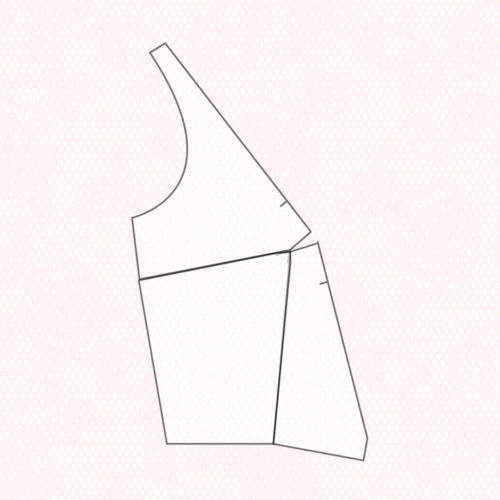
Close both the bust and waist darts. Tape.
Step | 10
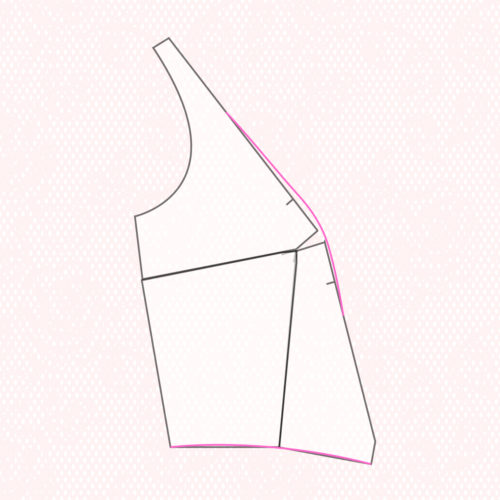
Tape paper under pattern piece. Following the outermost edge, blend a curved line around the jagged point of the pattern piece.
Step | 11
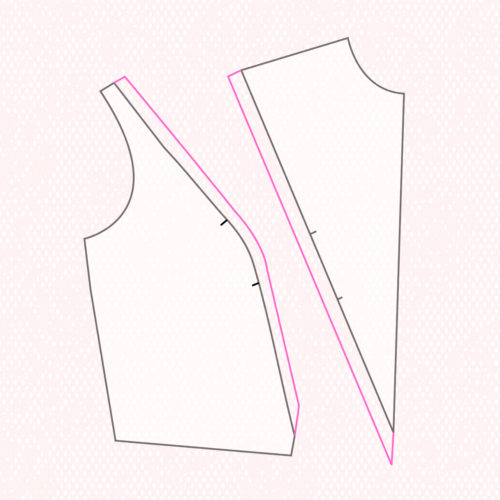
Add seam allowances to both cut edges.
Step | 12
The upper piece will be cut on the fold at the center front. For the side panel, draw the grainline parallel to the center front. To do this, overlap the lower edges at the stitching line and use a clear ruler to draw the grainline while referencing the center front edge.
Sewing notes:
Cut one center panel on the fold and two side panels. Sew the sides to the front, using notches for reference and easing together the edges. Stitch the sides together at the bottom of the center front.