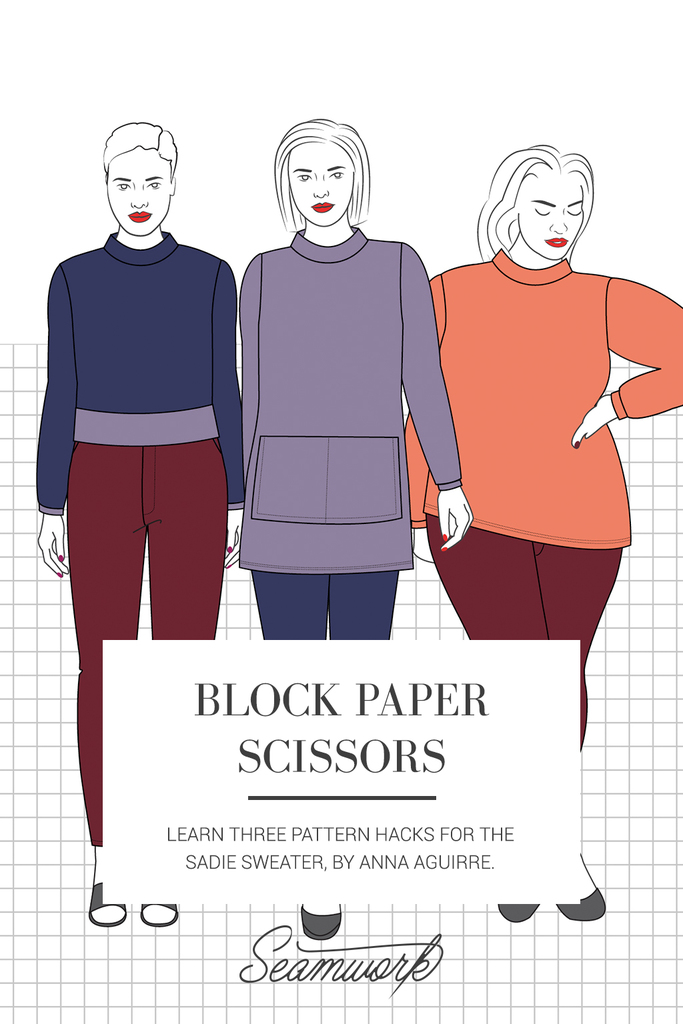
Block Paper Scissors is a monthly column that teaches three pattern hacks. These hacks help you give your Seamwork patterns a custom spin—all you need is paper, a ruler, and a pencil!
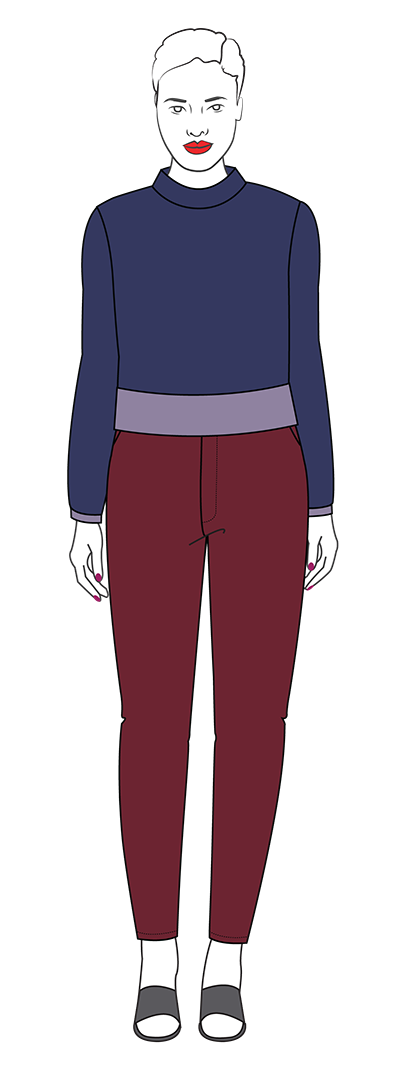
This month we walk you through three different pattern hacks for the Sadie sweater. Learn how to create an angled hem, a tunic-length sweater with a kangaroo pocket, and a cropped sweater.
Note: For best results, be sure to make any necessary fit adjustments before hacking your pattern.
You'll Need:
- Sadie
- Paper
- Pencil
- Scissors
- Clear ruler
- French curve
Angled Hem
Step | 01
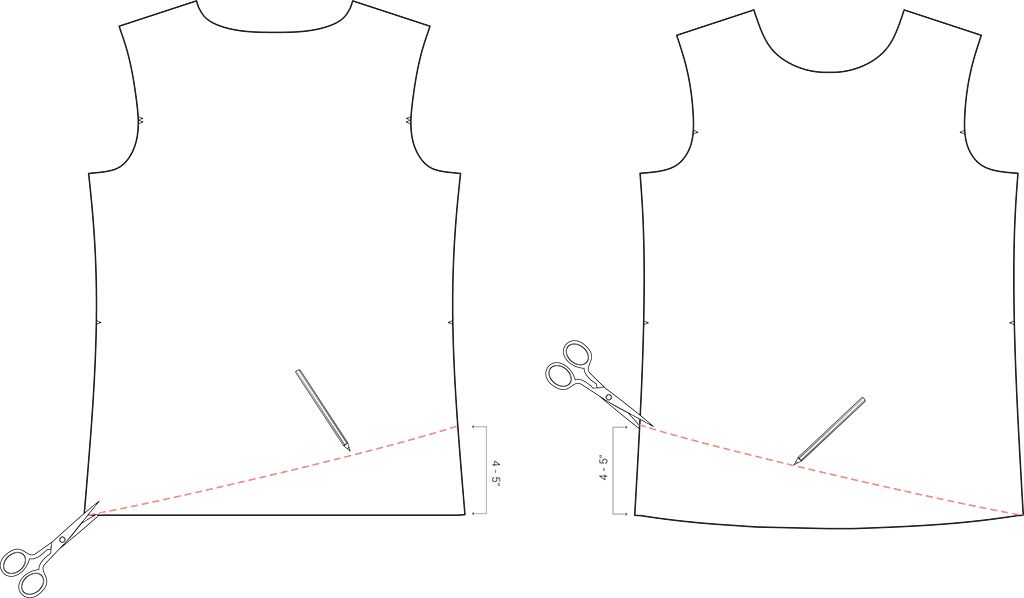
Trace off the front (A) and back (B) pattern pieces, mirroring each so that they are cut on a single layer of fabric, rather than on the fold.
Step | 02
Make a mark 4-5” up from the hem on the front (A) pattern piece. Repeat this on the corresponding side seam edge on the back (B) pattern piece.
Step | 03
Draw a new hemline, blending from the mark on the side seam, to the hem of the opposite side seam, on both front (A) and back (B).
Step | 04
Cut along this line to create the new hemline. Label both pieces “cut one with right side up.”
Step | 05
Finish the sweater according to the pattern instructions. When constructing, it may be easier to hem the front (A) and back (B) before sewing the side seams.
Tunic Sweater with Kangaroo Pocket

Step | 01
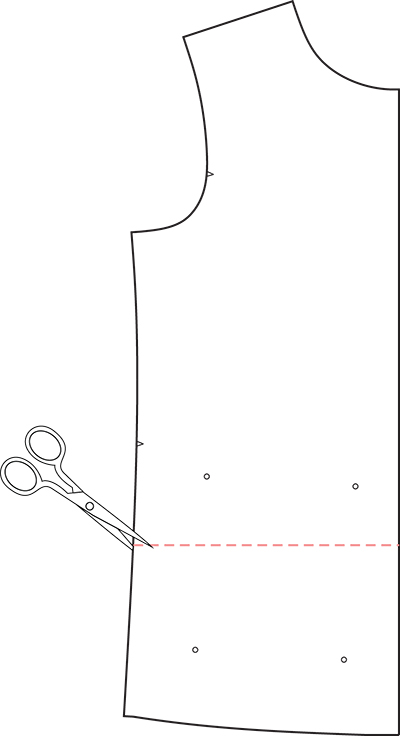
Cut along the lengthen/shorten line on the front (A).
Step | 02
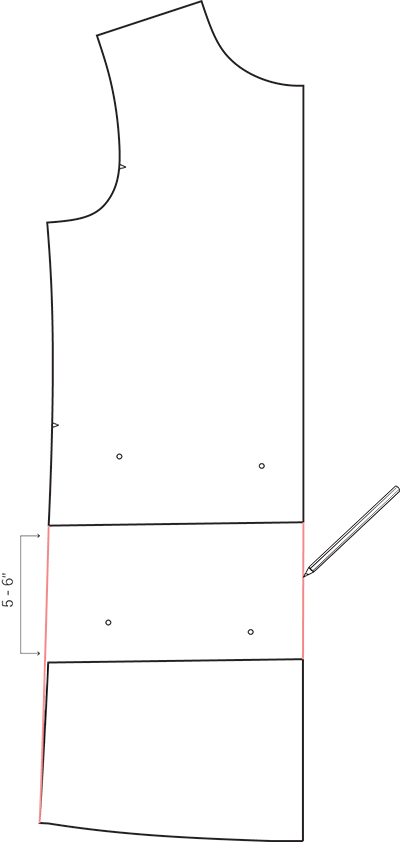
Measure approximately 5-6” between the top and bottom front (A) piece. Redraw the center front and side seam edges, blending between the pieces.
Step | 03
Repeat steps 1-2 for the back (B).
Step | 04
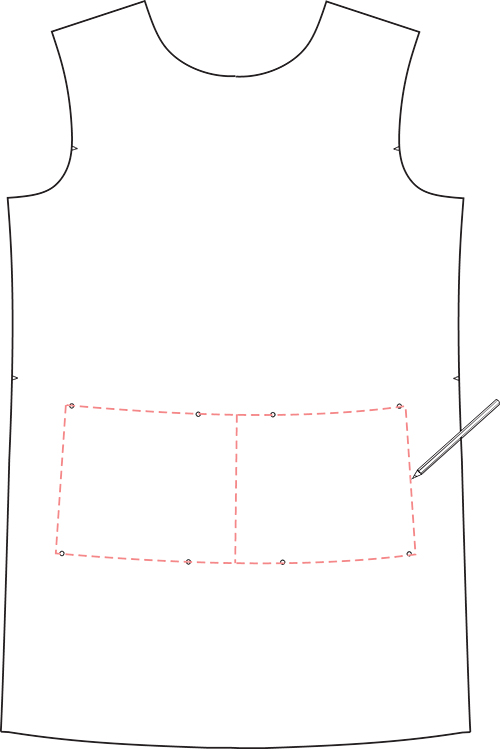
Trace off the new front (A) piece, including the pocket placement markings.
Step | 05
Using the pocket markings on the front (A) as a guide, trace a kangaroo pocket, connecting all the dots. Draw a line along the center front.
Step | 06
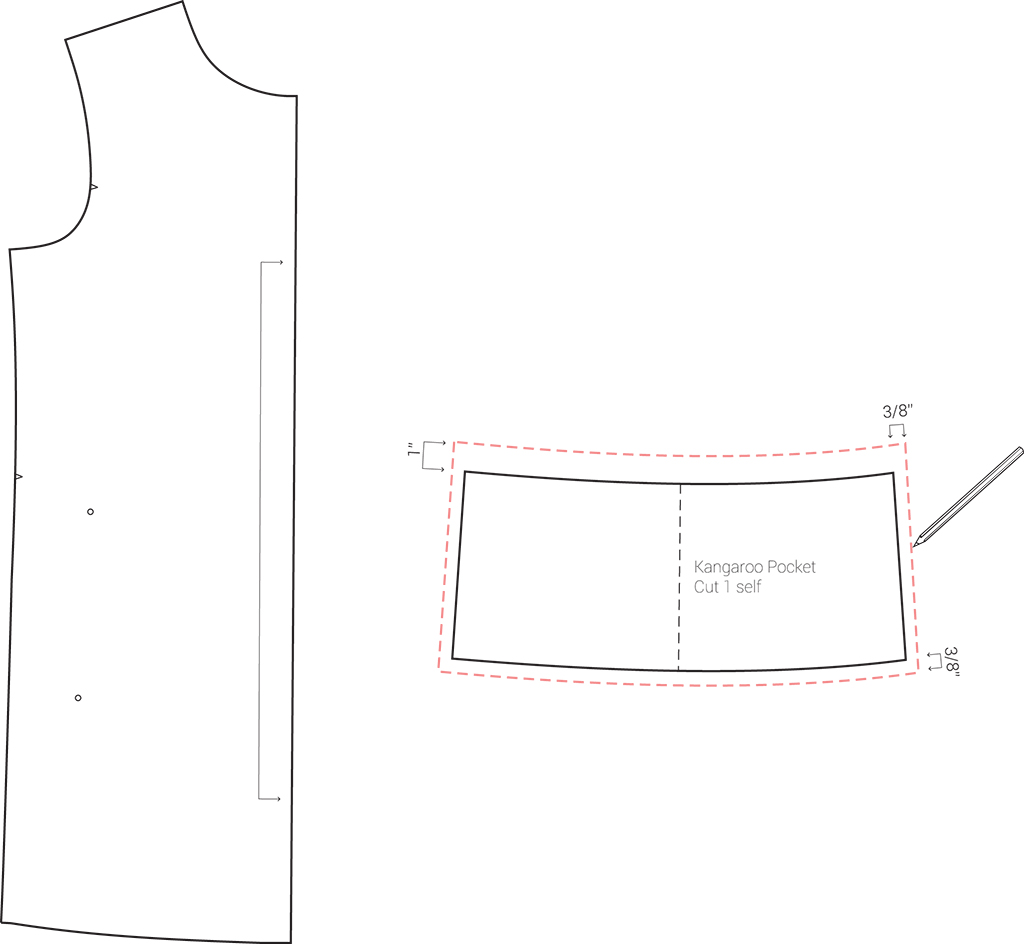
Trace a new front (A). Mark the pattern piece “cut 1 on fold,” and remove the inner pocket placement circles. Trace a new back (B).
Step | 07
Trace off the kangaroo pocket. Add 1” seam allowance to the top of the pocket. Add 3/8” seam allowance to all the other edges. Label the pocket “cut 1.”
Step | 08
To construct, follow the original instructions for assembling and attaching the pocket. Once attached to the front (A), topstitch down the center front line.
Cropped Sweater
Step | 01
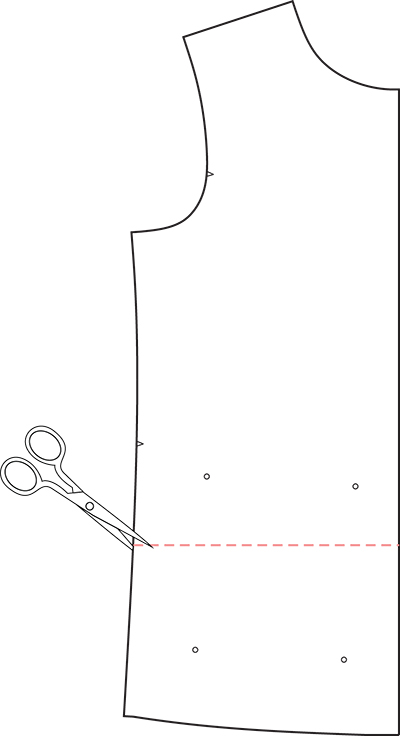
Cut along the lengthen/shorten line of the front (A) pattern piece.
Step | 02
Trace off a new front (A) and add 3/8” seam allowance to the bottom edge.
Step | 03
Repeat steps 1-2 for the back (B).

Step | 04
Make a hem band for the cropped sweater by measuring the length of the hem on the new front (A) and back (B) pattern pieces. Make a hem band this length and 4” wide. Add 3/8” seam allowance to the center back edge of the hem band. Label the center front “cut on fold.” Make circles where the side seams will be, and add a notch at center back.


