Sign In
I bought my coverstitch machine over five years ago as I was about to be admitted to the hospital with six months of homebound recuperation afterwards. I already owned a sewing machine, serger (known as overlockers in many parts of the world), and a little travel sewing machine I’d bought to take into hospital with me. Still, I was disappointed with the quality of hems I was getting with the various twin needles I’d tried, and I thought a coverstitch machine, though a frivolous purchase, would make the months of recovery sewing ahead more pleasant.
While I still don’t think anyone needs a coverstitch machine, I can honestly say that it has earned its money back tenfold for me in saved time and stress over the years. It’s also the least fussy of any of my machines, and one I can thread as quickly and easily as my sewing machine. It doesn’t require buying all sorts of new thread either, as you can easily swap in spools from your sewing machine or cones from your serger, and I very rarely have to change the tensions or replace the needles. It just sits happily in the corner of my tiny sewing room until I’m ready to hem. Hemming used to be my least favorite part of the sewing process. By that point, I’m just impatient to wear it, but my coverstitch machine makes this process so quick and painless that I hardly notice it anymore. If you sew a lot of knits, a coverstitch machine can be a massive time saver, not just when sewing hems, but also when topstitching elastic for activewear, swimsuits, and underwear, too.
Whether you’ve just bought a coverstitch machine or are curious about buying one, this article will help you to understand not only the basic capabilities of a coverstitch machine, but also essential hem finishing techniques the manuals never seem to include!
Coverstitch vs. Twin Needle
Why would anyone want to buy a coverstitch machine when twin needles are so much cheaper and take up less room? Well, if you’ve used a lot of twin needles, then you probably also have realized that twin needles break easily and require the exact needle tip matched to your fabric (resulting in multiple packs lying around). They also require the bobbin to be loosened each time to prevent tunneling (see Tips and Troubleshooting). They don’t look as nice on the reverse and require you to break “flow” to re-thread your machine mid-project. For the occasional project, they do a pretty good job, but for the heavy knit sewist, a coverstitch machine can be a real stress-saver!
What and Why
With knit fabrics gaining popularity in the sewing world over the past few years, more and more home sewists have taken the plunge to buy their own serger. These allow the home sewist to achieve a great finish at home, with neat and tidy yet robust seams on T-shirts, dresses, and leggings, to name a few. But there’s one aspect of sewing knits that most sergers can’t easily do—hem your finished garment edges. Sure, you can always use a twin needle, but there are downsides to that (see sidebar). Or perhaps you’re just wondering what all the fuss is about. I mean, all they really do is sew those two lines of stitches, right? Well, yes and no, but they stitch those lines really, really well.
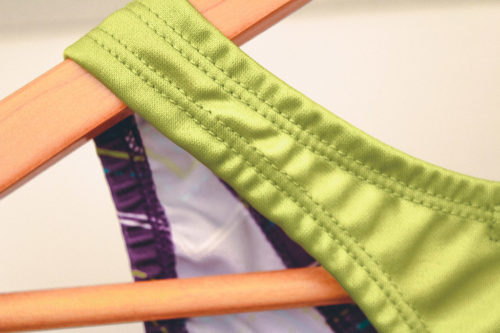
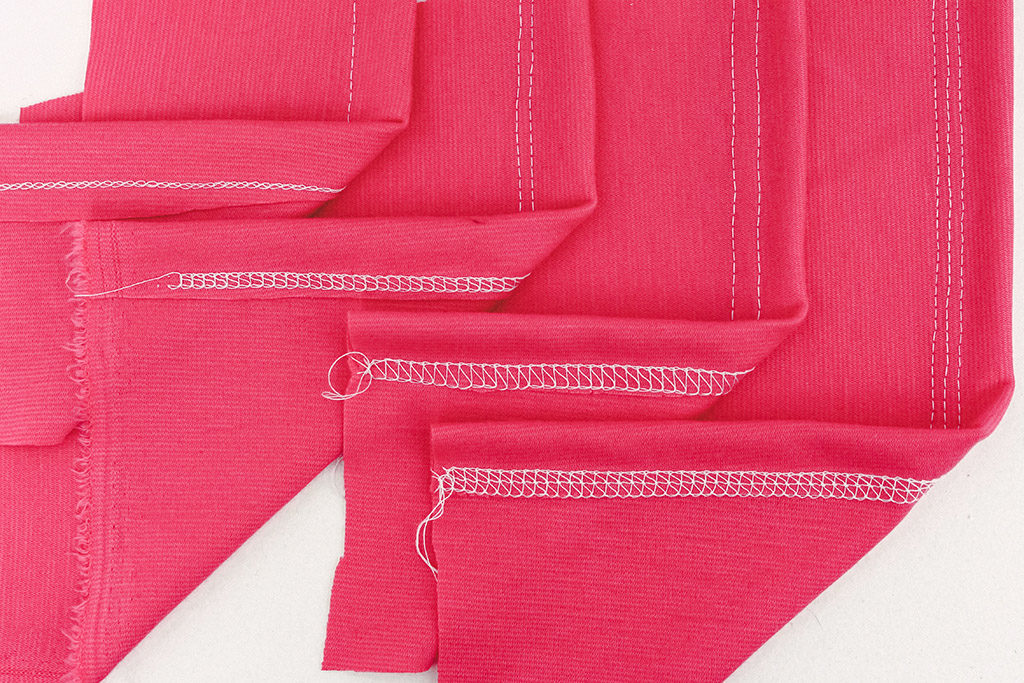
Single needle coverstitch allows for the neat look of a a single line of
stitching, with the stretch of a chainstitch.
Most coverstitch machines have the capability to sew with one, two, or three needles, plus a looper underneath. If only one needle is used (plus the looper thread, which is used in all circumstances), then a simple chain stitch is produced on the right side and reverse.
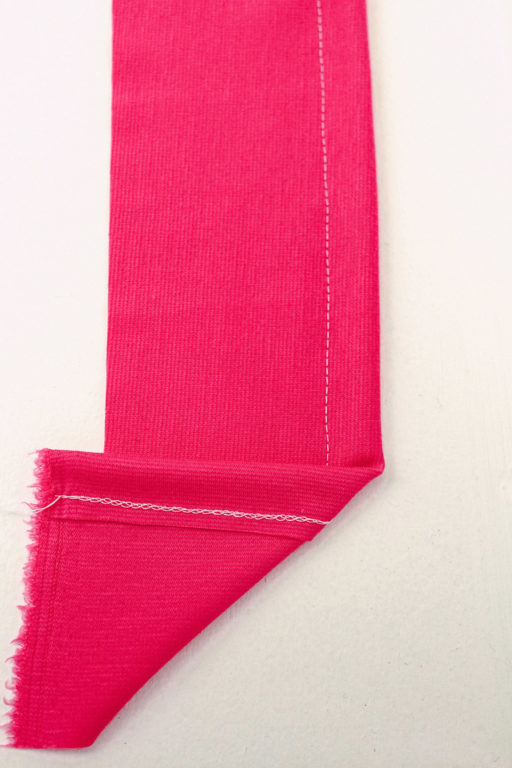
A triple needle coverstitch offers both strength and stretch.
If three needles are used, then three lines of parallel stitching appear on the right side of the fabric, with the looper producing a complex thread pattern on the reverse.
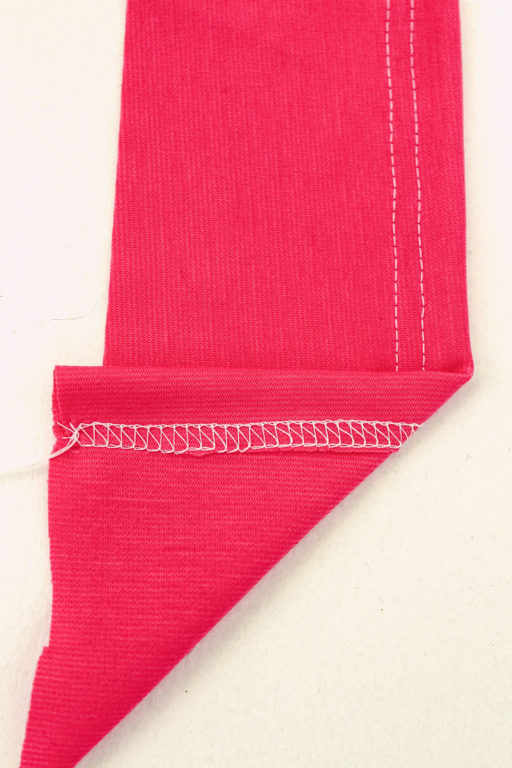
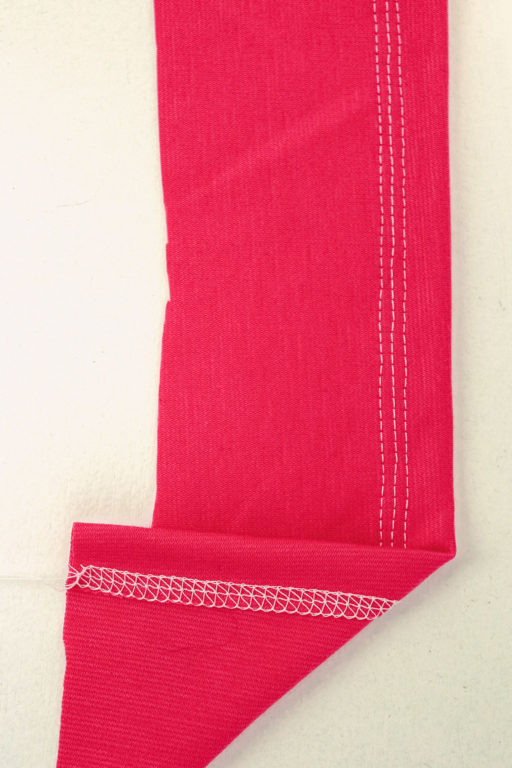
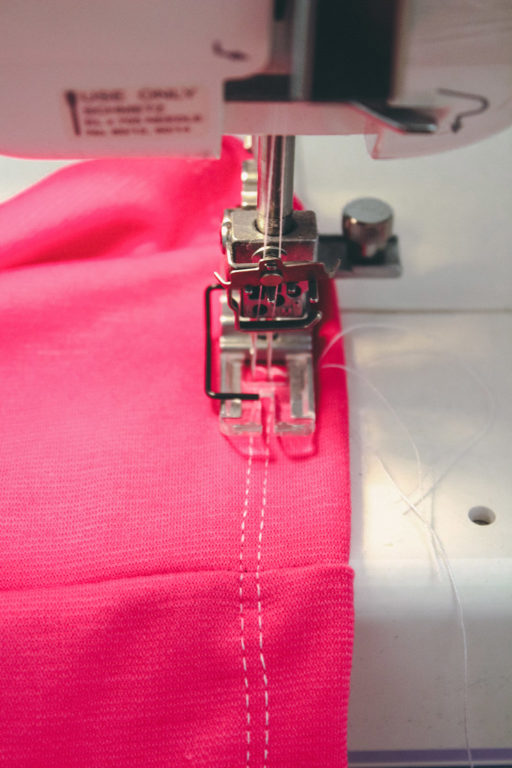
A classic double needle coverstitch.
By far the most common arrangement, though, is to use two needles to create a classic T-shirt hem look. As there are three needle positions, you can either choose to remove the left or right needle for twin rows of stitches, which are fairly close together, or instead, remove the central needle to create a wider set of stitches. In all cases, the needles not in use should be removed, so they don’t interfere with the stitching process.
You may be thinking right now that you’ve seen (or even own) a hybrid serger/coverstitch machine—one that can perform both functions with a few changes to the settings. While this is technically true, many sewists buy these machines thinking they’ll save money, but soon learn they are cumbersome to convert between the two functions and don’t do either function as well as a dedicated machine.
Basic Applications
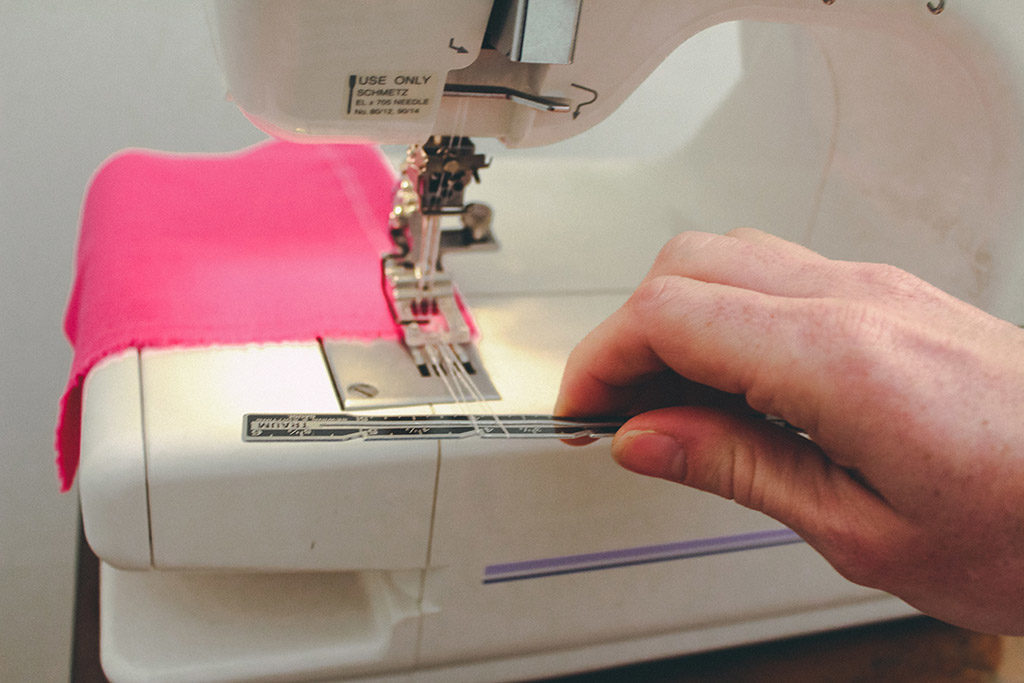
While there are numerous books on the market to teach new owners all about the basic functions and options involved with a serger, there are few precious printed or online resources dealing with coverstitch machines. Just as when you transition to a different mindset when switching from a sewing machine to a serger, there is a special series of steps you must perform when coverstitching in order to start and finish the stitching. These may seem cumbersome at first glance, but you’ll soon find that these quickly become second nature.
All the examples below show the most common coverstitching, a two needle arrangement, but the procedures are the same for one or three needle coverstitching, too.
Basic Flat Hem
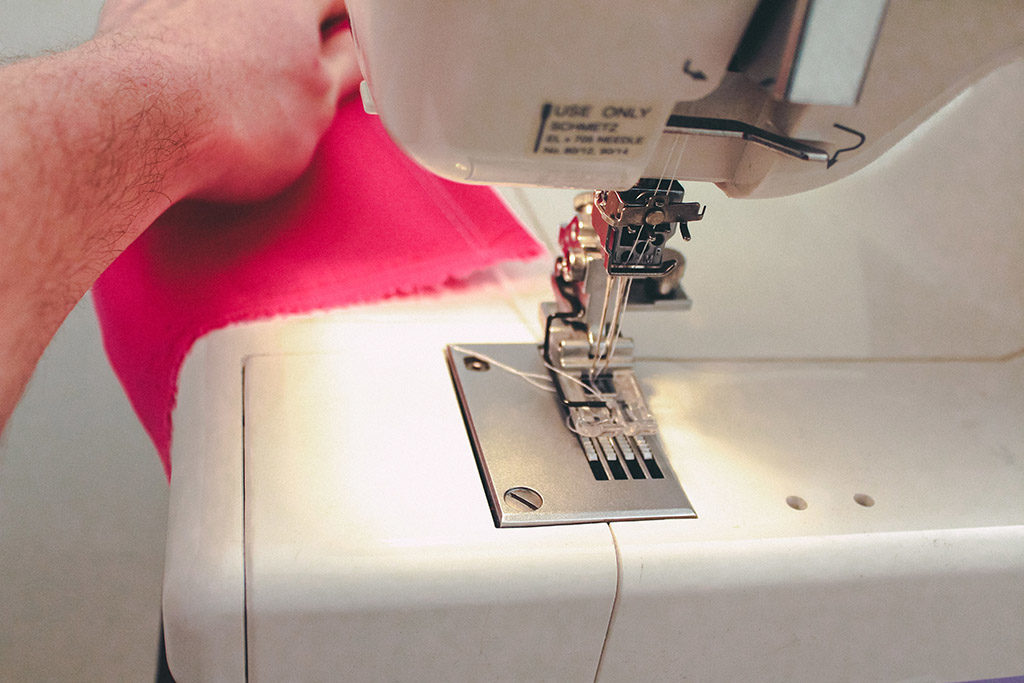
The most basic coverstitching involves folding over the hem of a flat piece of fabric to the wrong side, and coverstitching from the right side, catching the hem underneath.
Start at the leading edge of the fabric, making sure both needles are either straddling the cut edge underneath or piercing both layers of fabric.
Start stitching, and stop when you reach the end of the fabric (or your desired point if you’re not hemming the entire length).
Raise the presser foot and ensure the needles are at their highest position. Wave a thin object (such as a metal loop turner or ruler) between the foot and the feed dogs, pulling the needle threads toward you.
Cut both threads.
Pull the fabric away from you and behind the presser foot, and cut the looper thread.
(Optional) Knot the end threads together.
Hemming in the Round
More often than not, however, you’ll be hemming fabric in the round, such as on a sleeve, neckline, or skirt hem. As with the flat hem, you’ll first need to fold (or press) back the hem allowance to the wrong side of the fabric, pin in place, and coverstitch from the right side, catching the hem underneath.
Start at any point in the round hem (usually near a seam, such as in the inner leg or a mid-sleeve seam), making sure the needles are straddling the cut edge underneath, or that the needles will pierce both layers of fabric.
Start stitching, and when you come around to the beginning, overlap the previous stitches for a few millimeters.
Raise the presser foot, and ensure the needles are at their highest position. Wave a thin object (such as a metal loop turner or ruler) between the foot and the feed dogs, pulling the needle threads towards you.
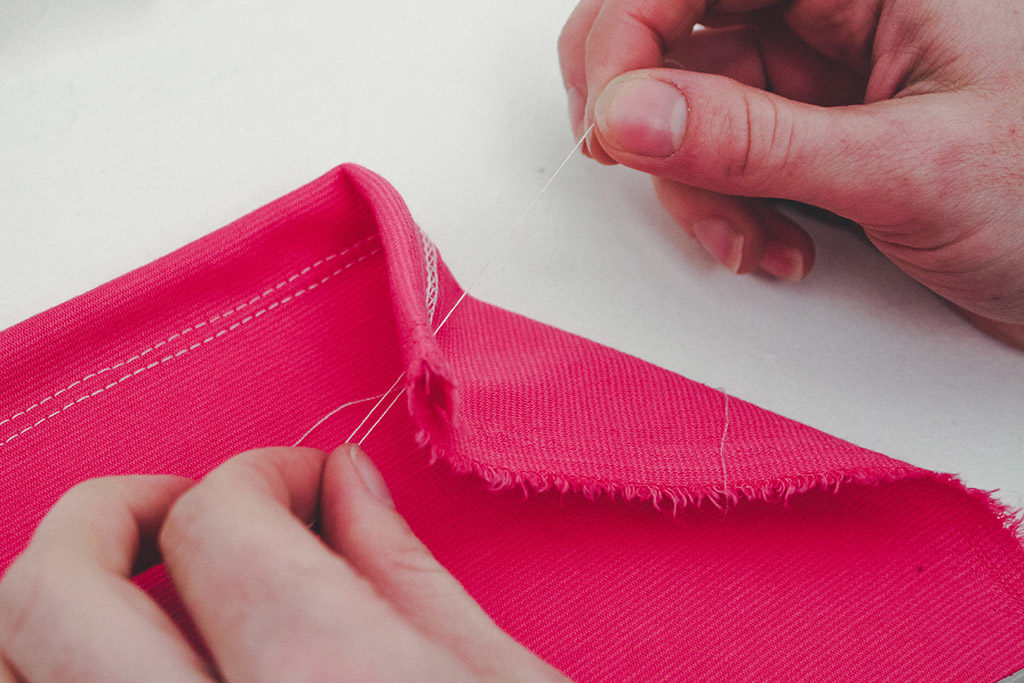
Cut both threads.
Pull the fabric away from you and behind the presser foot, and cut the looper thread.
This series of steps will pull the needle threads to the reverse of the fabric, where you should knot the end threads together to prevent unraveling.
(Optional) Use a pin to carefully pull the beginning needle threads to the reverse. From the reverse, look for a little loop of needle thread at the base of each stitch, and pull with a pin.
Or if it’s in a hidden area, just cut these close to the fabric, as the stitches won’t unravel from the beginning.
Unpicking
Let’s face it, sometimes despite our best efforts, we have to unpick our stitches. Coverstitching looks like it’d be as tedious to unpick as serger stitches, but it’s surprisingly the easiest of all once you know how!
The most important thing to remember is that coverstitching can only be unraveled in the opposite direction of how it was stitched (i.e., from the last stitches backwards). This is why it’s important to always secure the threads from the ends of your coverstitching, but securing the threads from the start is largely aesthetic. If you’ve already secured these threads, start by cutting off your knot and pulling the needle threads to the right side of the fabric. With a pin or seamripper, gently undo a few stitches so you’ve got enough length to hold onto, but don’t cut the threads. With the needle threads on the right side of the fabric and the looper thread on the reverse, grasp the needle threads in one hand, the looper in the other, and pull. The stitches should unravel as if by magic.
Gadgets
Unlike sewing machines, which seem to attract presser feet like moths to a flame, there really aren’t very many accessories or gadgets you need to add on once you’ve bought your coverstitch machine. The easiest and cheapest tool for your coverstitch machine is something you’ve probably already got lying around at home: a stack of Post-it notes! Remove the backing so that the entire block can be stuck to the bed of your coverstitch machine and used as a guide to keep your stitching at a consistent distance from the folded edge. Just align the folded edge to the stack of notes as you stitch, and the hem will be even the whole way around.
If you do a lot of hemming in the round, a clear foot (which often comes with a removable guide) can really help with lining up your stitches when you come back round to the beginning, as you can accurately see through the foot at the crucial final few stitches. The guide can also be useful when topstitching around banded edges, like on T-shirt necklines. While not essential by any means, this is a relatively inexpensive accessory but useful to have, with or without the guide in place.
The coverstitch gadget that gets all the attention are binder attachments, used to quickly wrap a binding around the cut edge of a fabric while coverstitching at the same time. Binders are something that you can usually wait to purchase until the need arises, as they are expensive (often around a third of a cost of the machine itself!). They come in a dizzying variety of widths and fold arrangements, and have an extremely high learning curve to get right. Most sewists can easily replicate a bound look on knit fabrics either by using a folded and serged-on binding (like on most T-shirts) or by using fold over elastic.
Tips and Troubleshooting
Tunneling – Sometimes the fabric between the two (or three) rows of coverstitching (or twin needle stitching) raises up, creating a little mountain between the stitches. This is referred to as tunneling and can usually be fixed by loosening the looper tension until the fabric between the stitches lies flat.
Reusing Thread – If you don’t have two matching spools or cones of thread for your coverstitch hems, take the regular thread spool and bobbin from your sewing machine to use as your two top threads, and use a neutral thread color in the looper.
Wavy hems – If your fabric is slippery, thick, or piled, your presser foot may be stretching the fabric as it stitches, resulting in wavy hems. Try loosening the presser foot pressure or fusing lightweight interfacing tape on the wrong side of the hem before stitching, or even basting the hem with the sewing machine first.
Buyer’s Guide
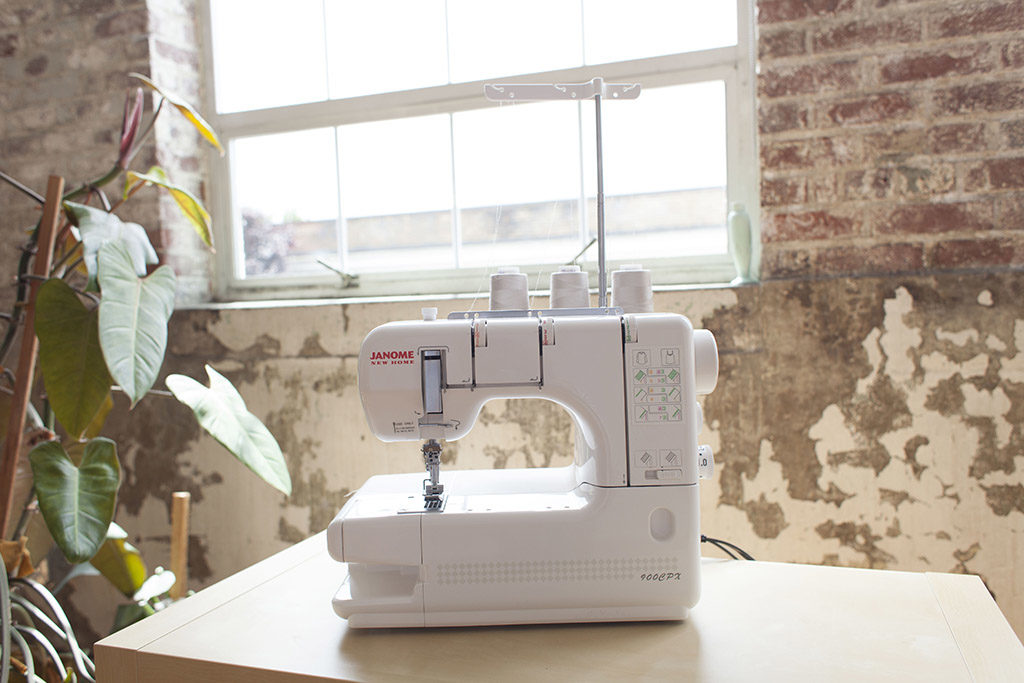
There are nowhere near as many different models of coverstitch machines to choose from as there are regular sewing machines or sergers, but chances are your favorite sewing brand offers a coverstitch model. Janome make the most widely used coverstitch machines for home use, but many sewists also swear by their Baby Lock, Brother, and Singer machines.
Unlike sewing machines or sergers, there isn’t a whole lot to differentiate between the different coverstitch models, but there a few features to be aware of:
Number of Threads – Most coverstitch machines use three threads and a looper, but if you foresee yourself only ever using a double-stitched hem, then you may opt to save a bit of money and buy a “three thread” (i.e., two upper threads plus a looper) model instead.
Threading – By and large, coverstitch machines are as easy to thread as a regular sewing machine (in other words, nowhere near as complex or time consuming as a serger, despite the number of threads involved!). Some models offer automatic jet air threading though, which may be crucial if you have visual or fine motor control issues.
Tension – All coverstitch machines will provide some mechanism to adjust the needle thread tensions, whether it’s by a dial or lever, but some models have additional controls to help adjust the tension when stitching over thick seam intersections like you may find on sweatshirt or fleece garments.
Free Arm – In this author’s opinion, a free arm is the single most important feature to look for in a coverstitch machine, as it makes hemming shirt sleeves and other narrow tubes infinitely easier. Unless you’ll be only hemming flat items, go for a machine with a free arm.
Adjustable Presser Foot Pressure – This allows the presser foot to be closer or further away from the machine bed, and (along with a differential feed) can be a lifesaver for correcting wavy hems. You can hem everything from thick sweatshirts to thin and drapey jerseys with equal success.
Differential Feed – Serger owners will already be familiar with the differential feed feature, which adjusts the feed dogs so that stretchy fabrics don’t get stretched unevenly during stitching, which can also result in wavy hems.
After five years together, my coverstitch and I are definitely the best of friends, and the tricks I learned in those first 6 months at home without any outside distractions really helped to cement the processes as habits in my mind. I no longer need to think about how to start and end my coverstitching, and I find that the process is just as second nature to me as reversing is when I use my regular sewing machine. Furthermore, my coverstitch machine has put joy back into hemming for me, and means I no longer dread that last step between creating and wearing my newest knit garment.

About the Author
Melissa Fehr designs activewear sewing patterns from her floating home in London, UK. She can usually be found running along the Thames in the wildest leggings imaginable. Visit her at fehrtrade.com.