Sign In
If you want to completely transform your pattern by changing just one pattern piece, start with the sleeves. To create glamour with a nod to fashion history and an enviable silhouette, hack your plain, straight sleeves into gigot sleeves. This recognizable sleeve—also known as leg-of-mutton—may look like it’s straight from a fashion museum, but if you use a modern pattern, especially one designed for knits, it creates a chic style with a vintage twist.
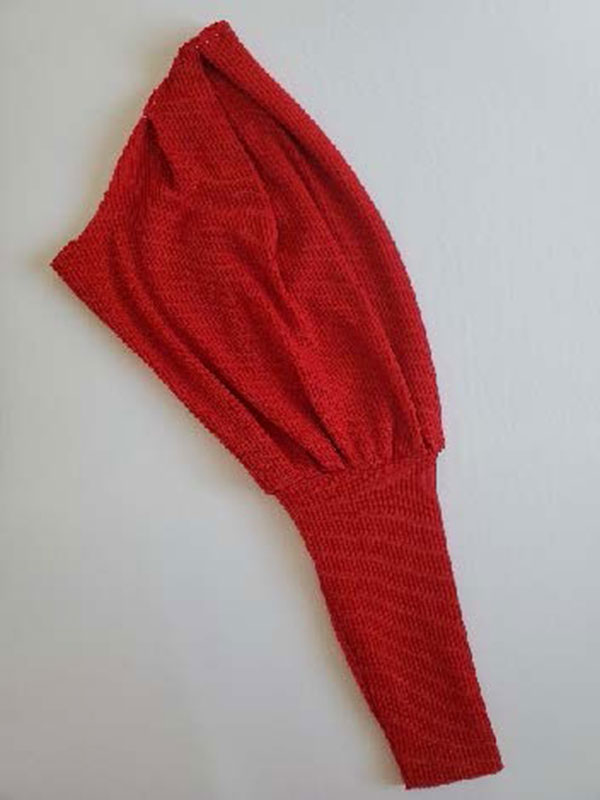
Gigot sleeves are voluminous at the shoulders and taper at the elbow to a narrow finish at the wrist, resembling a leg of lamb (hence the name). For this hack, we will be taking the Neenah dress pattern and transforming it into a stylish gigot-sleeve top. Although this involves some pattern manipulation that might be new to you, this is an easy sew.

Hack Your Pattern
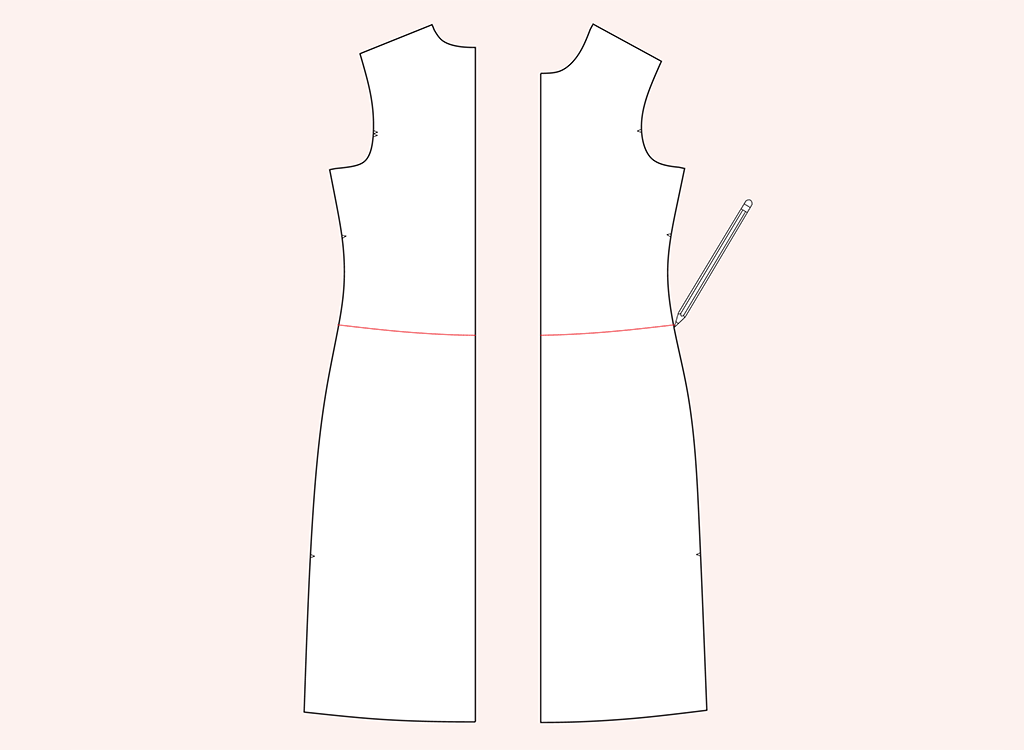
Step 1. Shorten the Neenah Dress to a Top
For this hack, I shortened the Neenah dress into a top. If you are adding these sleeves to the original dress pattern, you can skip this section.
There are a few ways to approach shortening a pattern.
- Watch this video on the Seamwork YouTube channel to learn how to lengthen or shorten patterns.
- Measure from your underarm seam to 3 inches below hip level. If using a sweater knit or heavy knit, 4 inches is best to allow for a deep hem.
- Use a ready-to-wear shirt as a template. Place your top on the Neenah bodice pattern piece, matching it at the side seams, and trace off the new hemline. Just remember to add hem allowance.
Shorten both the front and back bodice pieces to your desired length, then check to make sure the side seams match up. If they do, square off the side seam edge and cut along this new hemline.
Step 2. Adjust Armscye
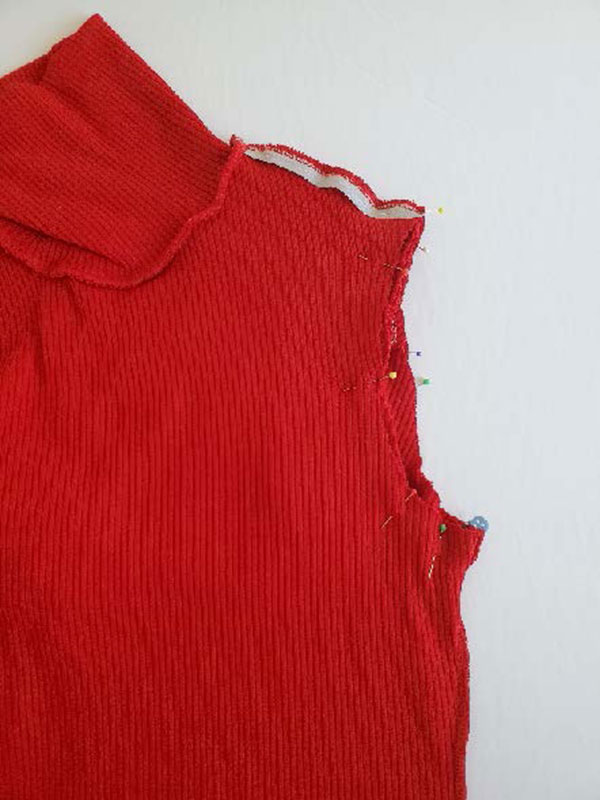
If you are using a stable knit with less stretch, this step is not essential, but if your sleeve cap needs a little support for the extra volume, remove ½ inch from the outer edge of the bodice front and back, reshaping the armscye just a little.
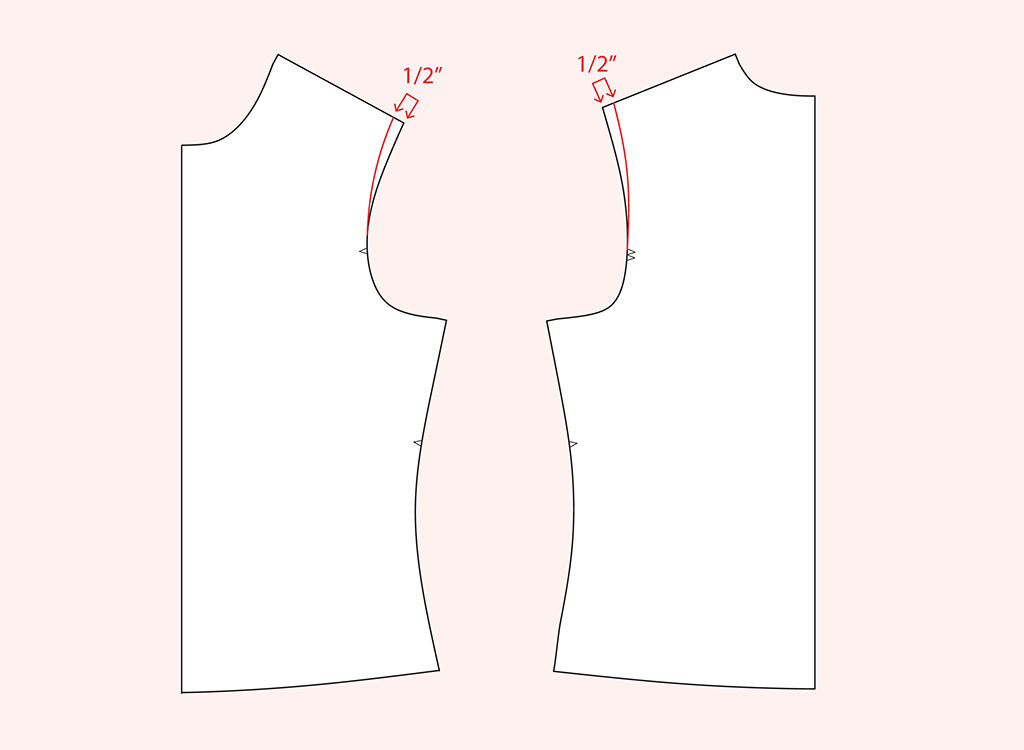
To do this on the front bodice, measure ½ inch in from the shoulder point closest to the neck edge and measure down ½ inch using your ruler to square off the new shoulder edge. Repeat for the back bodice.
Step 3. Create a Two-part Sleeve
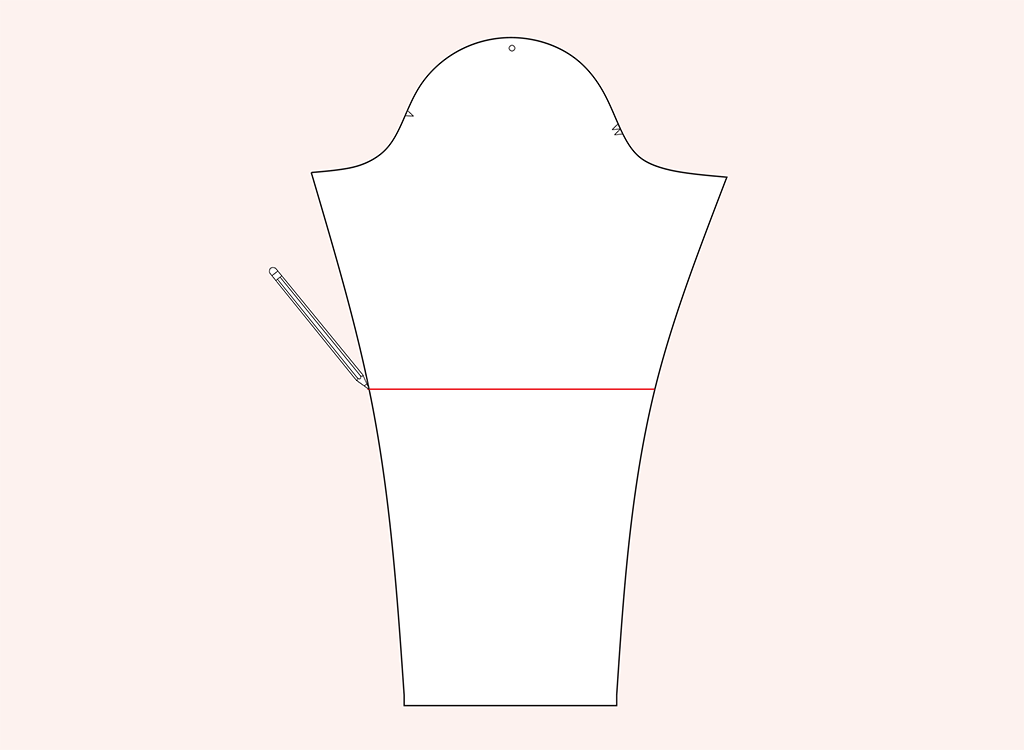
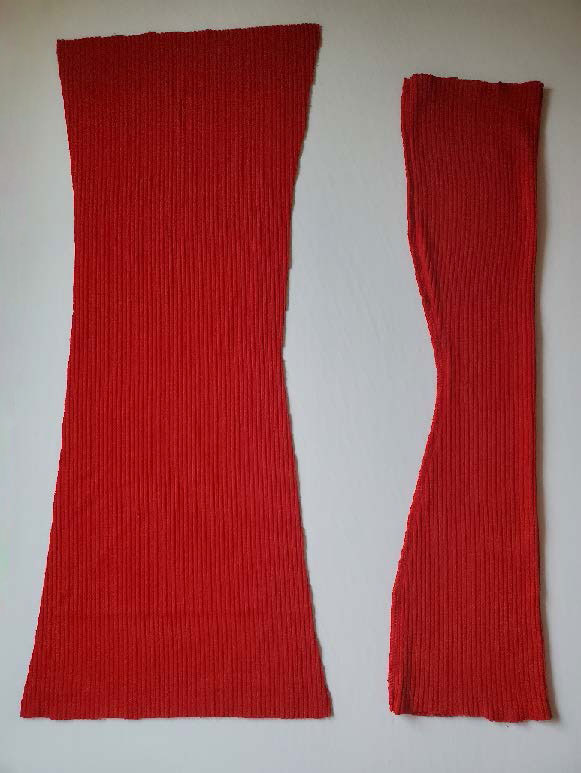
Use your tape measure to find the halfway point of your underarm seam and draw a horizontal line bisecting the sleeve.
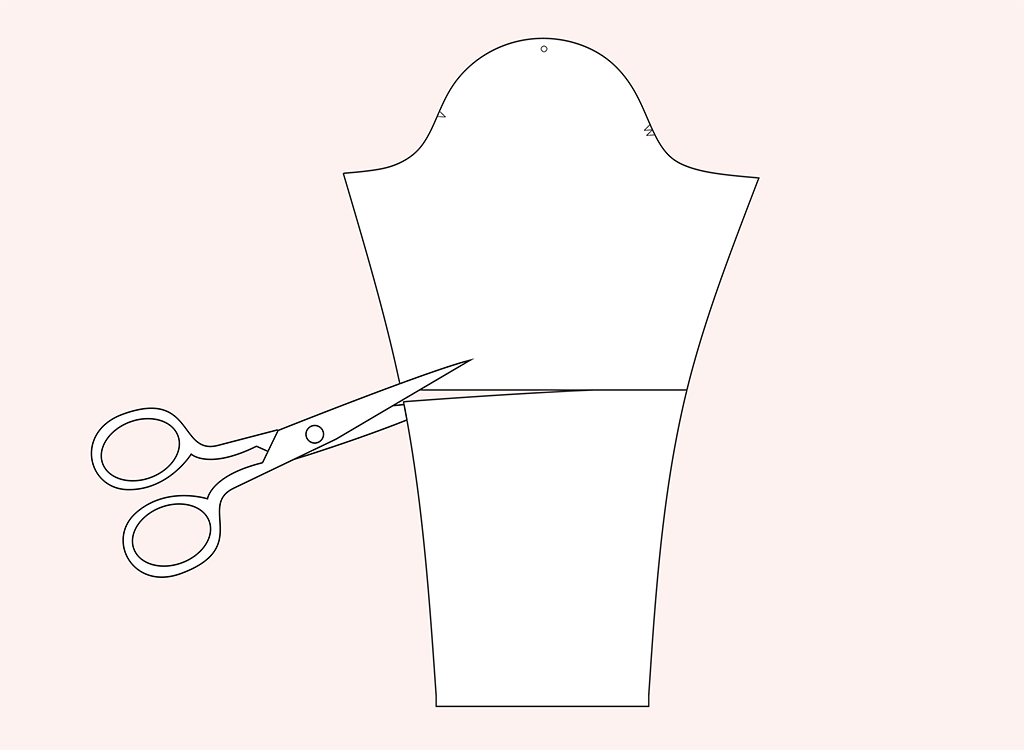
Use your scissors to cut the sleeve in half on the horizontal line.
Step 4. Create a Self-lining for the Lower Sleeve
On the lower part of the sleeve, tape some extra paper at the elbow line (the line you just cut) and add your desired seam allowance along this edge, squaring up from the straight edge.
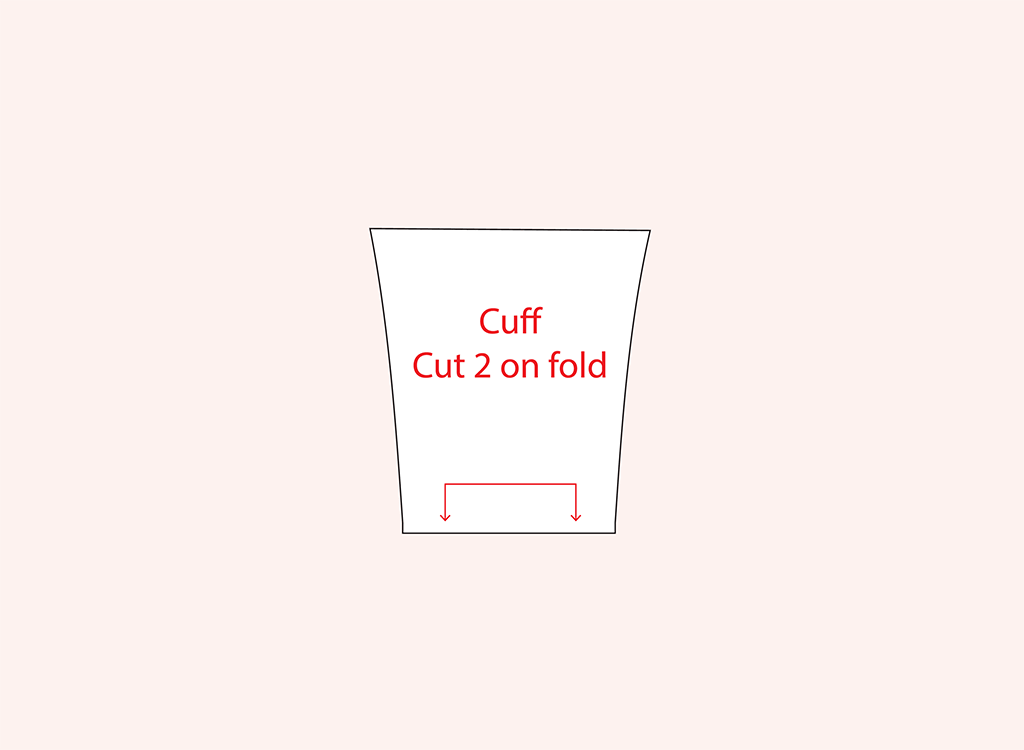
To make this lower sleeve pattern piece self-lined, all you have to do is change the pattern markings by writing “Cut 2 on fold” at the sleeve hem edge.
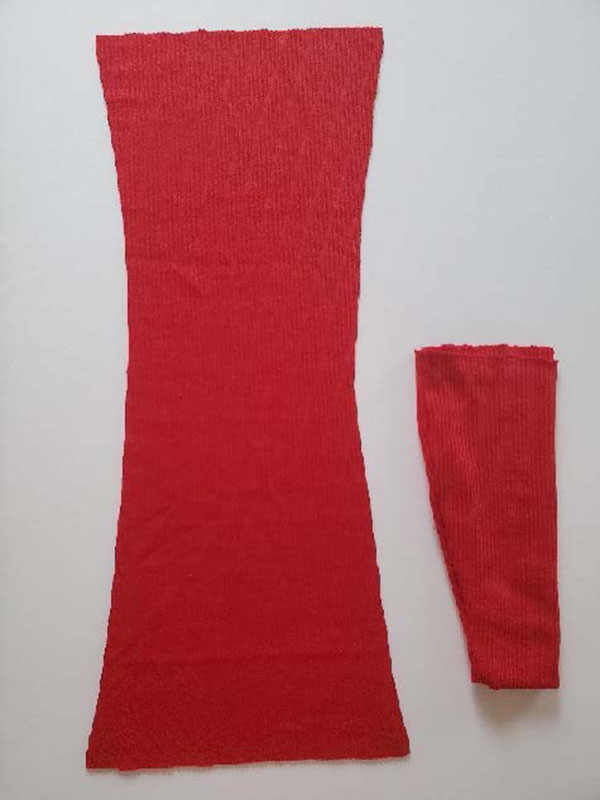
Step 5. Slash and Spread to add Volume to the Sleeve Cap
The volume for this hack will appear as pleats. First, you will slash and spread the pattern to add volume. Then, you will fold the pattern back in place to create the pleats.
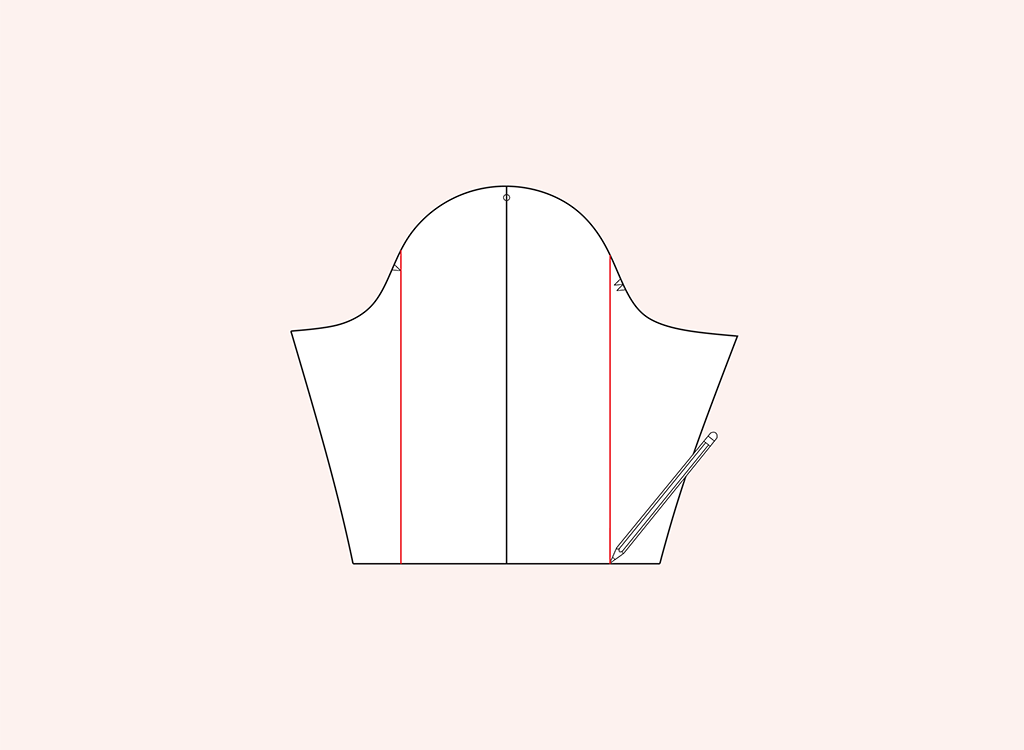
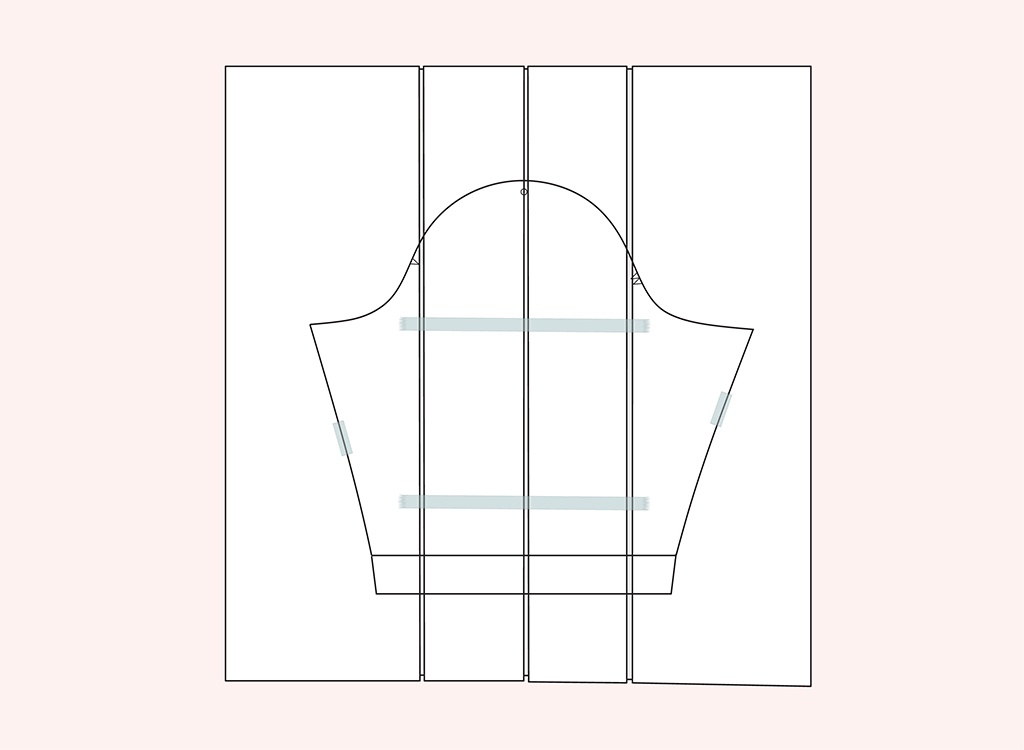
Draw a vertical line from the circle on the sleeve cap, straight down to meet the bottom of the piece at a perpendicular angle. Note: the line will meet the bottom of the sleeve piece just slightly off-center.
Measure 2 inches to 2 ½ inches away from each side of the center line and draw two additional vertical lines down the sleeve. Cut along these three vertical lines to give you four pattern slices total.
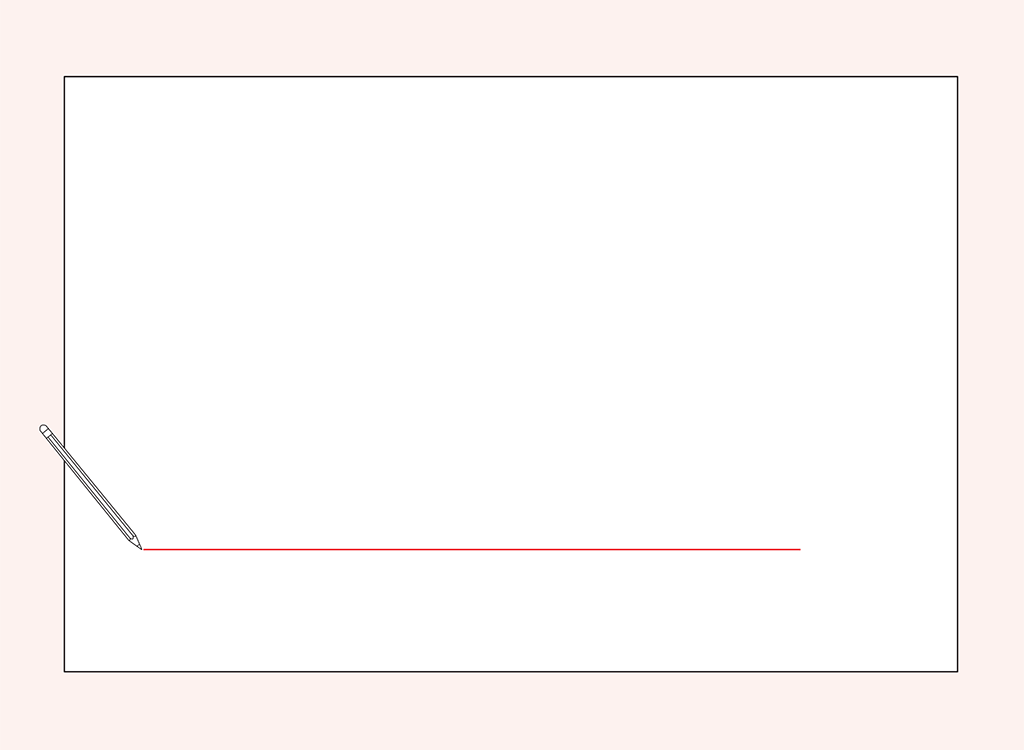
Next, take a piece of paper (or several printer pages taped together lengthwise) large enough to fit the sleeve slices, plus 12 inches. Draw a horizontal line across the length of the paper at least 3 inches from the bottom.
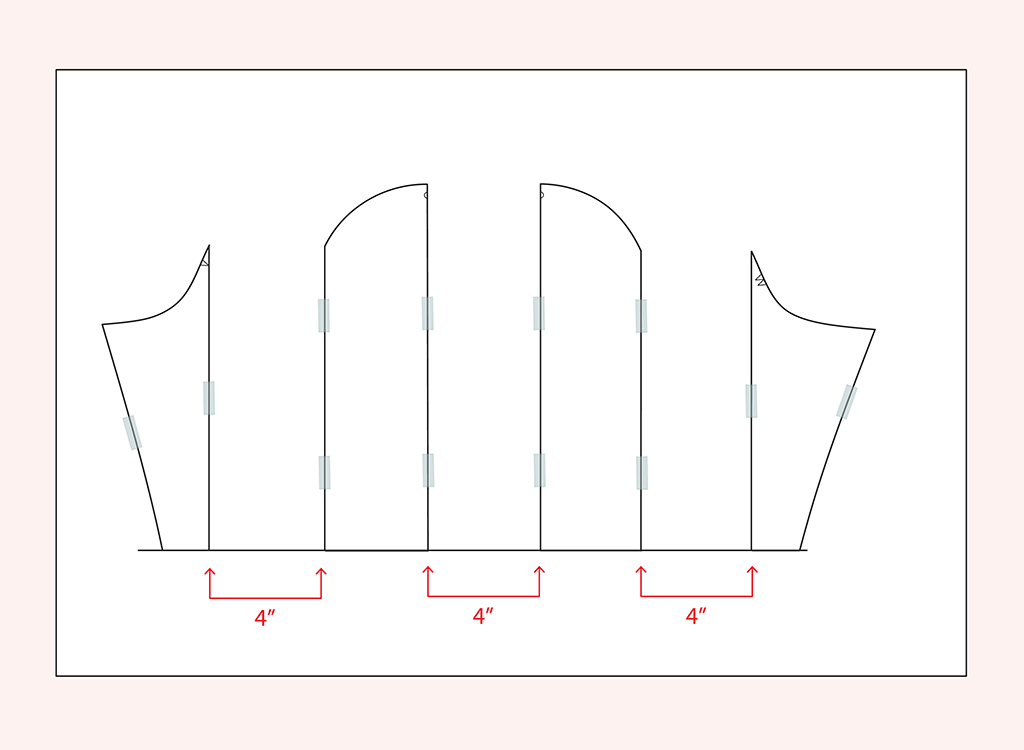
Place the sleeve slices along the line spacing them each 4 inches apart. Tape in place.
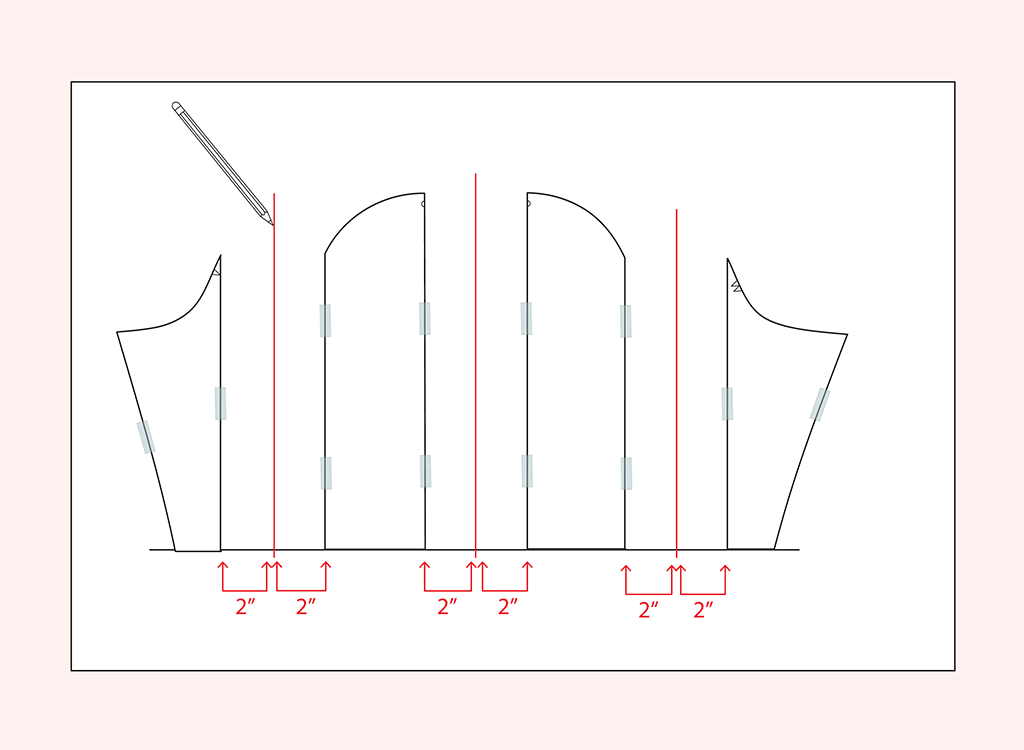
Between each slice, draw a vertical line at the center of each space (2 inches from the cut edge).
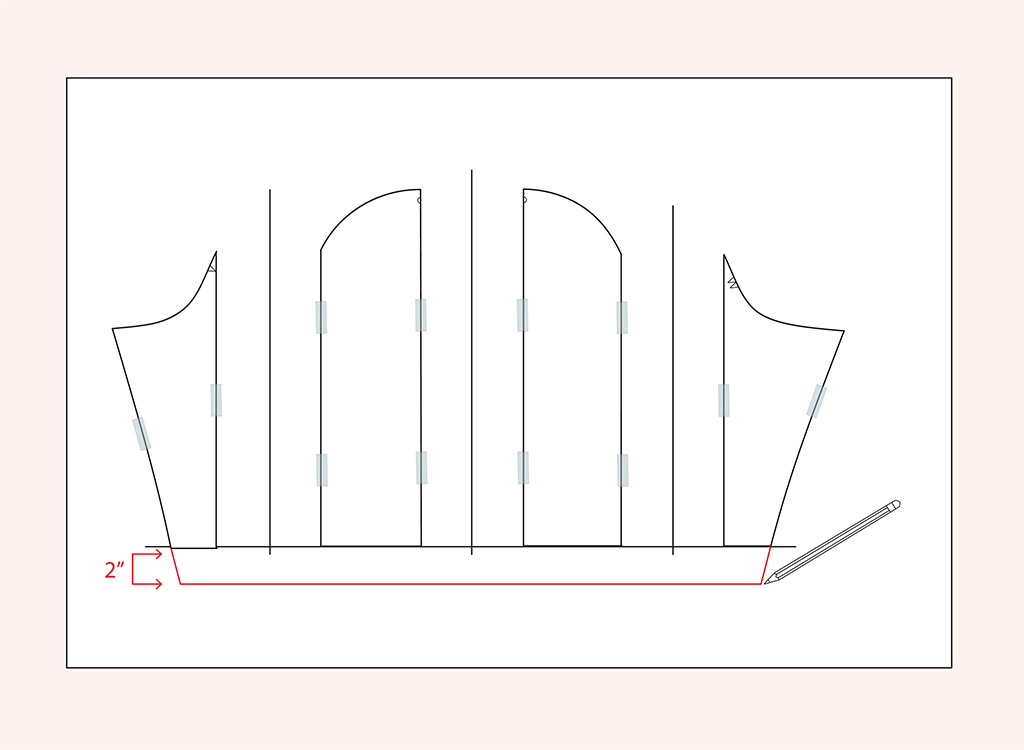
To give the gigot sleeve a little overhang, add 2 inches to the bottom of the pattern piece. Add your desired seam allowance, squaring off the outer edge of the sleeve.
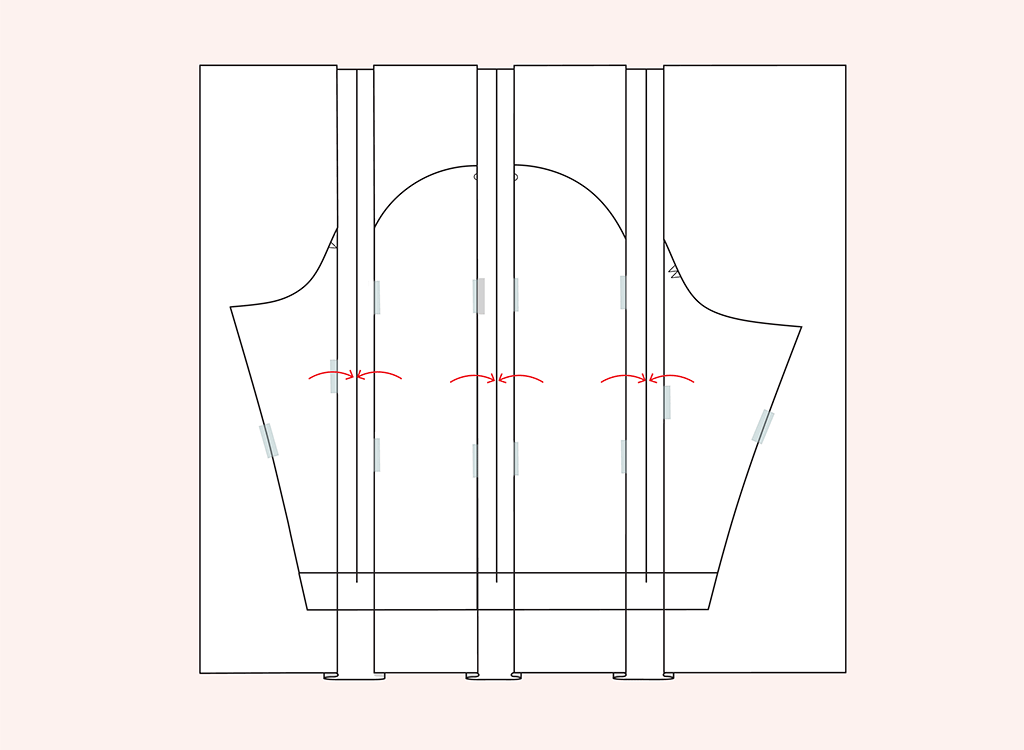
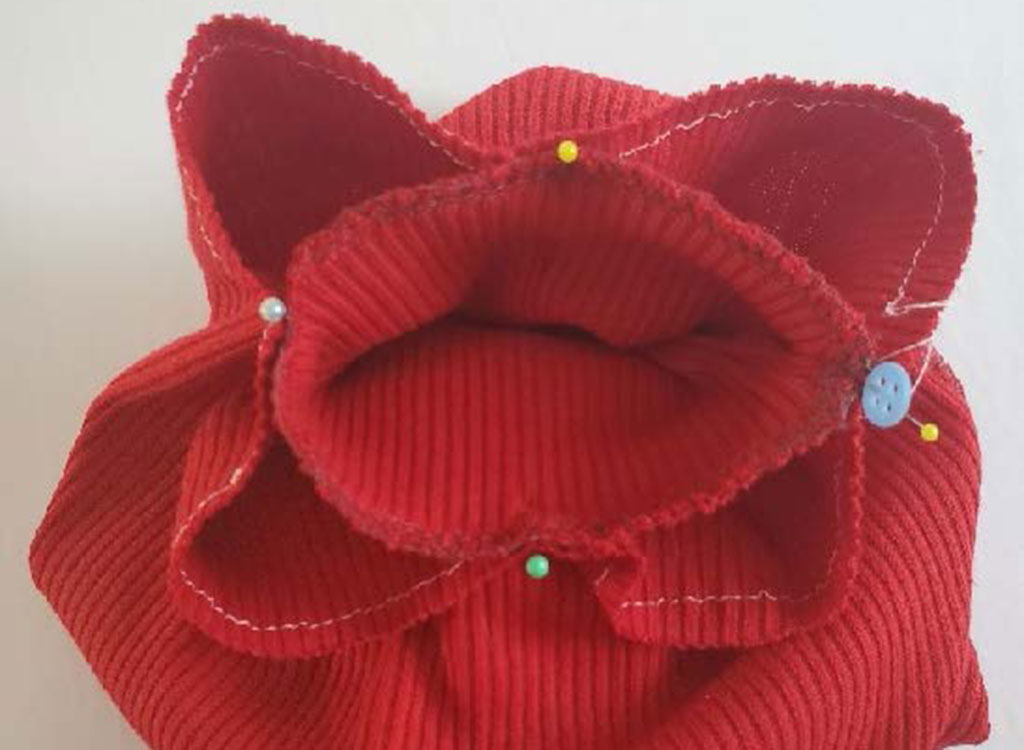
Next, fold the cut edge of each pattern slice to meet at the vertical lines drawn in the last step.
Once you’ve folded the pattern correctly, it should look like it did initially—before you slashed and spread to add volume—except the back of the pattern will now have box pleats.
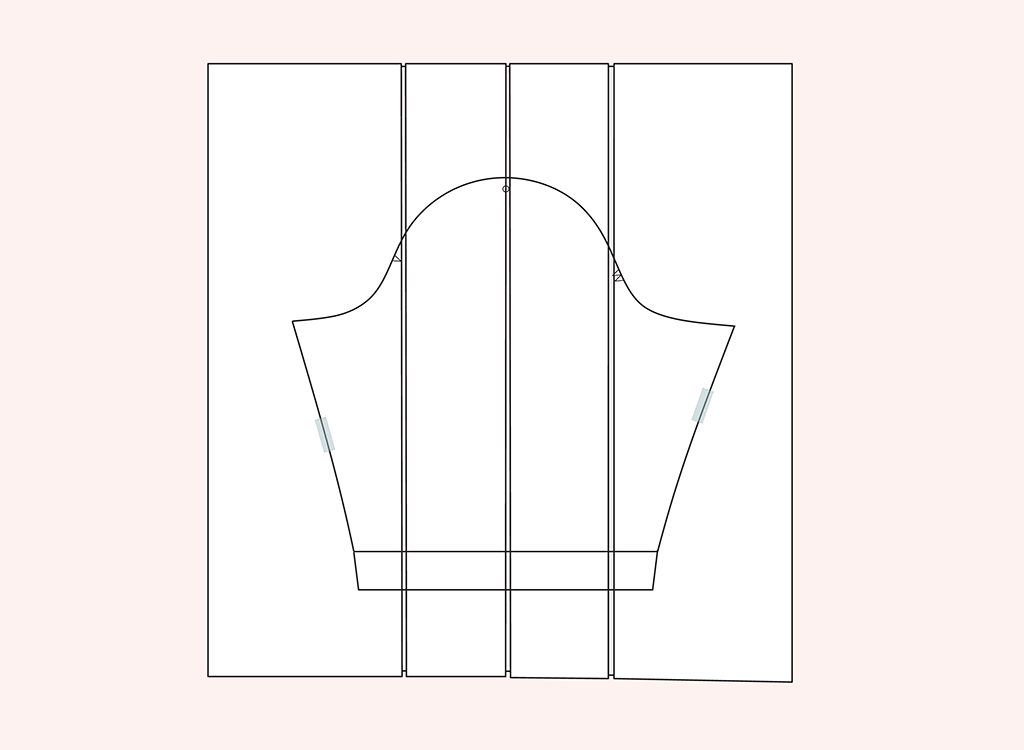
Using tape or pattern weights to keep the folds in place, cut along the sleeve cap through the folded pleats.
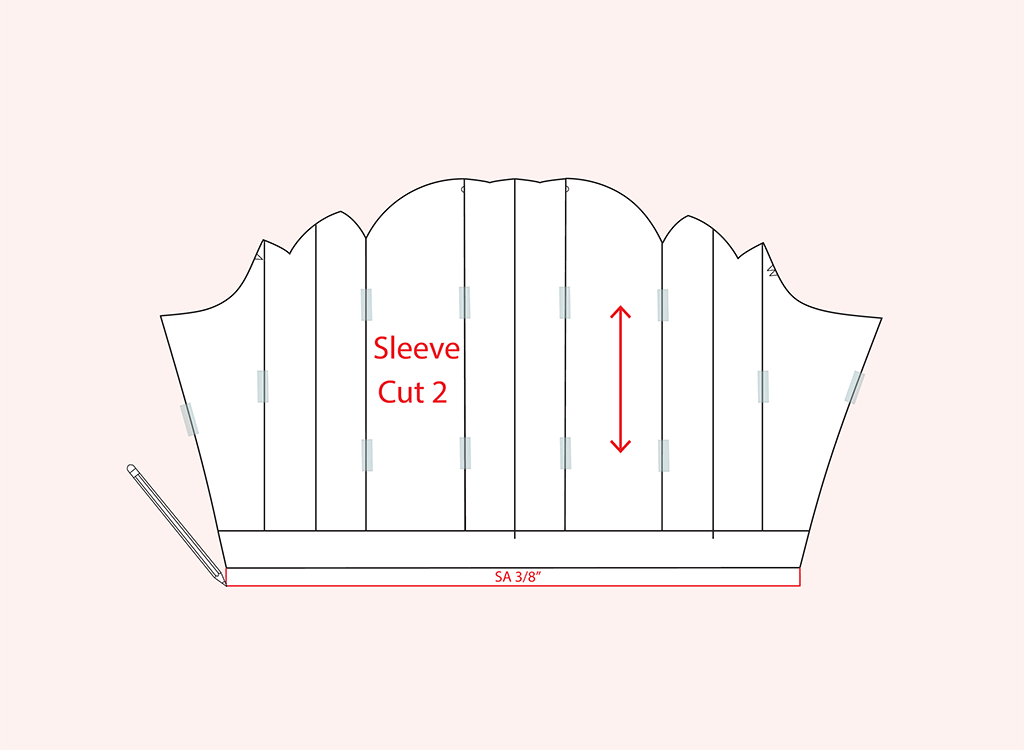
When you unfold your pattern piece, you should have a new sleeve cap with some mountain peaks that will become pleats. It’s kind of like magic!
Next, add notches or a quick snip into the pattern piece, so you know where to align the pleats. These notches should be approximately 1/8-inch deep, at the central line of each spacing and on both sides of each pattern slice.
Pattern Alterations are Done! Time to Sew.
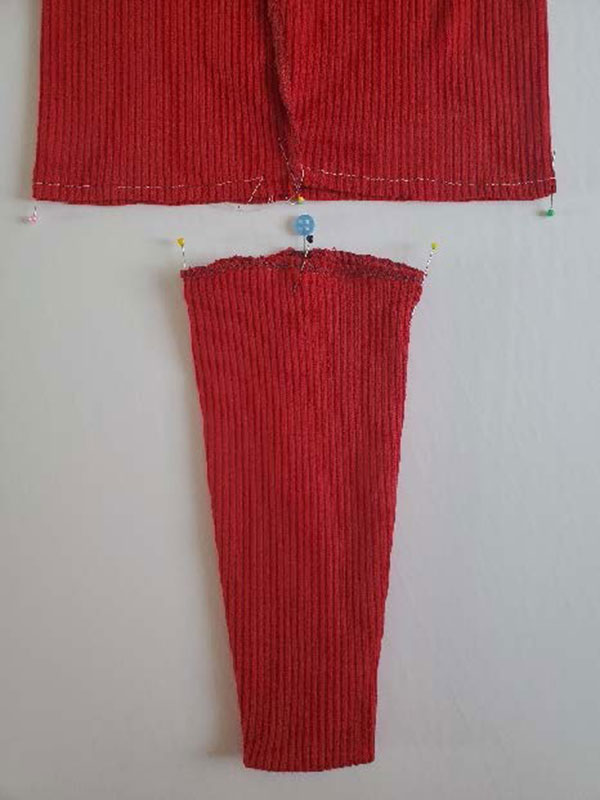
Step 1. Assemble the Bodice
Assemble the bodice and turtleneck for your Neenah top, following the original instructions and stopping before you attach the sleeves.
Step 2. Prepare the sleeves
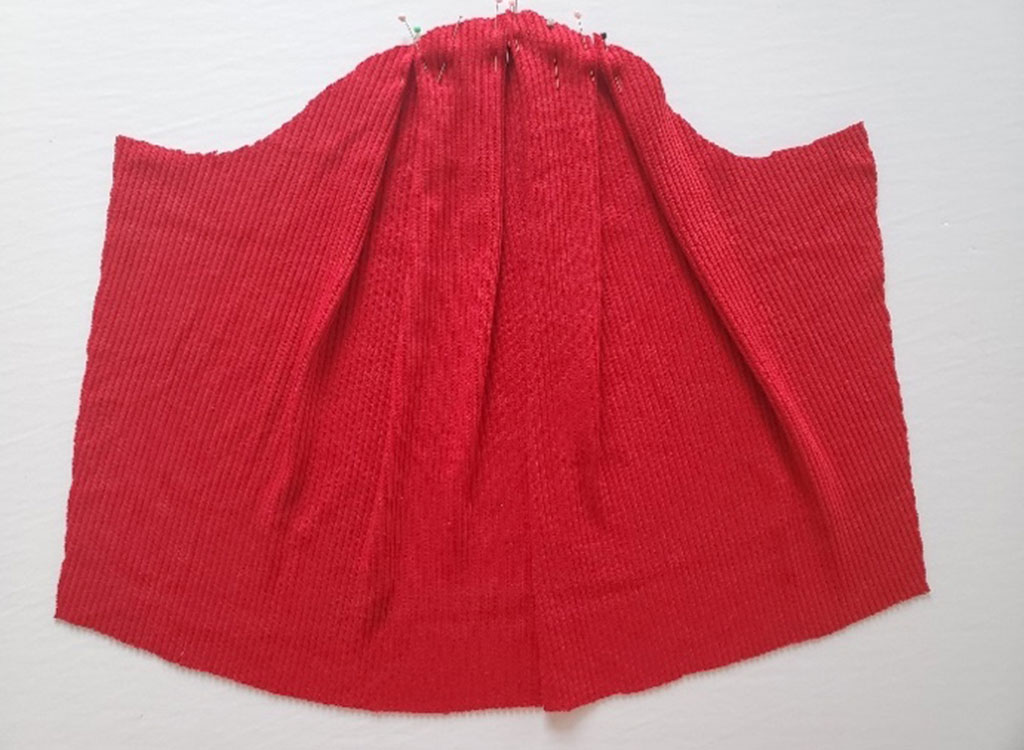
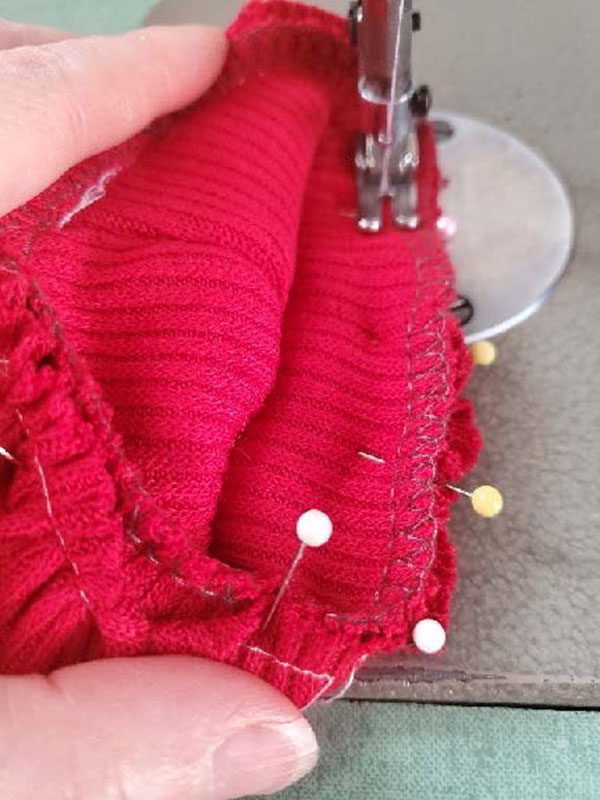
To prepare the sleeves, pin each of the inverted sleeve pleats towards the center notch.
Use your iron to lightly press the sleeve pleats in place.
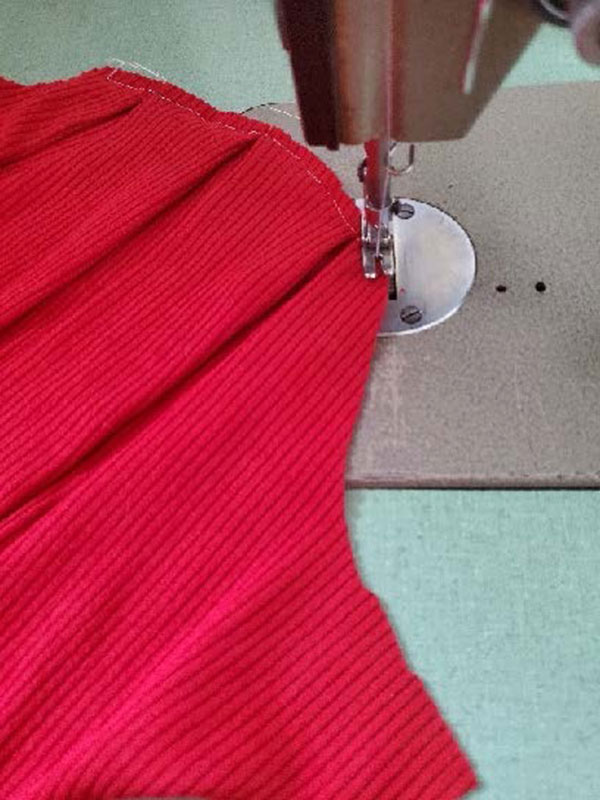
Baste along the edge of the sleeve cap, within the seam allowance, making sure that all the pleats are stitched down and the edge of the sleeve cap is a smooth, rounded shape.
With right sides together, sew the underarm seam and press. Make sure that the sleeve is the right way out—the pleats are inverted on the right side.
Sew a line of gathering stitches along the lower edge of the sleeve, just inside the seam allowance.
Step 3. Assemble the Cuff
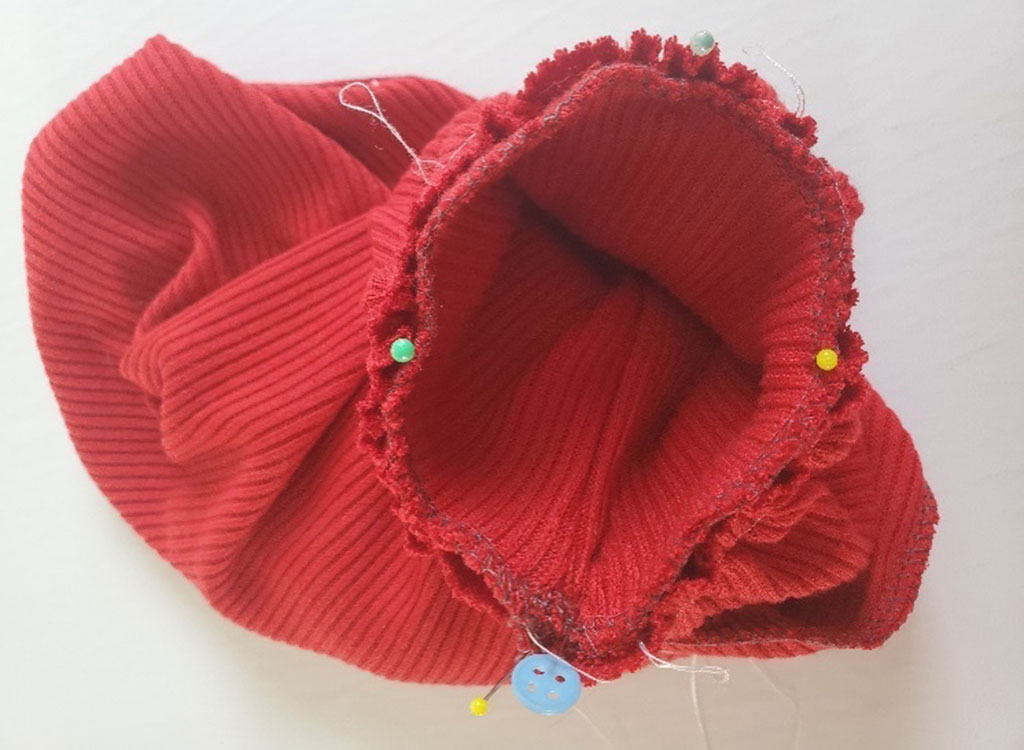
Line up the long edges of the lower portion of the sleeve (which is now the cuff). Stitch and press.
Turn the cuff right side out and then fold half of the cuff inside itself, aligning the raw edges. This creates a long, self-lined cuff. You can baste or serge the raw edges together to make it easier to join the cuff and the sleeve.
Step 4. Attach the Cuff to the Sleeve
Note: Before joining the sleeve top and cuff, double-check that you have the upper sleeve portion with the inverted pleats on the right side.
Turn the upper part of the sleeve wrong side out (the cuff is right side out) and align the underarm seams.
Use pins to quarter the sleeve at the gathered edge. Between these pins, pull on the gathering stitches until the sleeve fits the cuff, adding more pins as you go.
Stitch the sleeve and cuff together.
Press the seam allowance into the upper part of the sleeve. Repeat all steps for the second sleeve.
Step 5. Insert the Sleeves and Hem the Bodice
Align the center notch on the sleeve and the shoulder seam of the bodice. Pin. Align the underarm seam of the sleeve and the bodice and pin. Continue to pin the rest of the sleeve into the armscye.
With the sleeve underneath, checking that the pleats aren’t twisted, stitch the sleeve into the bodice. Lightly press the seam allowance up, being mindful not to crush that new volume.
Finish your top with your desired hem, and you are all done!
I hope you found this hack inspiring. If you end up hacking your Neenah top, feel free to share with the hashtag #seamworkneenahhack or #seamworkhack!

Emma Bonsall
Contributing Writer
Emma Bonsall is a British-born Fashion Design Graduate and Mum of two living in Canada. When she's not designing costumes or sewing for herself, she's altering clothes for others. Yes, she WILL hem your jeans, TAKE your money, and turn it into more FABRIC. Emma loves to knit, crochet, embroider, refashion, and has had her work featured in the Huffington Post, craft magazines, and books at home and abroad. She is excited to be a Seamwork Ambassador and is stitching up her dream wardrobe with the help of Seamwork’s extensive pattern library.