Sign In
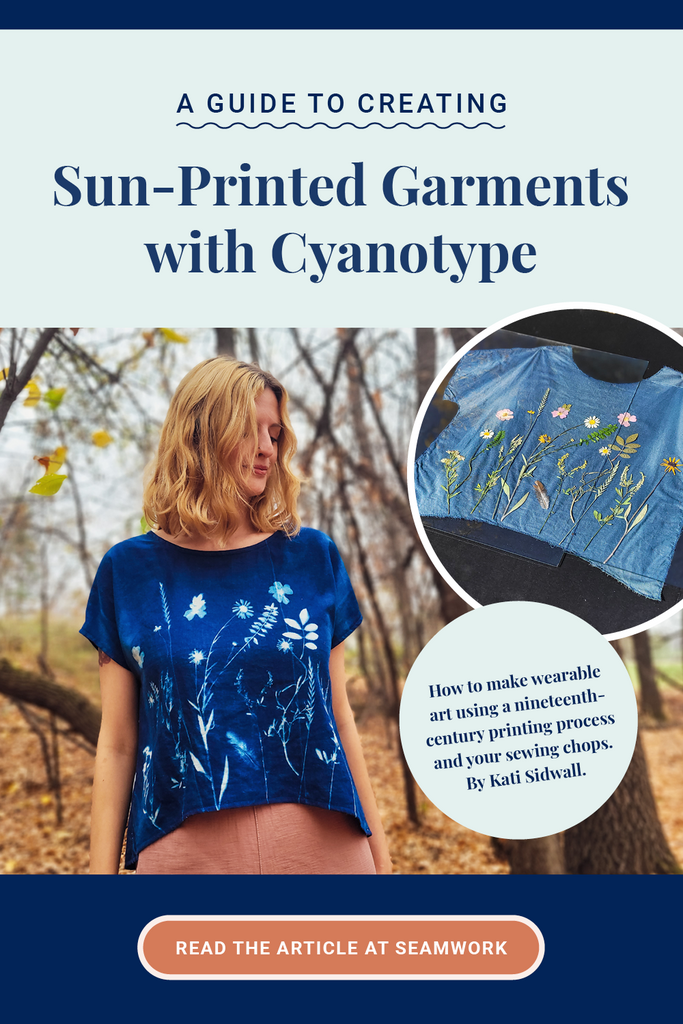
Dyeing or printing your textiles lends you even more magic and creativity to your handmade garments—and the process of making them. One of the earliest photographic printing methods, Cyanotype printing, is an artistic yet accessible process that results in beautiful custom textiles. If you sew your own clothes and want to create unique sun-printed garments, this guide will introduce the cyanotype process step-by-step.
Find more details and tips related to these supplies throughout the article.
Step 01: Plan your project
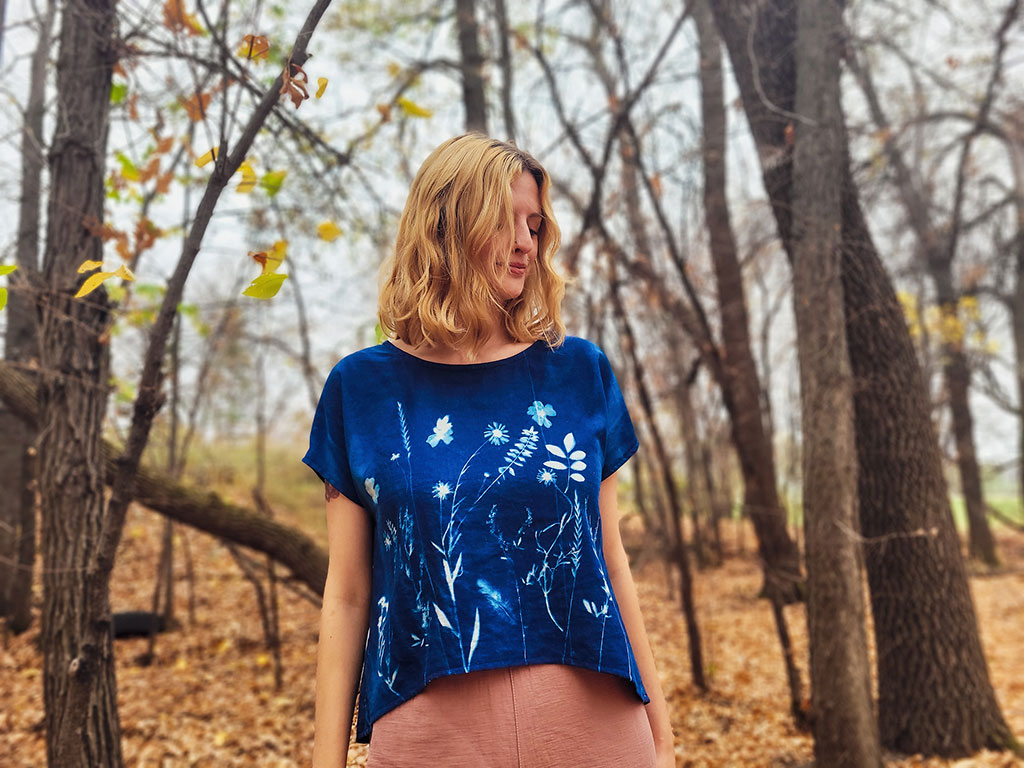
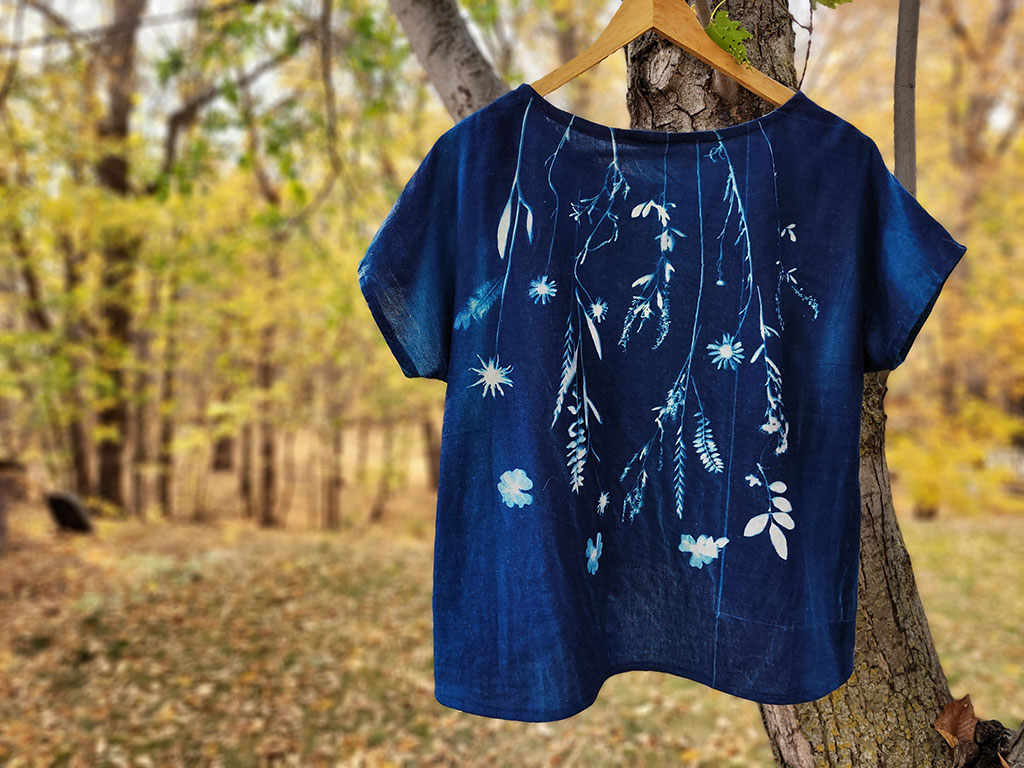
Cyanotype was discovered in the mid-1800s and has since produced monochromatic prints of photographs and field specimens. The cyanotype process yields a deep blue hue on paper and natural fabrics, creating a negative print of any object arranged to cast a shadow on the surface during exposure to sunlight.
The three main considerations for your cyanotype garment project are the print objects, the sewing pattern, and the fabric.
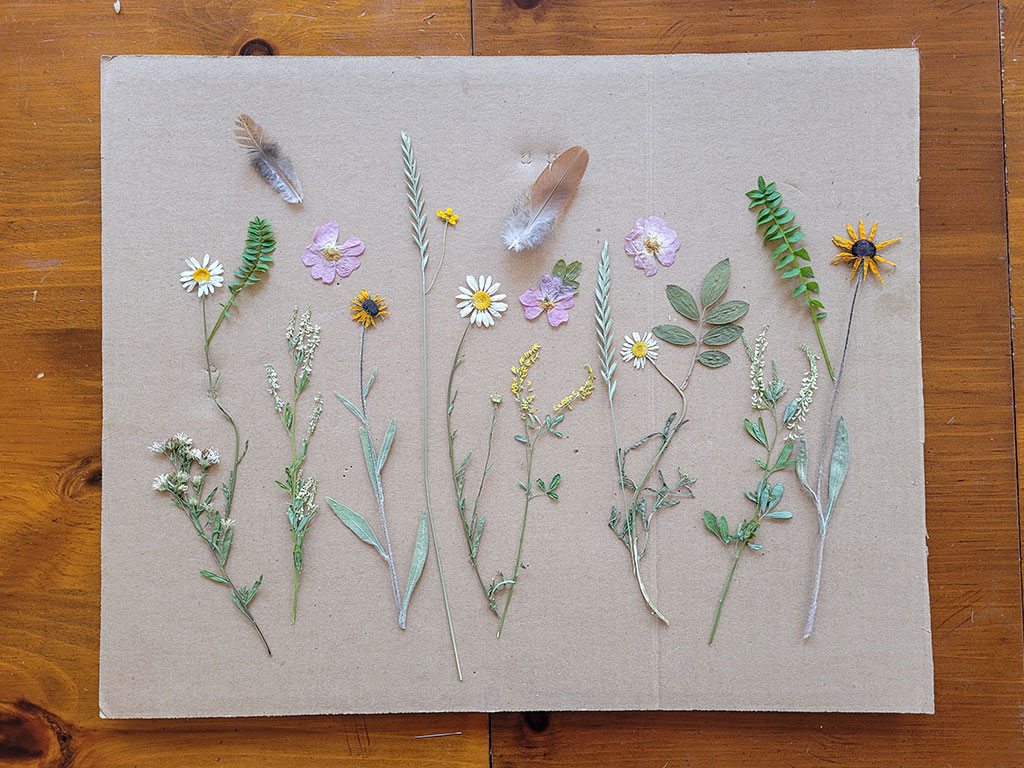
Print Objects: I love using pressed or fresh plants for cyanotype because of the intricacy and variation in opacity—more sunlight can pass through a flower petal than a leaf. You can also use household objects, paper cut-outs to create an image or spell a word, or photographic negatives—anything that casts a shadow. Decide on a layout for your print objects before starting the printing process. You’ll need to work relatively quickly once the fabric is sensitized!
Sewing Pattern: Smaller pattern pieces are easier to work with for beginners, and simple design lines allow your prints to shine. In this tutorial, I work with the Sew Liberated Strata Top; it meets these criteria and also has a relatively large seam allowance, which provides a bit more margin for manipulating fabric at the edges. However, you could also choose a more involved pattern and feature the cyanotype via patchwork or color-blocking.
Fabric: Choose a fabric with all-natural fiber content. Cotton, linen, viscose or rayon, and silk all work well. Fabric should be white or off-white for the most vivid prints. Lighter-weight fabrics will require less cyanotype solution. Smooth-textured fabrics will produce clearer prints—in my tests, slub-textured linen caused the prints to distort. For this project, I used a linen-rayon blend.
Step 02: Cut your fabric and run some tests!
You can work with pre-cut pattern pieces (cut first, cyanotype later) or fabric yardage (cyanotype first, cut later)—there are benefits and drawbacks to both.
You may elect to work with cut pieces if you are just starting with cyanotype, as yardage can be a little unwieldy. However, yardage does give you more margin for error, especially around the edges of the fabric, where hanging and folding can create color variation.
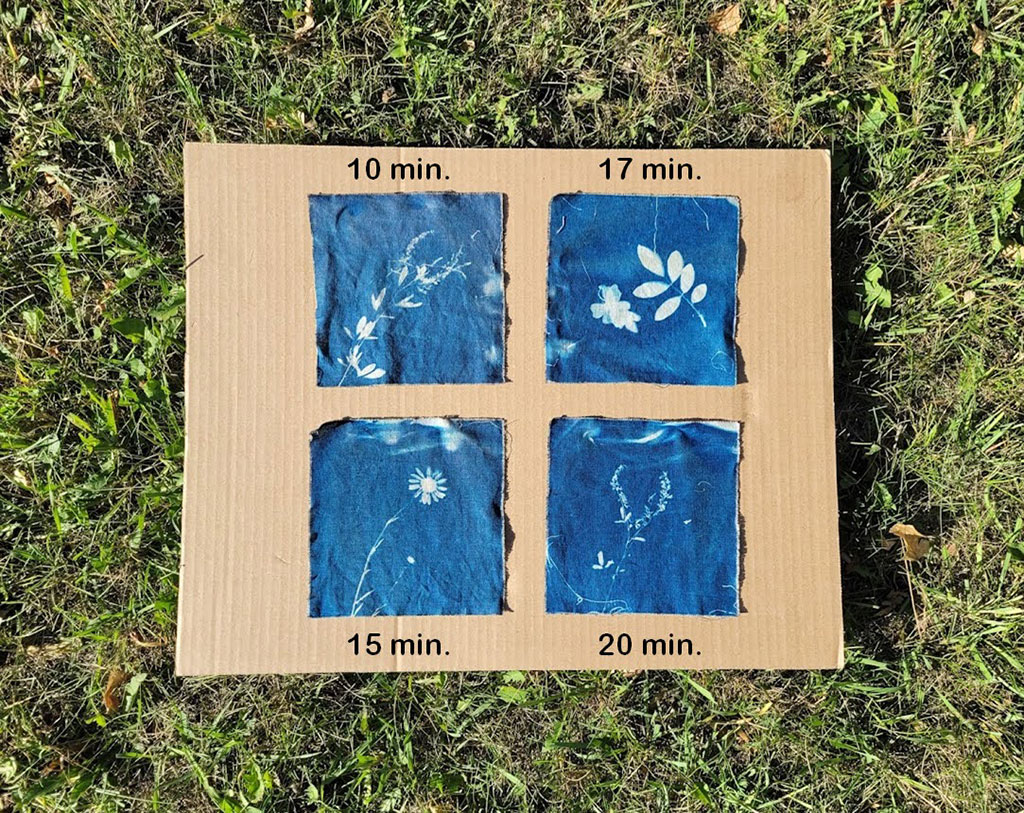
Whichever method you choose, I recommend running some tests on small swatches before going ahead at the project scale. This allows you to confirm your fabric choice, print objects, and exposure time—given the weather.
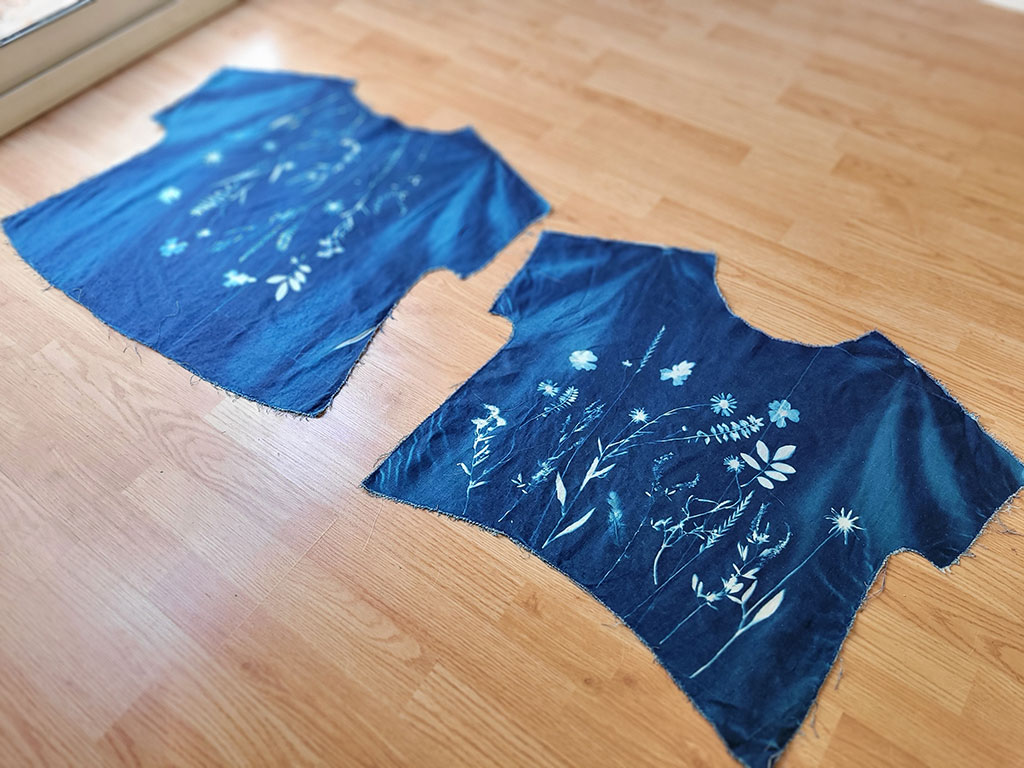
If you use pre-cut pieces, make sure to zigzag around the raw edges, as you’ll be manipulating the fabric quite a bit. I finished my pieces with Gütermann Sew-All No. 230 to match the cyanotype color.
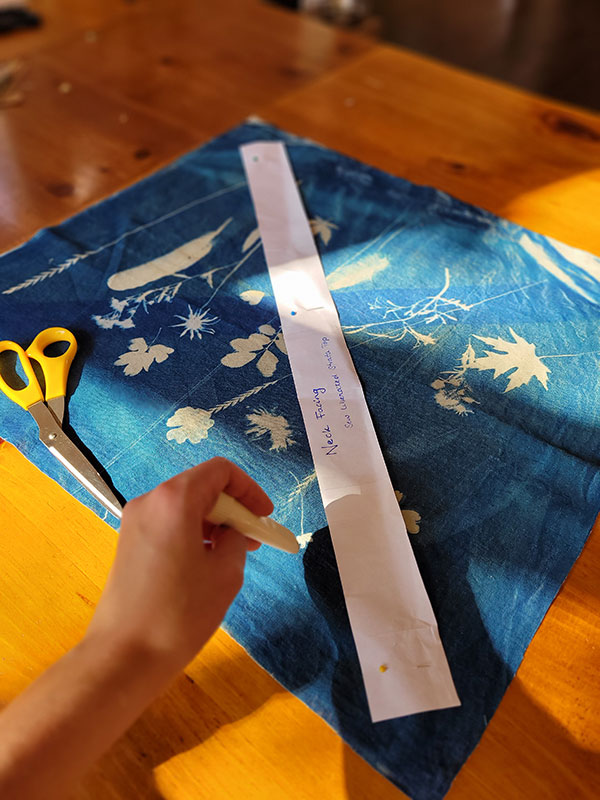
I used pre-cut pieces for the front and back of my shirt for this project, but I cut the neck facing from a larger piece of fabric that I had already printed with cyanotype. This latter method might also be good if you’re sewing something with several small pieces, like a collar.
Step 03: Prepare cyanotype solution components
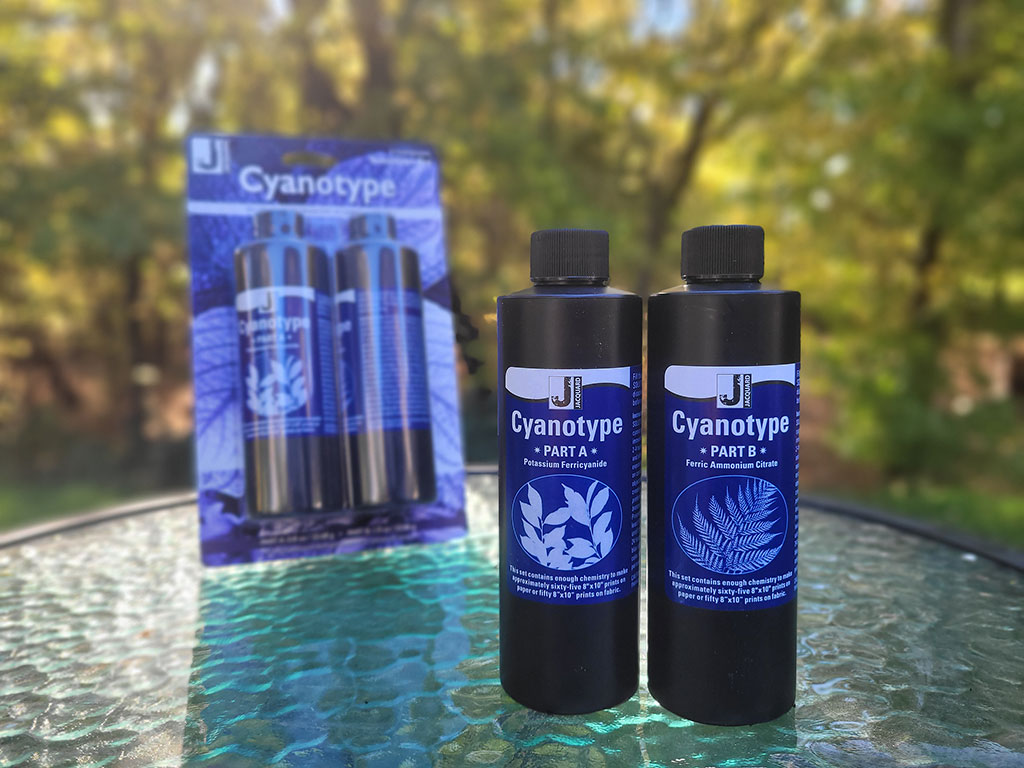
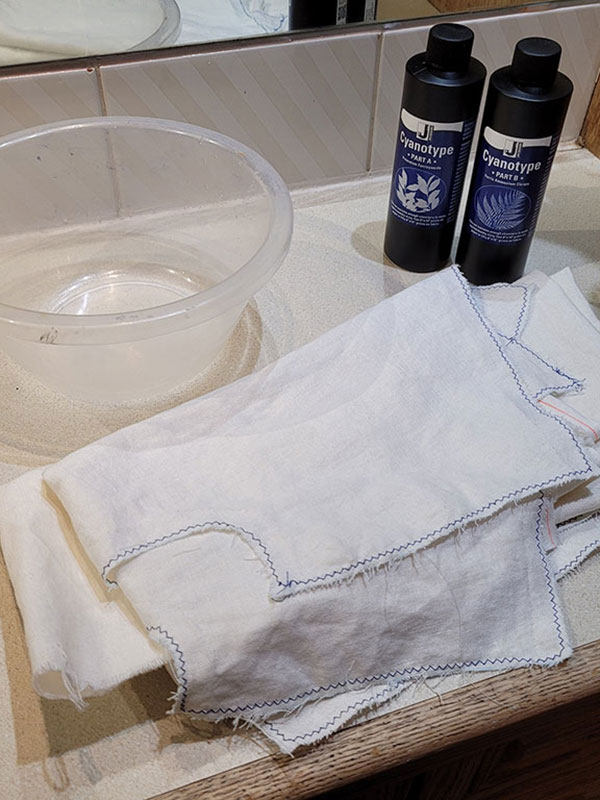
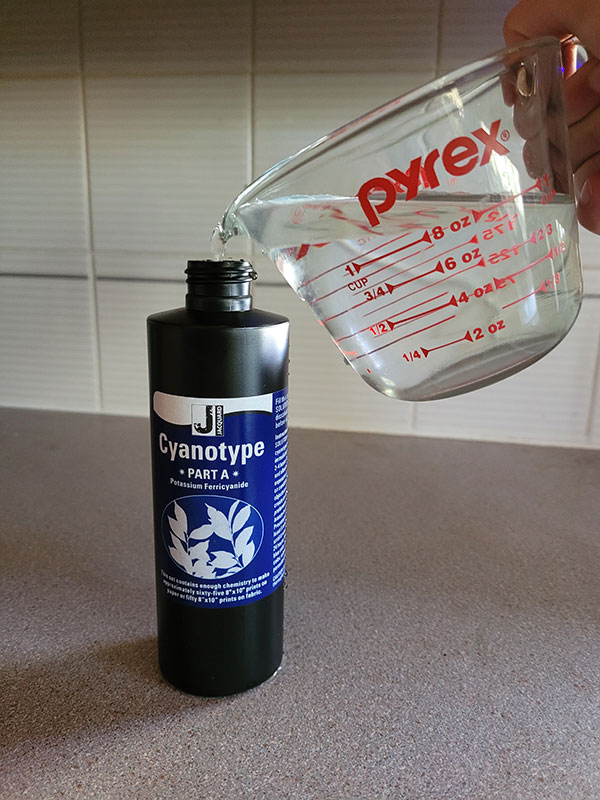
The two chemical compounds required to create the cyanotype solution, Potassium Ferricyanide, and Ferric Ammonium Citrate, are available in a few different forms. Here, I’m using a convenient set from a craft store—just add water. You can also buy the powder in bulk or get small pre-sensitized sheets of cotton fabric. Once you add water to the two bottles of powder (creating “stock solutions”), they need to sit for at least 24 hours before use. You can store these stock solutions long-term in opaque bottles.
One cyanotype set was sufficient for me to create the garment in this article, but i would need more solution for heavier-weight fabric or a larger garment. Cyanotype chemicals are non-toxic, but take precautions when working with them. Read the instructions on the package and wear gloves.
Step 04: Mix cyanotype sensitizer, apply to fabric, and dry
Mix the two stock solutions in equal parts to create the final cyanotype solution. Note that the final solution is only stable for a couple of hours and is sensitive to sunlight, so do this in a dimly lit space when you have your fabric pieces ready to go.
Mix the final solution in a dedicated or disposable bowl or container. Dip the fabric pieces into the solution, coating them completely.
Allow fabric pieces to dry in the dark. Be mindful that any folds or creases in the fabric as it dries will create a slight color variation once exposed to sunlight. These variations can look really beautiful, but if you’re hoping for a monochromatic blue, be careful to hang or lay your pieces, so they are somewhat taut. Once fully dry, store sensitized fabric in the dark.
Step 05: Arrange printing objects on fabric and prepare for exposure
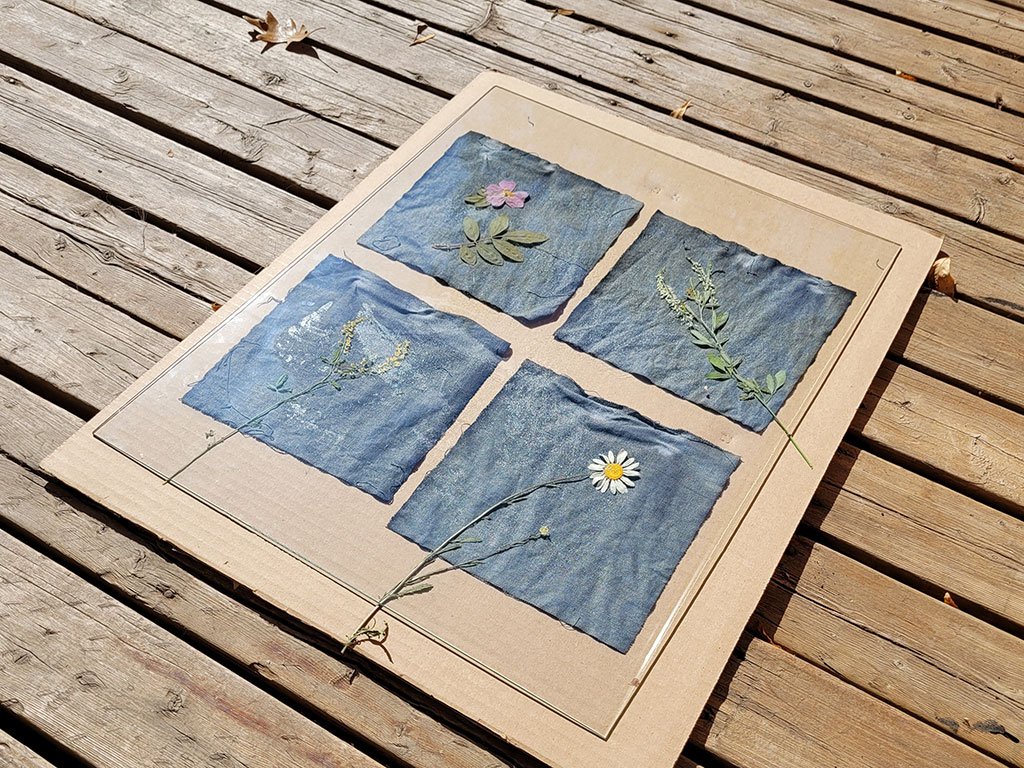
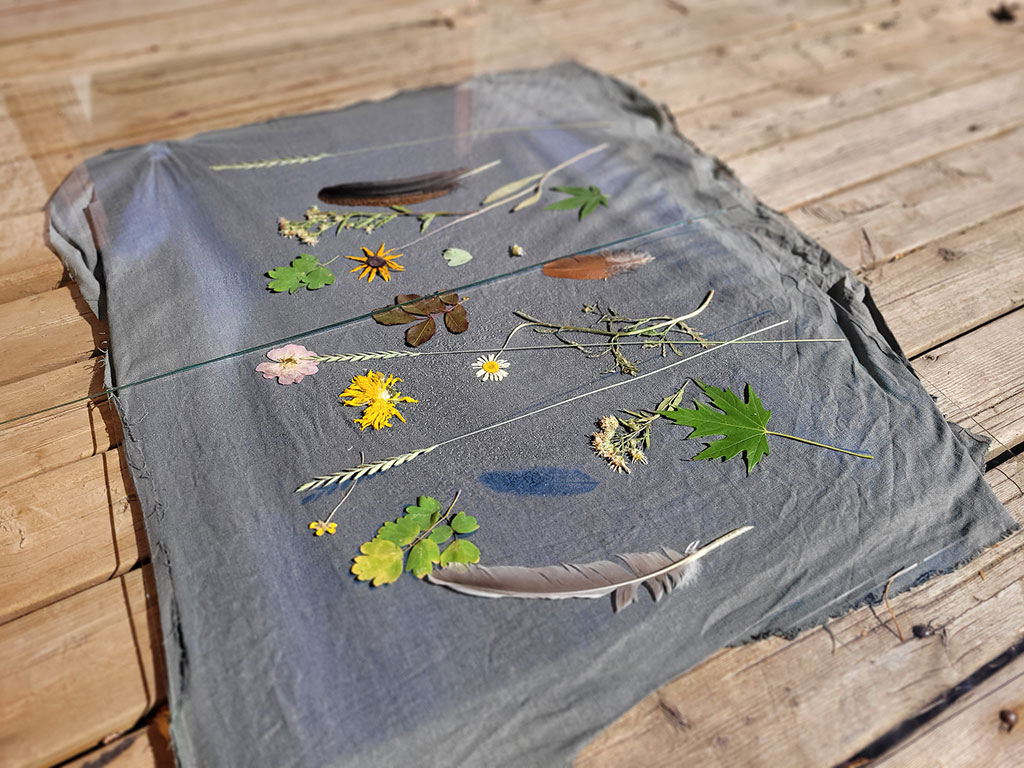
Before exposing your fabric to sunlight, arrange everything in a dimly lit room. The best way to get clear prints of lightweight print objects is to lay your fabric pieces on top of a cardboard or foam backing board, place the objects on your fabric, and lay a clean sheet of glass (picture framing glass works well) on top. The glass keeps the plants close to the fabric and holds them firmly in place, which is key for a crisp print.
Alternatively, you could use binder clips (within the seam allowance) to secure the fabric to the backing board and pin the plants down. I find that glass works better than pinning, but this will vary by project.
For this project, I used two sheets of glass to cover my fabric pieces. As a result, there is a very faint line on the final garment from where the glass pieces meet.
Objects held further away from the fabric will create a less defined print. Objects removed or added throughout the development process will give different vibrancies. You can play around with these factors to get different effects in your prints.
Step 06: Expose sensitized fabric to sunlight
Now for the fun part! Bring your project outside (or to another UV light source) and start a timer. The fabric will look grey or bronze when it reaches full exposure.
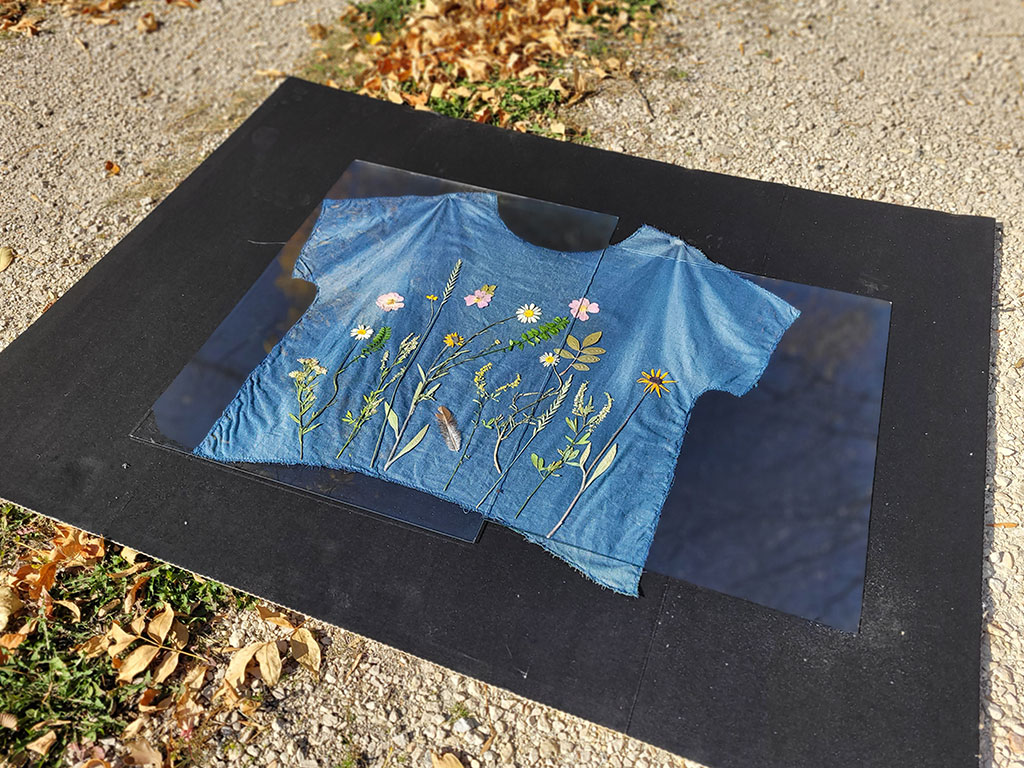
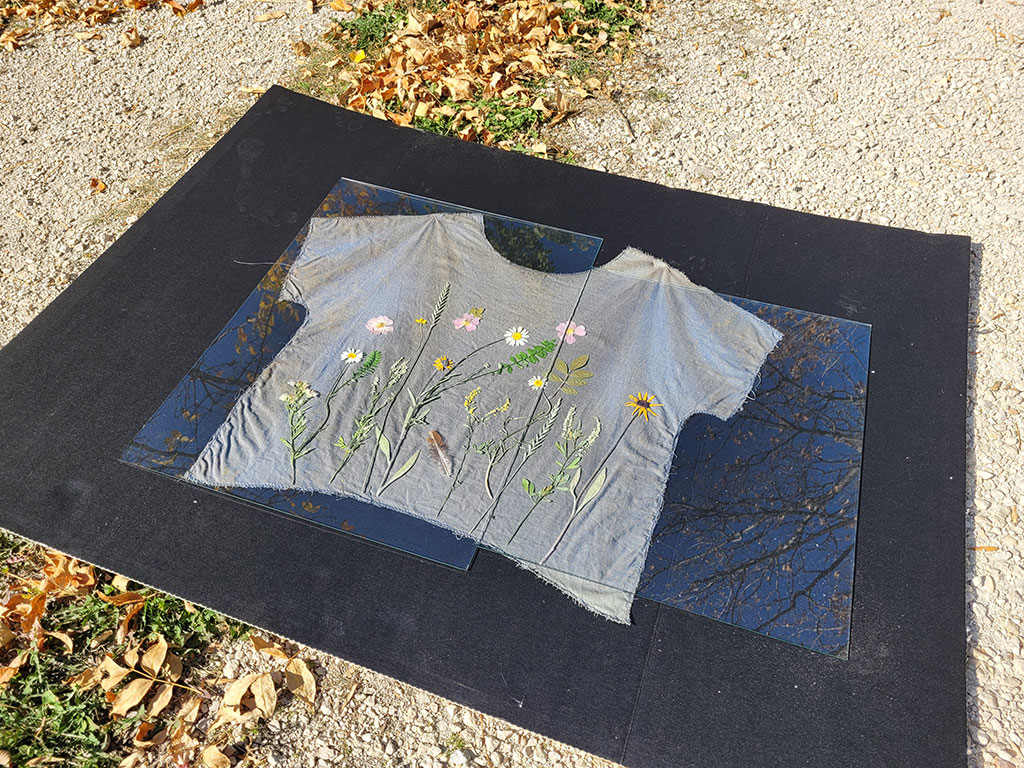
The time required for exposure will vary significantly depending on the environmental conditions and the depth of color you want. I worked with some test swatches before my actual pattern pieces to determine my ideal exposure time. This was on a sunny autumn day in Canada with a UV index of 3. On the other hand, I worked with cyanotype on a cloudy day last winter, and that project took a full hour to expose.
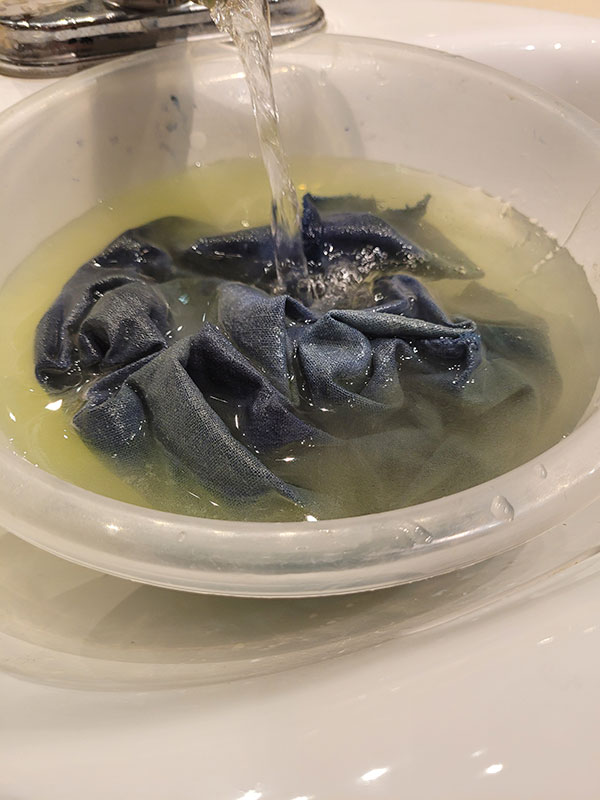
Step 07: Wash fabric in cool water and air dry
Washing the fabric in cool water will stop the development process—I place a plastic tub in my sink and wash fabric pieces, changing the water often until the water is completely clear. When you pull your thoroughly washed fabric from the clear water, it will be a beautiful blue color. Hang your fabric to dry overnight (avoid direct sunlight here to be safe, or your prints may darken).
The blue will deepen slightly over the next 24 hours, and prints will become more vibrant, so wait until the next day to judge your final color. A little hydrogen peroxide in your washing water does the trick if you want to speed things up.

Step 08: Sew, wear, and care for your garment
Now you’re ready to sew! Sew as usual, but take extra care when pressing. It’s safest to use a pressing cloth and a dry iron when pressing cyanotype fabric. Taking these precautions, I’ve never experienced discoloration or fading when pressing.
Finished cyanotype is sensitive to certain chemicals and pH levels, so launder printed garments with non-phosphate detergent. I hand wash my cyanotype garments and hang them to dry.
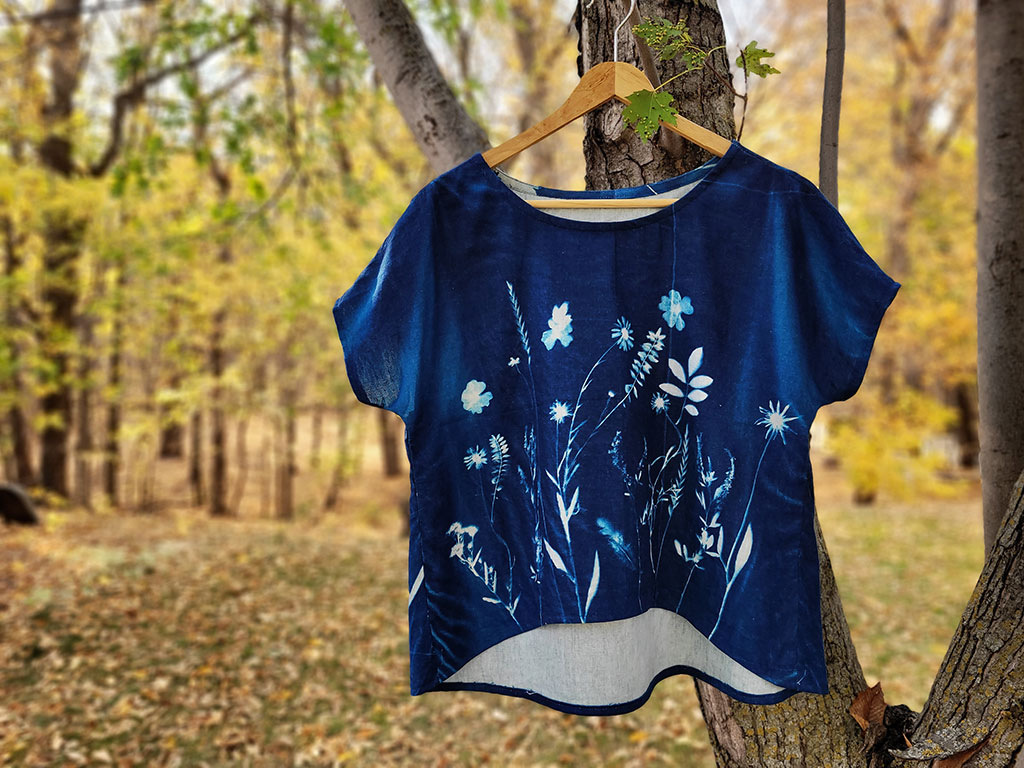
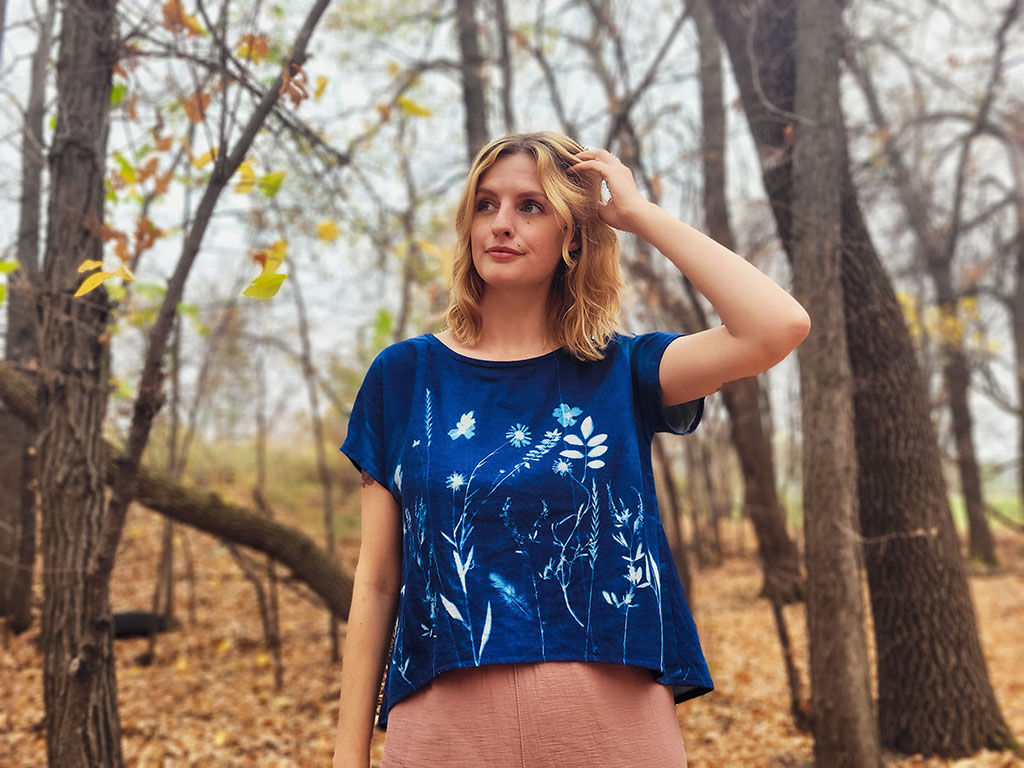
And now for the best part—wearing your magical finished piece! I hope you inspire yourself and others with your wearable art.
Love the article? Pin it for later.

Kati Sidwall
Contributing Writer
Kati Sidwall is an engineer and writer who sews her own clothes by twilight. She is fascinated by natural dyeing and printing using treasures from around her home on the Canadian prairies (Treaty 1 territory). She lives and plays on the Red River with her partner, dog, and small flock of chickens. Connect with Kati on Instagram at @hemsandhens.