
 Sign In
Creating a pointed shape is one of the most basic challenges almost any sewing project presents, and yet to do it consistently and well remains a challenge for many of us. If only we could get the last little bit of those pesky points to turn all the way out...or at least to turn out so that matched pairs actually matched! Problem is, when there's more than one point visible at the same time—as on a collar, a pocket flap, a waistband tab—the most important thing is that they be as similar as possible, despite how far from “perfect” each point is, and being off-perfect in a dependably consistent way is almost as demanding as being perfect in the first place.
Never having been a patient enough sewer to simply let sufficient practice solve this problem for me. I’ve always been on the lookout for any way to make the point-turning process more precise, or at least more predictable. Over the years have collected, tried out, and even come up with a lot of different approaches, along with the understanding that no single approach is going to be ideal in all situations. In this article, I’ll run down the main options I currently regard as worth trying out if you’re not dependably getting the results you’d like, or simply feel there’s got to be a better way.
First, let's consider the making-a-point-in-fabric problem as it applies to a single layer of fabric. I find that to get a neat, crisp, and well-formed point in a single fabric layer (such as when forming a patch pocket, or the end of a placket, or any other stitched-down sort of detail), simply folding the fabric as needed is the obvious way. And if that’s proving difficult at all, slipping inside a shaping guide in the form of something stiff and press-able, like a pre-shaped piece of stiff paper or interfacing, to establish the final shape, and then folding and pressing the fabric around that, will guarantee precise, repeatable results.
Joining these observations with the techniques that have consistently given me the best results when forming two-layer points, I draw these conclusions. So far have held up very well when applied to all the light to heavy natural fiber fabrics that are my usual materials:
- Pre-folding the seam allowance layers when point-forming is more controllable and easier to manage than turning a trimmed and stitched point.
- Folded points typically make sharper corners than turned ones, regardless of how bulky the layers are.
- Folded seam allowances better support a turned shape and its edges, compared to trimmed allowances.
Turning Prep
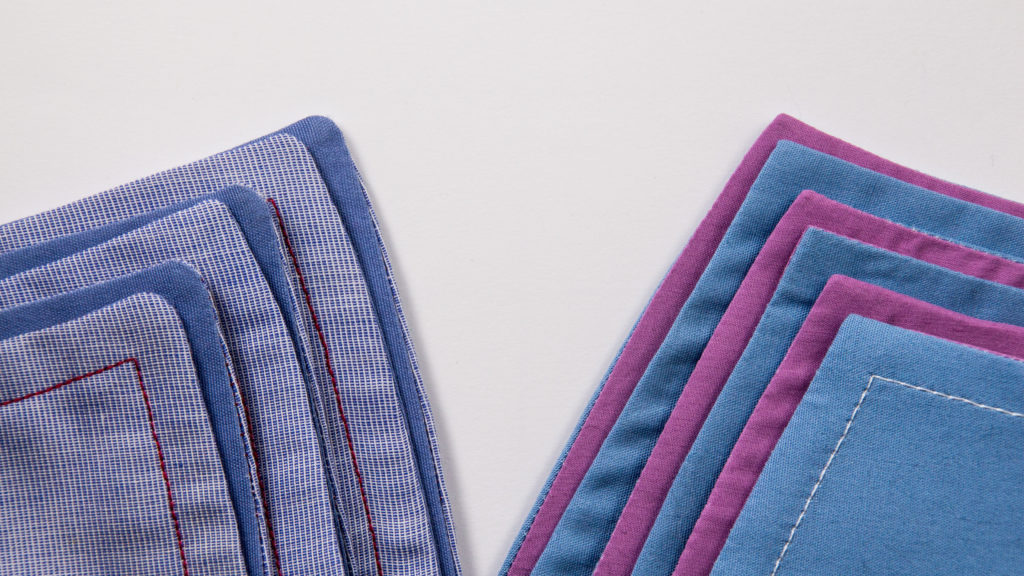
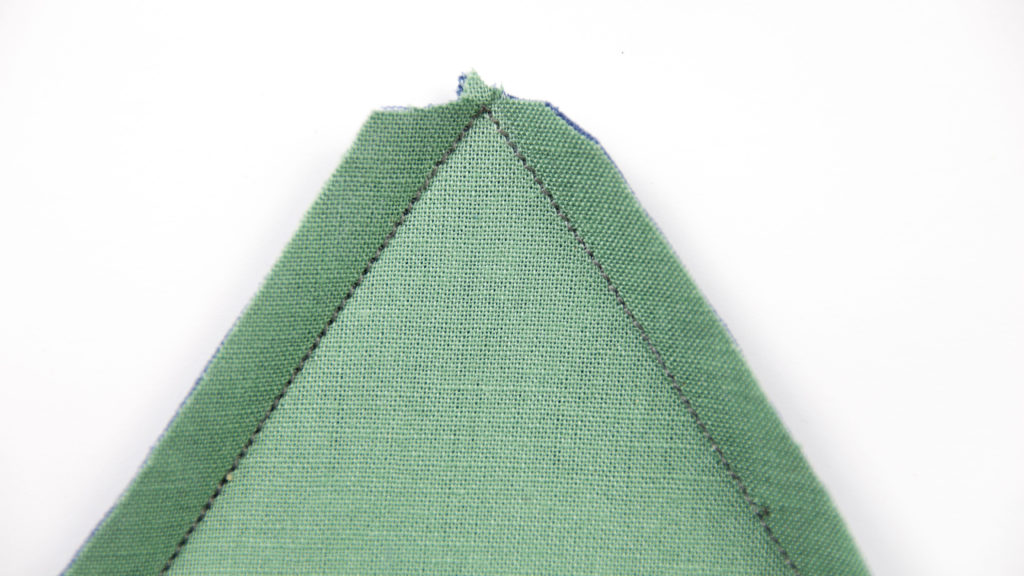
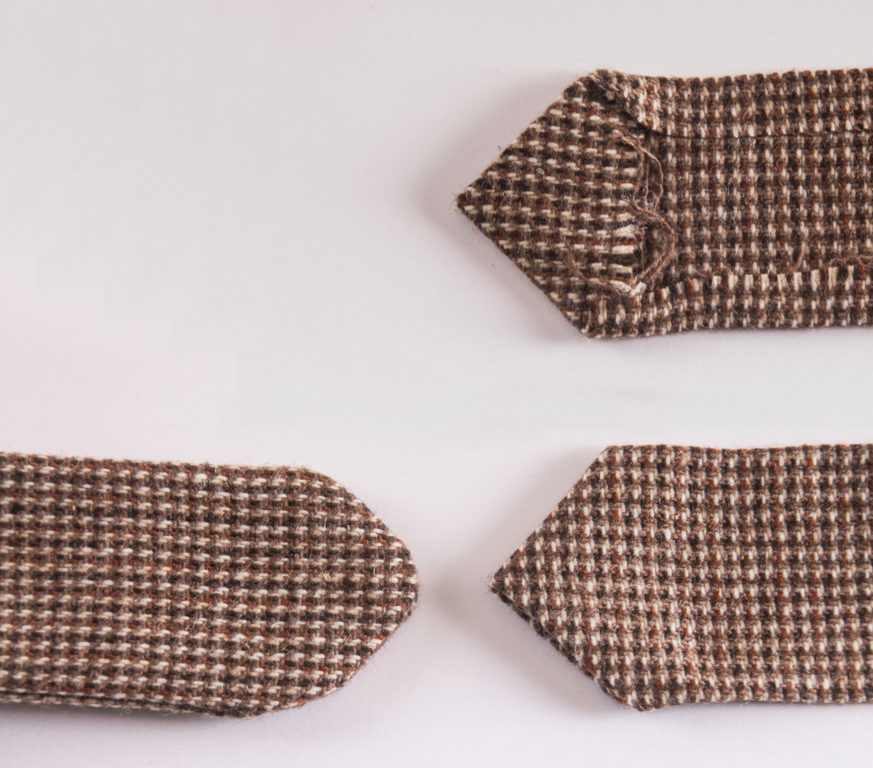
Applying these ideas to a typical turned point, compare the differences between my results using the typical home-sewing method described everywhere, in which the seam allowances at the point are first trimmed back as severely as possible (above left), with the folded approach (above right), in which the seam allowances are left untouched and are both folded together over the seams and only trimmed at the point after the folds are well established, and only then if the point is less than a 90-degree angle and the last folded allowance will extend beyond the sides as a result, as in my example. Incidentally, this is the tried and true factory method found on virtually every manufactured shirt collar I’ve examined that was made over the last 100 years or so. I’ve no doubt the method goes much farther back than that.
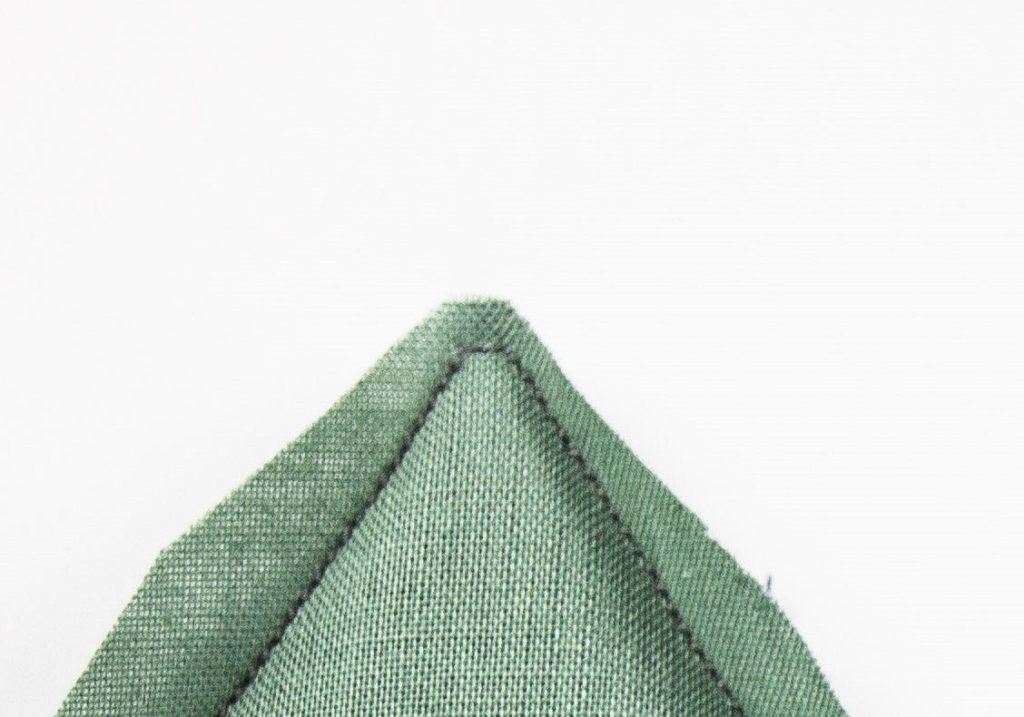

Note that in my trimmed example I also included the oft-repeated advice to snub off the point seam by taking a stitch or two across the point rather than just pivoting, as I did in the folded one (and as factory workers I've watched usually do, too). As you can see, this didn’t help me achieve a better point compared to folding the allowances over a just pivoted seam; in fact, it got in the way.
Getting to the Point
Of course, preparing for the turn of the point is just the beginning. Getting the thing turned all the way out, regardless of how you treat the allowances, is the real challenge. Virtually everyone I’ve watched, asked, or read about, either in a factory or custom work-room, or in a sewing class or in a text, first turns a point out as far as possible with their fingers only. Usually this includes some little fingertip wiggling of the partially-turned point after the turn.
Then they switch to some other tool for the final point-making, usually a blunt poking-from-the-inside device for home sewists, or a sharp pulling or levering-from-the-outside device for industrial sewists. Either way, this is the part of the process where the magic actually happens—or doesn’t. It’s where skill and practice need to take over from simply following directions, if they can!
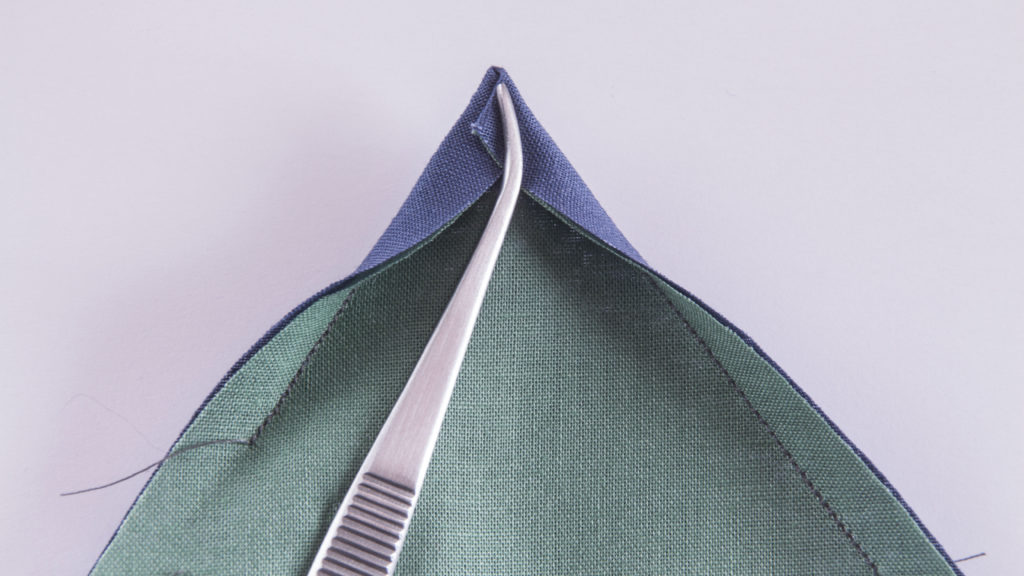
My reaction to this often frustrating moment has been to look for tools that let me turn the point in one go, without the shift from a partial turn to the final turn. In the images below you can see two of the tools I’ve found that can do this, the tong-like Point Former and Tube Turner at left, which I used for years, and one of my two current favorites, a simple pair of long, thin, but not-needle-pointed tweezers, at right.
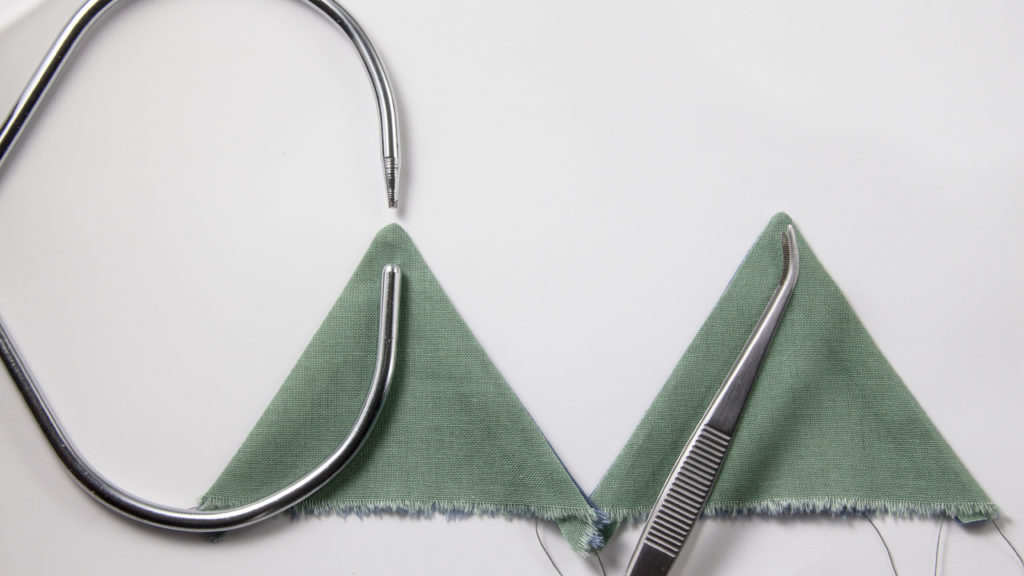
Both of these work by extending the gripping point before you start to turn from some distance to the point that your fingers can manage in the two-step approach, all the way to the tip, so there’s no need for a two-step process.
I’ve switched from the tongs to the tweezers simply because they work better in almost every way. The tweezers are much better at holding the folded seam allowances in place while turning—which is of course essential to get the benefits—and are thinner on both inside and out.
They’re not quite as easy to use, since there’s not much room between the tips for your garment detail while gripping, and because it simply takes more effort to pull and ease the un-gripped side of the unturned point over the outer tweezer tip to make the turn, compared to how the tongs let you reverse both layers at once. But if you keep a firm grip throughout and don't mind some wrinkling of the layers in the process, they're quite manageable. So far, they’ve never failed to work very well and are much easier to figure out than any sharp pulling-from-the-outside tools.
Three Ways to Fold and Trim Seam Allowances
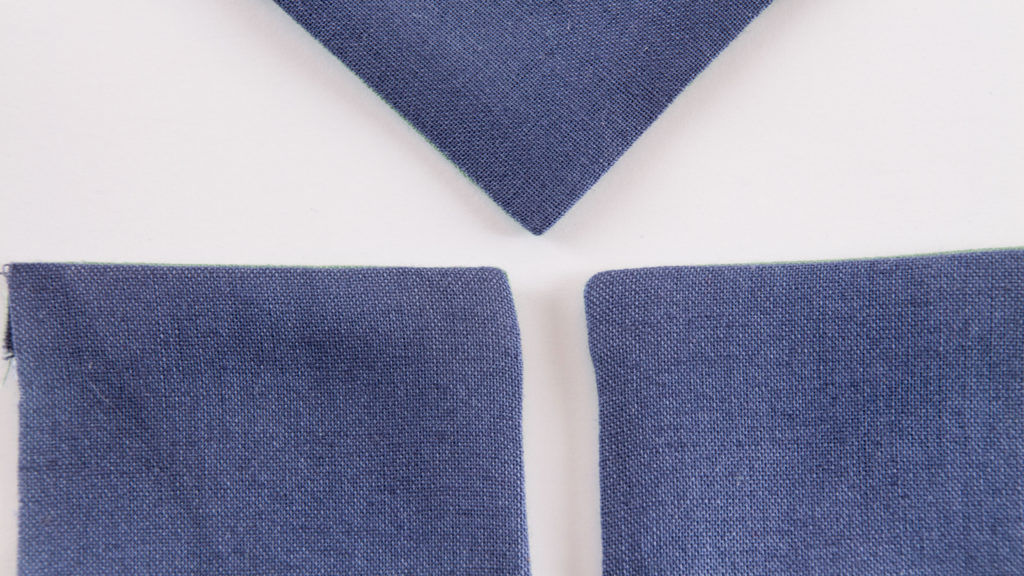
Here are various ways I’ve tried for folding and trimming seam allowances before turning a folded point. In each case, I trim only after creating the folds and at least finger-pressing them.
First Approach
Just trim off the ends of the seam allowances that extended beyond the pointed shape.
Second Approach
Unfold the layers and trim away as much as you can while still keeping the full allowance width right up to the cross-over, then fold them back.
Third Approach
First fold the point down over the stitching, as is often done in factories, then fold the angled sides over that, trimming nothing away.
In all three techniques, the folds should be held the same (shown above).
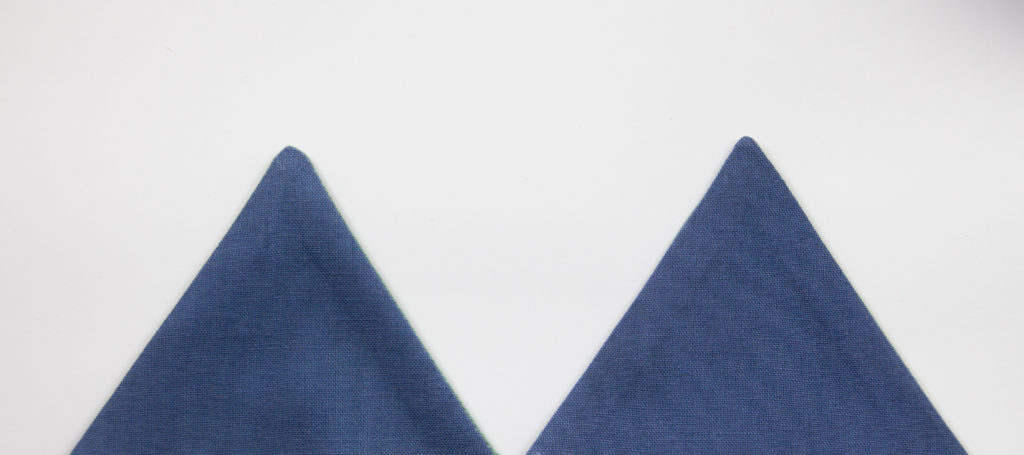
I used each approach to make the same corner, and as predicted by my second observation (that folded points make sharper corners than turned ones), none of these folding or clipping variations produced a sharper or duller point; they simply provided different levels of bulk but the shaped points were the same shape. I guess that's why factory sewers I've watched don't bother with any trimming! It's also why interfacing layers don't often complicate this method of point turning; I still keep them out of the seam allowances as a rule, nonetheless.
A Turning Thread
Adding a turning thread to the pivoting stitches is another trick that can be added to this process or to the home sewist's trim-and-turn method, if you want to trim. It seems, on first encounter, to be the missing grail in all this turning drama, and it can certainly be helpful, though not for me as much as I'd hoped. I use it only sometimes, as insurance; tweezers or the following tool are usually just as good for me without it. Here's how I learned to do it.
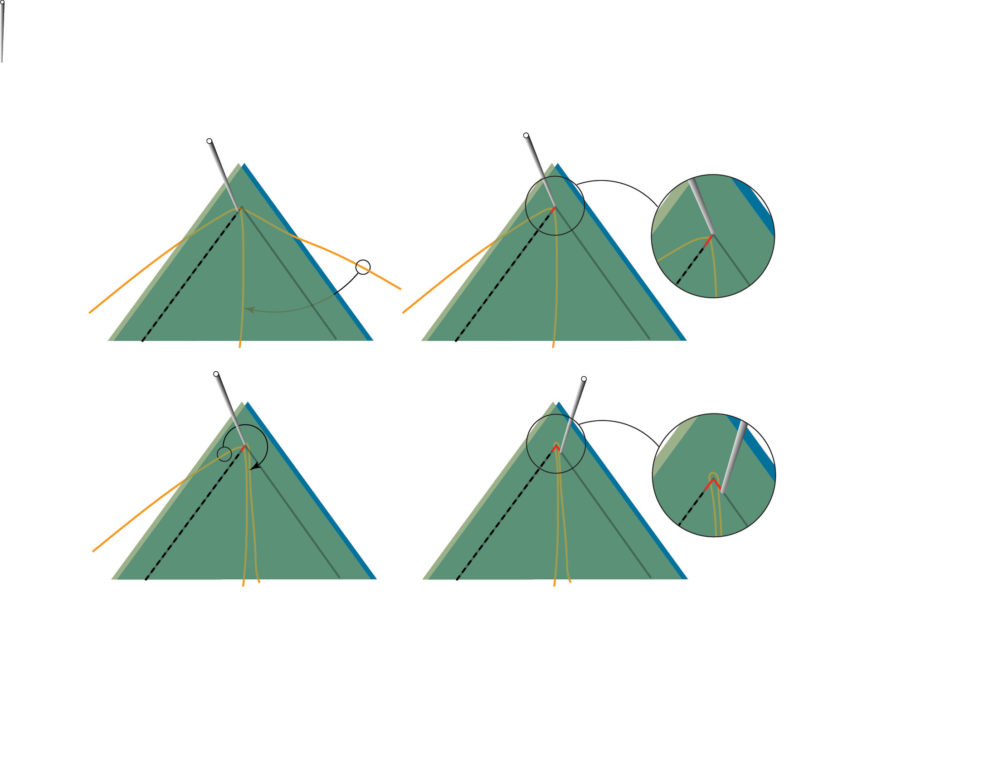
Stop your needle, when it is down, one stitch away from the pivot, and then insert a length of strong thread between the point layers, wrapping it tightly against the needle.
Slowly make one stitch over the thread.
Wrap the strong thread around the needle, as shown.
Pivot and stitch over the strong thread, continuing the seam and then turning as usual. Pull on the thread ends together to bring the point fully out.
The Hemostat Method
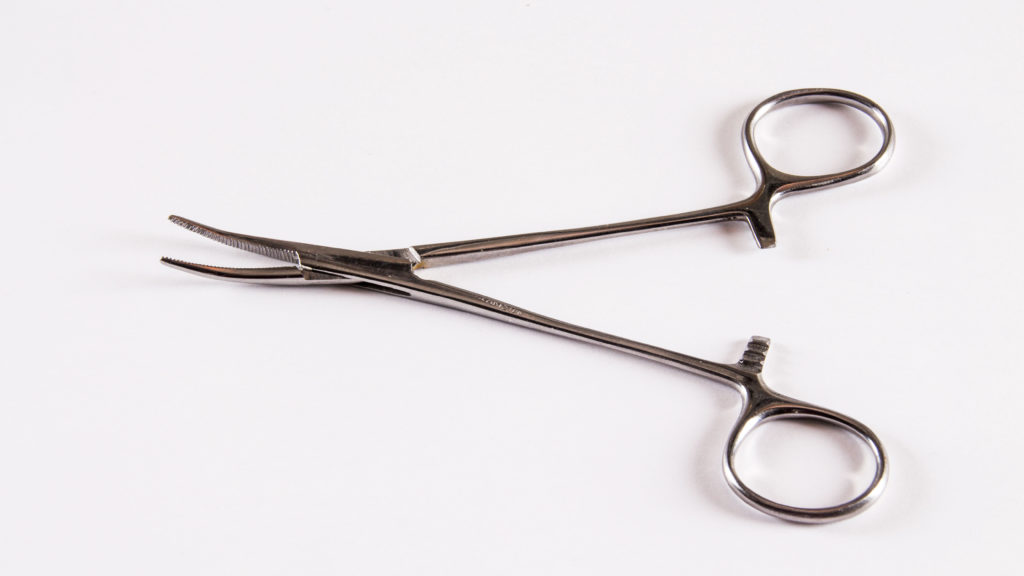
There’s one other one-step gripping-to-the-tip tool that’s actually my favorite for turning points, and I’ve left it ‘til last only because it works best on angles that are close to 90 degrees, and not so well for very narrow points, as the tweezers do. The tool is a hemostat (shown above), and while I use it with essentially the same folded seam allowance logic, the steps are quite different and quite a bit simpler.
Hemostats (also known as forceps or needle pullers), come in many shapes and sizes. For points, I like them to be about five inches long with very narrow, curved, toothed tips. The great thing about them is that you can grab little things very precisely, hold them very firmly, and then let go without releasing the grip, thanks to the locking teeth at the handles. I'm still looking for a pair with long jaws that only close at the tips, like my tweezers, so I could use them instead; the locking feature is great, as it leaves both hands free to work on the gripped layers.
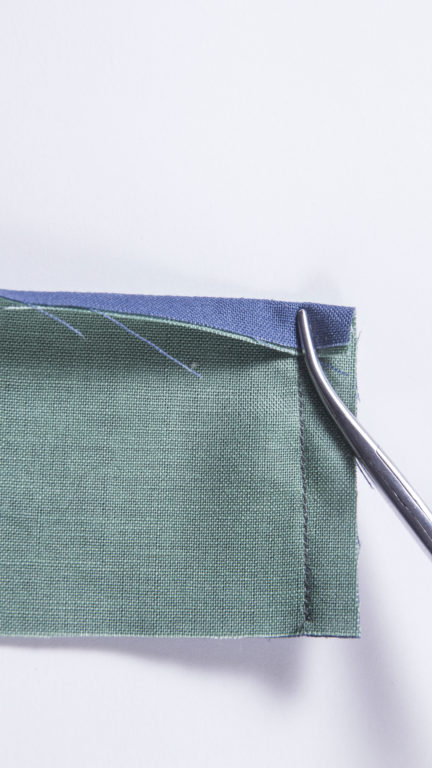
With a hemostat holding one set of allowances right at the seamline, it's only necessary to have folded the other pair, then to turn the point over the tool tips, which folds the gripped allowance at the same time.
Imperfect corners can be rectified with a couple simple tricks.
I've occasionally had gripped corners that turned out less than fully right where gripped, as shown in the photo above (bottom left), and have solved that issue by very slightly angling the stitching only in the gripped area to compensate, as shown below. If you overdo this, naturally you'll get the opposite problem, so do a few samples beforehand to see if this is necessary, and to what degree. Once nailed, there's no easier way I know of to get such nearly perfect turned corners.
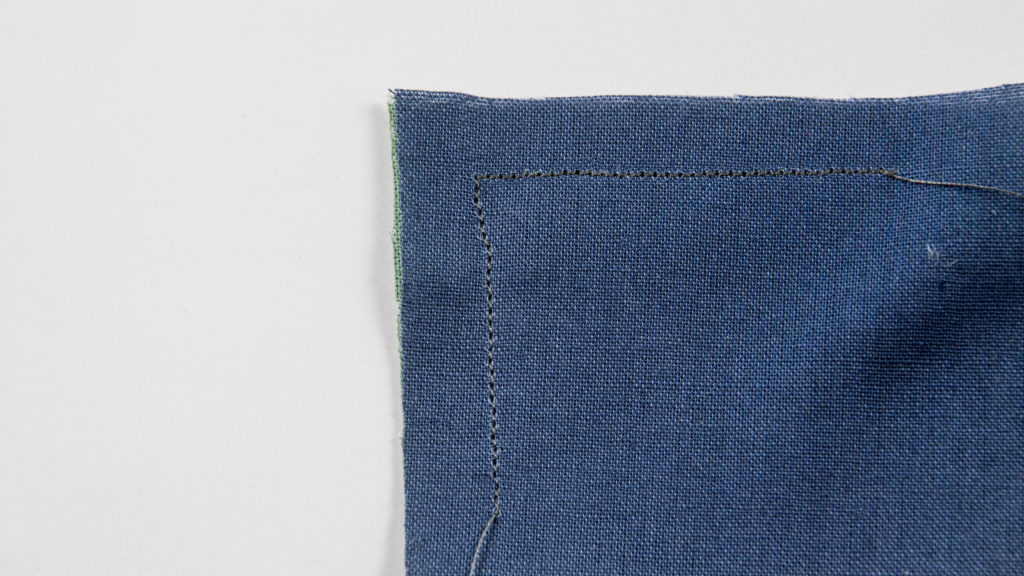
By sewing slightly outside the stitching line at the corner, you can compensate for the slight inward edge that sometimes results from using a hemostat.
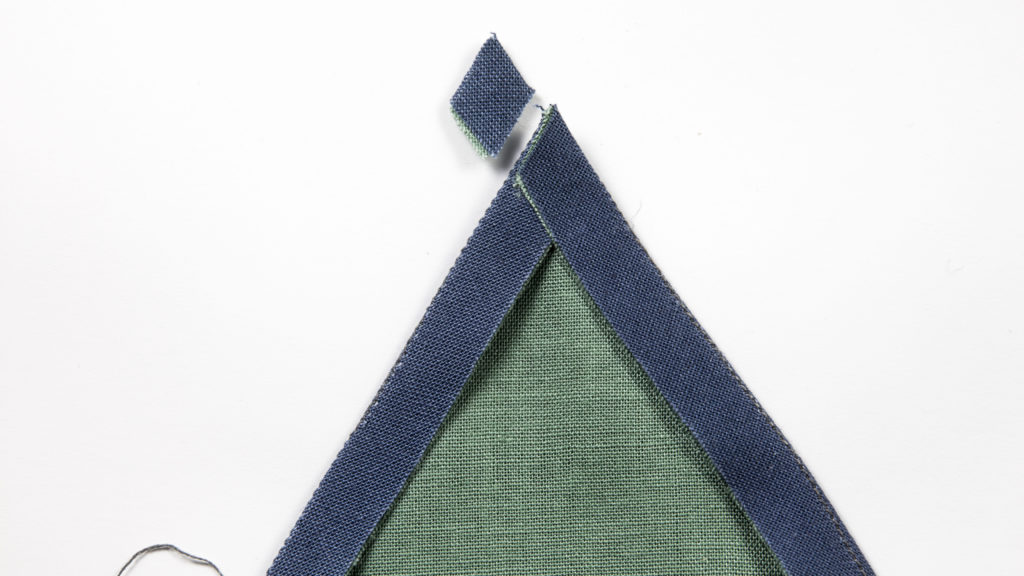
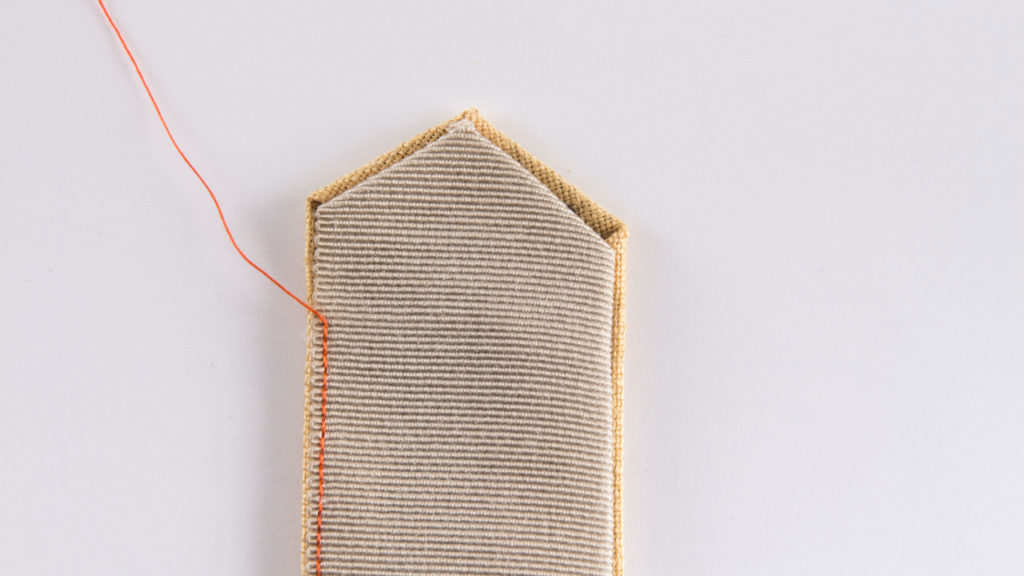
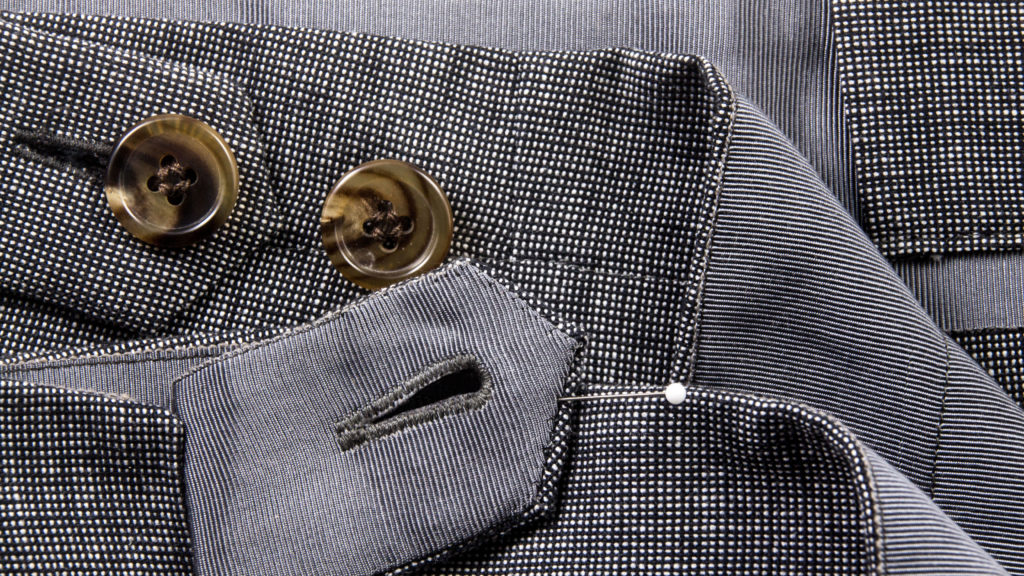
The No-Turning Method
When the point or points needing turning are packed together within a small area (as at the end of a narrow band), so they'd all need to be formed and turned at once, I generally opt to ditch turning altogether in favor of folding alone, relying on hand stitches to secure the inner and outer folded edges. I'll machine stitch the layers up to about an inch away from the first corner, then switch to folding only. Besides being a sure path to splendid results, the opportunity this provides to take up a needle is quite interesting, I find, and a welcome reminder to slow down, if only for a few minutes.
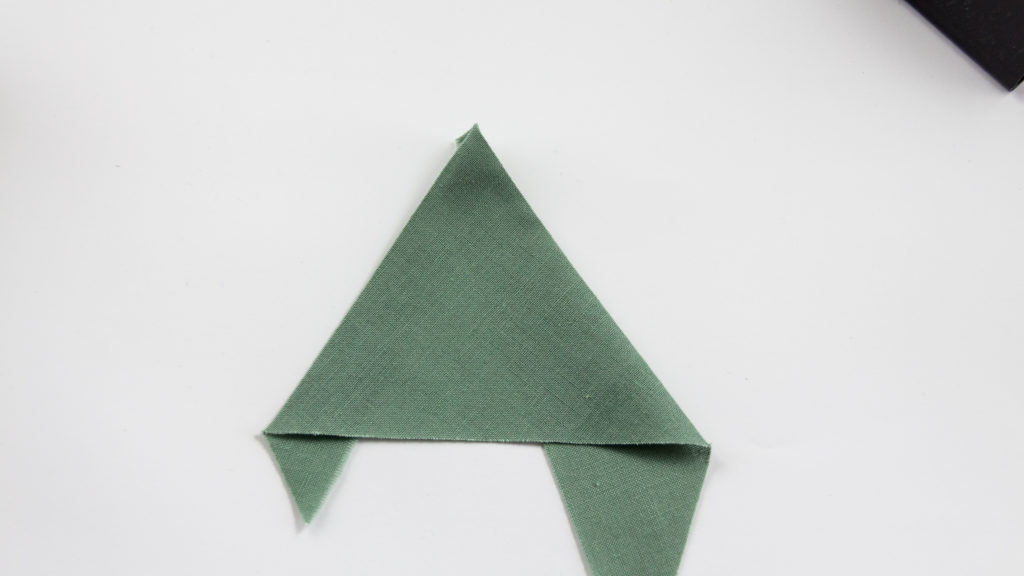
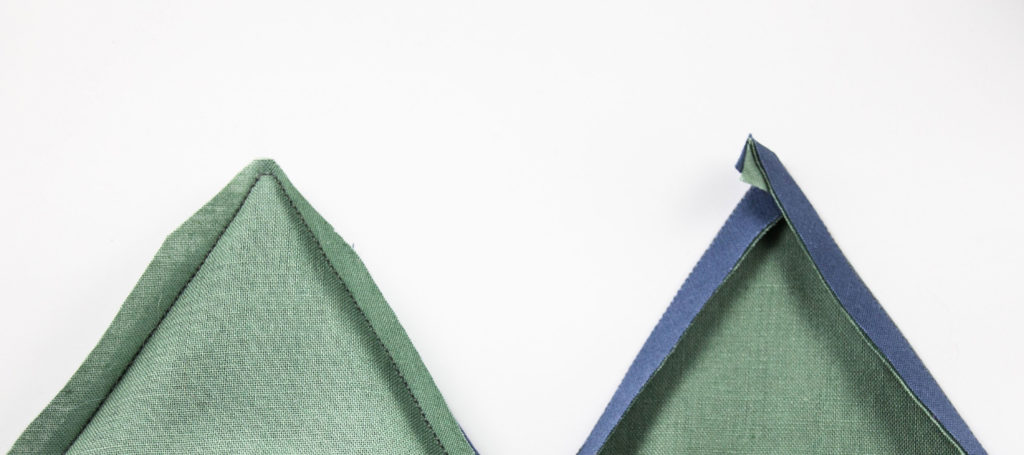
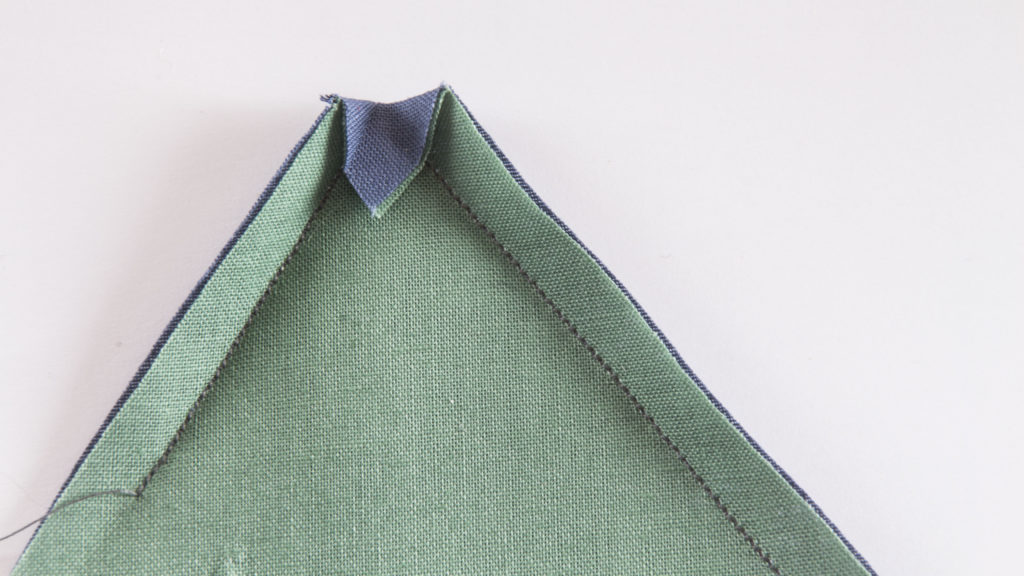
Sometimes folding alone (bottom right) produces far sharper results than a turned corner (bottom left). Above, the anatomy of a folded corner.
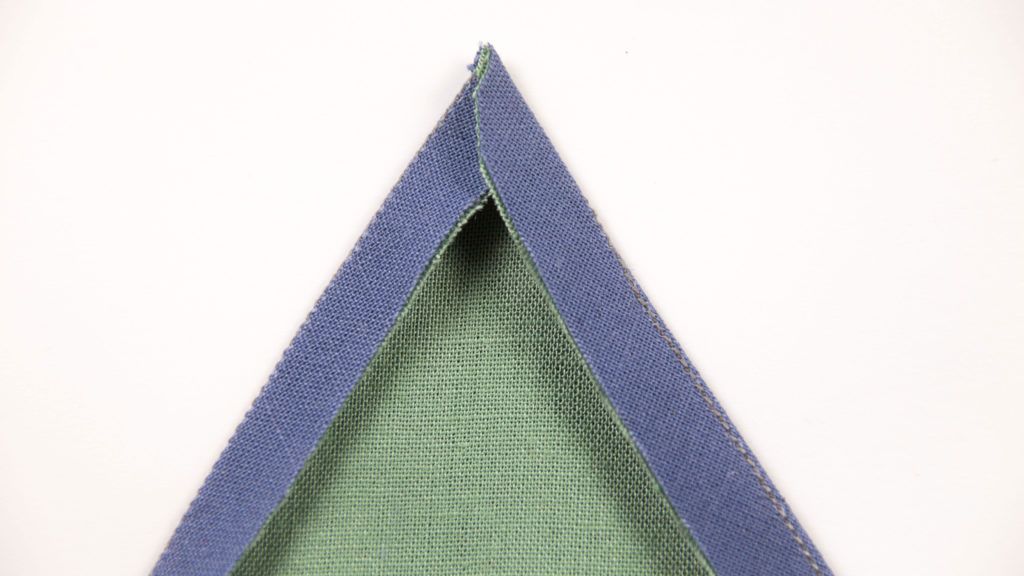
If there was any further proof needed that bulk isn't an obstacle to sharp corners, this method delivers it. Here's a shot of a tricky corner: a wrong-side shot of the folded tab that has been folded out of an untrimmed rectangle so that the tip is four layers and each side corner eight layers, yet the points remain much sharper than had they been turned.
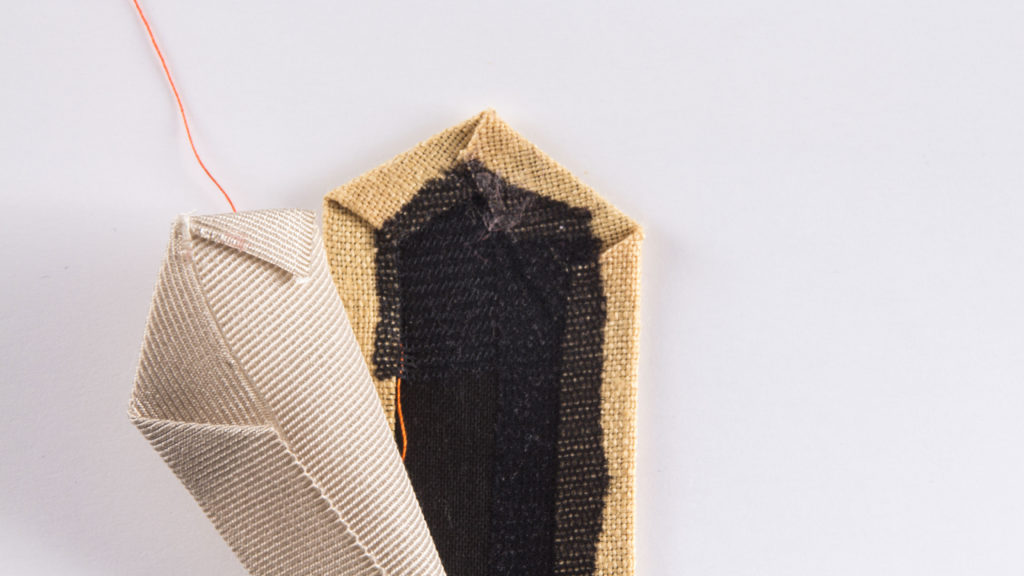
Often in situations like this, I'll first pre-cut interfacing exactly to the desired angles and apply it to the outer layer, as a guide to precision folding, then either glue-baste or lightly fuse over the raw edges of both the pre-folded inner and outer layers, after folding (and sometimes trimming) the seam allowances in their final position.
The stitches that secure the layers needn’t be tiny or perfect, only invisible from the right side, which will be perfect, or as near to as I know how to achieve.

About the Author
David Page Coffin is the author of popular sewing books including Shirtmaking, Making Trousers, and the Shirtmaking Workbook. He has written professionally about sewing techniques for high-quality results for over 30 years and was an editor at Threads Magazine for 18 years. Catch up with David Page Coffin at his website.


