Sign In
In my early sewing years, I purposefully and strategically avoided certain fabrics because I was afraid I would ruin them; leather was high on that list. Can you relate? But as I became more and more bold with my sewing endeavors, I realized this mentality caused me to miss out on one of the fundamental aspects of sewing: learning how to do something new. Fast forward almost eight years, and I am experimenting with more and more patterns, fabrics, and techniques. It turns out bravery and sewing go together quite well, and there’s no better way to dip your toe into the leather-sewing waters than with an accessory.
The Finch is a lined, zippered clutch whose shell can be made with any combination of fabrics, and it’s the perfect project for learning to work with leather (or artificial leather). The dimensions are highly customizable; I like a bigger clutch but you may prefer a smaller one, so I’ll walk you through scaling your dimensions to create your perfect clutch. You can really use any fabric combination for the shell, but since the Finch looks stunning in leather, I’ll cover the ins and outs of working with leather (and artificial leather).
Before We Begin: A Quick Lesson from the Sewing Table

Cutting and Marking
Leather comes from animal hides, and can be made from a wide array of animals—cow, deer, kangaroo, ostrich, you get the idea. There are three grades or classes of leather. The lower-grade leathers have been buffed and refinished to hide imperfections, but are lower quality and do not age as well with use. In contrast, Full Grain Leather comes from the top layer of the hide, and the natural surface will burnish and beautify with use. In addition, leather can be tanned, or transformed from a skin into a leather, using different materials, including chromium salts, vegetable matter, and synthetic tanners. Different tanners will produce leathers that are different colors and that have varying levels of suppleness and pliability.
For garment sewing, you’ll want to look into lightweight garment grade leather. Leather is often sold in hides (just as fabric can be sold in panels). Keep in mind that no two panels will be exactly the same; each animal has its own quirks, and likewise each hide will have its own subtle differences.
Artificial leather comes in many varieties, such as vinyl and pleather, and can be very similar in look and feel to real leather. Artificial leathers are generally cheaper than leather and are not made from animal hides, making them great options for those who are vegan and those who are cost conscious, as the price of leather can be quite high. They can also be cleaned with a rag and warm water, are often easier to cut and sew, and needle marks are generally less noticeable than in real leather. However, artificial leathers do not stretch or breathe like leather, and won’t develop the same luster and patina over time. There are a wide range of artificial leathers, so you may want to experiment with a couple before diving in. Look for ones that are supple, don’t crease too easily, and are the right weight for your project.
Because leather hides can have some variations in texture and imperfections, carefully inspect your hide for scars, holes, or other imperfections. This will help you plan out your pattern placement.
For best results, cut each pattern piece individually (instead of layering the hides). Rather than cutting pieces on the fold, trace one side then flip the pattern piece over and trace the other side.
Every time you puncture leather, you leave a permanent hole in the leather. Instead of pinning your pattern in place, use pattern weights and a rotary cutter.
To avoid accidental stray marks on your finished object, trace or cut your pattern pieces on the wrong side of the hide, and be sure to transfer all markings to the wrong side, as well.
Choosing Notions and Tools
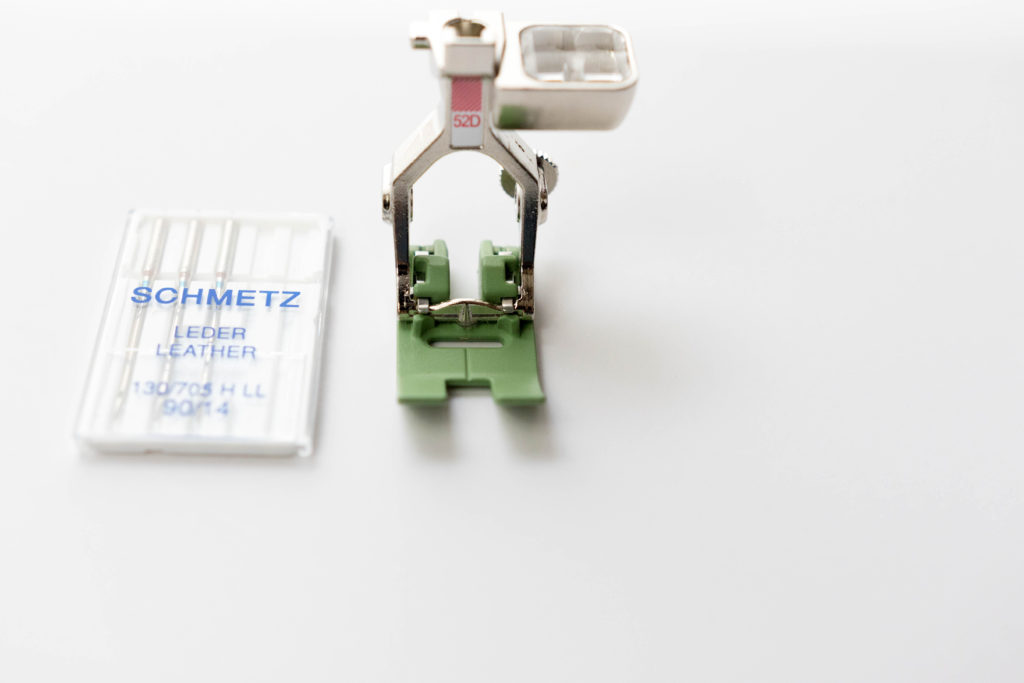
Needles: A Universal Leather sewing needle will pierce the leather properly while sewing. Unlike an all-purpose needle, a leather needle has a very sharp tip, which penetrates the leather to form a nice, even stitch. Use a fresh needle at the start of every project for best results.
Thread: Polyester or nylon thread is strong, durable, and will hold up well over time. Look for a good-quality thread, and opt for thicker thread if your machine can handle it.
Sewing foot: Leather can stick to a universal sewing foot so many people opt for a Teflon foot, which won’t stick to the leather while you sew. You can also use a walking foot; try placing a piece of Scotch tape or masking tape over the bottom of your universal foot to prevent sticking.
Tips and Tricks
Because pinning leaves a permanent hole in leather, make sure to stay within the seam allowances when you pin. Or ditch the pins and instead use paper clips, binder clips, or hair clips. Leather can stretch, so pin (or clip) at regular intervals. If you find the leather slips around a lot as you sew, look into leather tape. It’s a double-sided tape that you place along the right side of your fabric to temporarily keep your pattern pieces together. Look for tape that is narrower than your seam allowance so that you don’t gum up your needle.
It’s always a good idea to test out stitch length and stitch tension on a scrap, especially if you’re using a walking foot and universal needle. In general, leather should be sewn with a longer stitch length.
Go slow! Because your sewing needle will leave permanent puncture marks, you want to get your stitching right the first time around. If your stitches skip, try swapping in a new needle.
Now that we’ve covered the basics of working with leather, let’s dive into the construction process for the Finch.
You’ll Need
Supplies List
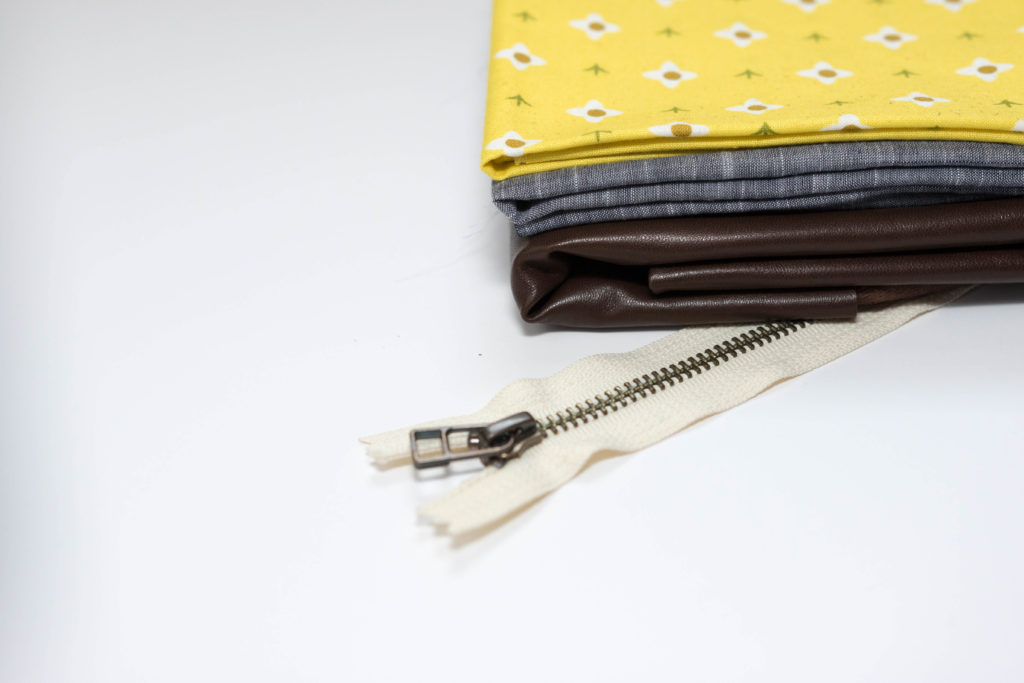
- 1 leather hide or ½ yard artificial leather*
- ½ yard contrast shell fabric*
- ½ yard lining fabric*
- Leather sewing needles
- Teflon foot or walking foot (optional)
- Paper clips, binder clips, or hair clips
- Leather tape (optional)
- Scotch tape or masking tape (optional)
- Point turner (or chopstick or blunt knitting needle)
- Thread
Note: depending on the size of your clutch, you may need more or less fabric or leather. The amounts listed here are sufficient for creating the clutch that is featured in this article, which measures 14.5” wide and 12.5” long.
Since half of the clutch is leather (or artificial leather), you will need to determine what you would like to use for the contrast shell and the lining. For the shell, if you choose to go with a light- to mid-weight quilting cotton for the contrast fabric, I highly recommend using interfacing to give the quilting cotton stability and make it more durable. Other options include home décor fabric, wool, oil cloth, bark cloth, and canvas; these materials do not need an interfacing.
For the lining, quilting cotton, a cotton-linen blend, or even denim can work well.
Prep
Calculate Your Clutch Dimensions
First, we’ll calculate how much fabric you’ll need for a custom-made clutch. You’ll need to decide on the desired width and length for your clutch. You can just use your zipper to determine the width; simply measure the length of the entire zipper, including the tape, and you have your width measurement. If you want a clutch that’s a different width than a standard zipper, you can also buy a longer zipper and shorten it.
Shortening Zippers
You can shorten a zipper by stitching back and forth over the teeth several times. Using a zigzag stitch set to the biggest width and a short length, stitch over the zipper teeth to create a bartack.
This bartack acts as a new zipper stop, allowing you to create a 100% customized clutch!
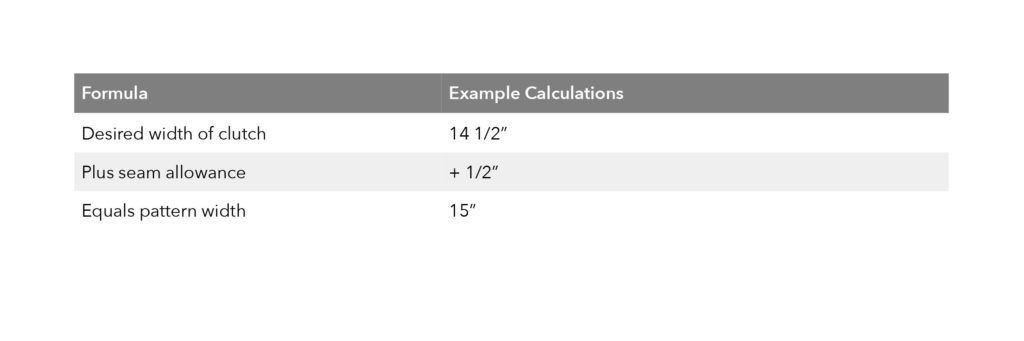
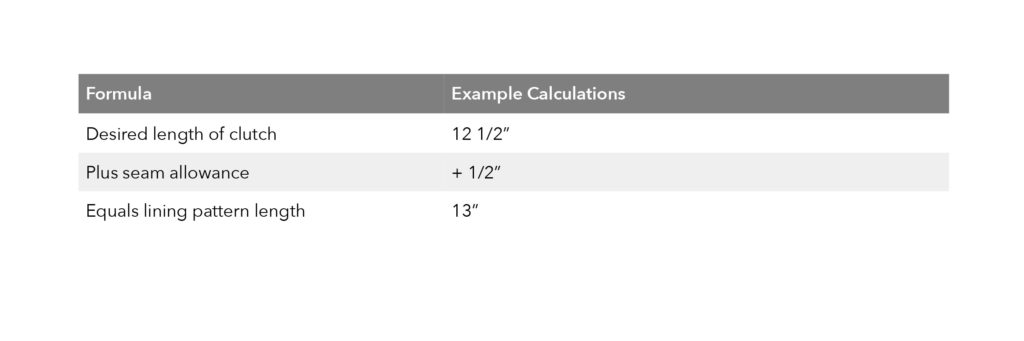
The length of your clutch is measured based on your desired outcome: if you want a shallow clutch then cut a short length, and if you would like a deeper clutch then cut a longer length. Try using fabric scraps or scratch paper as mockups to get a sense for the proportions that you prefer. Whatever length you decide, we will be using ¼” seam allowance, so be sure to add ½” to your measurement to account for this seam allowance. Here are a series of simple charts to help you determine your measurements:
Width
Lining Length
Leather length

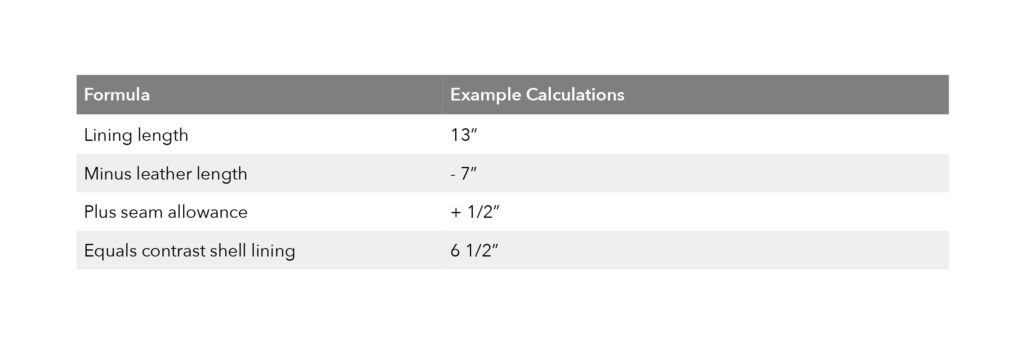
Contrast Shell Length
Cutting and Prepping
There is no need to pretreat leather, and the bag won’t be washable so you don’t need to prewash your fabric (do give it a good press, however!) Use the measurements you calculated above to cut your fabric and leather:
- 2 Leather Shells (Leather Length x Width)
- 2 Contrast Shells (Contrast Shell Length x Width)
- 2 Linings (Lining Length x Width)
Once your pattern pieces are cut, it’s time to assemble!
Construction
Assemble the Shell
Seam allowances are ¼” unless indicated otherwise.
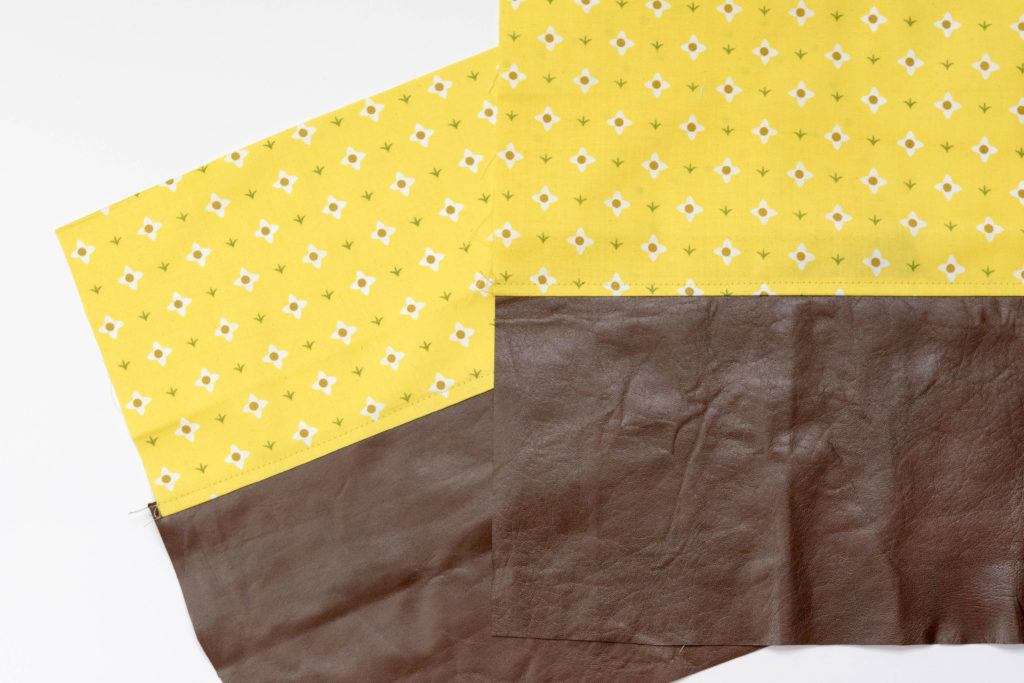
- With right sides together, sew one leather shell to one contrast shell. Press the seam allowance towards the contrast shell, making sure the iron does not come in contact with the leather.
- Repeat for the other leather shell and contrast shell.
- Topstitch 1/8” from the seam, if desired, on both shells. This will help keep the seams flat and adds a nice decorative touch.
Assemble the Zipper
Change your sewing foot to your zipper foot; I did not change my sewing needle or stitch length, but you may wish to test your stitches on a scrap before proceeding.
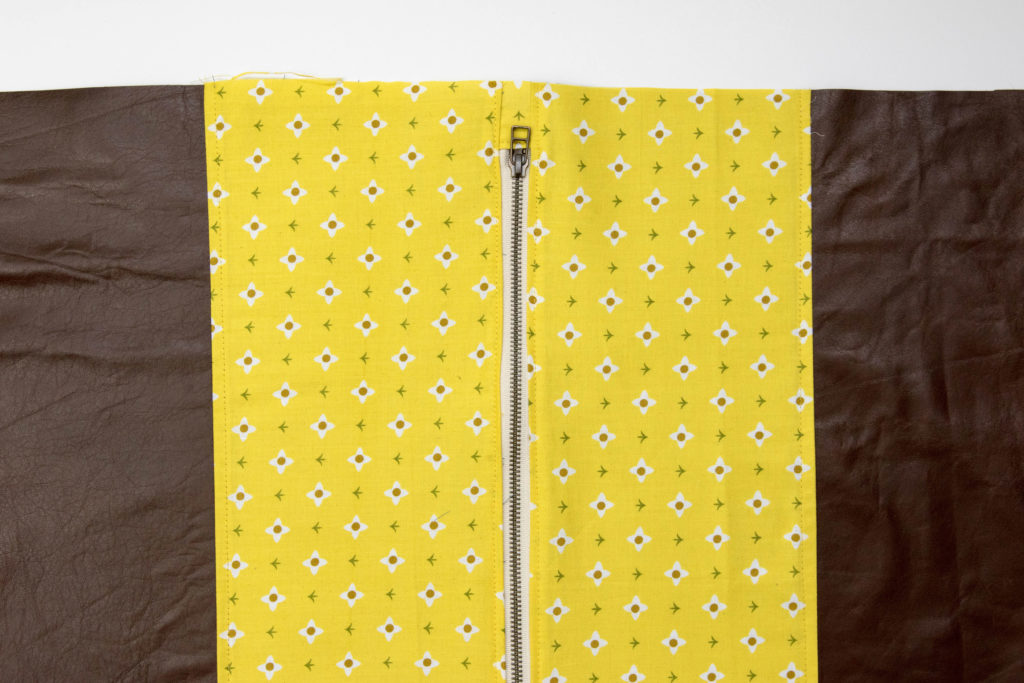
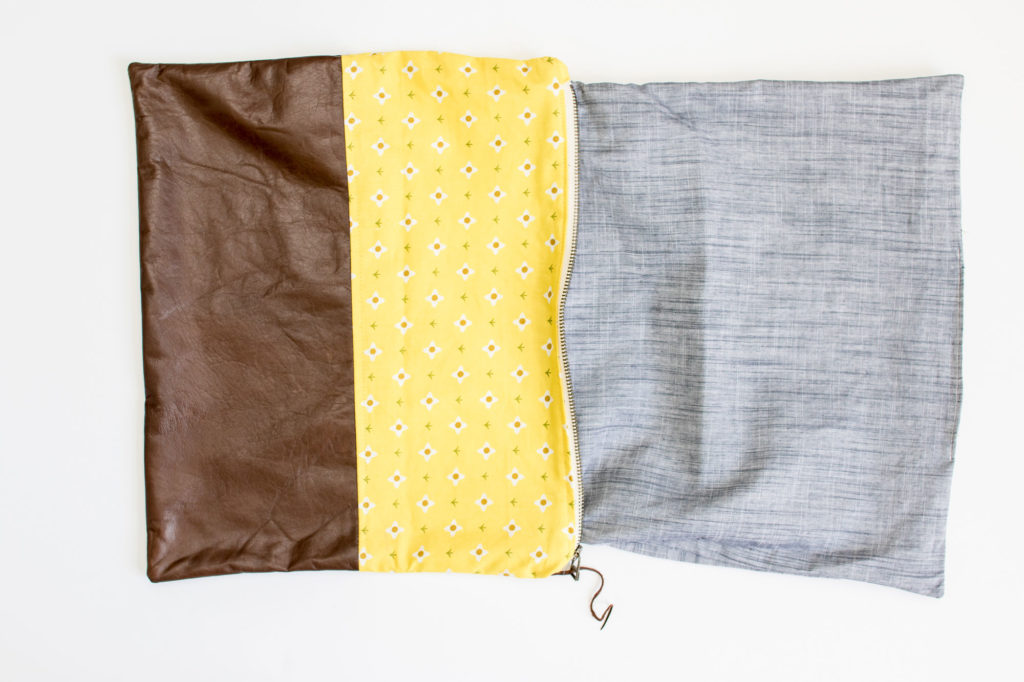
- Make a zipper sandwich. Lay one lining fabric, right side facing up, and then lay the zipper (right side facing up) on top of it so that the right edge of the zipper tape lies flush with the right edge of the lining. Next, lay your assembled shell, right side down, on top of the stack. Be sure that the contrast shell fabric is closest to the zipper and the leather is the fabric furthest from the zipper. Check to make sure that all corners of the lining and assembled shell match up. Pin through all three layers (lining, zipper, shell).
- Sew down the zipper sandwich. You won’t actually be able to see that you’re sewing along the zipper tape because the assembled shell covers it, but that’s what you’re doing!
- Press the assembled shell open. One side of your zipper should now be sandwiched between the assembled shell and lining, such that the wrong side of the assembled shell lies against the wrong side of the lining, and the seam allowances are hidden inside the sandwich. Be careful not to press the leather.
- Repeat step 1 with the other side of the zipper, the second lining, and the second assembled shell.
- Topstitch 1/8” away from the zipper on both sides.
Assemble the Clutch
Change your sewing foot back to the Teflon foot or regular sewing foot.
- Unzip your zipper halfway.
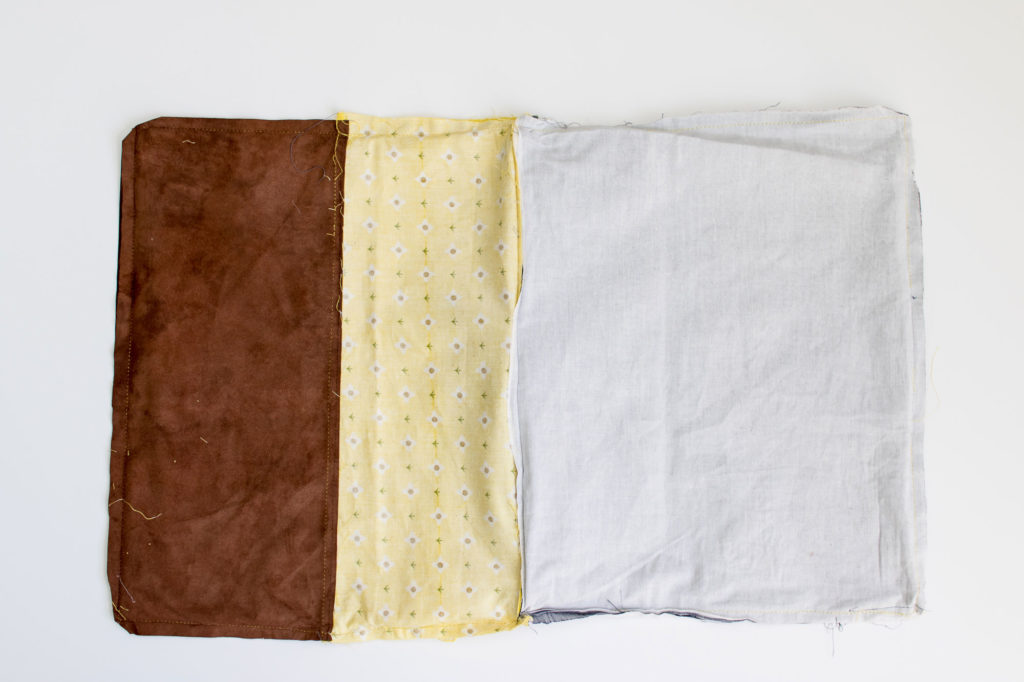
- Reorient your layers so that both lining pieces are on the same side of the zipper and both assembled shells are on the other side of the zipper. The lining pieces should be right sides together, and the assembled shell pieces should also be right sides together.
- Make sure the assembled shell pieces are all lined up, pinning as necessary (or clipping or taping for the leather). Sew around the remaining three corners.
- Make sure the lining pieces are all lined up, pinning if necessary. Leaving a 4” no-sew-zone along the bottom of your lining, sew around the lining.
- After sewing, carefully clip the corners.
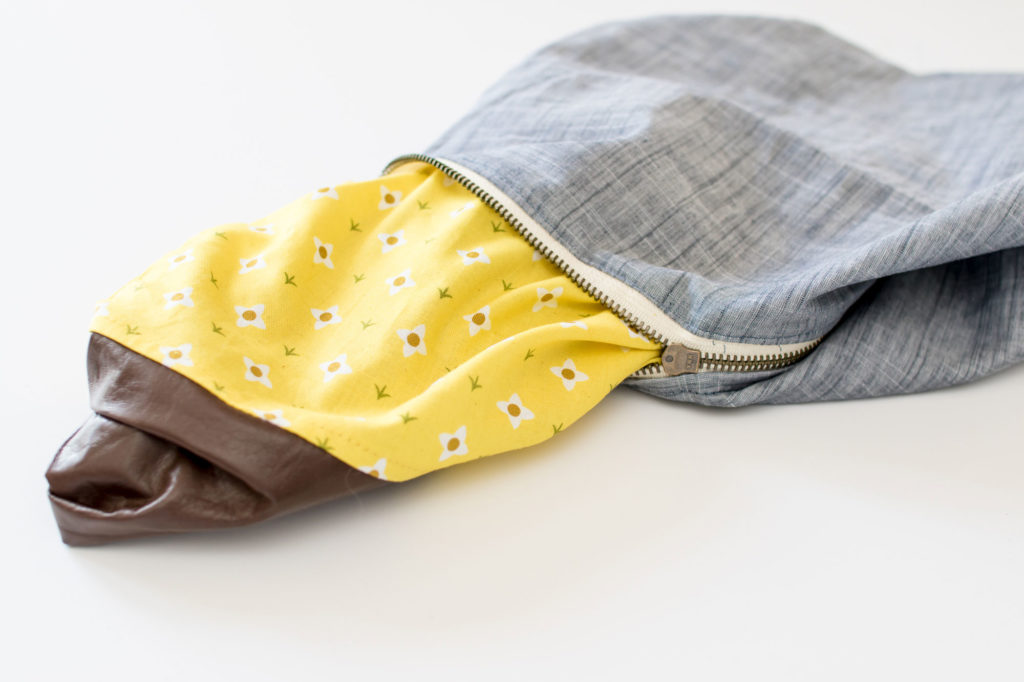
- Reach your fingers through the 4” no-sew-zone and past the half-unzipped opening between the two pieces. Grasp the shell fabric and tug it through the half-unzipped opening between the two pieces, and then continue to pull it through the no-sew-zone in the lining.
- Unzip the zipper entirely.
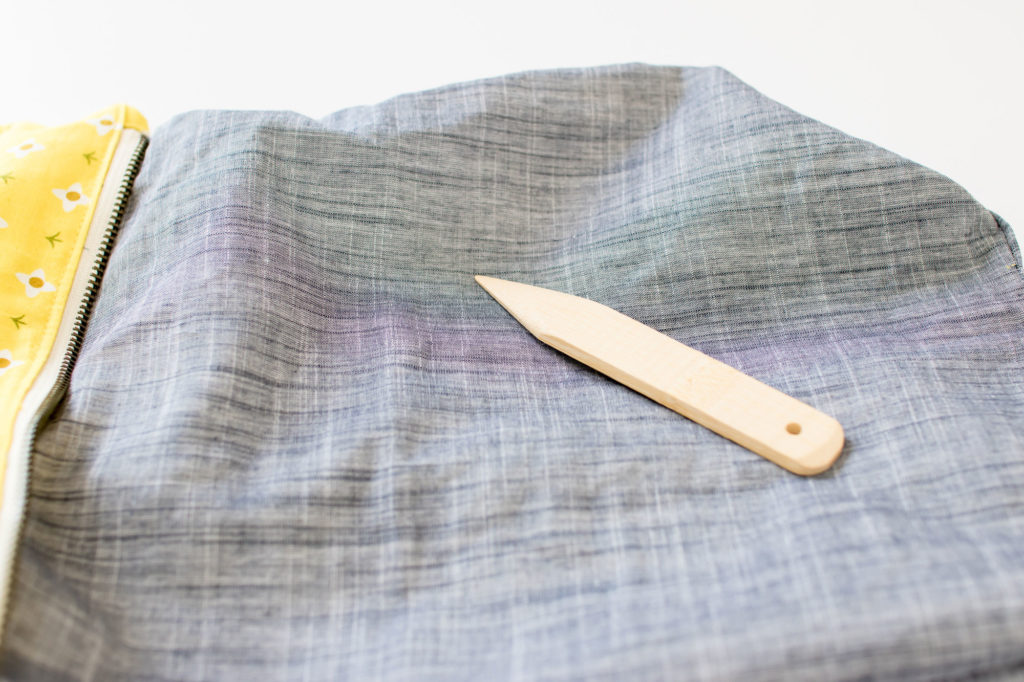
- Use the point turner to gently poke out the corners of the shell to give it a rectangular shape. Press the outside and the inside gently, avoiding the leather.
- Whip stitch the no-sew-zone closed or sew closed with a 1/8” seam allowance.
- Push your lining piece through the opened zipper piece.
- Close your zipper and fold the zipper portion over. Press once again if needed, avoiding the leather.

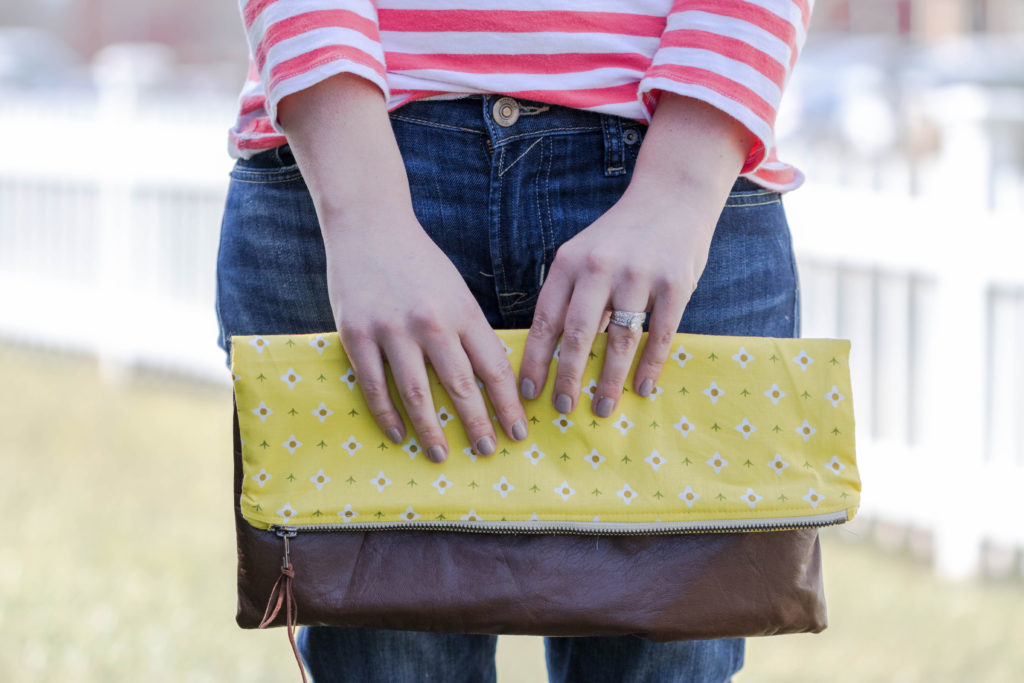
Making a garment to wear is one thing, but making an accessory you love is another. Each technique or each fabric we master gives us permission to be bolder the next time we tackle an unknown technique or fabric, and it might just be a great excuse to make leather clutches for everyone we know. Celebrating small sewing successes gives us the confidence to make bigger and better projects. What better way to celebrate the craft of making than by being brave and trying new techniques?

About the Author
Stefanie is a freelance writer, photographer, stay at home mom, and college student. When she isn't writing or taking photos, she can be found reading, sewing, or hoarding yarn while dreaming about going out to dinner.