Sign In
Last month, we talked about the alchemical process of turning scraps into gold by first recognizing the value of discarded textiles. This month, we’ll transform these scraps into compositions of their own making—a collaboration with the leftovers of former projects.
We will release the need to control our creative work, and ask ourselves, what if we loosened up our grip on the results? What if we chose to move with the shapes we discover and allow their forms to speak to the final composition?
Playing with our discards and reviving our previous projects' waste sends us on a journey through a forest of creative possibilities. Staring into our collection of pre-existing cuts of fibers, we are no longer in full control; but the beauty and expansion that awaits us on the other side of this experience are well worth the time.
The ogres and monsters we encounter on this journey tell us we’re not productive. They tell us we’re not really creative and to stop wasting time. I’m not here to tell you the ogres are wrong... but I can tell you if you continue to listen to them, you’ll drift further and further from your own creative agency. Here’s why.

Creativity Thrives in Playtime
I feel blessed to have learned to approach creative work not as an opportunity for productivity but as an opportunity for exploration. The weekends of my childhood were a time for playing with textiles—my mom was off work, the paints and fabrics and craft supplies were out, and we allowed whatever was inspiring us to show up on fiber and paper.
Through this playtime, I learned not to be too attached to the process of making. It became a natural part of my existence, and it’s what I return to regularly when I'm feeling out of balance.
I took these experiences for granted; as an adult, I realize these days were not what everyone got to live. I was told how to do a few things, but I was rarely told I was doing them wrong. Experimentation was embraced, mistakes were more than OK—they were expected—and play was the name of the game.
Through this playtime, I learned not to be too attached to the process of making. It became a natural part of my existence, and it’s what I return to regularly when I'm feeling out of balance. Stitching and making—and learning new methods of making—are ways to feel your own potential for transformation. Playtime will color future endeavors by allowing us to gain a deeper understanding of our materials.
Scientific research shows that play is integral not only in the development of a child's brain but also in developing resiliency and problem-solving skills for adults. Brene Brown—qualitative researcher of shame, vulnerability, and ultimately wholehearted living—was shocked when she discovered that embracing play was consistent across the board in those who live wholeheartedly.
How to Play with Fabric Scraps
So today, I’ll share with you how I like to play with my scraps.
We’ll take our most popular color range from last month’s scrap organizing and turn these pieces into our very own recomposed scrap patchwork.
If you feel you need an end goal to work towards, you can plan to turn your recomposed textile into a quilt, or use a simple and streamlined Seamwork pattern—like the Sawyer skirt or the Samson top—to create a garment with these recomposed fabrics.
For both of these techniques, I generally use wovens of similar weights. Sometimes I start with a plan for how big the finished patchwork will be–especially if I plan to make a garment out of this—but mostly, I allow the scraps I have to dictate the size of the final piece.
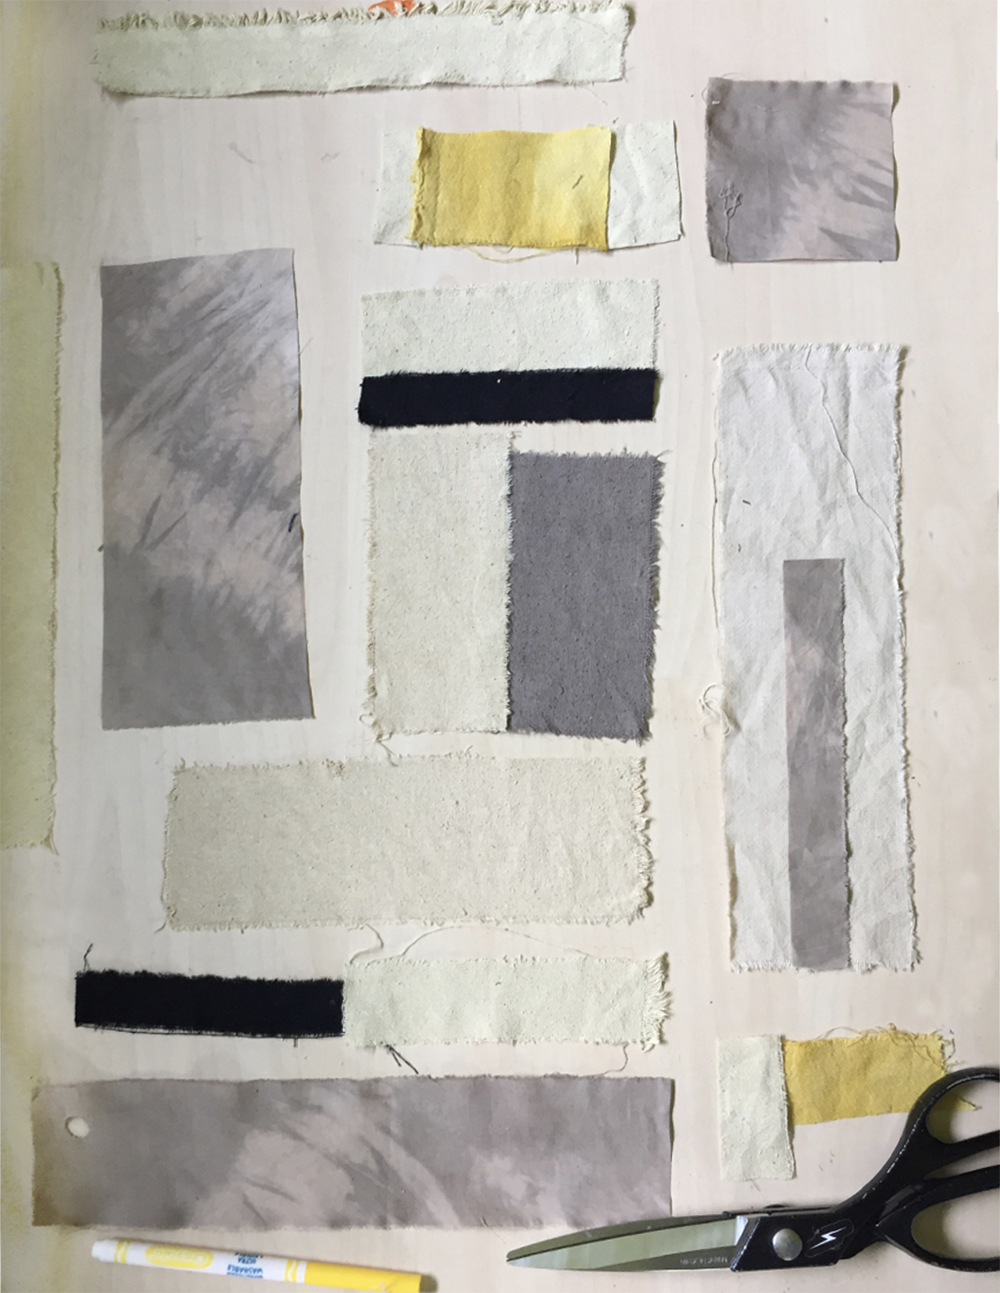
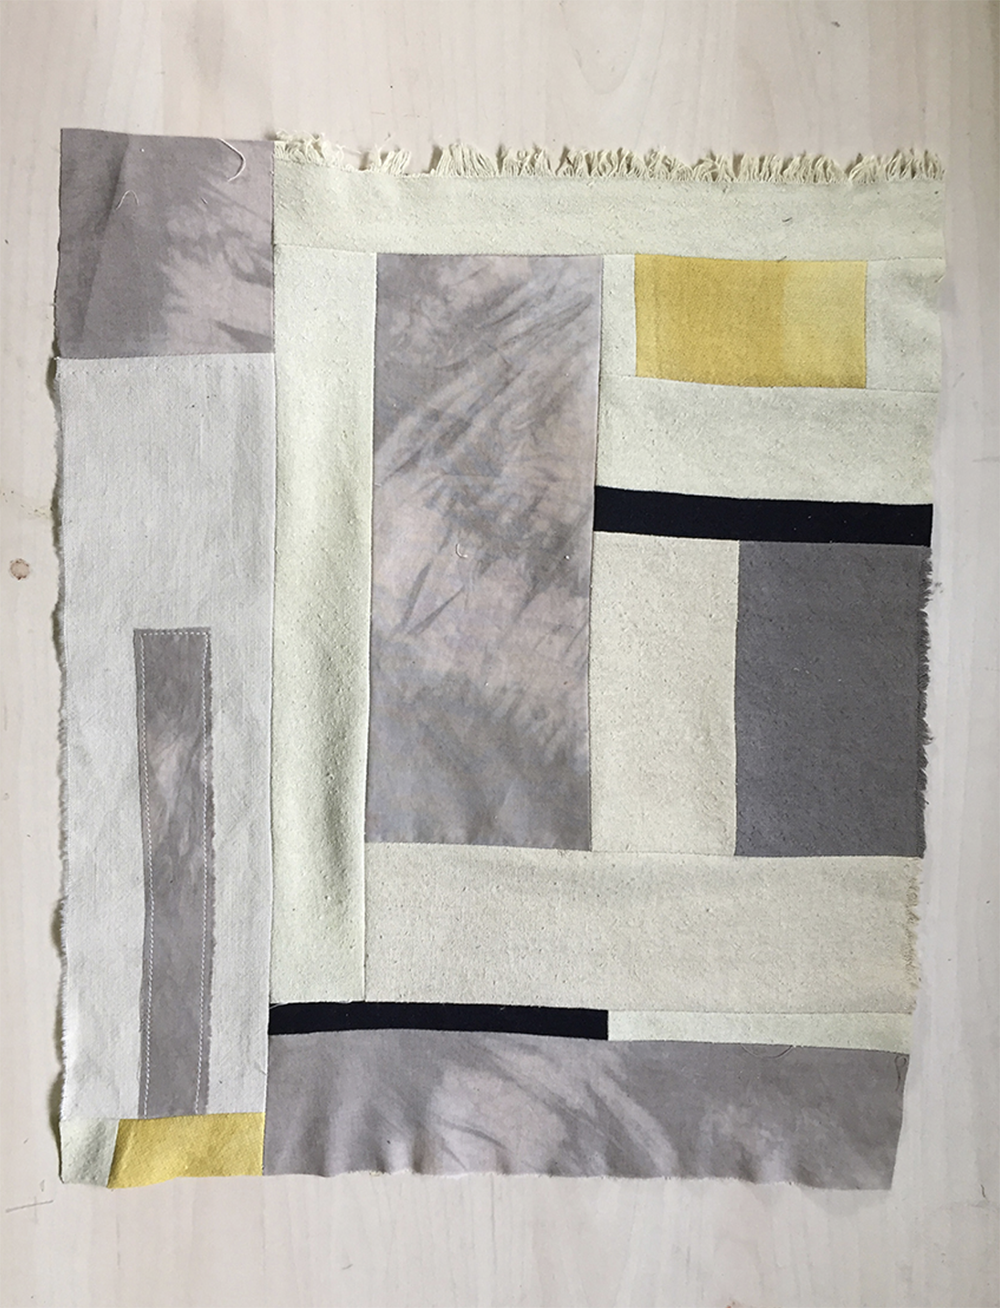
Recomposing Scraps: The Squares and Rectangles Technique
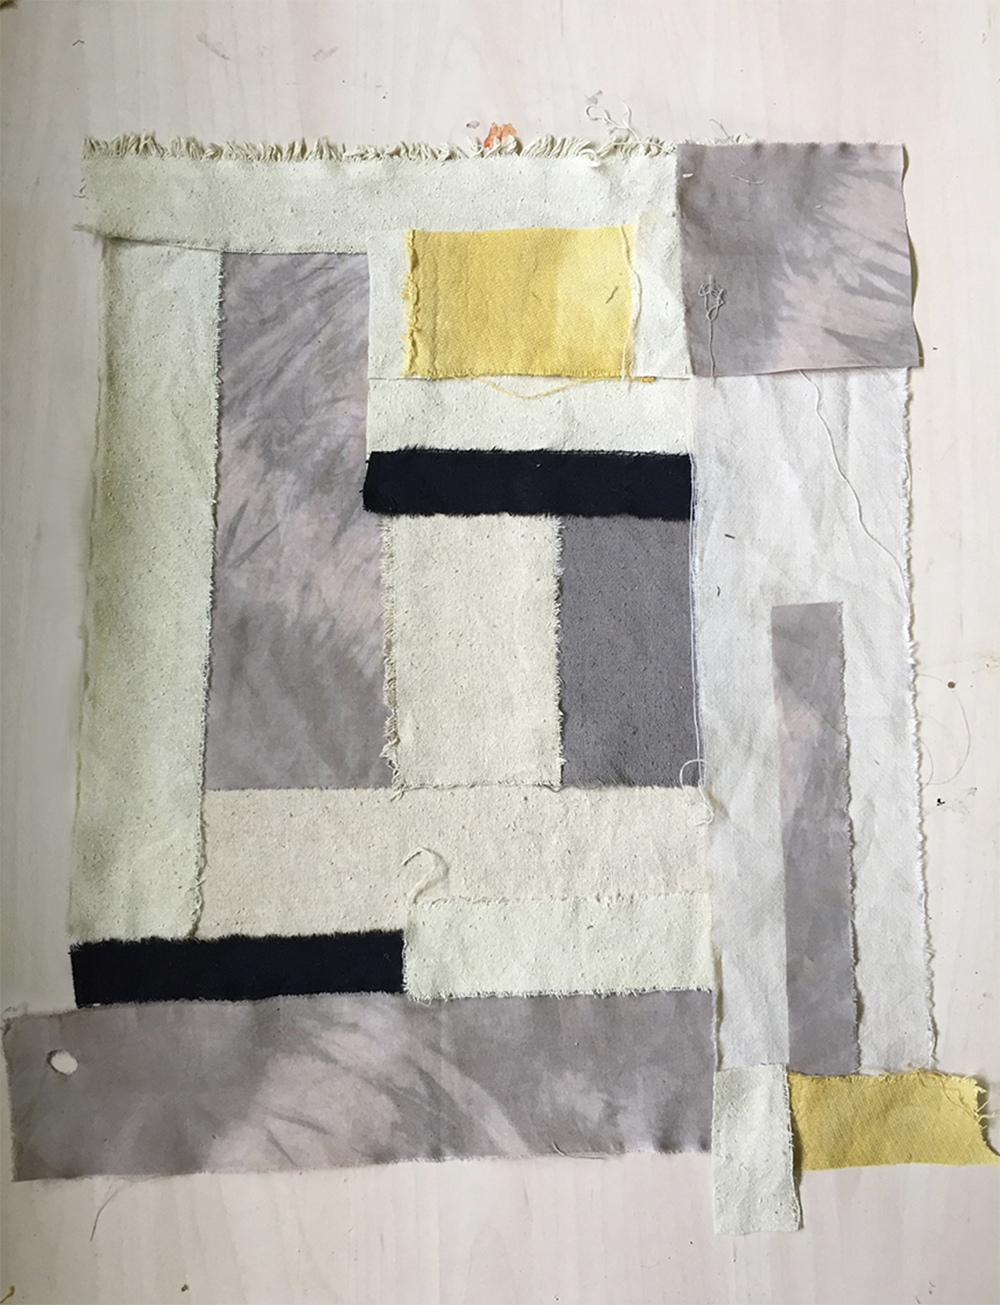
- After gathering scraps in a pleasing color palette, trim off any random edges, so you are left with rectangular pieces of fabric. This makes the assembly so much easier, so you only have to sew straight seams (not any strange and unexpected curves). I use the snip-and-rip technique to be sure all the edges of my scraps are on the grain.
- Press fabrics flat for easy layout and sewing—you can do this all at once or as you go.
- Start to arrange these rectangles on a flat surface near your sewing machine. As you lay them out, be sure to overlap the fabric's edges about 3/4 inch to account for seam allowance.
- Turn the pieces in different directions, and play with how different fabrics look next to each other. Find scraps of similar length to sit next to one another. Don’t be scared to cut pieces down; doing this means that a certain color or fabric will show up multiple times in your finished patchwork. Again, I use the snip-and-rip technique.
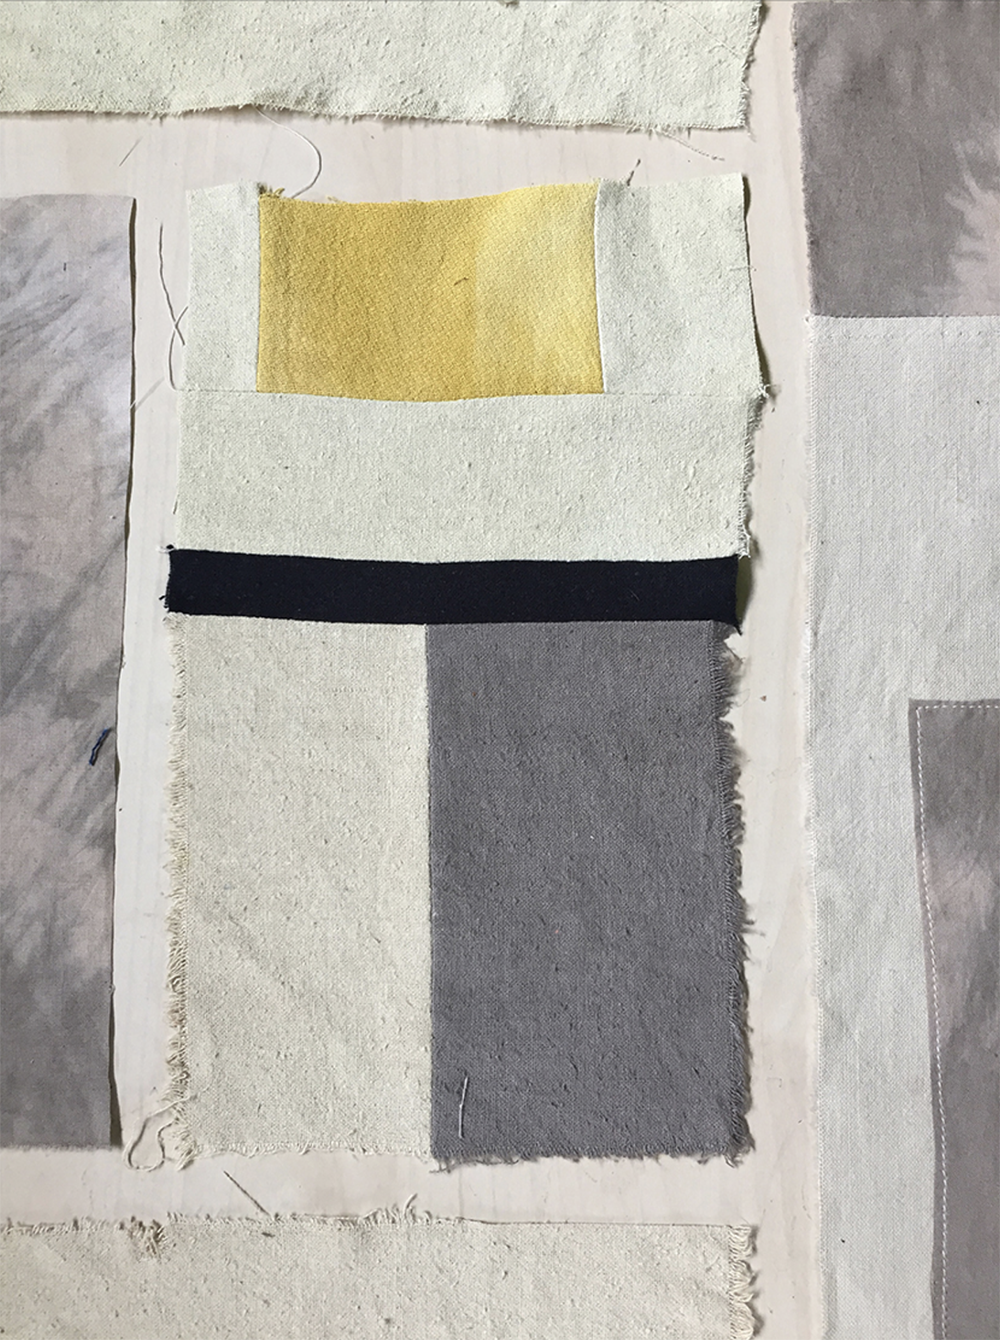
- Within a composition, I usually have one or two accent fabrics that are brightly colored, printed, striped, or textured in some way. I like to use these sparingly, but somewhat frequently, throughout the design to give. It gives the design a little more dimension, like the black and yellow fabric in this patchwork.
- As you start to nail down your composition, begin to sew the pieces together. Depending on your arrangement, you’ll start by sewing together the smaller elements to create larger pieces, then stitch these larger panels together.

- After stitching a seam, press open—or if you’re clean finishing the seam allowance, overlock and press to one side—returning it to the layout after it's been stitched and pressed. Continue until you’re all out of scraps in your layout.
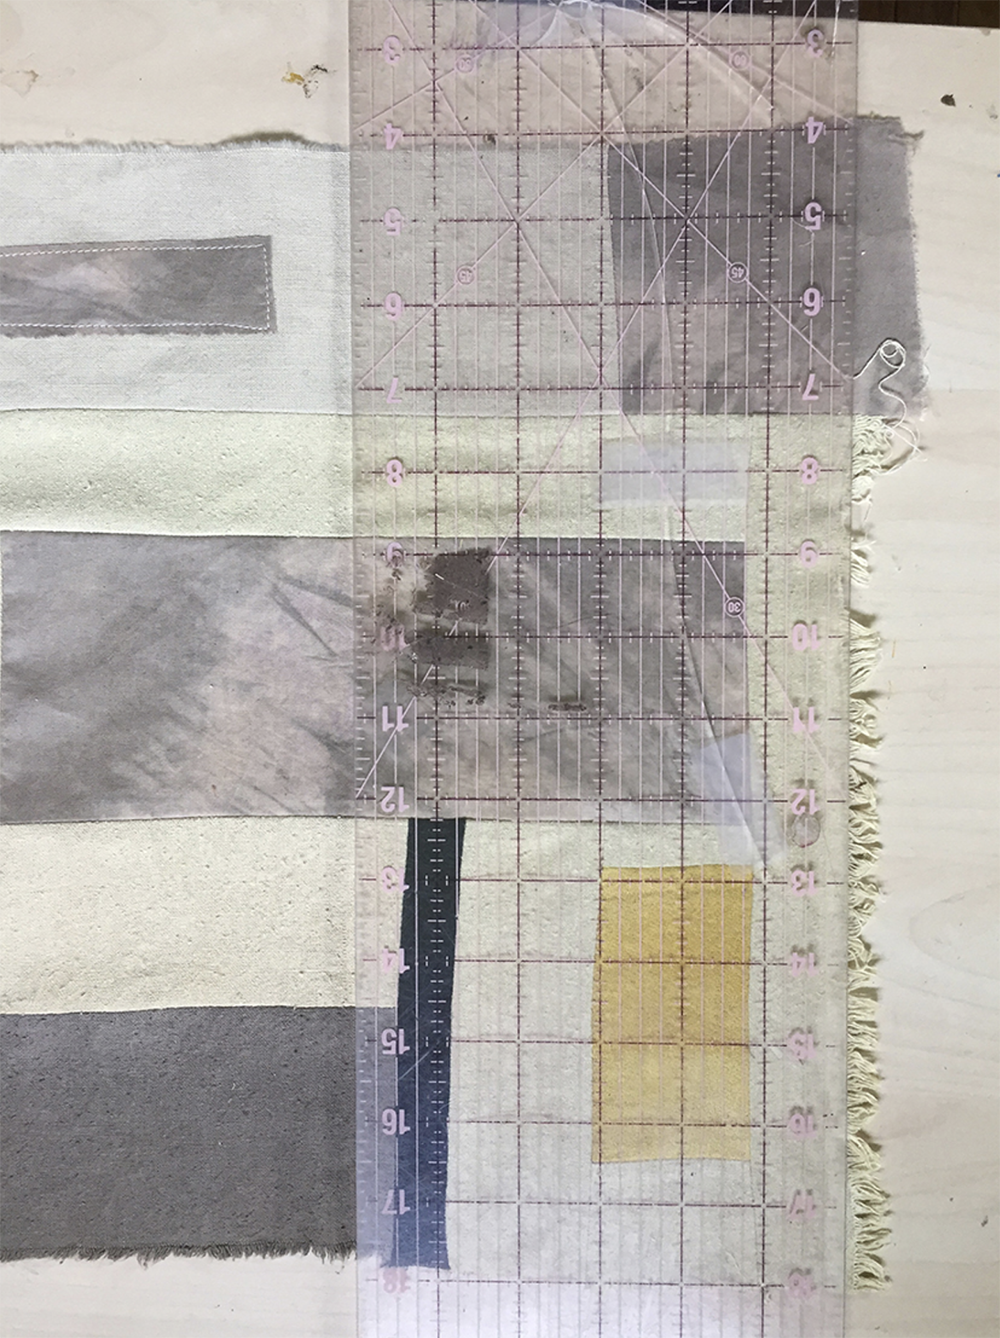
- Using a large straight edge, mark and trim edges of your final composition, and you’re all ready to go—hooray!
Hooray! All done.
This simple squares-and-rectangles patchwork technique is just the beginning of reviving textile scraps.
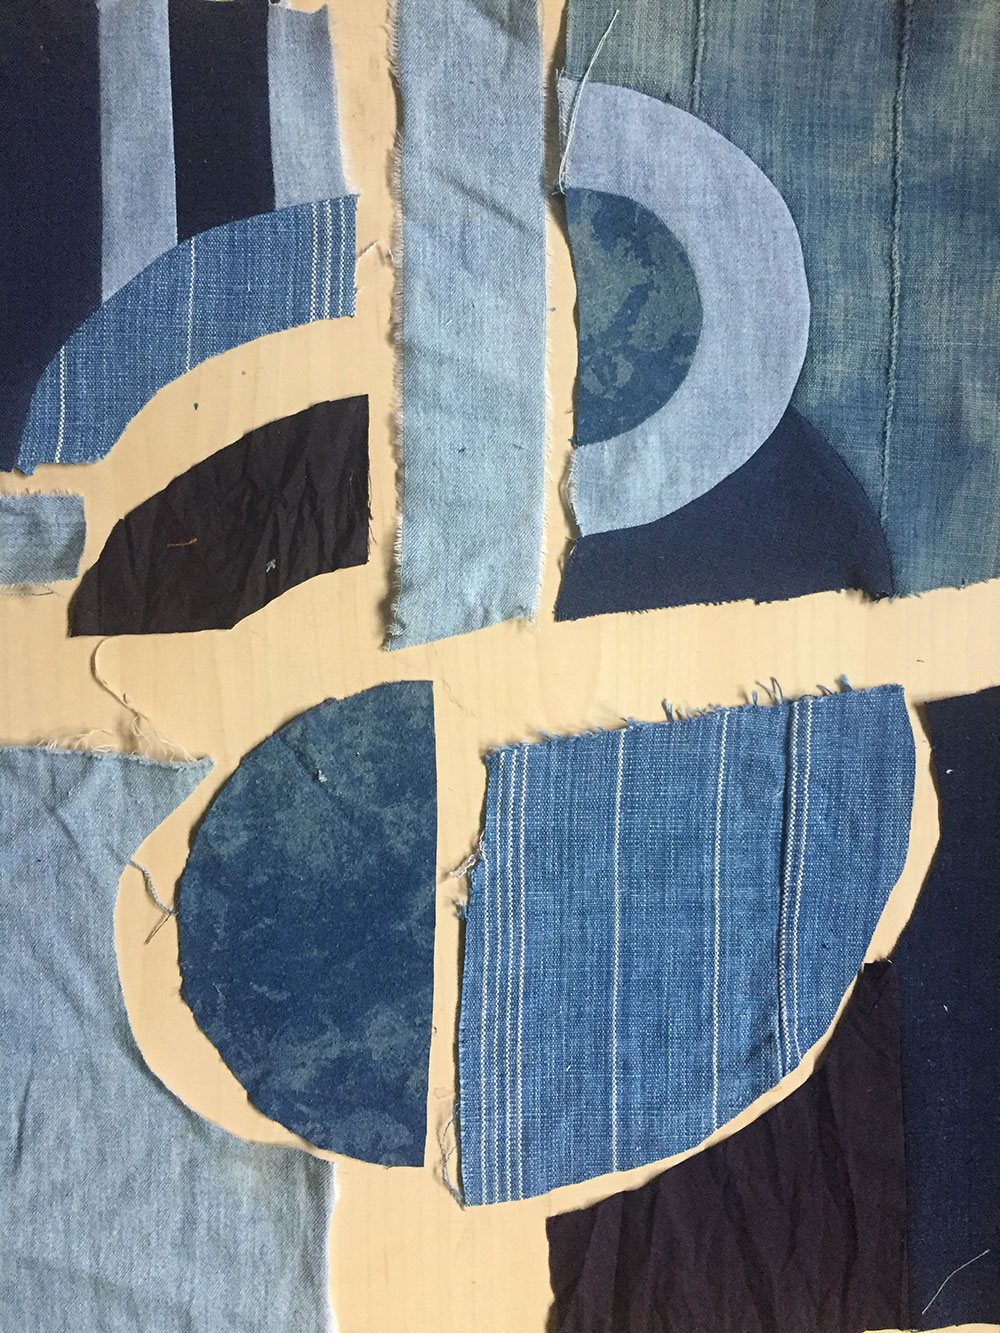
Recomposing Scraps: The Template Technique
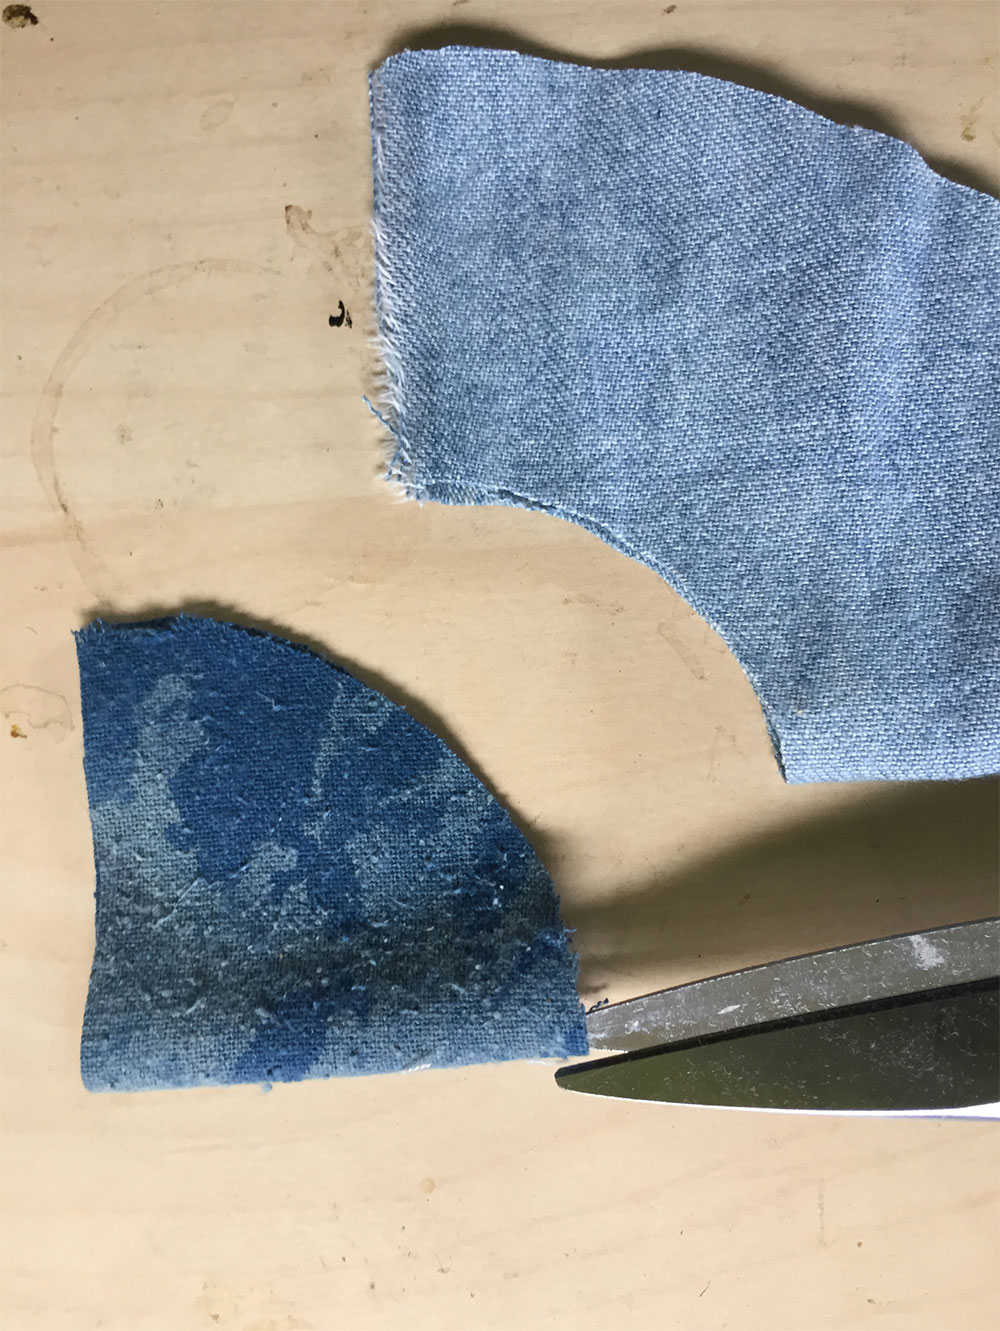
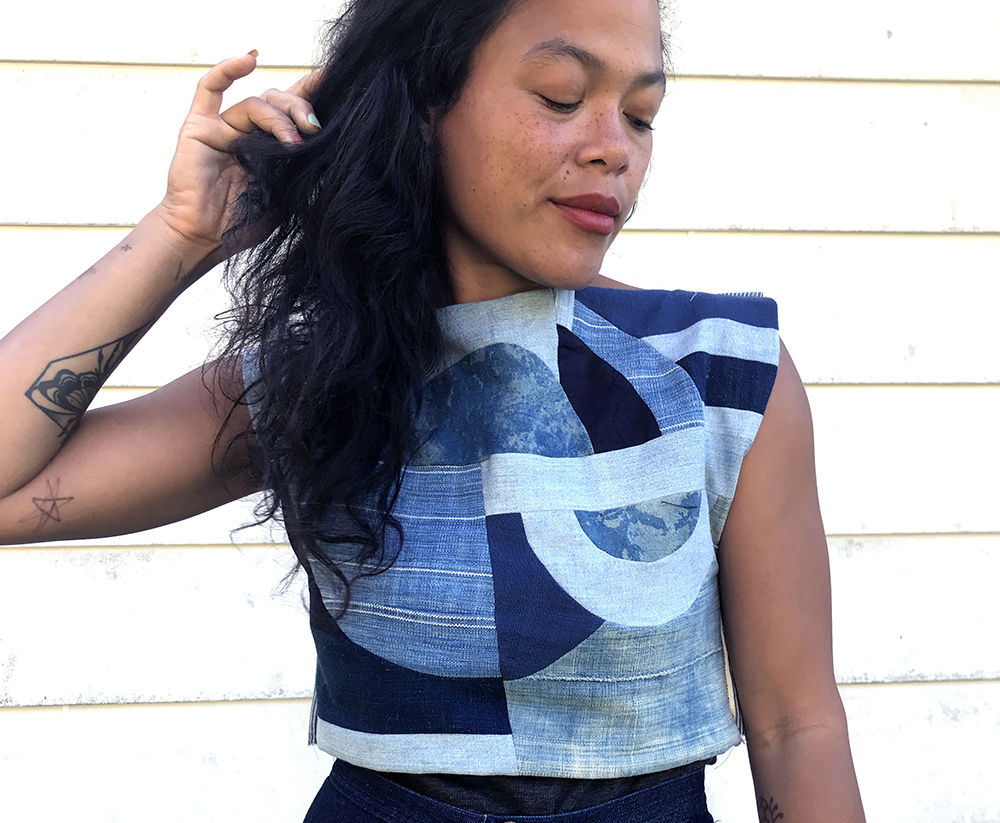
When creating this second patchwork technique, I collected a bunch of oddly shaped scraps. I didn’t want to use the rectangles and squares method, so I decided to play with the circular shapes and arcs I found on my scraps. Since circles aren’t exactly easy to stitch, I had to make a few paper templates.
I call these templates and not patterns because they do not include seam allowance. This means you don’t need any fancy patternmaking techniques, you don’t need to do a bunch of cutting and taping and revising of pattern pieces, but you DO need to remember to add seam allowance when you’re cutting them out!
I usually write “ADD SEAM ALLOWANCE” on all templates for this reason.
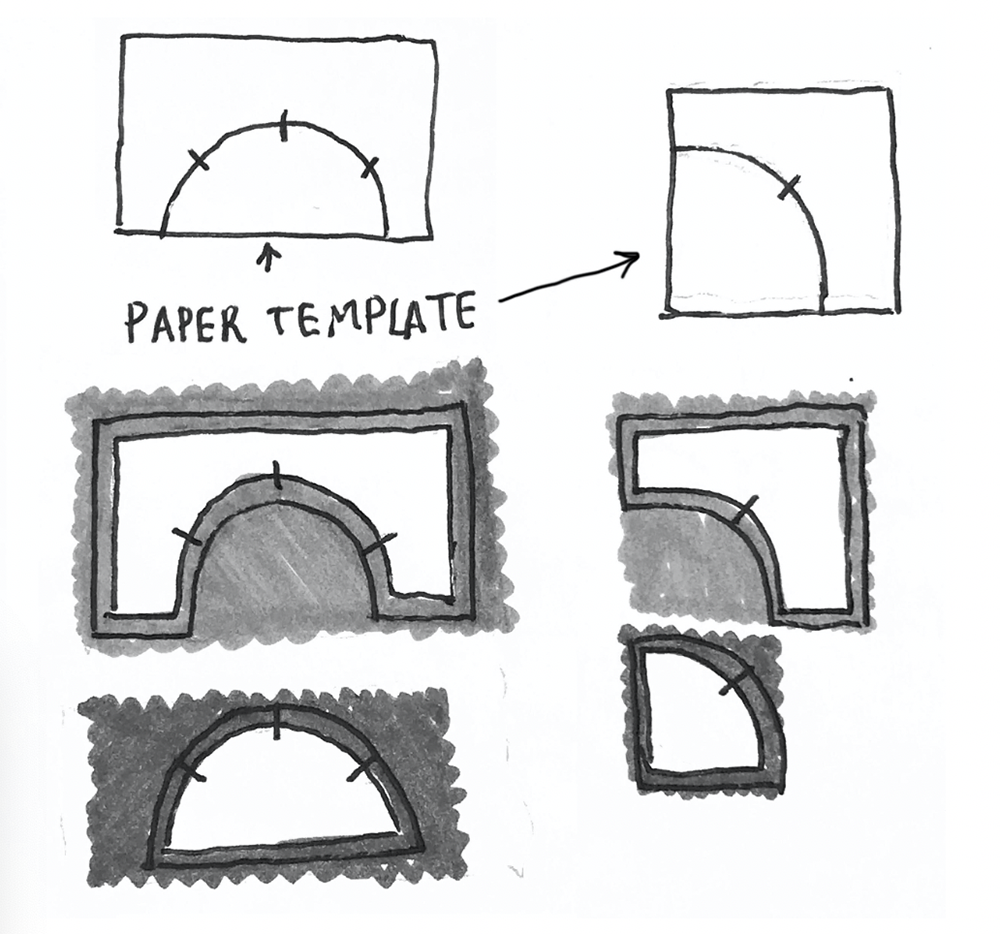
- Using a piece of scrap paper the same size as the piece of fabric (junk mail is perfect for this), draw a half- or quarter-circle shape. You can use a compass, or trace the opening of a cup, jar, pot, or any other round object to get the right shape.
- Mark this circle at a few points along this line with an intersecting line as shown in the illustration—these are notches that you’ll transfer to your fabric—then cut on this circular line.
- Place your template over fabric and trace, adding 1/4-inch to 3/8-inch seam allowance (I use more seam allowance for thicker fabrics that are more likely to fray). You can use a clear ruler to do this, or you can trust your eyeballs and wing it—my personal choice. Mark the intersecting line on the seam allowance area of the fabric.

- Cut out fabric, and make a small snip into the notches that you’ve marked, being careful not to snip past the seam allowance.
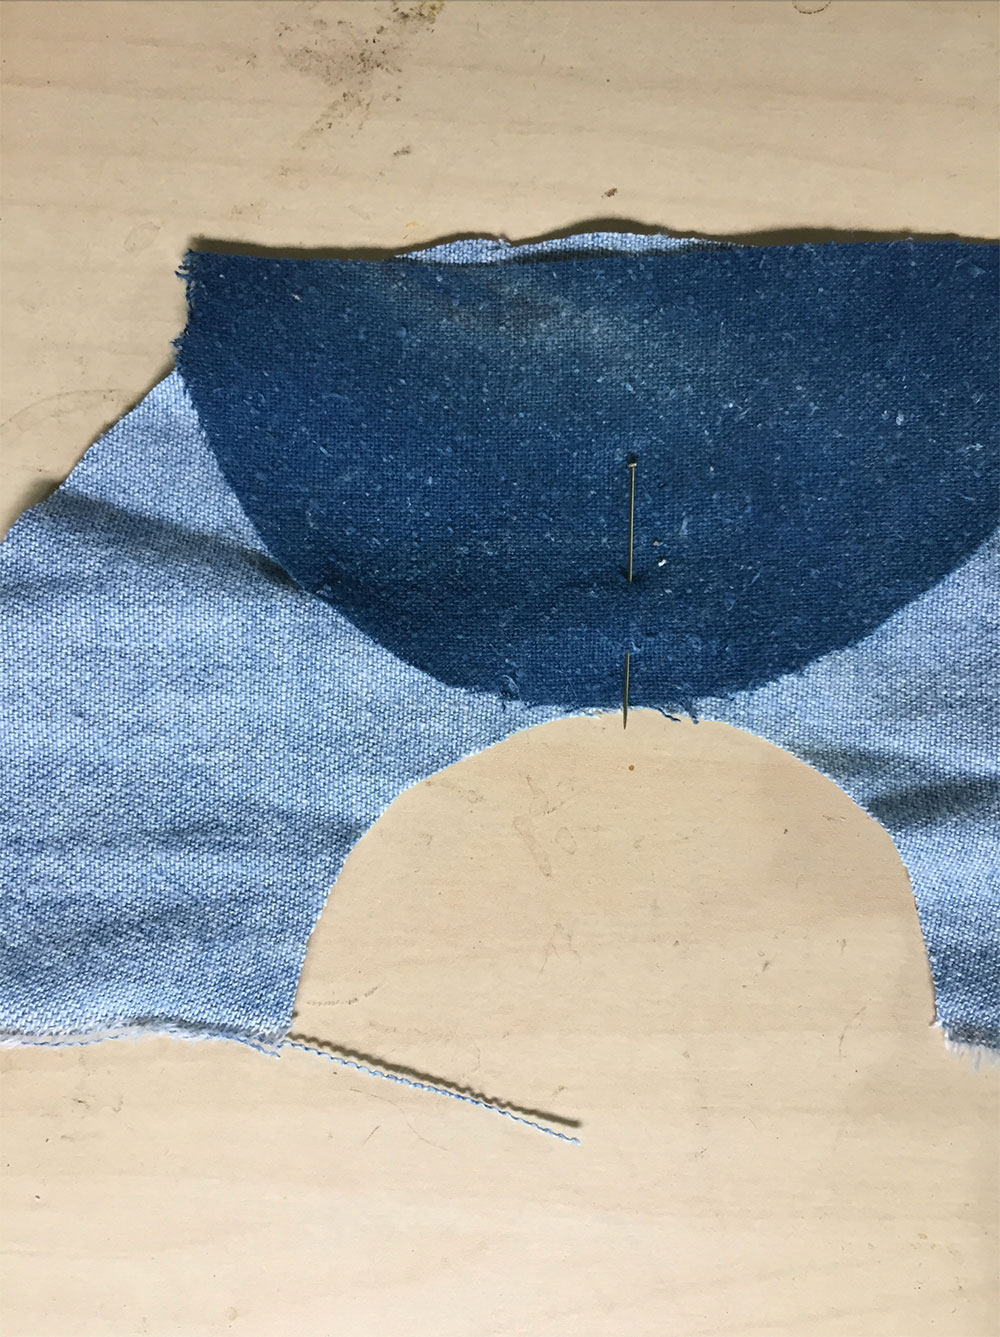
- Pin edges together at these notches and the ends, with edges parallel.
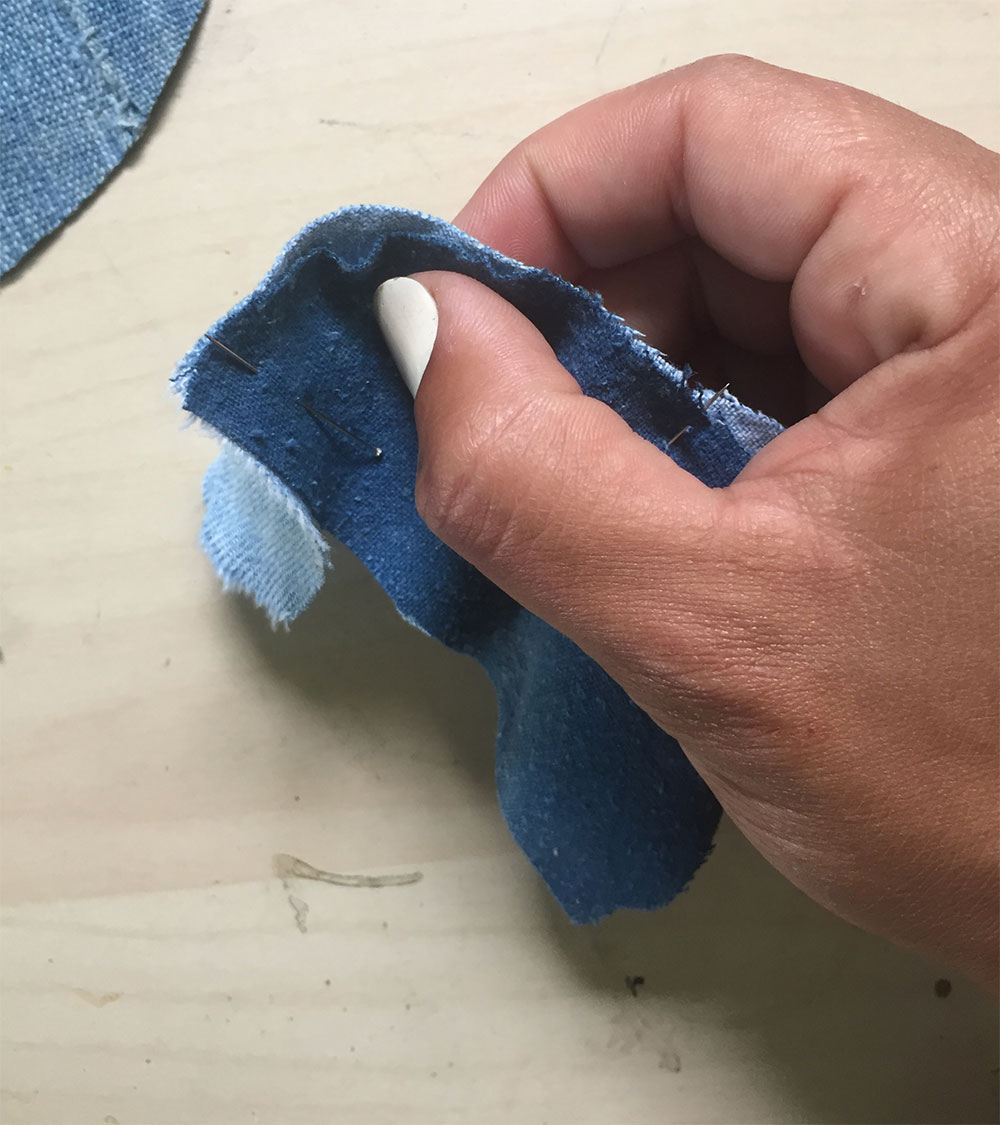
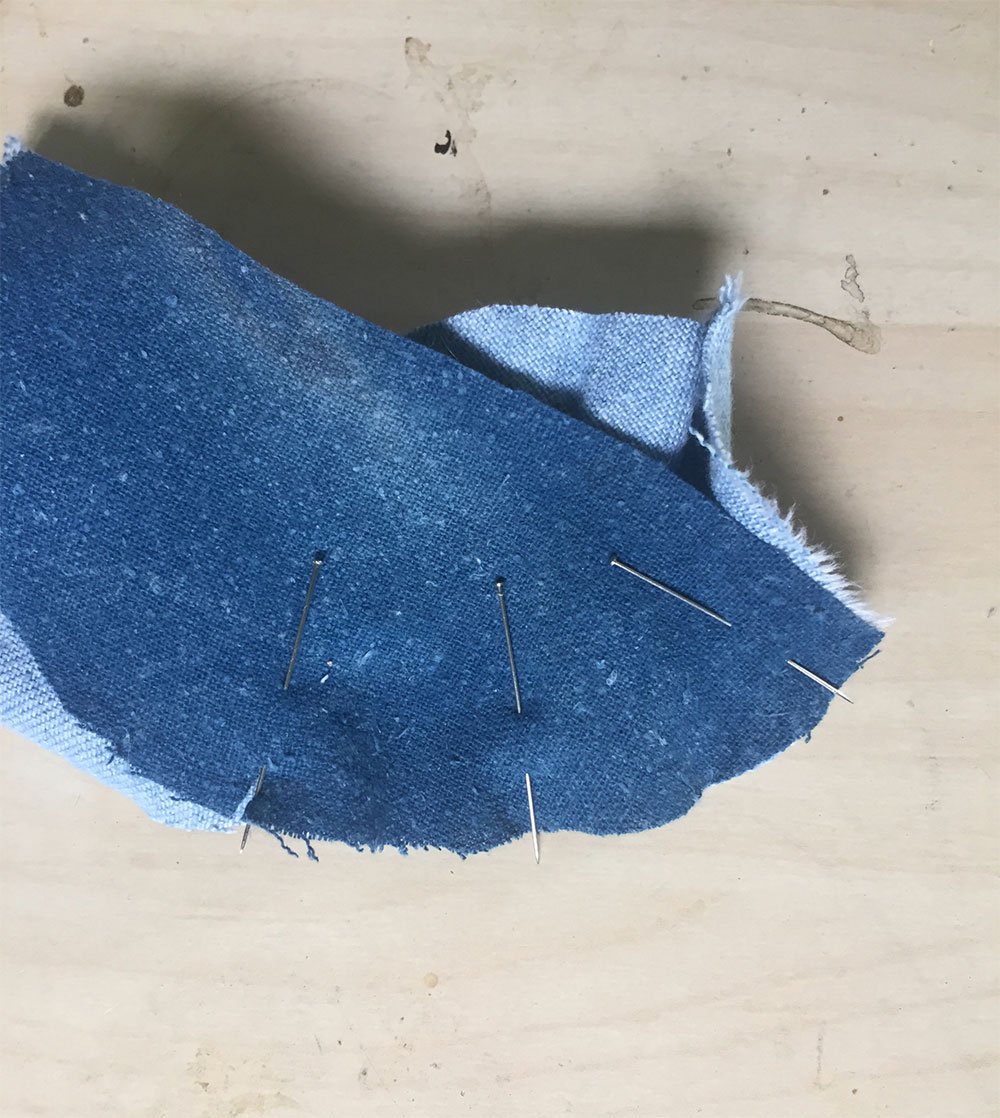
- Stitch the edges together. Sewing tight curves usually means you’ll need to slightly stretch the fabric on the arc's outer edge to match the fabric on the inner arc.
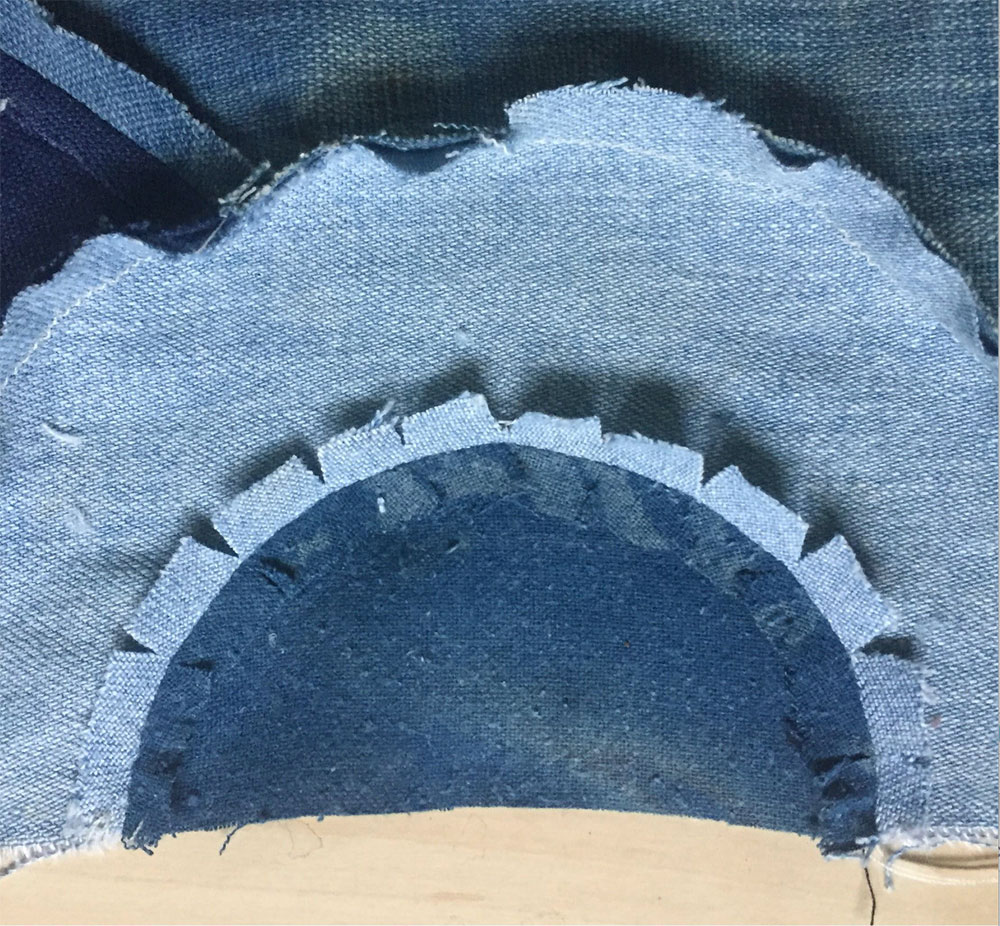
- After sewing, snip into the seam allowance on both sides to release the tension, then press flat.
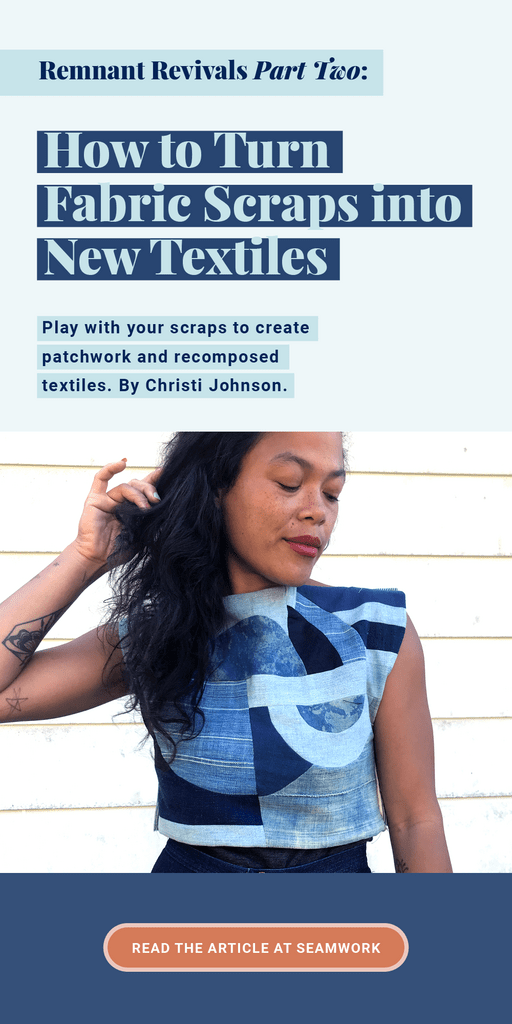
I chose to turn this patchwork into a little crop top, but it could easily be a pillow, or I could have kept going and made a dress.
I hope you enjoy releasing expectations and engaging in a little playtime patchwork process. I’ll be back next month with more playful stitching adventures, and I'll share some of my favorite ways to turn clothing into personalized works of art through embroidery! In the meantime, check out my online journal and snag some free stitching resources—go to www.mixedcolor.net for more.

Christi Johnson
Contributing Writer
Christi Johnson is a textile artist who combines cosmic visions expressed through embroidery with natural dyes, creating a hypnotic dance of symbols stitched slowly and methodically into botanically infused fibers. She works from the belief that through creating with textiles, our most intimate of personal belongings, we recognize our powers of transformation in all areas of life. Visit Christi at Mixed Color.