Sign In
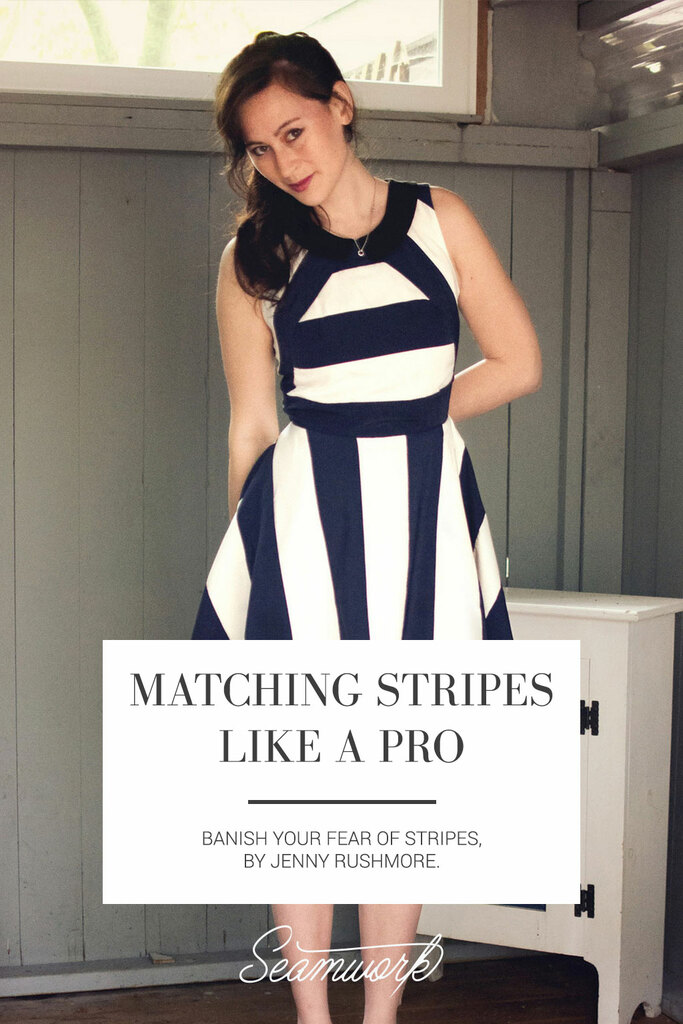
Stripy garments are timeless—throw on a navy Breton shirt with a pair of jeans and you’re all set for a stylish brunch, and a dress in a thick watercolor stripe is classic but quirky. Whether you like them thick or thin, bold or subtle, it’s easy to end up with a wardrobe full of stripes. However, they can be a challenge to sew! As sewists, we want to have perfectly matching stripes but it can be tricky. In this article, I’ll take you through several different methods for stripe matching—and then we’ll have some fun with alternative stripe inspiration!
Accurate Cutting
The most important part of stripe matching actually happens before you start sewing! If you cut your pattern pieces very accurately, you are on your way to beautifully matching seams.
The Importance of Grainlines
It’s important to lay out your fabric very carefully: especially with knits and silk, it’s easy for the fabric to go off grain and the stripes will no longer be straight or parallel. Some tips to try:
• Use as large a surface as you can (the floor can work!) so your fabric can lay totally flat.
• If you have a suitable surface, you can pin the selvages of the fabric down to secure them.
• If you’re cutting a shifty fabric like silk, sandwiching it between two layers of transparent tissue paper will help stabilize the fabric and stop it from moving off grain.
Occasionally you’ll find that a fabric has stripes that have been printed off grain, which is very frustrating. If you’re making a fitted garment, you might be able to get away with cutting your fabric slightly off grain so that the stripes still look even. But if you’re making a garment with drape or a flowy structure, these will twist or buckle if they’re off grain, and you’re better off finding an on-grain fabric.
How To
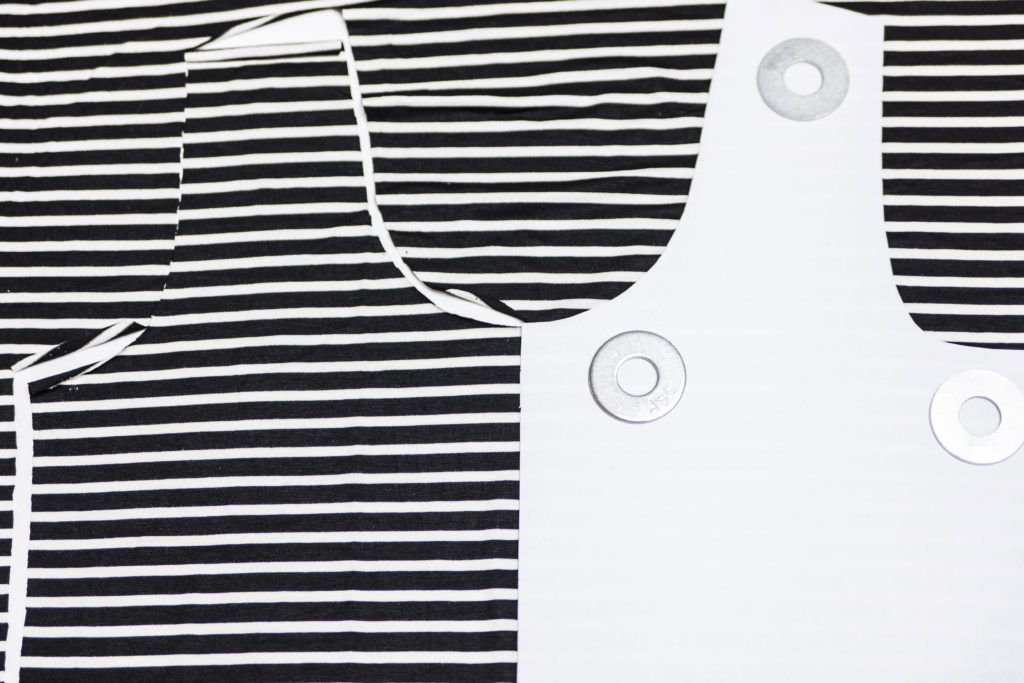
While it’s common for pattern instructions to tell you to fold fabric and then place your pattern piece on top and cut through both layers, it can be hard to get a great stripe match using this technique. Instead, cut on the flat. The following steps assume you’re trying to match side seams, but the same approach works for any seam.
Step | 01
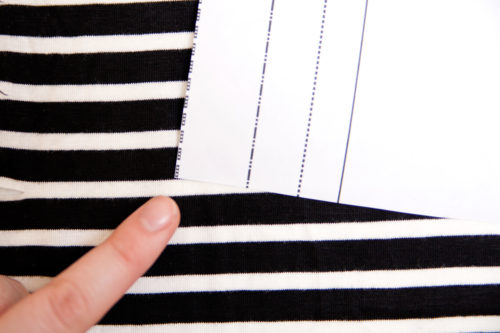
Place your front pattern piece on your fabric and secure with pins or weights. Align the top of the side seam (the underarm) with the top of a stripe.
Step | 02
Trace around the piece using chalk or a fabric marker, and make a mark at the top and bottom of the center front.
Step | 03
Carefully flip the front pattern piece over, keeping the center front and bottom at the markings you made. Do a quick visual double check: Make sure the top of the side seam is still at the top of the same stripe, the bottom is parallel, and that the shoulders look like mirror images of one another.
Step | 04
Trace around this second side and then cut out your pattern piece.
Step | 05
Take your back pattern piece and follow the same approach, lining up the top of the side seam with a stripe, marking, flipping, and marking again. If there are notches on the side seam, make sure they’re hitting the same stripe on the front and back.
Step | 06
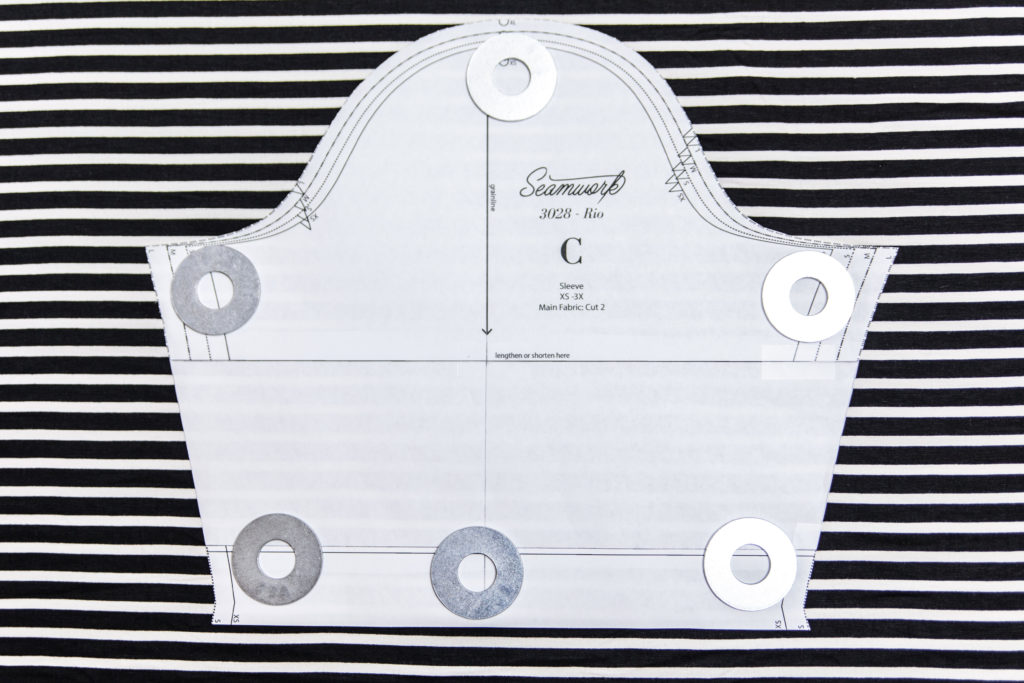
If your garment has sleeves and you want to continue the stripe across the sleeves, line up the bottom of the sleeve cap with the same stripe that you used to align the top of the side seam, as shown.
Special Considerations
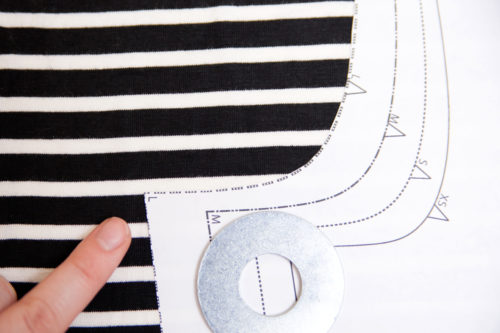
If you’re using an irregular or unusual stripe, try tracing your pattern piece onto semi-transparent paper (like Swedish tracing paper or medical paper), then placing it over the pattern and draw the stripe or fabric pattern directly on to the pattern piece. Now, when you flip it over, you can see exactly where your stripe landed and make sure the second side is directly aligned underneath the markings you drew.
If you’re cutting smaller pieces that are placed along a stripe, like a t-shirt neckband, consider using a ruler instead of your pattern piece. Neckband pieces can be fiddly and small, but if you measure the dimensions of the piece you can draw it directly on to the fabric with chalk or a pen for a more accurate result.
If you can’t cut on the flat, cutting on the fold is possible, it just takes a little more attention. When you fold the fabric make sure the stripes are going perfectly parallel to the fold, and pin each strip together at the selvage. As stripes can easily “wobble” between the fold and selvage you may even want to put multiple pins through both layers to make sure the stripes are parallel all the way across the fabric. Lay your pattern piece on the fold, and then double-check the stripes are parallel by sticking a pin through at crucial points (like the top of the side seam and the bottom hem corner) and checking that it’s at the same point in the stripe pattern on both sides.
Prepare for Sewing by Lining up Your Stripes
As fabric tends to shift a little bit as it is sewn, securely basting or pinning your seams is absolutely essential for perfectly matched stripes. Remember, that you want to align the stripes at the stitching line, not the edge of the cut fabric, which is especially important if you have a curved seam. Here are two approaches:
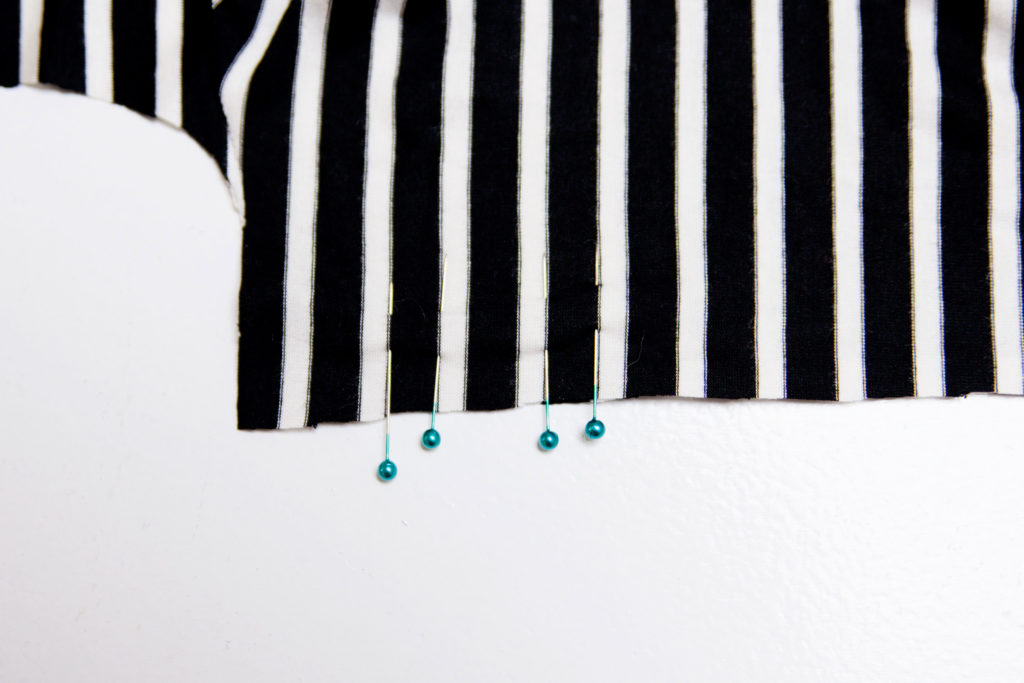
Using Pins
Sewing with stripes takes extra pins—pin twice, stitch once! If you want even more security, use Clover double-pronged pins (designed for quilting), which are extra secure.
Step | 01
As you pin, place one into every stripe down your seam—if they’re wide stripes, you can even pin the top and bottom of each stripe.
Step | 02
Look on both sides of your fabric to make sure the stripes are lining up.
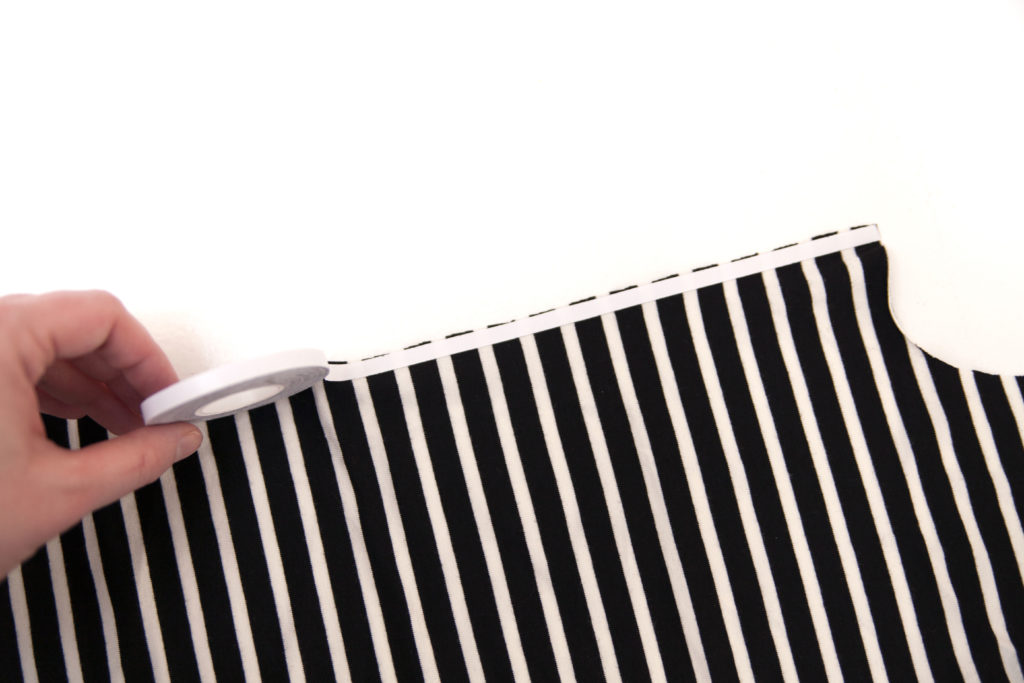
Double-Sided Basting Tape
Double-sided basting tape, like wonder tape, is a temporary tape that washes away once the garment launders.
Step | 01
Place tape along the seam allowance of the right side of one pattern piece.
Step | 02
Bring right side of second pattern piece to meet first pattern piece along edge so that the two pieces stick together along the seam allowance.
Step | 03
Check to make sure all the stripes align. If it’s not perfect, unpeel and re-position.
Sewing
Patience is the name of the game once you get to sewing! It’s better to take a few deep breaths and accept it may take a few goes to get it right rather than rushing in.
Baste first. Use a long stitch on your sewing machine, or hand-baste using silk thread, to sew the seam first.
Check to see if the stripes are perfectly aligned. If they are: great! If not, it’s easy to unpick the seam and try again.
Once everything looks good, adjust your stitch length to a regular length stitch (if you machine-basted) and re-sew the seam.
If you find it difficult to keep the two layers of fabric aligned as you sew, consider using a walking foot. On most sewing machines, the feed dogs underneath the presser foot move the fabric through the machine, and as a result they tend to move the bottom layer ever so slightly faster than the top layer, which can cause stripe slippage. To avoid that, use a walking foot presser foot, which has a second set of feed dogs on top and will feed the fabric through evenly. If you own a Pfaff machine, the IDT system works in the same way.
Having Fun with Stripes
Of course, we don’t always have to obsess about stripes matching up! There are plenty of fun ways you can play around with stripes.
Intentional Mis-Matching
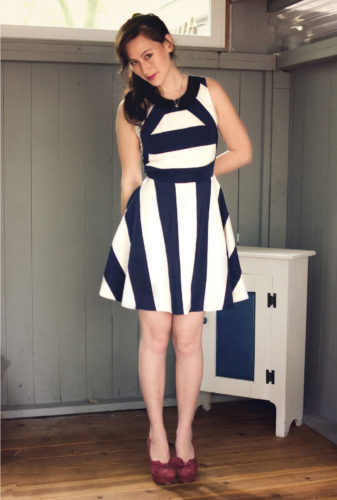
If you have a bold striped fabric, you might want to try intentionally mis-matching the stripes, like staggering the stripes at a side seam or using different striped fabrics for different parts of the garment.
Change up the Stripe Direction
If you’re using a garment that has panels, like a color-blocked t-shirt or a shirt with a yoke, you can play around with the direction of the stripes. How about a horizontally-striped shirt with a vertically-striped yoke? Or a sundress with a horizontally-striped bodice and vertically-striped skirt? Just bear in mind that with knit fabrics, you should be aware of the direction of the stretch, so only use the stripe cross grain in an area of a garment that doesn’t have to stretch for fit, like the skirt of a gathered or pleated dress.
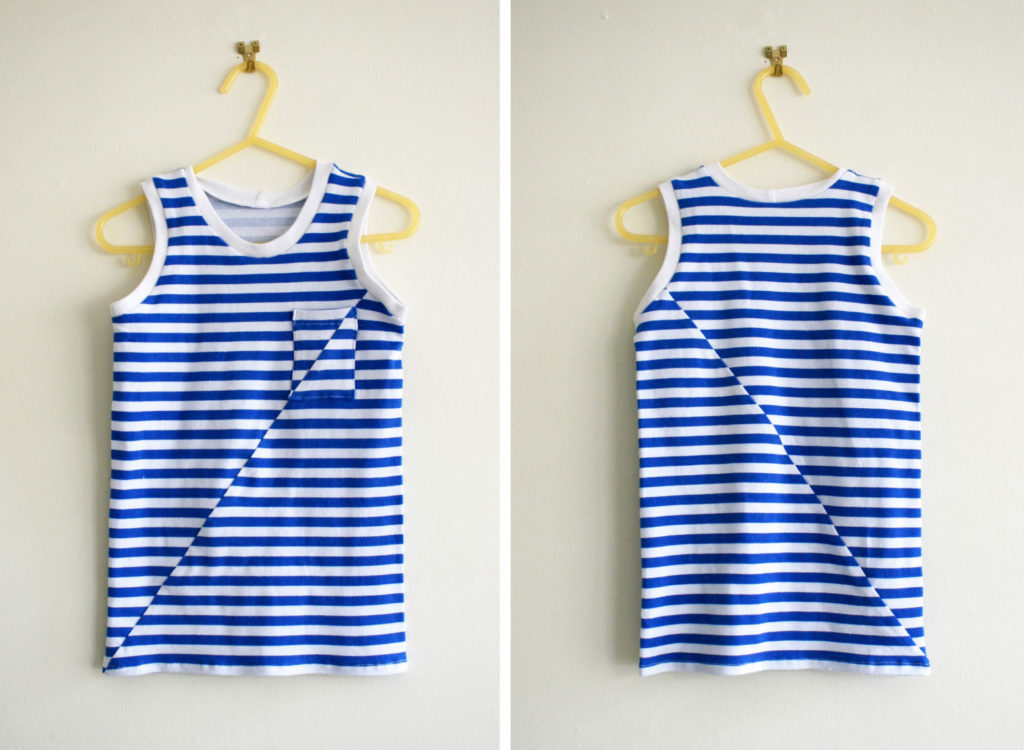
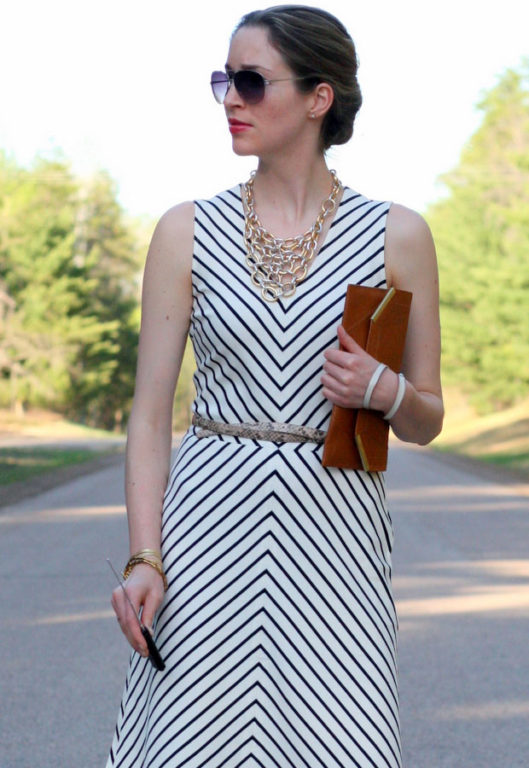
Bias Stripes
Using stripes on the bias can create a very dramatic effect! You can even use them on panels to create a chevron effect. One easy tip for making easy chevron panels is to first sew two large pieces of fabric into a chevron, and then place your pattern piece on top and cut it with the center of the chevron at the center of the pattern piece. Much easier than doing it the other way around!
Getting a perfect stripe match can be intimidating, but with the right tools and preparation, you’re well on your way to sewing the striped garments of your dreams. Best of all, once you begin you’ll find that playing with stripes opens up a whole new world!

About the Author
Jenny Rushmore is the founder of Cashmerette Patterns, the first modern sewing patterns designed for curves, in sizes 12–28 and cup sizes C–H. Originally from Scotland, Jenny now lives in Boston, Massachusetts, where she follows her passion of helping women find body positivity through sewing.