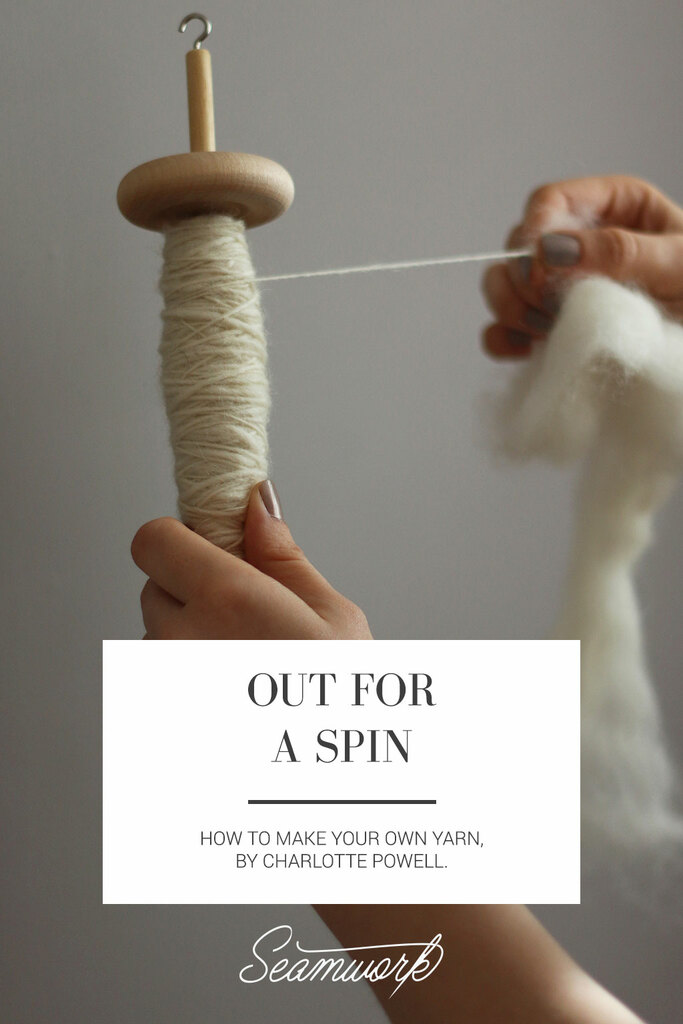
Sign In
Many of us began exploring a yarn craft (in my case knitting) using cheap acrylic yarns for fear of messing up. As we grew more confident we began paying attention to our materials, taking as much care selecting yarns as selecting patterns or projects. But at some point, we itch for more. For me, I didn’t just want to create with yarn. I wanted to create my own yarn. By learning to construct yarn I also learned a lot about its properties, which demystified questions like: which yarn is best to use for what kinds of projects, and why? I was also able to create unique, high-quality yarns that elevated my knitting projects to a new level of handmade goodness.
This article shows you how to purchase and wash your fleece, process the fibers so that they’re ready for spinning, spin the fiber to create individual strands of yarn, and finally how to twist those individual strands together to create plyed yarn (yarn where there are multiple strands twisted together). We’ll cover the full process, start to finish, but you can jump in at any point along the way, depending on the amount of time you have.
Working with Fleece
If you’d like to begin right at the very start, an unprocessed fleece is the place to start. The easiest place to purchase one is in person at a yarn show, or via a farmer who supplies fleeces. Woolsack maintains a list of stockists of British fleece, and Ravelry is a great source of information. If ordering internationally, check your country’s regulations regarding the import of raw fleece.
Warning: unwashed fleece is quite dirty and smelly. If you’re squeamish I would advise buying a washed fleece or skipping straight to buying your fiber in roving or top form.
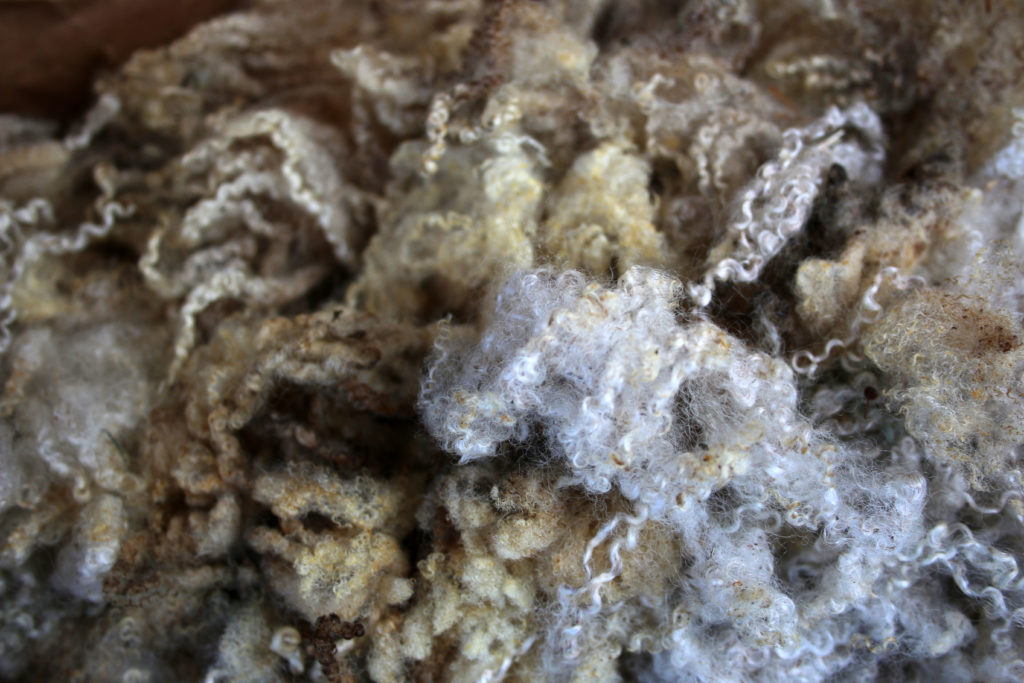
Because the fleeces of different sheep will handle differently, it is best for beginners to select a sheep breed with a medium length wool, as wools with particularly long and short staple lengths are more difficult to spin. Look for sheep such as Blue Faced Leicester, Romney, or Corriedale.
A good fleece for hand spinning should easily pull apart, and it should be possible to see right through it. It should have already been skirted, meaning that the less desirable wool and dirt has been cut away, but unwashed fleece will still contain dirt and vegetable matter (like hay or straw). The wool will also feel greasy due to the lanolin that is naturally present in wool.
Give It to Me Straight:
Spinning Vocab 101
Worsted: Type of yarn where the fibers run parallel to the length of the yarn. Produces a yarn that is less elastic but stronger and less irritating to the skin.
Woolen: Type of yarn where the fibers run perpendicular to the length of the yarn. Produces a yarn that is very springy and has more bounce, but weaker and more irritating to the skin.
Carding: Preparation method for creating woolen yarn (hand carding is covered in this article).
Combing: Preparation method for creating worsted yarn (this method is not covered here).
Wool staple length: The length of the wool fiber, which impacts spinning speed and yarn quality.
Lanolin: A wax secreted by sheep that protects the animal’s skin and wool from rain and the environment.
Rolag: A small roll of fiber.
Roving: Ready-to-spin strips of fiber (lets you skip the washing and carding steps). Also used for felting. Typically used to create woolen yarns.
Top: Ready-to-spin fiber (lets you skip the washing and carding steps). Typically used to create worsted yarns.
Washing
For those working with unwashed fleece, the next step is to wash the fleece. I used a traditional washing method that involved fermentation, but you can also use your washing machine for a twenty-first century update on this ancient tradition. The most important thing during washing is to not accidentally felt your fleece. Felting is caused by a combination of temperature change and agitation, and can be avoided by: 1) handling the fleece as little as possible while wet, 2) preventing water running directly onto the fleece, and 3) allowing water to drain out of the fleece rather than wringing it.
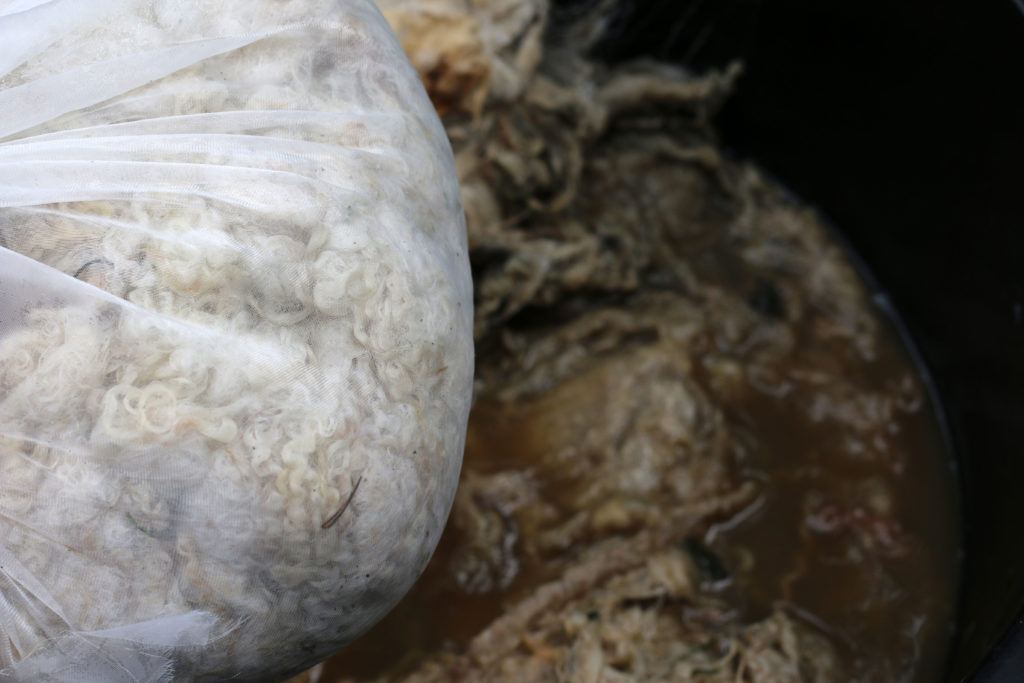
Fleece undergoing the suint fermentation method (below); fleece after it has been rinsed (above).
To wash my fleece, I used the suint fermentation method, which is a traditional washing method where the suint (sweat) and lanolin in the fleece are broken down biologically. I soaked my fleece in lukewarm rainwater for 5–7 days; ideally this should happen in a warm location such as a greenhouse (indoors should be avoided due to the smell). When you smell a strong farmyard smell and a scum forms on the surface, remove the fleece from the rainwater and wash it with soap and water, rinse it, and then allow it to dry thoroughly. Finally, store it in a cotton or paper bag, which will allow the wool to breathe.
If you don’t have the space or stomach for the suint fermentation method, fleece can also be washed by hand or machine (carefully on the most delicate settings) with a wool-safe detergent and very hot water (lanolin starts to melt at 35°C/95°F, so you’ll want temperatures above that).
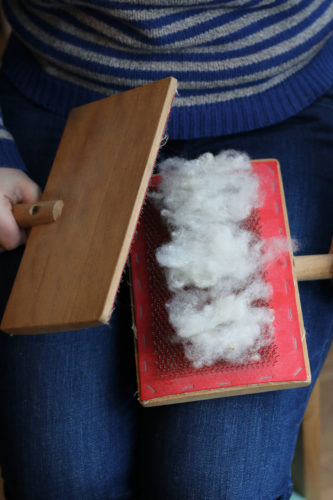
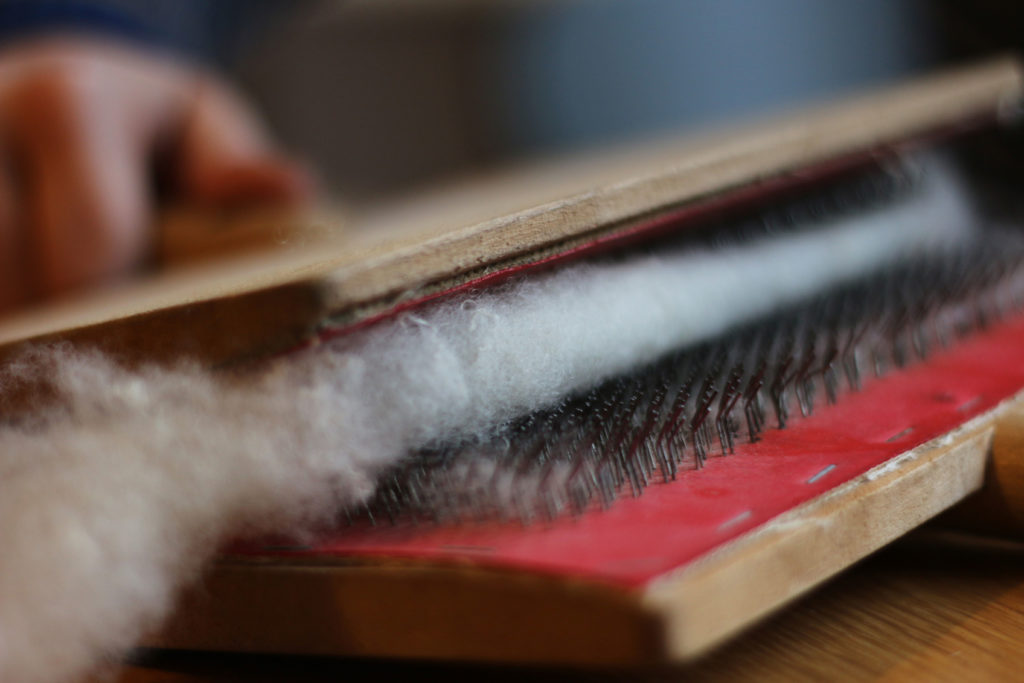
Carding

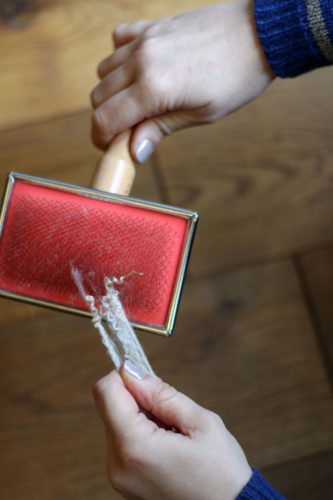
Working with a pair of hand cards (left) will produce a rolag (a small roll of fiber; right).
Now your fleece needs to be brushed to separate and straighten the wool fibers, so that it can be spun into yarn. This article covers the basics of hand carding, which will align all the fibers in the wool in the same direction. The main tool required in carding is a pair of hand cards. Hand cards are a pair of wooden paddles, where one side of each paddle has rows of wire teeth that catch on the fibers. Carding produces a rolag of lofty wool, or a roll of fiber that can then be used to spin yarn. At the end of this process, your fiber should all be in the form of rolag rolled cylinders.
A flicker helps to open up a lock and
remove debris.
Take an individual lock of wool and pull it apart from the center to open it out and remove any remaining debris. A potentially useful tool is a flicker, which looks like a mini card and which helps to remove debris and loosen the locks. To use a flicker, hold a lock very firmly on one end and flick the other end with the teeth of the flicker.
Place approximately three to four locks vertically on one card. Be sure not to overload the card. The locks should fit within the depth of the card to ensure all of the fiber is treated.

Hold one card stationary on your lap. If you are right-handed the stationary card should be in your left hand, and vice versa. Hold the second card in your dominant hand. Brush this second card against the stationary card around four to eight times. The teeth on the cards should face each other as you brush, and should barely be touching.
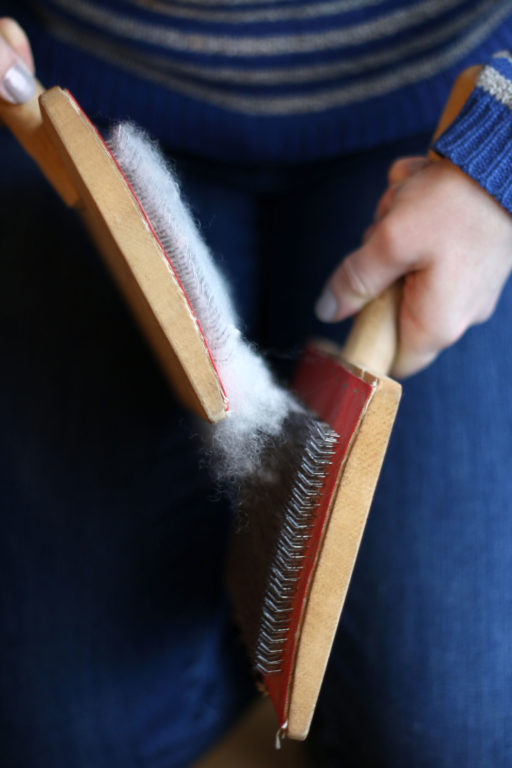
To ensure that all of the wool is being carded you need to transfer the fiber between cards. Do this by gently lifting the fiber off the card—be sure not to scrape it off. To lift the fiber off the card, hold the cards so that the handles are face up, then run the right card (with its teeth facing out) along the left card, from bottom to top, gently lifting the fiber across to the left card.
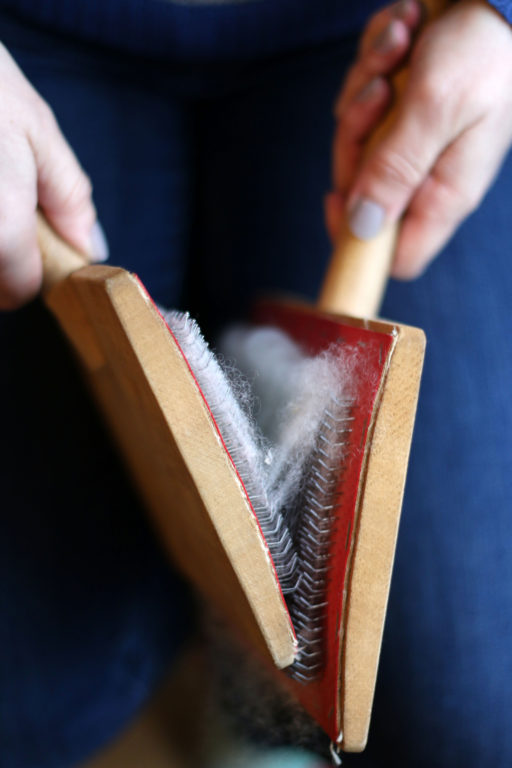
Repeat steps three and four, transferring the fiber between the two cards at least once more until the fiber looks smooth and aligned in one direction.
Transfer the fiber to the right card and then, without any brushing, to the left. This step should loosen the wool from the cards.
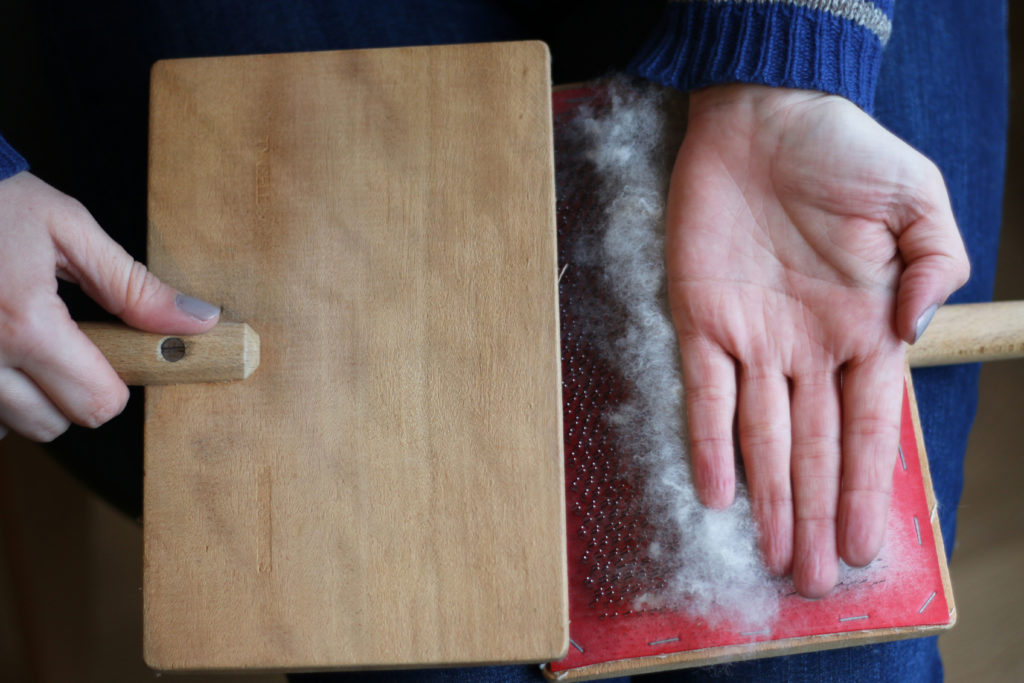

To create the rolag, lay your hand palm on top of the wool and gently loosen the wool by nudging the edge of the wool with the right card. Secure the loosened section of wool under your hand, and then nudge the remaining wool again. Repeat until all of the wool is rolled.
Hold the rolag to prevent it from unrolling, then lay it on the end of one card and roll it between the two cards (teeth facing out) to set it.
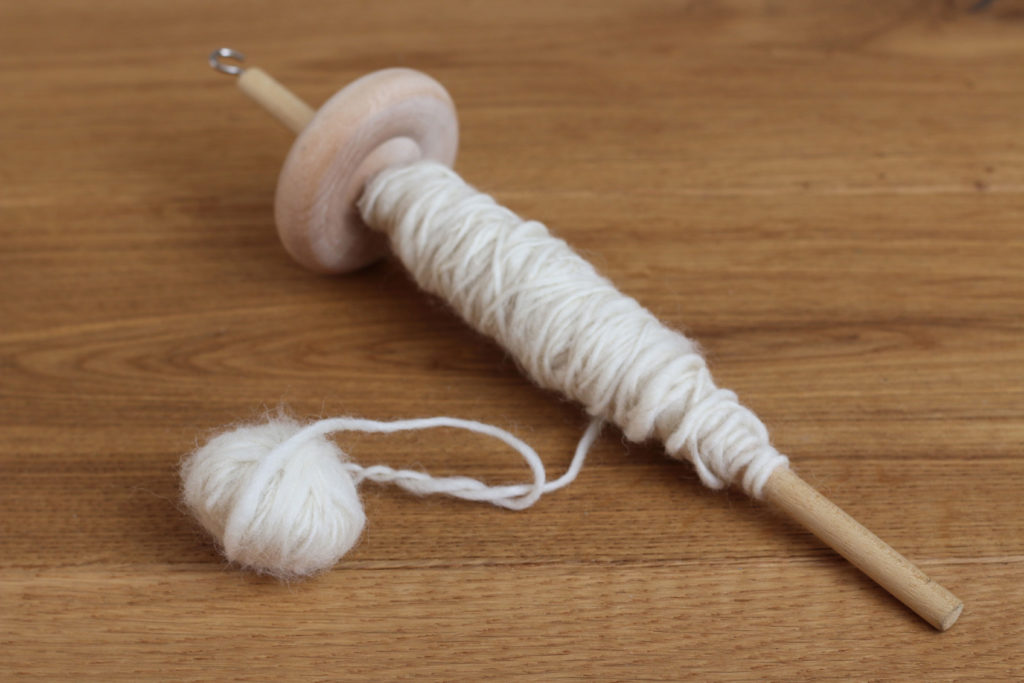
A drop spindle.
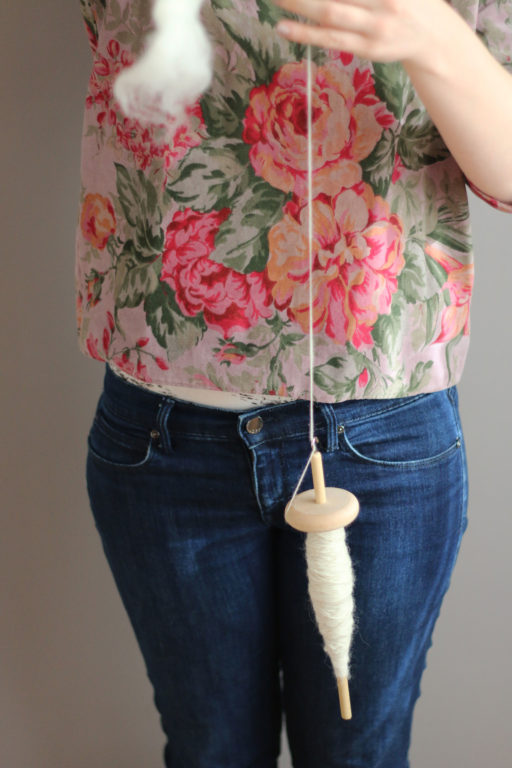
Spinning
Once you have created (or purchased) your rolags, it’s time to begin spinning. You have two options for spinning: you can use a spinning wheel or a spindle. The principles of yarn production are the same on both, but a spindle is cheaper so many use the spindle as an affordable way to learn the basics before moving onto the spinning wheel (which is faster). Creating your own yarn is an investment of both time and money, so it’s advisable to test your interest with a spindle before investing in a wheel.
There are multiple types of spindles. The variations are linked to different cultures and preferences, but to start you’ll just need a basic drop (or suspended) spindle. The spindle is suspended from the yarn, and as the spindle spins it passes this energy into the wool, causing the yarn to spin. Yarn can be spun clockwise or counterclockwise. It doesn’t matter which direction you spin it in, but each yarn must be spun in the same direction so that the individual strands of yarn can be twisted (or plyed) together, as detailed below in the section on plying. Also, because the spindle will be suspended from your yarn you will need some height, so it’s best to sit in a straight-backed chair or to stand, and not to sit on the sofa.
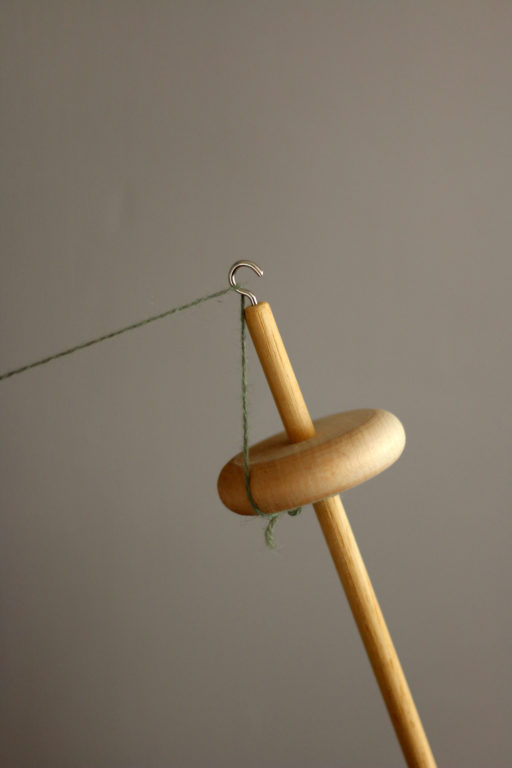
To make it easier to connect the wool to your spindle, take a short length of commercial yarn and tie it around the spindle shaft, pulling one end through the hook or notch at the top of the spindle.
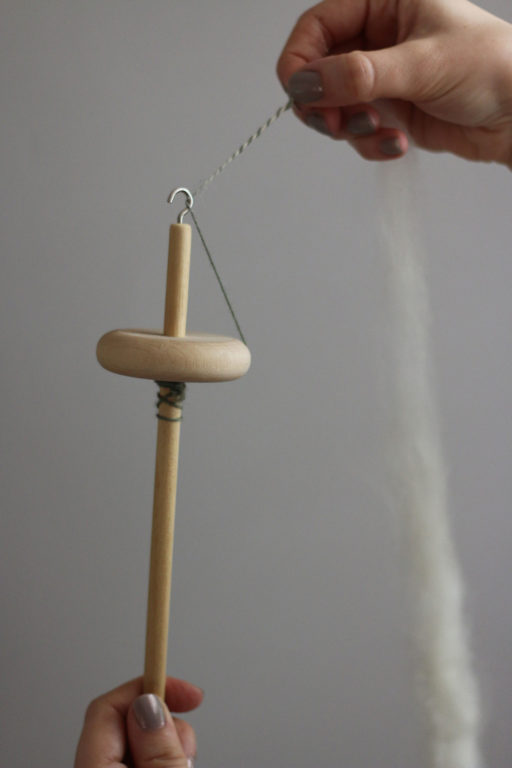
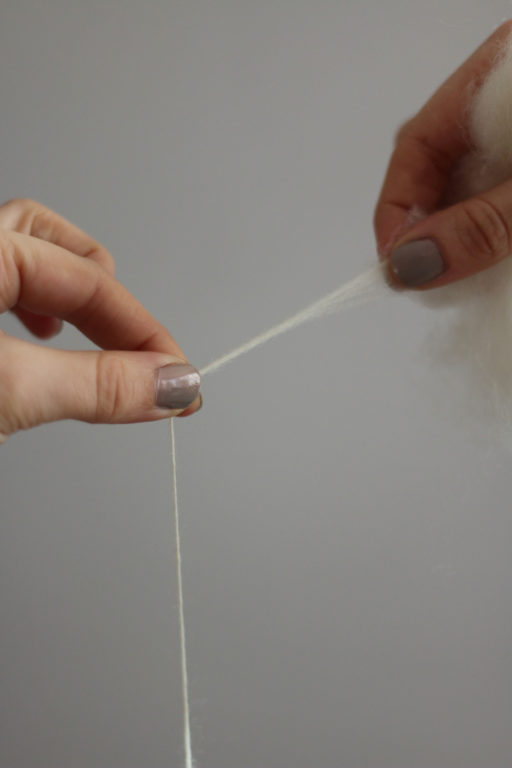
Pull a small amount of fiber from your rolag, place it against the commercial yarn, and twist the spindle in your hand. This starts the twisting process. Watch as the twisting in the spindle transfers to the fiber so that the fiber begins to twist. At the end of the step, the fiber should be joined to the commercial yarn.

Use one hand to pinch the point between the spun yarn and unspun fiber. As you spin more fiber, this hand will travel down the length of newly spun yarn so that it continually pinches the spot between spun yarn and unspun fiber. This hand controls how the twist goes into the fiber; if twist travels into the undrafted fiber it will lock it together, making it difficult to spin.
Spin the spindle by flicking it or rolling it against the side of your leg. You can spin in either direction, but be consistent. As the spindle spins you will see twist enter the portion of yarn in front of your pinched fingers. When the spindle begins to spin in the opposite direction, thereby removing the twist you have just created, catch it and spin in the correct direction.
With your free hand you need to gently tug your fiber apart so that it thins down to the correct diameter of the yarn you want to create (more on this below).
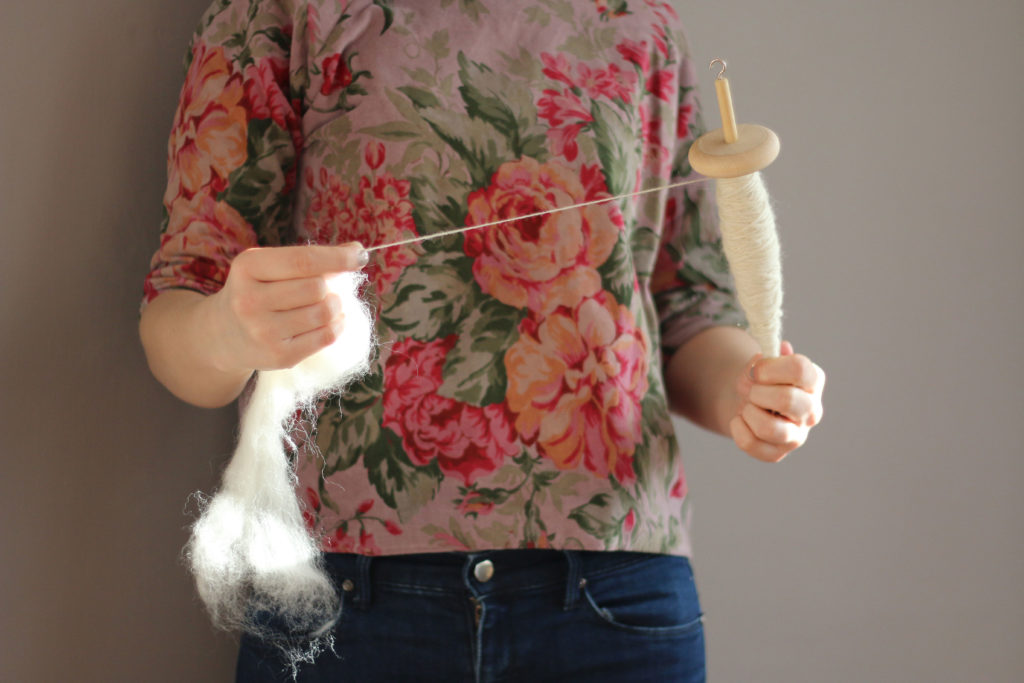
Once you have created a small section of fiber that is the right diameter, slowly move your pinching hand along the fiber, allowing the twist to enter it. When you get to the end of the fiber that you’ve tugged to the correct diameter or when you feel the twist begin to run out, pinch down.
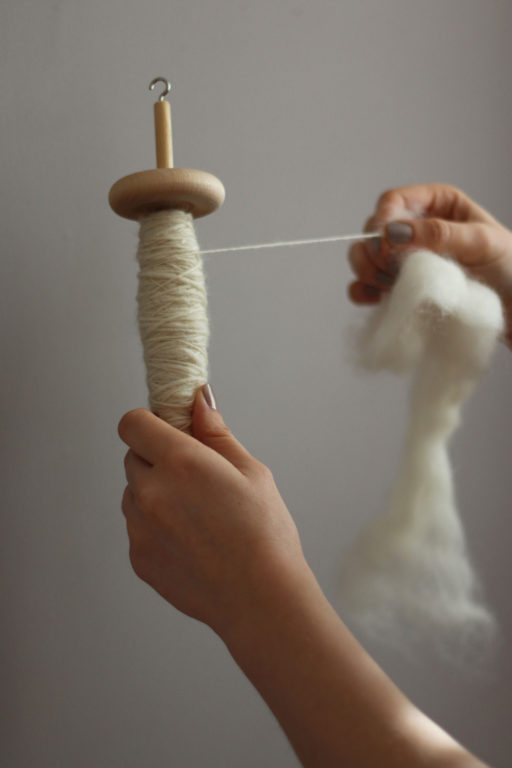
Repeat steps four to six until the length of yarn becomes unwieldy, and then wrap the spun yarn around the spindle, leaving approximately a foot (30cm) free. This length of newly spun yarn will now become the anchor to which you attach the next bit of fiber from your rolag.
Troubleshooting
All textile crafts require some level of physical dexterity, but spinning is particularly tactile. Some troubleshooting tips:
If the fiber comes apart and the spindle falls, the yarn does not have enough twist to support the weight of the handle. Add more twist to a section before allowing the twist to move along your fiber. Remember that you can just attach fiber to the length of yarn right before the break, as though you’re at the end of step 7.
If these steps are too many motions to learn at once, try the Park and Draft method. After step 4 (and once the yarn has sufficient twist), hold the spindle still, instead of letting it dangle, as you work through steps 5 and 6. You can “park” the spindle between your knees or under your arm.
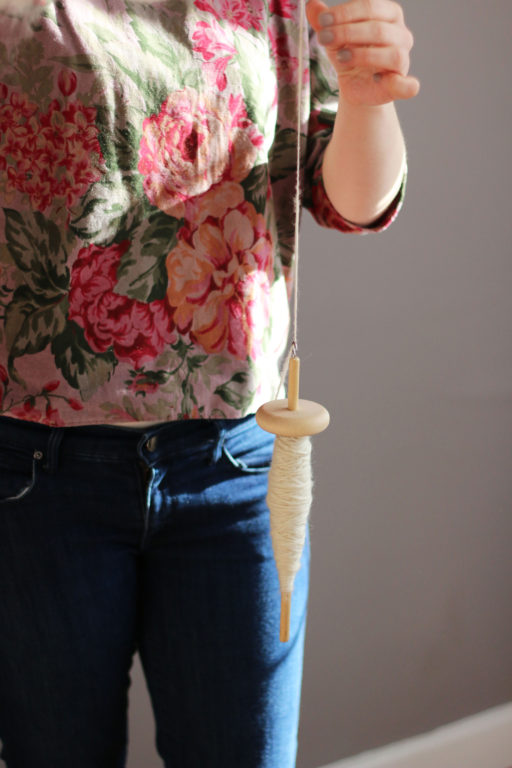
Removing Yarn from the Spindle
As you collect yarn on the spindle you increase the weight the yarn is supporting, so periodically you will need to remove the yarn. When you do this, the yarn can be spun into a ball around your fingers. Make sure to wind tightly to prevent the yarn from tangling.
Plying
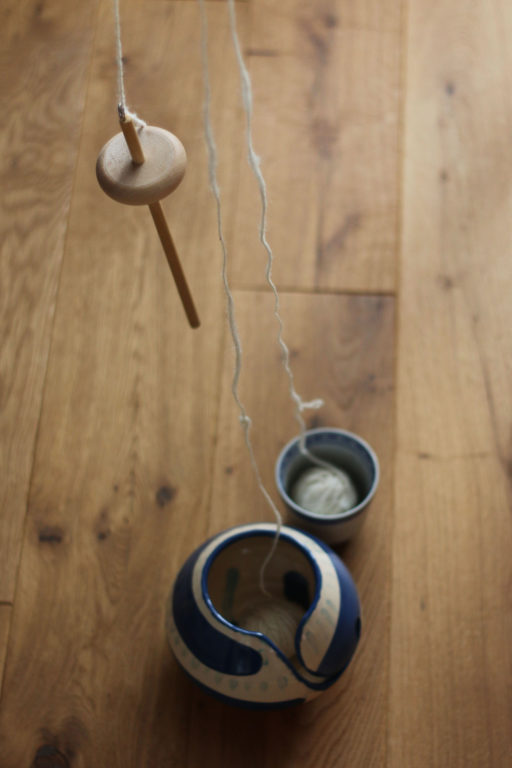
After you use your spindle to create single strands of yarn, you can then use your spindle to wind those singles together in a process called plying.
Most commercial yarns are composed of multiple strands (each strand is called a single). The process of combining the singles that you just spun is called plying. Plying isn’t absolutely necessary, but it creates a yarn that is much stronger and harder to break or stretch. Plying will also help even out inconsistencies in your yarn.
Winding two singles together will create two-ply yarn. Theoretically you can create three-ply or four-ply yarn, but two-ply is the most common in handspun yarn. To make two-ply yarn, start with two singles that have been wound into balls. To help the balls unwind neatly you can use yarn bowls, or you can also use cheap equivalents such as plant pots laid on their sides.
Take the ends of your singles to be plied and attach to the shaft of your spindle, pulling through the hook or notch at the top of the spindle.
Spin the spindle in the opposite direction from the direction you spun the singles. So if you spun the singles counterclockwise you’d want to now spin clockwise, and vice versa.
Follow the same steps outlined above in the spinning section. As before, you can control the twist by pinching the yarn. Maintain tension on the yarn between your two hands to prevent the singles from tangling, and try to keep equal amounts of tension on the yarns.
Wind the yarn onto your spindle as you go.
Finishing
Your finished yarn should be tied as a skein for washing and storage. You can use a specific tool for this step, which is called a niddy-noddy, or you can also use the back of a chair. Create a large loop of yarn, then secure it with ties at three or more places around the loop. Make sure the ties are relatively loose, which will allow the wool to expand during and after washing.
You’re almost done! But before you dive straight into knitting up your tasty new skein of yarn be sure to wash it first. The yarn’s characteristics, like weight and twist, can change significantly after washing. I like to let my yarn soak in a wool wash and hot water, after which it should be air dried. It is possible to block yarn at the drying stage, but the first time around it’s always good to let the yarn dry naturally so that you can understand how it behaves in its natural state, which will then let you know what changes you might want to make next time.
Taking It to the Next Level: Weight and Consistency
Once you’ve gotten the basics, the most difficult aspect of spinning is controlling the consistency of your yarn (you’ll probably have fat and thin bits) and achieving a desired weight.
Some tips:
Examples: Use existing yarn as a reference. Cut a small length, separate the plies, and use them as a reference point when spinning your singles.
Control samples: The spinner’s take on muslins or swatches. Take two feet (60 cm) of your first single, allow it to ply back on itself, knot, and remove. Use as a reference point.
Wraps per inch: Gently wrap your yarn around a pencil or ruler; the diameter across one inch indicates the yarn weight.
Creating your own materials, whether yarn or fabric, can be infinitely rewarding. Spinning yarn deepens your understanding of its characteristics and nuances. You’ll quickly pick up on variations in wool fibers, how different locales and even different farmers produce fleeces with varying properties, and how important it is to attend to the health of the sheep and the environment they’re raised in. But best of all, once you knit or sew with your finished product, every single bit of that garment is uniquely you.

About the Author
Sewing & knitting blogger Charlotte blogs at English Girl at Home and is spending the year growing and gathering to create natural dyes and enhance her dressmaking projects.